> For the complete documentation index, see [llms.txt](https://docs.bdb.ai/bdb-documentation/llms.txt). Markdown versions of documentation pages are available by appending `.md` to page URLs; this page is available as [Markdown](https://docs.bdb.ai/bdb-documentation/core-platform/platform-administration/admin-panel-options/git-migration/migrating-a-dashboard.md).
# Migrating a Dashboard
{% hint style="info" %}
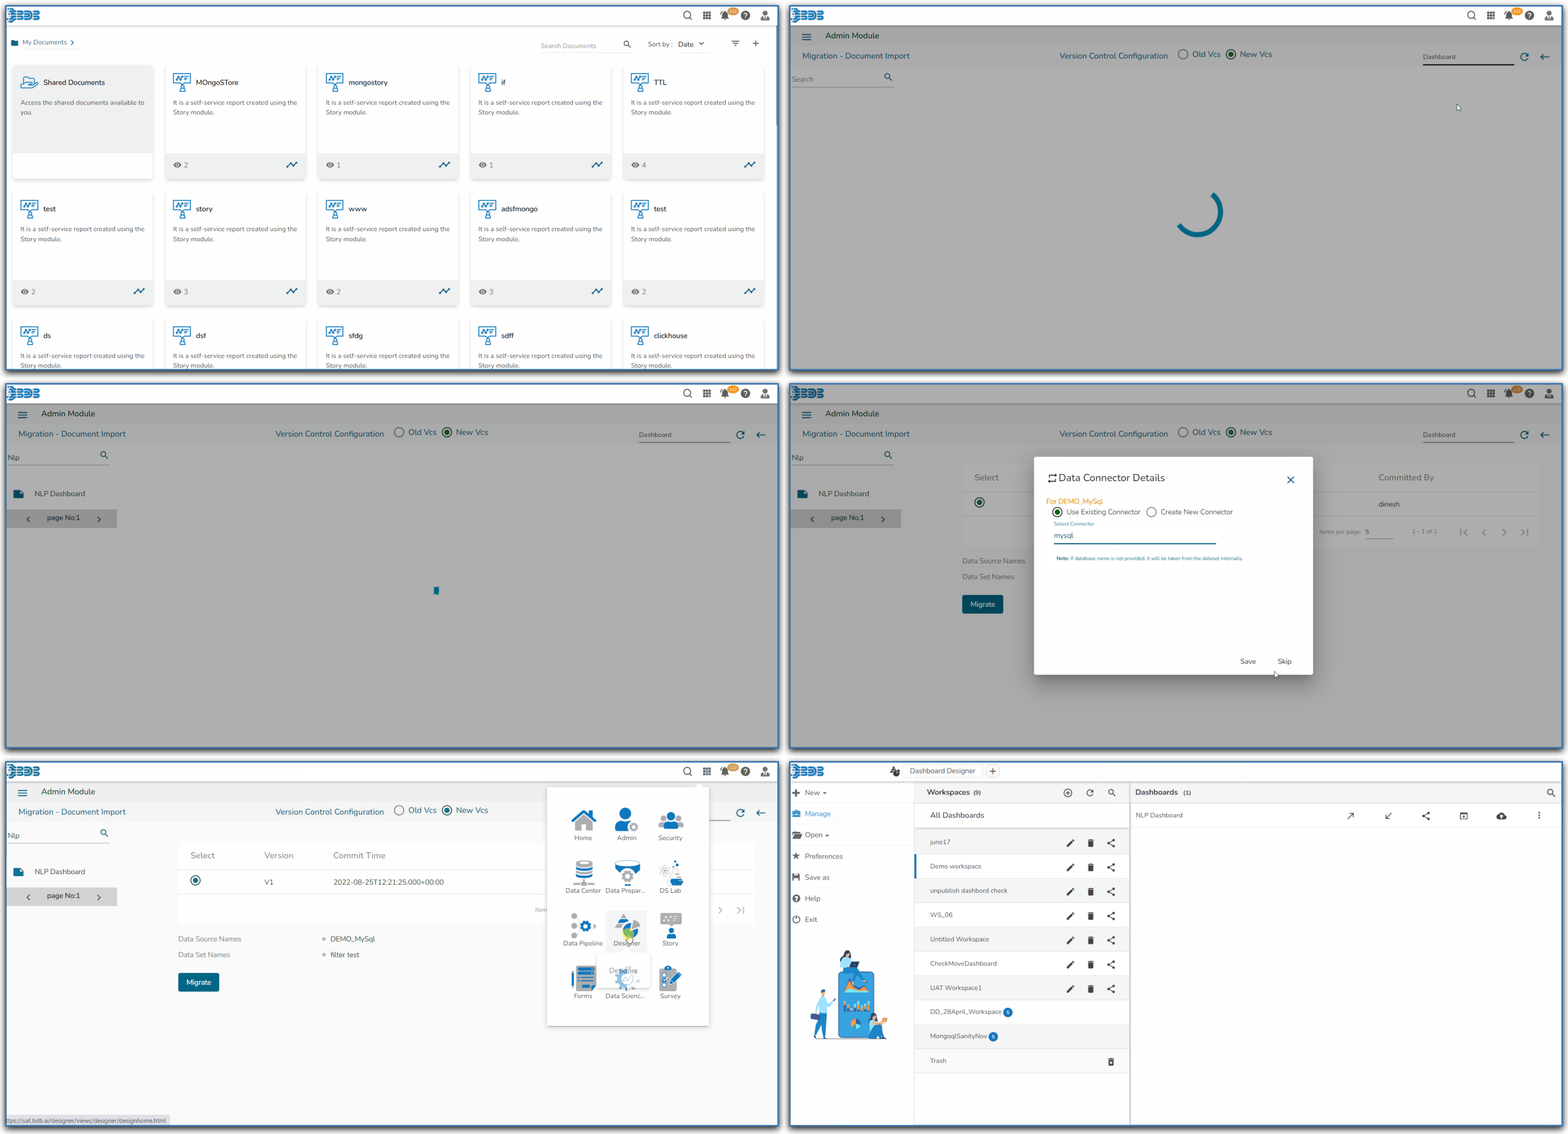
*Check out the walk-through on how to import a Dashboard using the GIT Migration option.*
{% endhint %}
* Navigate to the ***Admin Module.***
* Click the ***Menu*** icon to open the admin menu panel.

* Click the ***GIT Migration*** option from the Menu Panel.

* Click the ***Import file*** option that appears.

* Click the ***Import*** option that appears on the next page.

* The ***Migration-Document Import*** screen appears.
* Select the ***New VCS*** for the ***Version Control Configuration***.
* The ***Select a Module*** drop-down menu bar appears at the top-right side of the screen.

* Select the ***Dashboard*** module.
* A list of the exported dashboards appears on the left side of the page.

* Use the search bar to search for a dashboard. (Ex. Migration)
* The customized list appears based on the searched term.

* Select a dashboard and click to open the details.
* The various versions (if available in the GIT) of the selected dashboard appear.

* Select a version using the checkbox.
* Some more information about the selected dashboard gets displayed.
* Click the ***Migrate*** option.

* The ***Data Connector Details*** dialog window appears to configure a data connector.
* The user gets two choices to configure the data connector:

#### Use Existing Connector
* Let the checkmark be in the given checkbox to use an existing connector.
* Select a data connector from the drop-down menu.
* Click the ***Save*** option to save the configured data connector details.

{% hint style="info" %} Please Note: *When the selected Dashboard displays multiple connectors, the user must select them all with the **Use Existing Connector** option to load all the charts under the selected Dashboard.*
{% endhint %}

#### Create a New Data Connector:
* Select the ***Create New Connector*** option.
* Provide the required details: Username, Password, PI/Host, Database Name
* Click the ***Save*** option.

* A notification message appears, and the selected dashboard gets migrated to the Designer module.

* Navigate to the ***Designer*** module.
* The migrated dashboard gets added to the ***Manage*** section.

{% hint style="info" %}
Please Note: *Click the **GIT Export** icon to export the selected dashboard to GIT. All the exported Dashboards can be imported using the Import File option of the GIT Migration.*
{% endhint %}