Data Pipeline
  • Data Pipeline
    • About Data Pipeline
    • Design Philosophy
    • Low Code Visual Authoring
    • Real-time and Batch Orchestration
    • Event based Process Orchestration
    • ML and Data Ops
    • Distributed Compute
    • Fault Tolerant and Auto-recovery
    • Extensibility via Custom Scripting
  • Getting Started
    • Homepage
      • Create
        • Creating a New Pipeline
          • Adding Components to Canvas
          • Connecting Components
            • Events [Kafka and Data Sync]
          • Memory and CPU Allocations
        • Creating a New Job
          • Job Editor Page
          • Spark Job
            • Readers
              • HDFS Reader
              • MongoDB Reader
              • DB Reader
              • S3 Reader
              • Azure Blob Reader
              • ES Reader
              • Sandbox Reader
              • Athena Query Executer
            • Writers
              • HDFS Writer
              • Azure Writer
              • DB Writer
              • ES Writer
              • S3 Writer
              • Sandbox Writer
              • Mongodb Writer
              • Kafka Producer
            • Transformations
          • PySpark Job
          • Python Job
          • Python Job(On demand)
          • Script Executer Job
          • Job Alerts
        • Register as Job
        • Exporting a Script From Data Science Lab
        • Utility
        • Git Sync
      • Overview
        • Jobs
        • Pipeline
      • List Jobs
      • List Pipelines
      • Scheduler
      • Data Channel & Cluster Events
      • Trash
      • Settings
    • Pipeline Workflow Editor
      • Pipeline Toolbar
        • Pipeline Overview
        • Pipeline Testing
        • Search Component in Pipelines
        • Push & Pull Pipeline
        • Pull Pipeline
        • Full Screen
        • Log Panel
        • Event Panel
        • Activate/Deactivate Pipeline
        • Update Pipeline
        • Failure Analysis
        • Delete Pipeline
        • Pipeline Component Configuration
        • Pipeline Failure Alert History
        • Format Flowchart
        • Zoom In/Zoom Out
        • Update Component Version
      • Component Panel
      • Right-side Panel
    • Testing Suite
    • Activating Pipeline
    • Pipeline Monitoring
    • Job Monitoring
  • Components
    • Adding Components to Workflow
    • Component Architecture
    • Component Base Configuration
    • Resource Configuration
    • Intelligent Scaling
    • Connection Validation
    • Readers
      • GCS Reader
      • S3 Reader
      • HDFS Reader
      • DB Reader
      • ES Reader
      • SFTP Stream Reader
      • SFTP Reader
      • Mongo DB Reader
        • MongoDB Reader Lite (PyMongo Reader)
        • MongoDB Reader
      • Azure Blob Reader
      • Azure Metadata Reader
      • ClickHouse Reader (Docker)
      • Sandbox Reader
      • Azure Blob Reader (Docker)
      • Athena Query Executer
    • Writers
      • S3 Writer
      • DB Writer
      • HDFS Writer
      • ES Writer
      • Video Writer
      • Azure Writer
      • ClickHouse Writer (Docker)
      • Sandbox Writer
      • MongoDB Writers
        • MongoDB Writer
        • MongoDB Writer Lite (PyMongo Writer)
    • Machine Learning
      • DSLab Runner
      • AutoML Runner
    • Consumers
      • GCS Monitor
      • Sqoop Executer
      • OPC UA
      • SFTP Monitor
      • MQTT Consumer
      • Video Stream Consumer
      • Eventhub Subscriber
      • Twitter Scrapper
      • Mongo ChangeStream
      • Rabbit MQ Consumer
      • AWS SNS Monitor
      • Kafka Consumer
      • API Ingestion and Webhook Listener
    • Producers
      • WebSocket Producer
      • Eventhub Publisher
      • EventGrid Producer
      • RabbitMQ Producer
      • Kafka Producer
      • Synthetic Data Generator
    • Transformations
      • SQL Component
      • File Splitter
      • Rule Splitter
      • Stored Producer Runner
      • Flatten JSON
      • Pandas Query Component
      • Enrichment Component
      • Mongo Aggregation
      • Data Loss Protection
      • Data Preparation (Docker)
      • Rest Api Component
      • Schema Validator
    • Scripting
      • Script Runner
      • Python Script
        • Keeping Different Versions of the Python Script in VCS
    • Scheduler
    • Alerts
      • Alerts
      • Email Component
    • Job Trigger
  • Custom Components
  • Advance Configuration & Monitoring
    • Configuration
      • Default Component Configuration
      • Logger
    • Data Channel
    • Cluster Events
    • System Component Status
  • Version Control
  • Use Cases
Powered by GitBook
On this page
  • Import Utility
  • Importing the Utility File to a DS Lab Notebook
  • Sample Utility Script
  1. Getting Started
  2. Homepage
  3. Create

Utility

PreviousExporting a Script From Data Science LabNextGit Sync

This feature enable users to upload their files (in .py format) to the Utility section of a DS Lab project using this feature. Subsequently, it will allow users to import these files as modules in a DsLab notebook, enabling the use of the uploaded utility functions in scripts.

Prerequisite: To use this feature, the user needs to create a project under Ds Lab module.

Check out the below-given video on how to use utility scripts in the DS Lab module.

  • Activate and open the project under DS Lab module.

  • Navigate to the Utility tab in the project.

  • Click on Add Scripts options.

  • After that, the user will find two options:

    • Import Utility: It enables users to upload their own file (.py format) where the script has been written.

Import Utility

  • Utility Name: Enter the utility name.

  • Utility Description: Enter the description for the utility.

  • Utility Script: The users can upload their files in the .py format.

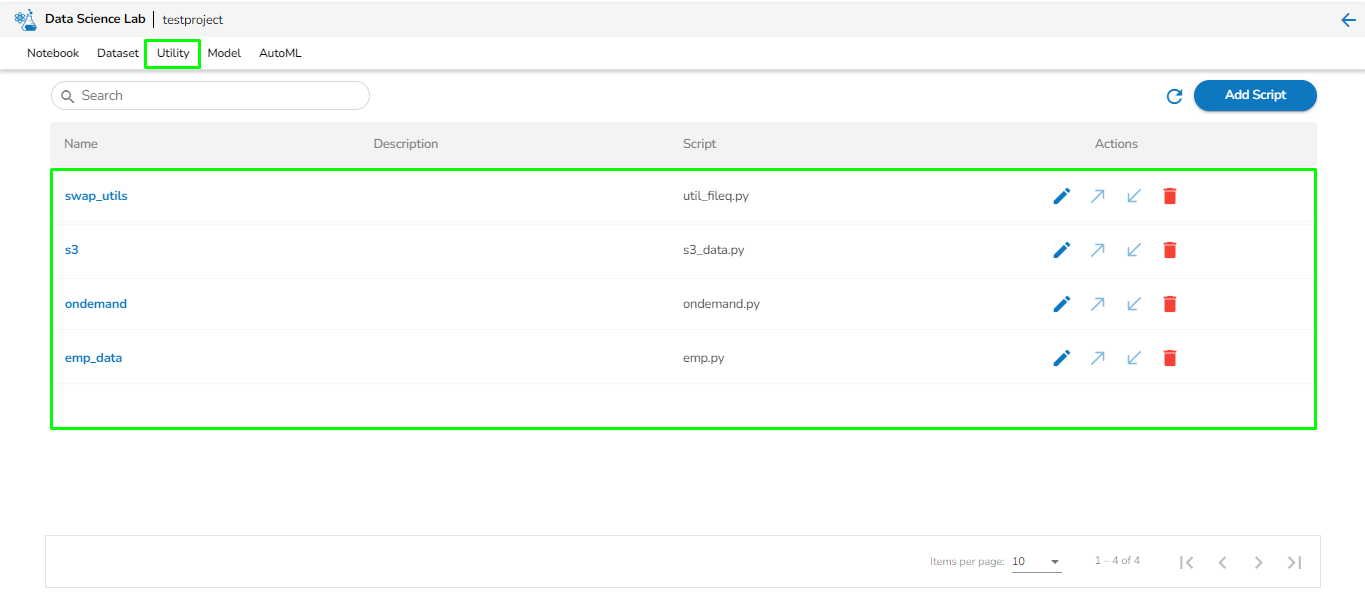
  • Click the Save option after entering all the required information on the Add utility script page, and the uploaded file will list under the Utility tab of the selected project.
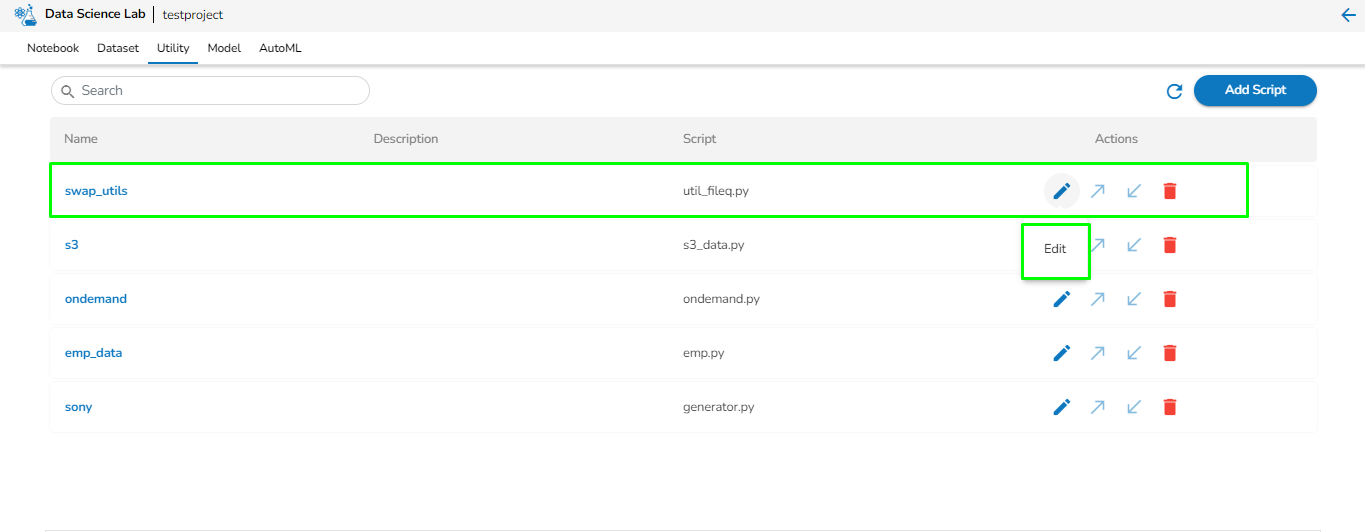
  • Once the file is uploaded to the Utility tab, the user can edit the contents of the file by clicking on the Edit icon corresponding to the file name.
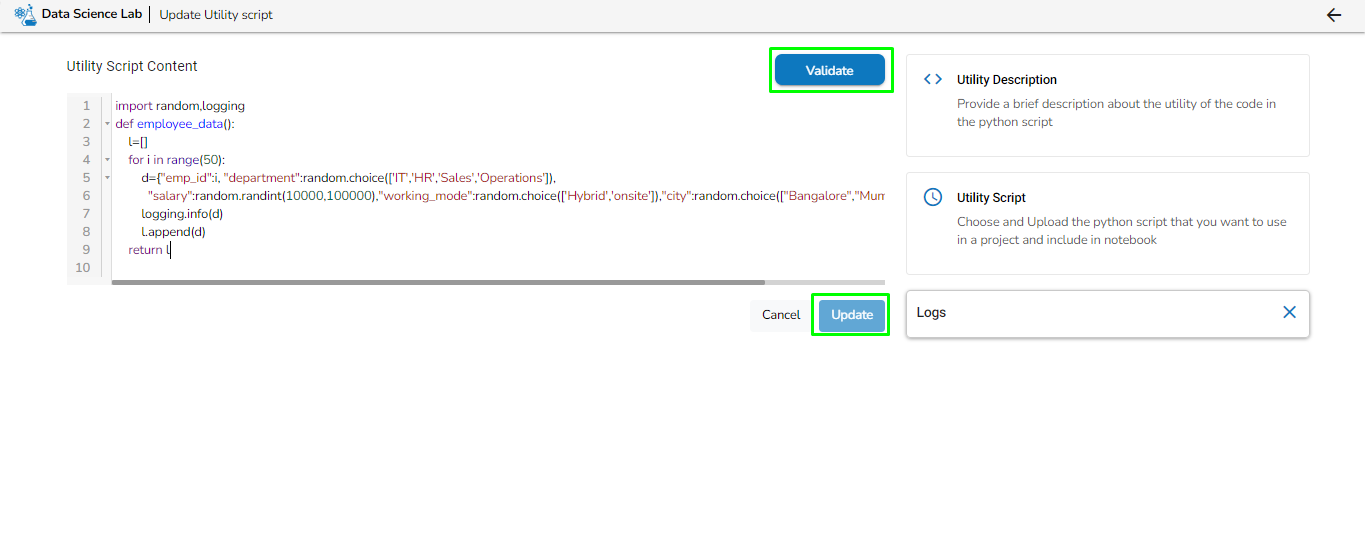
  • After making changes, the users can validate their script by clicking on the Validate icon on the top right.

  • Click the Update option to save the latest changes to the utility file.
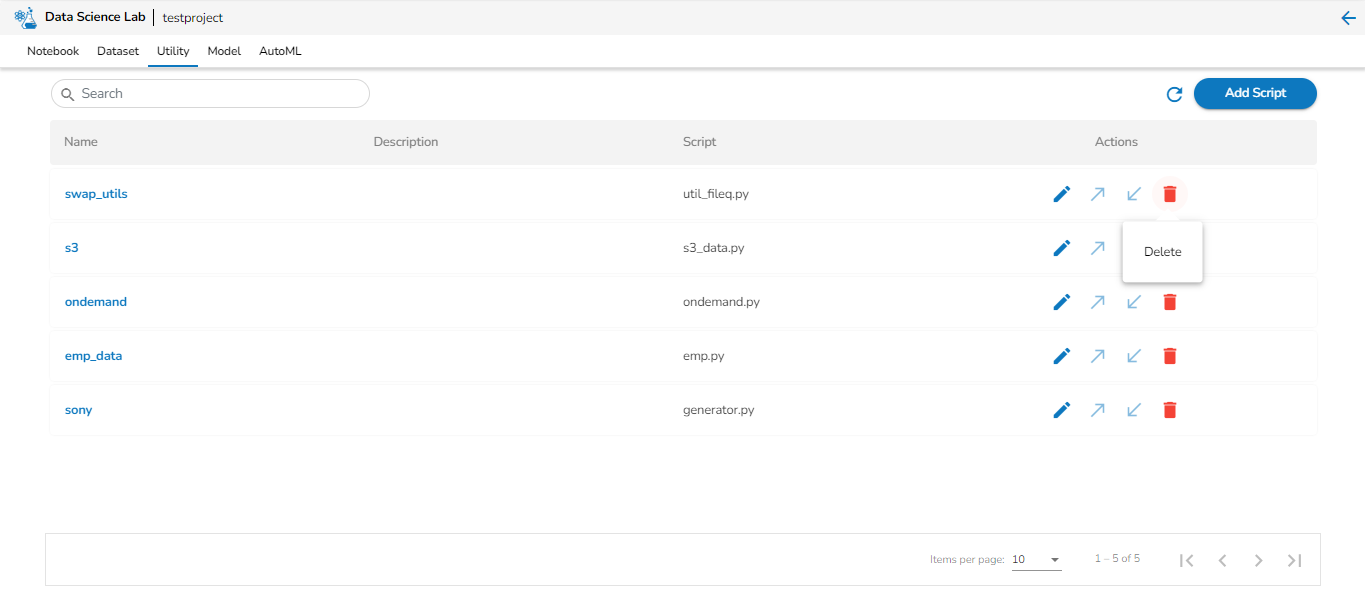
  • If the user wants to delete a particular Utility, they can do so by clicking on the Delete icon.
Importing the Utility File to a DS Lab Notebook

The user can import the uploaded utility file as a module in the DS Lab notebook and use it accordingly.
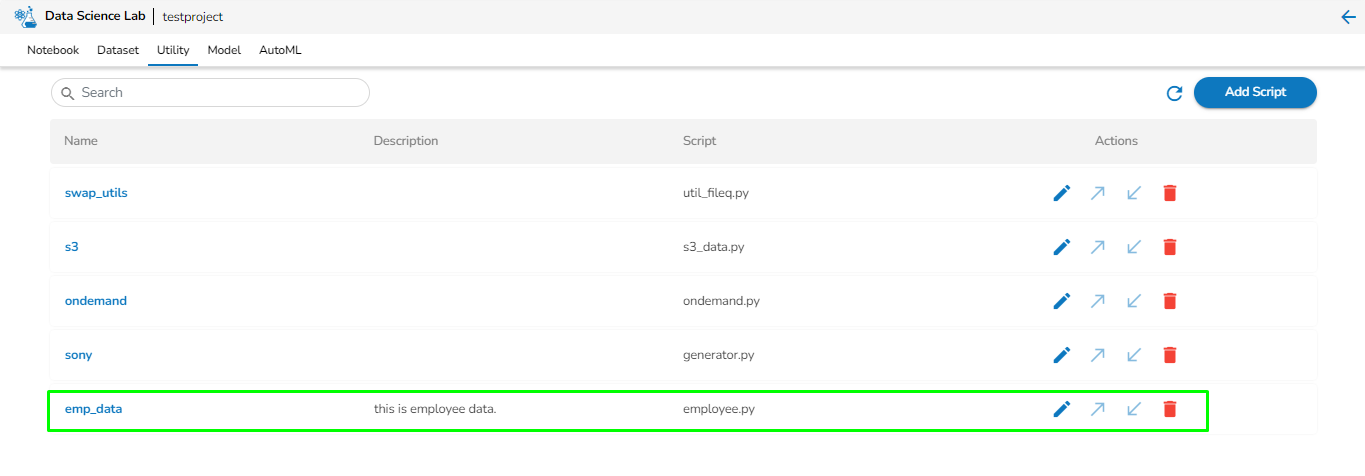
  • In the above given image, it can be seen that "employee.py" file is uploaded in the utility. Now, this file is going to be imported in the DS Lab notebook and will further used in the script.

Sample Utility Script

Use the below-given sample code for the reference and explore the Utility file related features yourself inside the DS Lab notebook.

# importing employee.py as a module in DS Lab Notebook.

import employee
import time
import logging
import pandas as pd
from pymongo import MongoClient

def run_scripts(conn_str, database, collection):
    conn_str = conn_str
    database = database
    collection = collection
    client = MongoClient(conn_str)
    db = client[database]
    collection = db[collection]
    res = employee.emp_data()
    
    for i in res:
        salary = i.get('salary', 0)
        i['status'] = 'rich' if salary > 50000 else ('middle_class' if 25000 < salary < 50000 else 'poor')
        logging.info(i)
        print(i)
    collection.insert_many(res)
    print(f"Inserted {len(res)} rows into MongoDB")
    logging.info(f"Inserted {len(res)} rows into MongoDB")
    
#The variable 'res' in this script holds the results derived from the code written in the utility file.
  • In the above written sample script, the utility file(employee.py) has been imported (import employee) and it has been used in the script for further processing.

  • After completing this process, the user can export this script to the Data Pipeline module and register it as a job according to their specific requirements.

Please Note:

  • Refer to the below-given links to get instructions on exporting to the pipeline and registering it as a job:

  • To apply the changes made in the utility file and get the latest results, the user must restart the notebook's kernel after any modifications to the utility file.

Pull from Git: It enables users to pull their scripts directly from their Git repository. In order to use this feature, the user needs to configure their Git branch while creating the project in DS Lab. Detailed information on configuring Git in a DS Lab project can be found here:

Git Sync
Exporting a Script from DS Lab
Register as Job
Adding an Utility script to a DS Lab Project
Utility Tab displaying the Utility scripts list
Editing the utility file
Editing and validating an uploaded utility file
Deleting a utility file
Utility file