Adding Data
This page describes the steps to add data to your DSL project.
Adding Data Sets
Pre-requisites:
The users must have permission to access the Data Center module of the Platform.
The users must have the required data sets listed under the Data Center module.
Check out the illustration to understand the steps for adding Datasets to a DSL Project.
Open a Project.
Click the Data tab to open it.
Click the Add Data option from the Data tab.
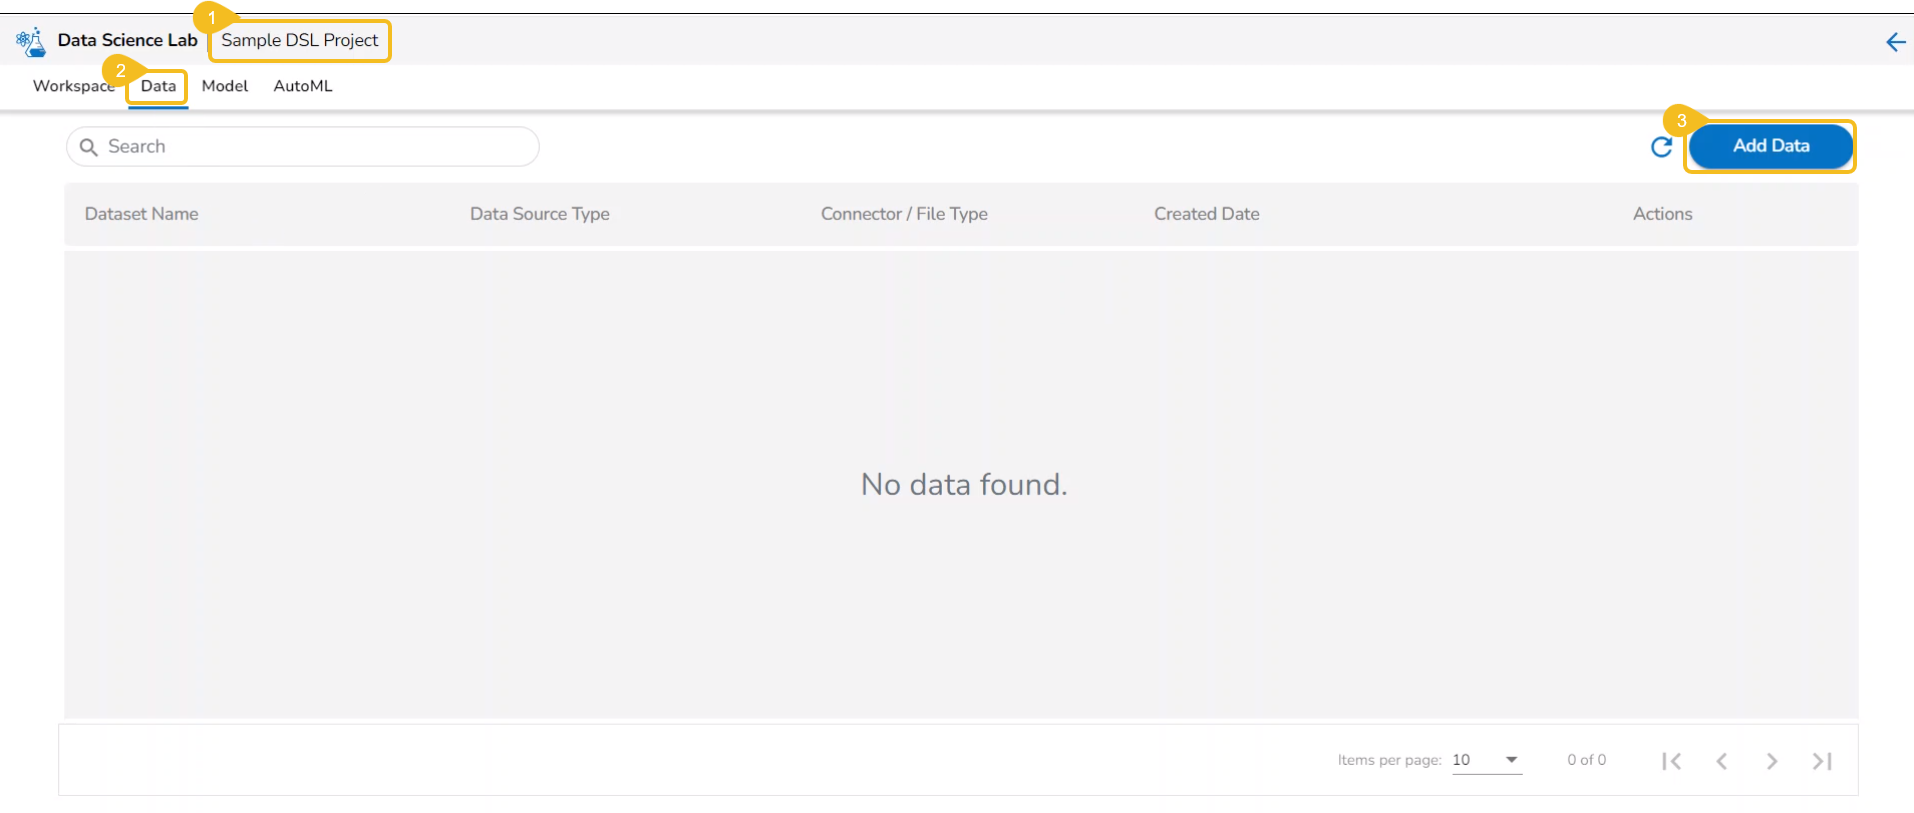
The Add Data page opens offering two options to choose data:
Data service (the default selection)
Data Sandbox Files
Feature Stores
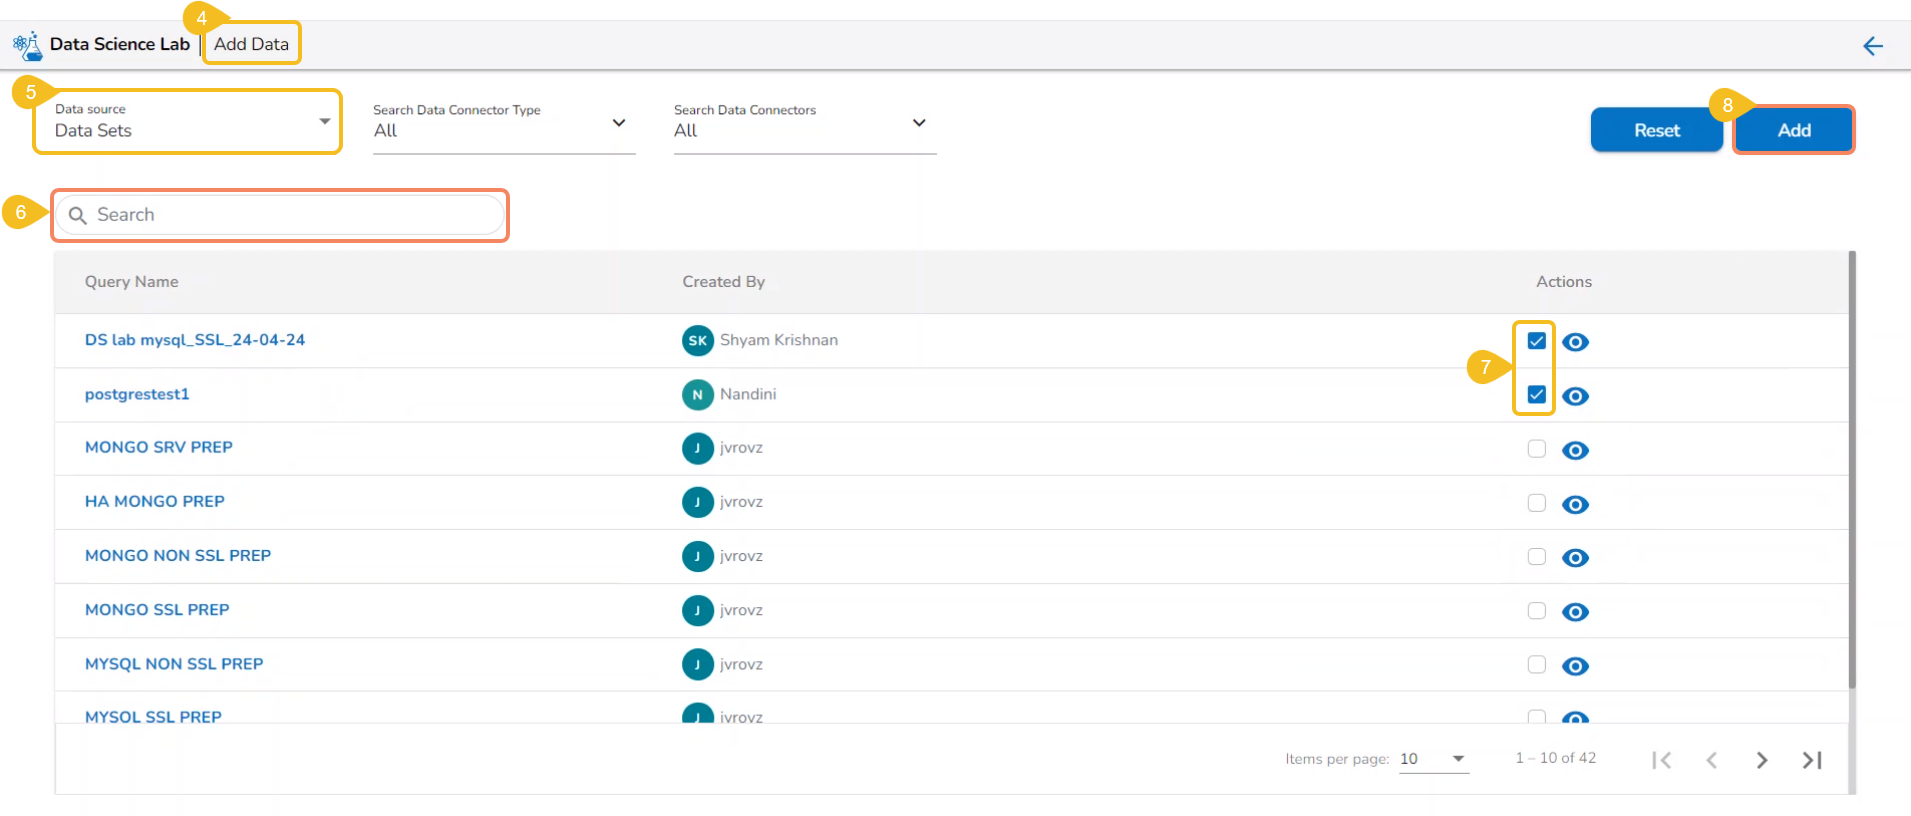
Go ahead with the Data Sets option from the Data Source drop-down menu.
Use the Search space to search through the displayed data service list.
Select the required data set(s) using the checkboxes provided next to it.
Click the Add option.
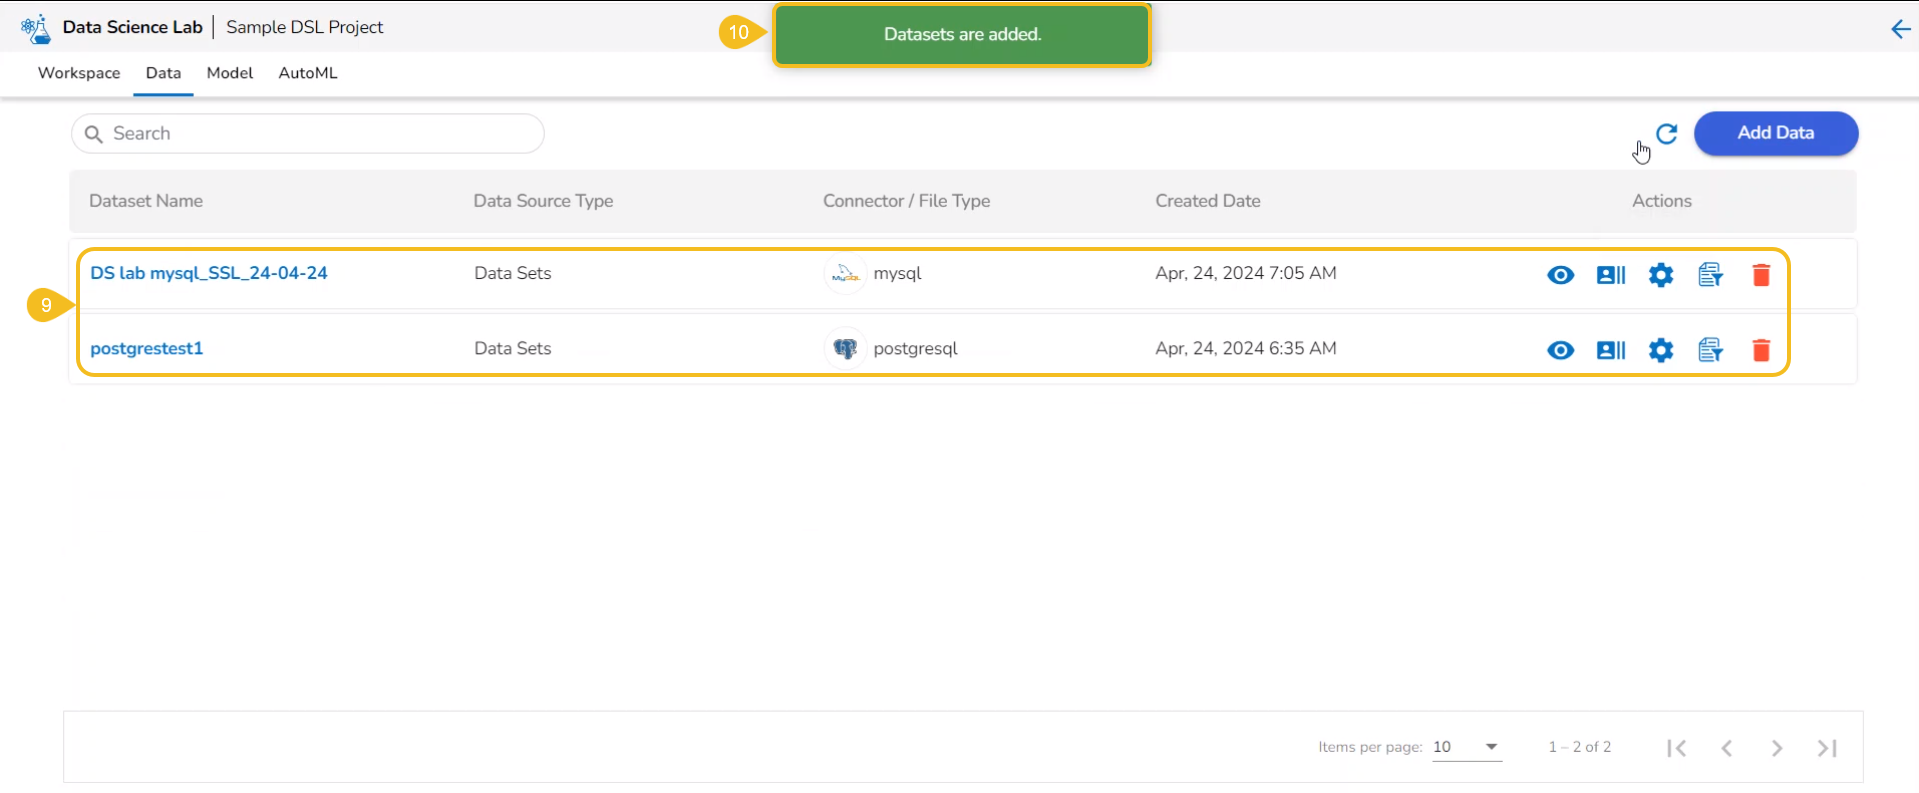
The selected data set(s) gets added to the concerned project.
A notification message appears to inform the same.
Uploading and Adding Data Sandbox Files
Pre-requite: The user must configure the Sandbox Settings to access the Data Sandbox option under the Data Science Lab.
Check out the illustration to understand the steps for uploading and adding Datasandbox to a DSL Project.
Uploading a Data Sandbox
Open a DSL Project.
Click on the Data tab.
Click the Add Data option.
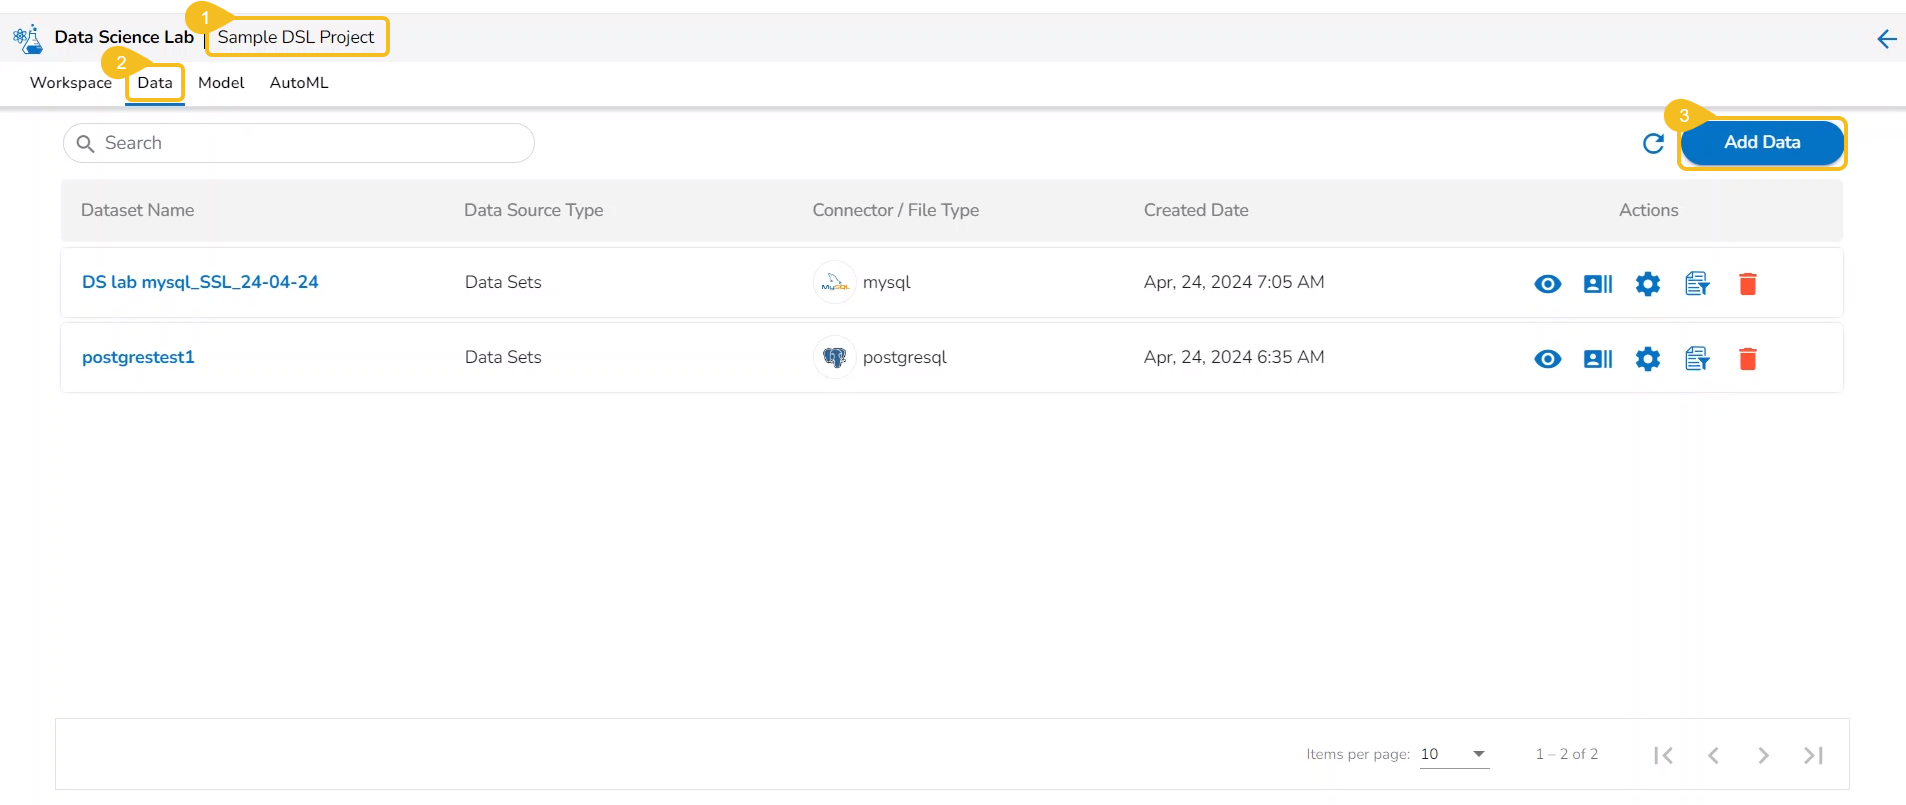
The user gets redirected to the Add Data page.
Select the Data Sandbox option from the Data Source drop-down menu.
Click the Upload option to upload a Data Sandbox file.
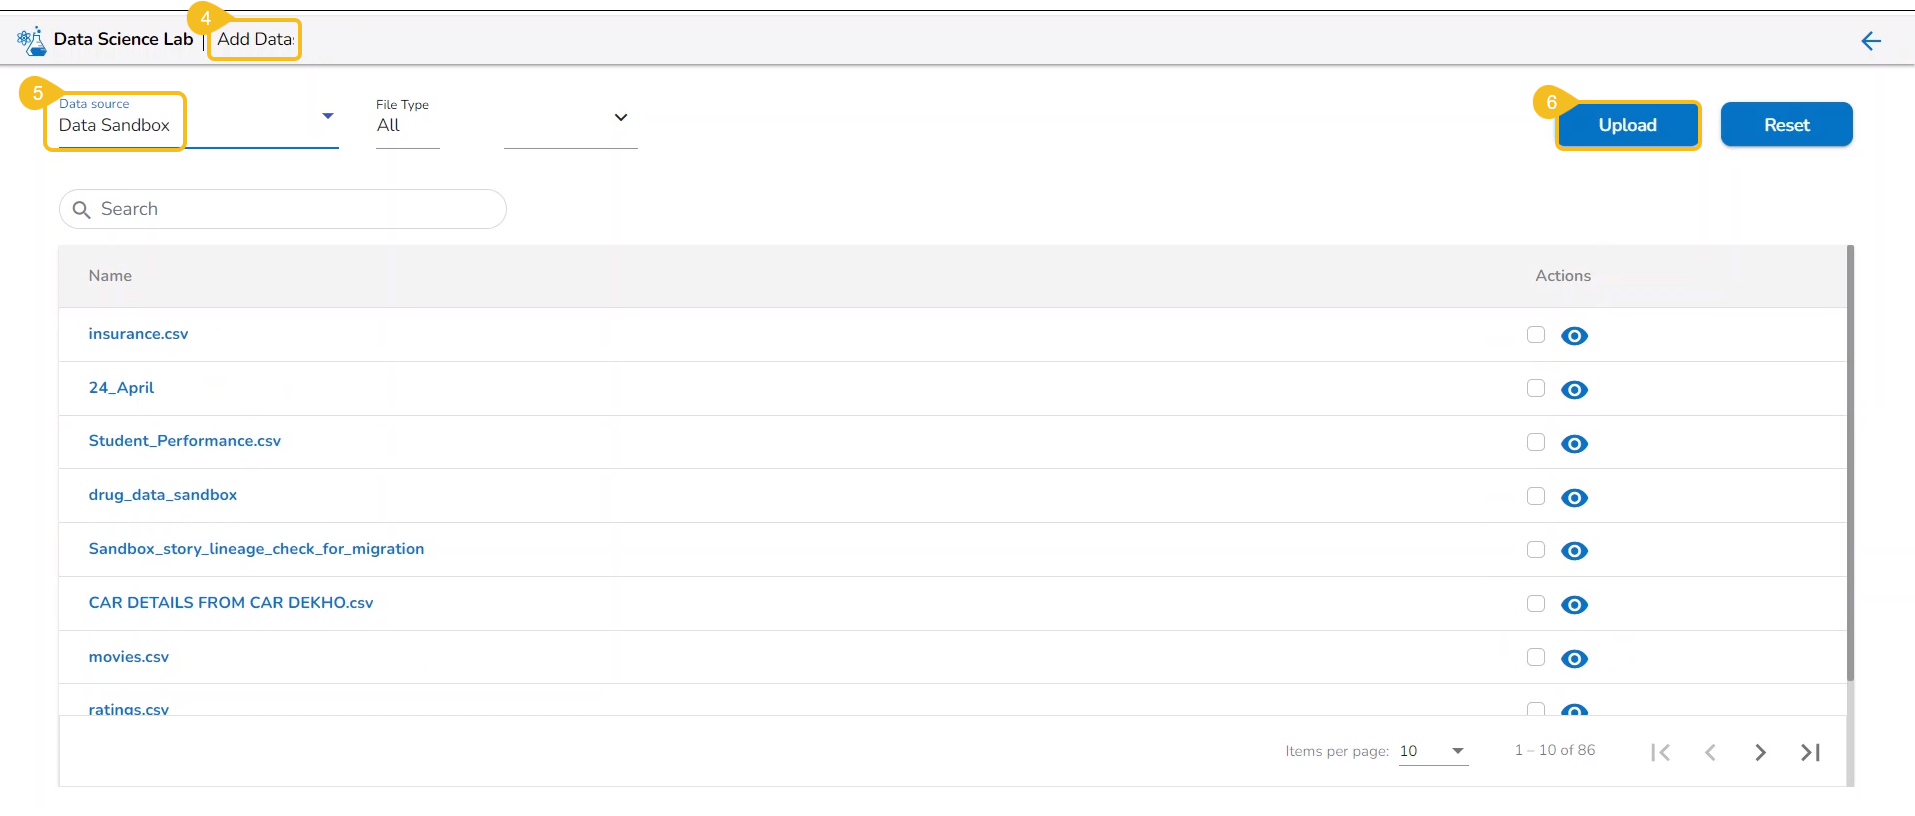
The user gets redirected to the Upload Data Sandbox page.
Provide a Sandbox Name.
Provide a Description of the Data Sandbox.
Click the Choose File option to select a file.
Choose a file from your system and upload it. The supported files are
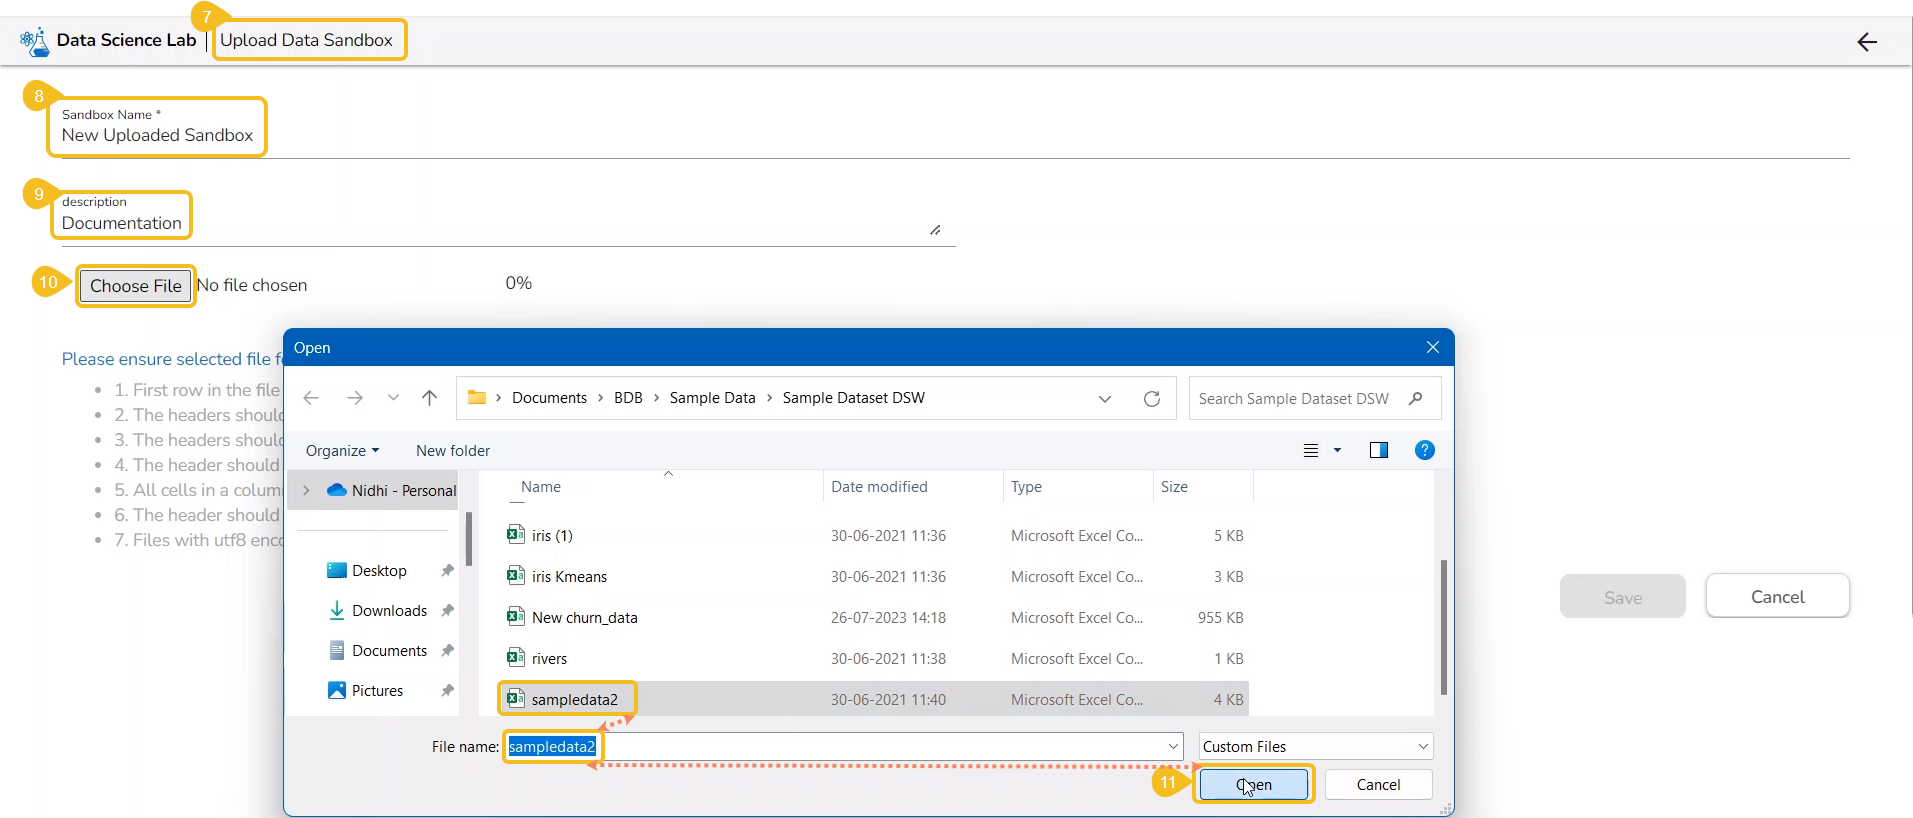
Click the Save option to begin the file upload.
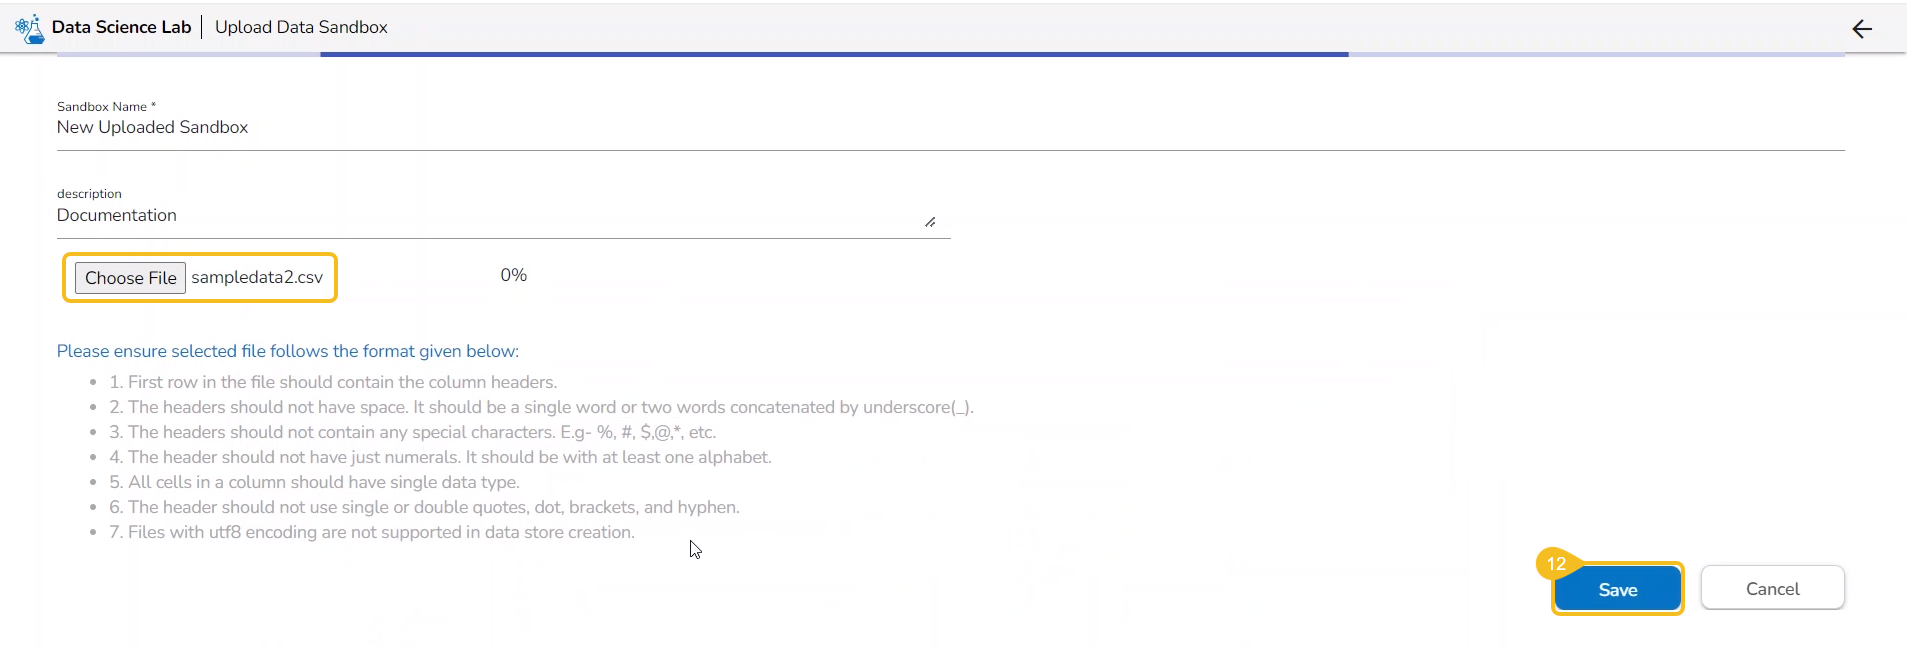
Wait till the uploaded file gets loaded 100%.
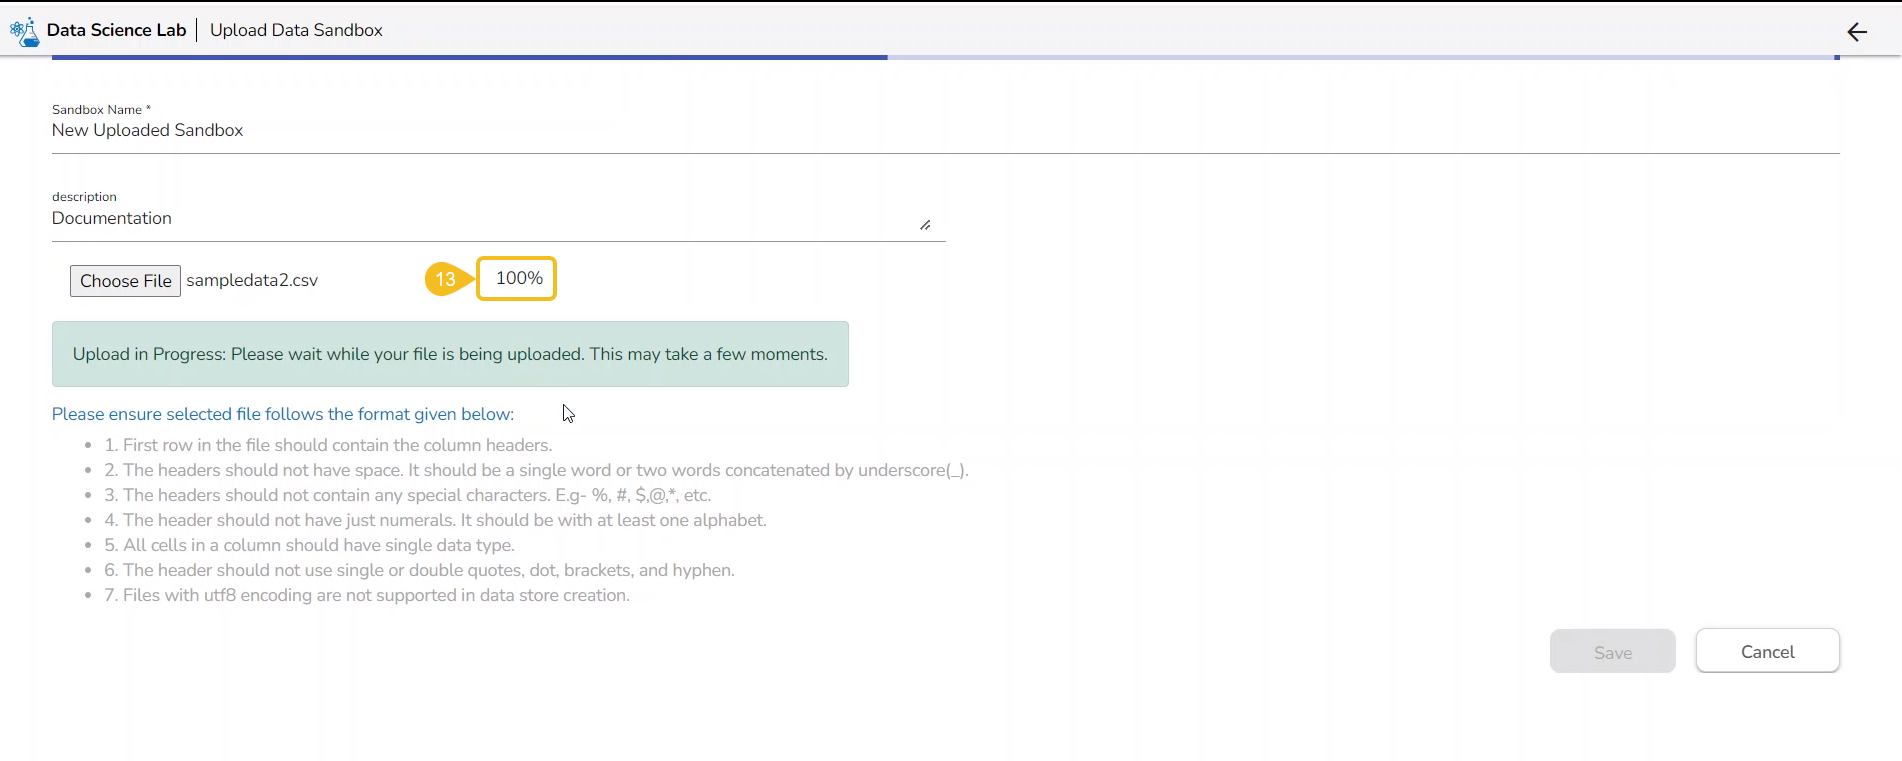
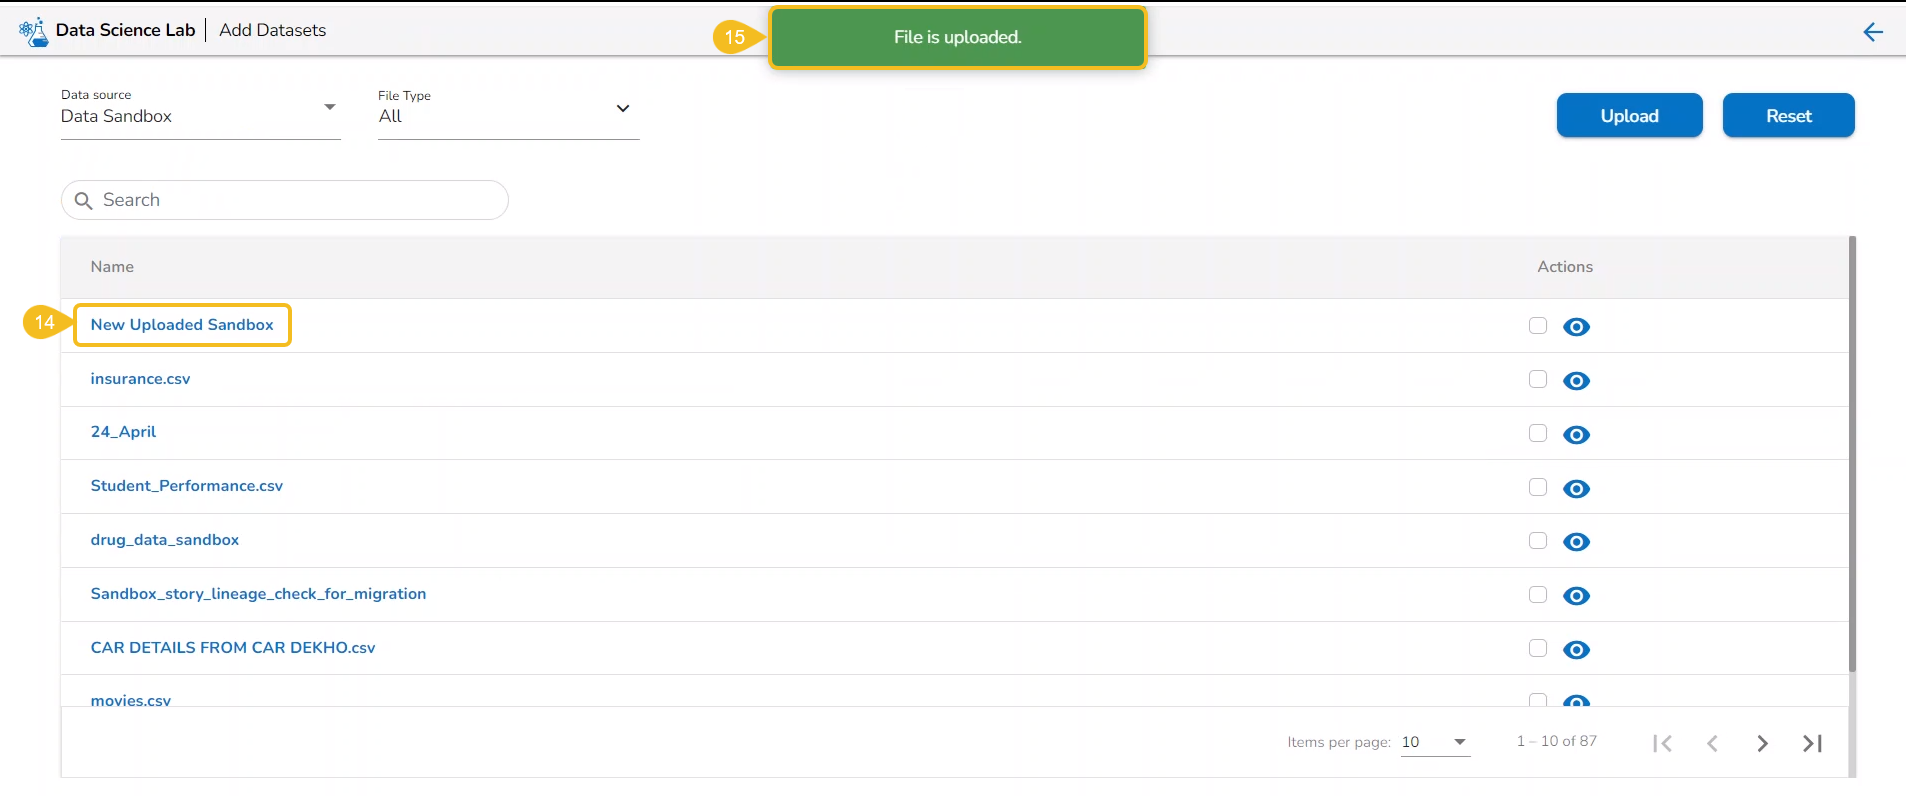
The uploaded sandbox file gets added under the Add Datasets page.
A notification message appears to indicate that the file has been uploaded.
Adding Data Sandbox files
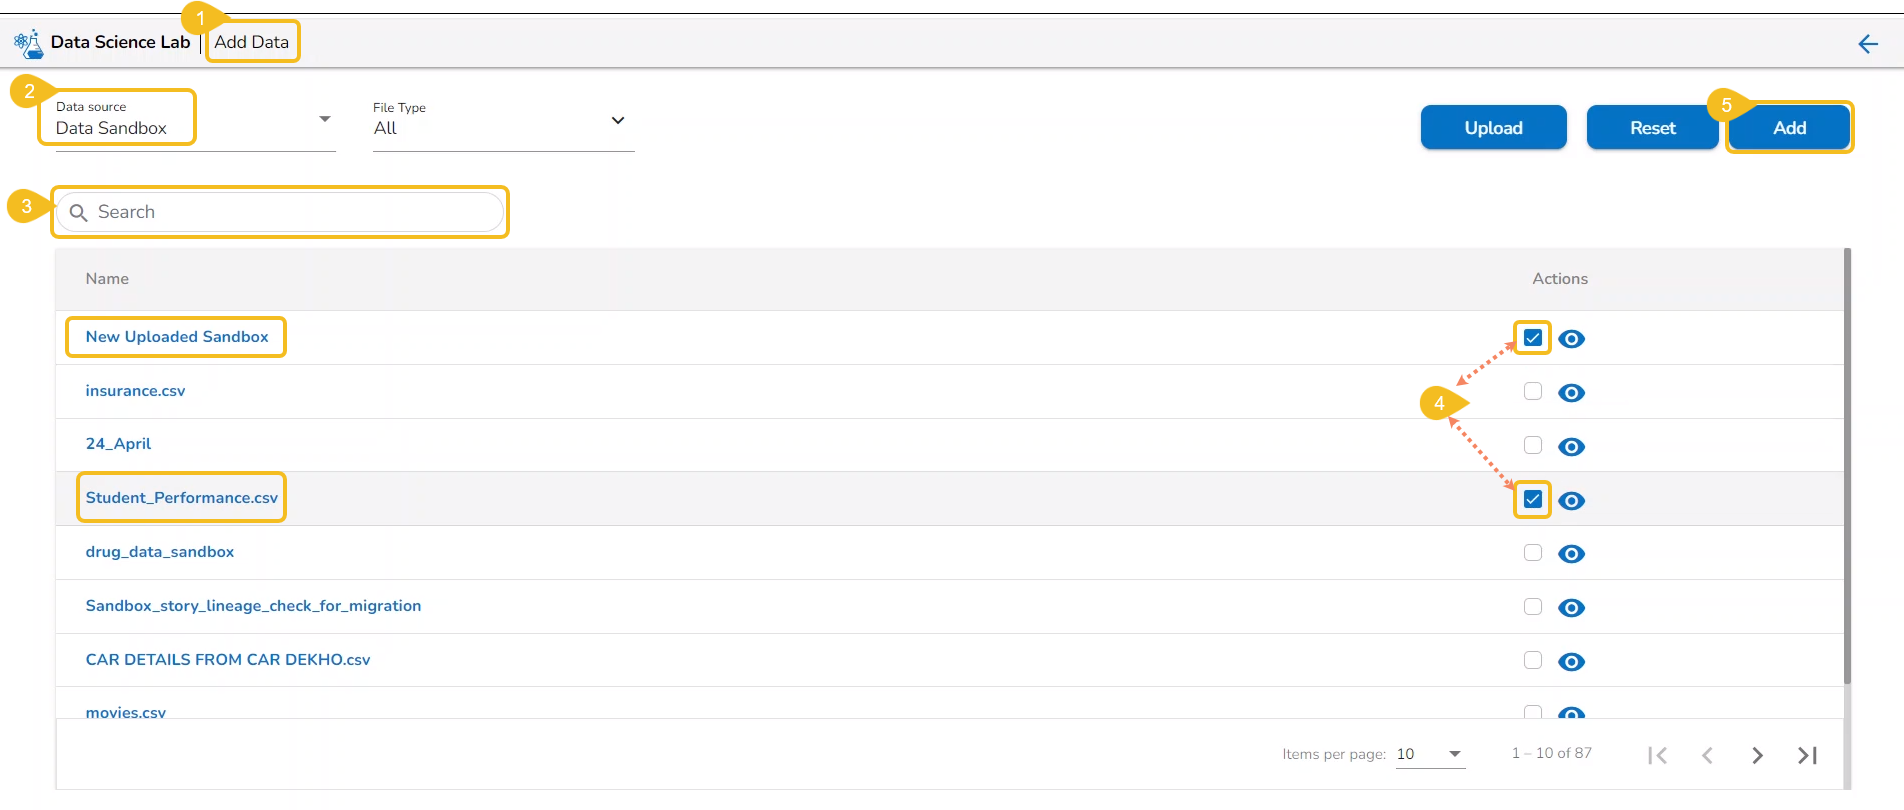
The user gets redirected to the Add Data page.
Select the Data Sandbox option from the Data Source drop-down menu.
Use the search space to search a specific data sandbox.
Select Data Sandbox files using the checkbox given next to the Sandbox entry (The uploaded Data Sandbox file appears at the top of the list).
Click the Add option that appears after selecting the uploaded Sandbox file.
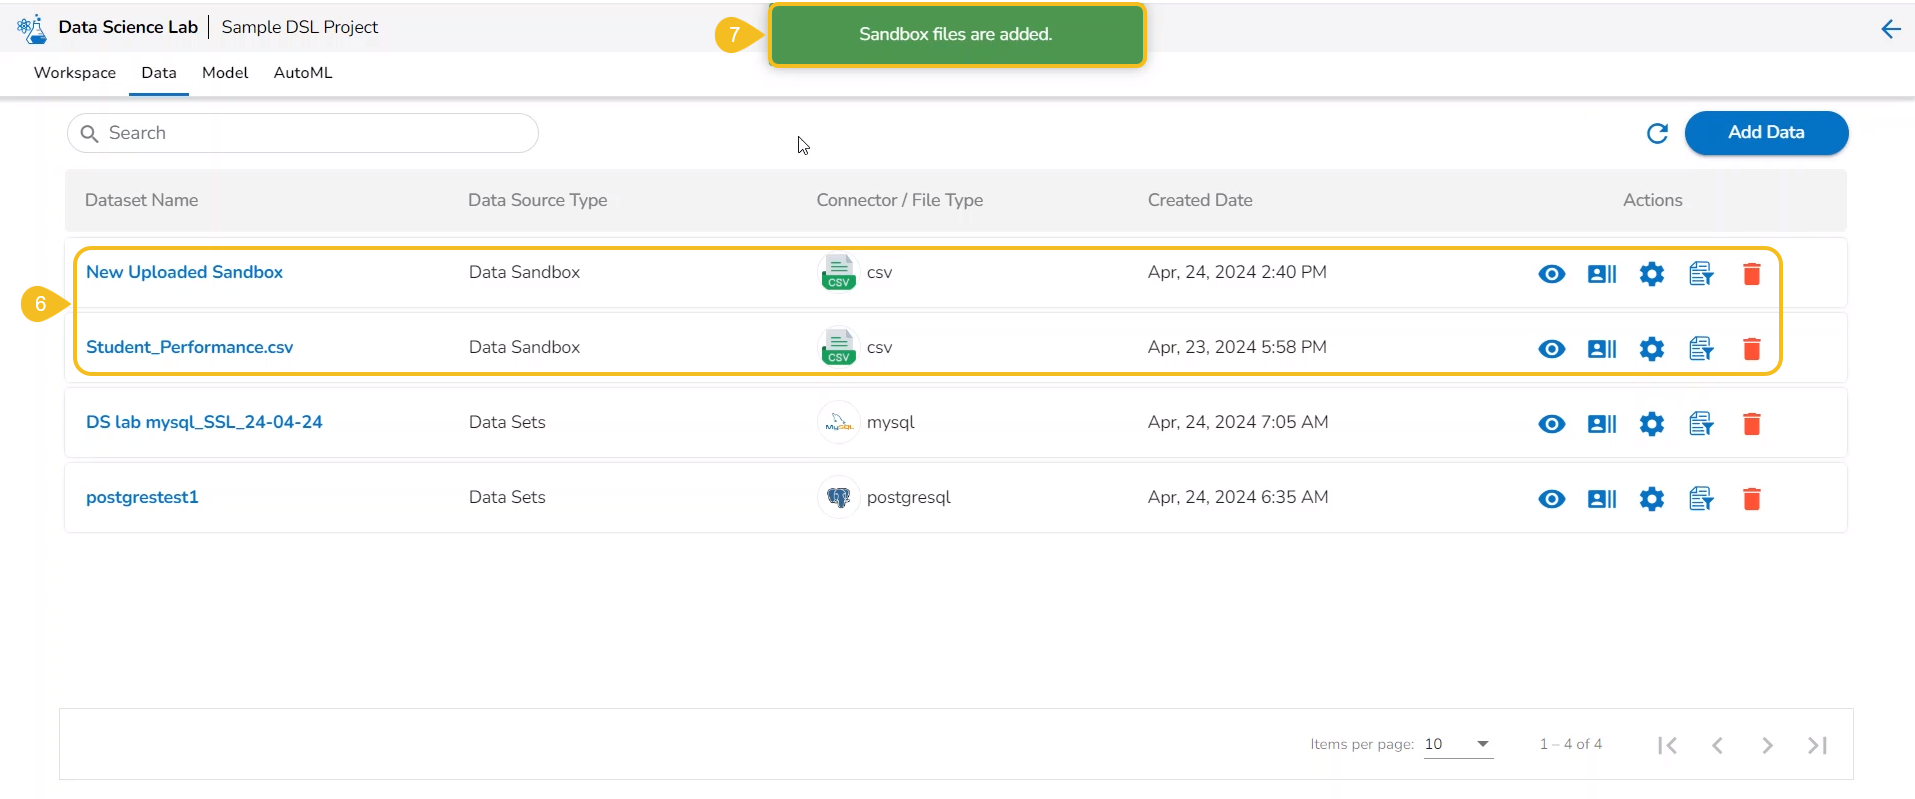
The user gets redirected to the Dataset tab where the added dataset file gets listed.
A notification message appears to inform that the selected Dataset (in this case, the selected Data Sandbox file) has been updated.
Please Note: The users get a search bar to search across the multiple Datasets options on the Add Datasets page.
Adding Feature Stores
Check out the illustration to understand the steps for adding Feature Stores to a DSL Project.
Navigate to a DSL Project.
Click the Data tab to open it.
Click the Add Data option from the Data tab.
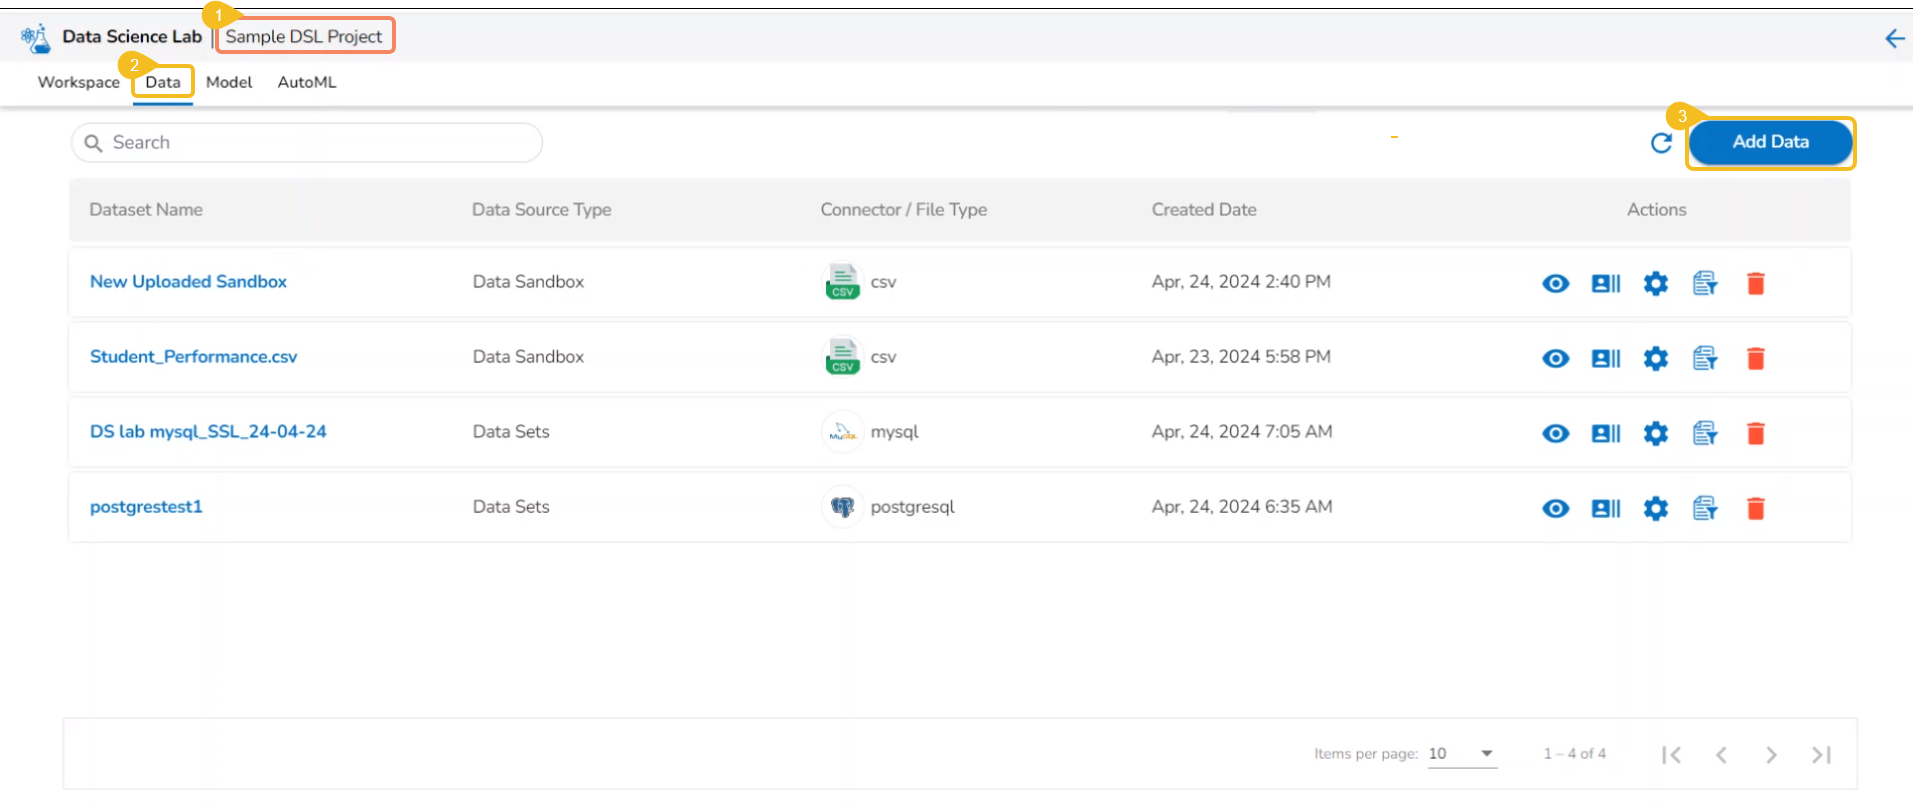
The Add Data page opens offering three options to choose data.
Select the Feature Stores option from the Data Source drop-down menu.
Use the Search space to search through the displayed data service list.
Select the required feature store(s) using the checkboxes provided next to it.
Click the Add option.

A notification message appears to inform the same.

The selected feature store(s) gets added to the concerned project.

Adding a Feature Store with Data Preparation
Check out the illustration to understand adding a Feature Store with Data Preparation.
Navigate to the Data Science Lab module.
Click the Create option provided for the Feature Store.

The Create Feature Store page opens.
Provide a name to the Feature Set.
Select a connector from the drop-down menu.
Select a query from the table info. / Metadata list or write an SQL Query.
Click the Validate option.
A notification message ensures that the query is validated.
The Preview of the data appears below.
Click the Data Prep option.

The user gets redirected to the Data Preparation page.

Navigate to the Transforms tab.
Choose a transform from the list. Here, the Label Encoding transform is selected from the ML category.

A warning appears to remind the users that if the SQL query is changed, the applied data preparations or transformations will be lost.
The Data Prep option will have a green mark suggesting that the Data Preparation is applied to the selected Feature Store.
Click the Create option.

A notification ensures that the Feature store job is initiated.

The user gets redirected to the Feature Stores page.
The newly created feature store gets added at the top of the list.

Open a Project.
The Workspace tab opens by default.
Open the Data tab.
Click the Add Data icon.

The Add Data page opens.
Select Feature Stores as an option using the Data Source filter menu.
The list of the available Feature Stores will be listed.
Select a feature store using the checkbox.
Click the Add option.

A notification appears stating that the feature store has been added.
The recently added feature store appears under the Data section of the selected project.

Add a new code cell and put a checkmark in the given checkbox next to the recently added Feature Store as data for the project.
The Data gets loaded in the code cell.

Run the code cell with the loaded feature store.

The data preview appears below the code cell.

Last updated