# Importing Notebook
You can bring your Python script to the Notebook framework to carry forward your Data Science experiment.
{% hint style="info" %}
*Please Note: The **Import** option appears for the **Repo** folder.*
{% endhint %}
The Import functionality contains two ways to import a Notebook.
* Import Notebook
* [Pull from Git](https://app.gitbook.com/o/BHXEmSpD7W3xDgxnOIpk/s/z33KQNYQvBTgQKJBgwTz/~/changes/20/tabs-for-a-dsl-project/workspace/working-with-the-workspace-tab/import/pull-from-git)
The users can seamlessly import Notebooks created using other tools and saved in their systems.
{% hint style="info" %}
*Please Note: The downloaded files in the **.ipynb** format only are supported by the **Upload Notebook** option.*
{% endhint %}
{% hint style="success" %}
*Check out the given illustration on how to import a Notebook.*
{% endhint %}
{% embed url="" %}
***Importing a Notebook***
{% endembed %}
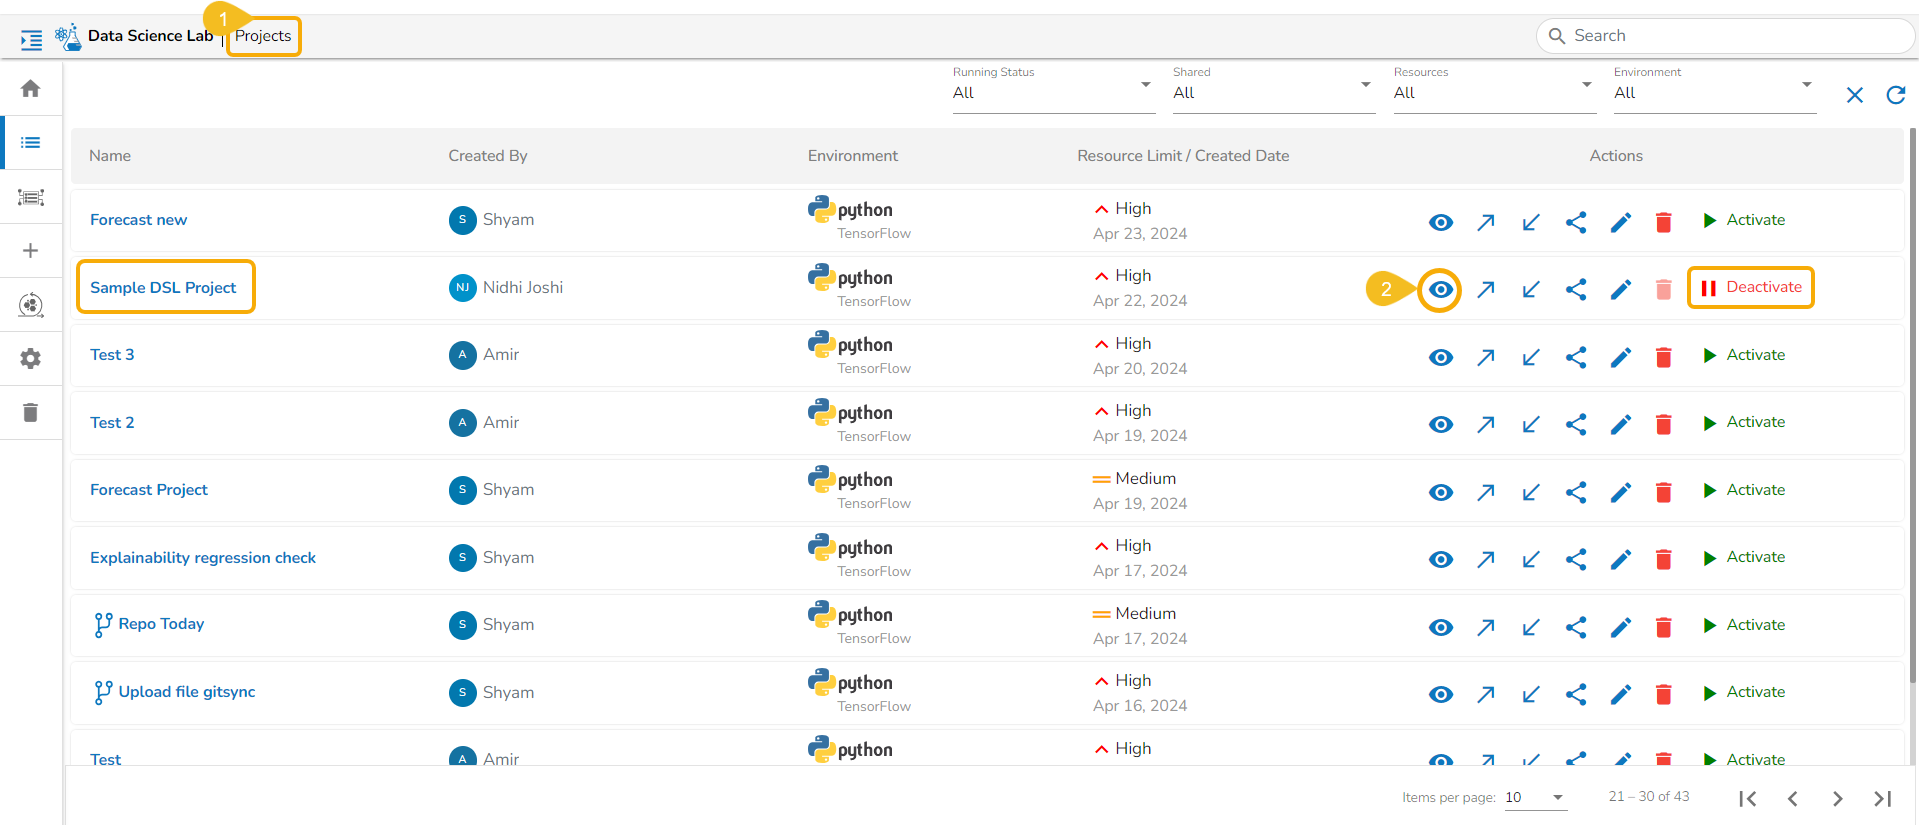
* Navigate to the Projects tab.
* Click the ***View*** icon for an activated project.
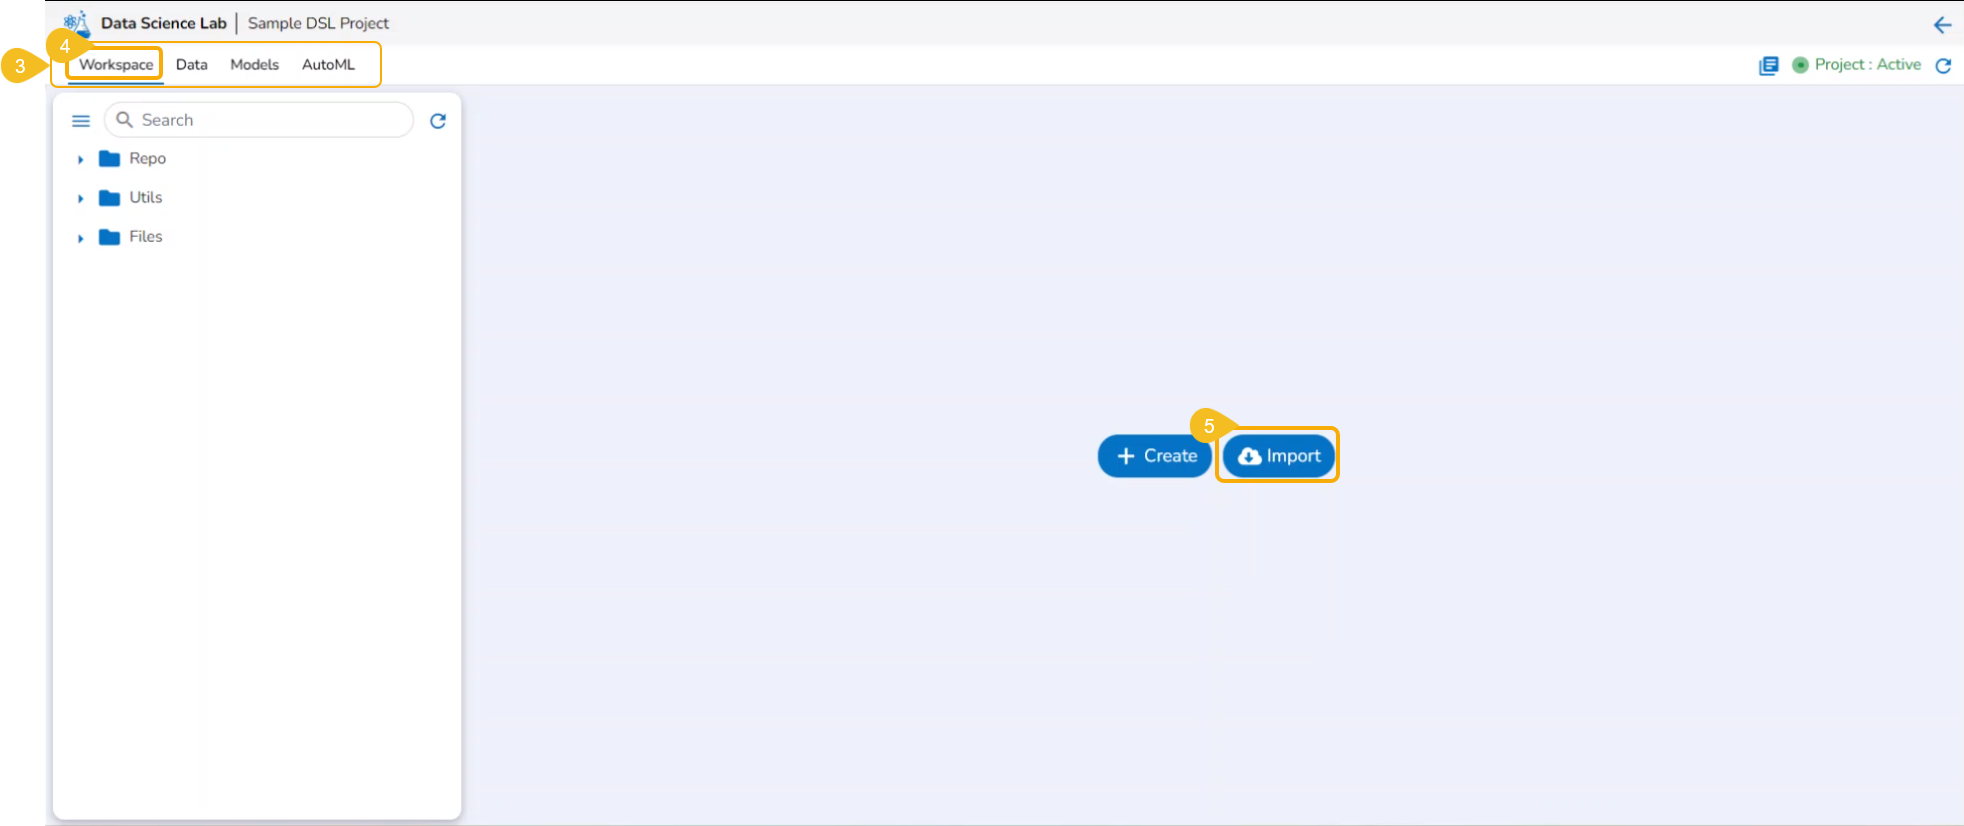
* The next page opens displaying all the related tabs.
* The ***Workspace*** tab opens by default.
* Click the ***Import*** option from the ***Workspace*** tab.
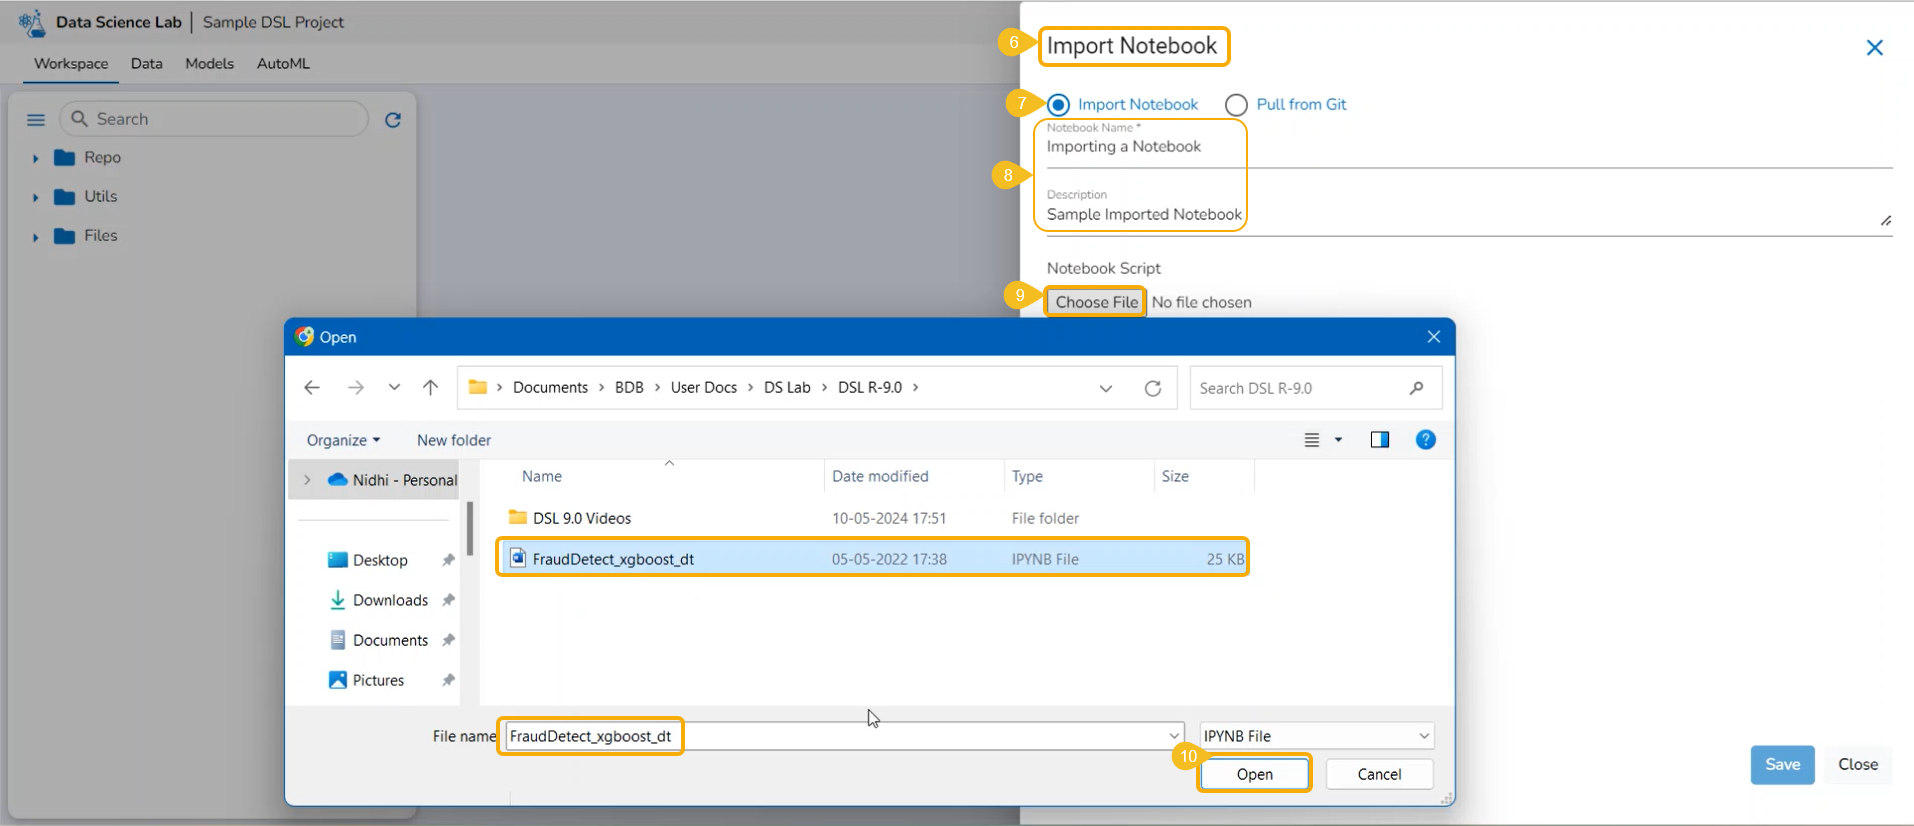
* The ***Import Notebook*** page opens.
* Select the ***Import Notebook*** option.
* Provide the following information.
* Notebook Name
* Description (optional)
* Click the ***Choose File*** option.
* Select the IPYNB file from the system and upload it.
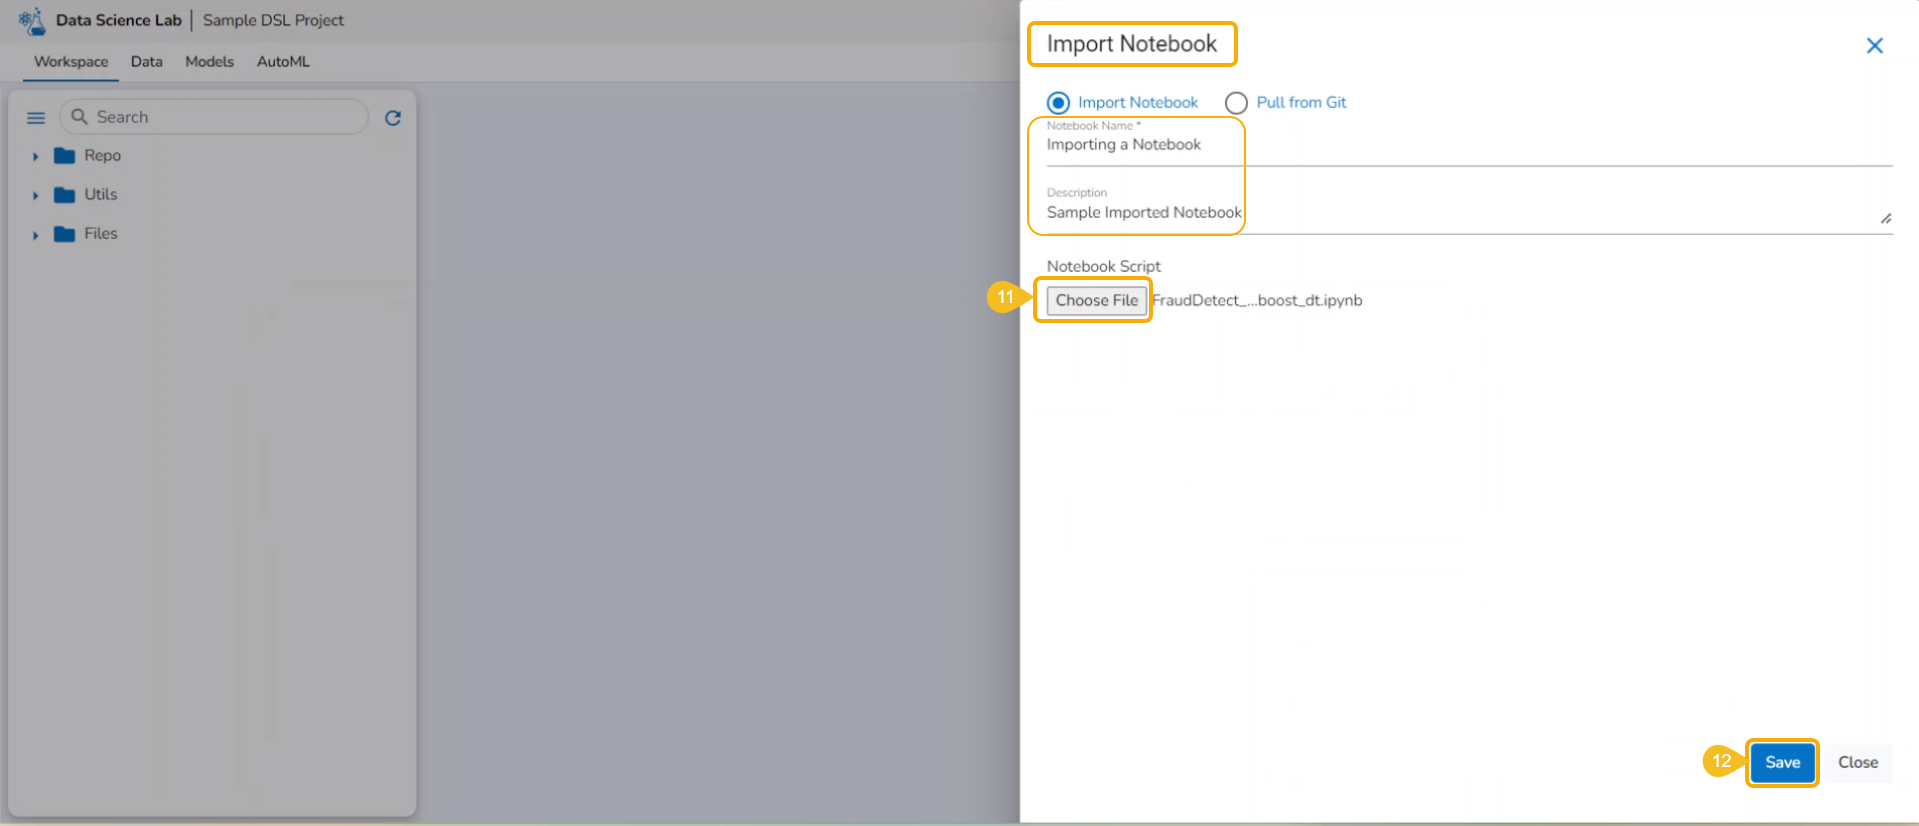
* The selected file appears next to the ***Choose File*** option.
* Click the ***Save*** option.
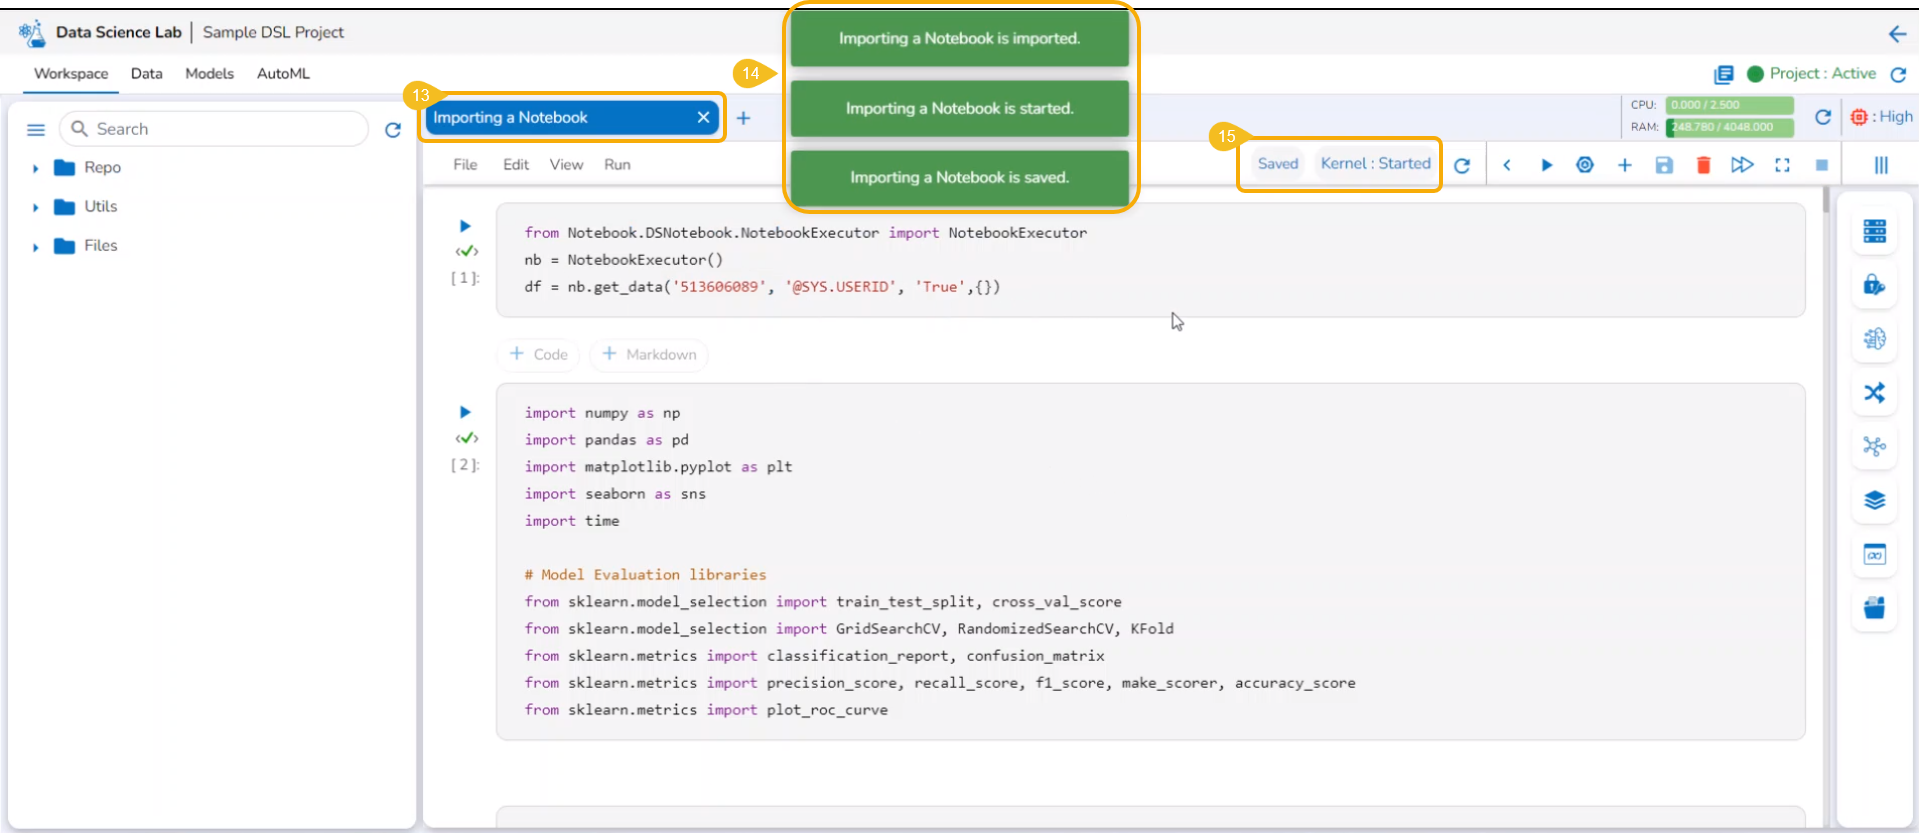
* The Notebook infrastructure opens with the given name for the recently uploaded Notebook file. It may take a few seconds to save the uploaded Notebook and start Kernel for the same.
* The following consecutive notification messages will appear to ensure the user that the Notebook is saved, uploaded, and started.
* The same is mentioned by the status updates on the Notebook header (as highlighted in the given image).
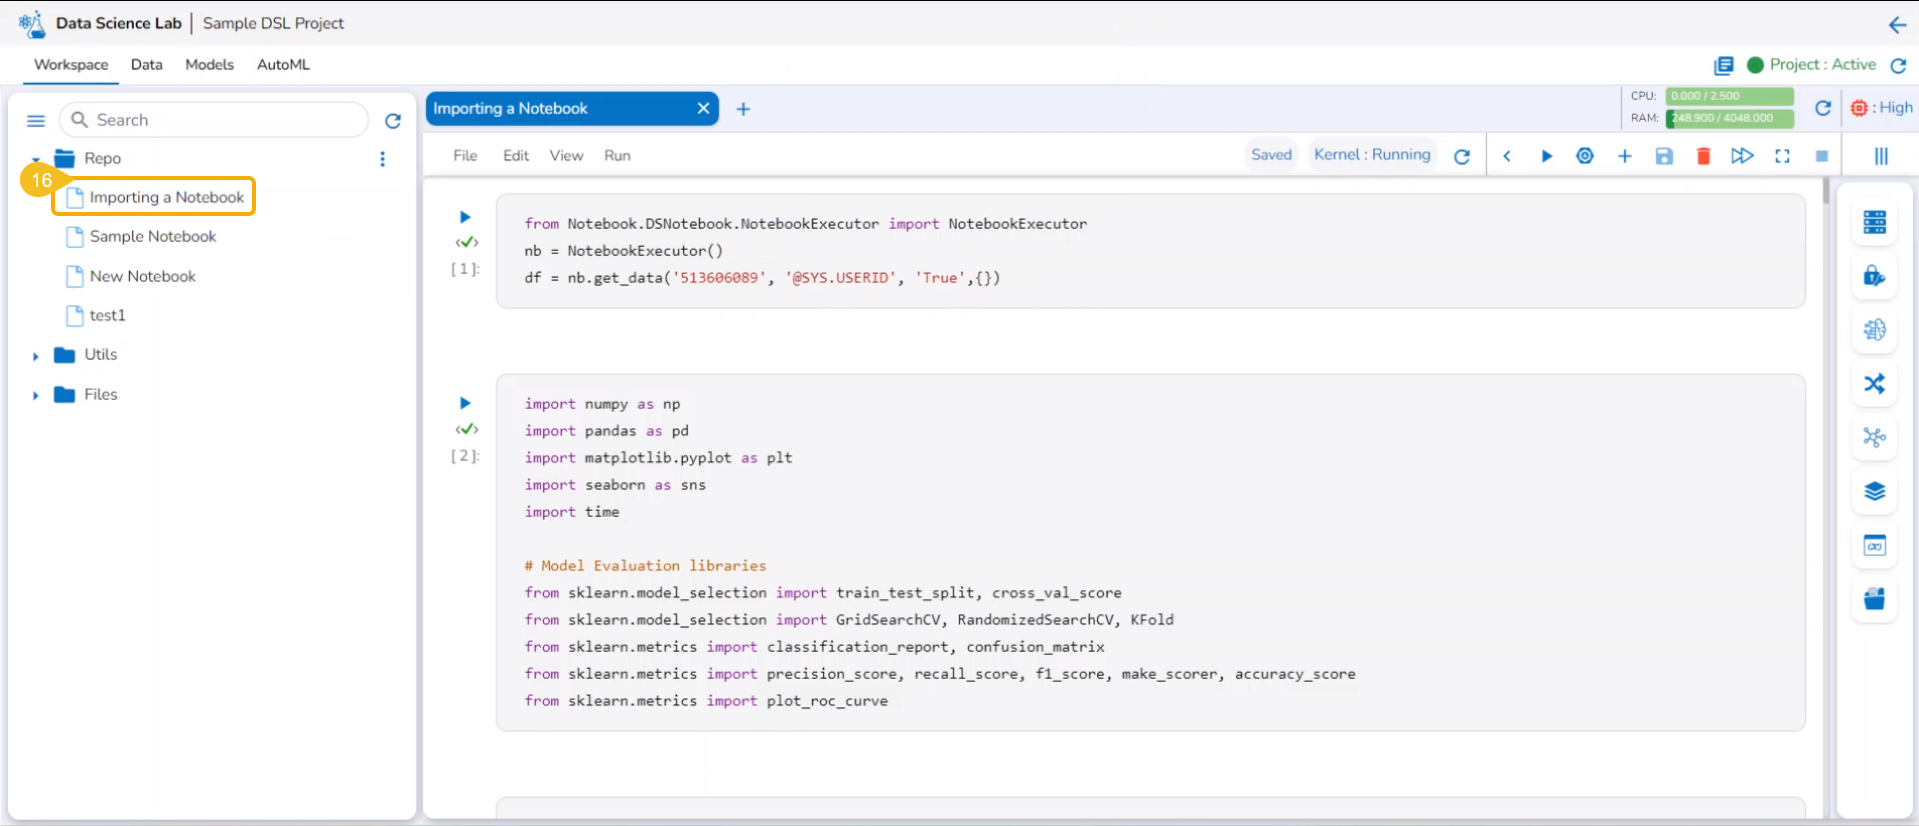
* The uploaded Notebook is listed on the left side of the page.
{% hint style="info" %}
Please Note: The Imported Notebook will be credited with some actions. Refer to the [***Notebook Actions***](https://app.gitbook.com/o/BHXEmSpD7W3xDgxnOIpk/s/z33KQNYQvBTgQKJBgwTz/~/changes/20/tabs-for-a-dsl-project/workspace/workspace-assets/attributes-for-the-default-folders/repo-folder-attributes/notebook-actions) page to know it in detail.
{% endhint %}