AutoML List Page
This section describes the Actions provided for the created AutoML experiments on the AutoML List page.
Once the initiated AutoML experiment is completed, it gets two Actions. The allotted Actions for an AutoML Experiment are:
Delete
View Report
It is indicated in Green color for the Completed Experiments (for the successful experiment).
It is indicated in Red color for the Failed Experiments).

View Report for a Completed Experiment
This option provides the summary of the experiment (completed or failed) along with the details of the recommended model (in case of a completed experiment).
Navigate to the Auto ML tab.
All the created Experiments will be listed.
Select a Completed experiment.
Click the View Report option from the Actions column.
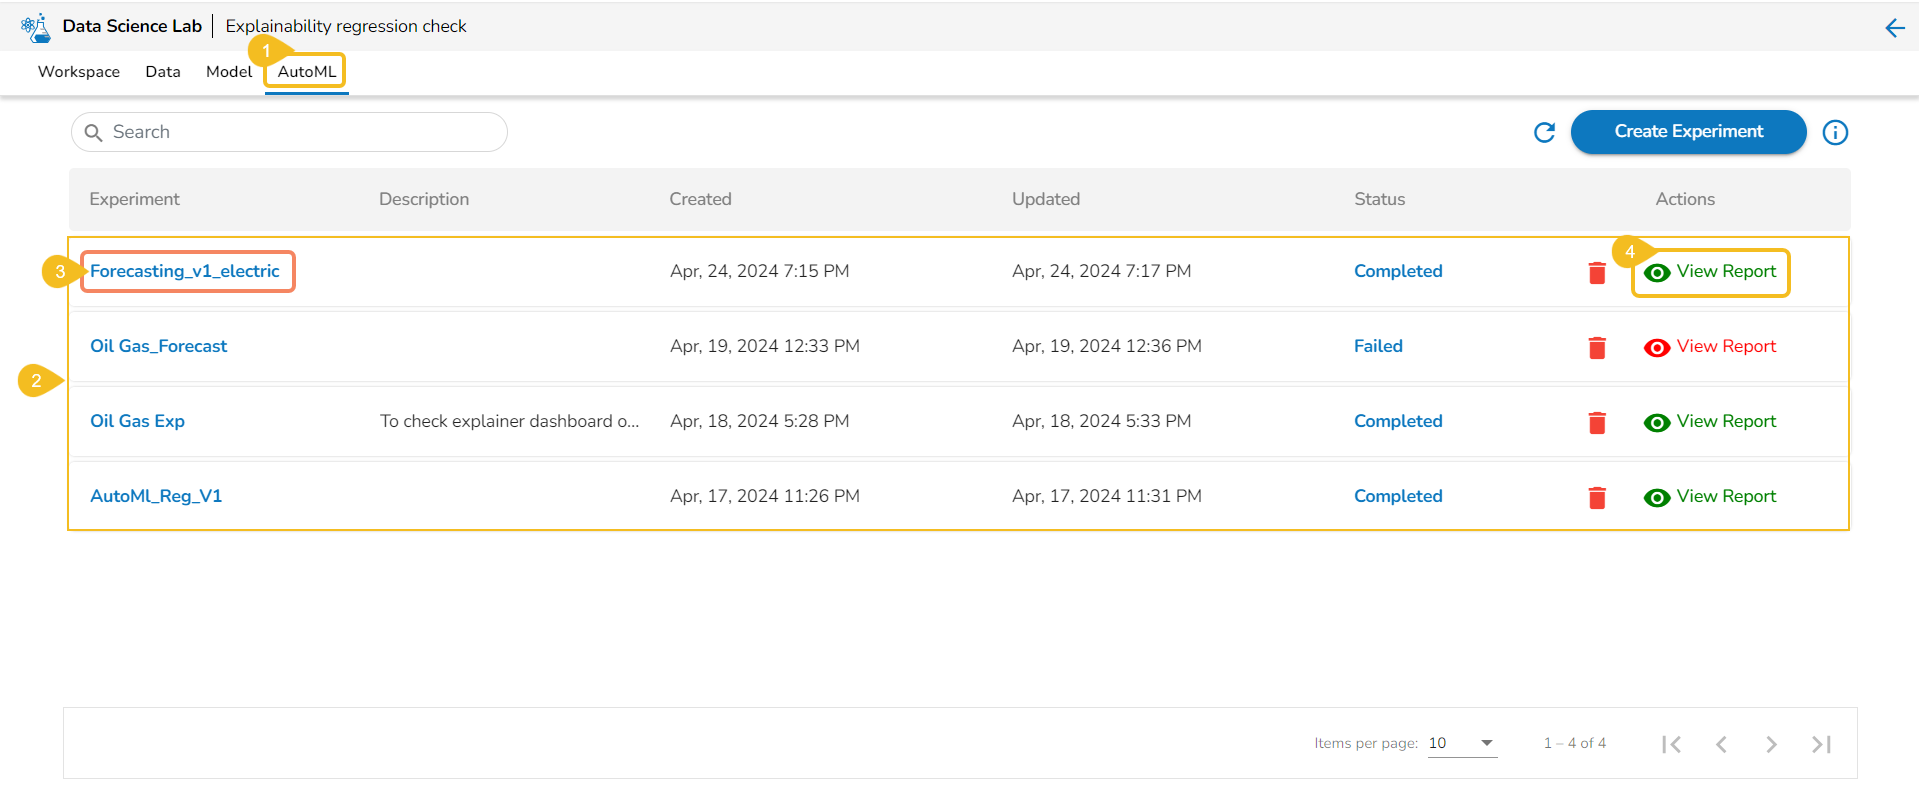
The Details tab opens for the selected completed experiment.

Details
The Details tab opens while clicking the View Report icon for an experiment with Completed status.
Click the View Report option for a completed experiment.
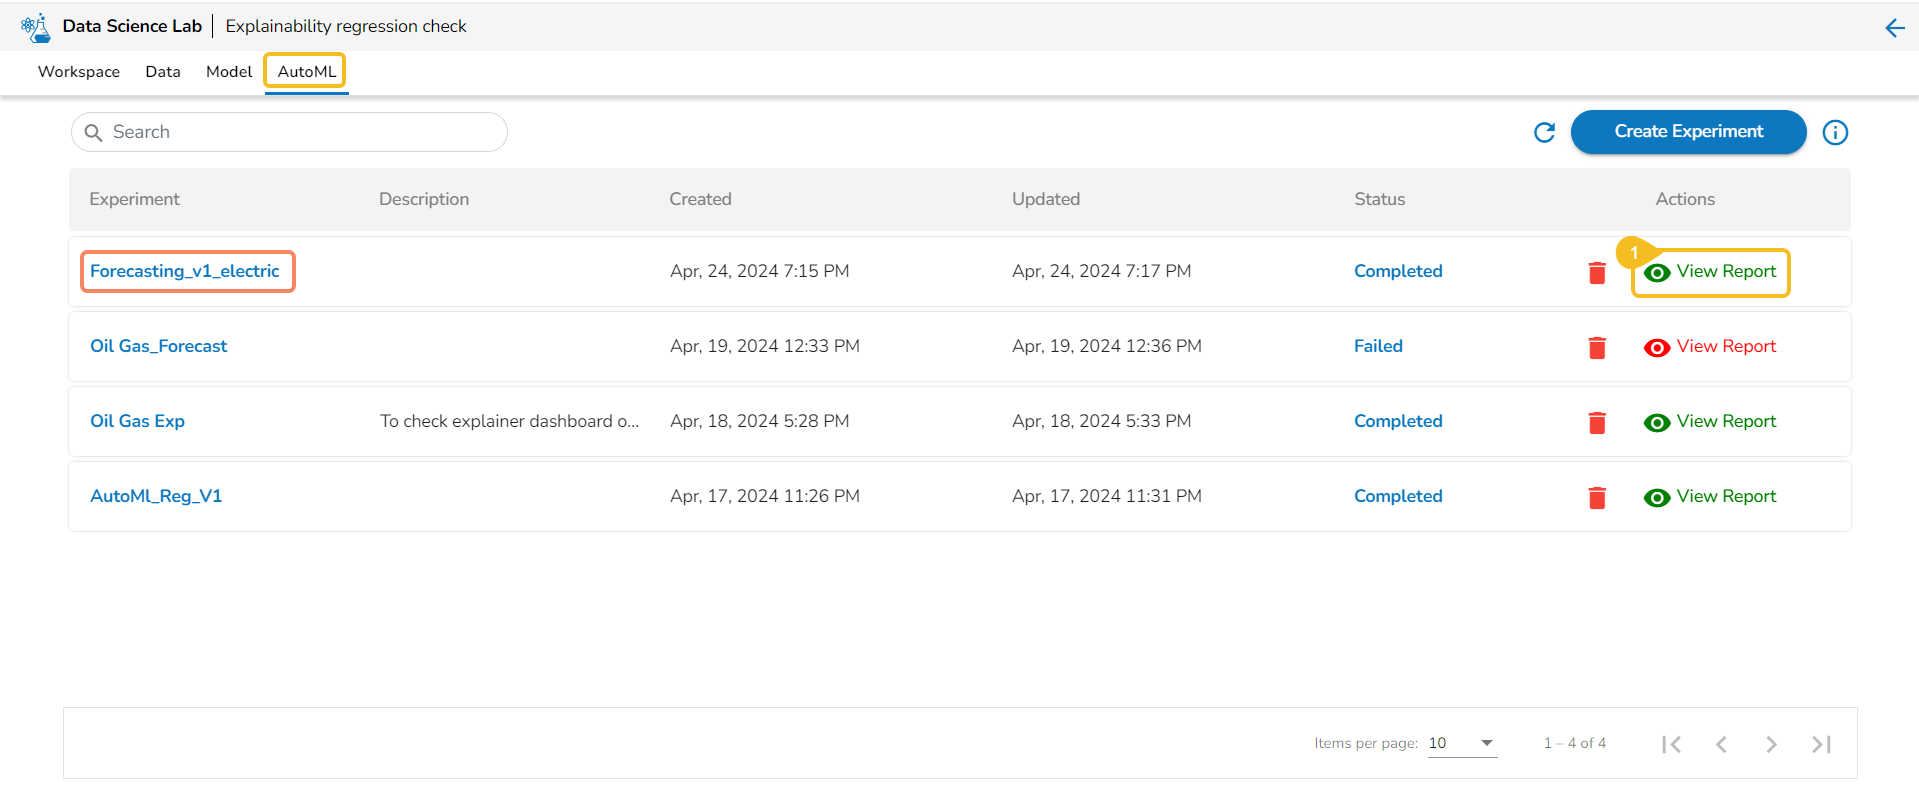
The Details tab opens by default displaying the following details for the model:
Recommended Model: This will be the most suitable model determined based on the metric score of the model.
Model Name: Name of the model
Model Score: Score of the model
Metric Value: On which basis the model was considered
Created On: Date of model creation
Run Summary: This portion will have the basic information about the experiment and trained model.
Task Type: it displays the selected algorithm name to complete the experiment.
Experiment Status: This indicates the status of the AutoML model.
Created By: Name of the creator.
Dataset: mentions the dataset.
Target Column: It indicates the target column.


Models
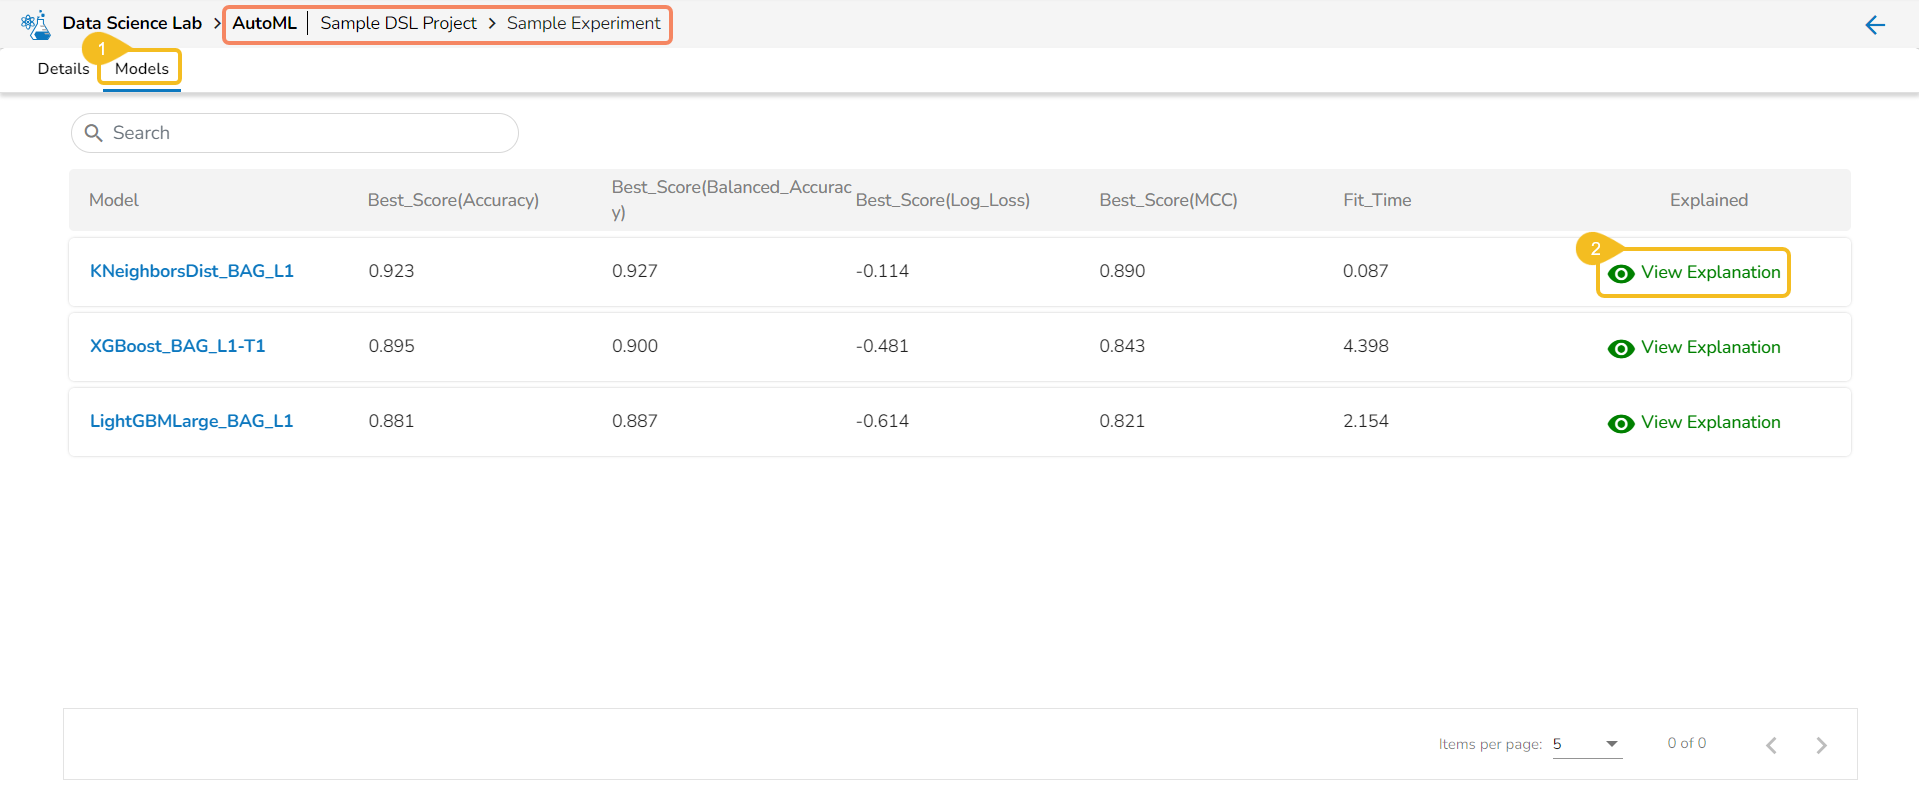
The Models tab lists the top three models based on their metrics score. The user gets the View Explanation option for each of the selected top three models to explain the details of that model.
Navigate to the Models tab of a completed Auto ML experiment.
Select a Model from the displayed list and click the View Explanation option. The View Explanation option allows the users to check details about each of the top 3 models.
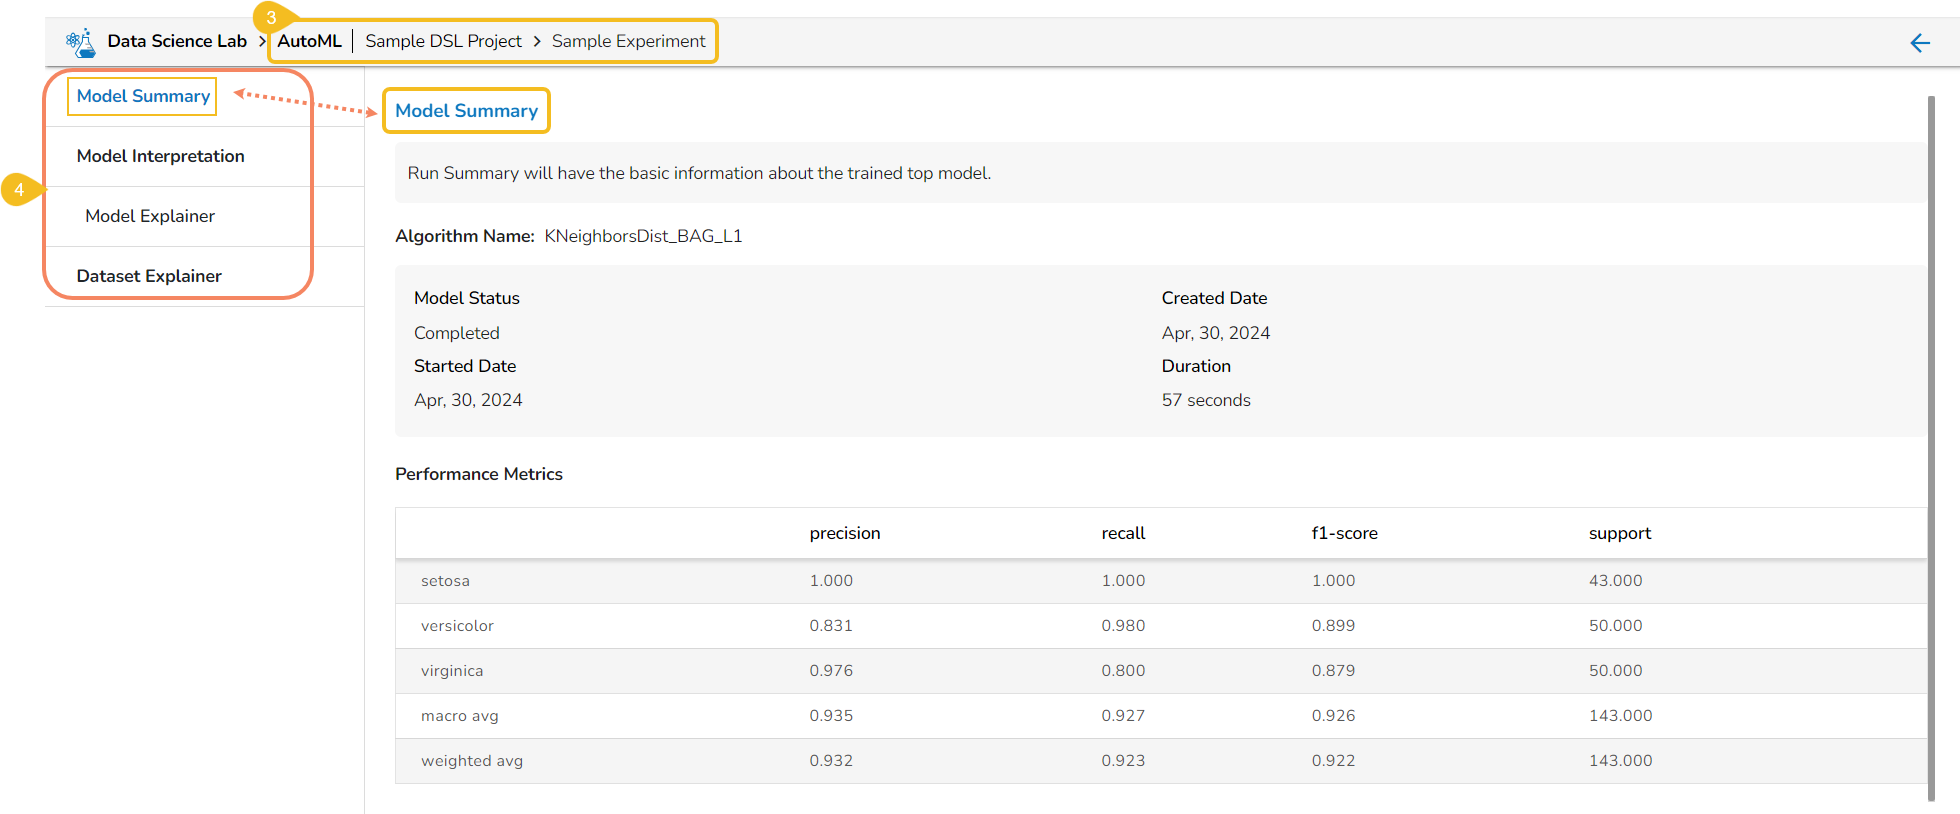
A new page opens displaying the various information for the selected Model.
The following options are displayed for a selected model:
Model Summary: This tab displays the model summary for the selected model. It opens by default.
Model Interpretation: This tab contains the Model Explainer dashboard displaying the various details for the model.
Dataset Explainer: This tab displays the Data Profile of the dataset for the selected model.
Please Note: Refer to this document's View Explanation section for more details.
View Report for a Failed Experiment
If the user opens the View Report option for a failed Experiment, it will display the Model Logs and mention the reason for the model's failure.
Navigate to the Auto ML tab.
Select a Failed experiment.
Click the View Report option from the Actions column.

The Logs tab opens for the selected completed experiment.
The Model Logs are displayed with the reason for failure.

Delete
The Delete option helps the user to remove the selected AutoML from the list.
Check out the walk-through to understand the steps to Delete an AutoML.
Navigate to the Auto ML list page.
Select a model/experiment from the list. (It can be any experiment irrespective of the Status).
Click the Delete icon for the model.
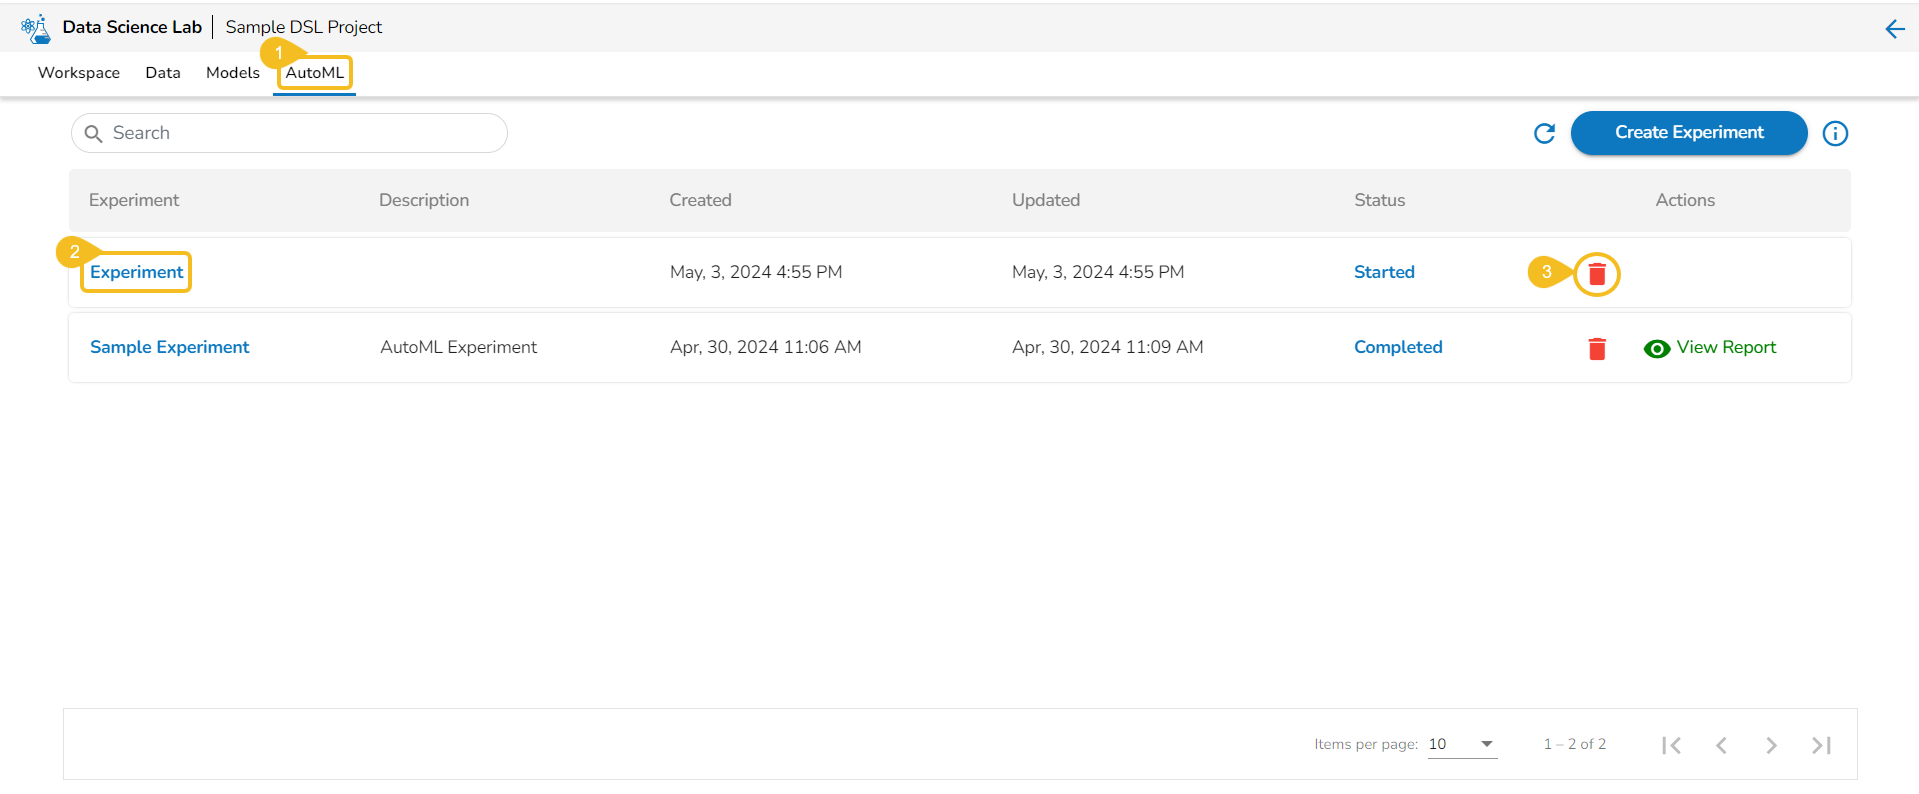
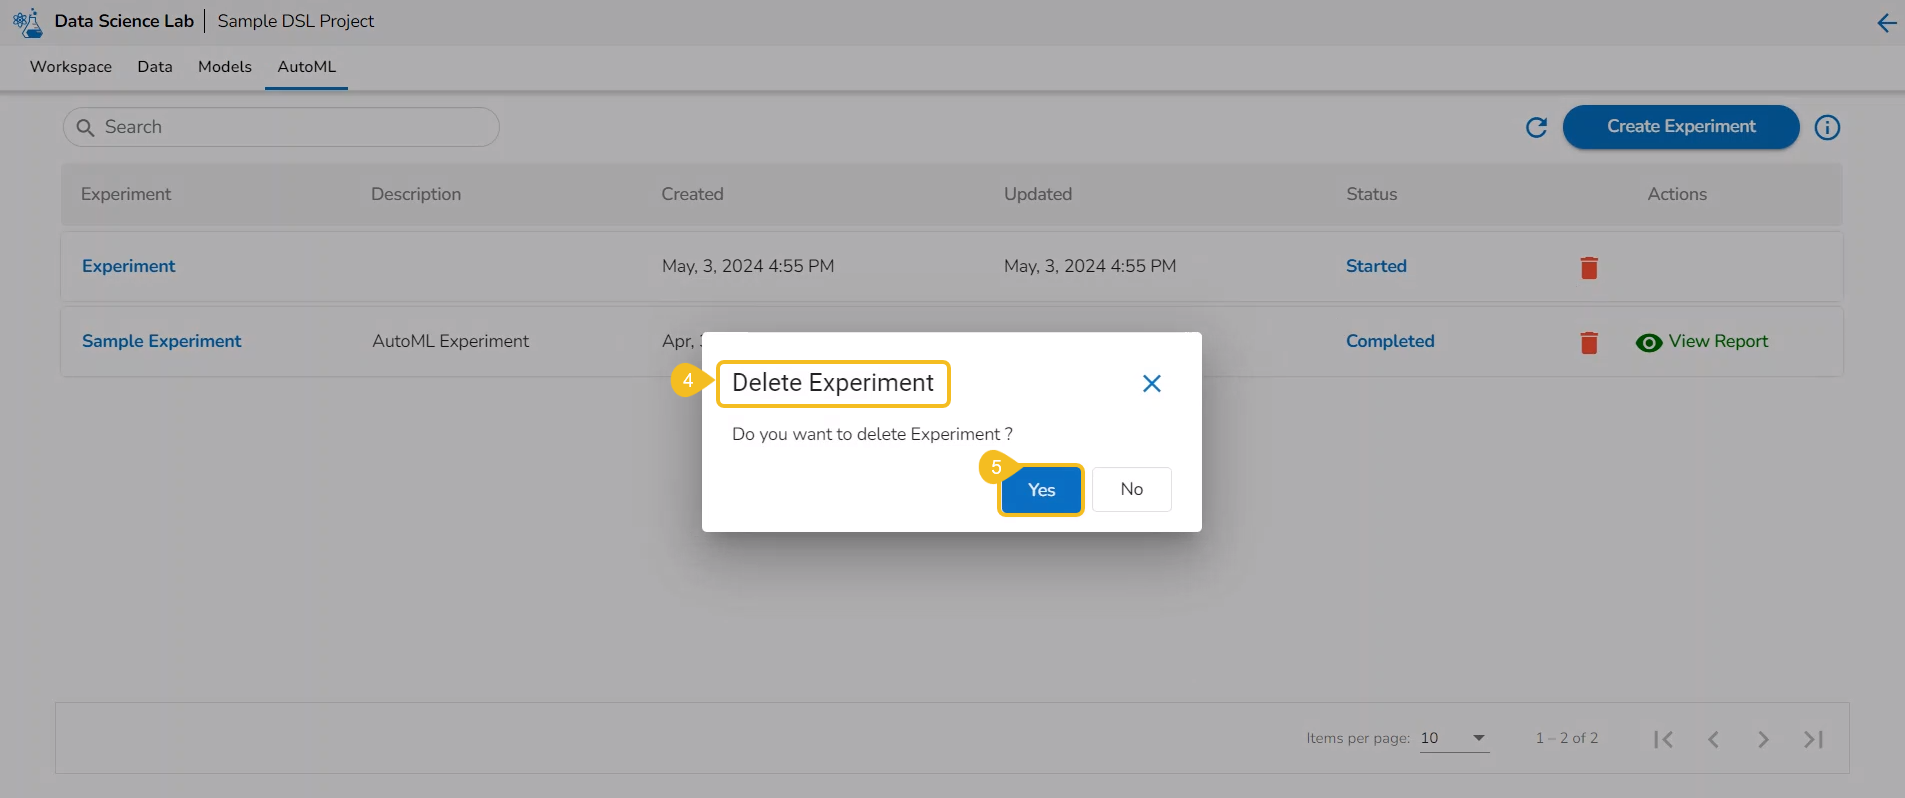
A dialog box opens to ensure the deletion.
Click the Yes option.
The selected experiment gets removed from the list.
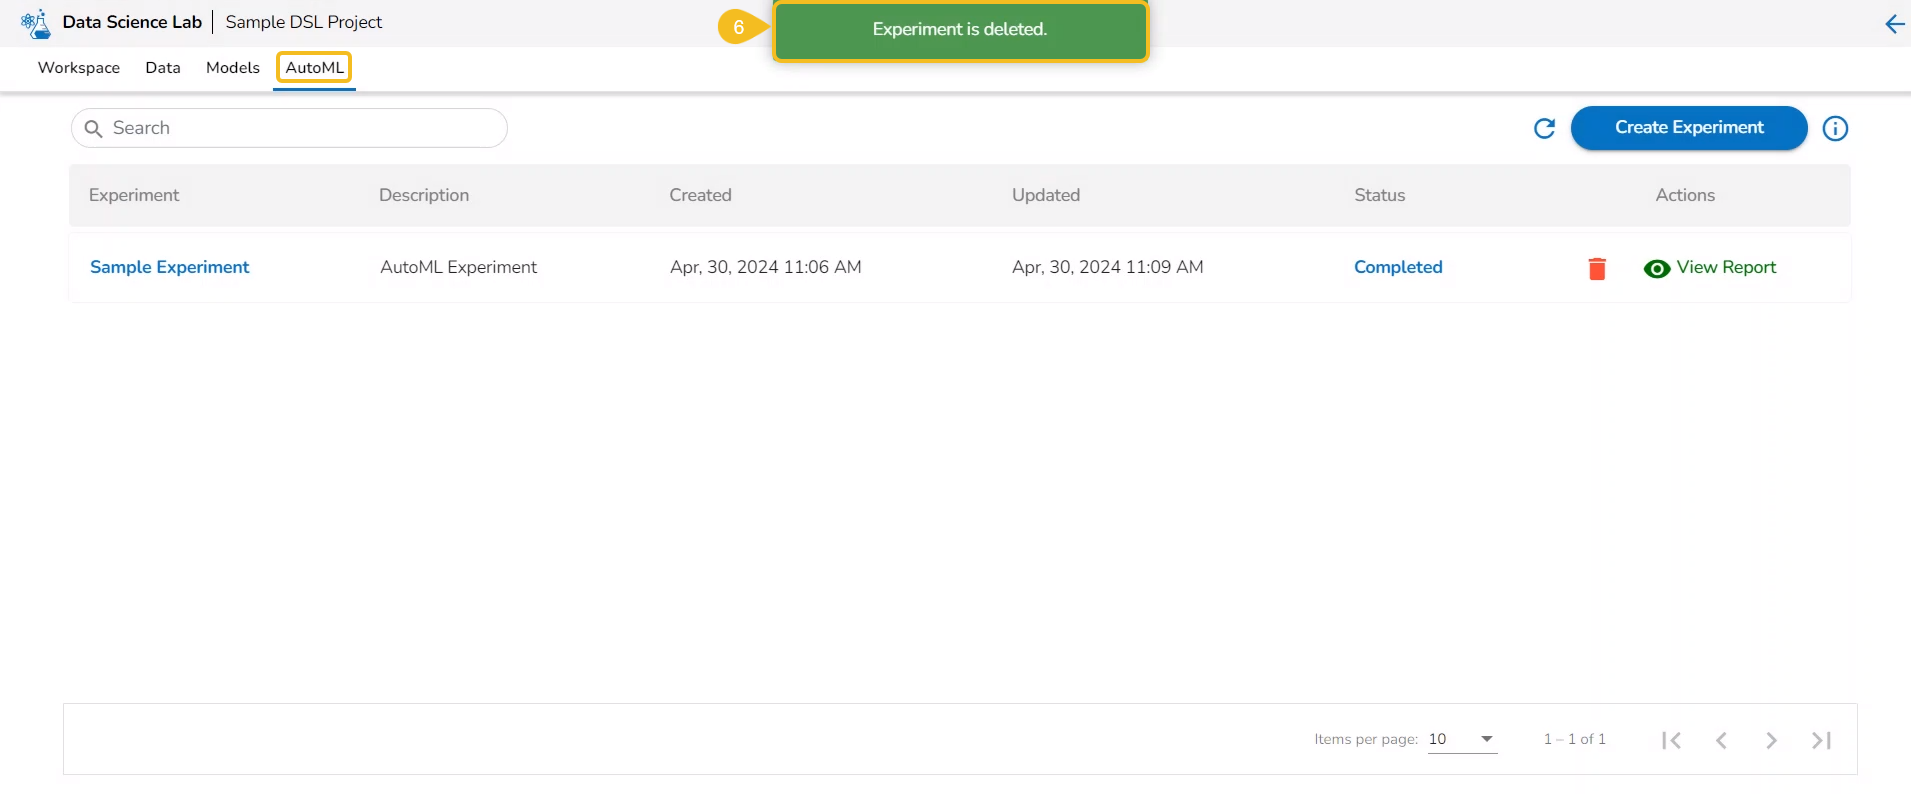
Please Note: The user can remove any Auto ML experiment irrespective of its status.
Last updated