Create Feature Store
What is a Feature Store?
A Feature Store is a centralized repository for storing, managing, and sharing machine learning (ML) features or attributes used to train models. It is a scalable solution for organizing and cataloging features, making them easily accessible to data scientists and ML engineers across an organization. Feature Stores facilitate collaboration, version control, and reusability of features, streamlining the ML development process and improving model quality and efficiency.
Check out the illustration to create a new Feature Store.
Steps to Create A Feature Store
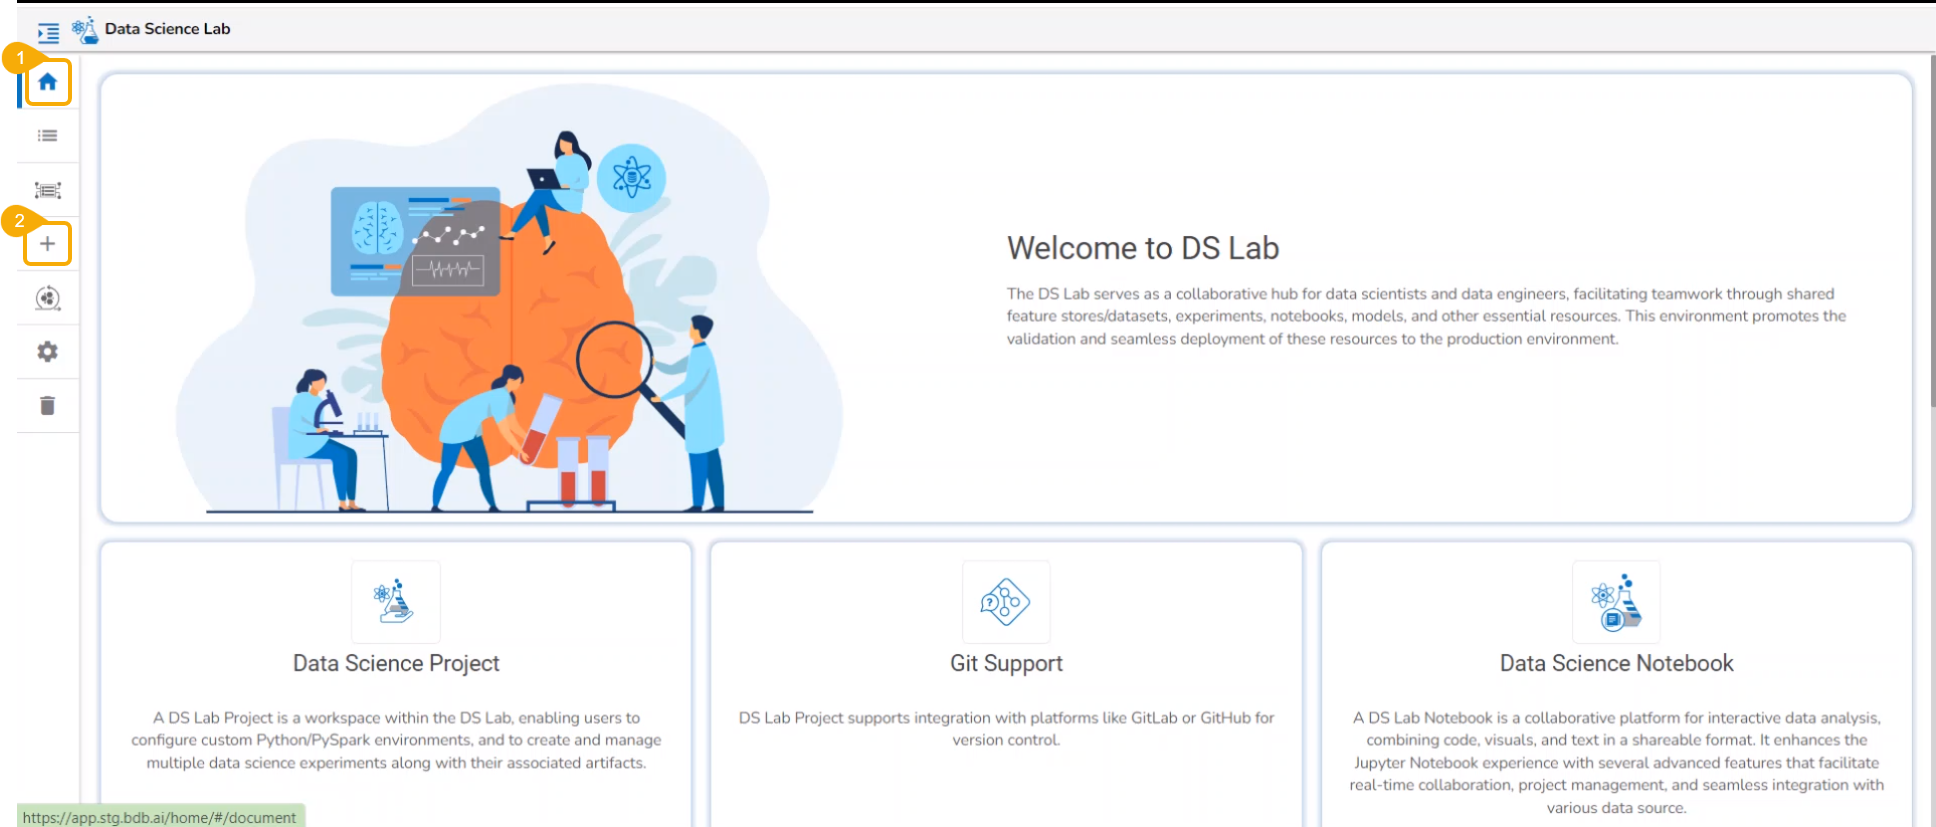
Navigate to the Homepage of the Data Science Lab module.
Click the Create icon from the homepage.

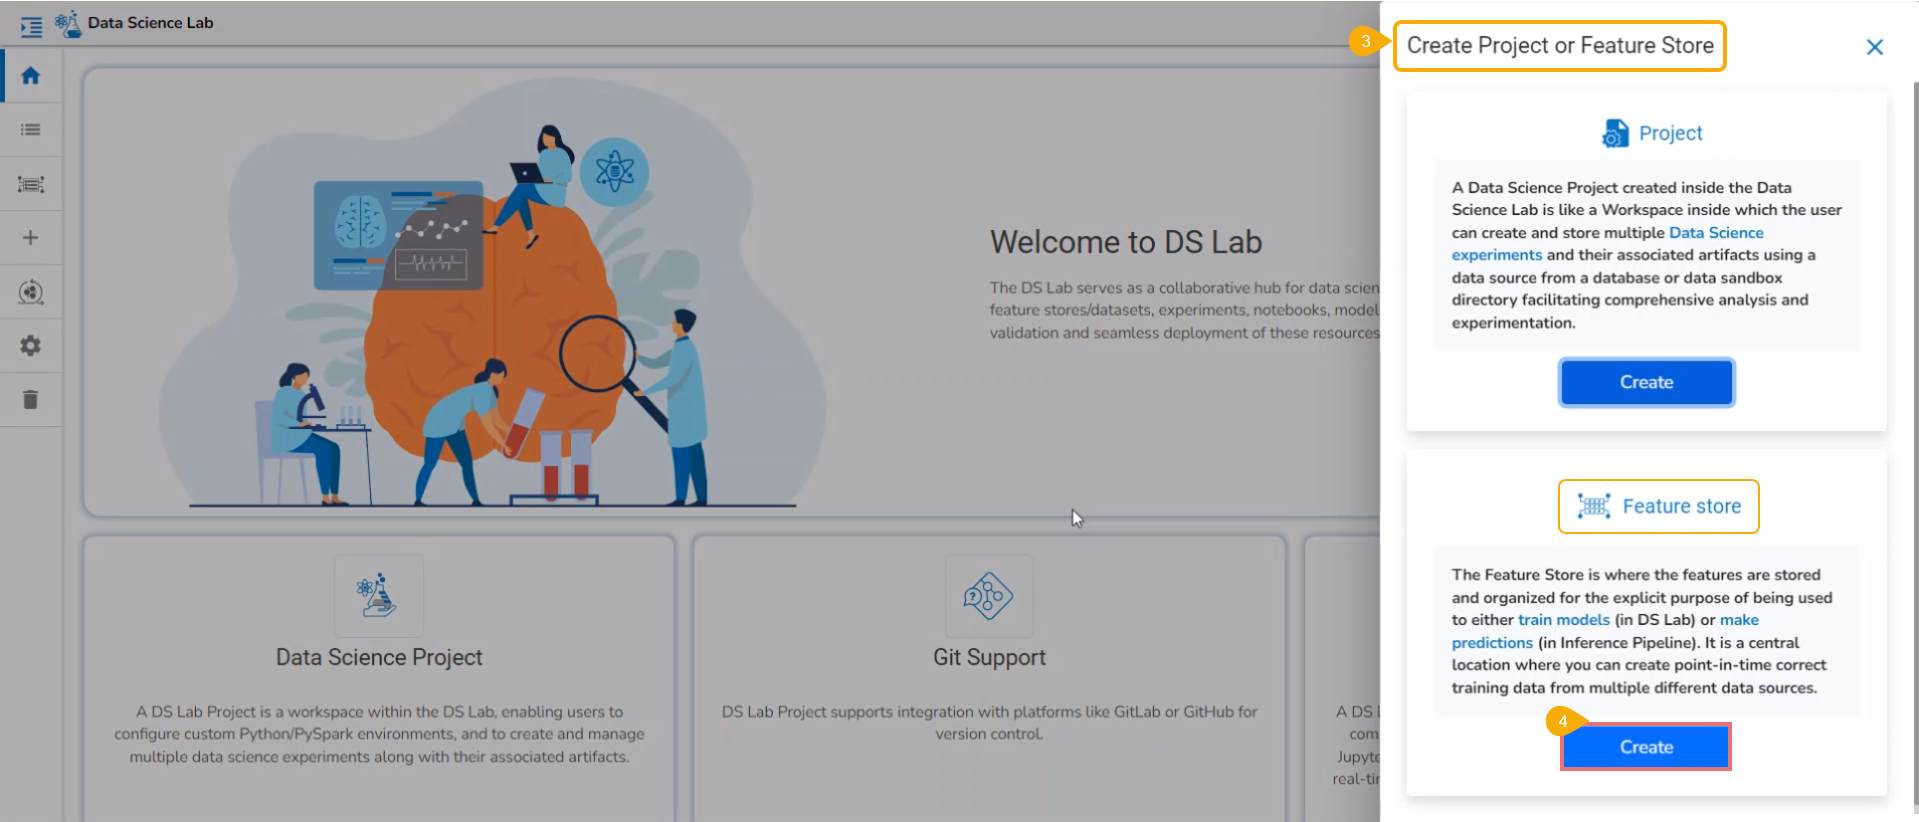
The Create Project or Feature Store drawer opens.
Click the Create option provided for the Feature Store.

The Create Feature Store page opens.
Provide a name for the Feature Store.
Select a Data Connector from the drop-down list.
The Table info/ metadata panel will appear on the right side of the page.
Click on a table name to select it.
An SQL query will be generated in the given place.
Click the Validate option.
A notification message ensures the user that the action has been executed successfully and the table is executed.
A preview of the table appears below.
Click the Create option.

A notification message ensures the user that the intended Feature Store is being created.
The user gets redirected to the Feature Stores page.
The newly created Feature Store gets added at the top of the list.

Feature Stores List with newly created Feature Store
Please Note:
Click the Refresh icon to get the status level updates for the newly created Feature Store.
A Feature Store gets Initializing, Started, and Completed as Status.
Scheduling a Feature Store
Check out the illustration on scheduling a Feature Store.
Navigate to the Data Science Lab module.
Click the Create option provided for Feature Store.

The Create Feature Store form opens.
Provide the Featureset Name.
Select a connector using the drop-down menu.
Write or get an SQL query by selecting a table/metadata from the Tab Info./Metadata panel.
Validate the query using the Validate option.
A notification appears to ensure the user after the query is validated.
Click the Schedule option.

The Schedule page appears.
Select an option for the Concurrency Policy. The following options are provided:
Allow (Parallel): Multiple instances run simultaneously. No concurrency restrictions. Suitable for independent tasks.
Forbid (Prevent, Deny): Only one instance runs simultaneously. New instances are skipped if a previous one is running. Suitable for tasks that can't run in parallel.
Replace (Terminate, ReplaceOlder): A new instance starts, previous one is terminated. Suitable when the latest instance should take priority. Ensures no overlap.
Navigate to the Cron Generator section.
Choose the Monthly or Yearly option and provide the required information.
Based on the selection from the Cron Generator the Scheduler Time will be added.
Click the Apply option.

The user gets redirected to the Create Feature Store page, a notification ensures that the Feature Store is scheduled.
The same will be indicated through a green mark in the Scheduler option.
Click the Create option.

The user gets redirected to the Feature Stores page.
The newly created Feature Store is added at the top of the page.
A notification message ensures that the Feature store job is initialized. The same is suggested through the Status column.
Click the Refresh icon.

The feature store status gets changed to Started.
Click the Refresh icon.

The Feature Store status gets changed to Completed.
The Stop Scheduling icon gets enabled for the feature store.

Please Note: The Stop Schedule option will remain enabled when a scheduled Feature Store reaches the scheduled time limit. The user can click the Stop Schedule icon during this period to stop the schedule.
Last updated