Register as a Job
This page describes steps to register a Data Science Script as a Job.
Register a Data Science Script as a Job
Check out the illustration on registering a Notebook script as a Job to the Data Pipeline module.
The user can register a Notebook script as a Job using this functionality.
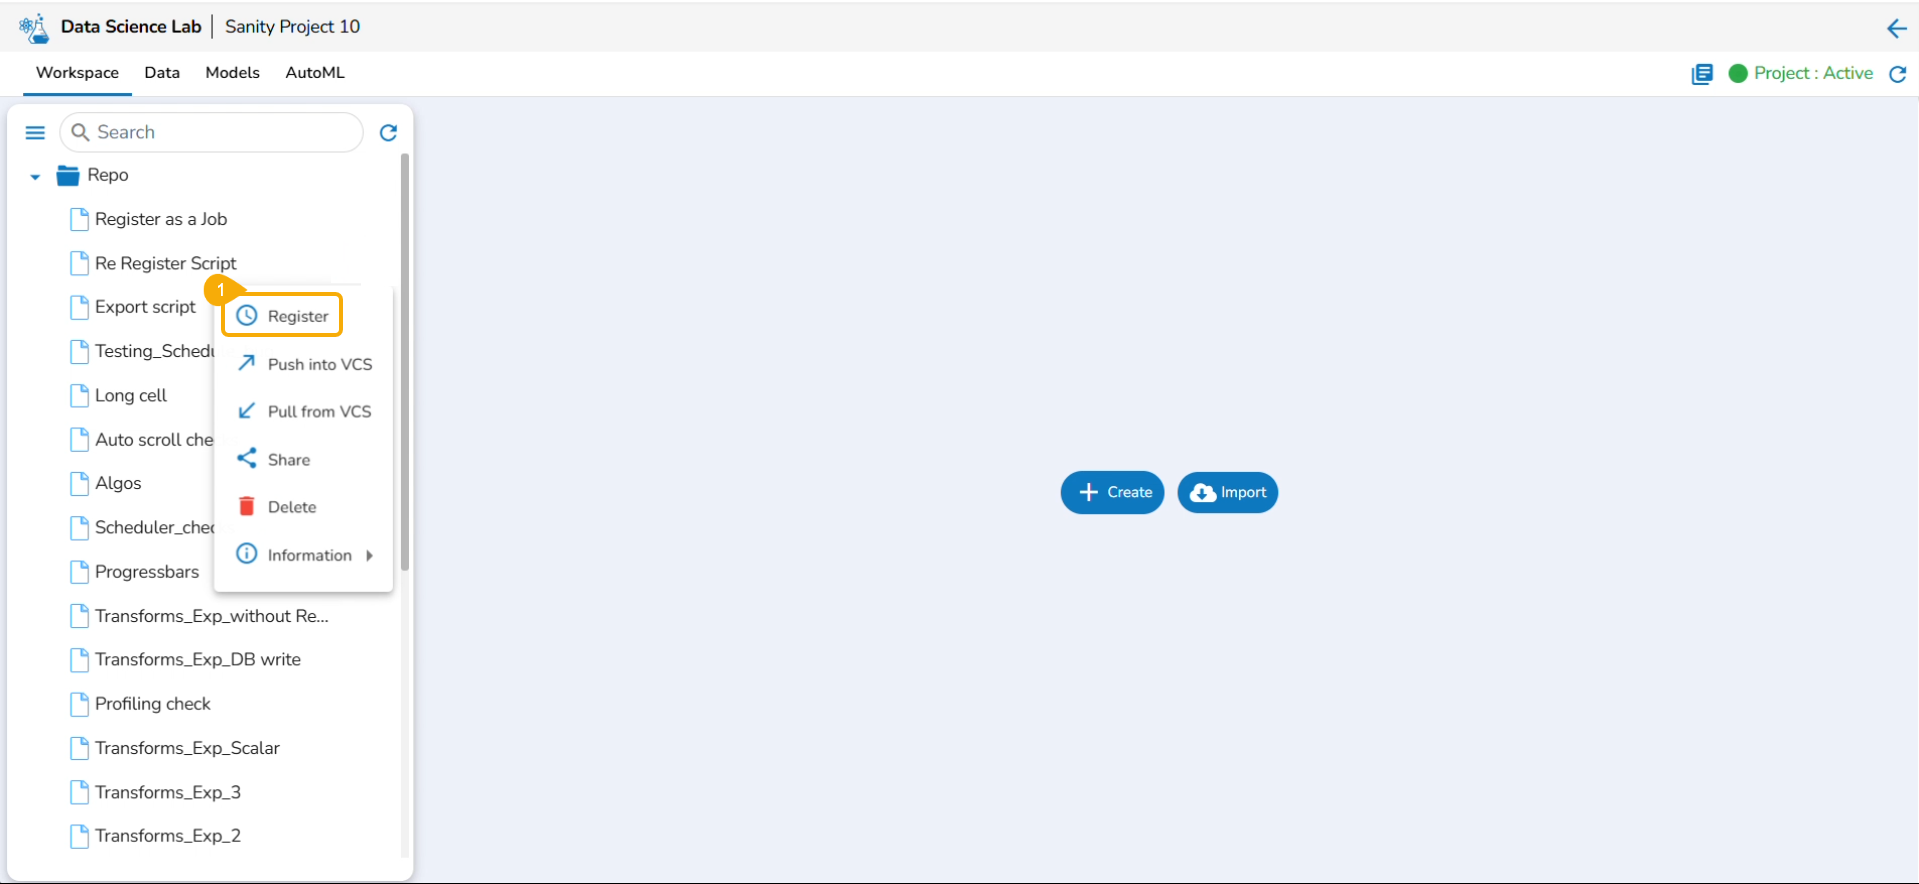
Select a Notebook from the Repo folder in the left side panel.
Click the ellipsis icon.
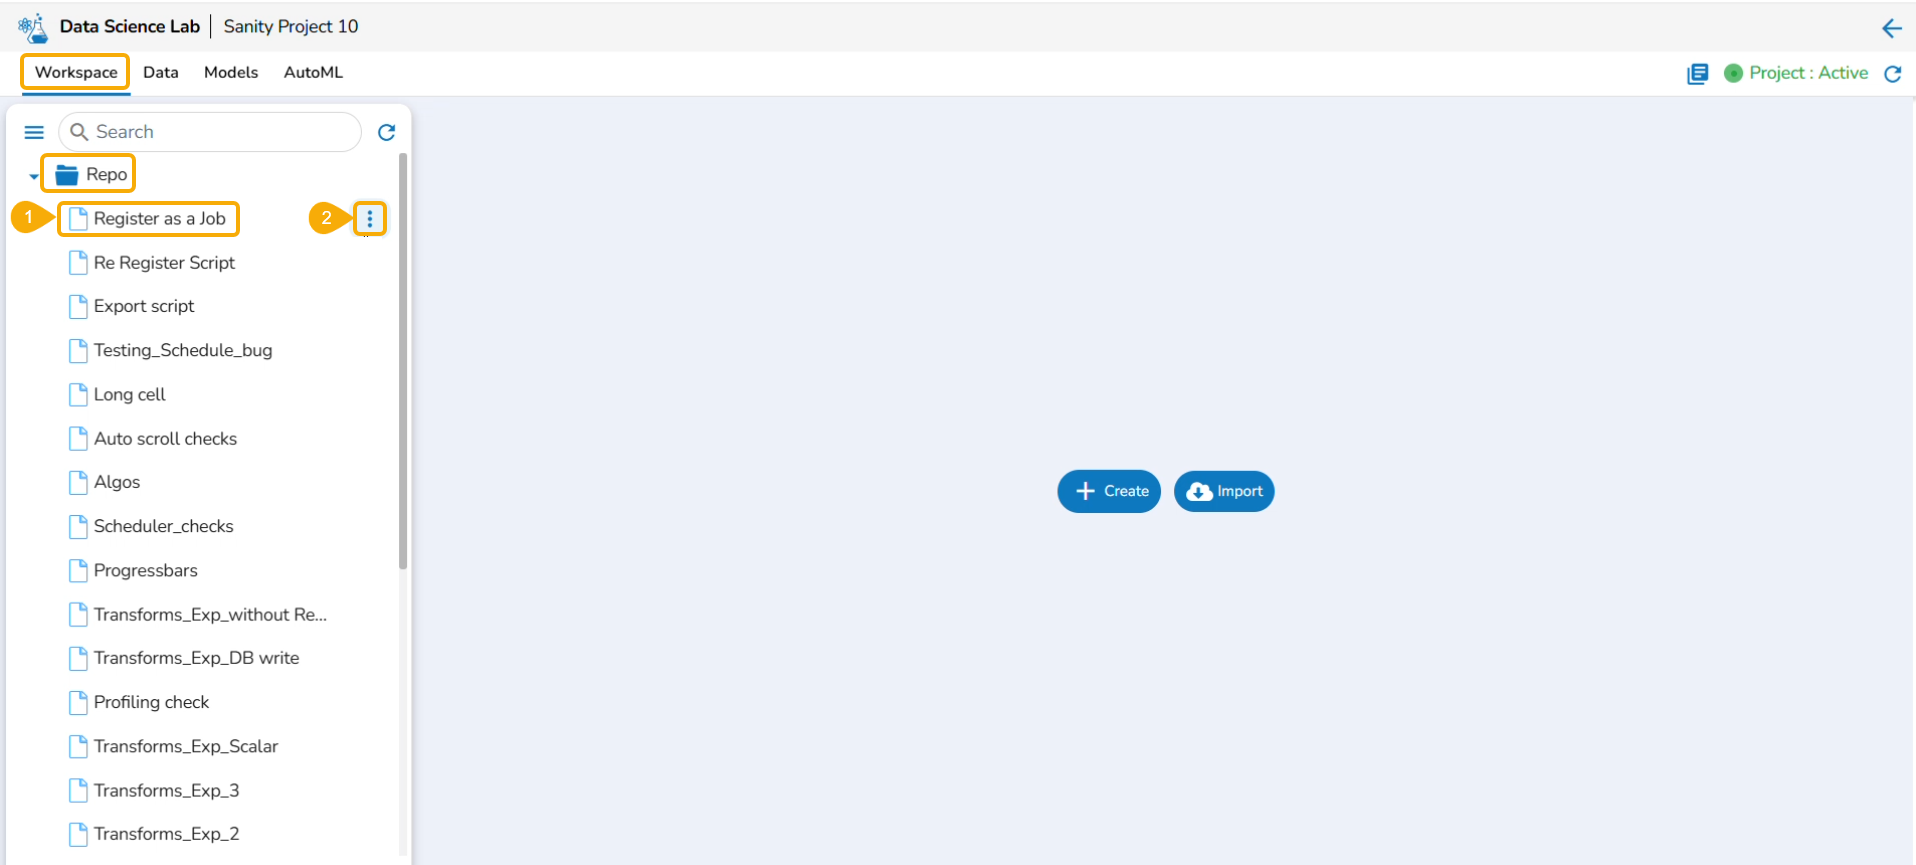
A context menu opens.
Click the Register option from the context menu.
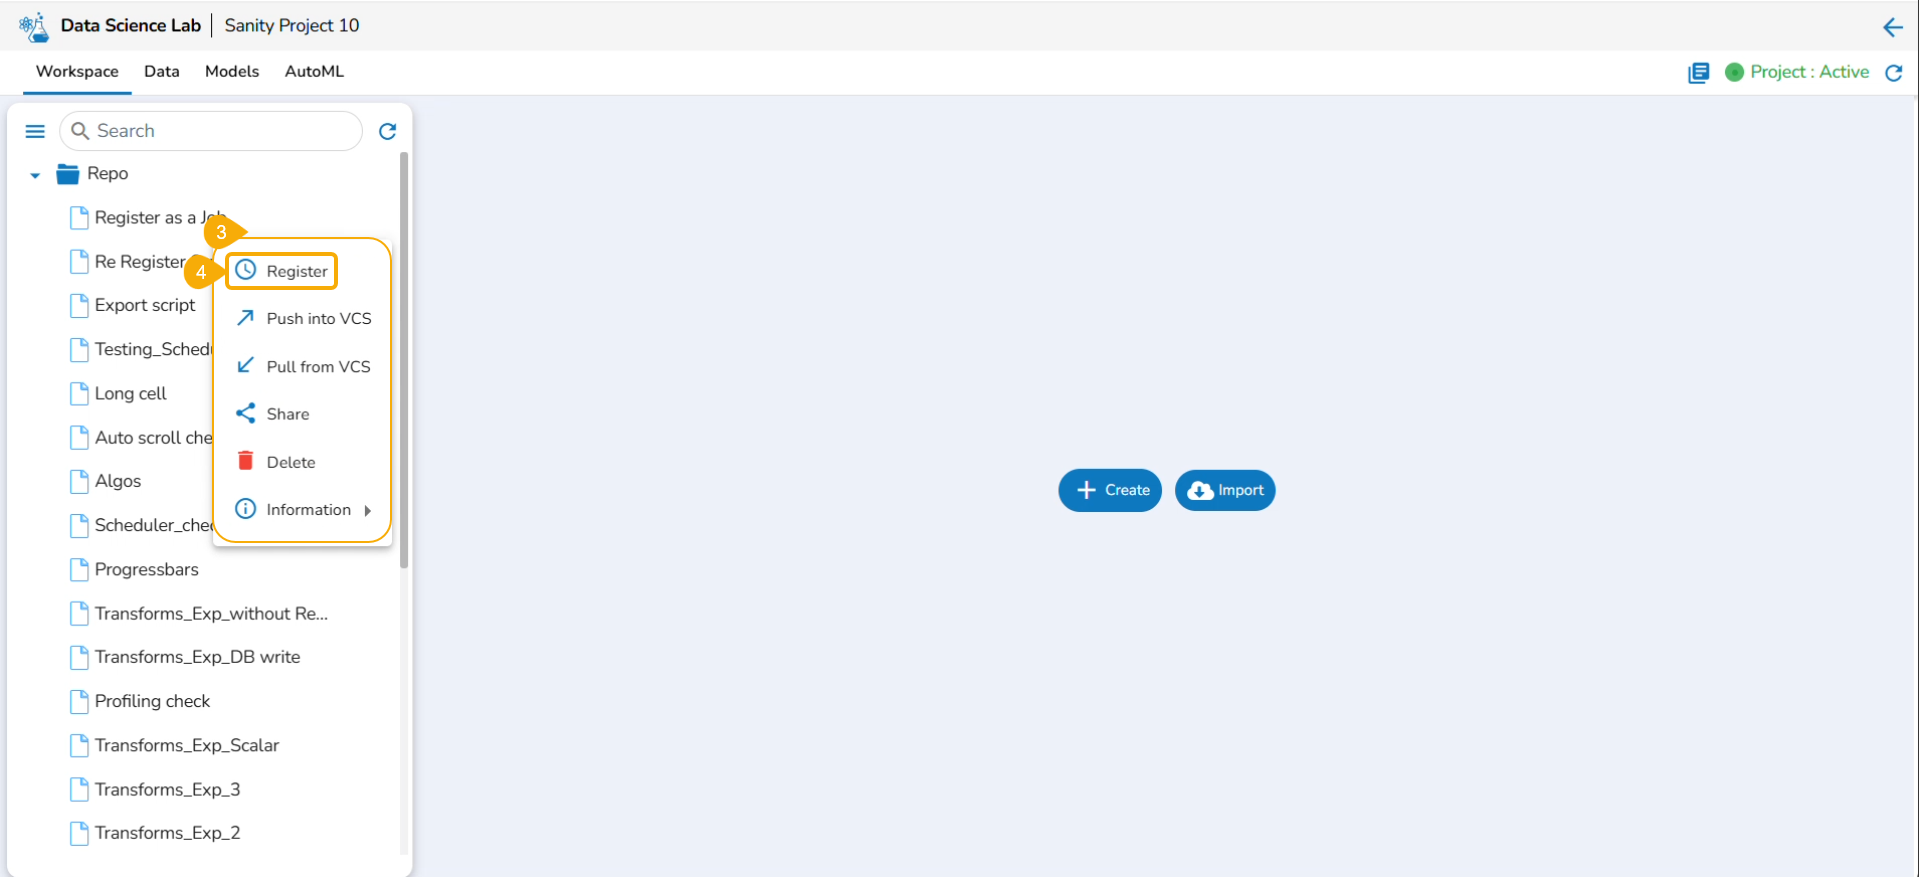
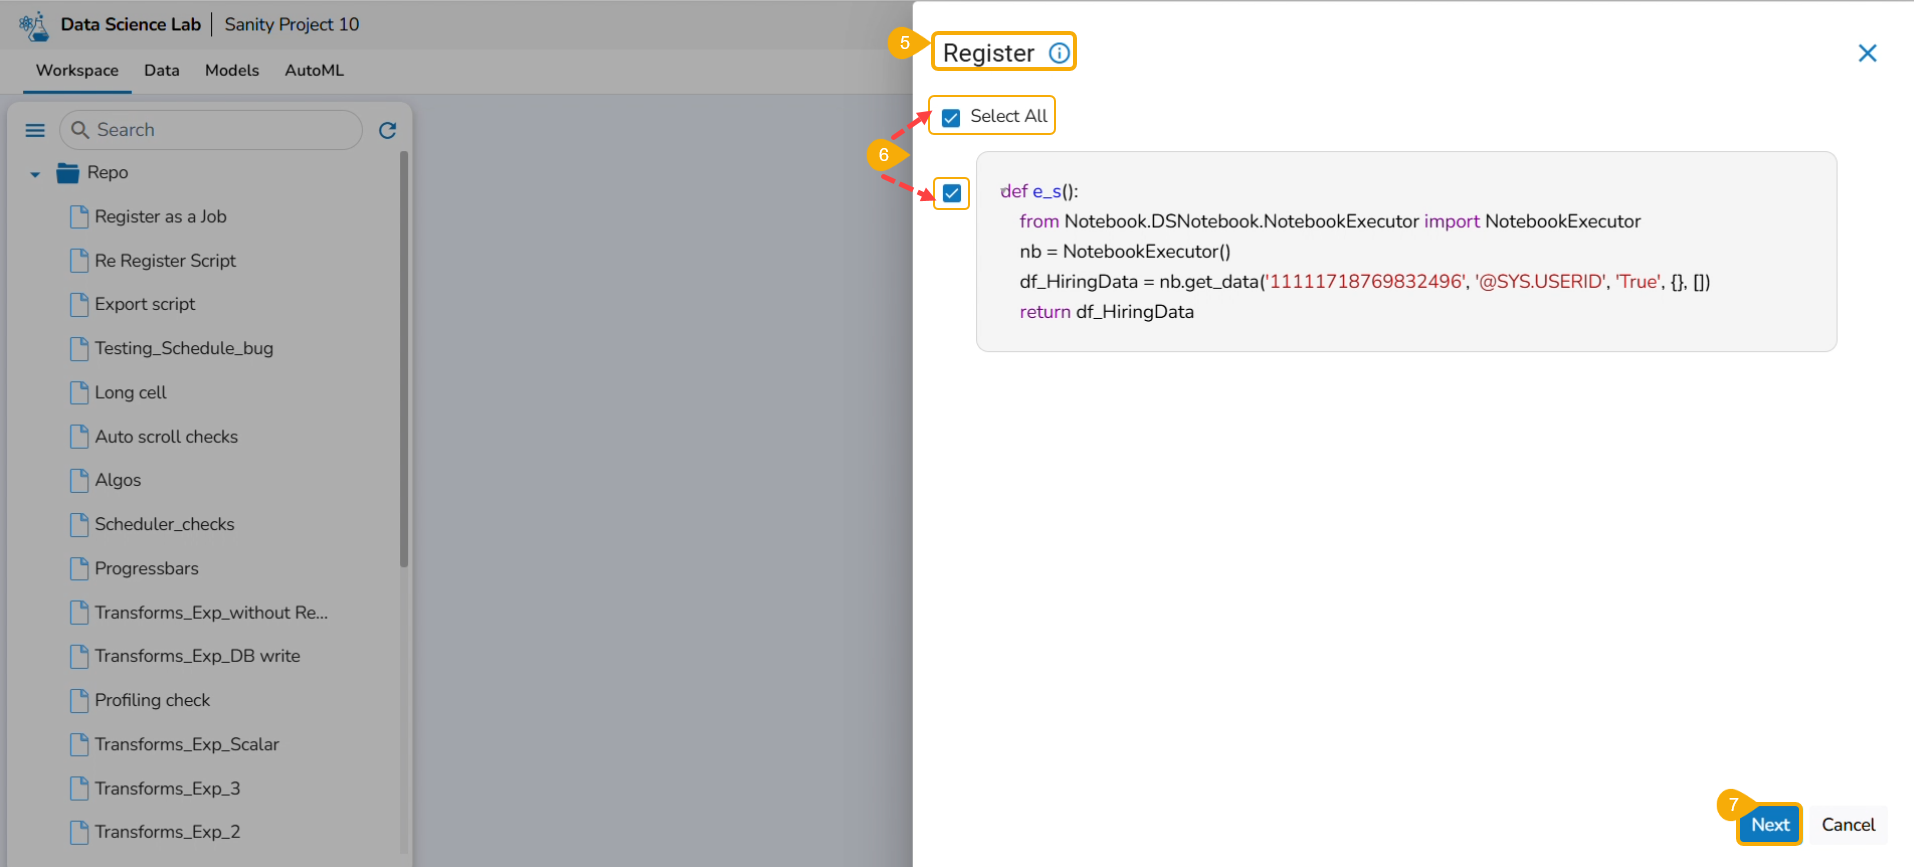
The Register page opens.
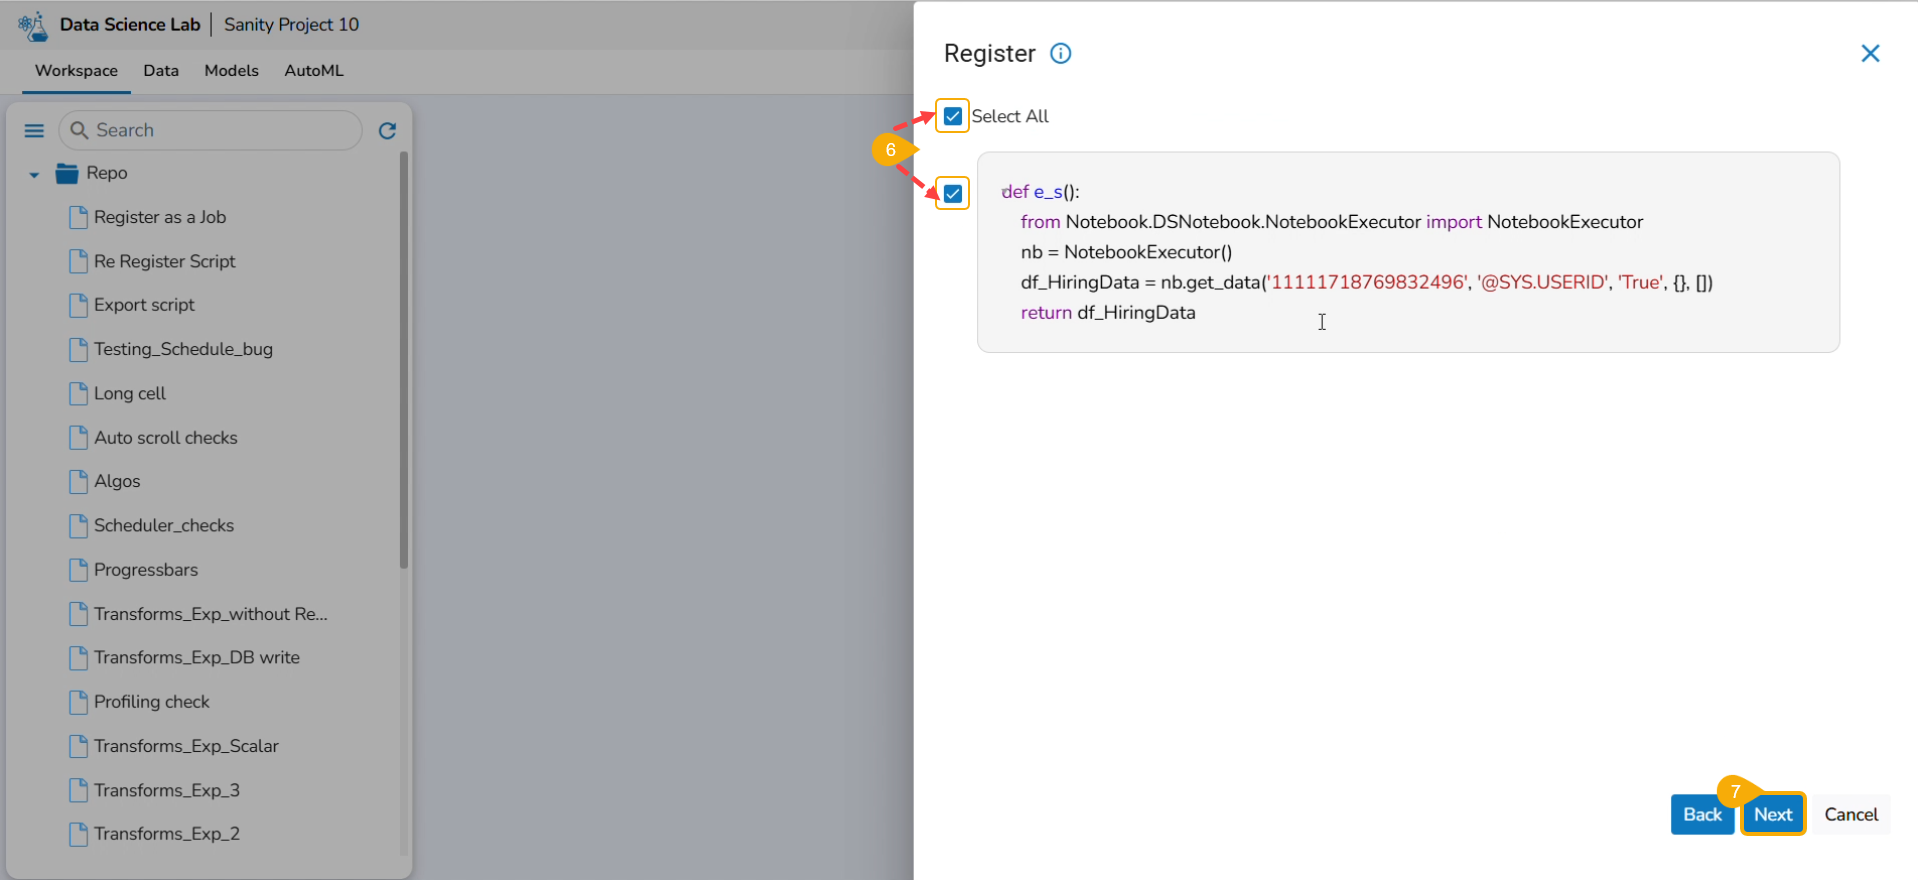
Use the Select All option or select the specific script by using the given checkmark.
Click the Next option.
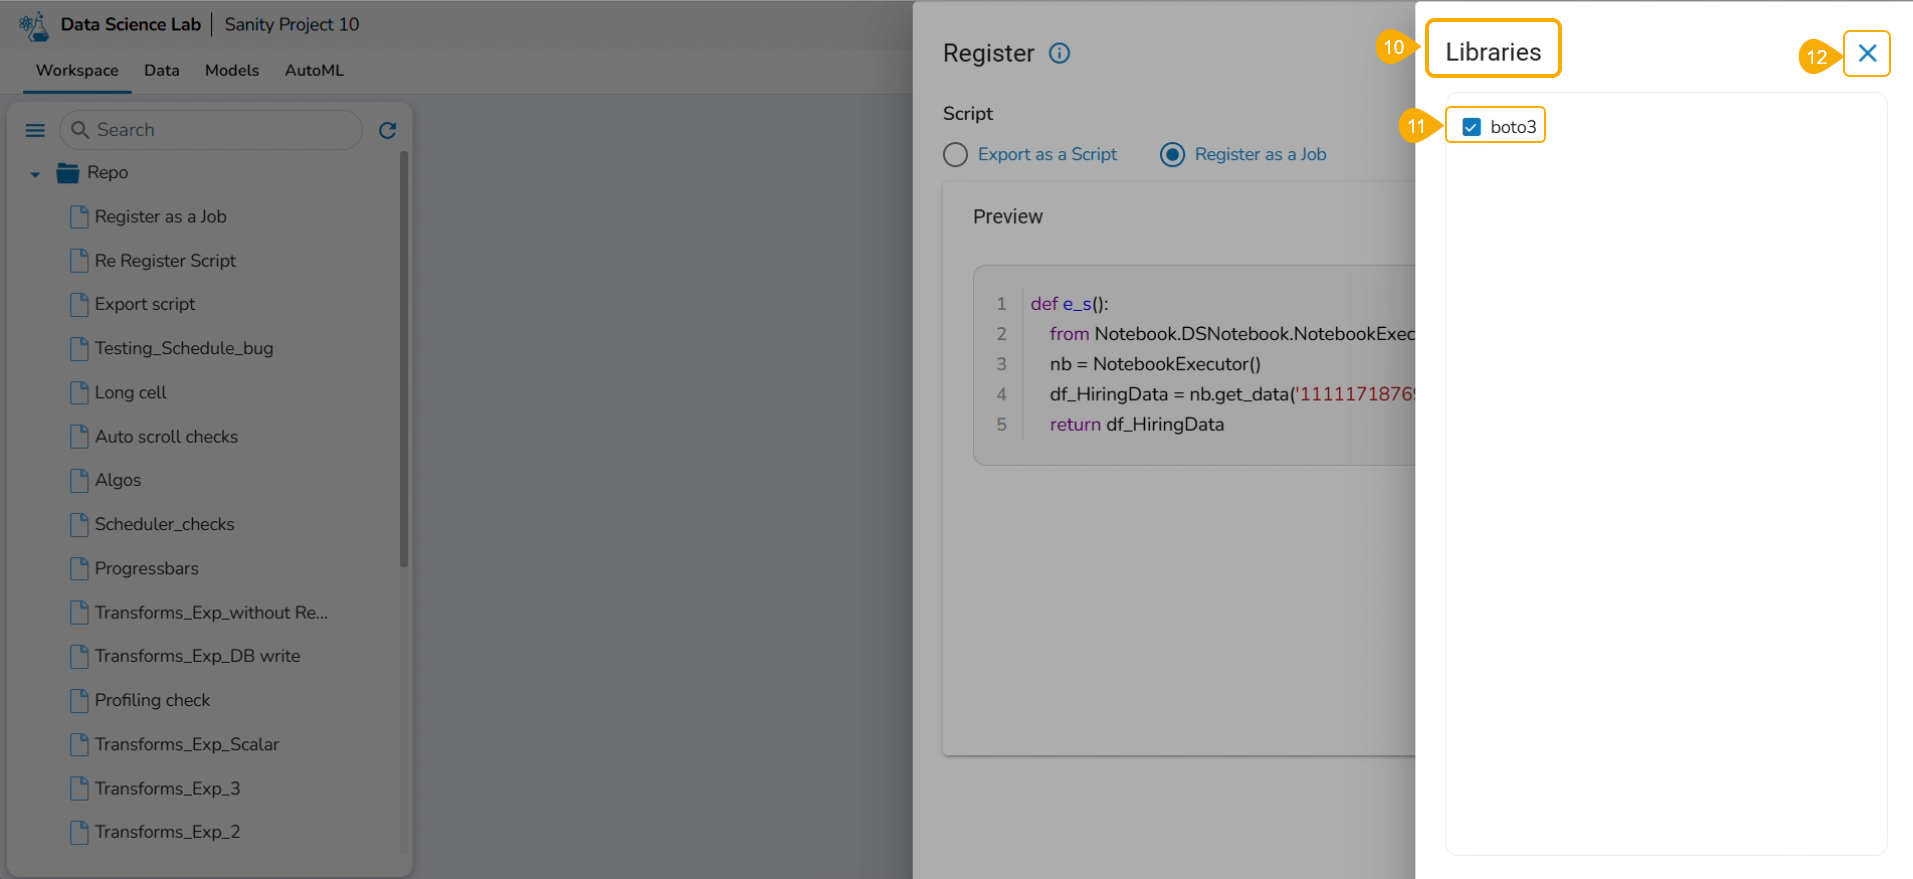
Select the Register as a Job option using the checkbox.
Click the Libraries icon.

The Libraries drawer opens.
Select libraries by using the checkbox.
Click the Close icon.
The user gets redirected to the Register drawer.
Click the Next option.

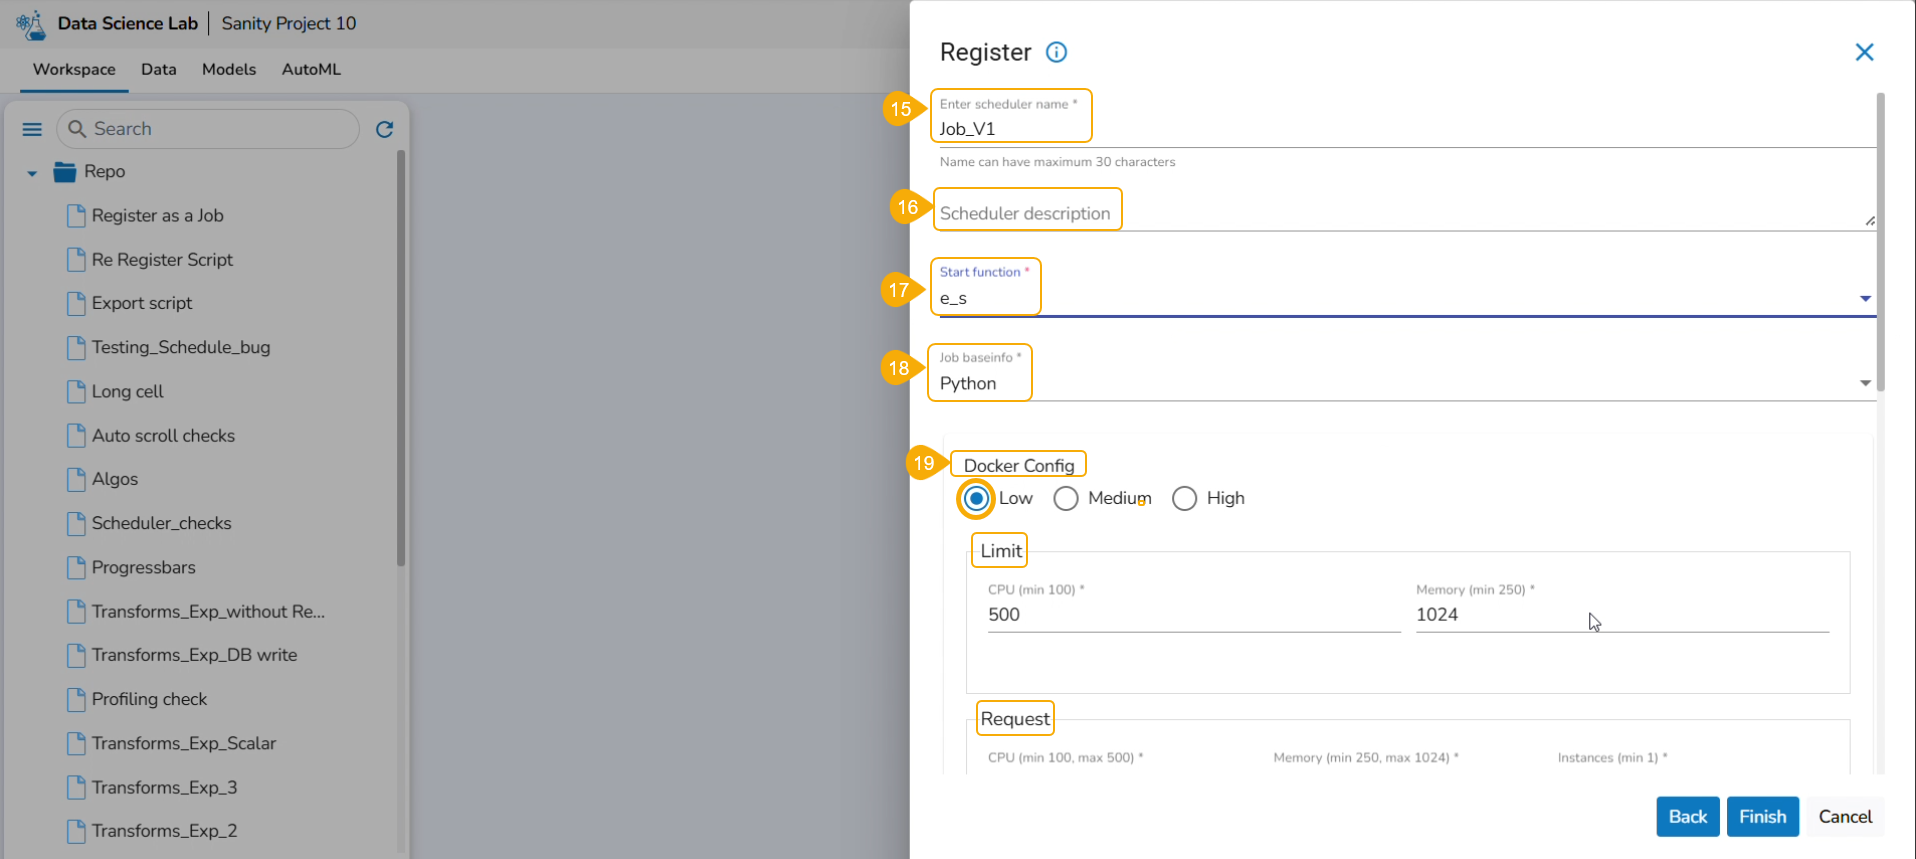
Provide the following information:
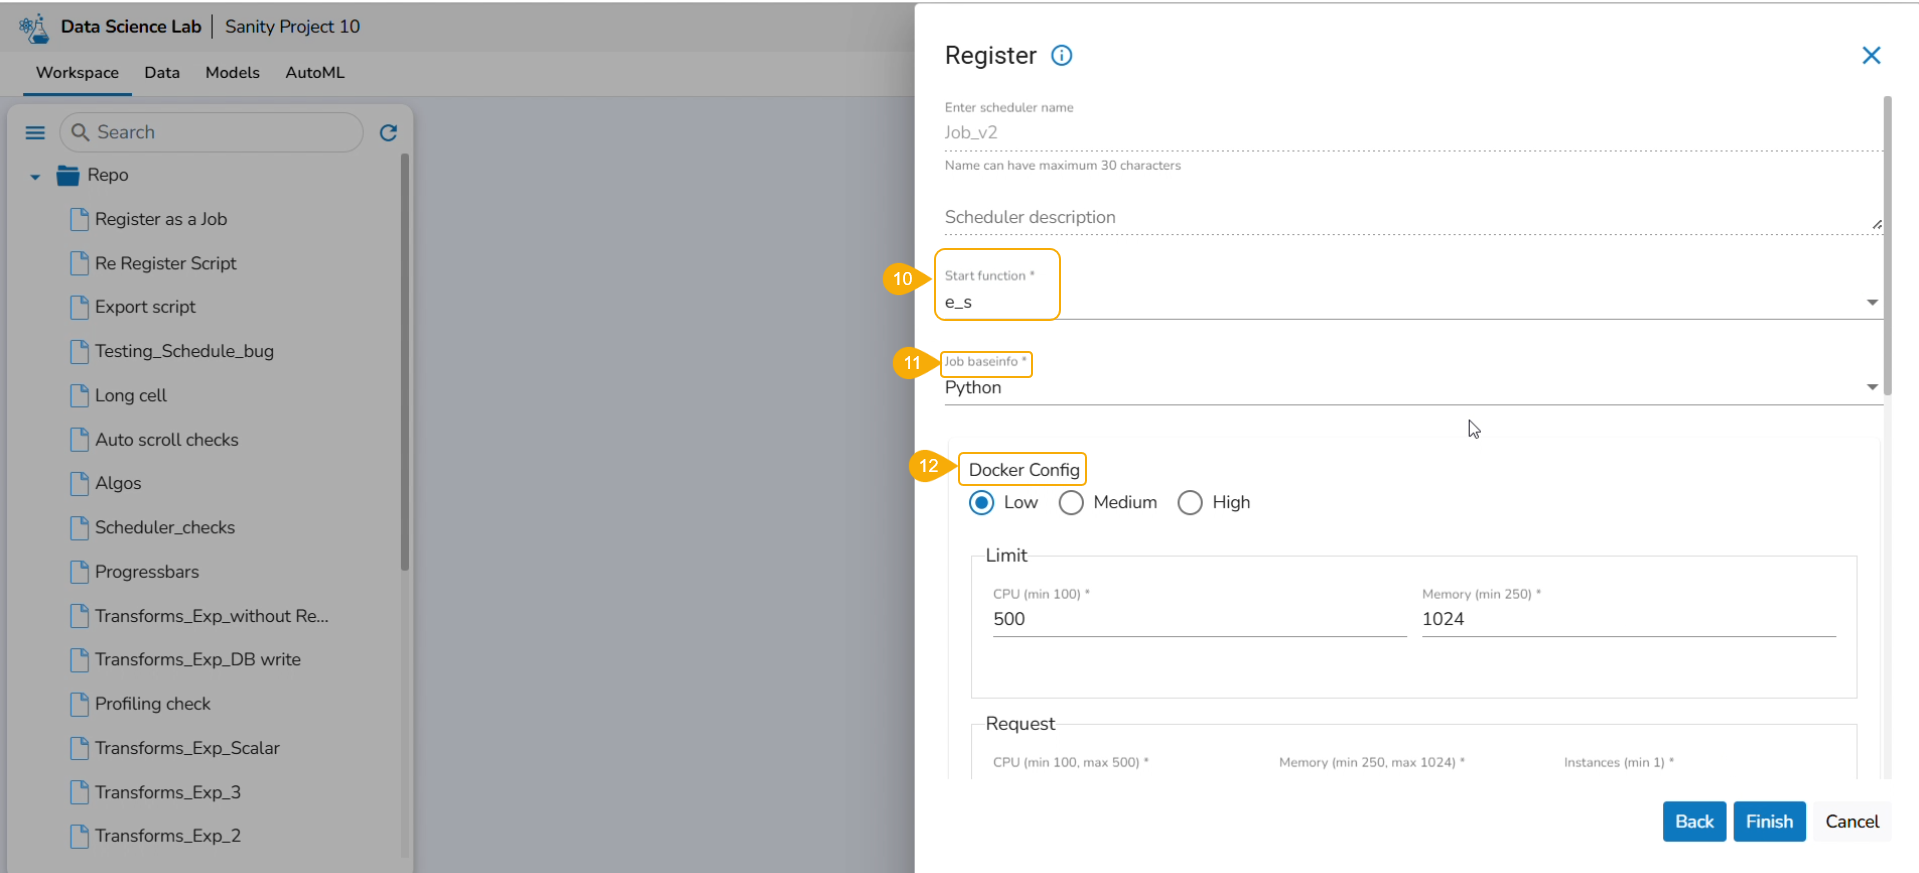
Enter scheduler name
Scheduler description
Start function
Job basinfo
Docker Config
Choose an option out of Low, Medium, and High
Limit - based on the selected docker configuration option (Low/Medium/High) the CPU and Memory limit are displayed.
Request -It provides predefined values for CPU, Memory, and count of instances.
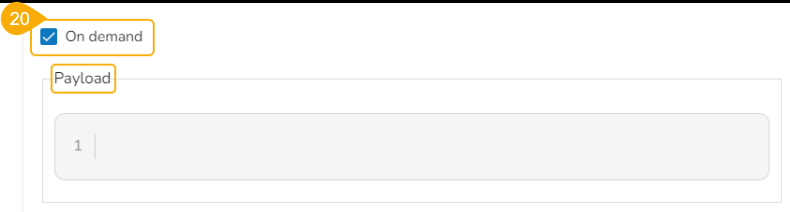
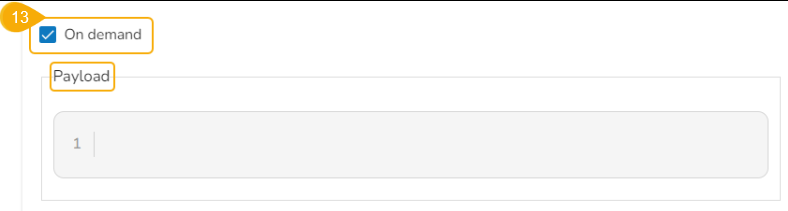
On demand: Check this option if a Python Job (On demand) must be created. In this scenario, the Job will not be scheduled.
Payload: This option will appear if the On-demand option is checked in. Enter the payload in the form of a list of dictionaries. For more details about the Python Job (On demand), refer to this link: Python Job(On demand)
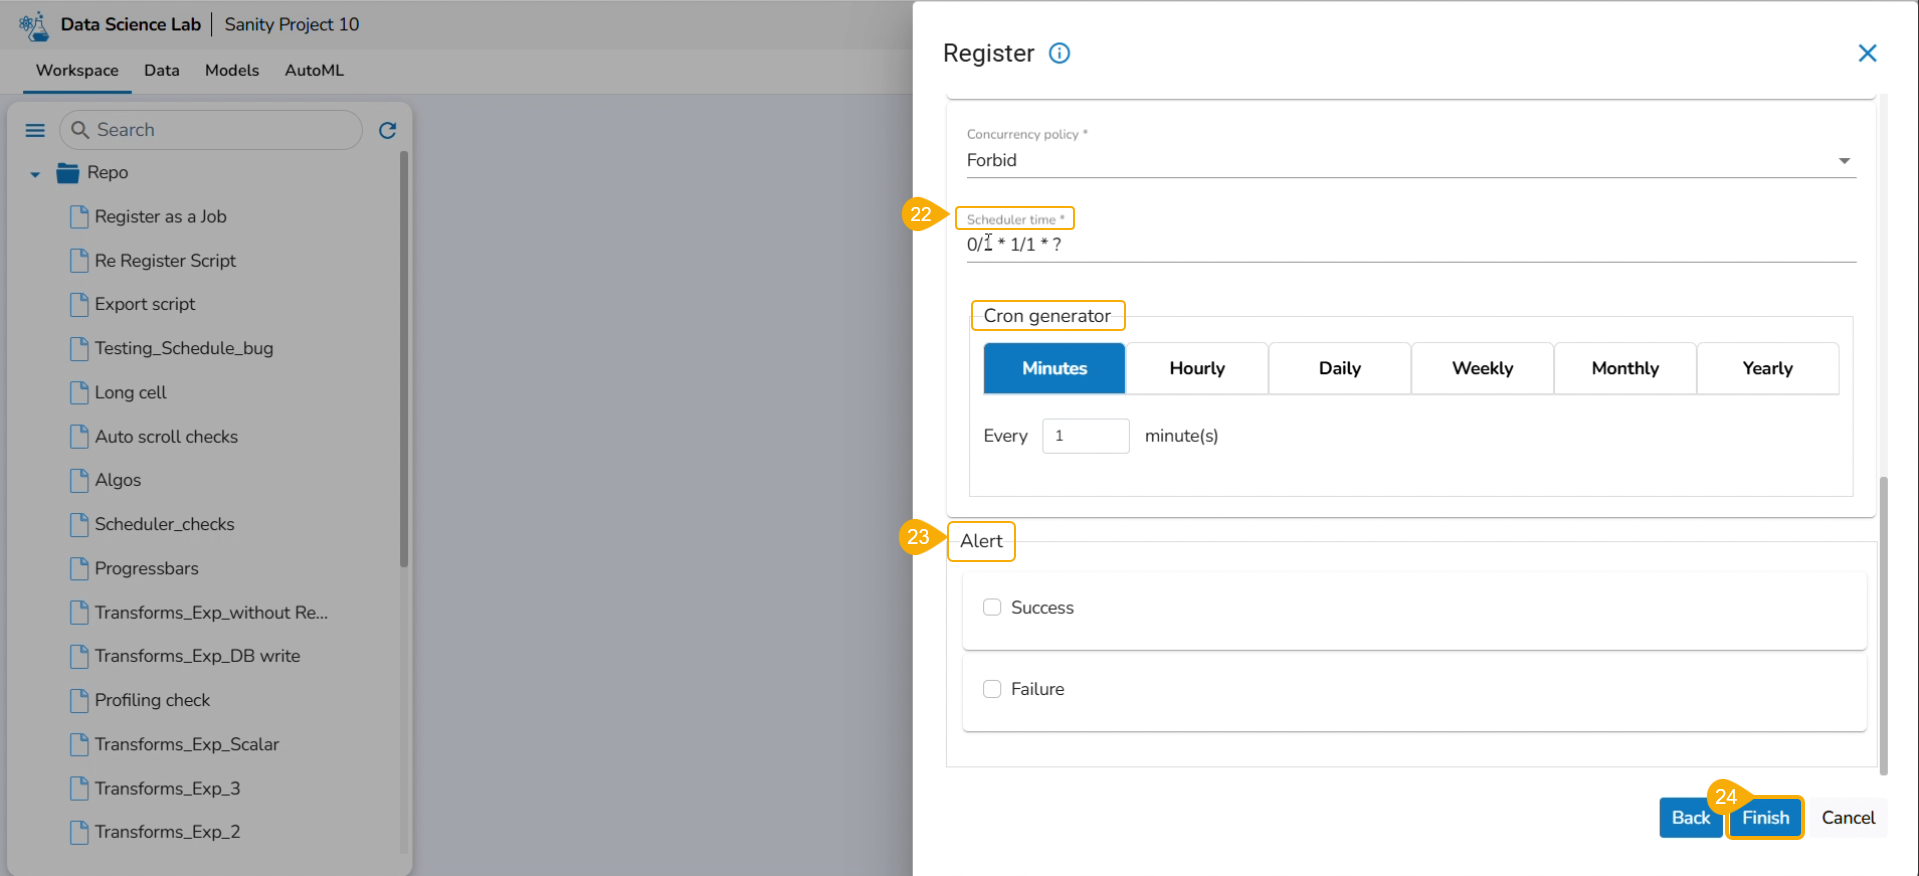
Concurrency Policy: Select the desired concurrency policy. For more details about the Concurrency Policy, check this link: Concurrency Policy

Please Note: The Concurrency policy option doesn't appear for the On-demand jobs, it displays only for the jobs wherein the scheduler is configured.
The concurrency policy has three options: Allow, Forbid, and Replace.
Allow: If a job is scheduled for a specific time and the first process is not completed before the next scheduled time, the next task will run in parallel with the previous task.
Forbid: If a job is scheduled for a specific time and the first process is not completed before the next scheduled time, the next task will wait until all the previous tasks are completed.
Replace: If a job is scheduled for a specific time and the first process is not completed before the next scheduled time, the previous task will be terminated and the new task will start processing.

Scheduler Time: Provide scheduler time using the Cron generator.
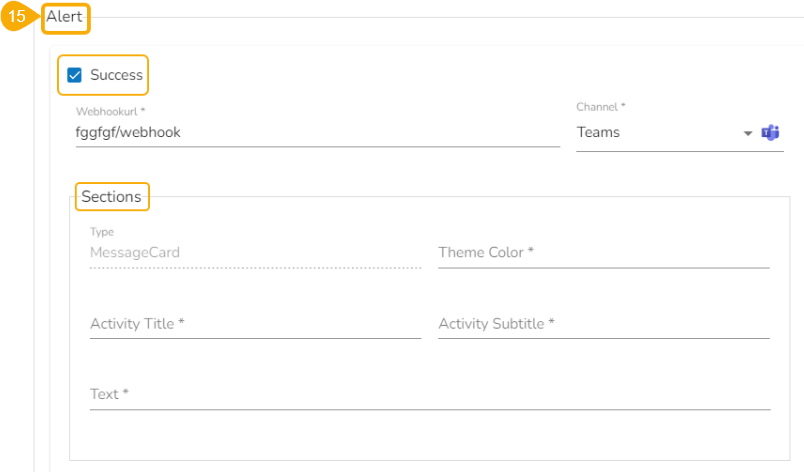
Alert: This feature in the Job allows the users to send an alert message to the specified channel (Teams or Slack) in the event of either the success or failure of the configured Job. Users can also choose success and failure options to send an alert for the configured Job. Check the following link to configure the Alert: Job Alerts
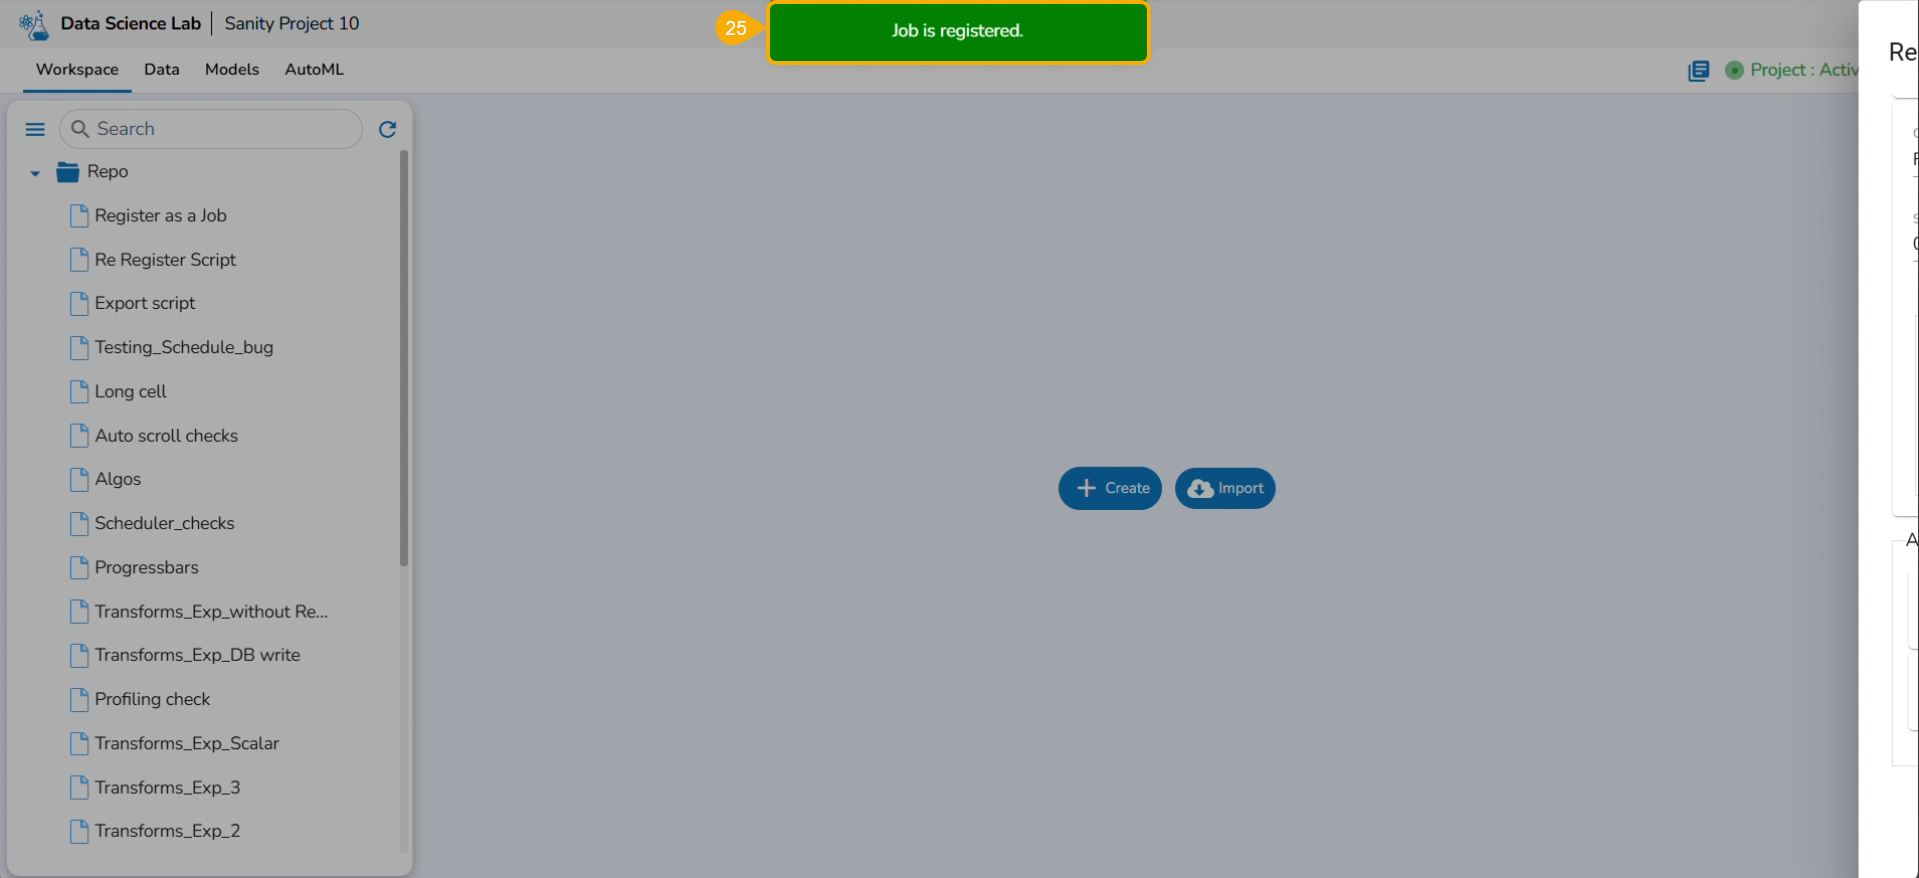
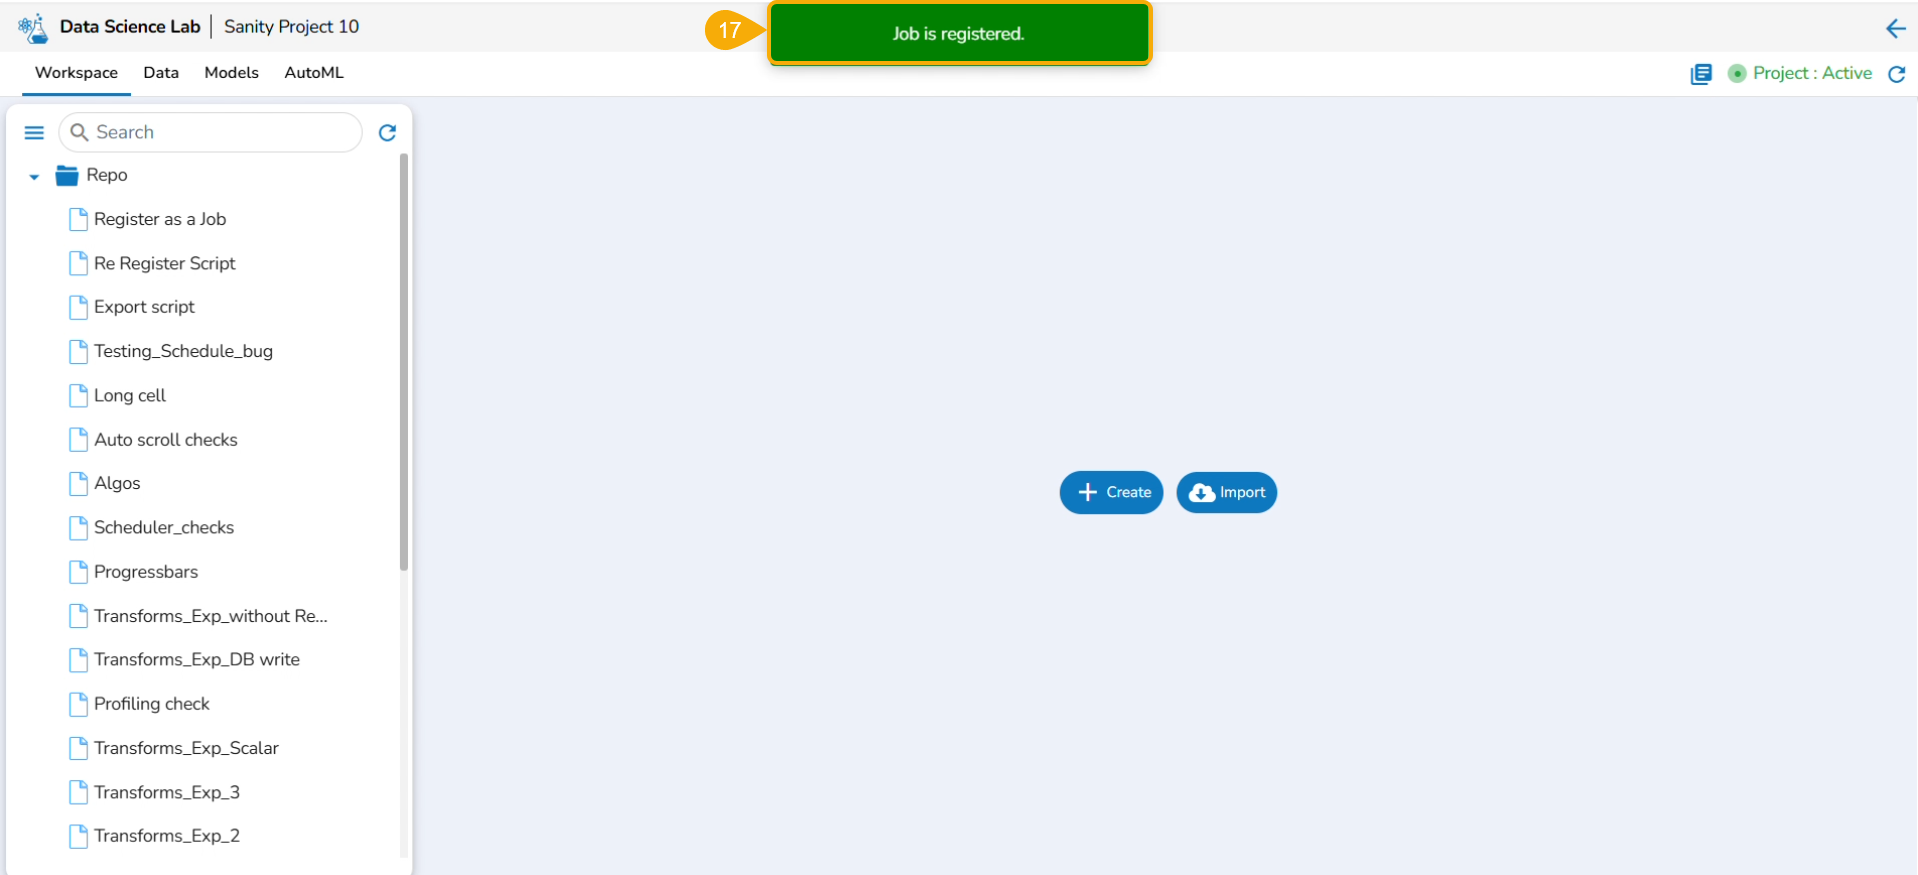
Click the Finish option.
A notification message appears.
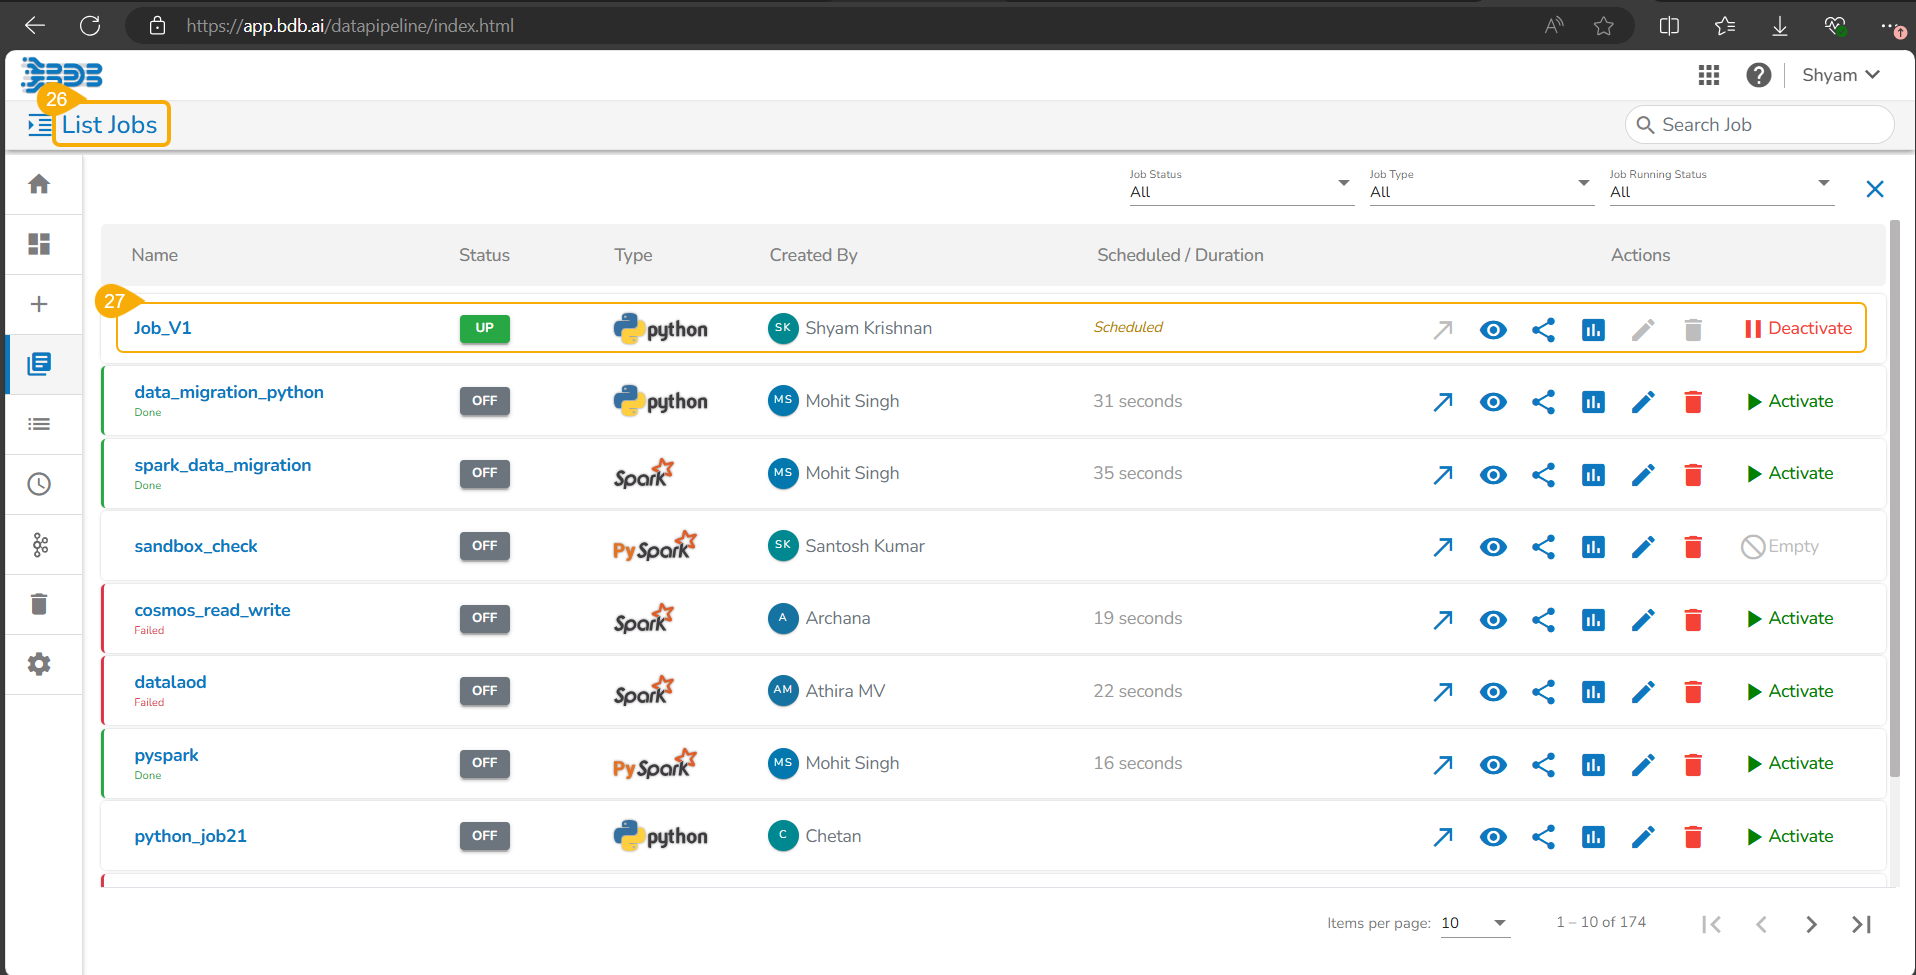
Navigate to the List Jobs page within the Data Pipeline module.
The recently registered DS Script gets listed with the same Scheduler name.
Re-Registering DS Script as a Job
Check out the illustration on re-registering a DS Script as a job.
This option appears for a .ipynb file that has been registered before.
Select the Register option for a .ipynb file that has been registered before.
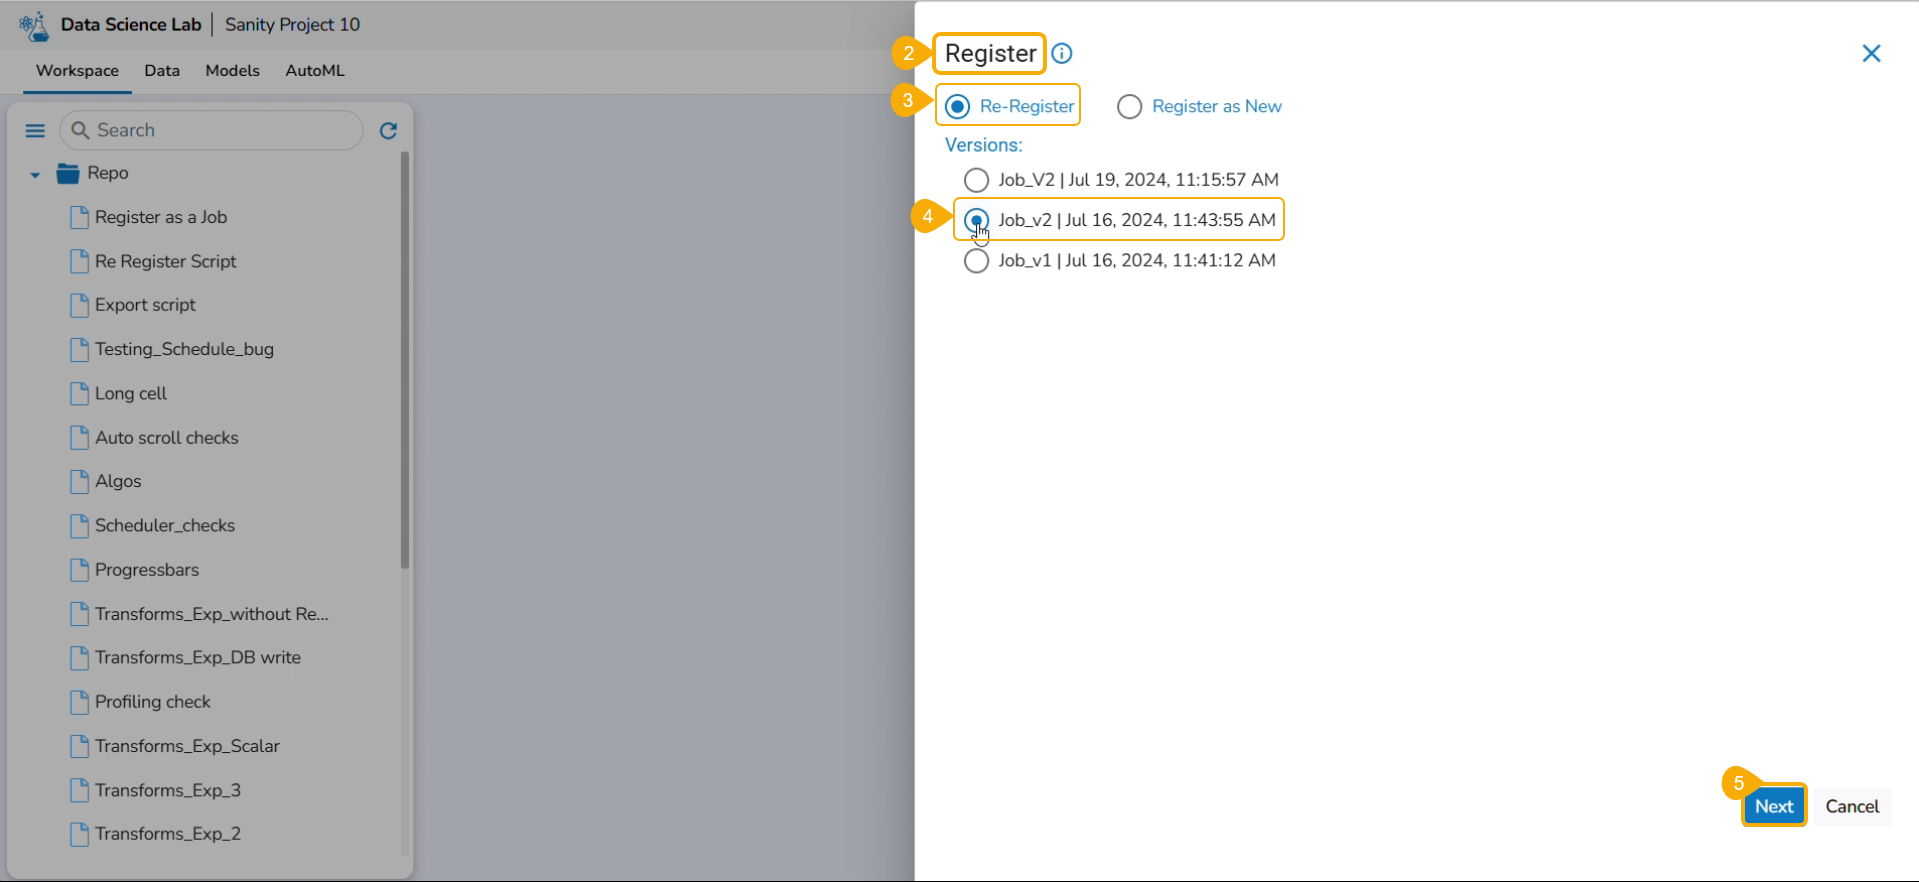
The Register page opens displaying the Re-Register and Register as New options.
Select the Re-Register option by using the checkbox.
Select a version by using a checkbox.
Click the Next option.
Select the script using the checkbox (it appears as per the pre-selection). The user can also choose the Select All option.
Click the Next option.
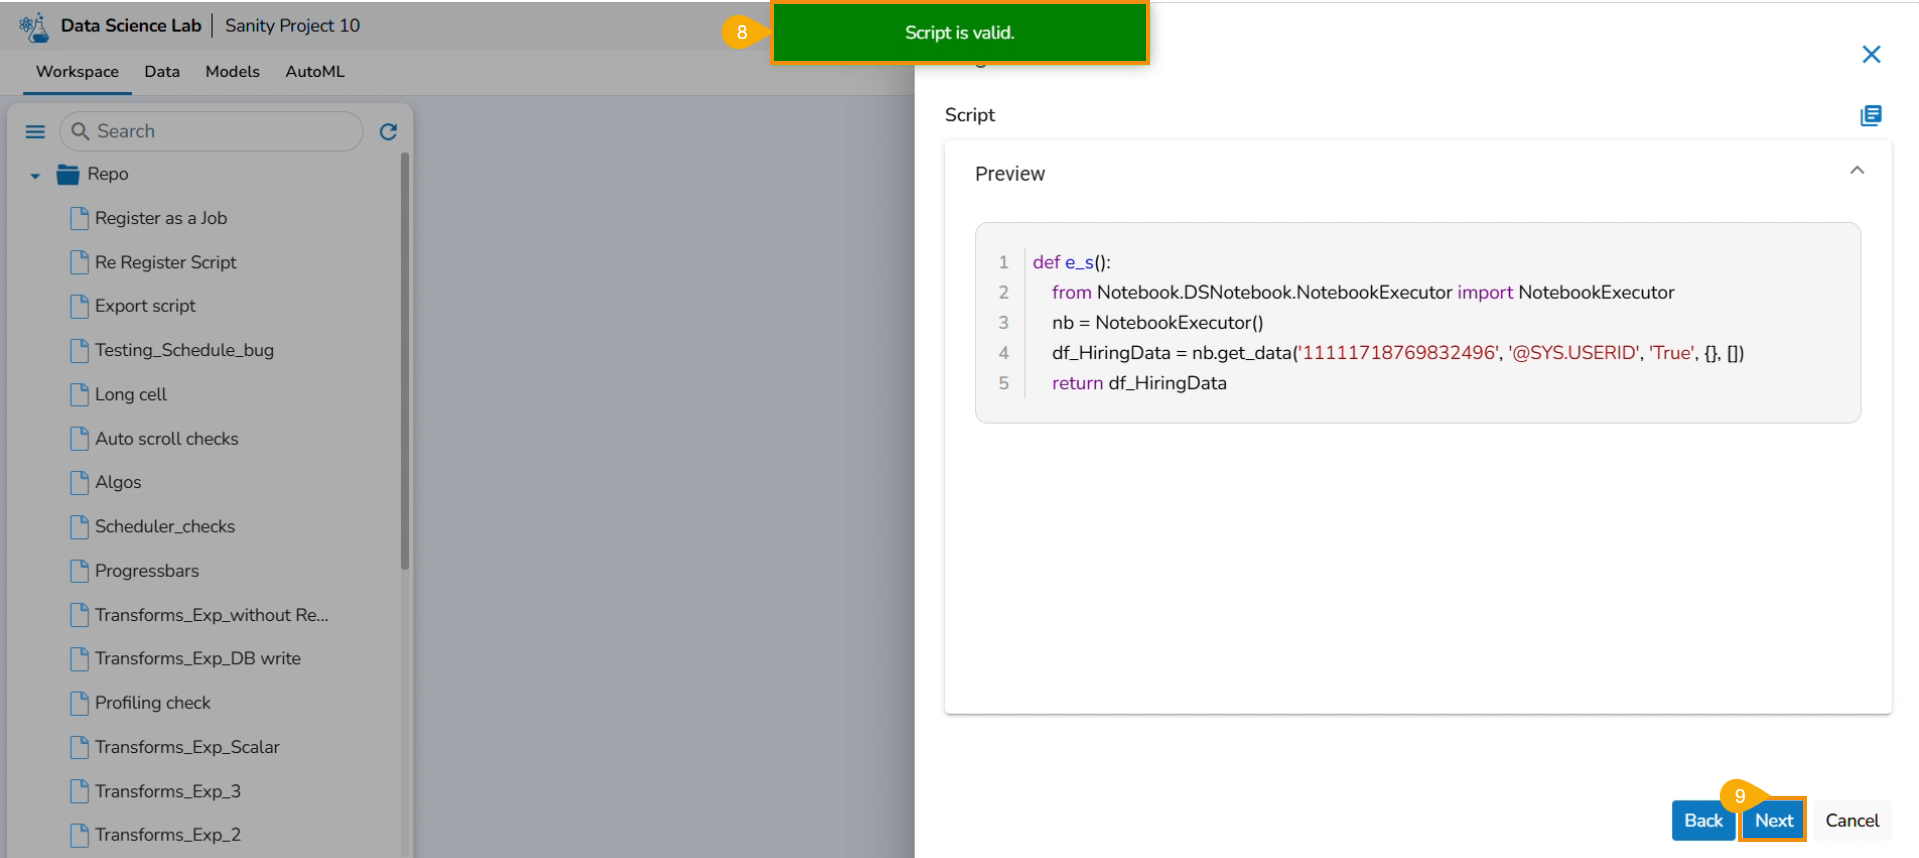
A notification message appears to ensure that the script is valid.
Click the Next option.
Start function: Select a function from the drop-down menu.
Job basinfo: Select an option from the drop-down menu.
Docker Config
Choose an option for Limit out of Low, Medium, and High
Request - CPU and Memory limit are displayed.
On demand: Check this option if a Python Job (On demand) must be created. In this scenario, the Job will not be scheduled.
Payload: This option will appear if the On-demand option is checked in. Enter the payload in the form of a list of dictionaries. For more details about the Python Job (On demand), refer to this link: Python Job(On demand)
Concurrency Policy: Select the desired concurrency policy. For more details about the Concurrency Policy, check this link: Concurrency Policy

Please Note: The Concurrency policy option doesn't appear for the On-demand jobs, it displays only for the jobs wherein the scheduler is configured.
The concurrency policy has three options: Allow, Forbid, and Replace.
Allow: If a job is scheduled for a specific time and the first process is not completed before the next scheduled time, the next task will run in parallel with the previous task.
Forbid: If a job is scheduled for a specific time and the first process is not completed before the next scheduled time, the next task will wait until all the previous tasks are completed.
Replace: If a job is scheduled for a specific time and the first process is not completed before the next scheduled time, the previous task will be terminated and the new task will start processing.
Alert: This feature in the Job allows the users to send an alert message to the specified channel (Teams or Slack) in the event of either the success or failure of the configured Job. Users can also choose success and failure options to send an alert for the configured Job. Check the following link to configure the Alert: Job Alerts
Click the Finish option to register the Notebook as a Job.

A notification message appears.
Register as a New Job
The user must follow all the steps from the Register a Data Science Script as a Job section while re-registering it with the Register as New option.
Check out the illustration on Registering a DS Script as New.