# Utility Actions
## Accessing Utility Actions
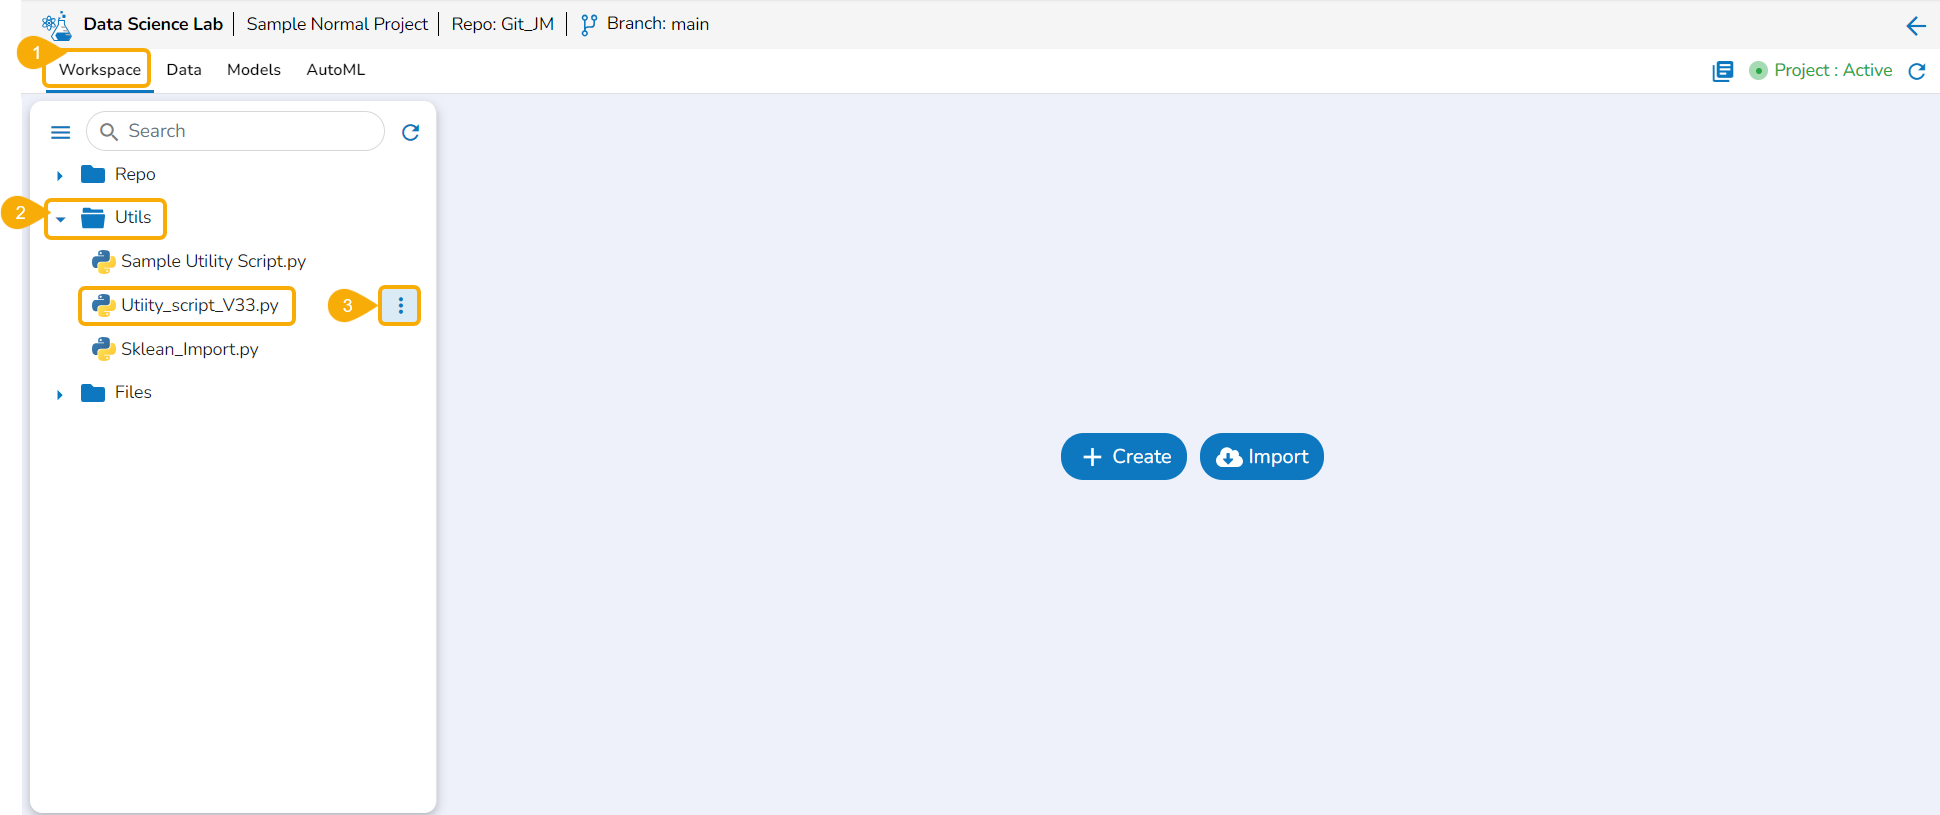
Navigate to the ***Workspace*** tab for an activated project.
{% hint style="info" %}
*Please Note:*
* *The imported Utility files from the system will not support **Push to VCS** and **Pull from VCS** actions.*
* *The same Actions functionality is available for a .py file under a Repo Sync project.*
{% endhint %}
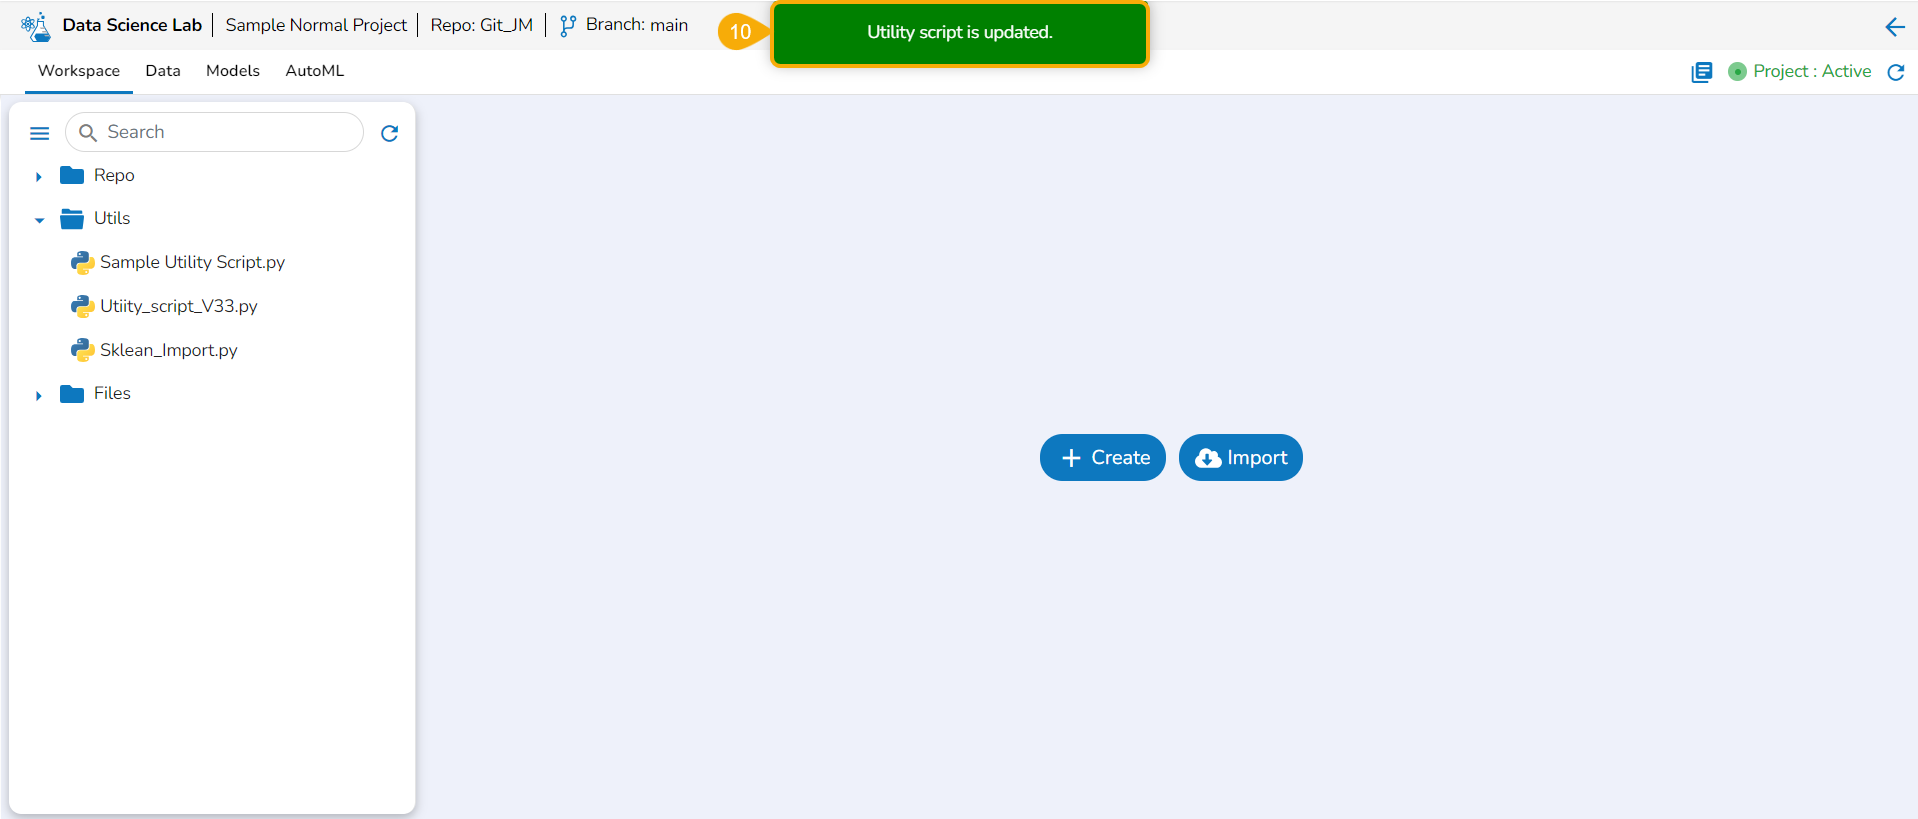
## Edit
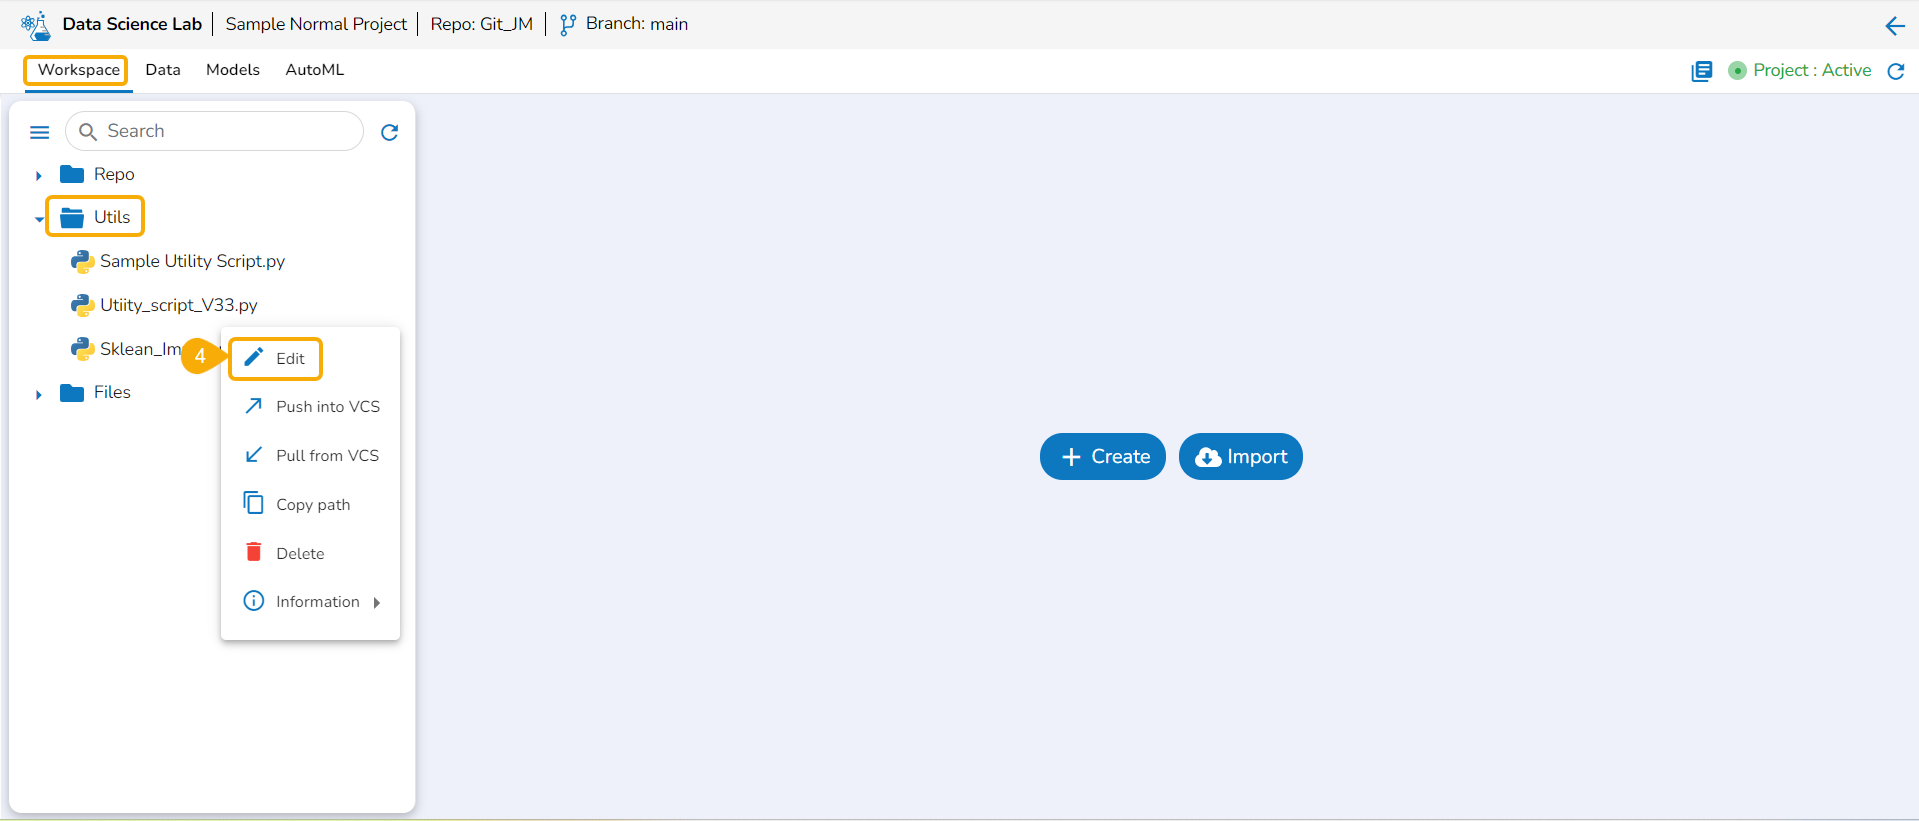
The user can modify the content of a utility script using the ***Edit*** option.
* Navigate to the ***Workspace*** tab for a normal Data Science Lab project.
* Click on the ***Utils*** folder.
* Select the ***Ellipsis*** icon provided for a Utility file.
* Select the ***Edit*** option from the context menu that opens for a Utility file.
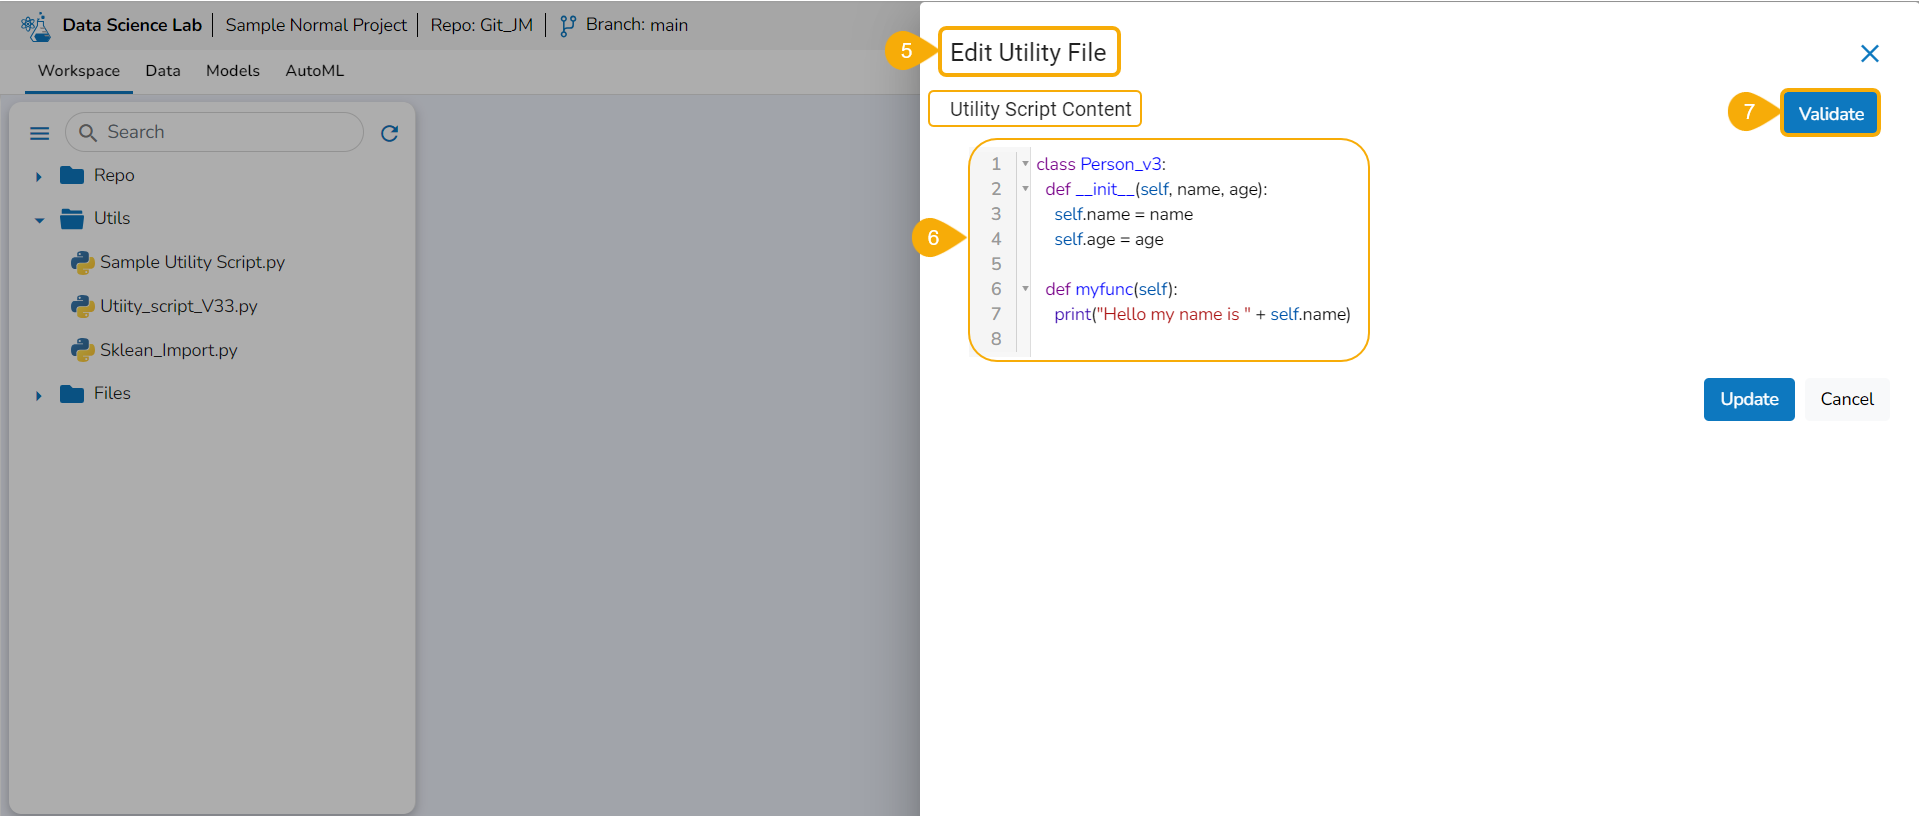
* The Edit Utility File window opens displaying the Utility script content.
* Modify the script content.
* Click the ***Validate*** option.
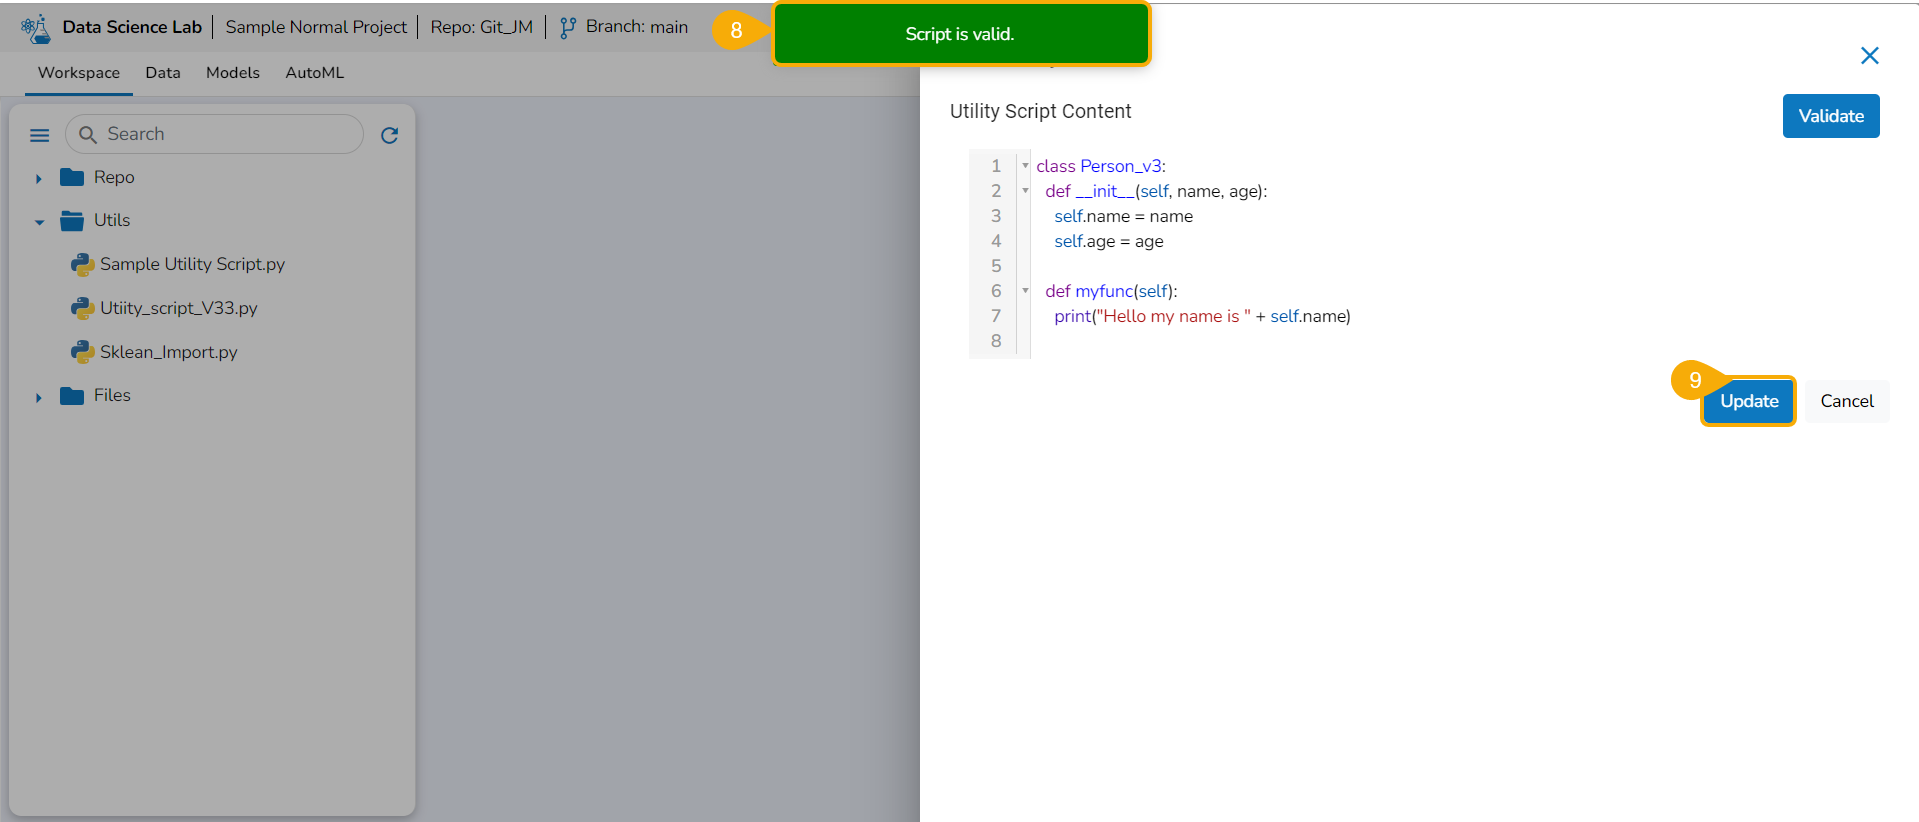
* A notification ensures the script is valid post modification in the script content.
* Click the ***Update*** option.
* A notification ensures that the utility script is updated.
## Push into VCS & Pull from VCS
### Push Pre-requisites
{% hint style="warning" %} Pre-requisites:
1. The user branch should have Developers' + maintainers' permission to push the latest code into the Main branch.
2. The User token has to be set in the user profile using the Custom Fields setting available at the Admin level.
3. The user token key name has to be '**bdbvcstoken'**.
{% endhint %}
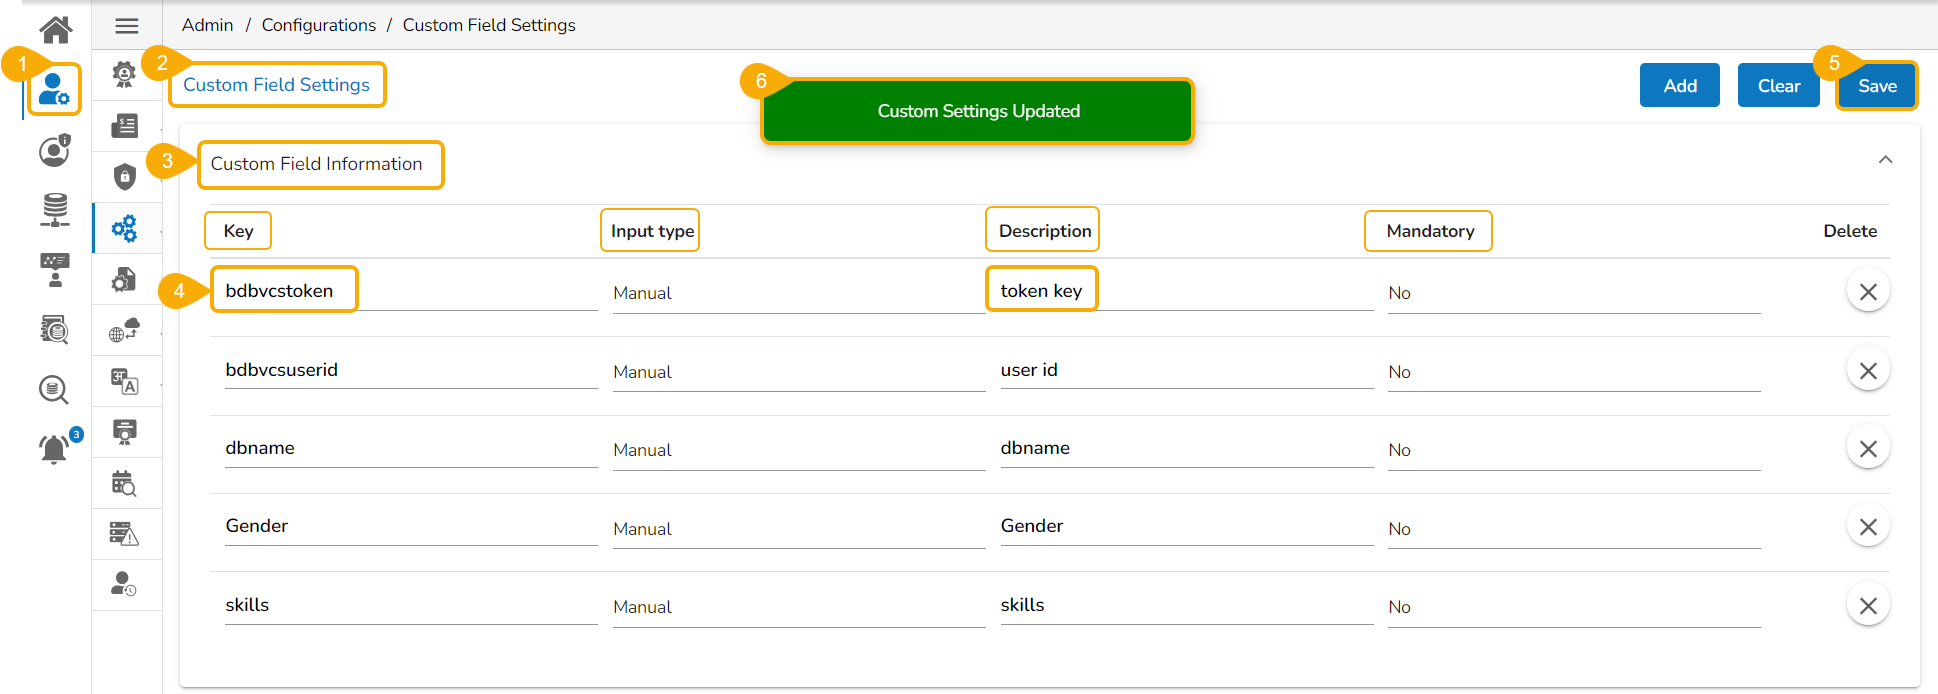
* Navigate to the ***Admin*** module.
* Open the ***Custom Field Settings*** under the ***Configurations*** option.
* The ***Custom Field*** Information appears.
* Provide the following information for the custom field:
* Key- ***bdbvcstoken***
* Input type *- Manual*
* Description - Git User Token
* *Mandatory - No*
* Click the ***Save*** option to save the modified ***Custom Field Settings***.
* A notification message informs the user that the custom field settings are updated.
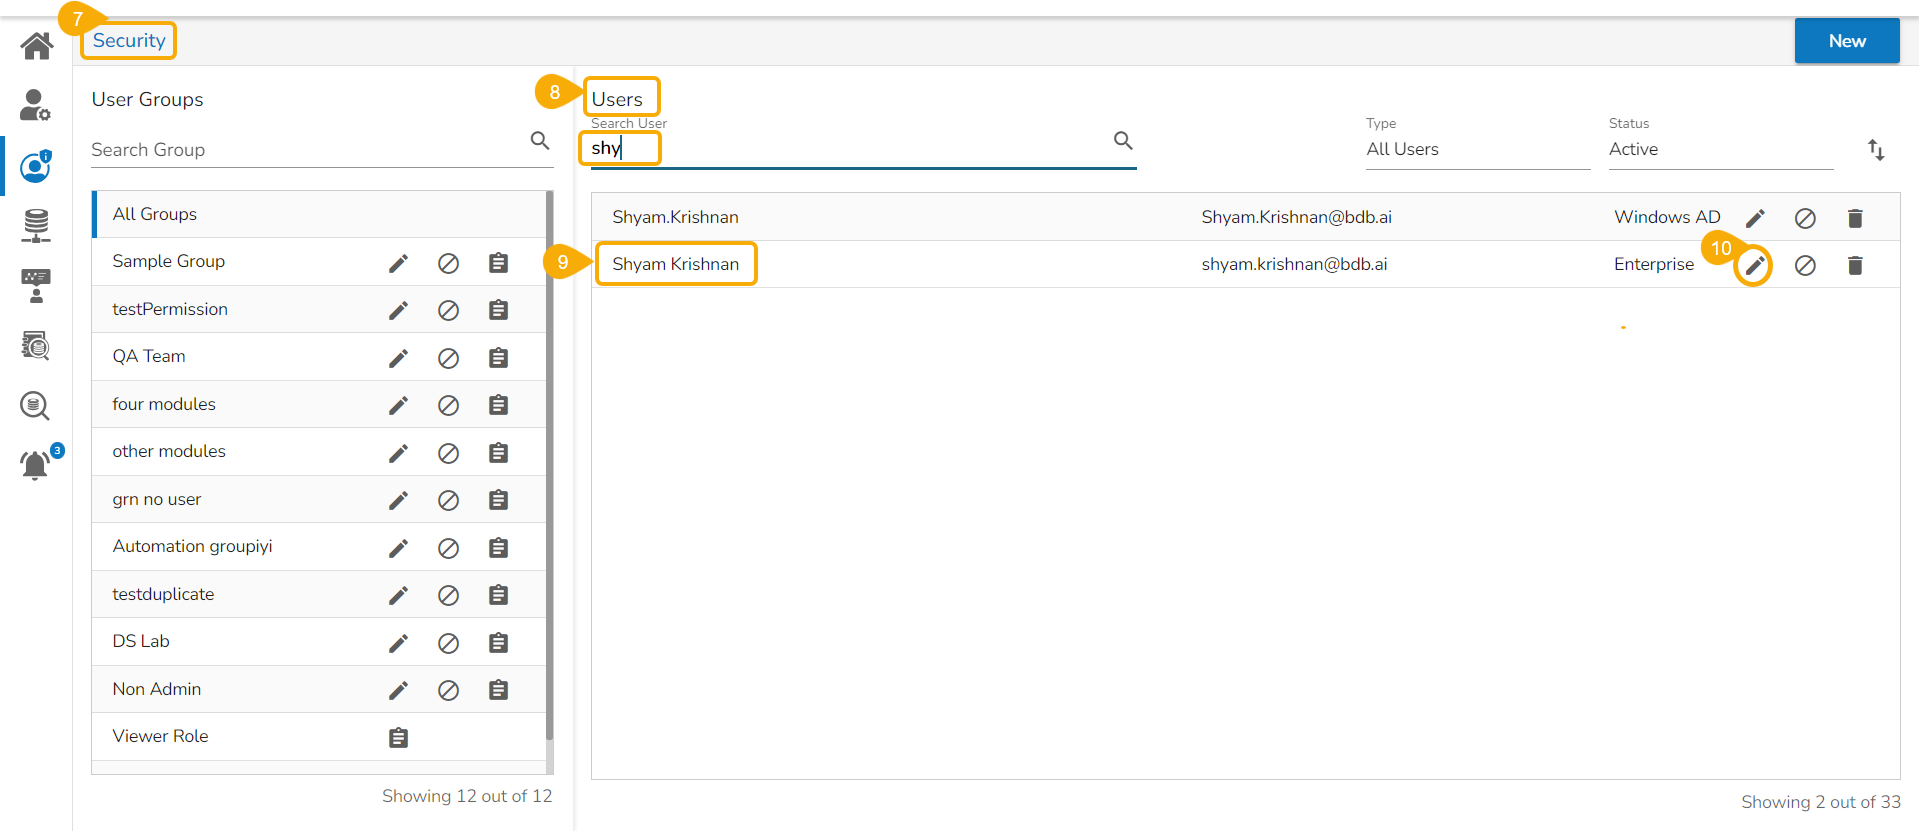
* Navigate to the ***Security*** module.
* Go to the ***Users*** list.
* Select the user from the list.
* Click the ***Edit*** icon.
* The ***Update User*** page opens.
* Check out the ***Custom Fields*** section.
* ***Validate*** whether the ***Git User Token*** is valid or not. If not ***provide the valid Git User Token***.
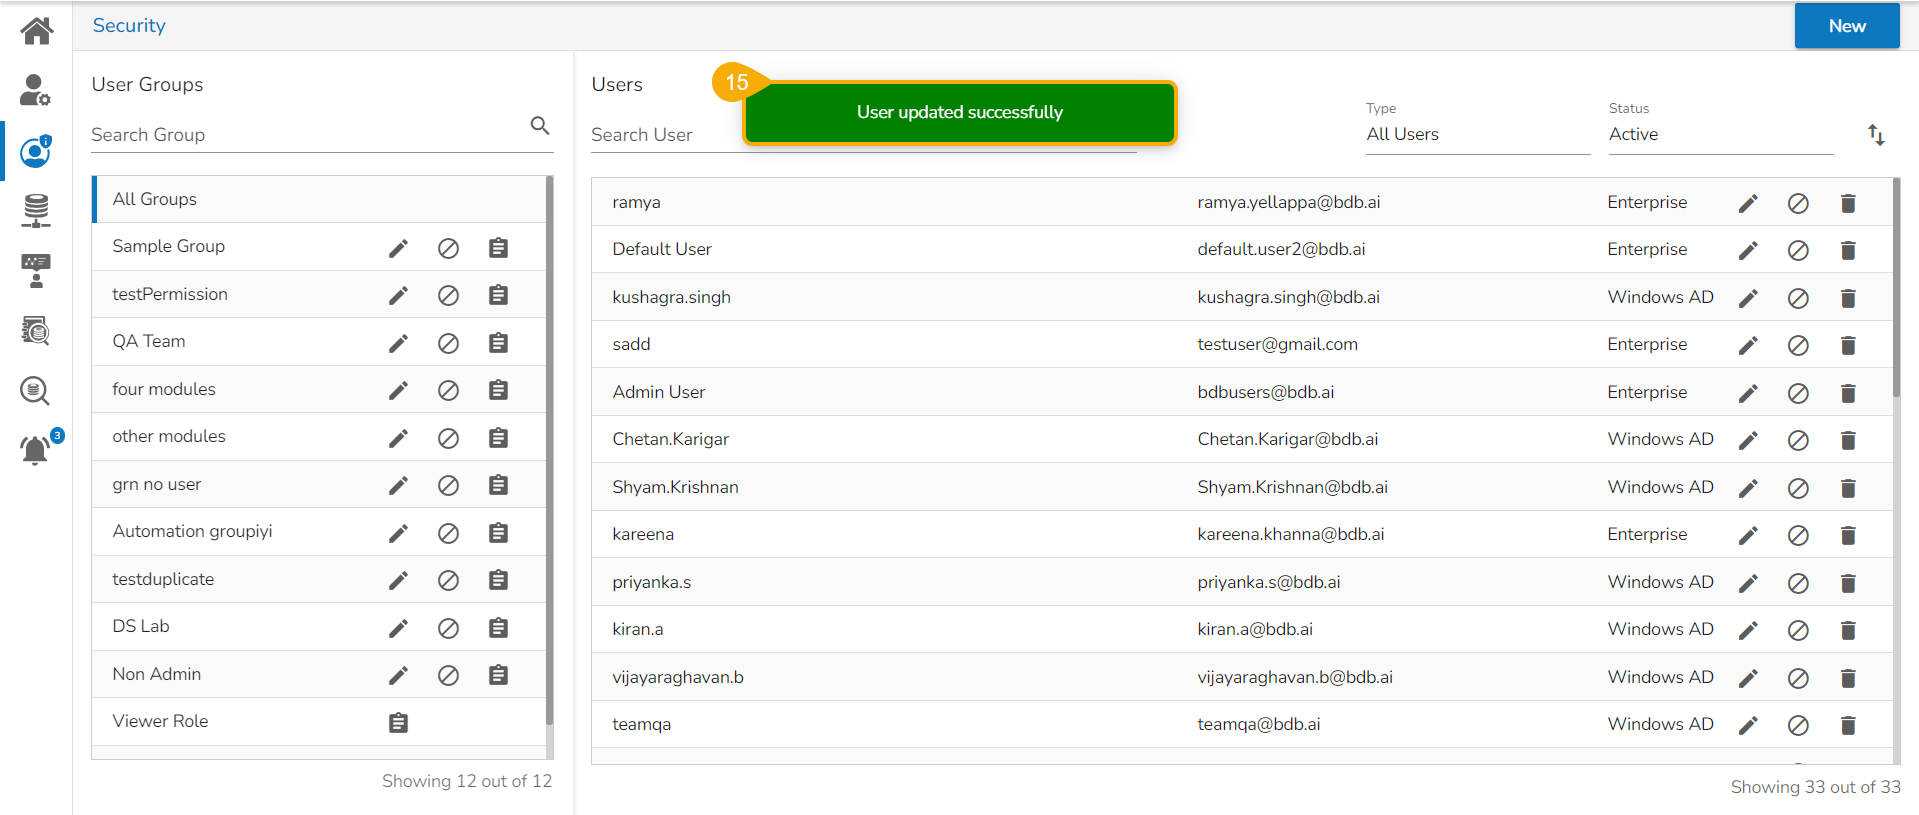
* Click the ***Save*** option.
A notification message appears to inform that the user is updated successfully.
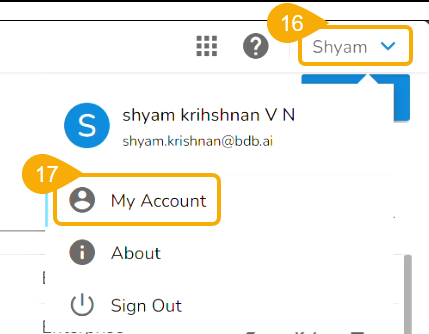
* Open the ***User Profile***.
* Select the ***My Account*** option.
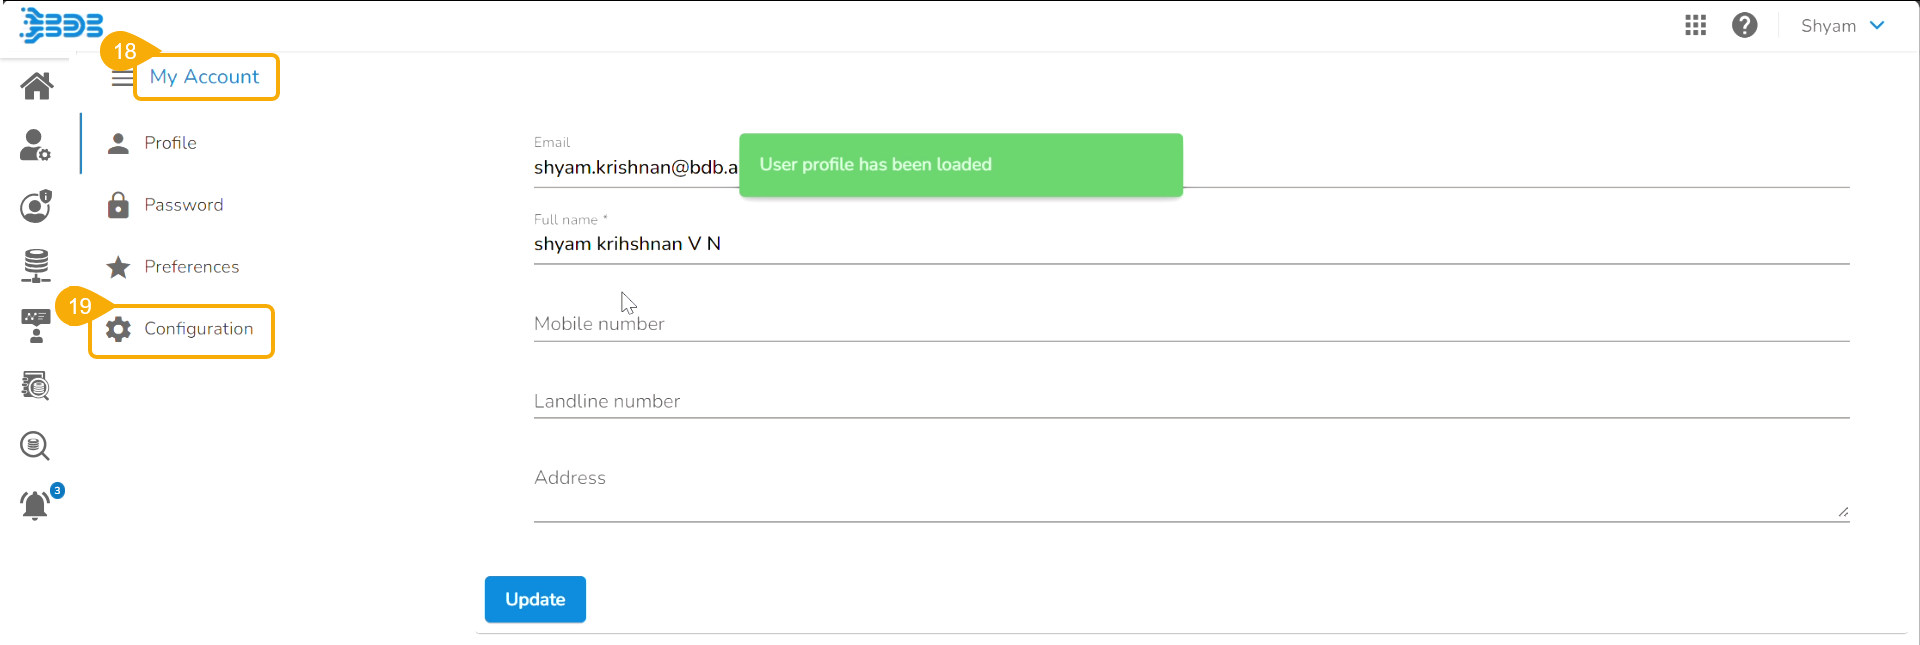
* The ***My Account*** details are displayed.
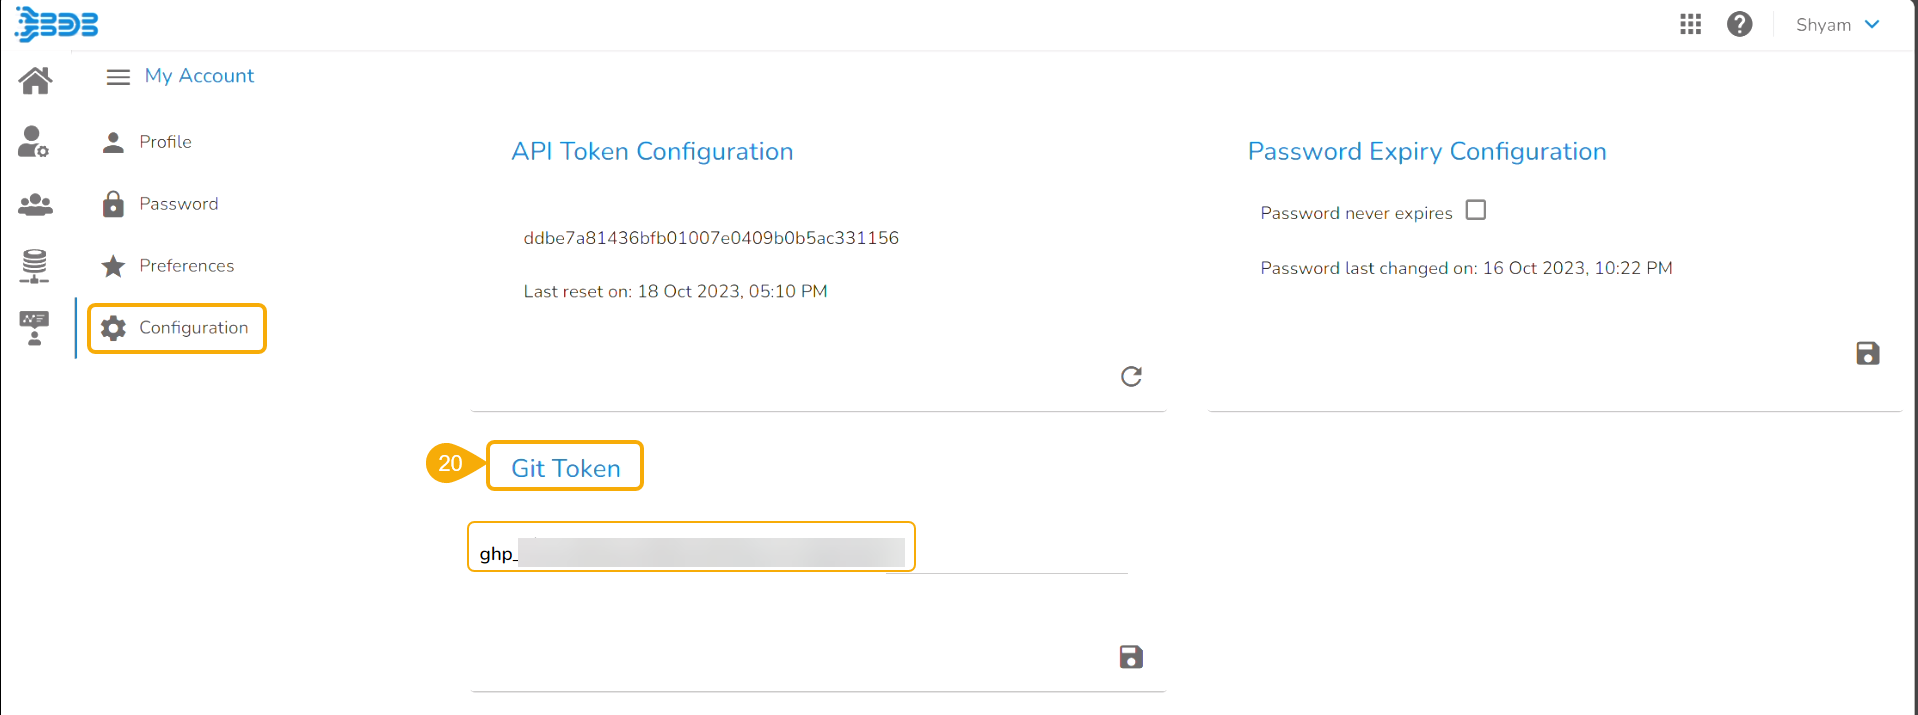
* Open the ***Configuration*** option.
* The same token gets updated as the ***Git Token*** section provided under the ***Configuration*** section.
### Pull Pre-requisites
The user can also pull a utility script or an updated version of the utility script from the Git Repository.
{% hint style="warning" %}
*Pre-requisite:*
* *The user needs to do an **Admin configuration** with an authentication token.*
* *The user needs to do the **Project** level- configuration of **Git Project** and **Git branch**.*
{% endhint %}
{% hint style="info" %}
*Please Note:*
* *The normal Data Science Project with the Git branch configured to it will support the **Pull from Git** import functionality for a utility file.*
* *Users can generate an authentication token from their **Git Lab** or **Hub** repositories.*
{% endhint %}
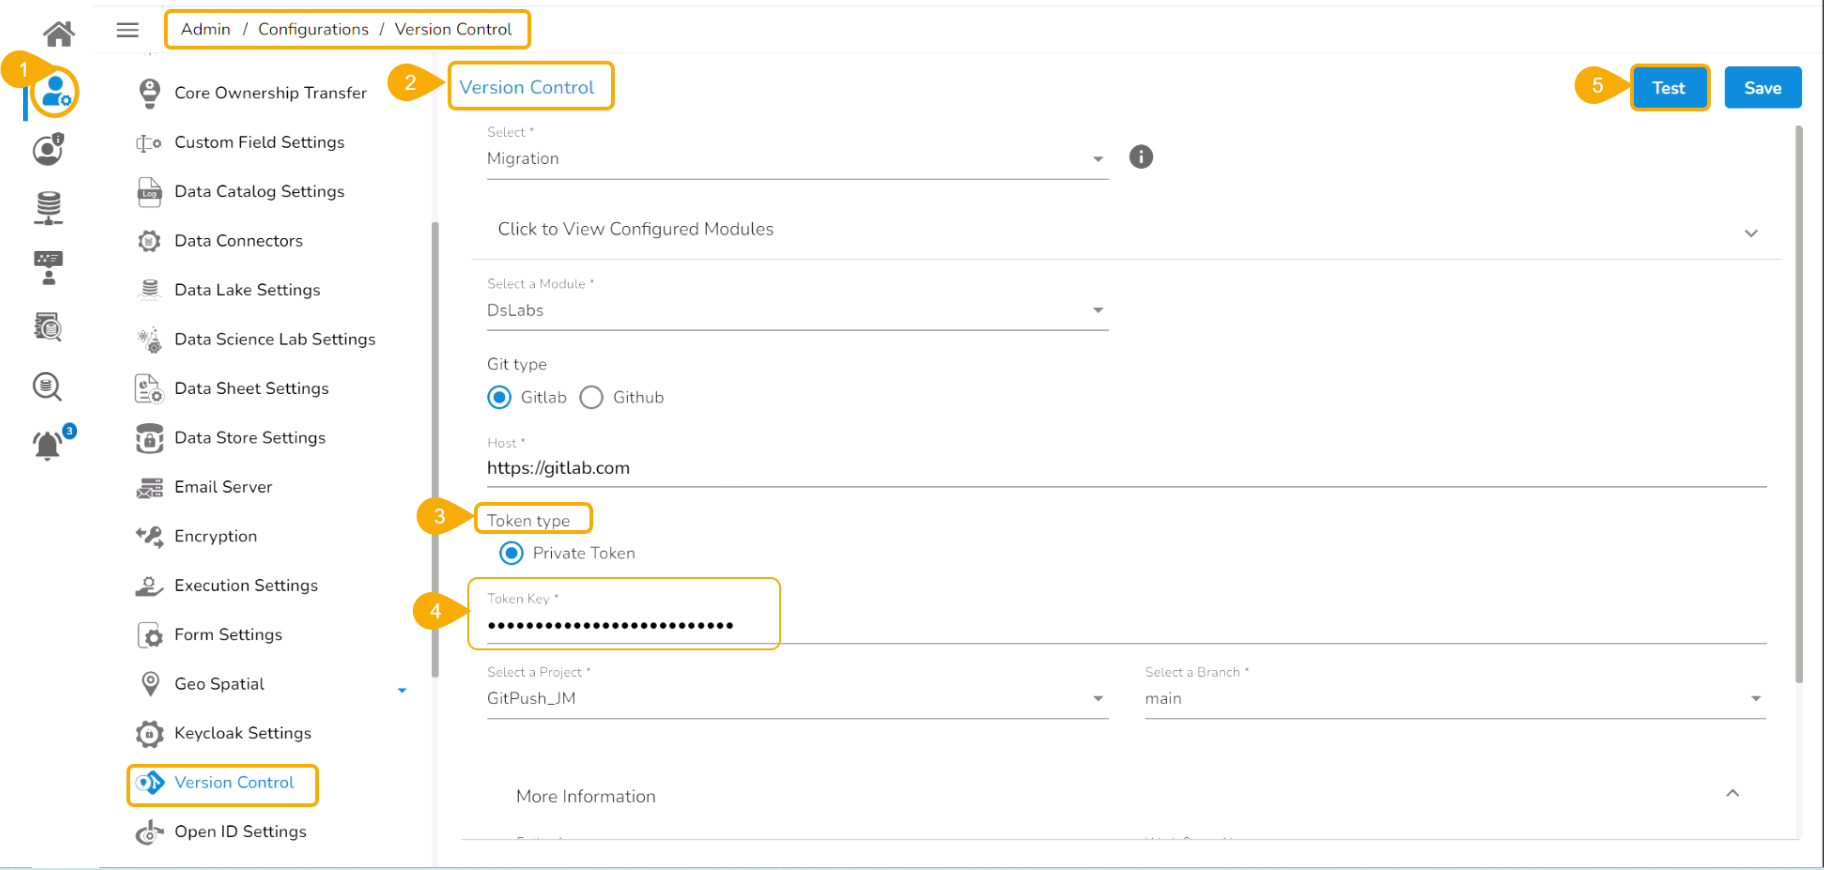
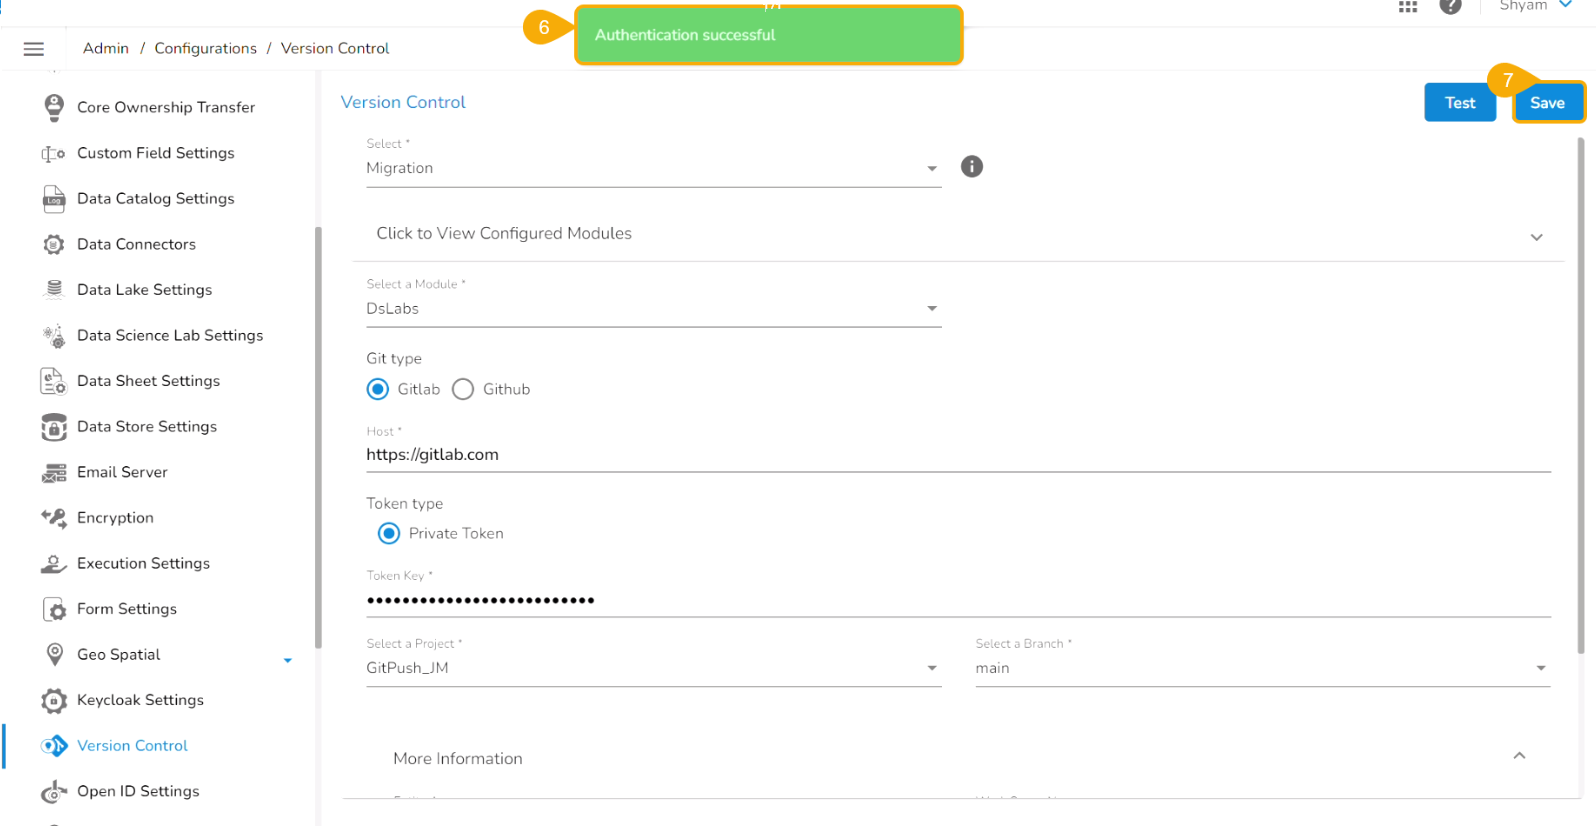
### Admin Level Configuration for Git Pull
* Navigate to the ***Admin*** module.
* Open the ***Version Control*** from the ***Configuration*** options.
* Select the Token type as a private token.
* Provide the authentication token in the given space.
* Click the ***Test*** option.
* A notification message appears to inform the user that authentication has been established.
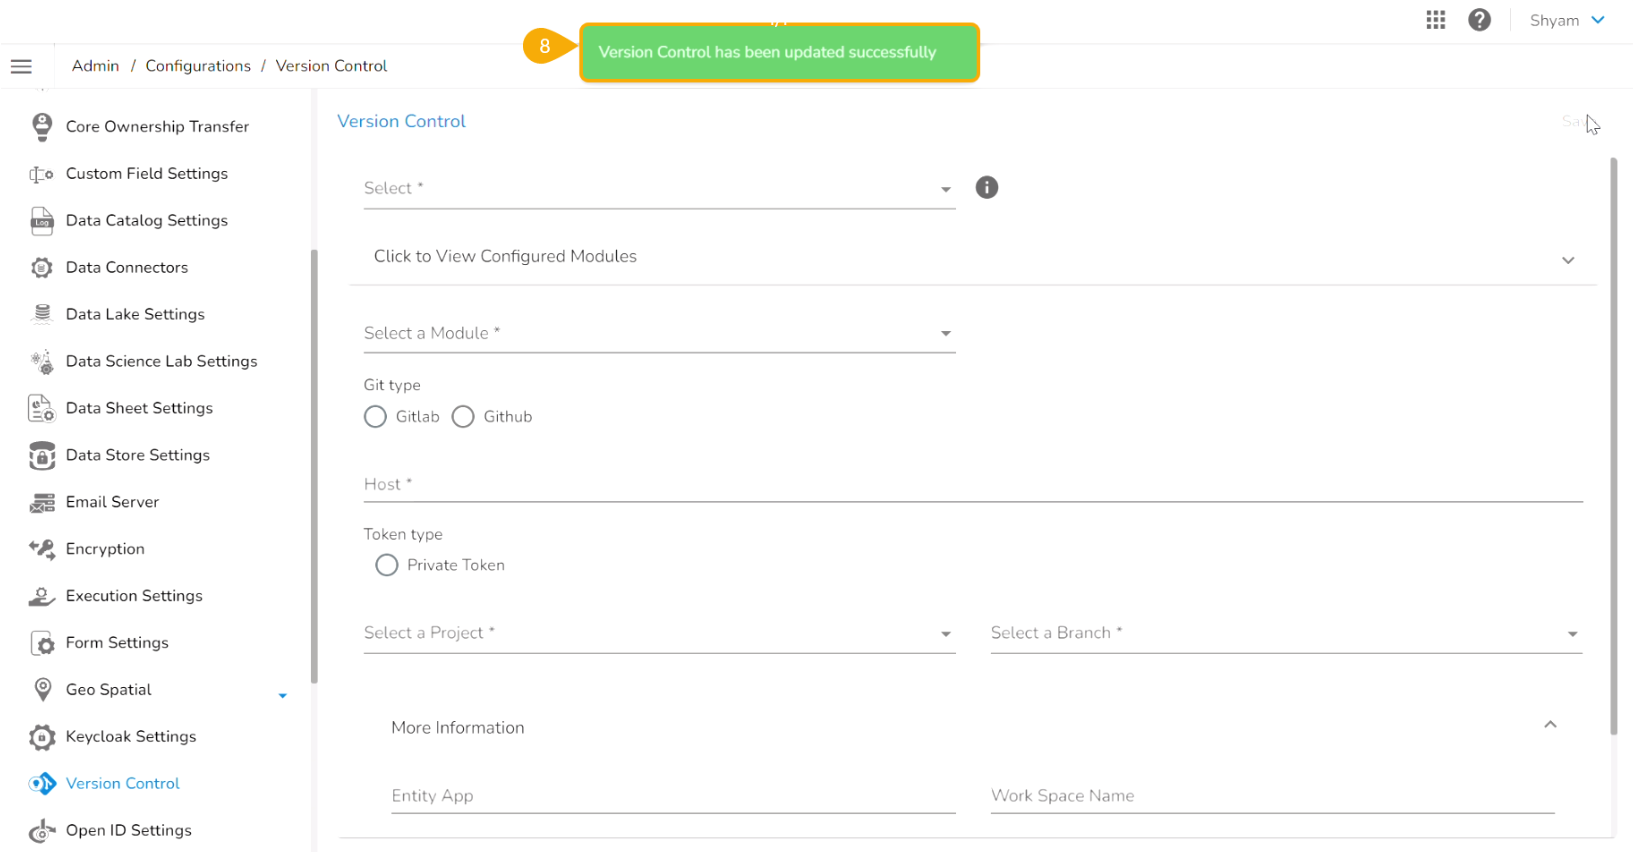
* Click the ***Save*** option.
* A notification message appears to inform that the version control has been updated.
### Pushing into and Pulling a Utility File
A user can make the changes in the pulled Python file and Push it into Git using the user token set in the user profile.
{% hint style="info" %}
*Please Note: Before using the Push a utility file to Git functionality make sure that the following requirements are fulfilled:*
1. *The latest file is pulled into DS Lab before modifying and pushing back to the Git branch.*
2. *The user should have access to the Git branch to push a change.*
{% endhint %}
{% hint style="success" %}
*Check out the illustration for a utility script to understand the Pull from VCS and Push into VCS functionalities. It displays how taking each time a pull from VCS is necessary for using the Push to VCS functionality.*
{% endhint %}
{% embed url="" %}
***Pull from VCS & Push into VCS functionalities for a Utility Script***
{% endembed %}
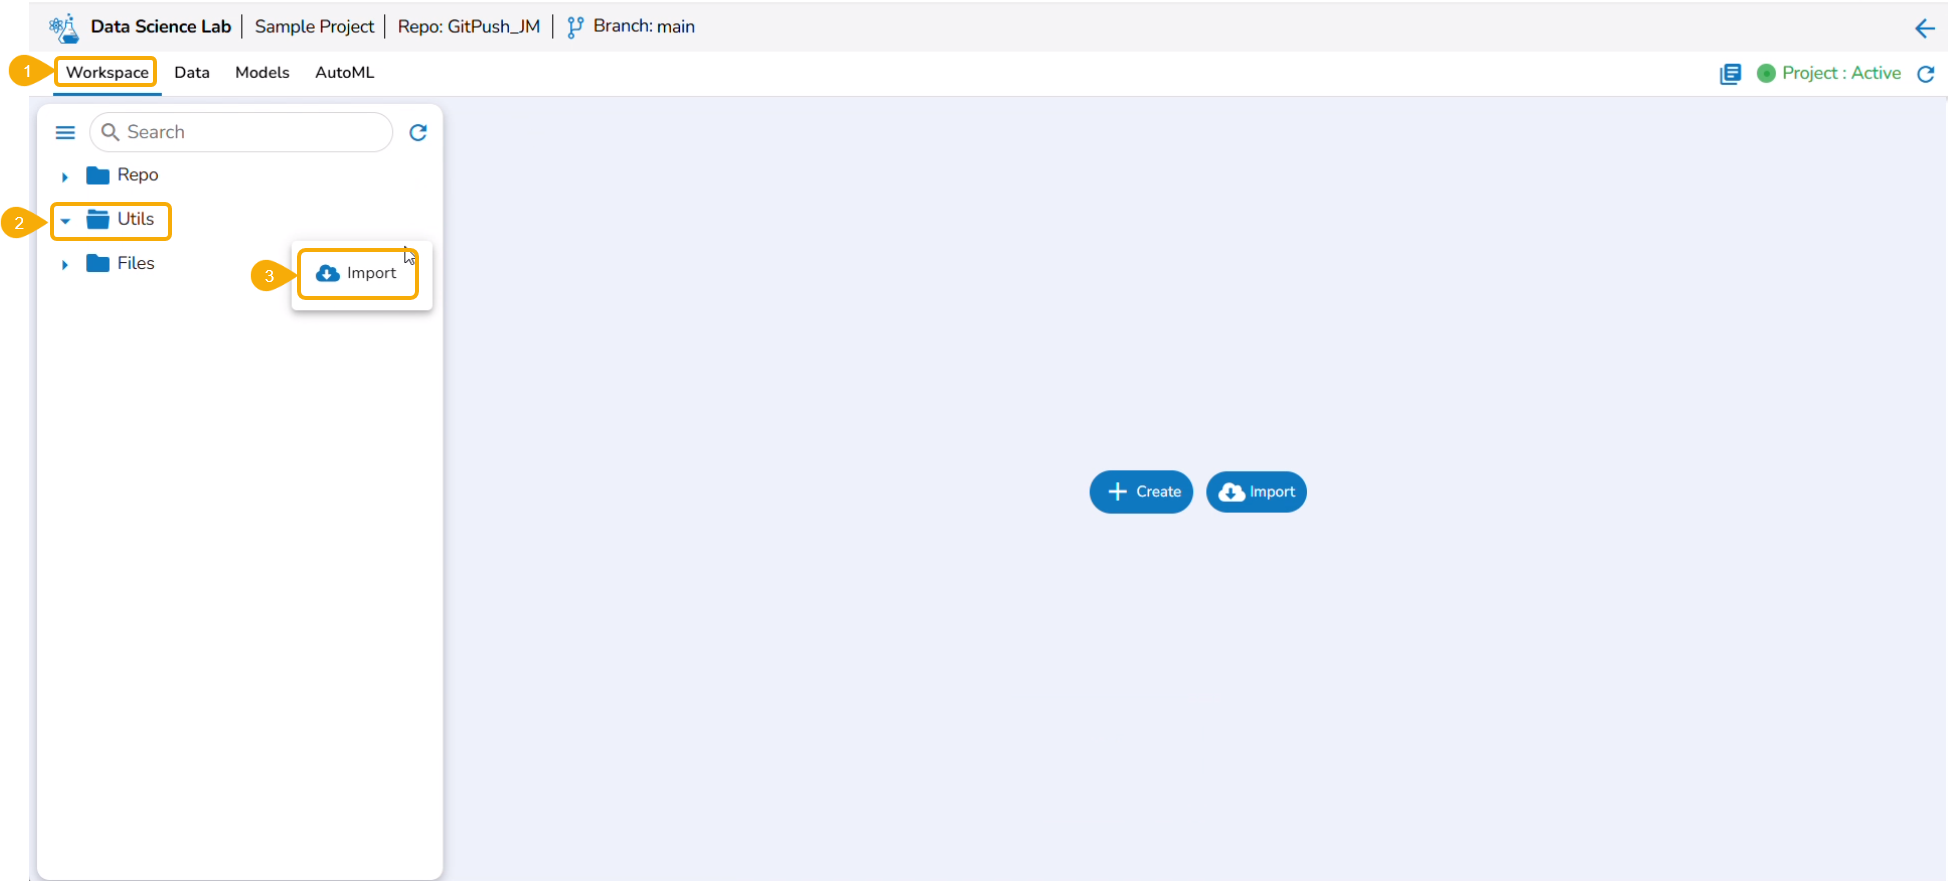
* Navigate to the ***Workspace*** tab for an activated project that has a Git branch configured.
* Click the ***Utils*** folder to get the Import option.
* Click the ***Import*** option.
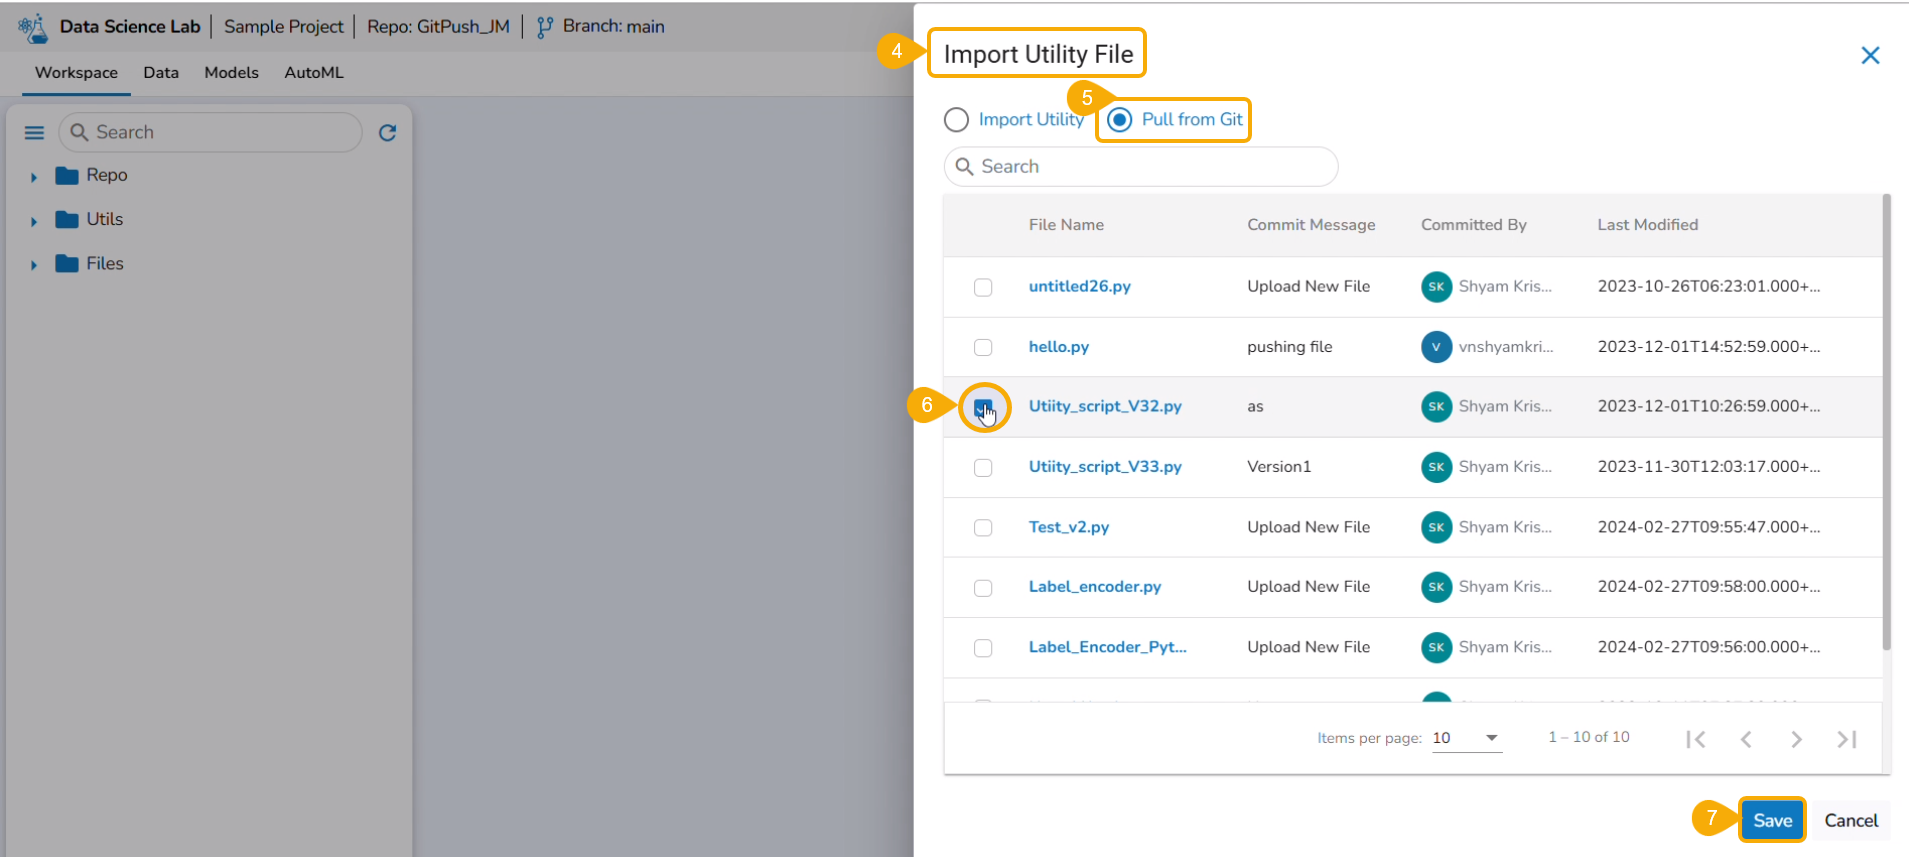
* The ***Import Utility File*** drawer appears.
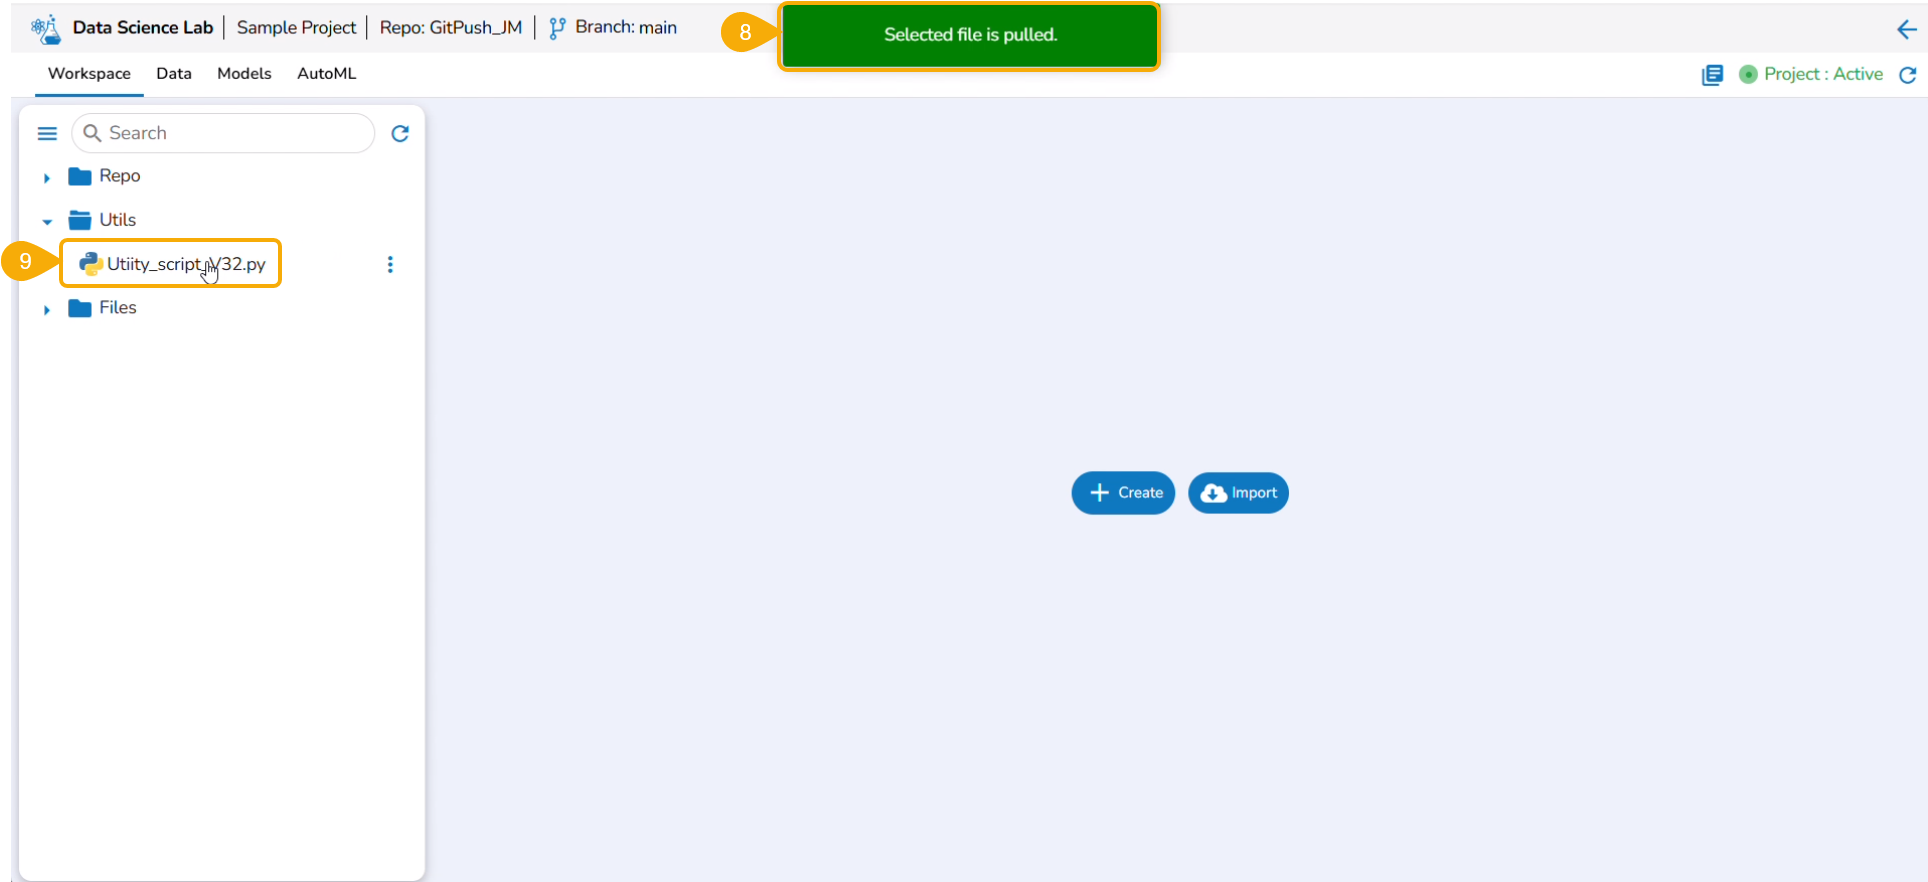
* Select the ***Pull from Git*** option.
* Select a file using the checkbox.
* Click the ***Save*** option.
* A notification message informs that the selected file is pulled.
* The pulled file gets listed under the Utils folder.
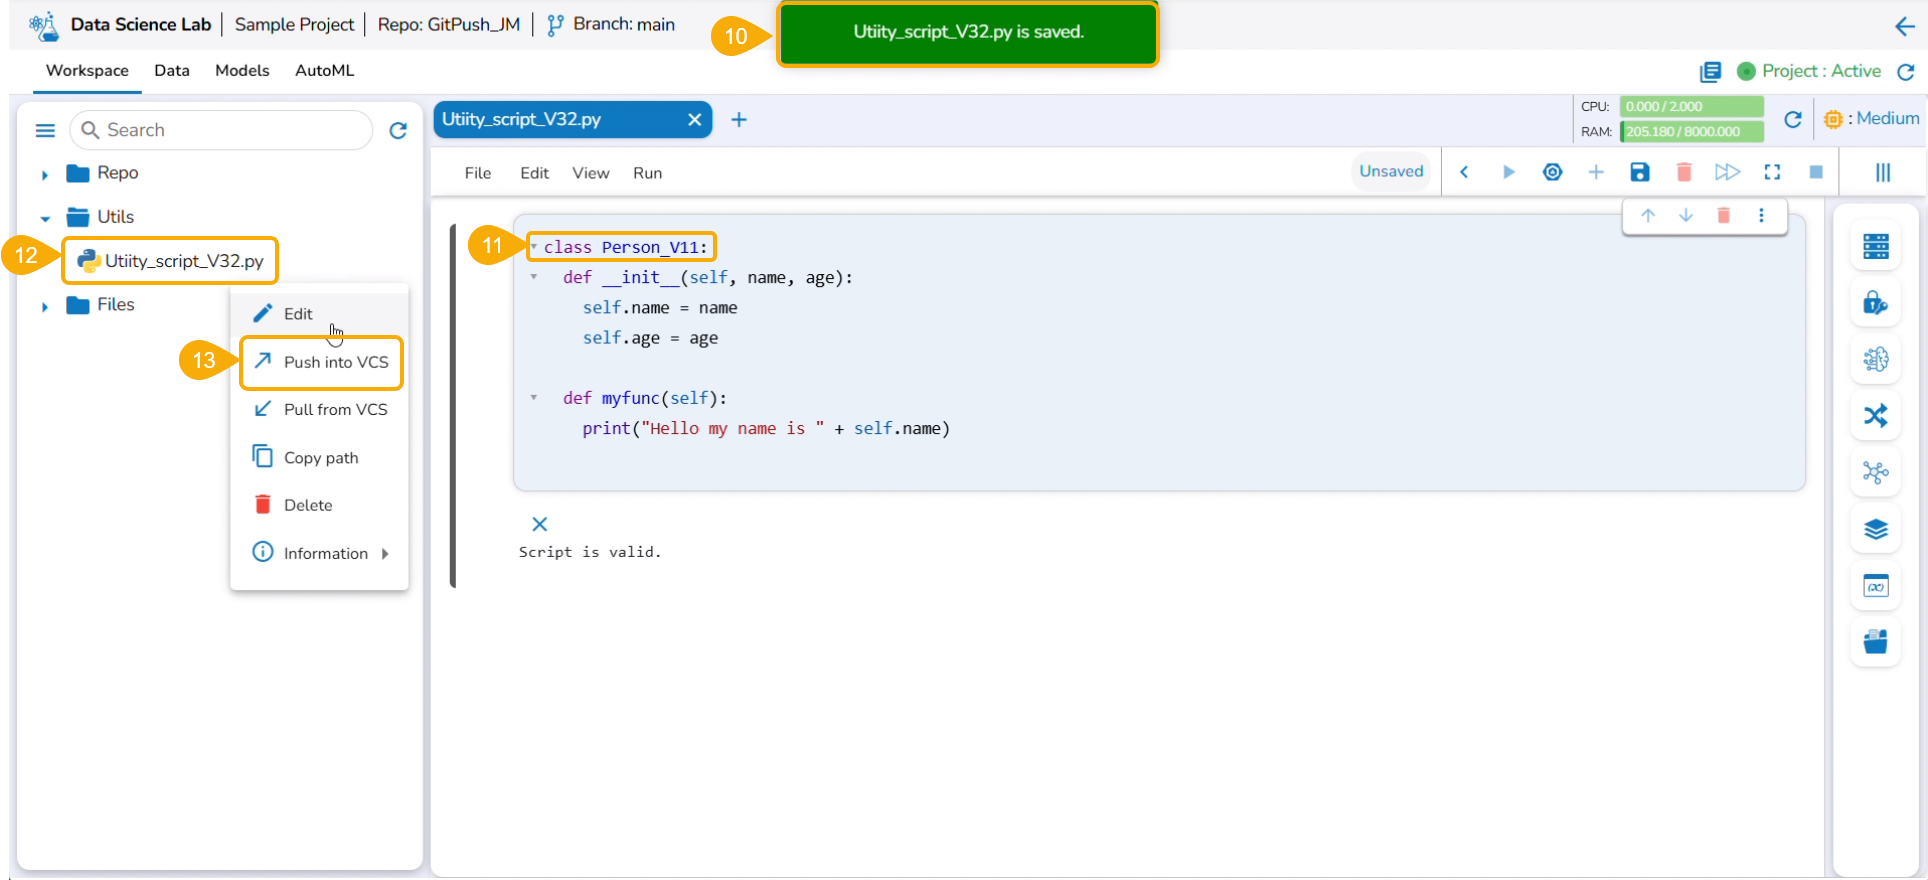
* Save the pulled file.
* Modify the content of the saved Utility file.
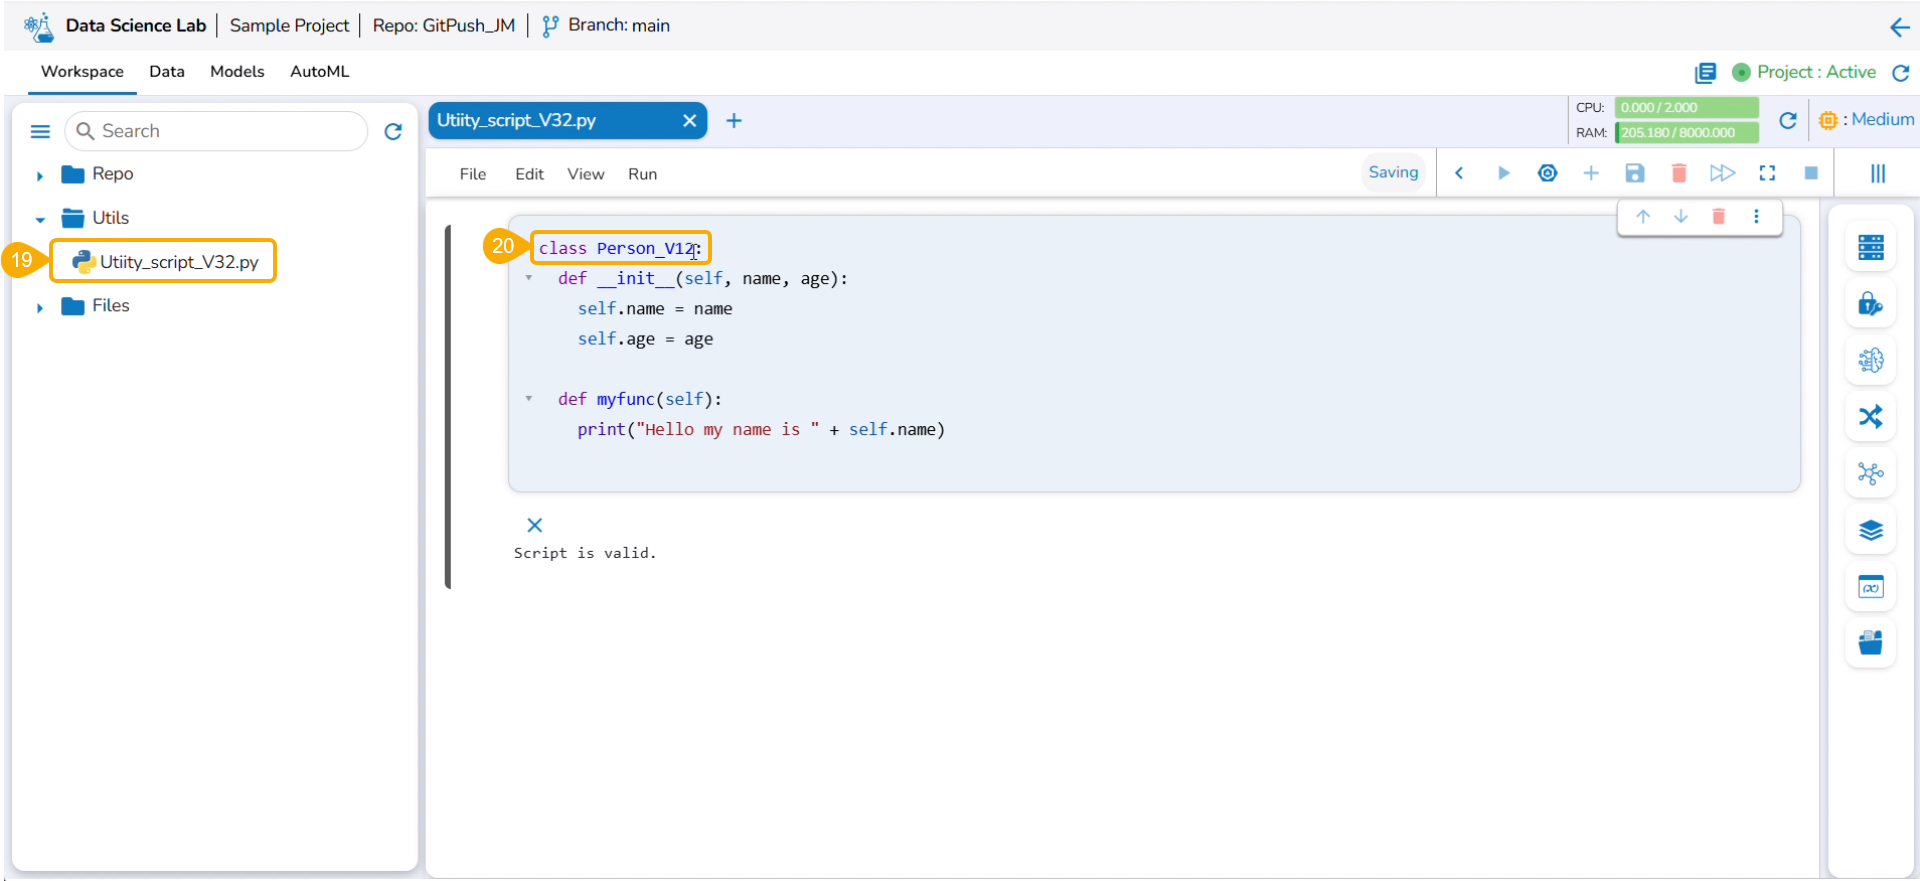
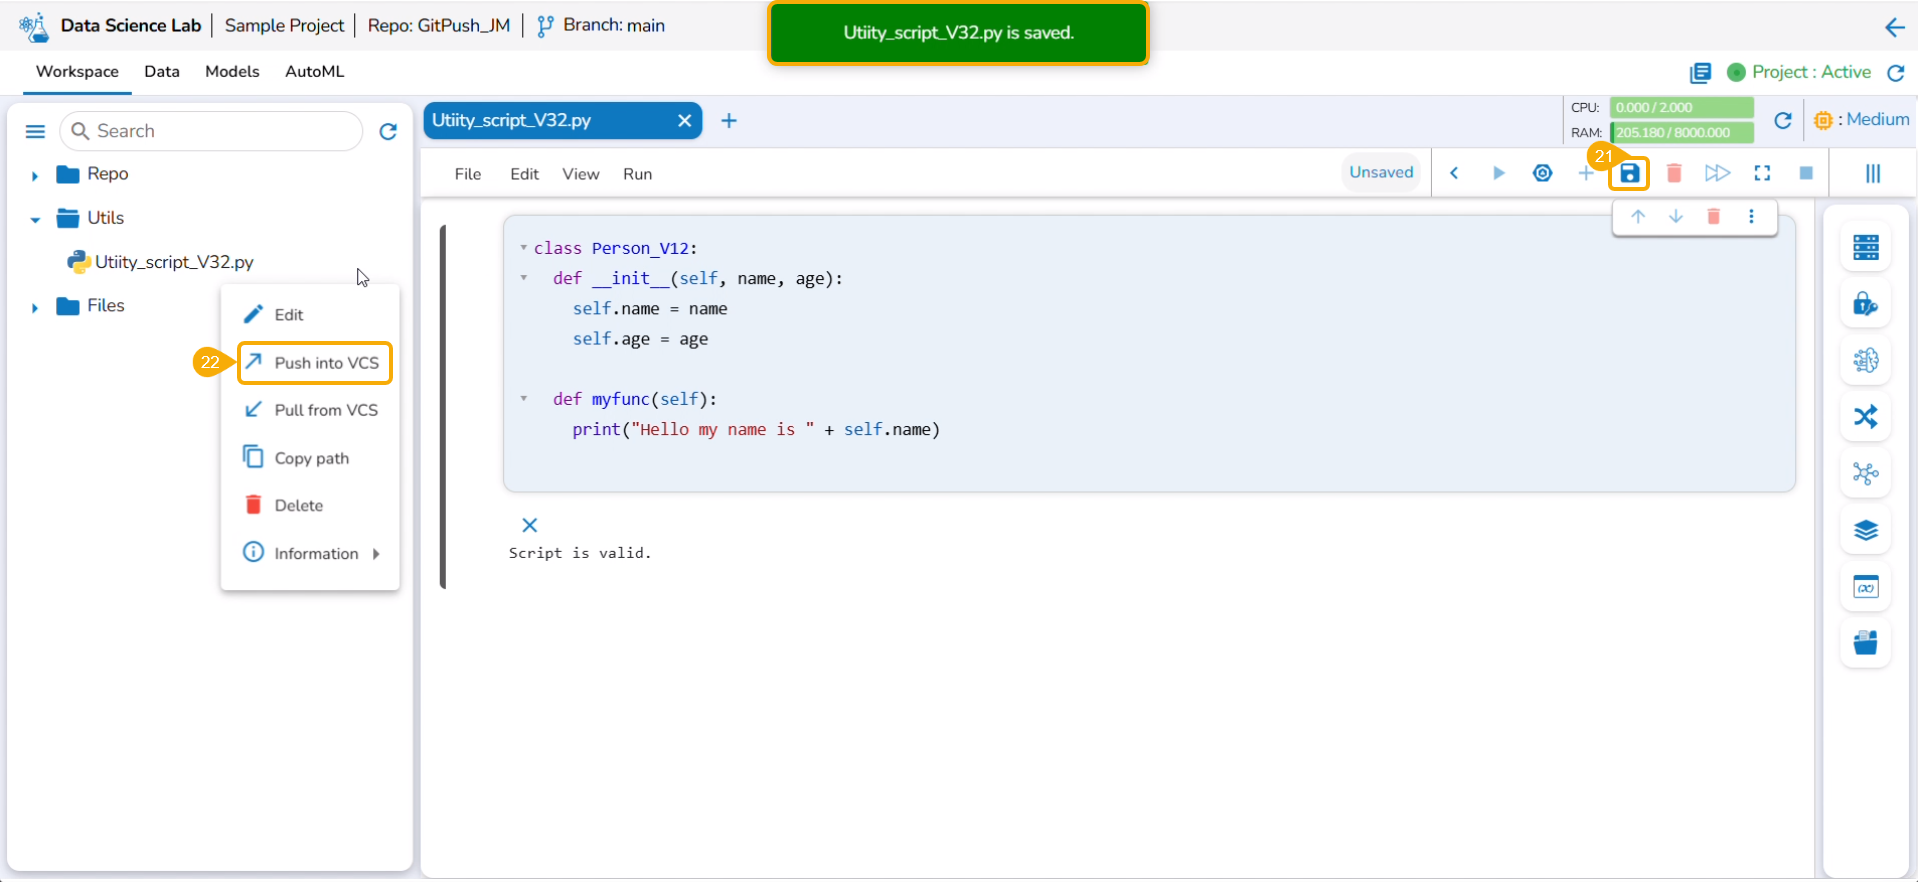
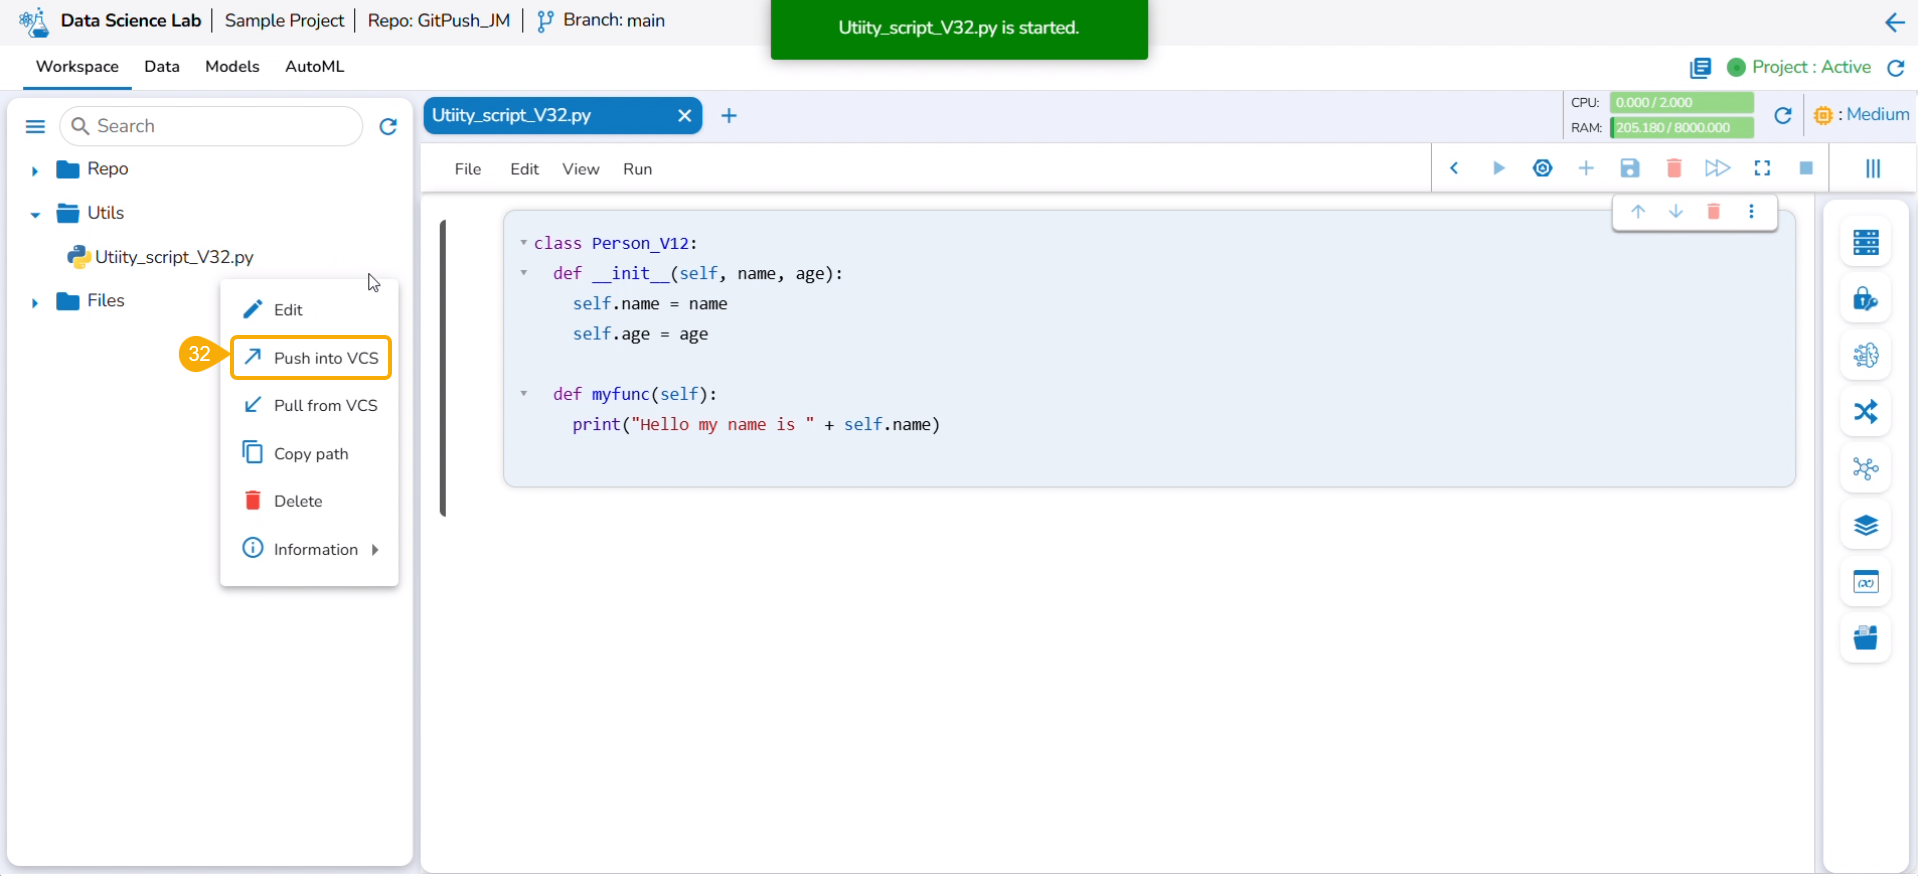
* Click the Pulled utility file from the Utils folder.
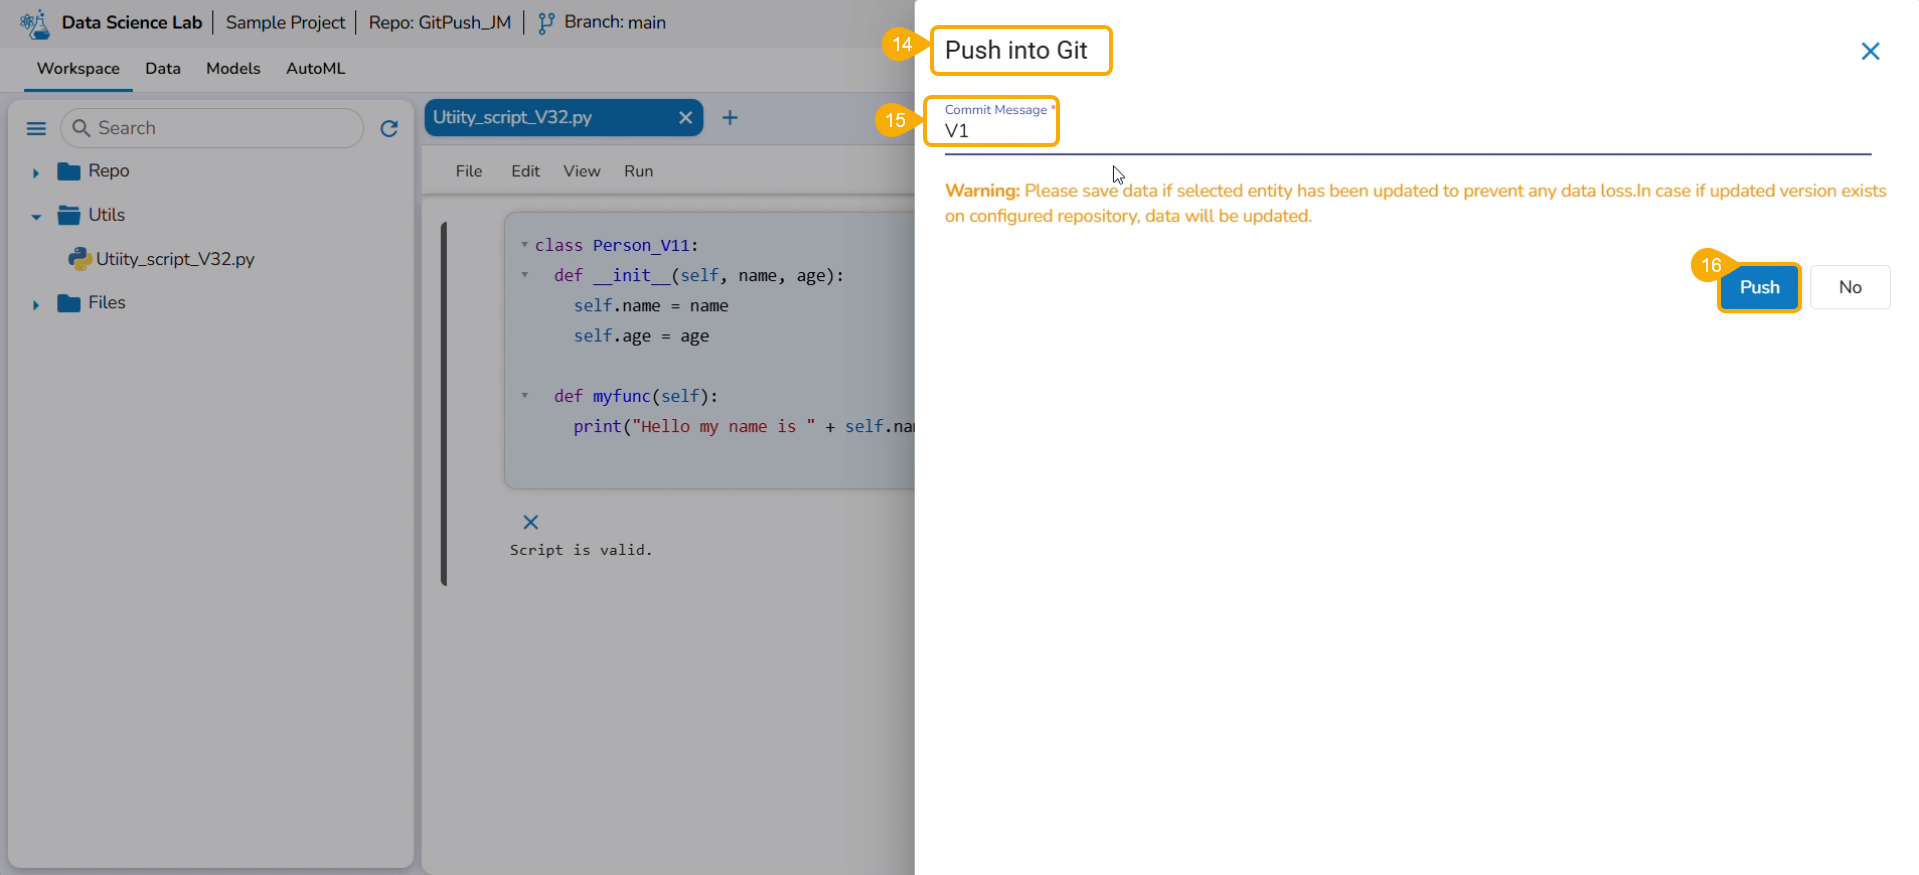
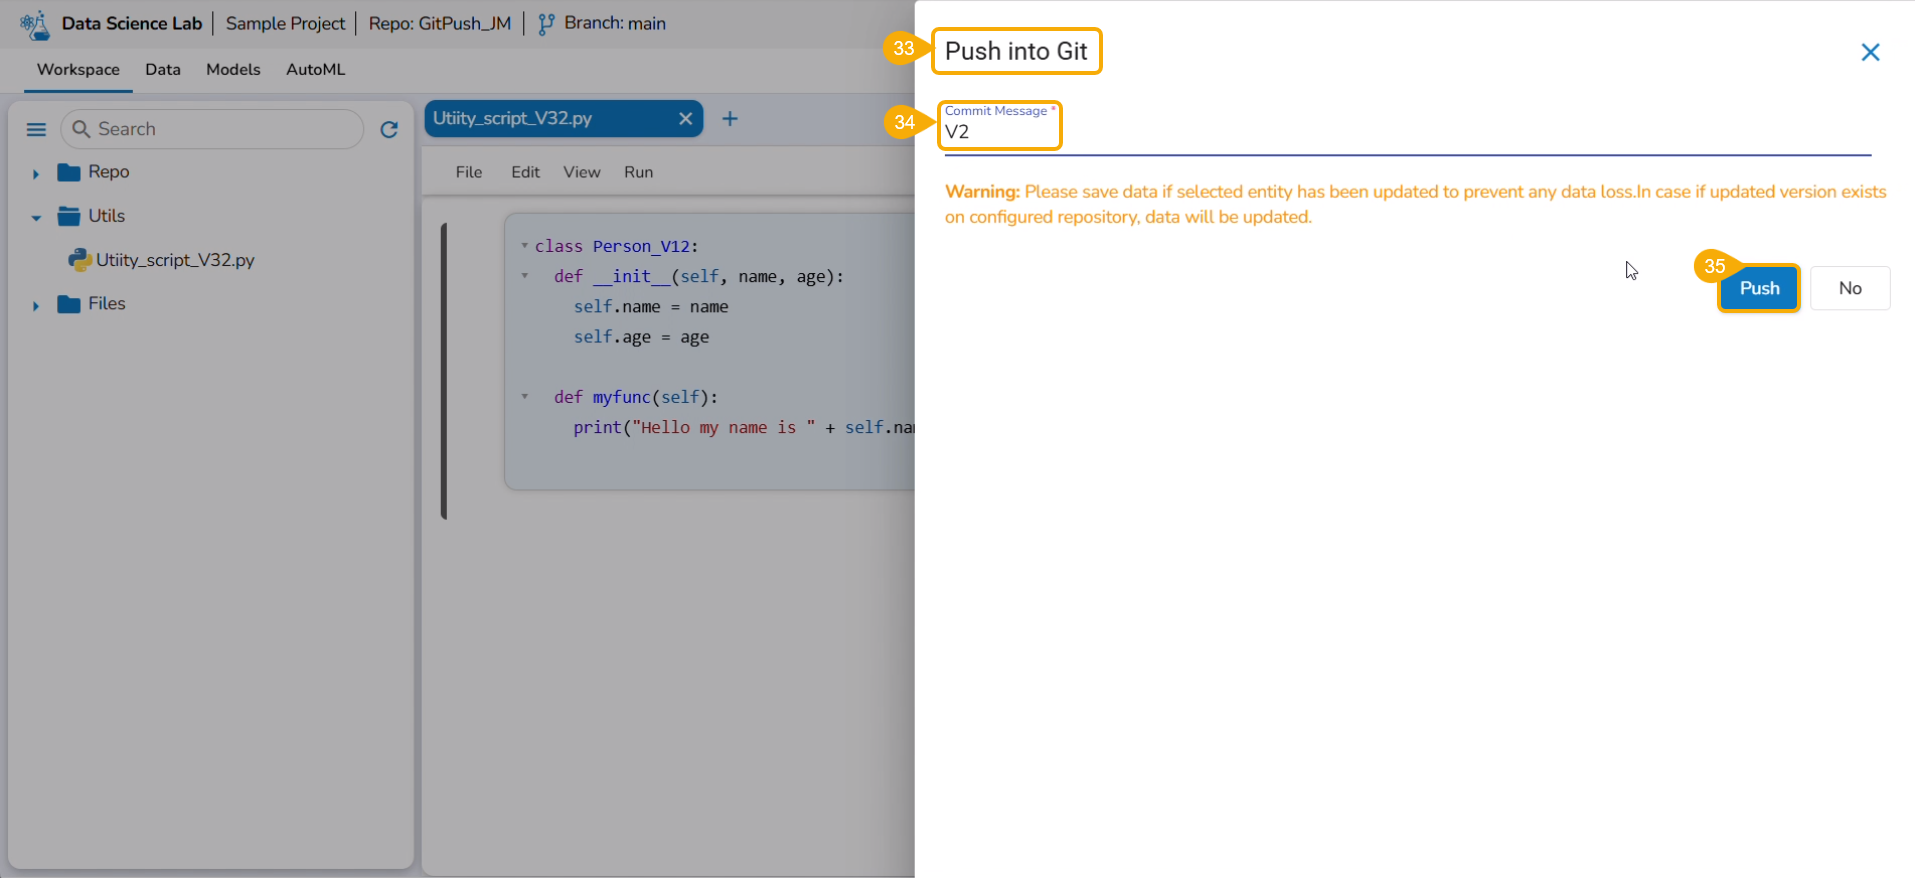
* Select the ***Push into VCS*** option.
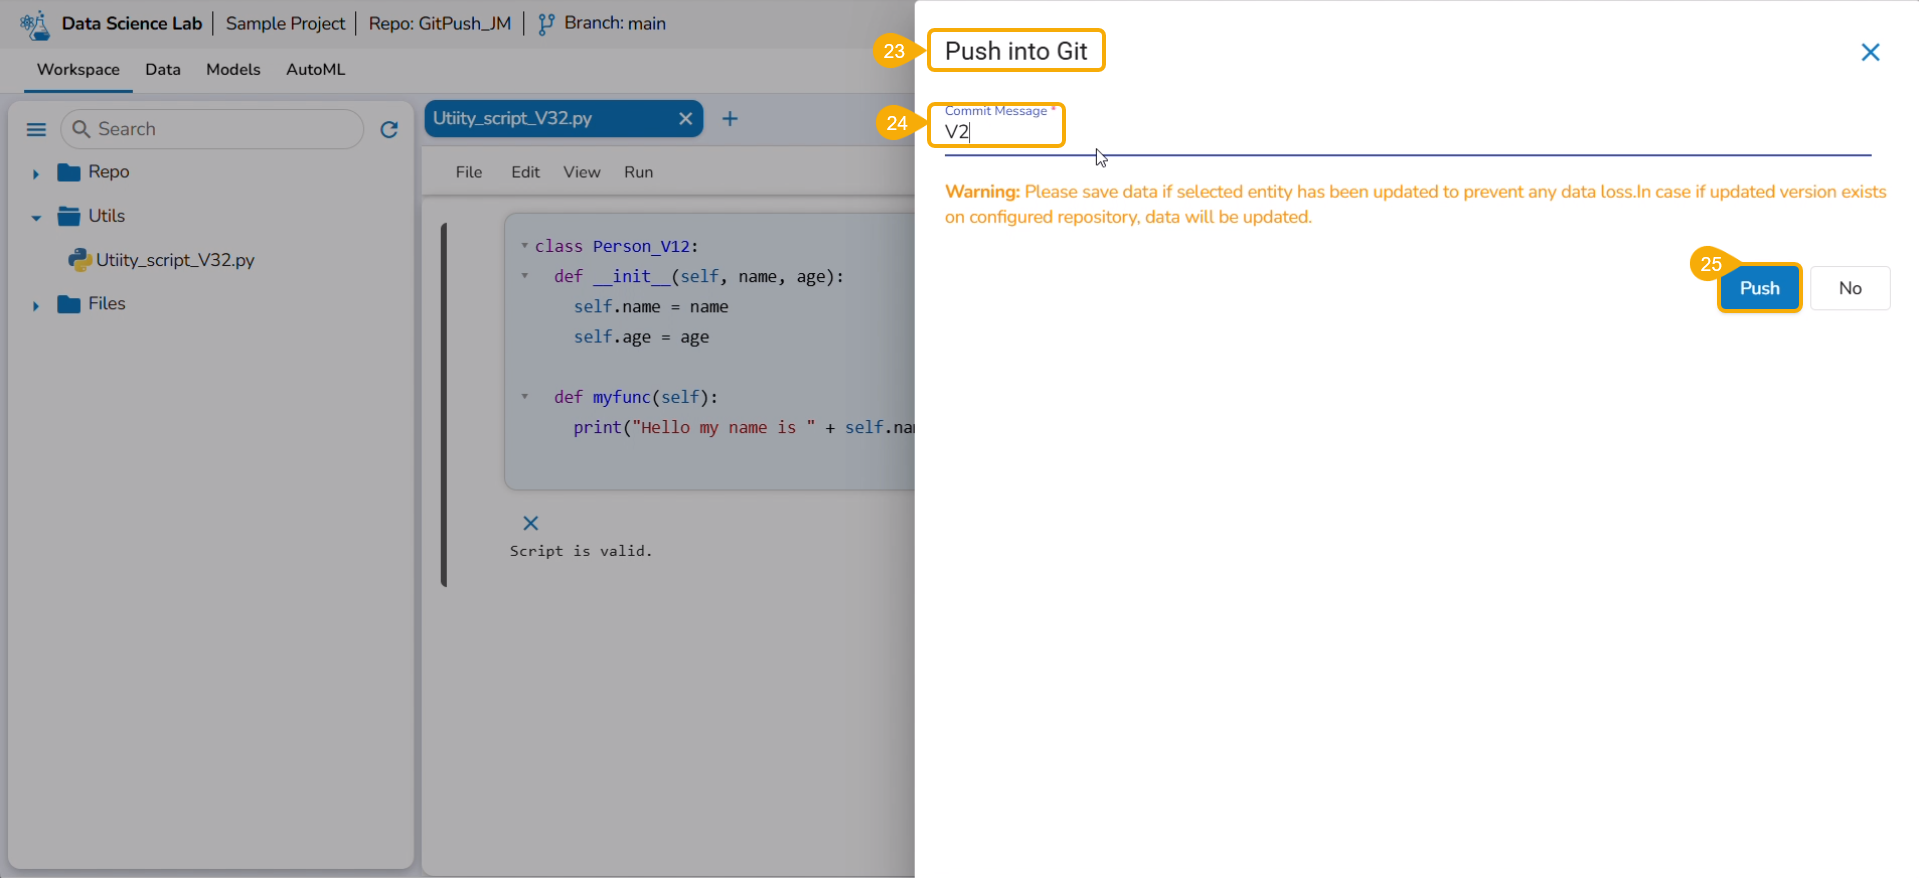
* The ***Push into Git*** drawer opens.
* Provide a commit message.
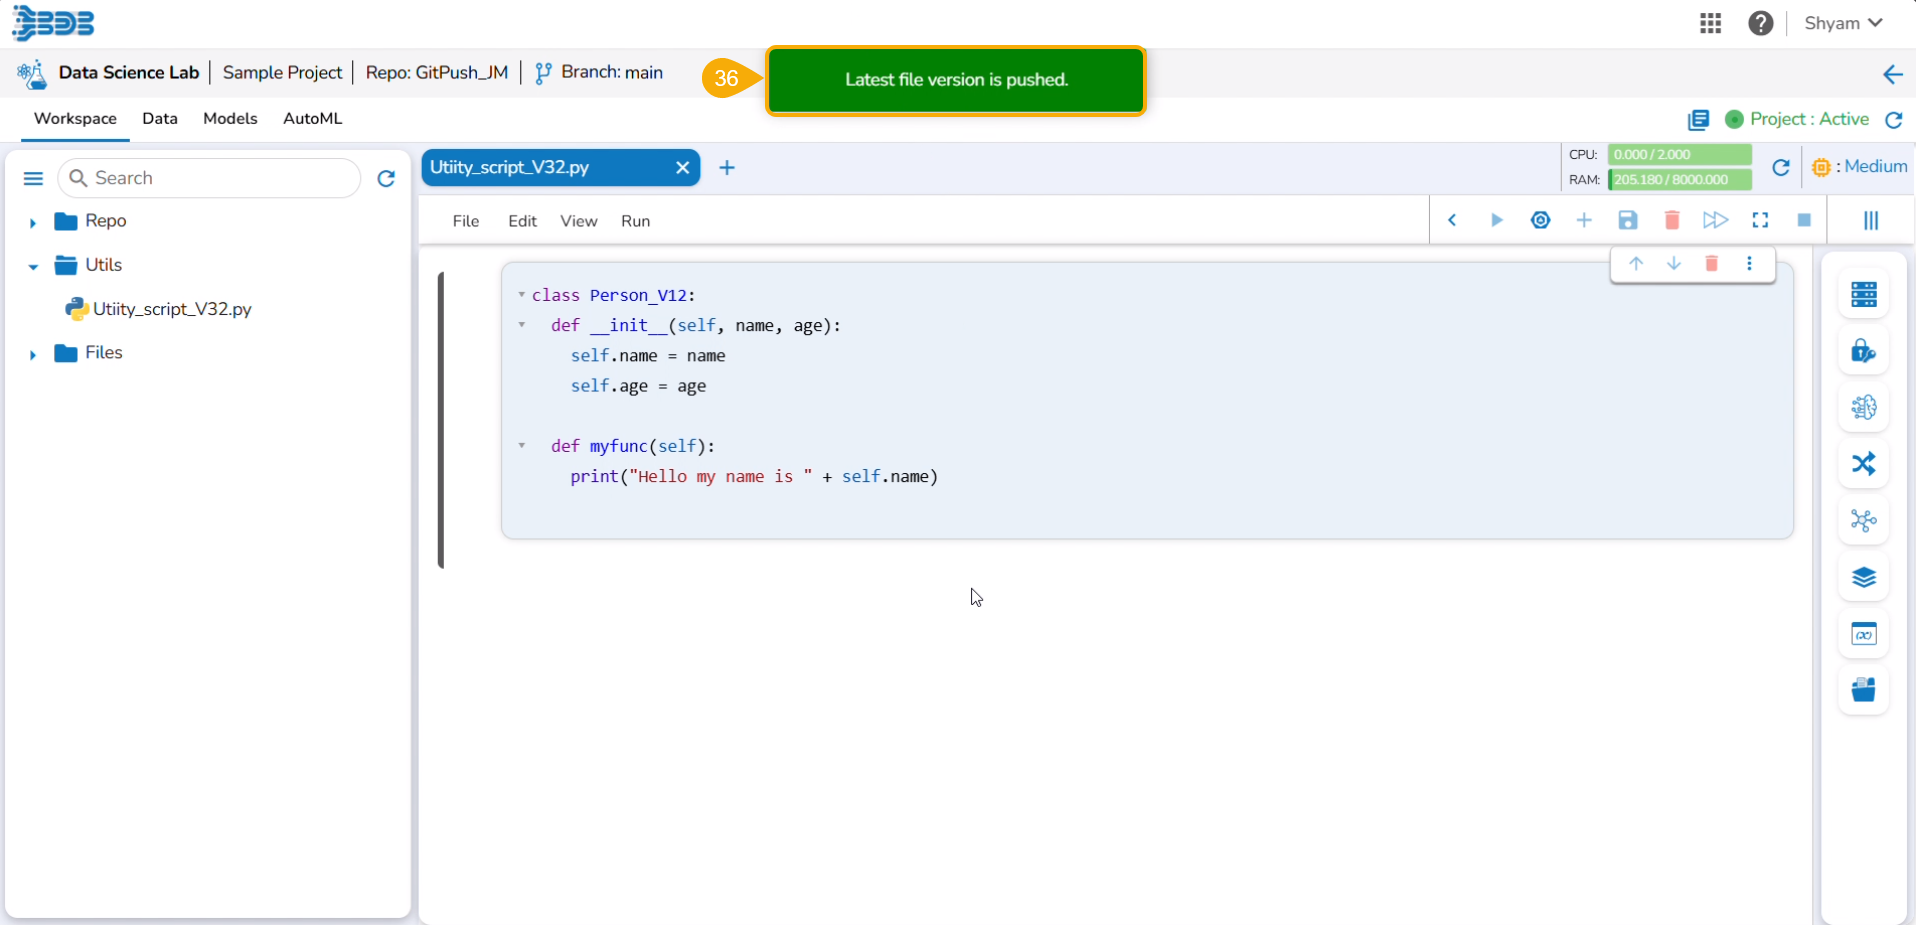
* Click the ***Push*** option.
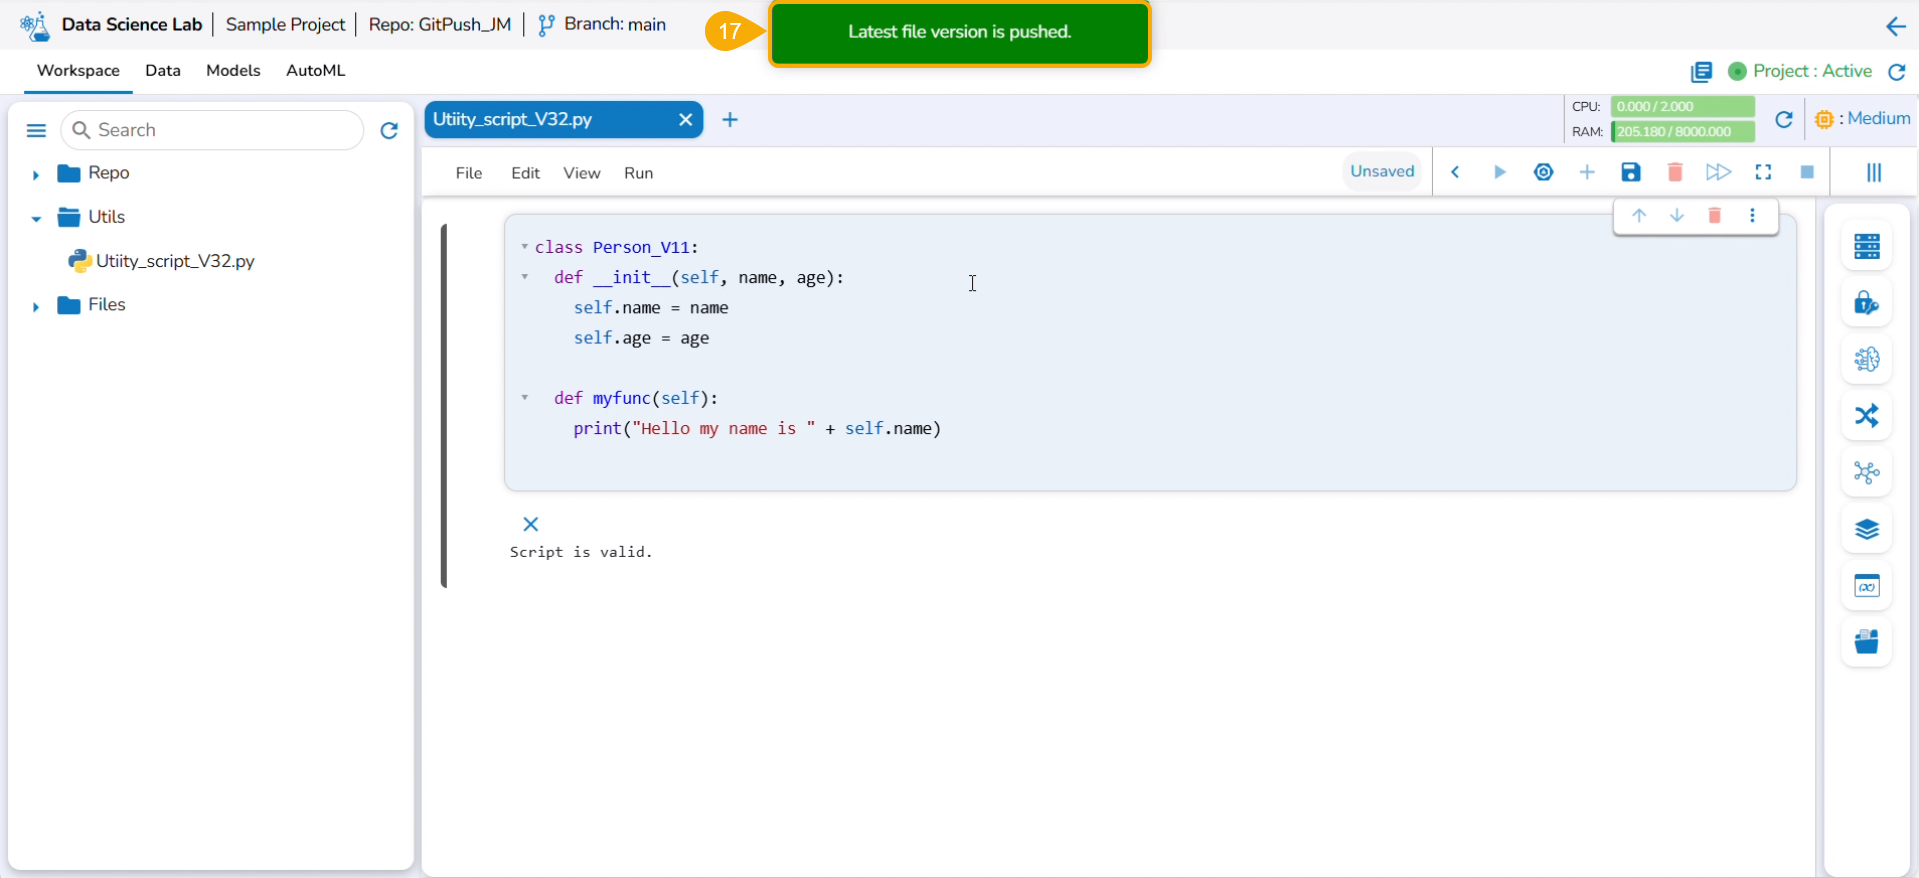
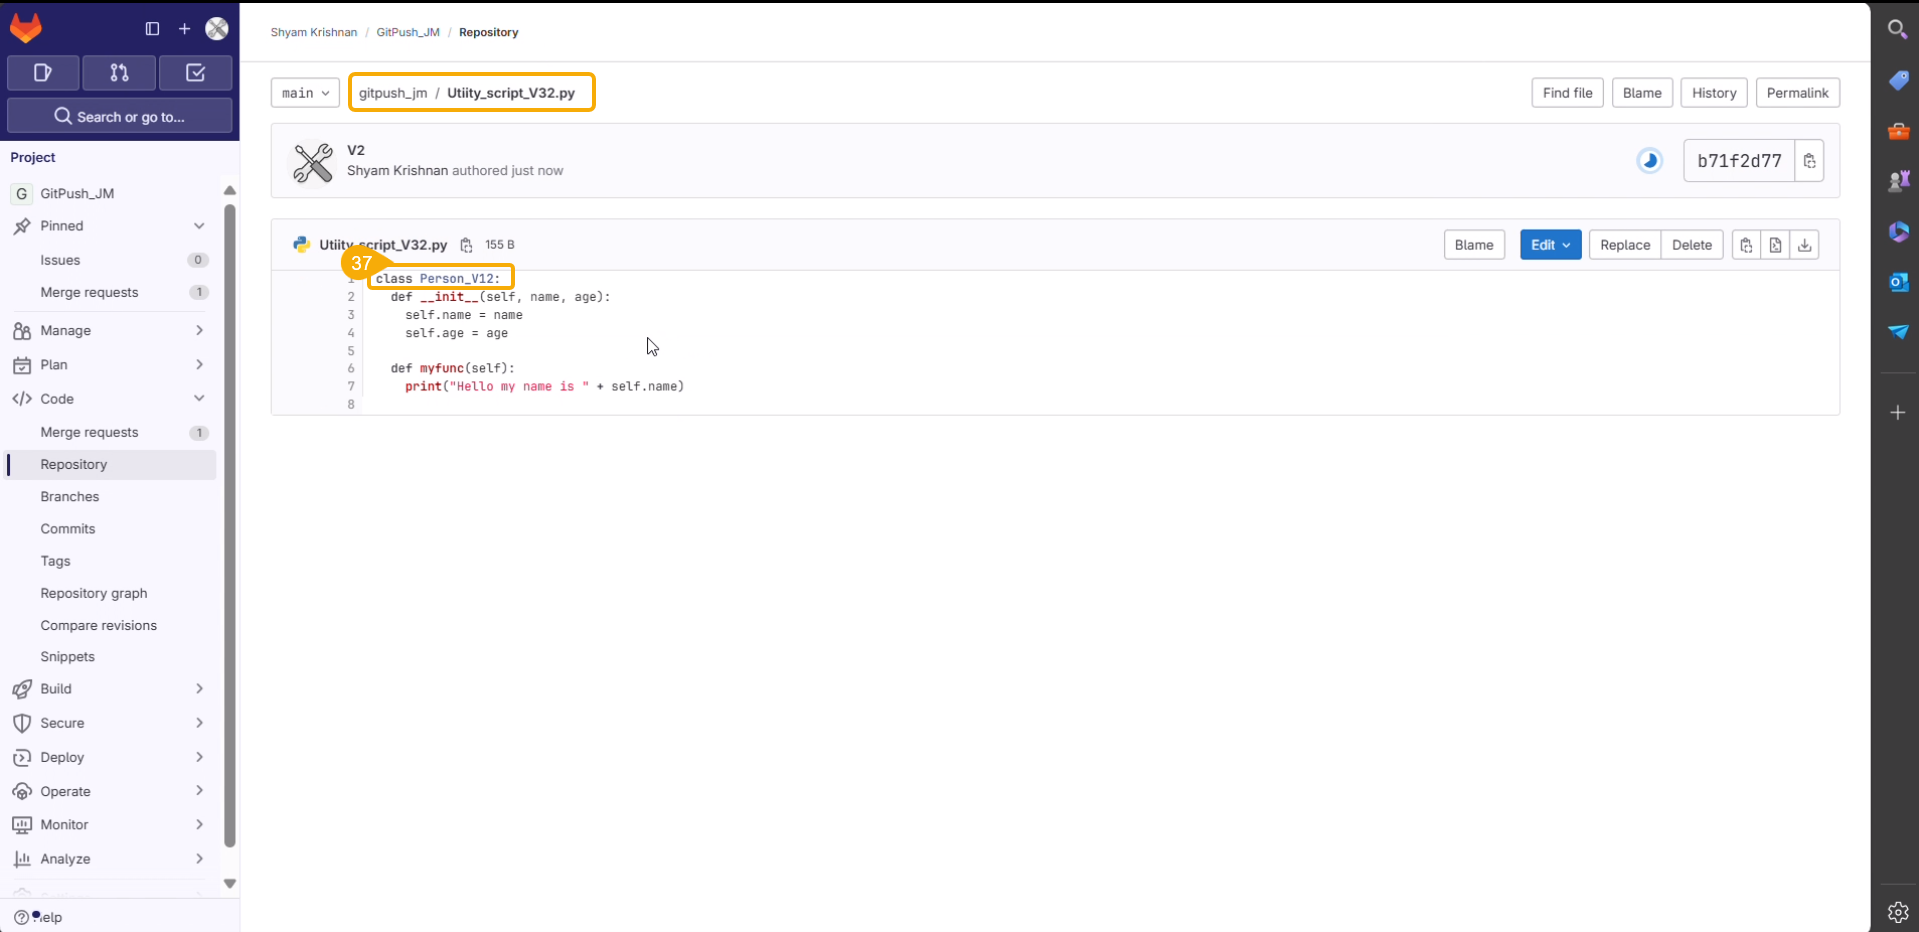
* A notification ensures that the latest file version is pushed.
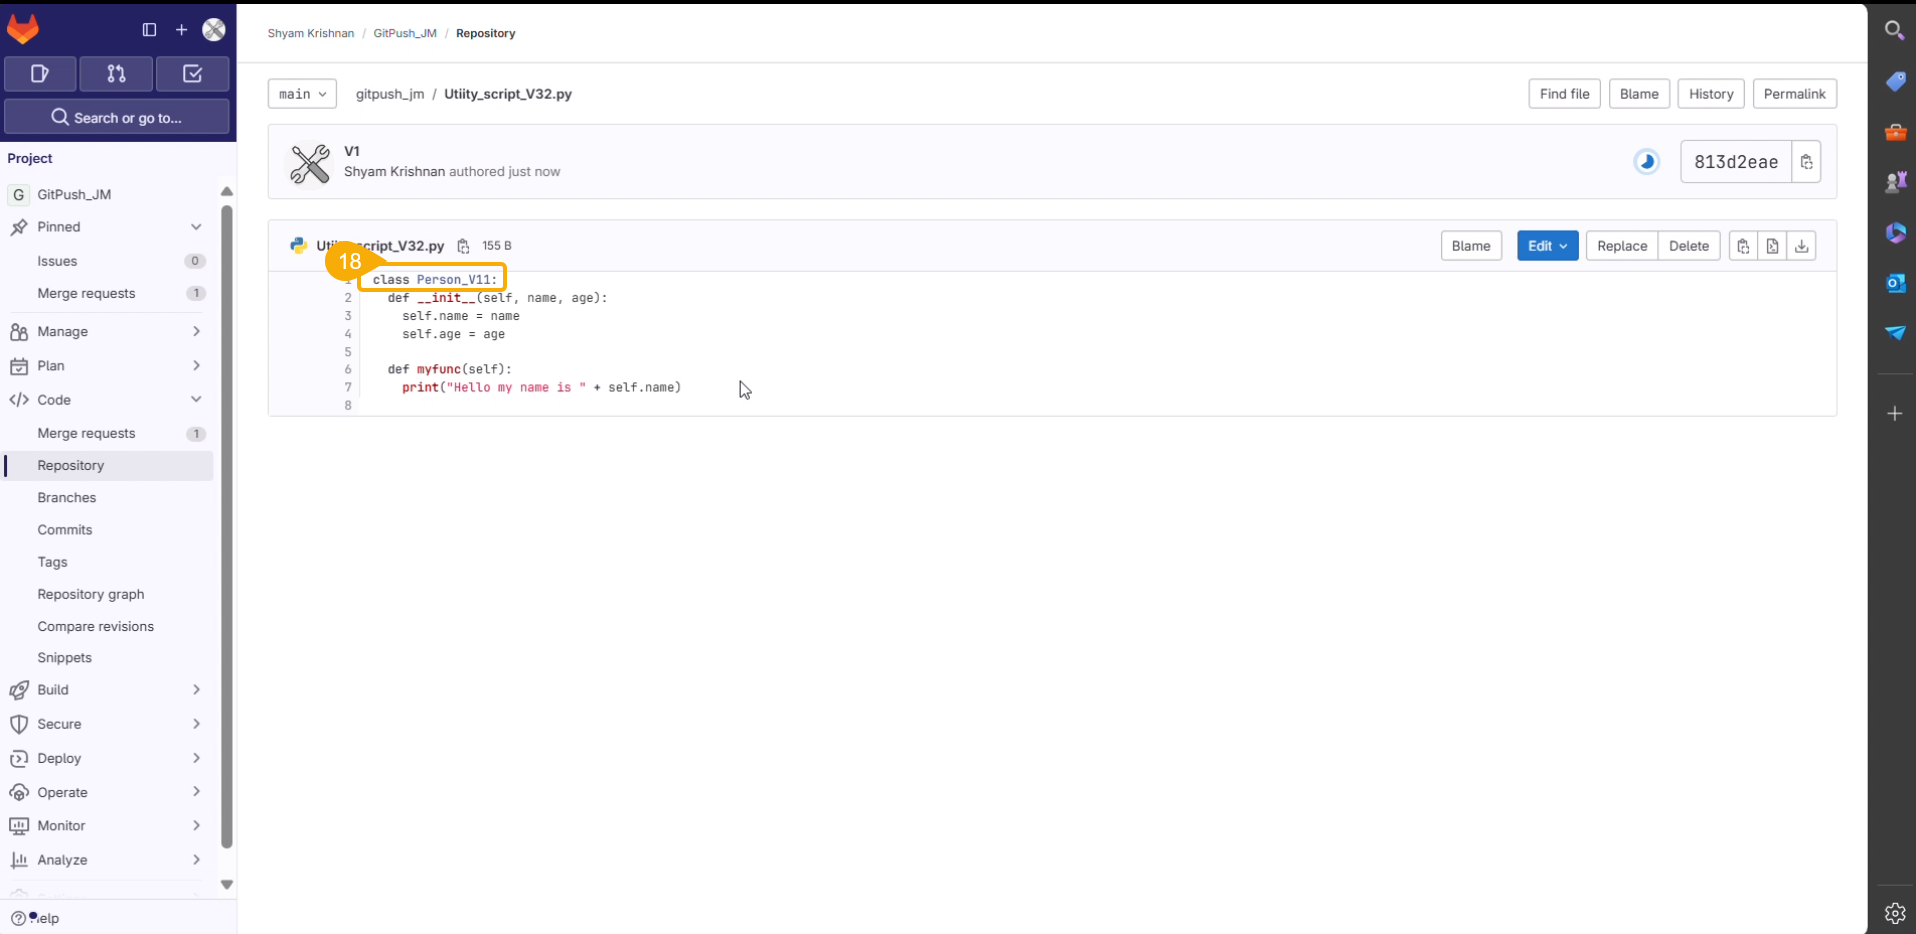
* You can open the Git repository and verify the script version.
* Navigate to the same Utility file.
* Modify the script.
* Save the script.
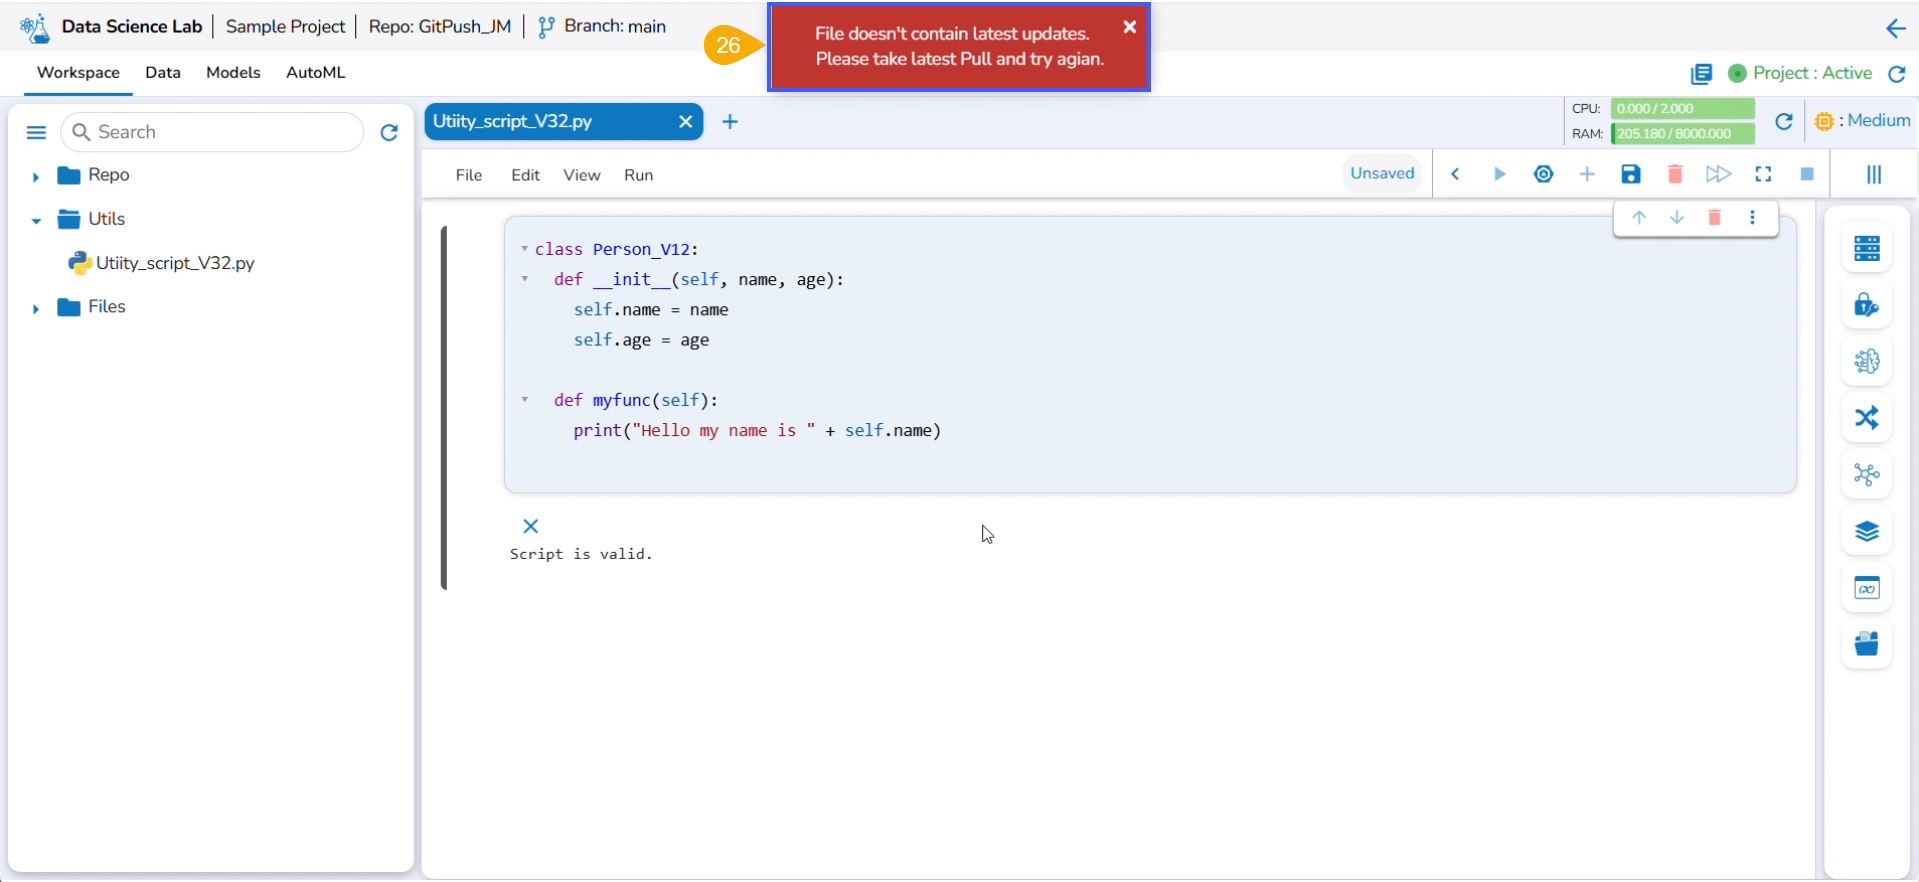
* Select the ***Push into VCS*** option from the Utility action context menu.
* The ***Push into Git*** drawer opens.
* Provide a commit message.
* Click the ***Push*** option.
* An error message states that the current file doesn't contain the latest version, and suggests taking the latest pull.
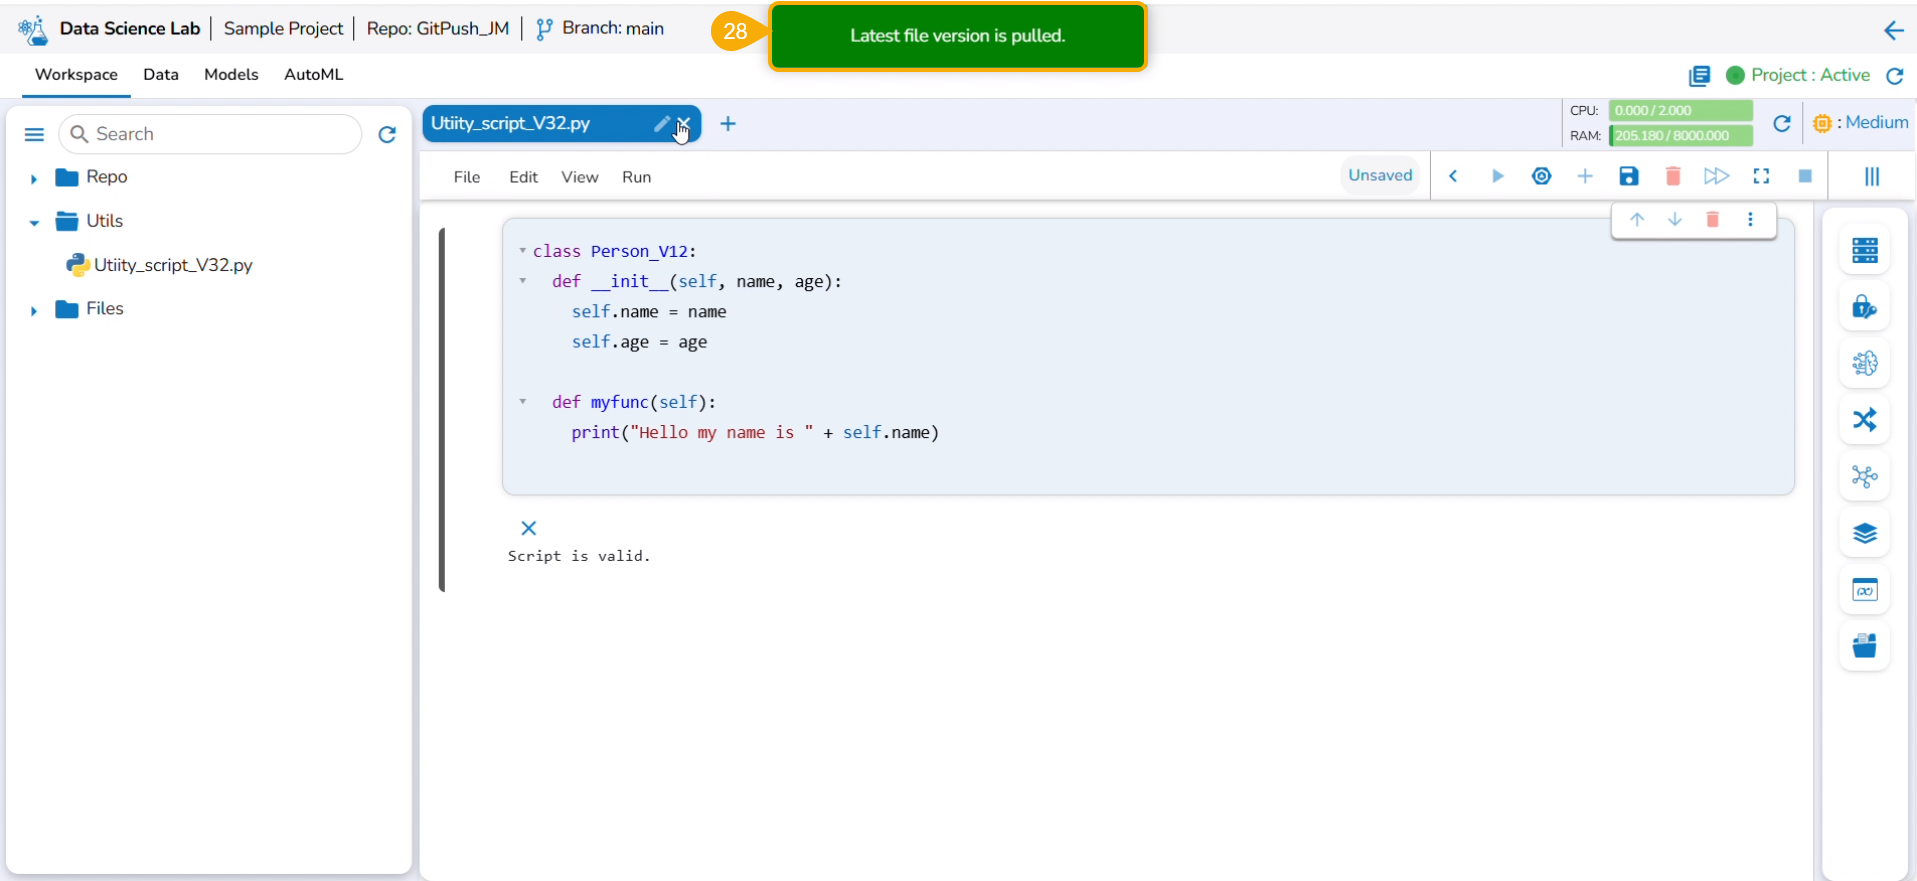
* Click the ***Pull from VCS*** option for the same utility file.
* A notification ensures that the latest file is pulled.
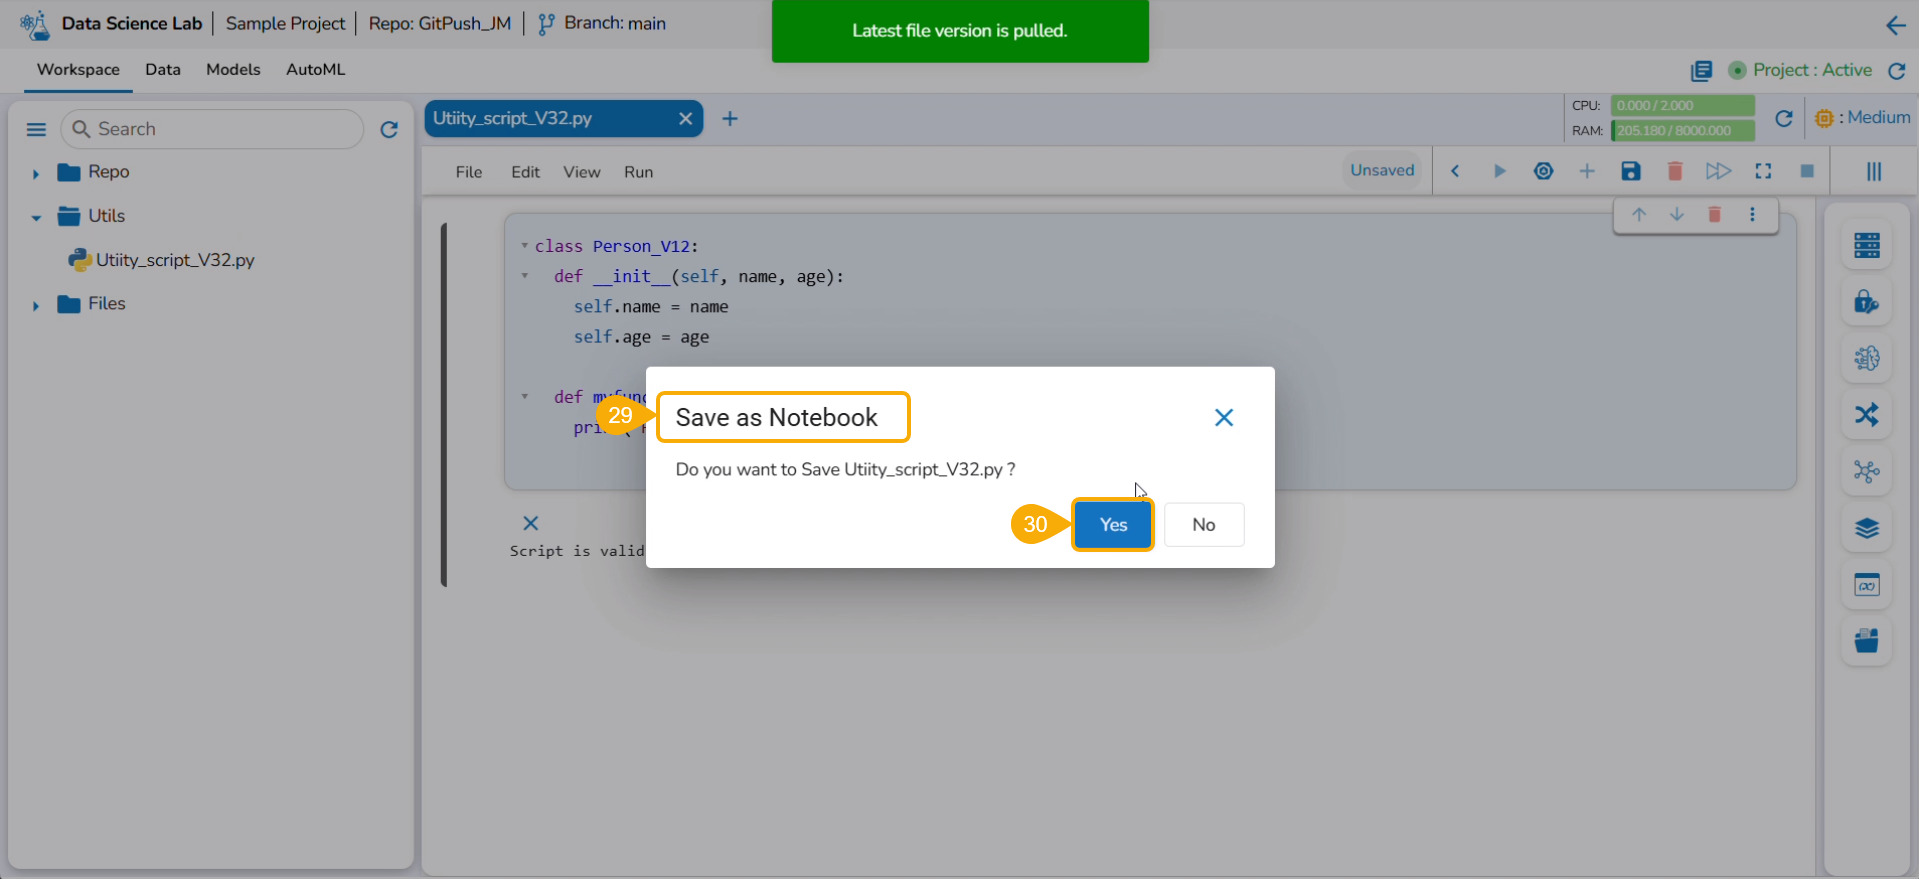
* Use the ***Save as Notebook*** option to save it.
* Click the ***Yes*** option.
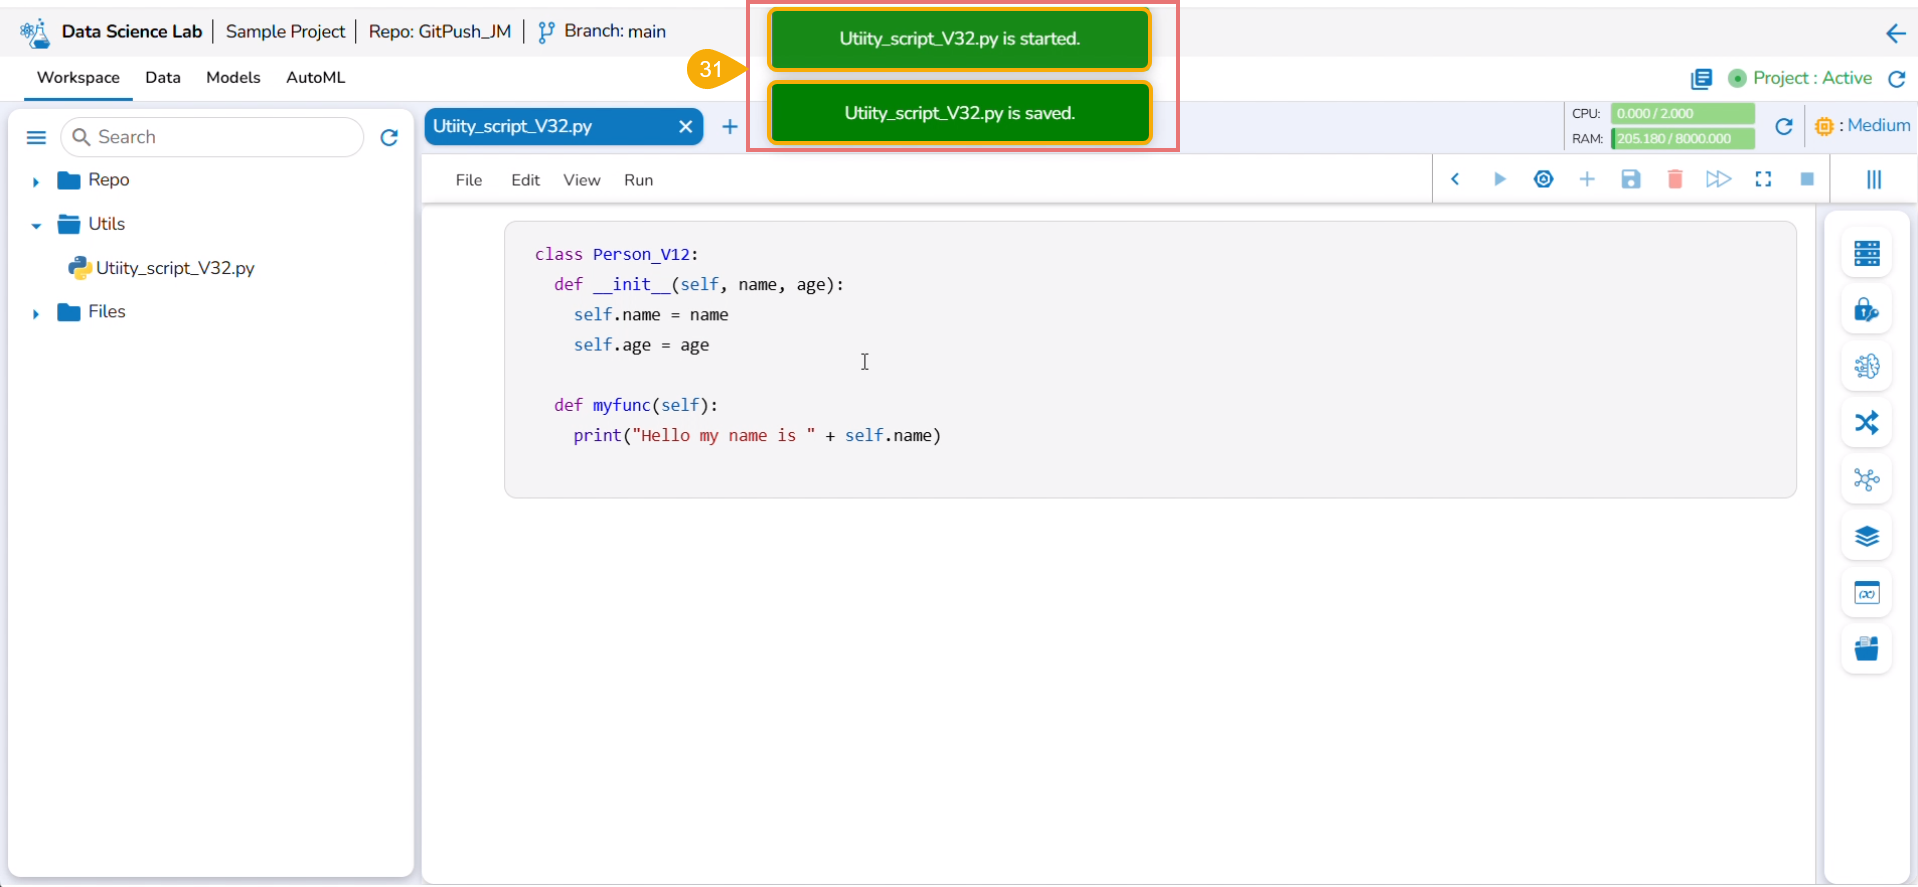
* Consecutive success notifications appear to ensure that the file is started and saved.
* Click the ***Push into VCS*** option for the same utility file.
* The ***Push into Git*** drawer opens.
* Provide the commit message.
* Click the ***Push*** option.
* A notification ensures that the latest file version is pushed.
* The same can be verified in the Git repository.
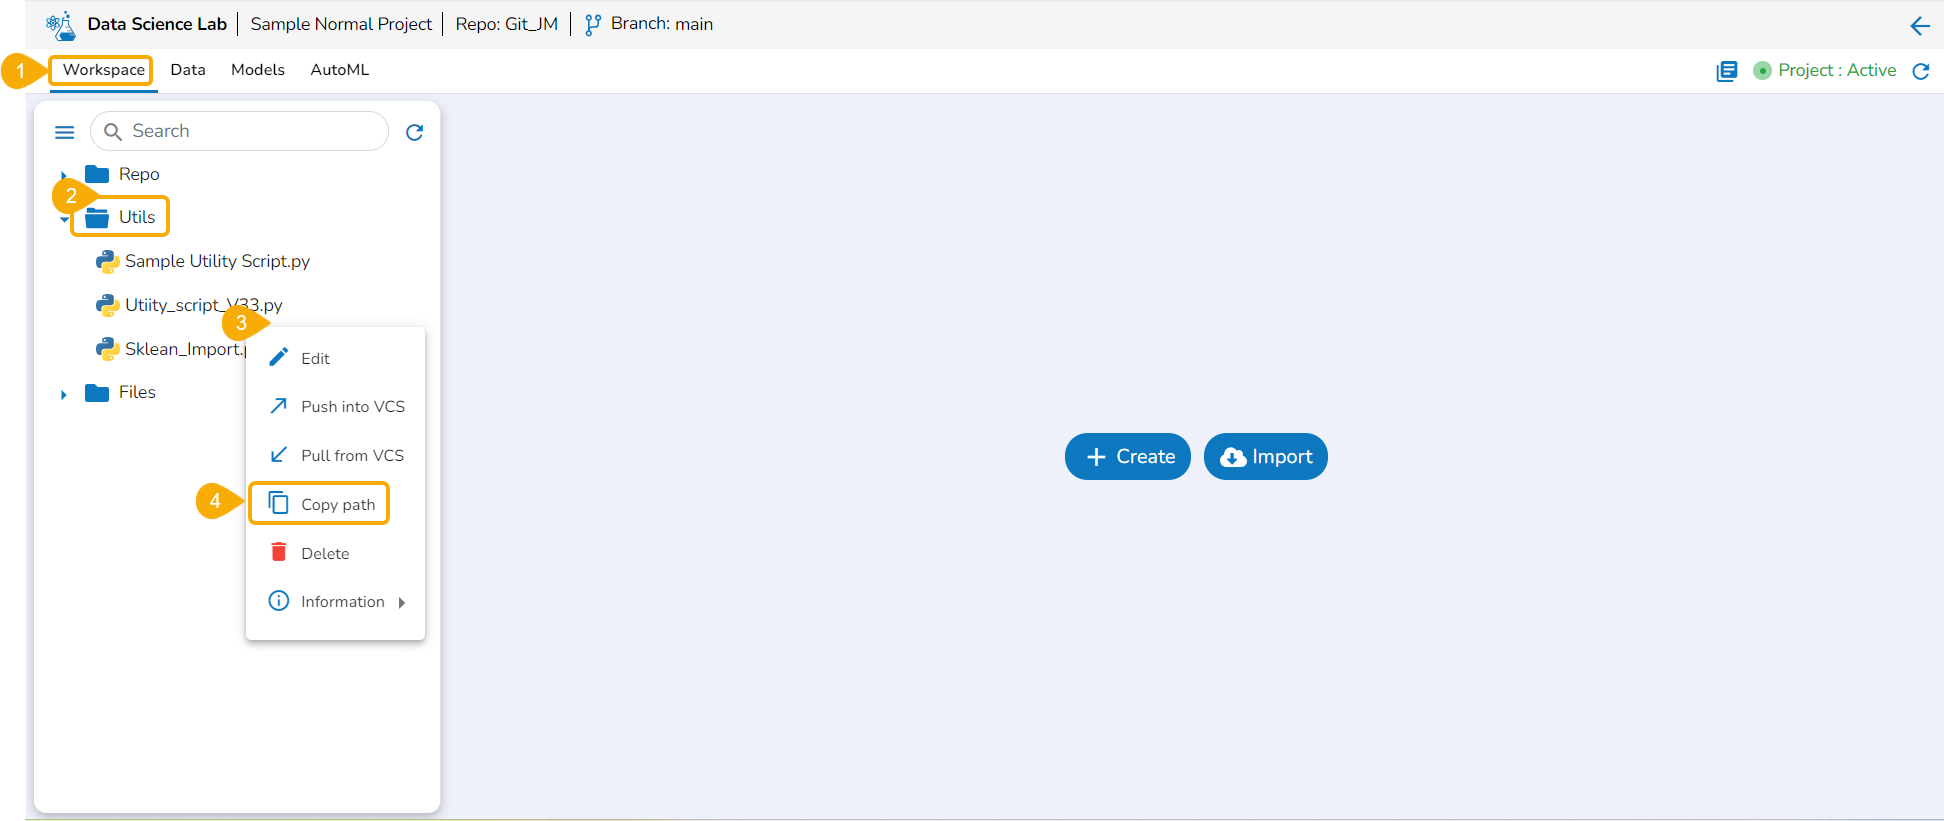
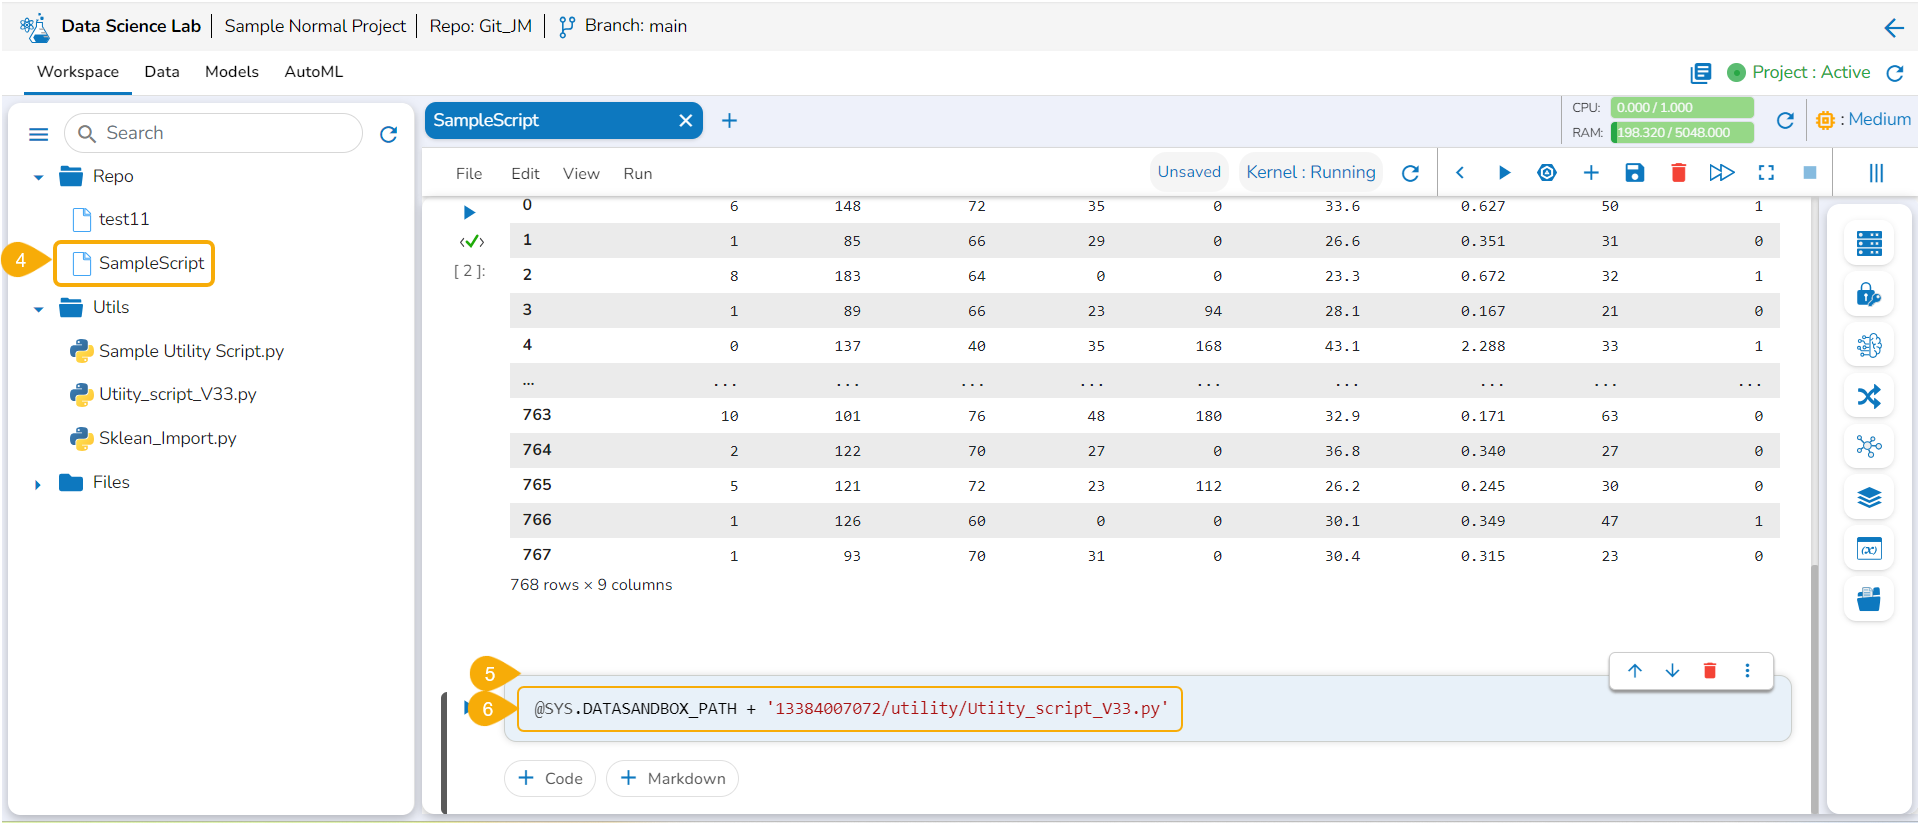
## Copy Path
The user can copy the utility file path by using this action option.
* Navigate to the ***Workspace*** tab for a normal ***Data Science Project***.
* Open the ***Utils*** folder to get the list of utility files.
* Access the Utility Actions context menu.
* Click the ***Copy path*** option from the Utility Actions context menu.
* Open a .ipynb file using the Repo folder.
* Add a new code cell.
* Use the ***Ctrl+V*** action to paste the copied path of the utility file in the code cell.
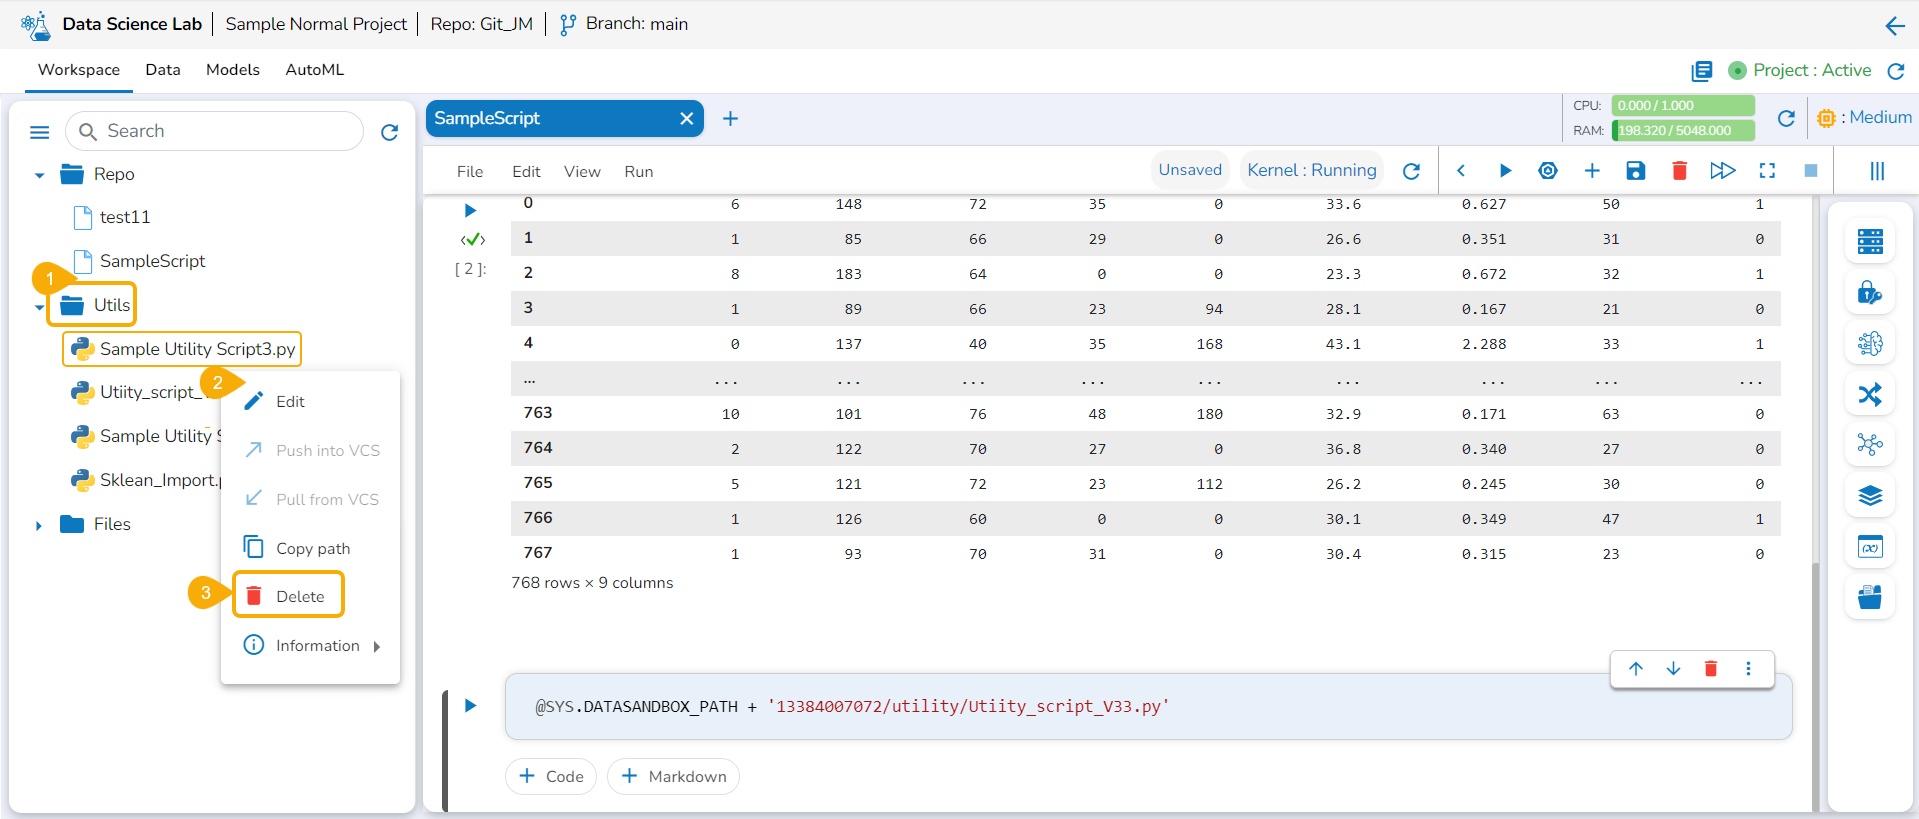
## Delete
* Navigate to the Utils folder for a normal DSL project.
* Select a utility file and open the ***Actions*** context menu for the selected file.
* Click the ***Delete*** option from the action context menu.
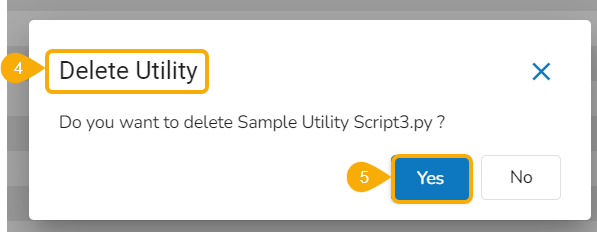
* The ***Delete Utility*** dialog box appears to confirm the action.
* Click the ***Yes*** option.
* A notification appears to ensure that the selected Utility script is deleted. The utility script gets removed from the list.
## Information
The information action option displays details for the Utility file whether it is imported from the Git of imported from the local system.
* Navigate to the Utils folder for a normal DSL project.
* Select a utility file and open the ***Actions*** context menu for the selected file.
* Click the ***Information*** option from the action context menu.
* Description: The inserted description for the utility file while importing the file gets displayed for the utility files imported from the system.
* Last updated & Description: The last updated date and description are displayed for the utility scripts imported from Git.
Information context menu for an imported Utility file
Information context menu for a Utility file pulled from GIt