# Pull from Git
You can bring your Python script to the Notebook framework to carry forward your Data Science experiment.
The Import functionality contains two ways to import a Notebook.
* [Import Notebook](https://app.gitbook.com/o/BHXEmSpD7W3xDgxnOIpk/s/z33KQNYQvBTgQKJBgwTz/~/changes/20/tabs-for-a-dsl-project/workspace/working-with-the-workspace-tab/import/importing-notebook)
* Pull from Git
{% hint style="info" %}
*Please Note: Only .ipynb files will be supported.*
{% endhint %}
## Pulling from Git
{% hint style="warning" %}
*Pre-requisite:*
* *The user needs to do an **Admin configuration** with an authentication token.*
* *The user must also need to do **Project-level**- configuration of **Git Project** and **Git branch**.*
* The user needs to Pull a version of the file from Git before using the Pull and Push functionality for the projects where the source files are available in Git Repo.
{% endhint %}
{% hint style="info" %}
*Please Note: the user can generate an authentication token from their Git Lab or Git Hub repositories.*
{% endhint %}
### Admin Level Configuration
{% hint style="success" %}
*Check out the given illustration to understand the Admin configuration part with the authentication token under the platform.*
{% endhint %}
{% embed url="" %}
***Pull Pre-requisite***
{% endembed %}
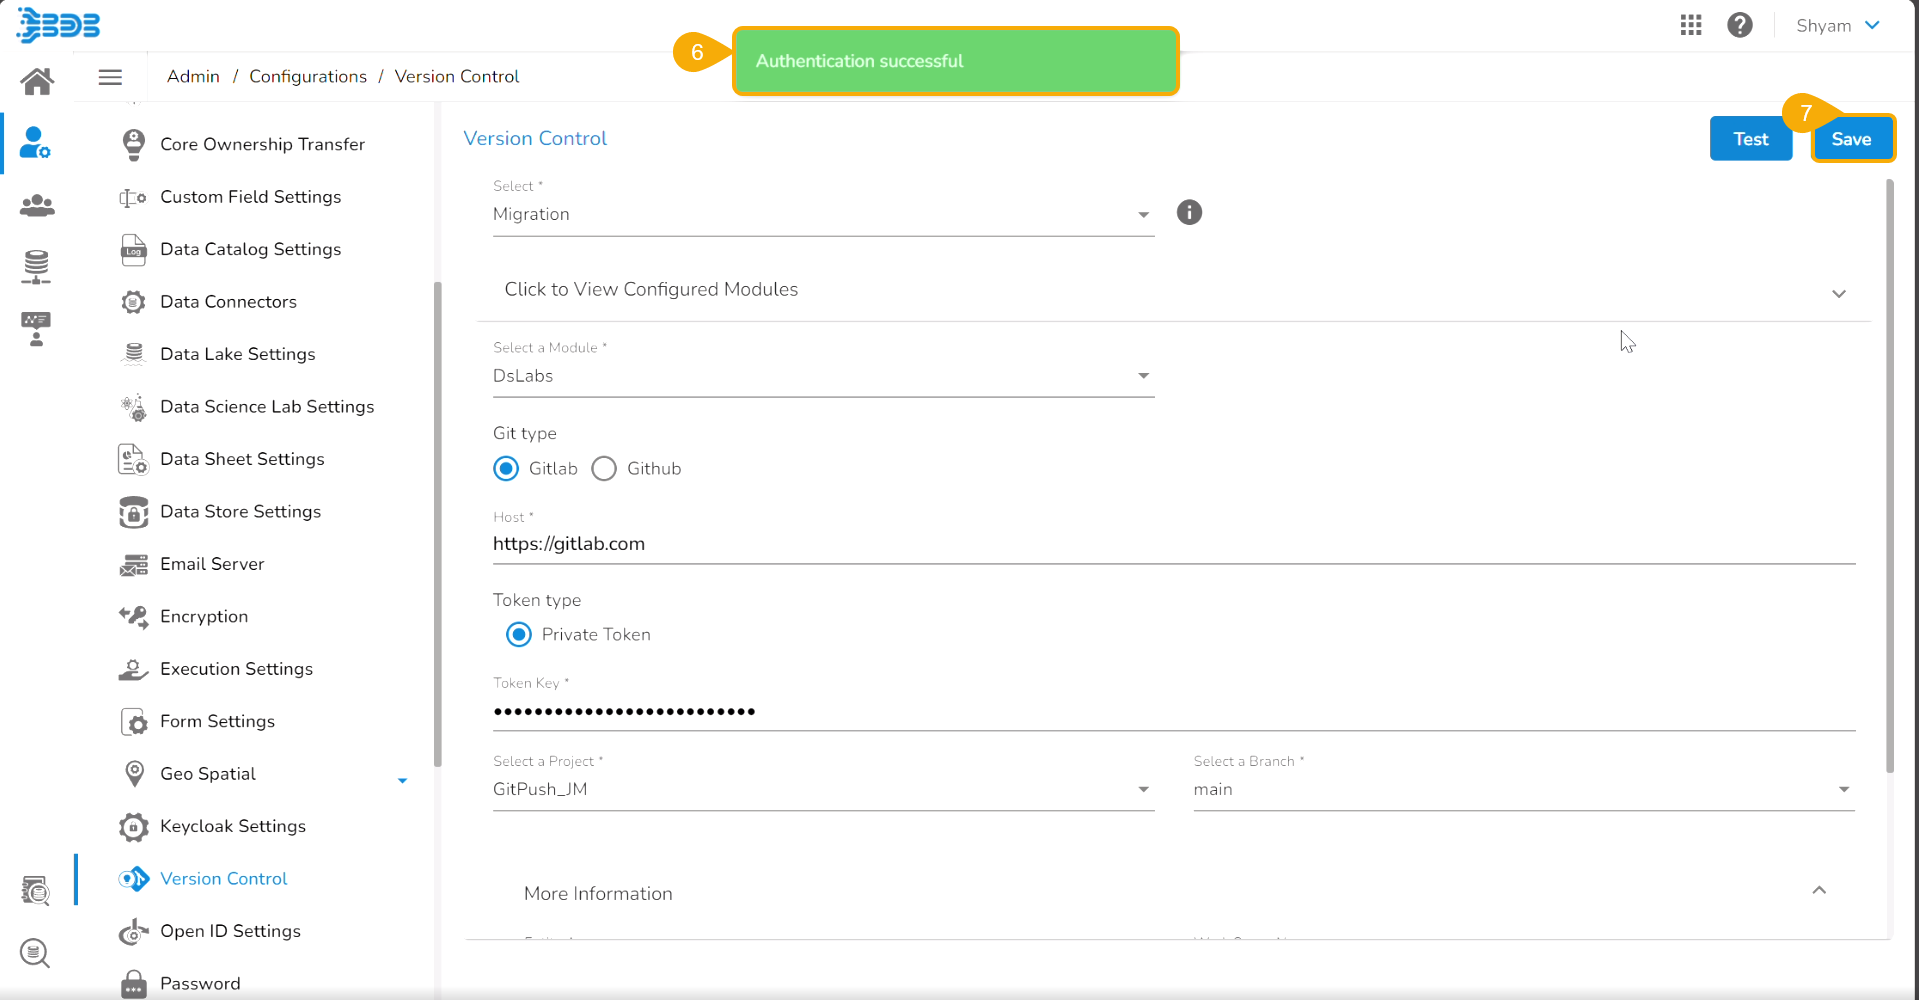
* Navigate to the ***Admin*** module.
* Open the ***Version Control*** from the ***Configuration*** options.
* Select the Token type as a private token.
* Provide the authentication token in the given space.
* Click the ***Test*** option.
* A notification message appears to inform the user that authentication has been established.
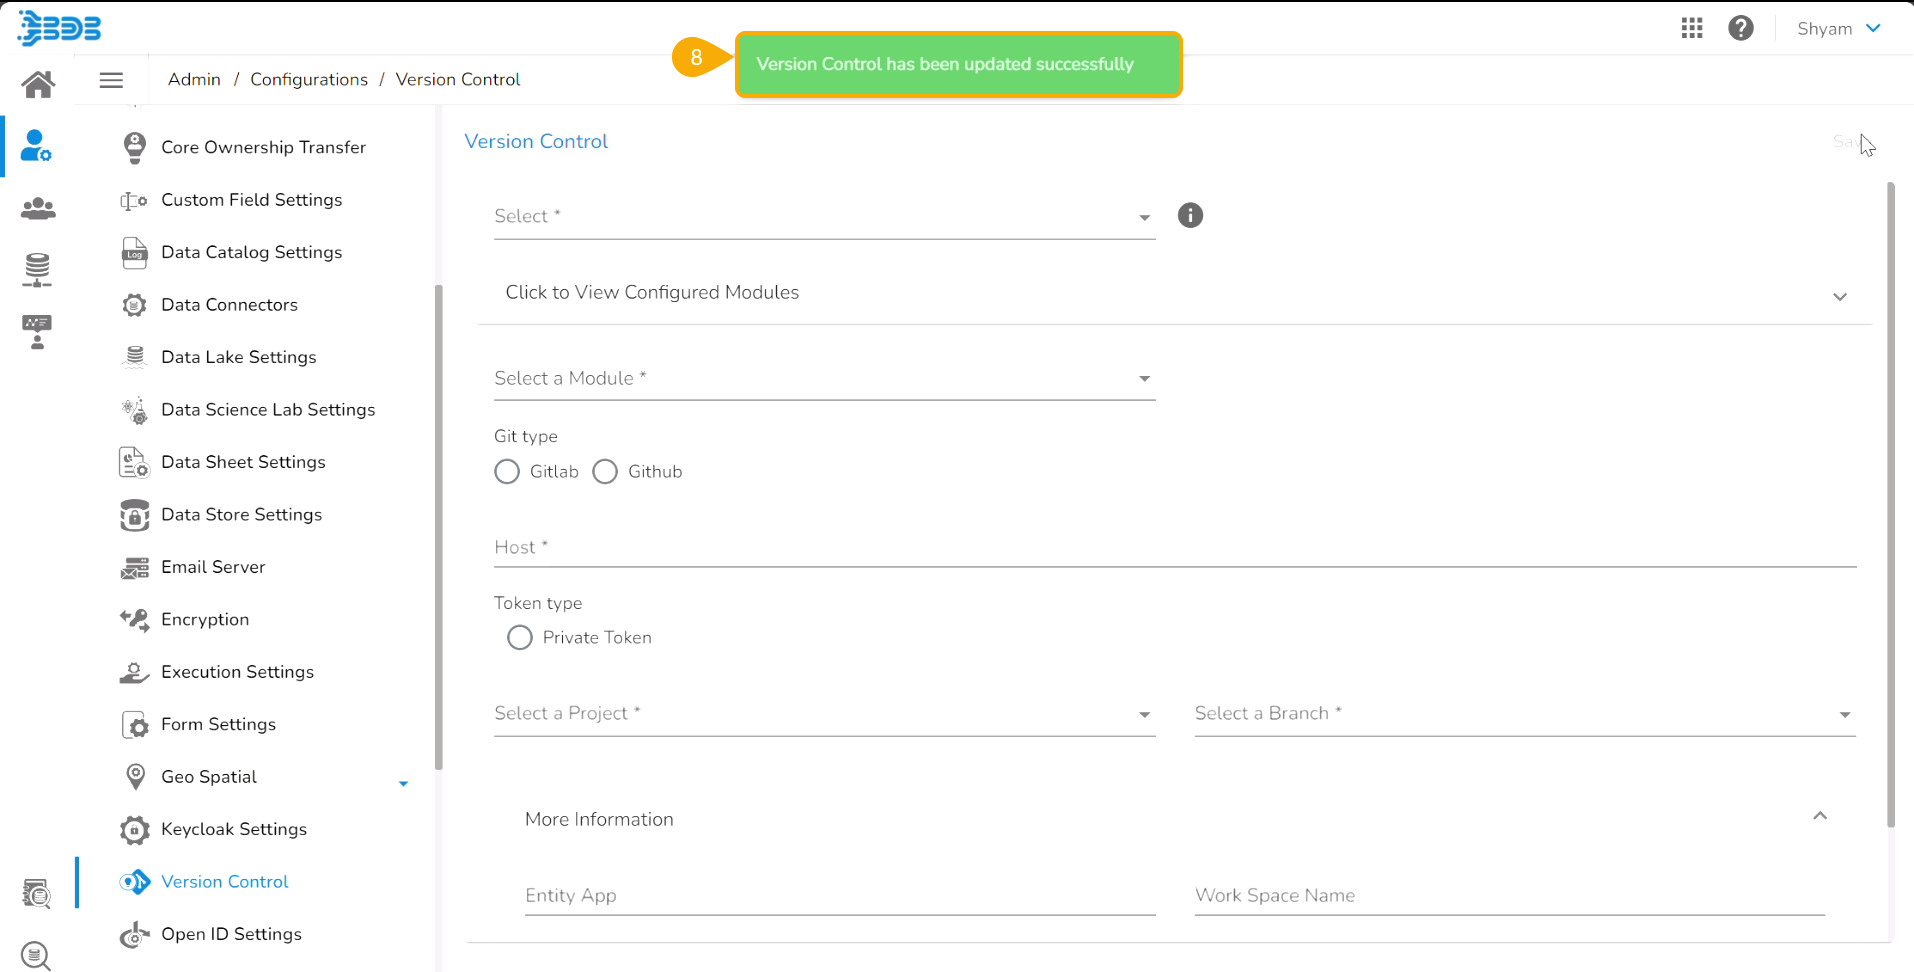
* Click the ***Save*** option.
* A notification message appears to inform that the version control has been updated.
### Pulling a file from Git
Projects and Branches created in GitLab/GitHub can be accessed using the access token inside the DS Lab and the files (.ipynb) can be pulled using the ***Pull from Git*** functionality.
{% hint style="success" %}
*Check out the given illustration to understand the **Pull from Git** functionality.*
{% endhint %}
{% embed url="" %}
***Pull from Git***
{% endembed %}
Once the initial pull (import) has happened, the user can pull the latest version of the Python file from Git using the Pull from VCS functionality available in the Notebook List.
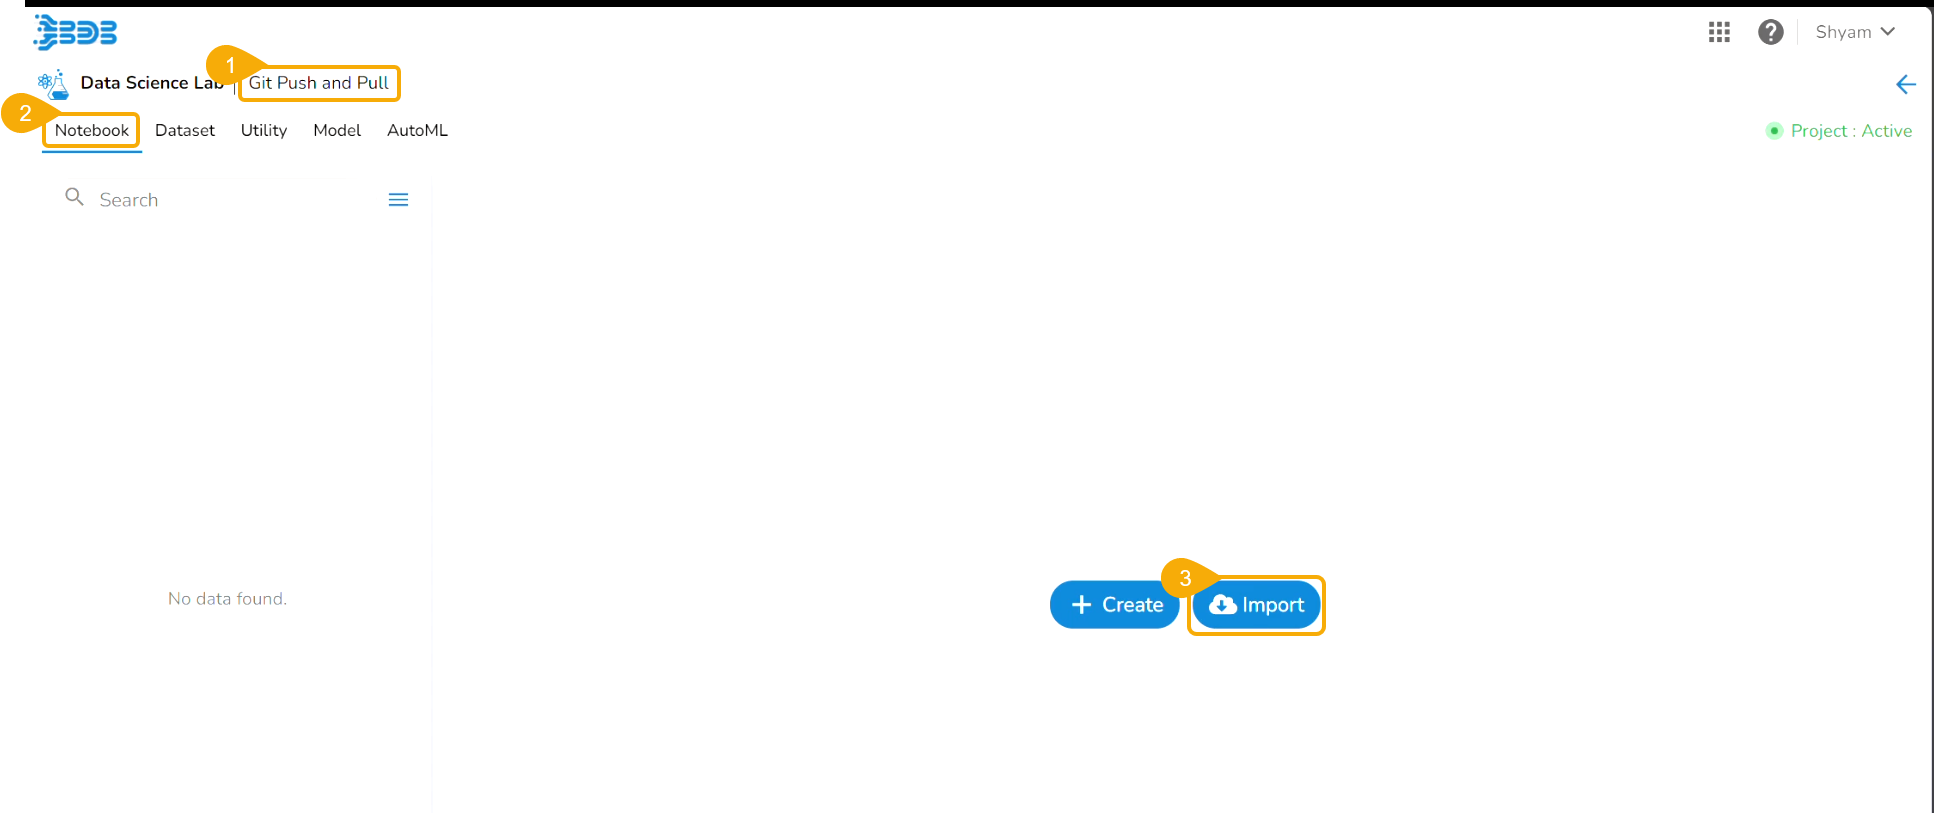
* Navigate to an activated Project.
* Open the ***Notebook*** tab (It opens by default).
* Click the ***Import*** option.
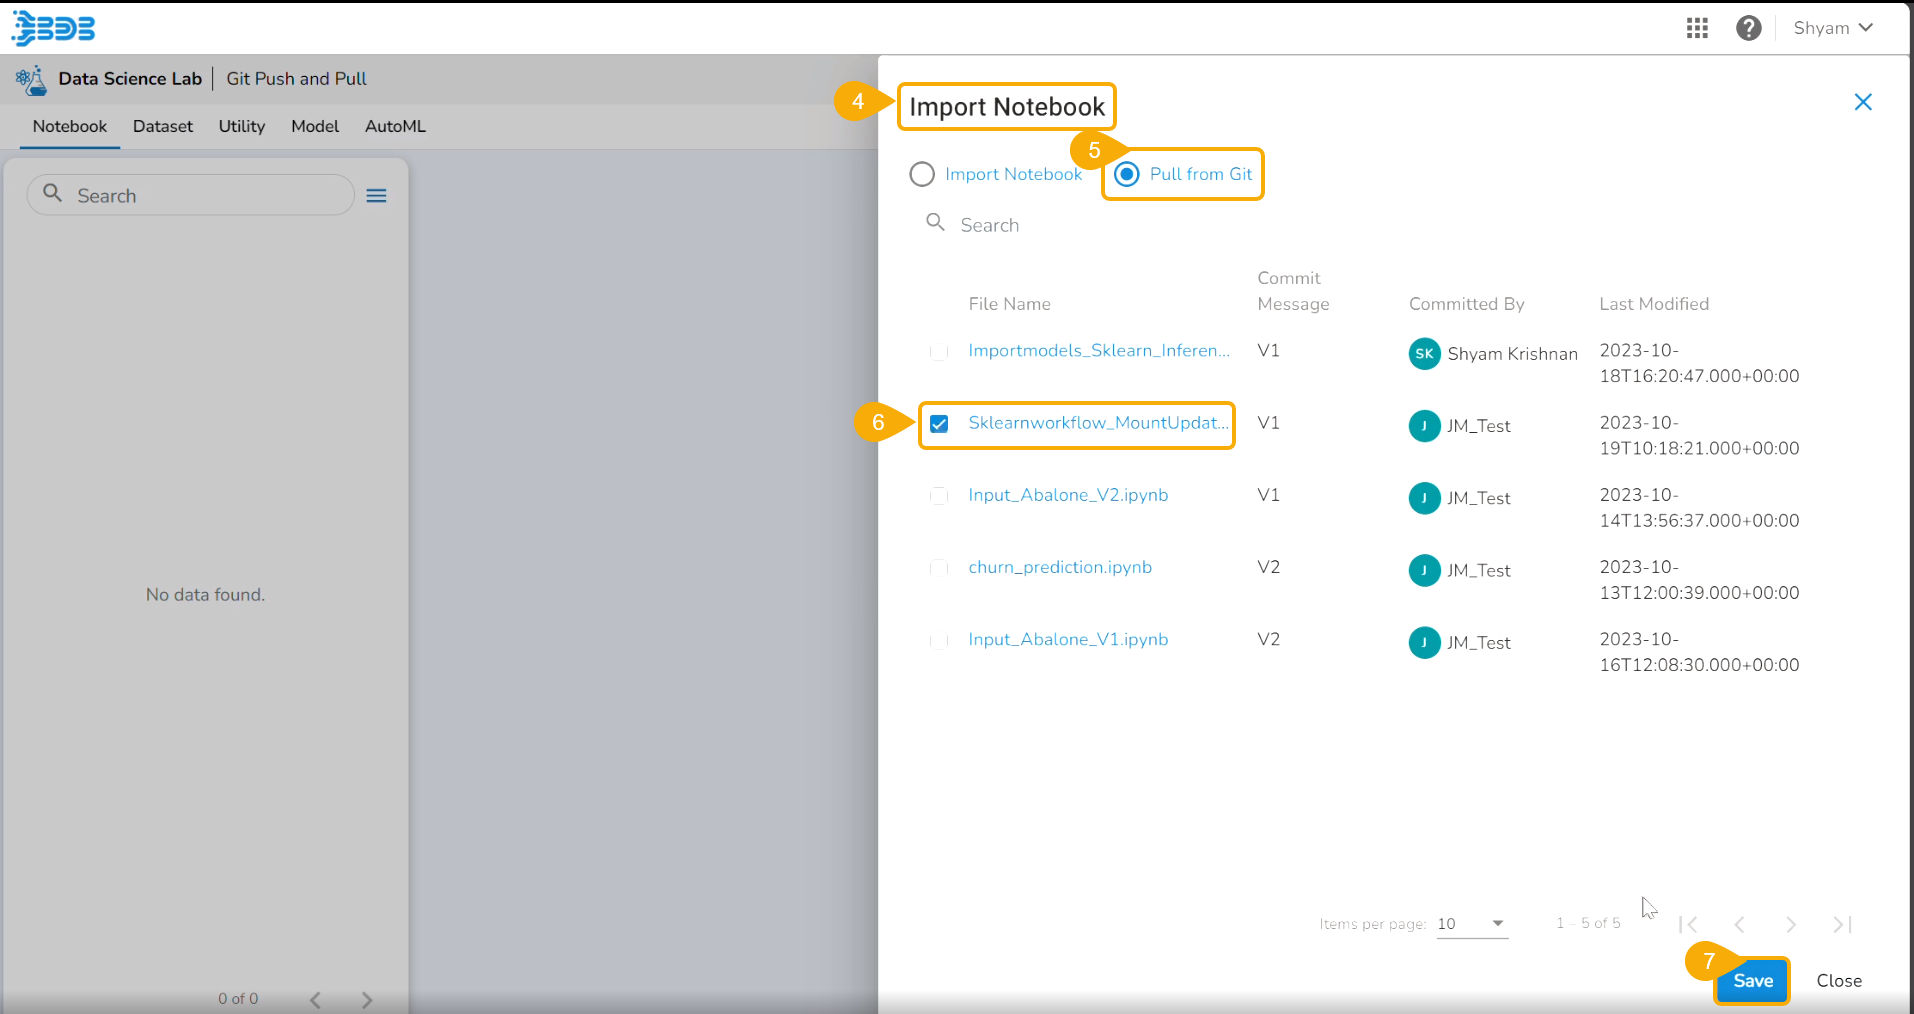
* The Import Notebook page opens.
* Select the ***Pull from Git*** option.
* All the available versions appear.
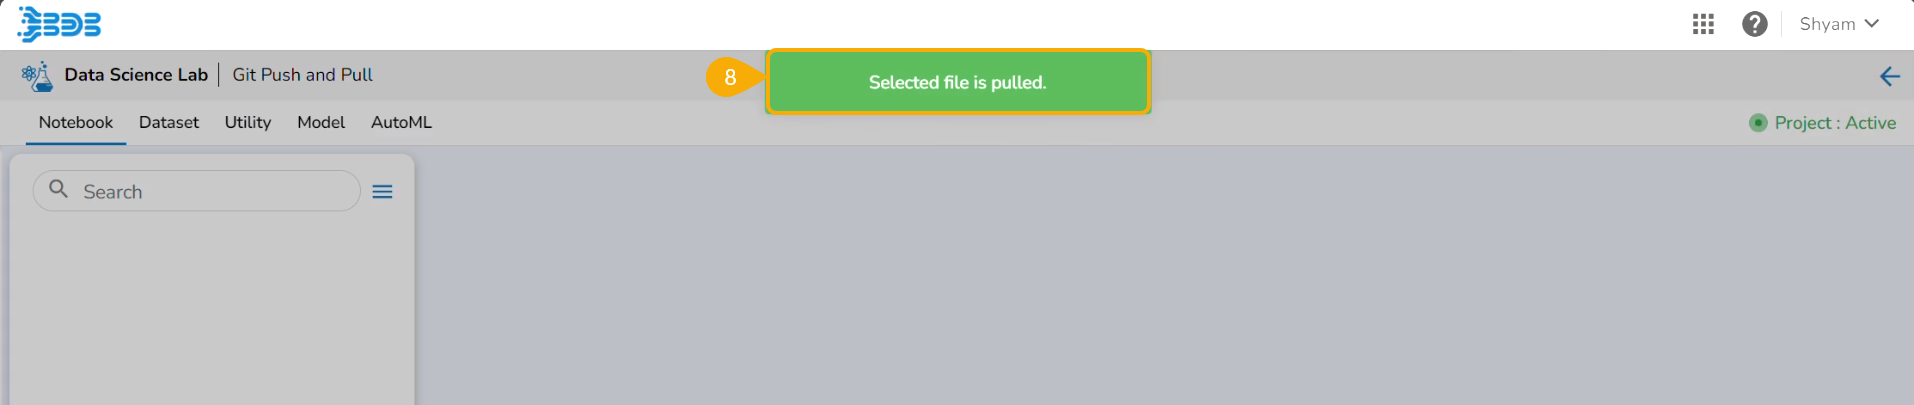
* Click the ***Save*** option.
* A notification message appears to ensure that the selected file is pulled.
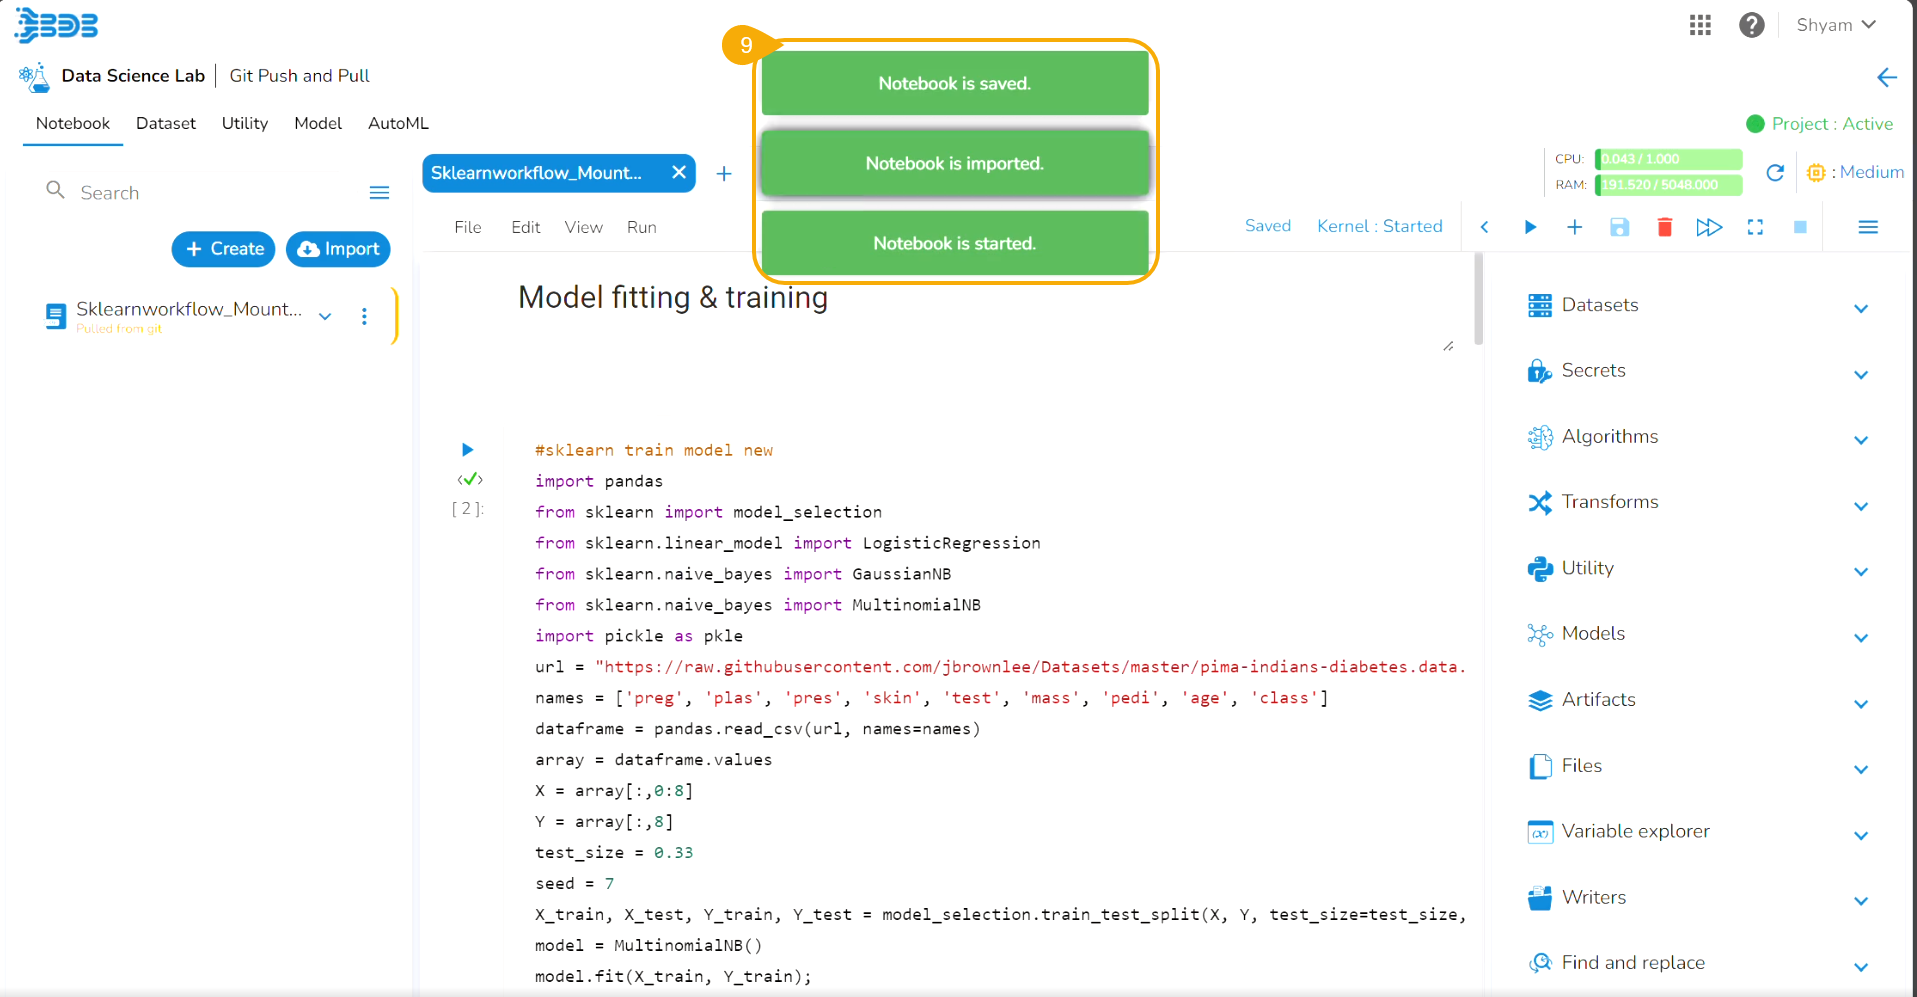
* Consecutive notifications ensure that the Notebook is started, imported, and saved.
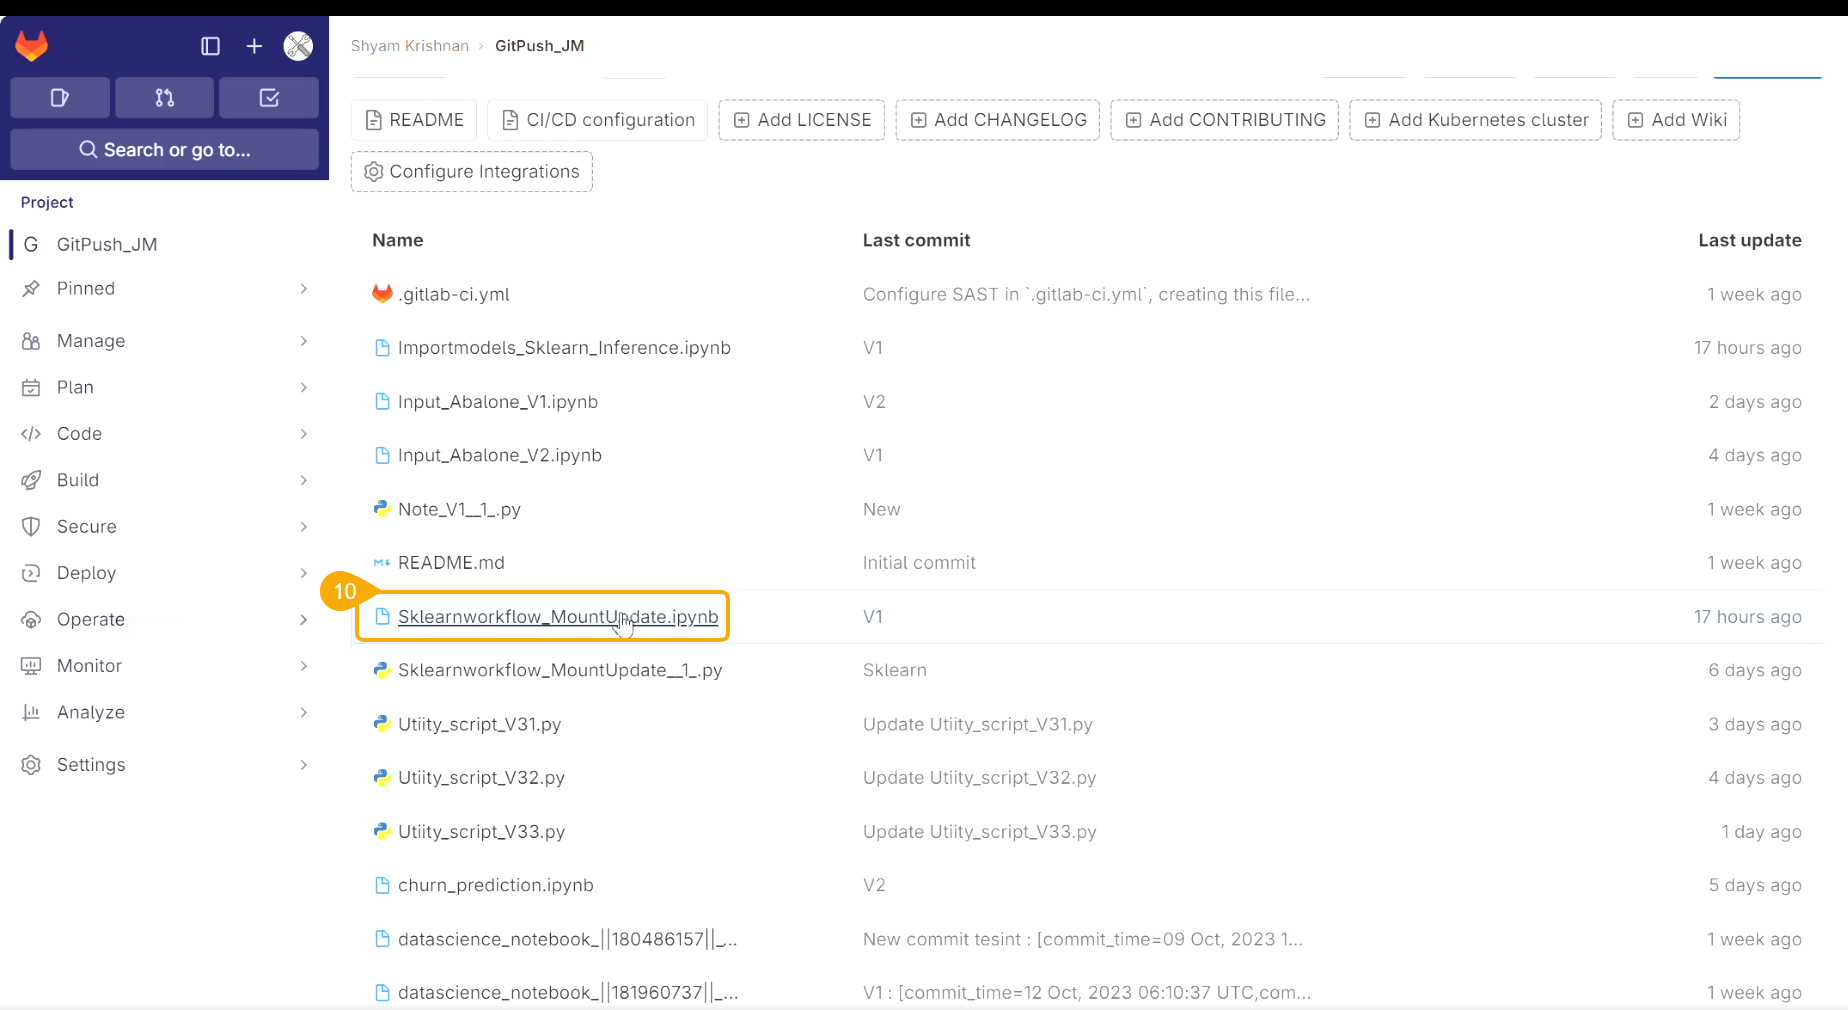
* Access the Notebook script from the Git repository.
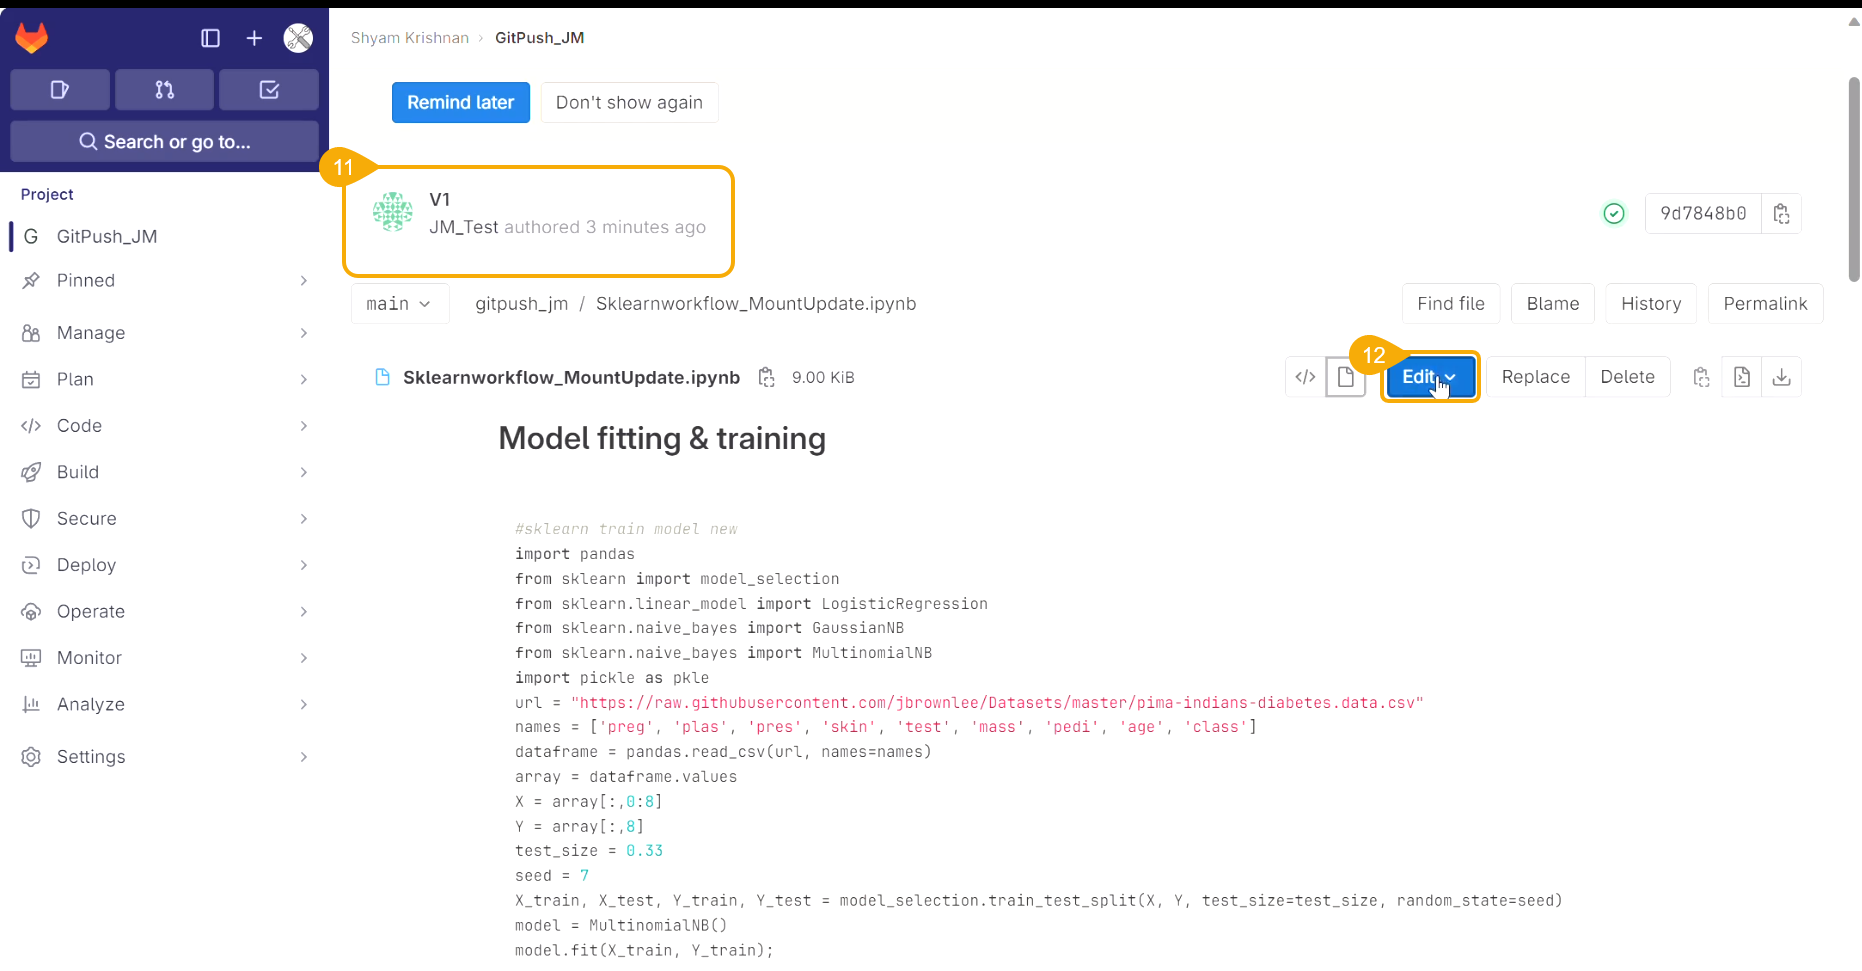
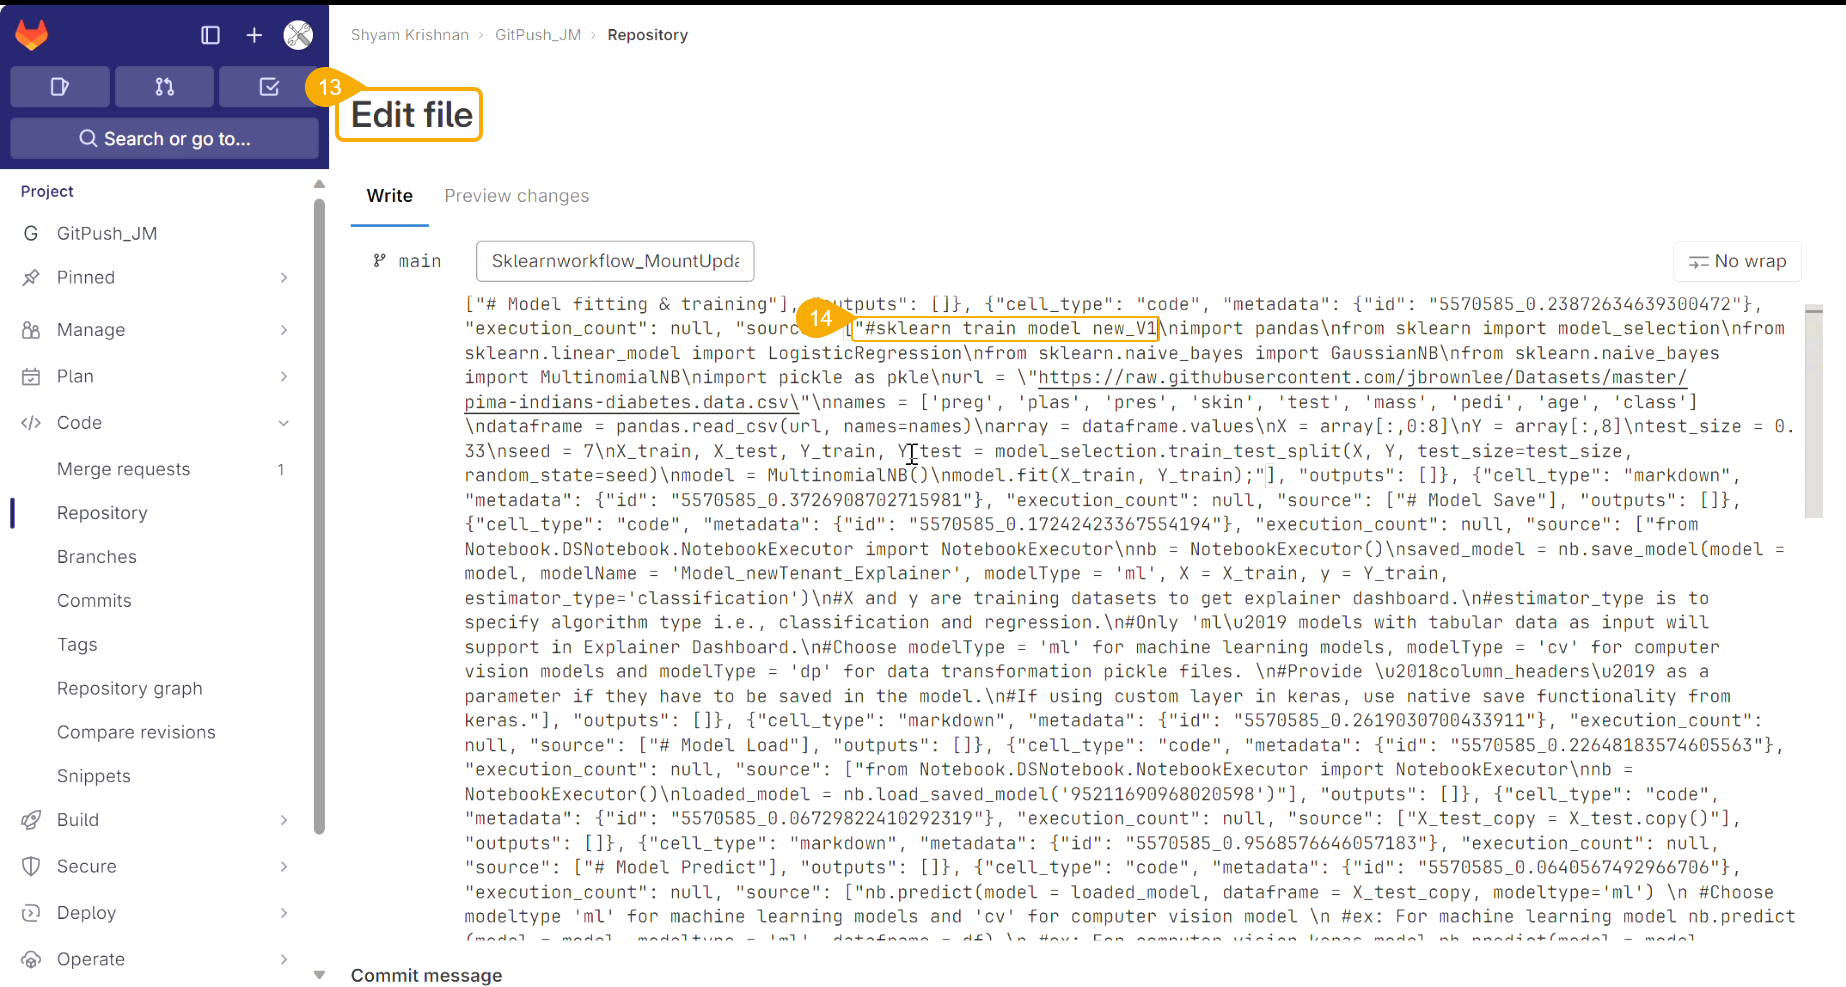
* Open the same script from Git.
* Click the ***Edit*** option.
* The script opens in Edit file mode.
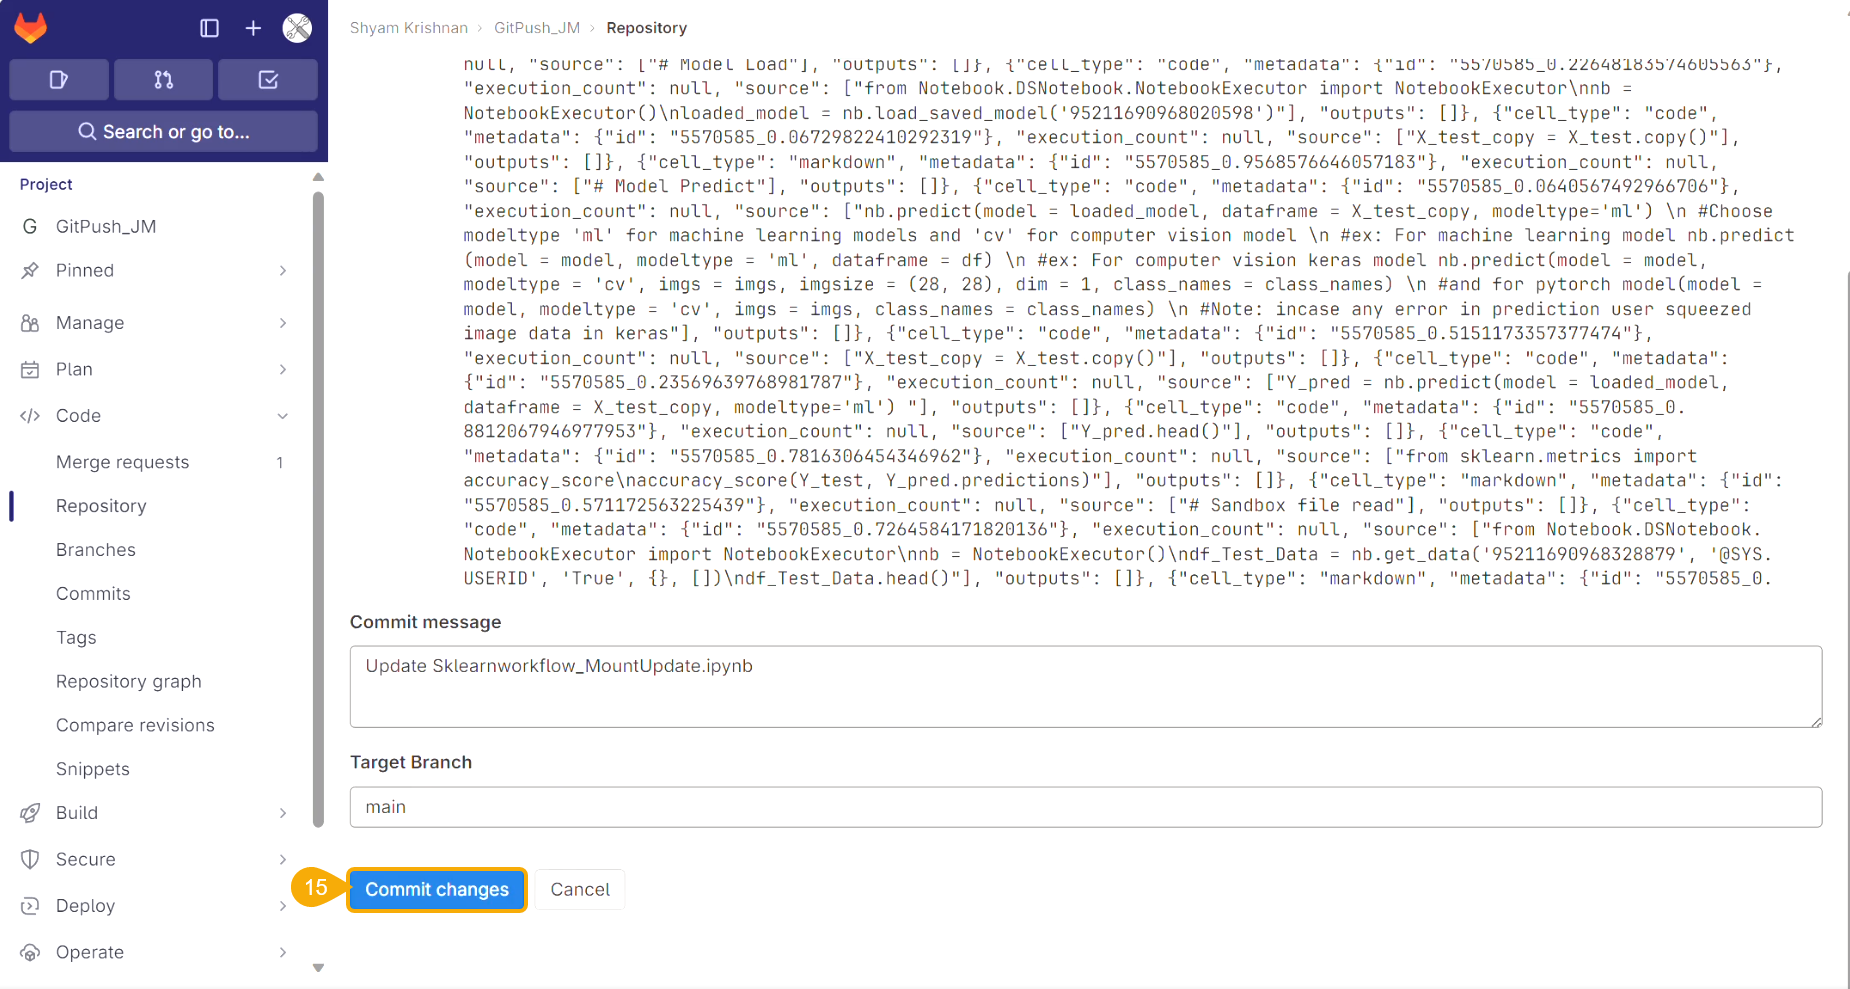
* Modify the script.
* Click the ***Commit changes*** option.
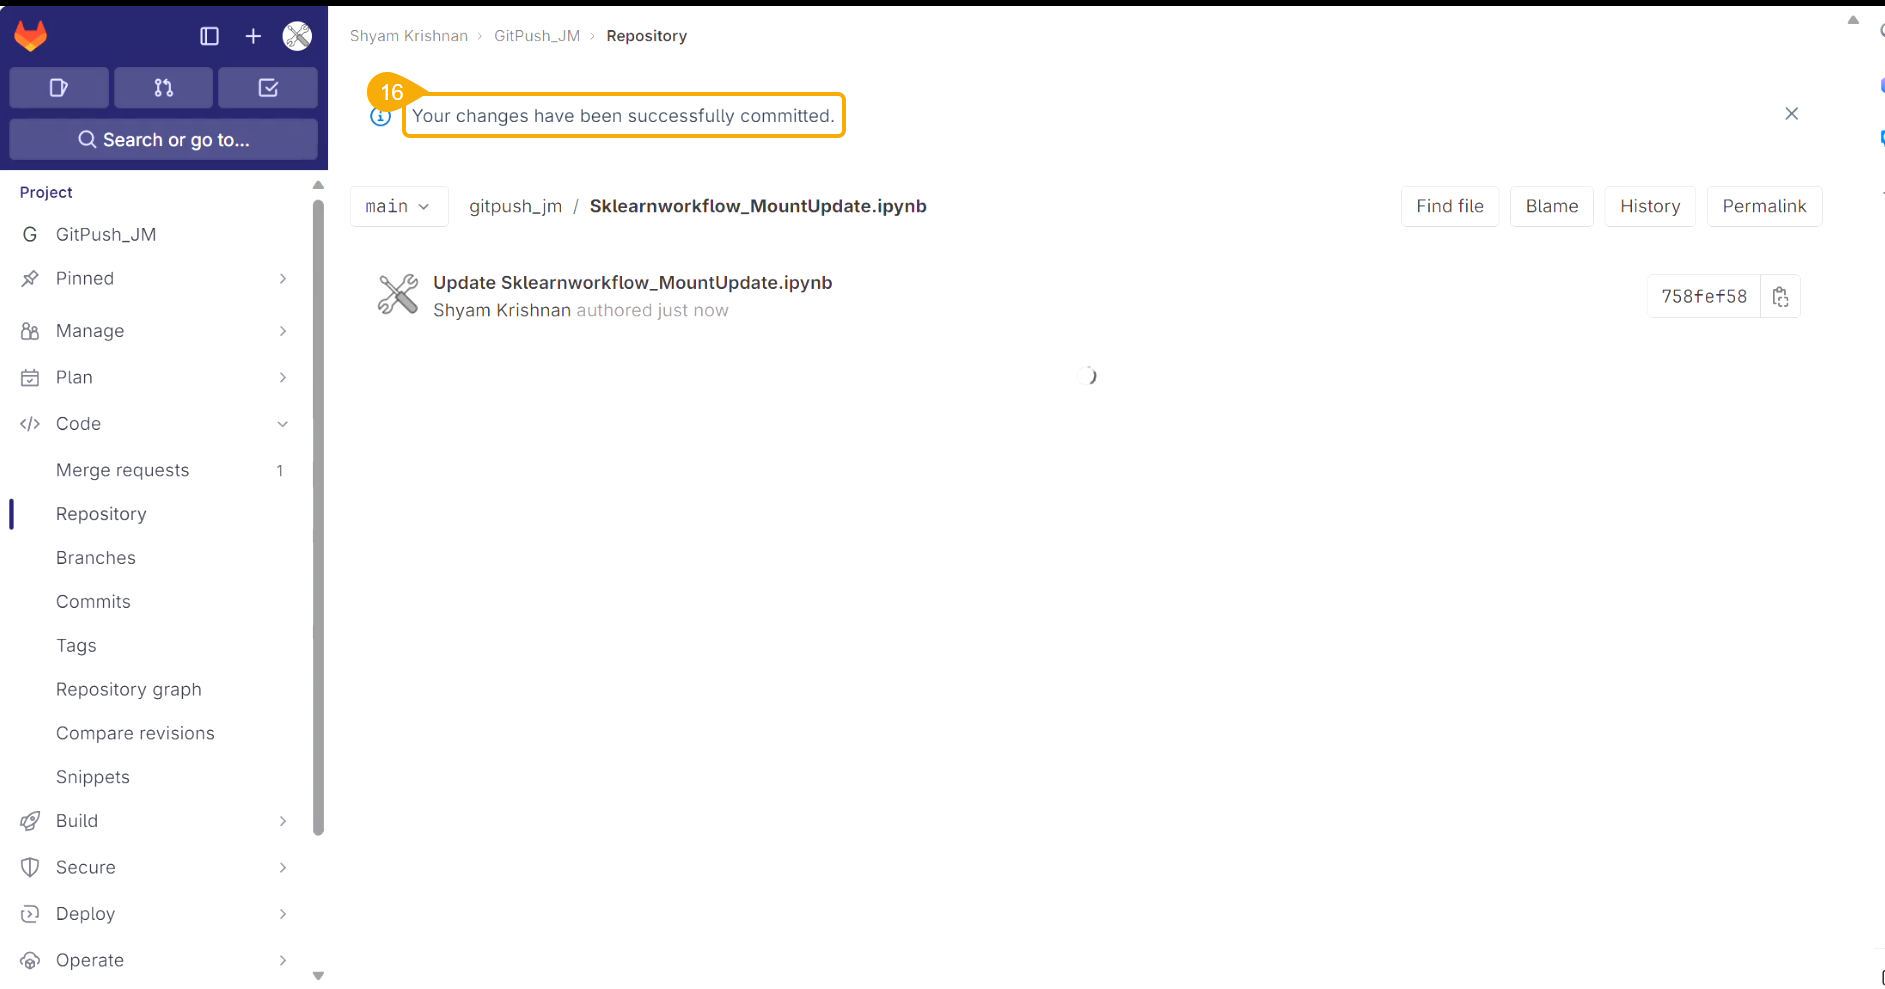
* A notification message appears to ensure that the changes are successfully committed.
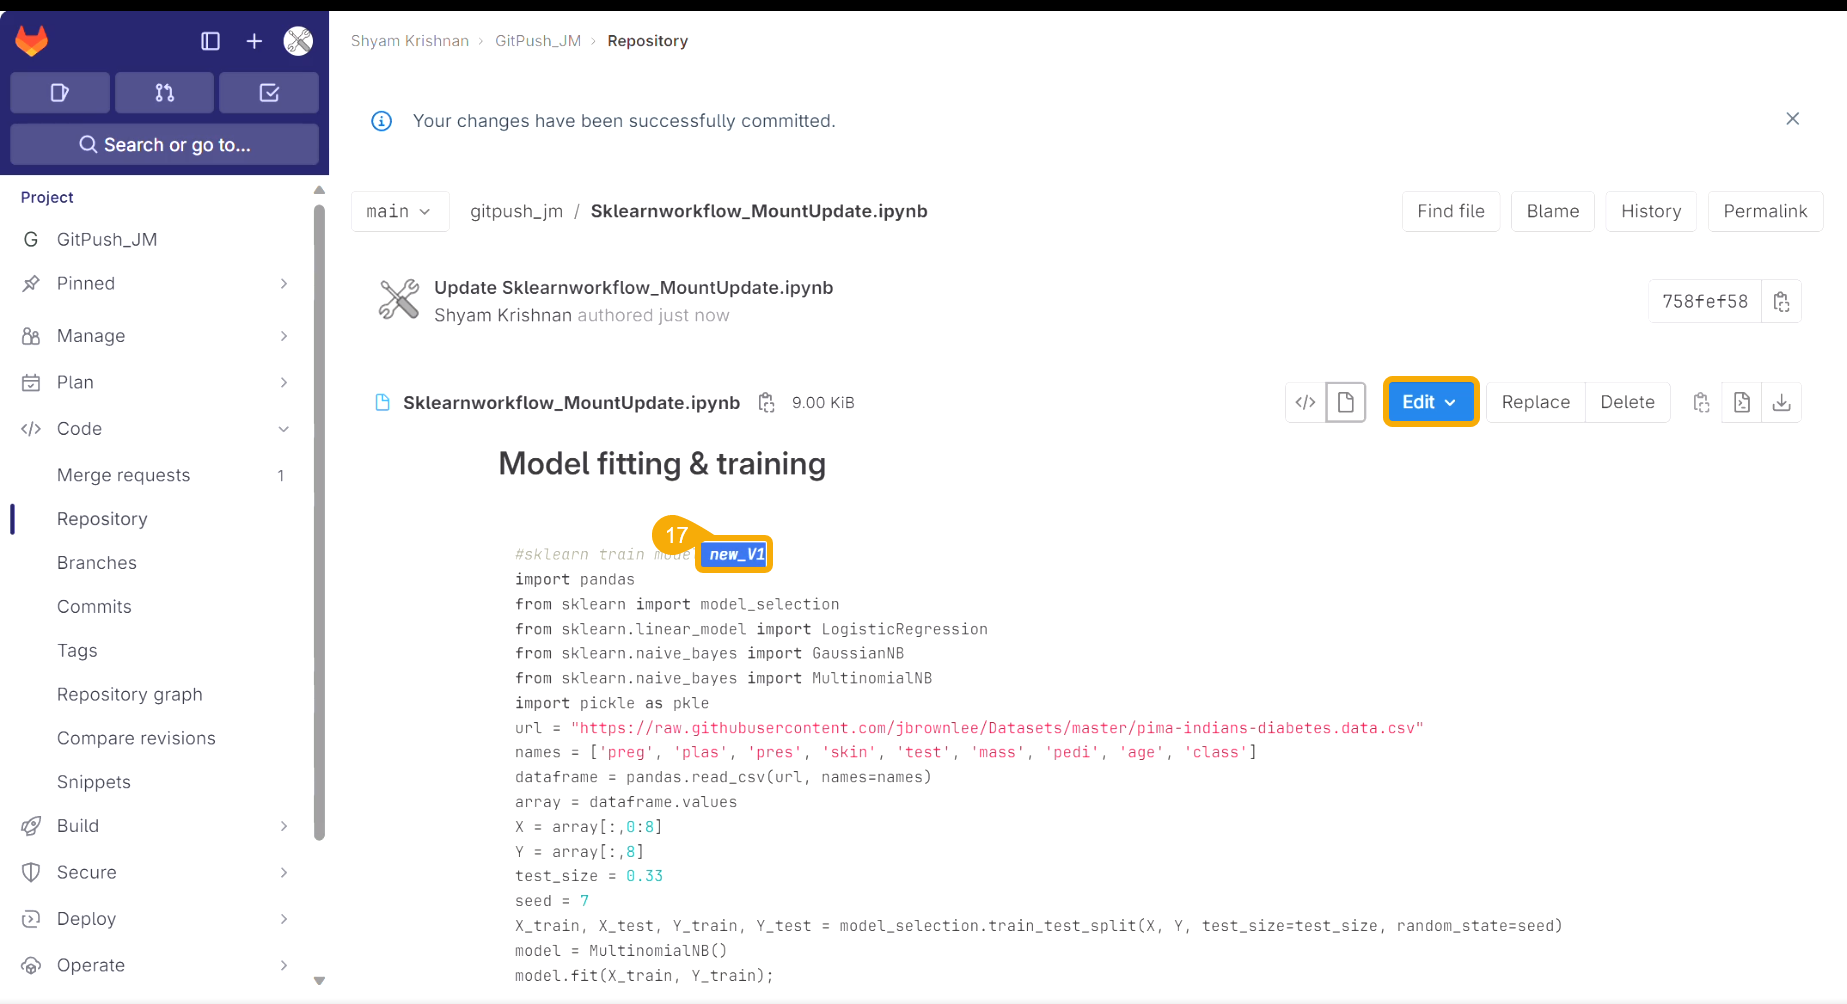
* The modification committed in the script gets saved.
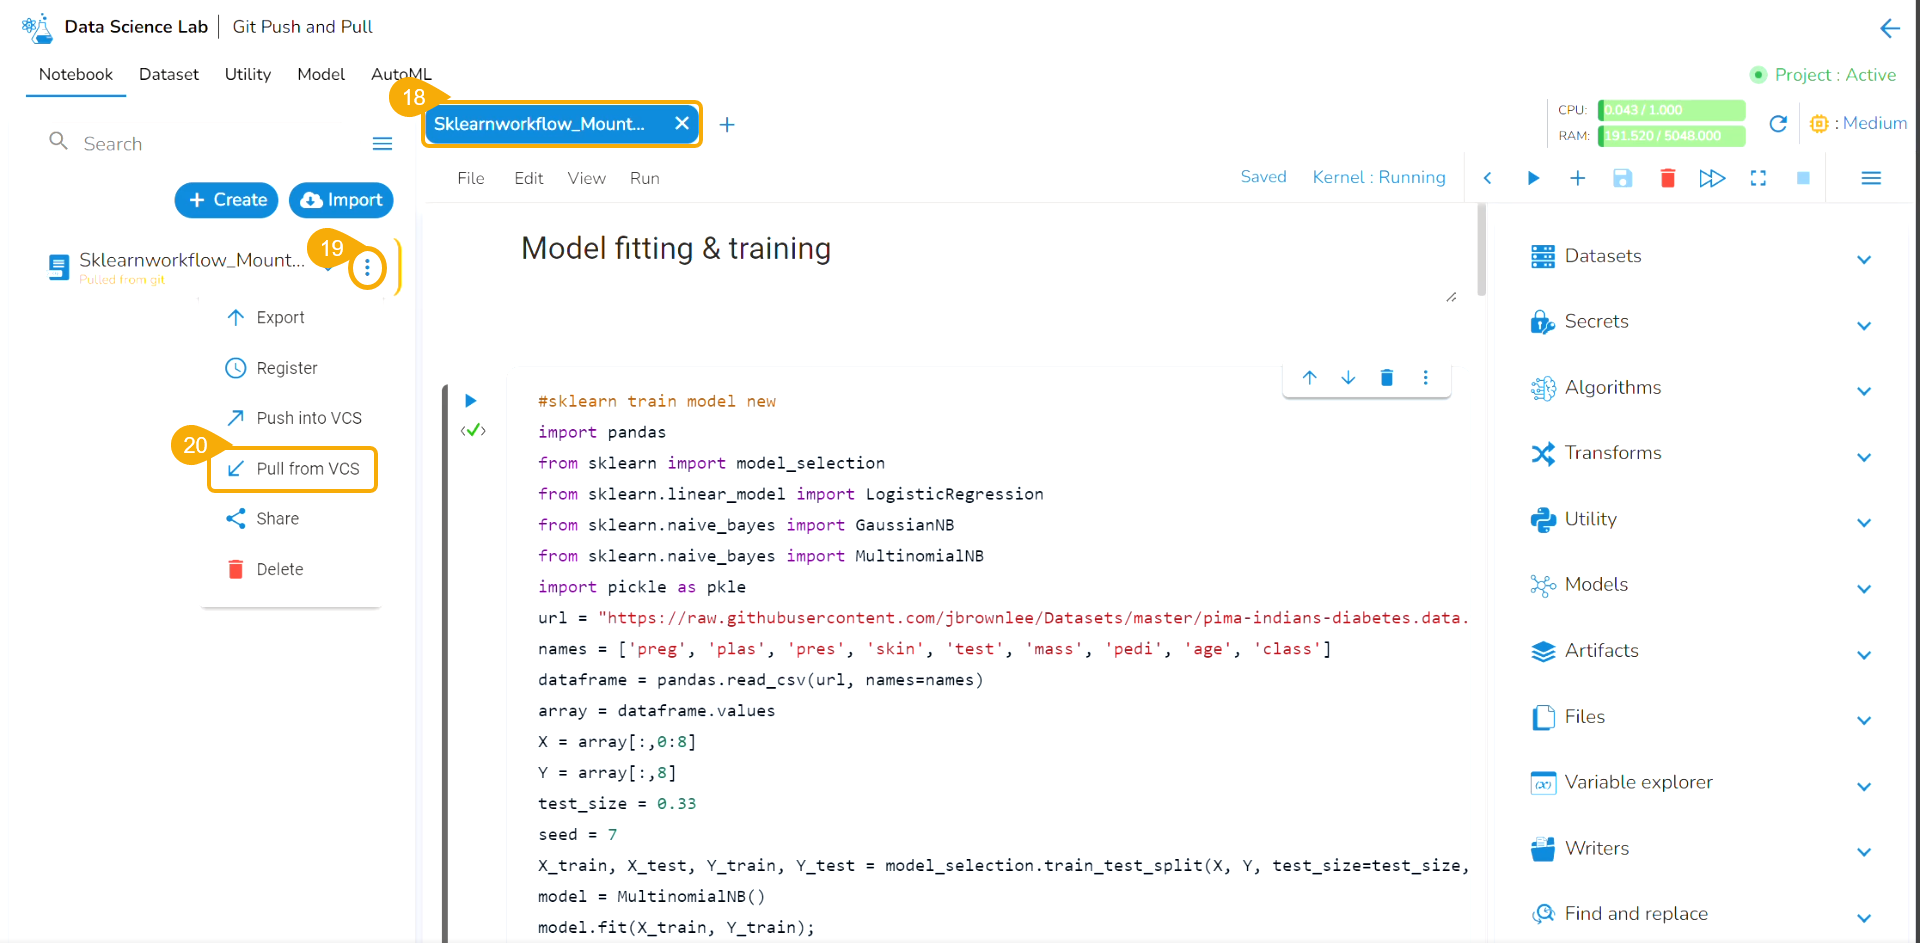
* Navigate to the same Notebook.
* Click the ellipsis icon to get the Notebook options.
* Click the ***Pull from VCS*** option.
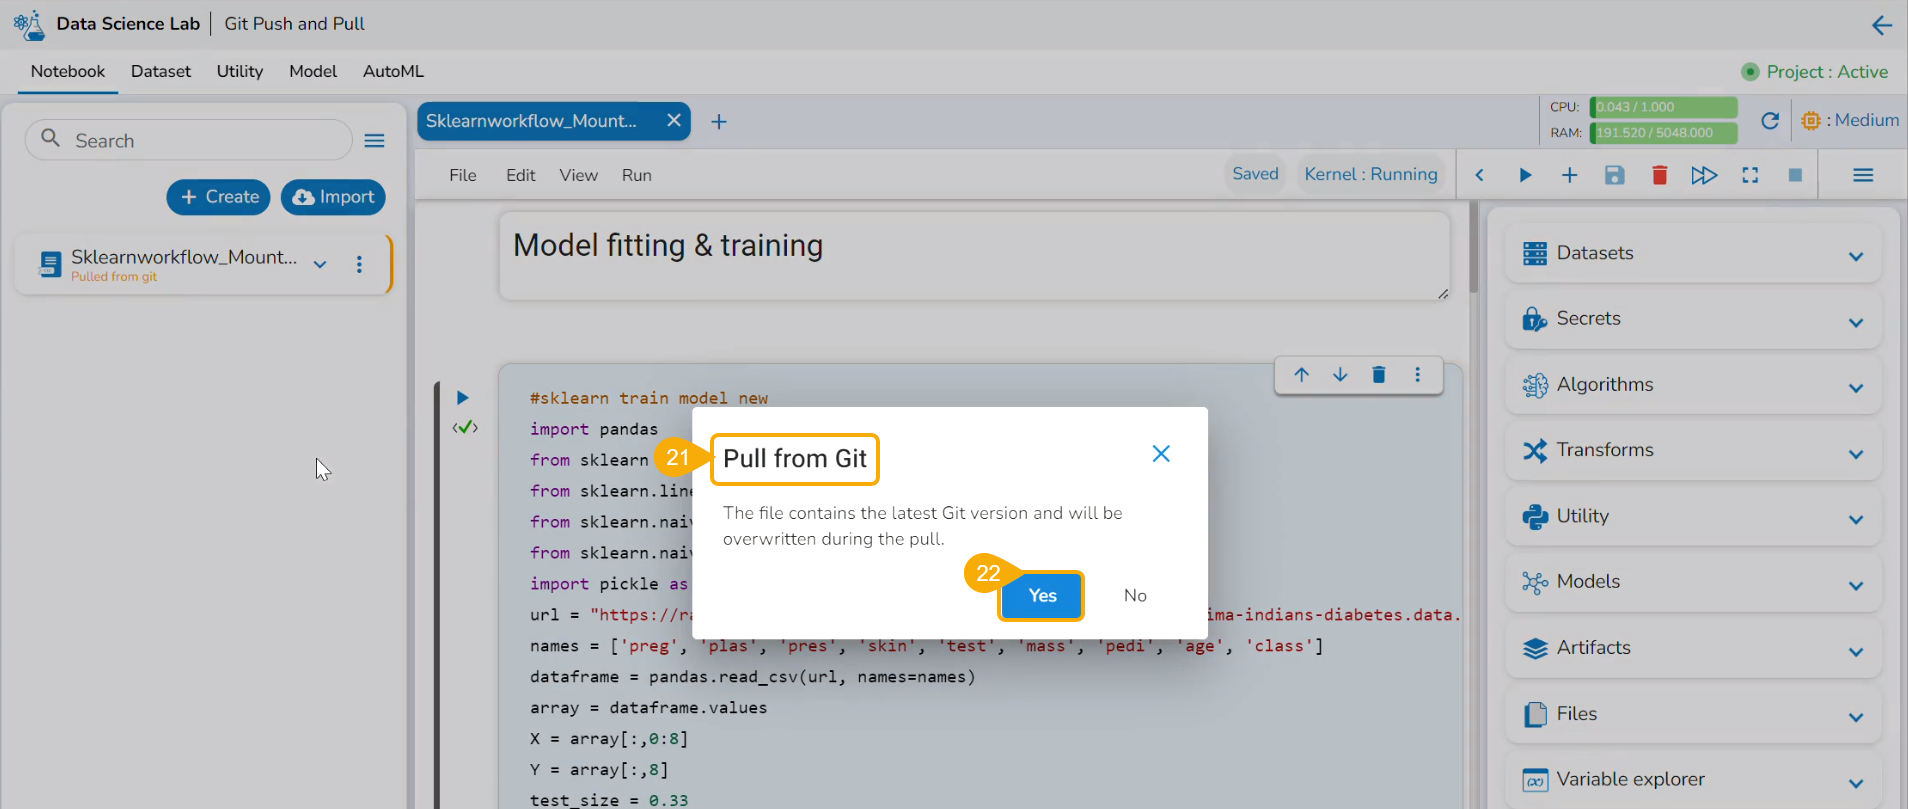
* The ***Pull from Git*** dialog box opens.
* Click the ***Yes*** optio*n*.
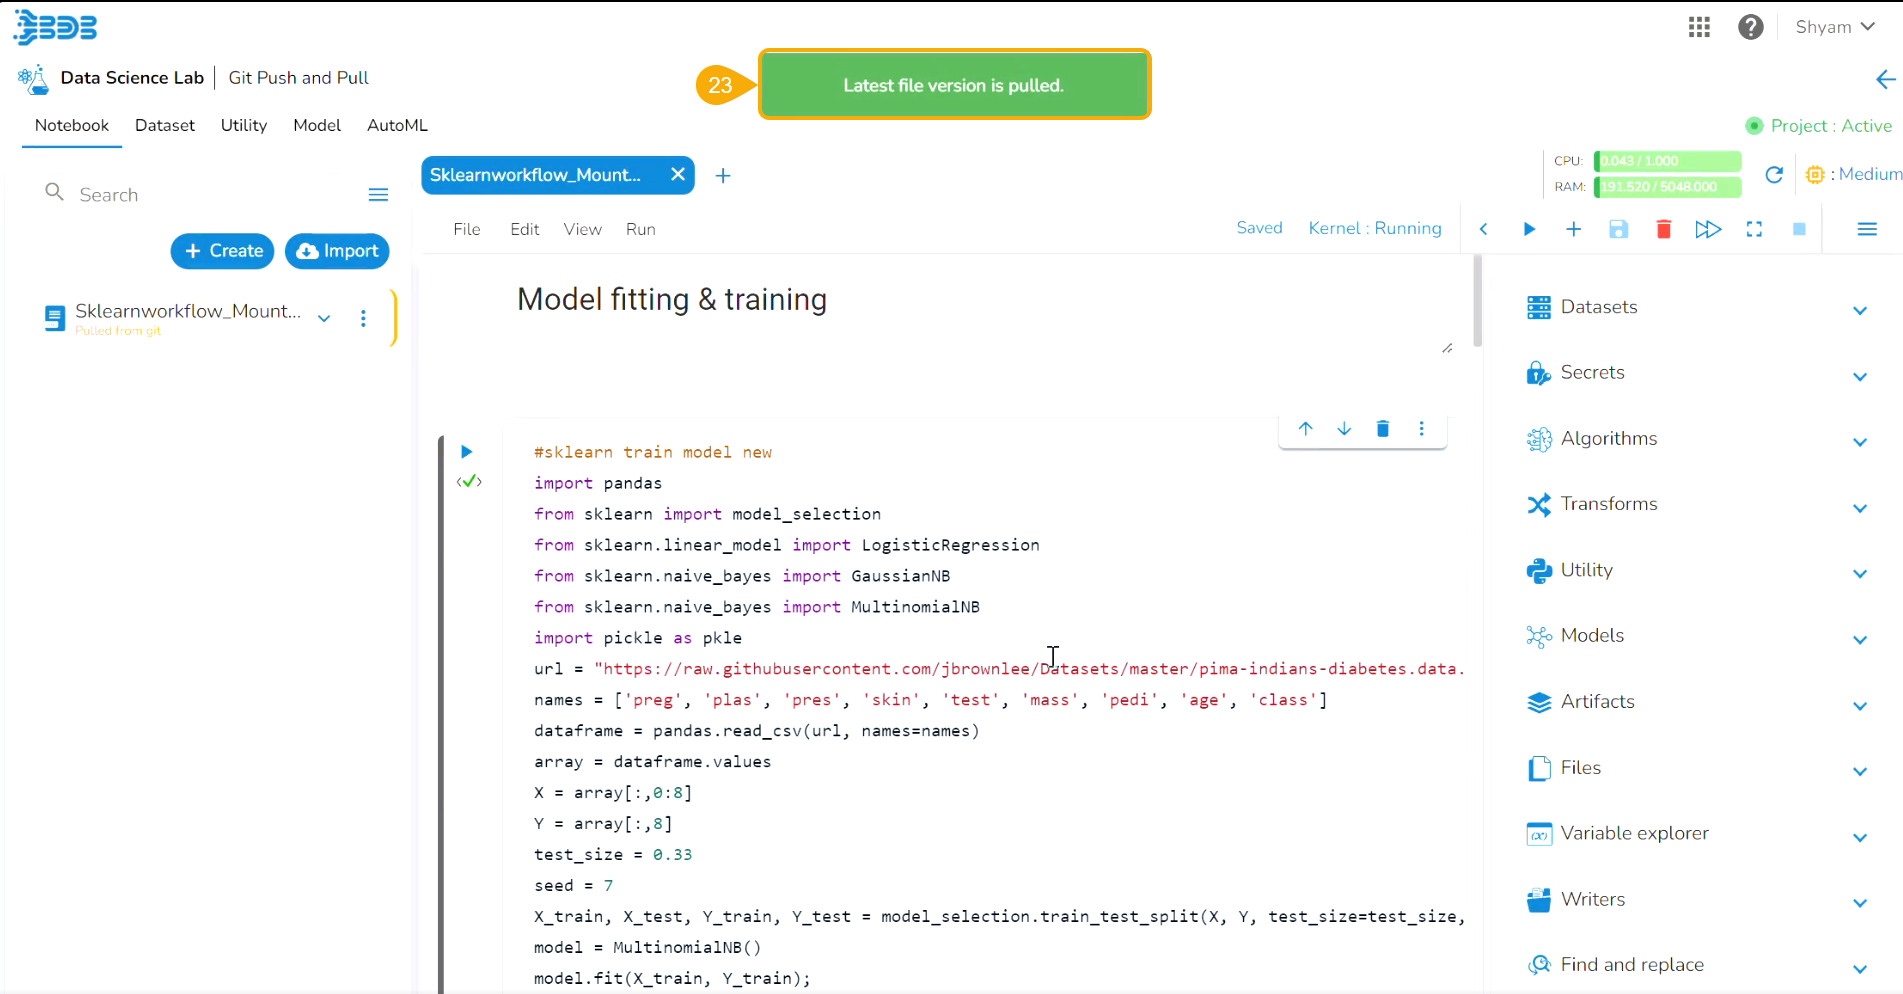
* A notification informs the user that the latest file version is pulled.
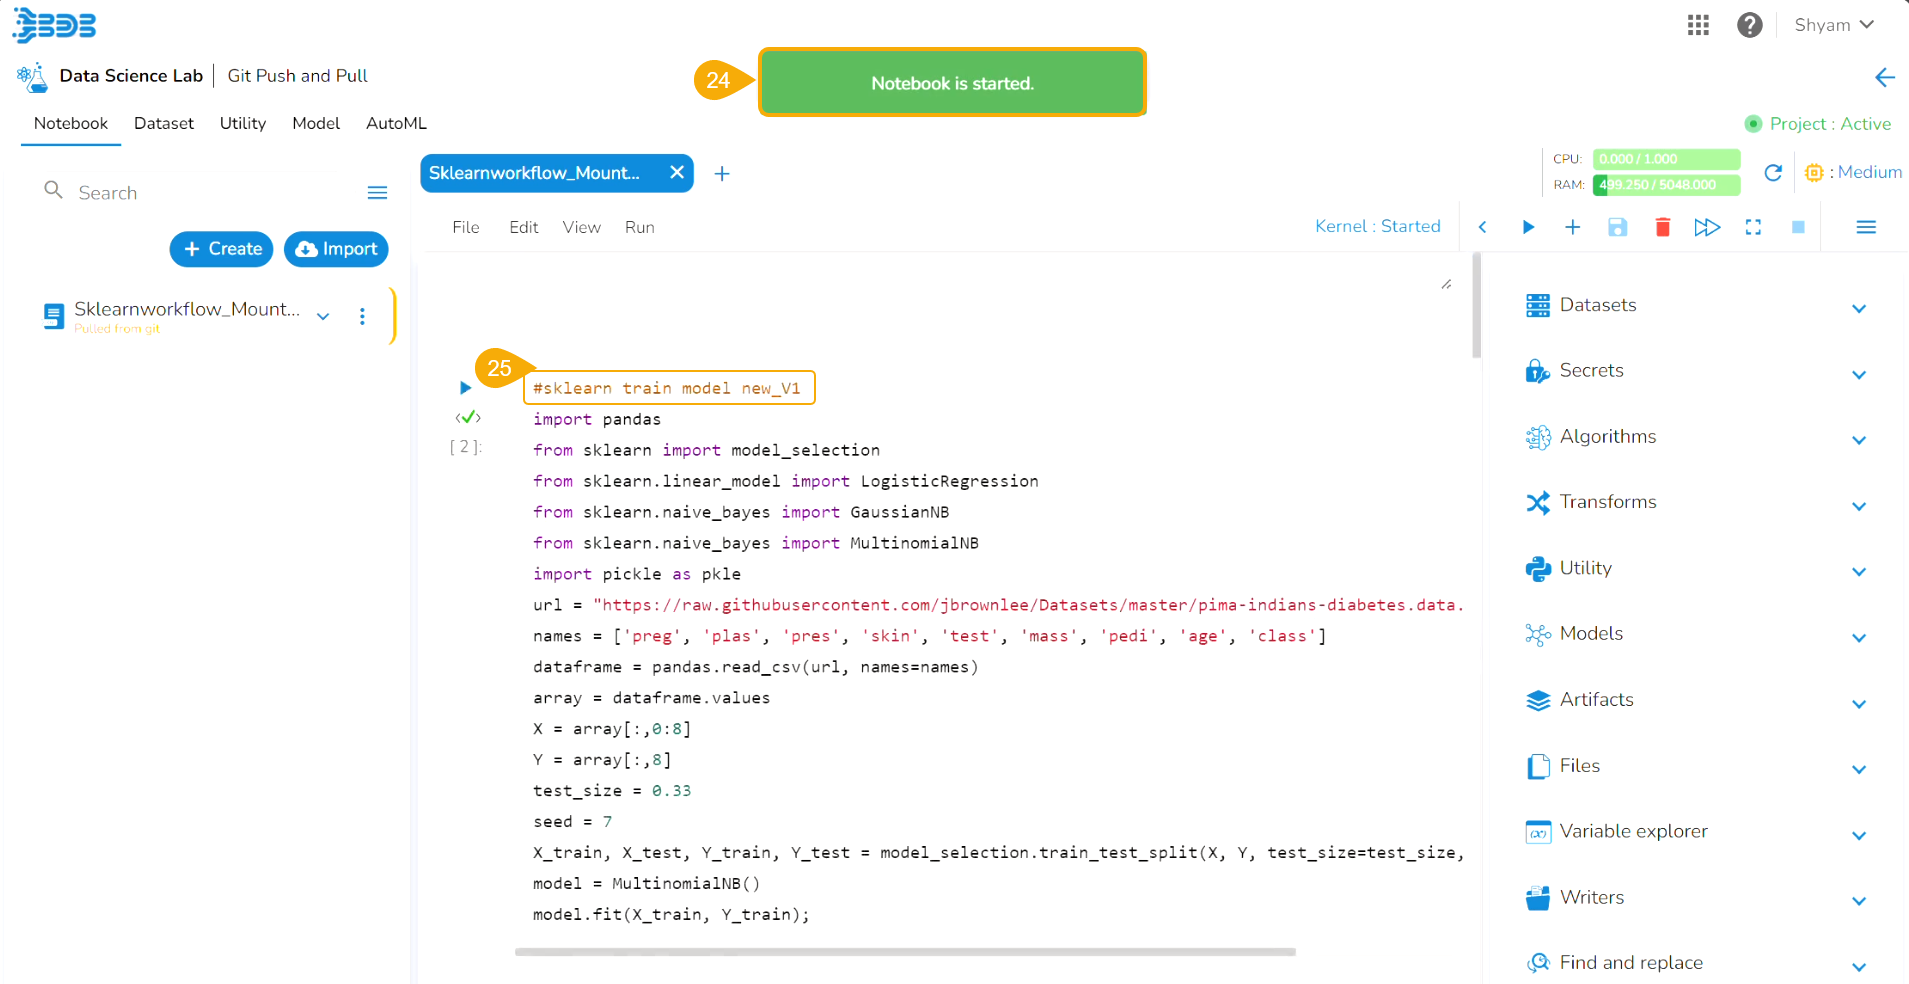
* Another notification message informs the user that the pulled Notebook is started.
* The latest/ modified script gets updated.
## Pushing to Git
### Related Settings for the Git Token
{% hint style="warning" %}
*Push pre-requisites:*
1. *The user branch should have Developers' and maintainers' permission to push the latest code into the **Main** branch.*
2. *The User token has to be set in the user profile using the Custom Fields setting available at the Admin level.*
3. *The user token key name has to be '**bdbvcstoken'**.*
{% endhint %}
{% embed url="" %}
***Pre-requisites for Pushing a file to Git***
{% endembed %}
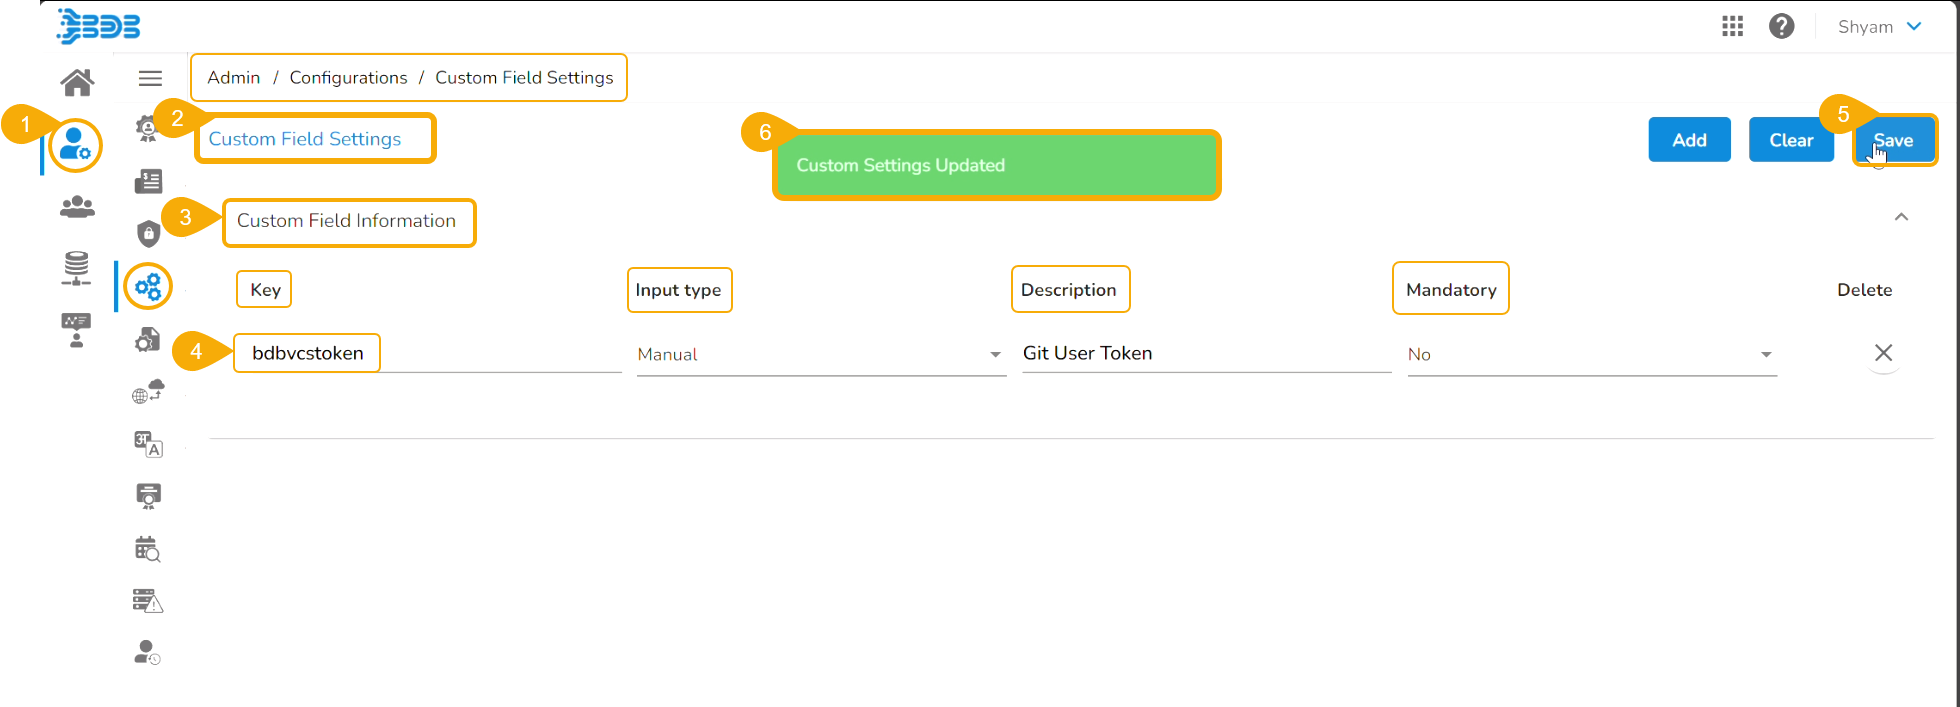
* Navigate to the Admin module.
* Open the ***Custom Field Settings*** under the Configurations option.
* The Custom Field Information appears.
* Provide the following information for the custom field:
* Key- ***bdbvcstoken***
* Input type *- Manual*
* Description - Git User Token
* *Mandatory - No*
* Click the ***Save*** option to save the modified ***Custom Field Settings***.
* A notification message appears to inform the user that the custom field settings are updated.
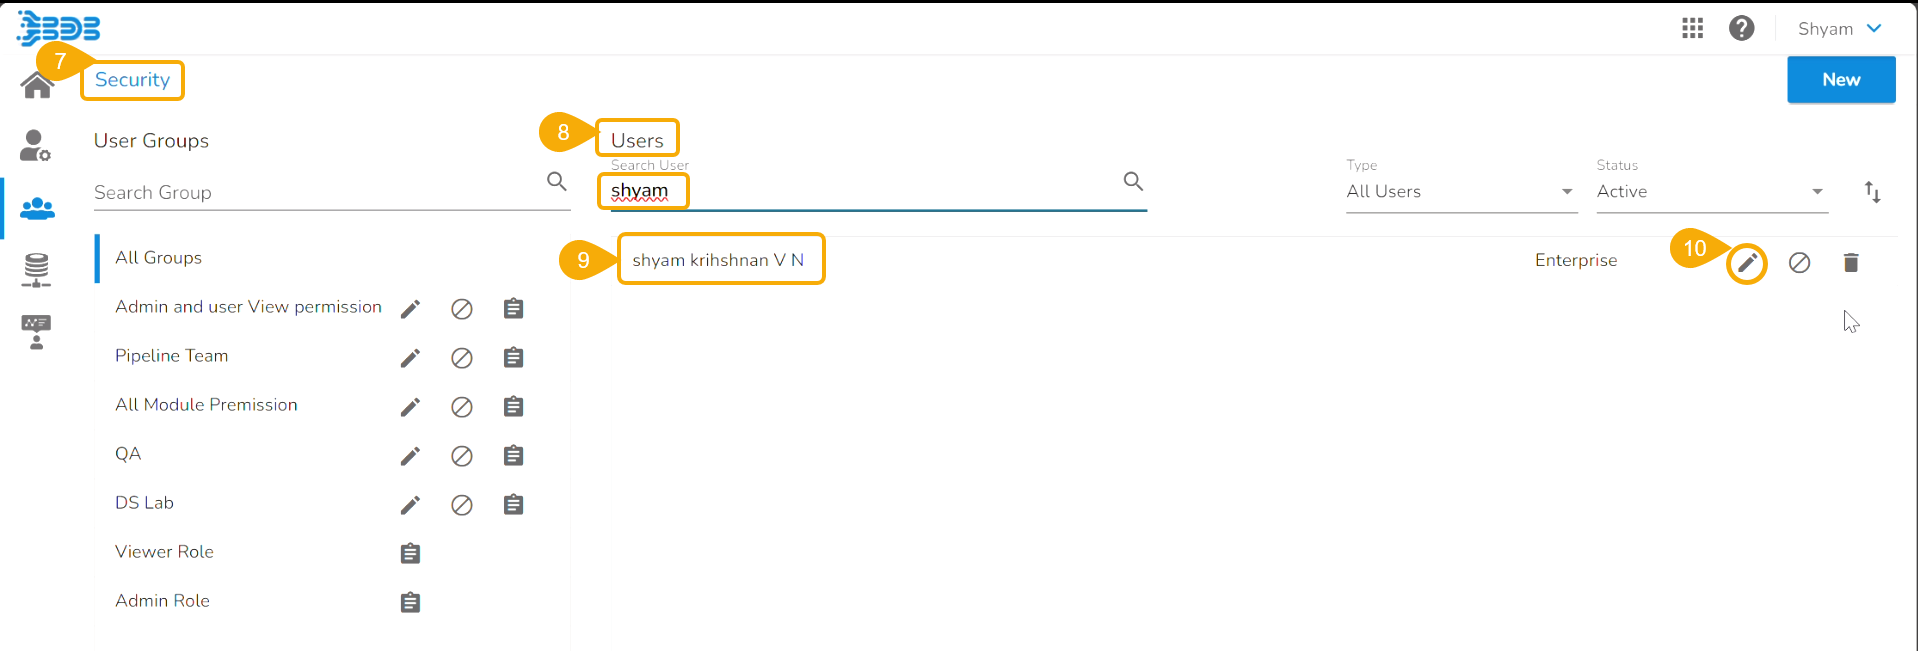
* Navigate to the ***Security*** module.
* Go to the ***Users*** list.
* Select the user from the list.
* Click the ***Edit*** icon.
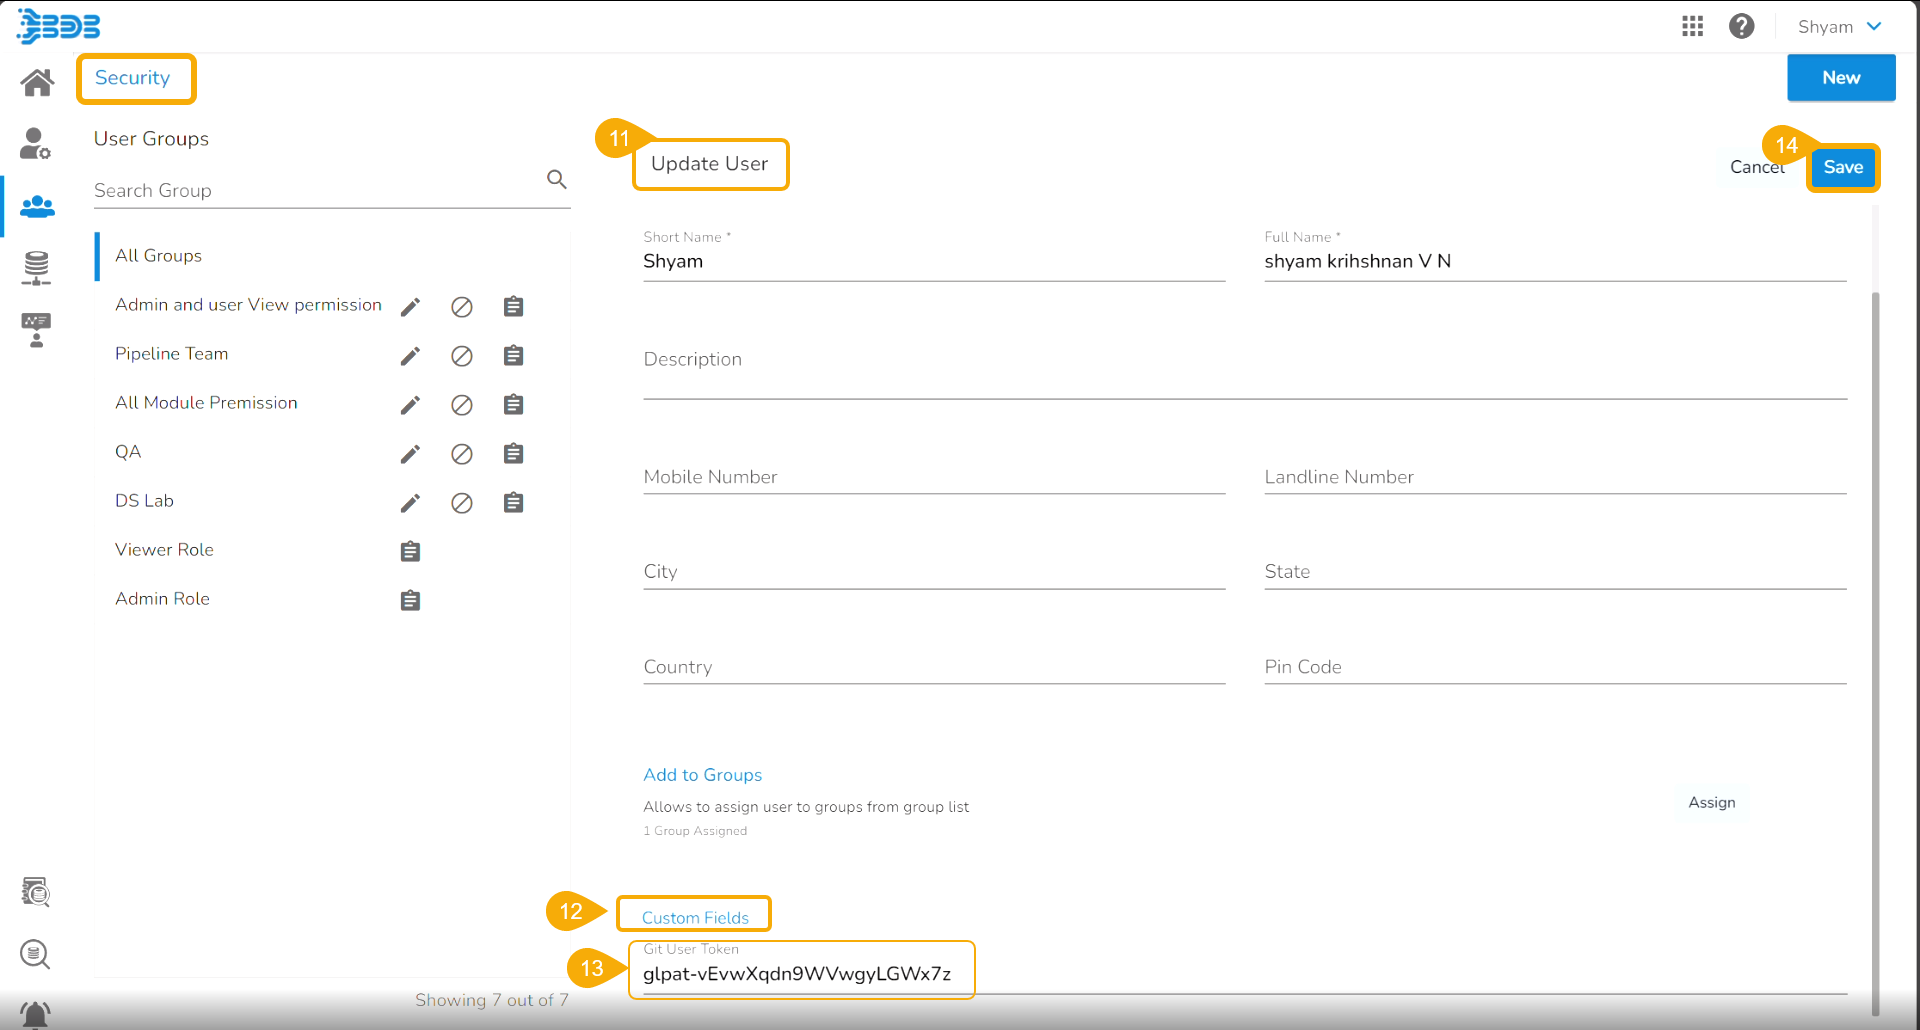
* The ***Update User*** page opens.
* Check out the ***Custom Fields*** section.
* ***Validate*** whether the ***Git User Token*** is valid or not. If not ***provide the valid Git User Token***.
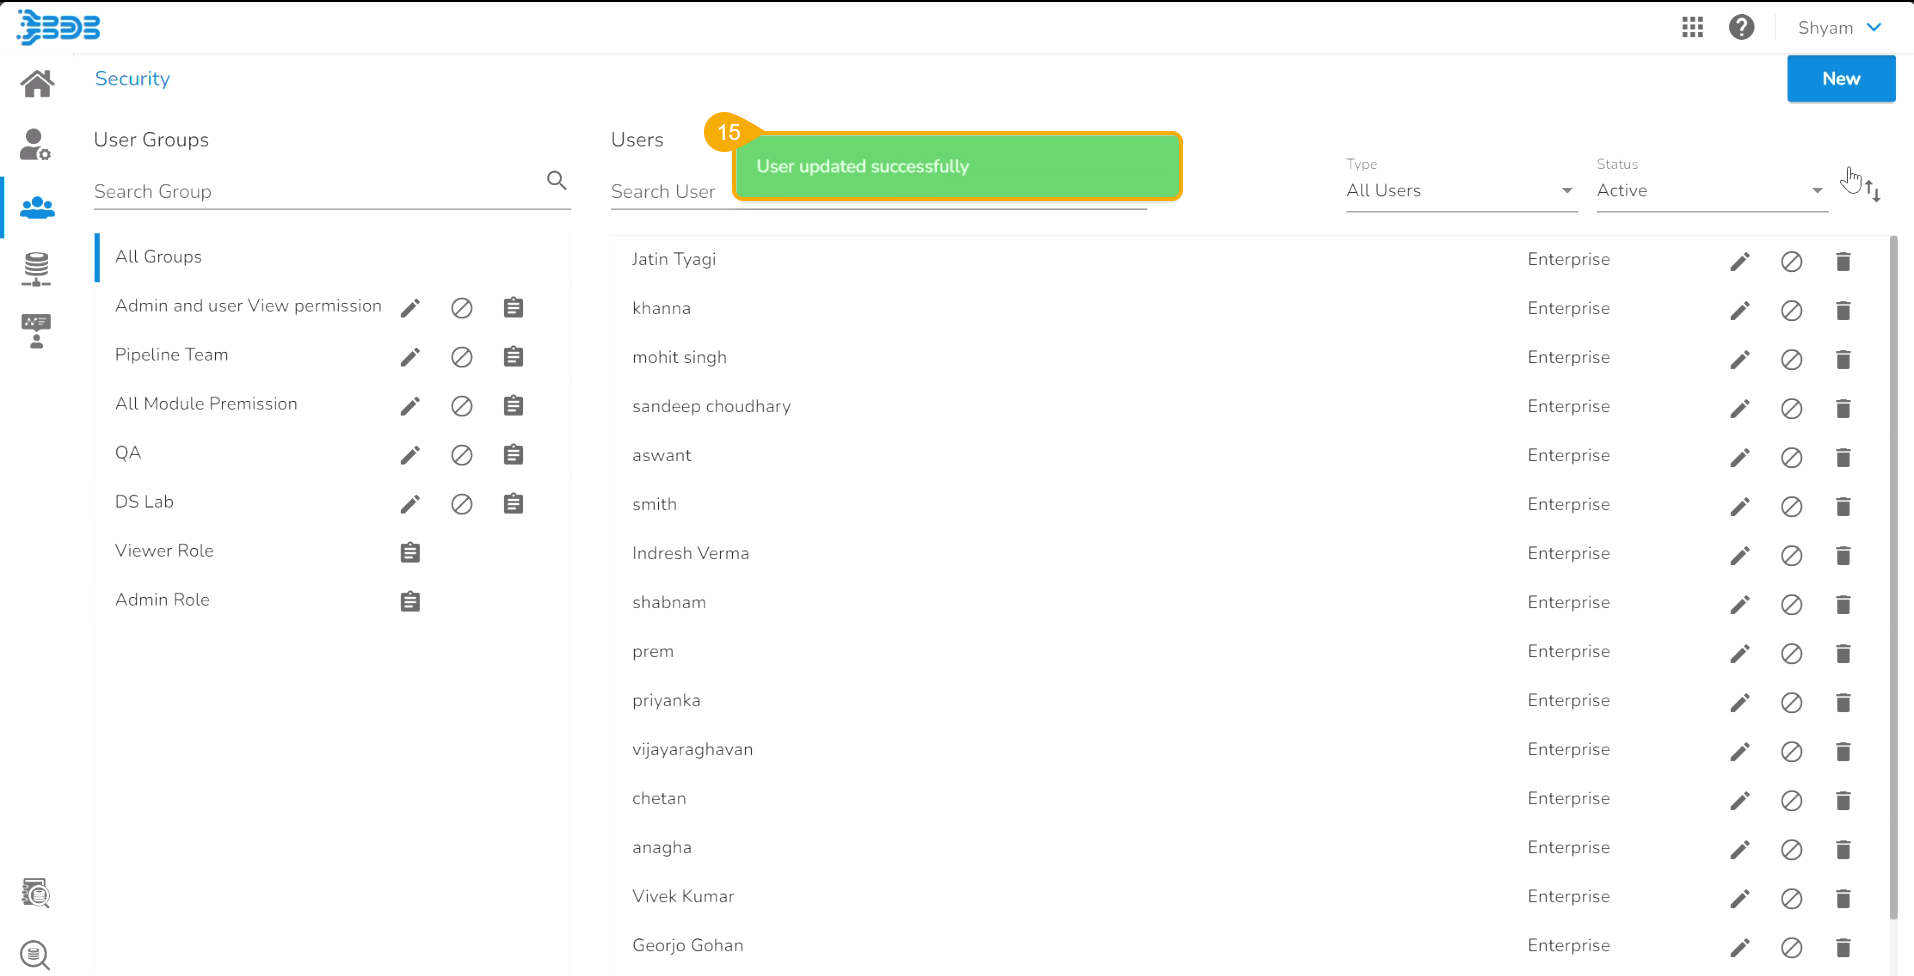
* Click the ***Save*** option.
* A notification message appears to inform that the user is updated successfully.
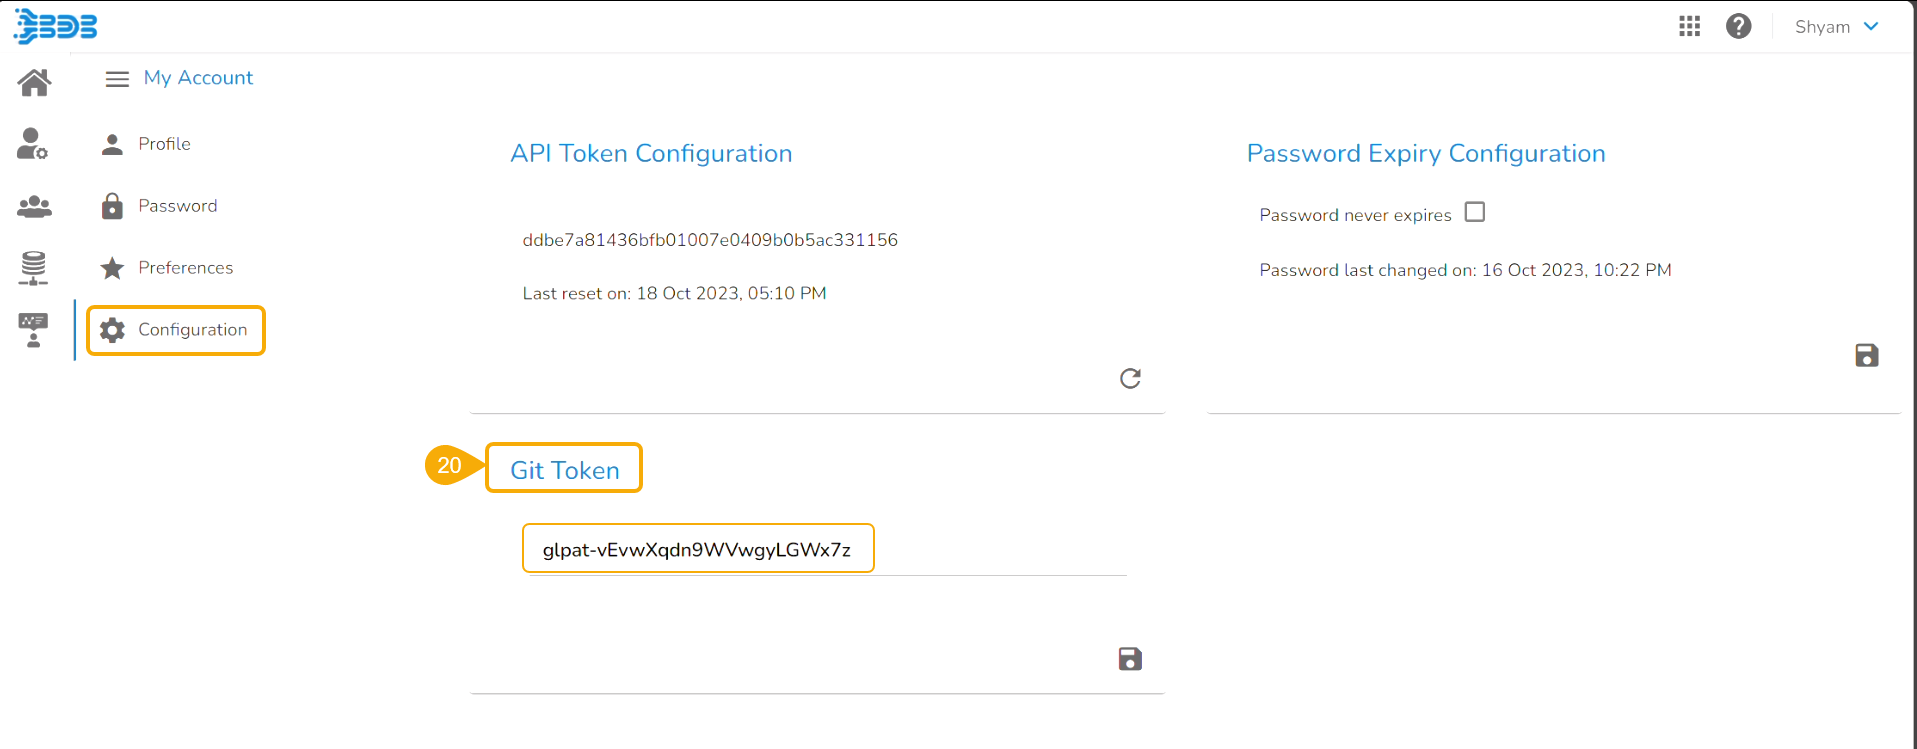
* Open the ***User Profile***.
* Select the ***My Account*** option.
* The ***My Account*** details are displayed.
* Open the ***Configuration*** option.
* The same token gets updated under the ***Git Token*** section which was provided under the ***Configuration*** section.
### Pushing a File to Git
{% hint style="info" %}
*Please Note: Before using the Push a file to Git functionality make sure that the following requirements are fulfilled:*
1. *The latest file is pulled into DS Lab before modifying and pushing back to the Git branch.*
2. *The user should have access to the Git branch for pushing a change.*
{% endhint %}
{% embed url="" %}
***Pushing to Git***
{% endembed %}
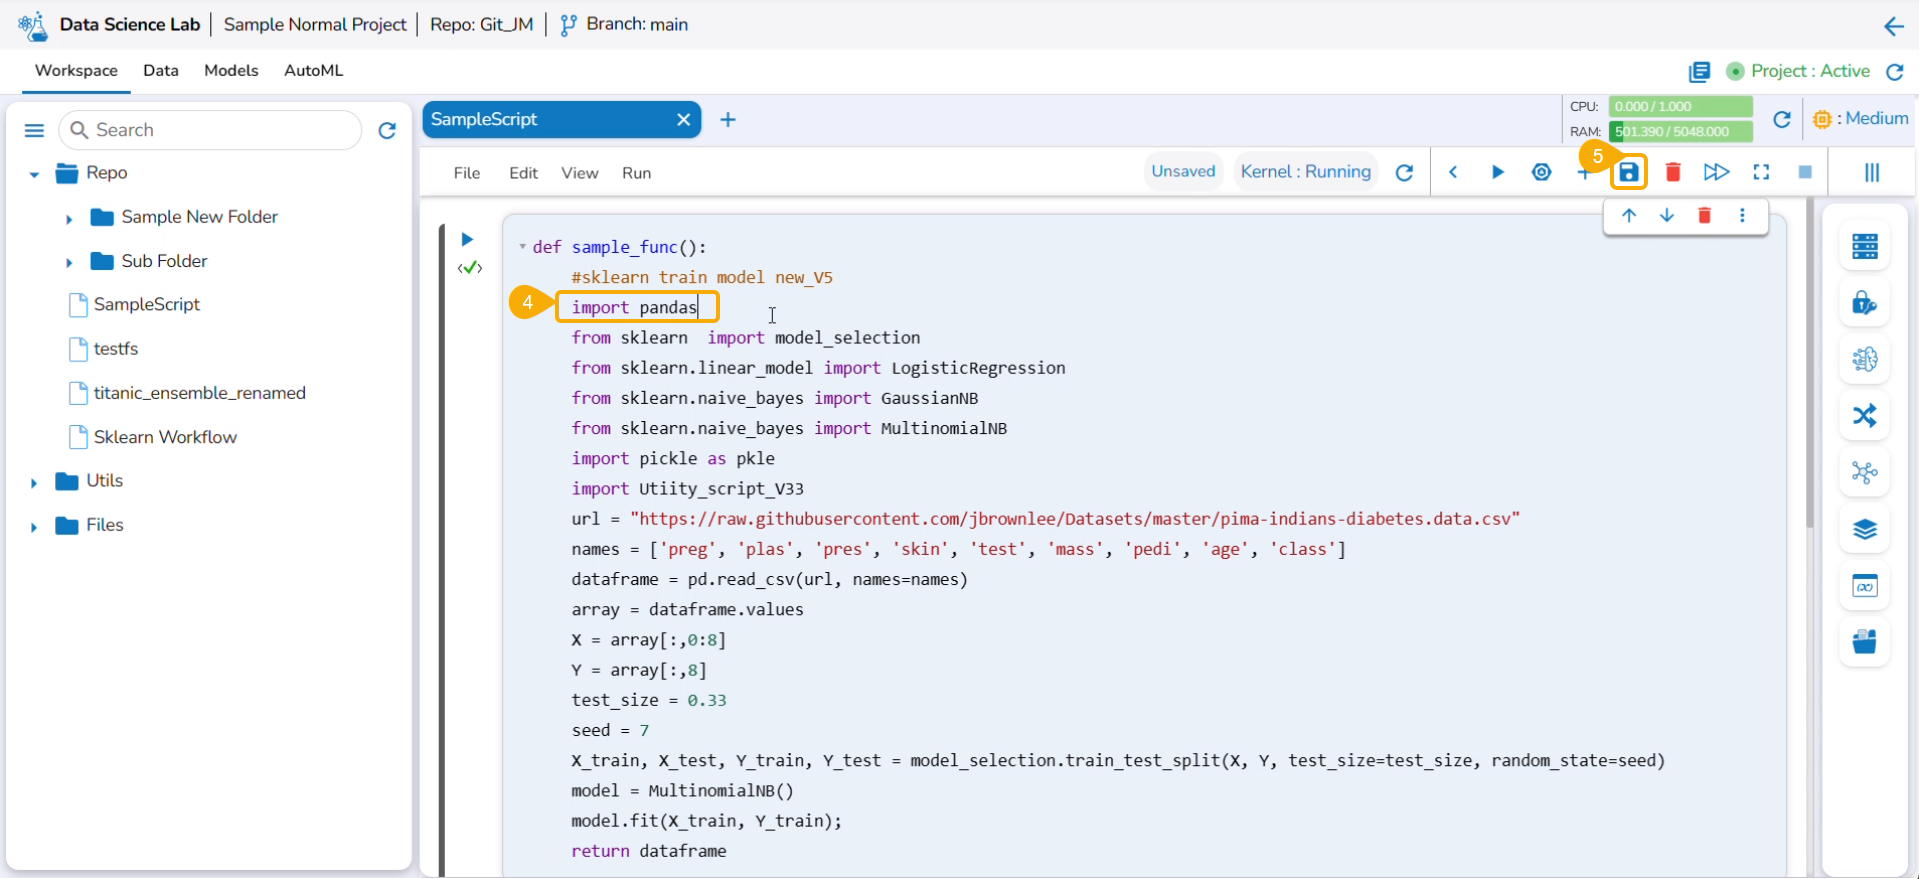
* Navigate to the ***Workspace*** tab (it opens by default) for an activated project.
* Select a Notebook from the displayed list to open the content/script.
* The existing content gets displayed.
* Modify the script to create a new version of the Notebook.
* Click the ***Save*** icon to save the latest of the Notebook.
* A notification ensures that the Notebook is saved.
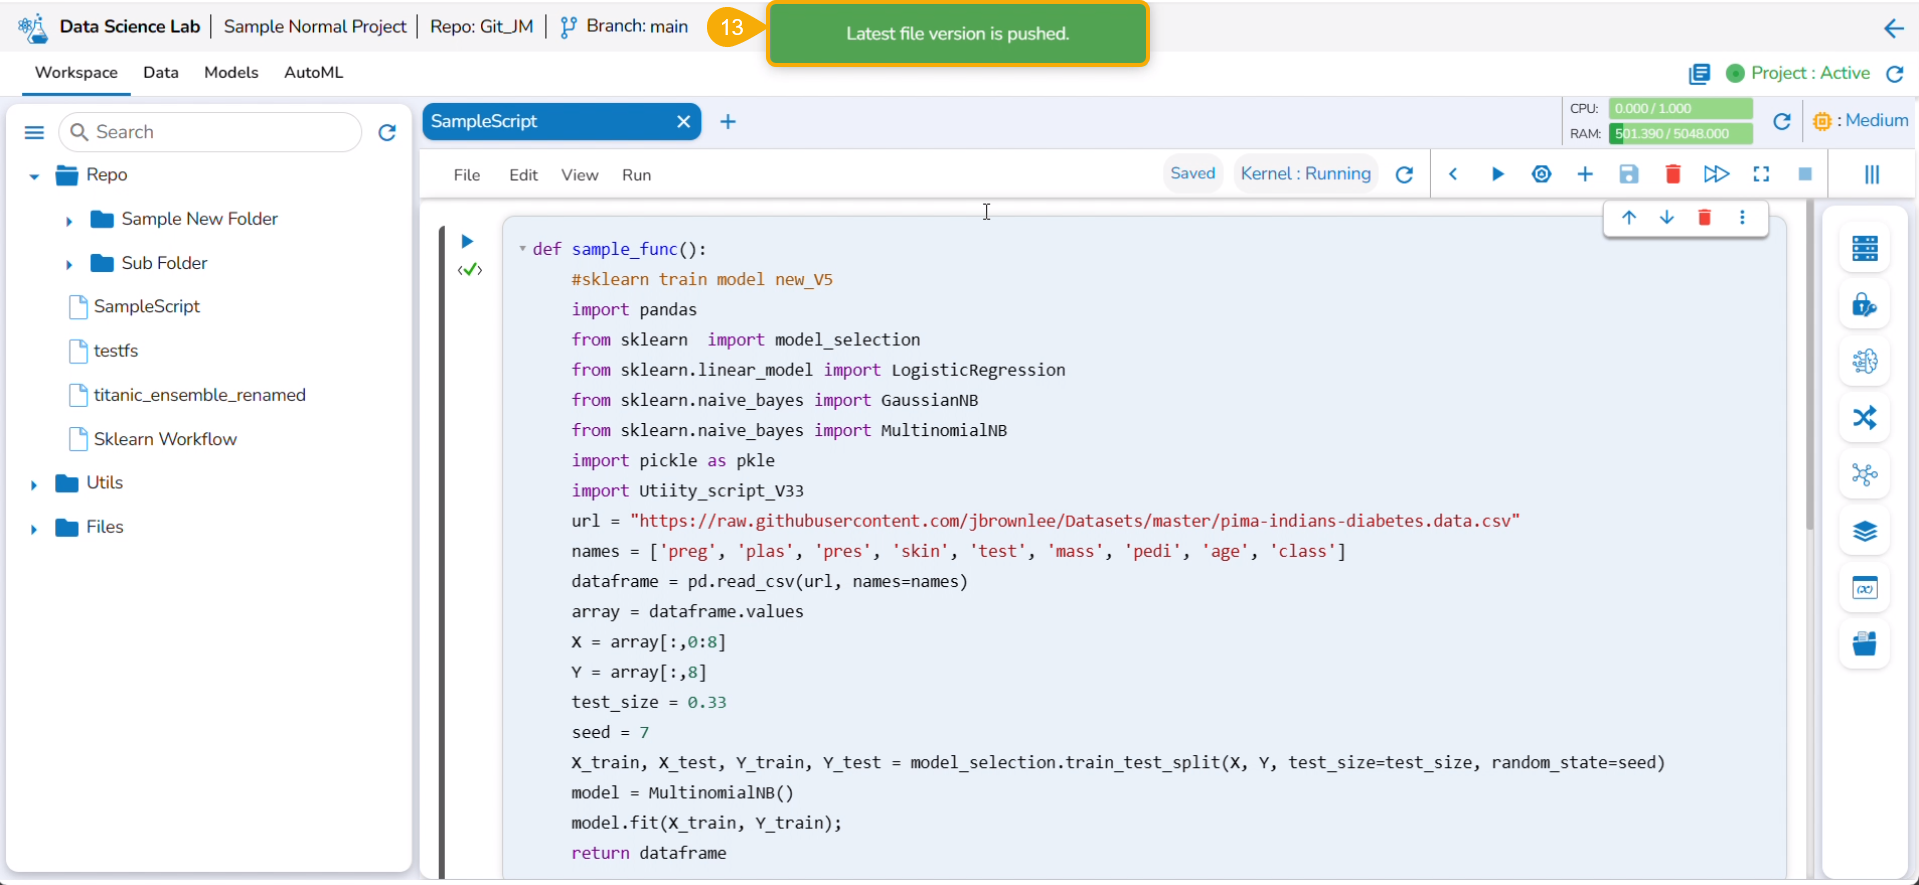
* Click the ***Push into VCS*** option from the Notebook options.
* The ***Push into Git*** drawer opens.
* Select the ***Version control*** option.
* Provide a commit message.
* Click the ***Push*** option.
* A notification message ensures that the latest file version is pushed (to Git).
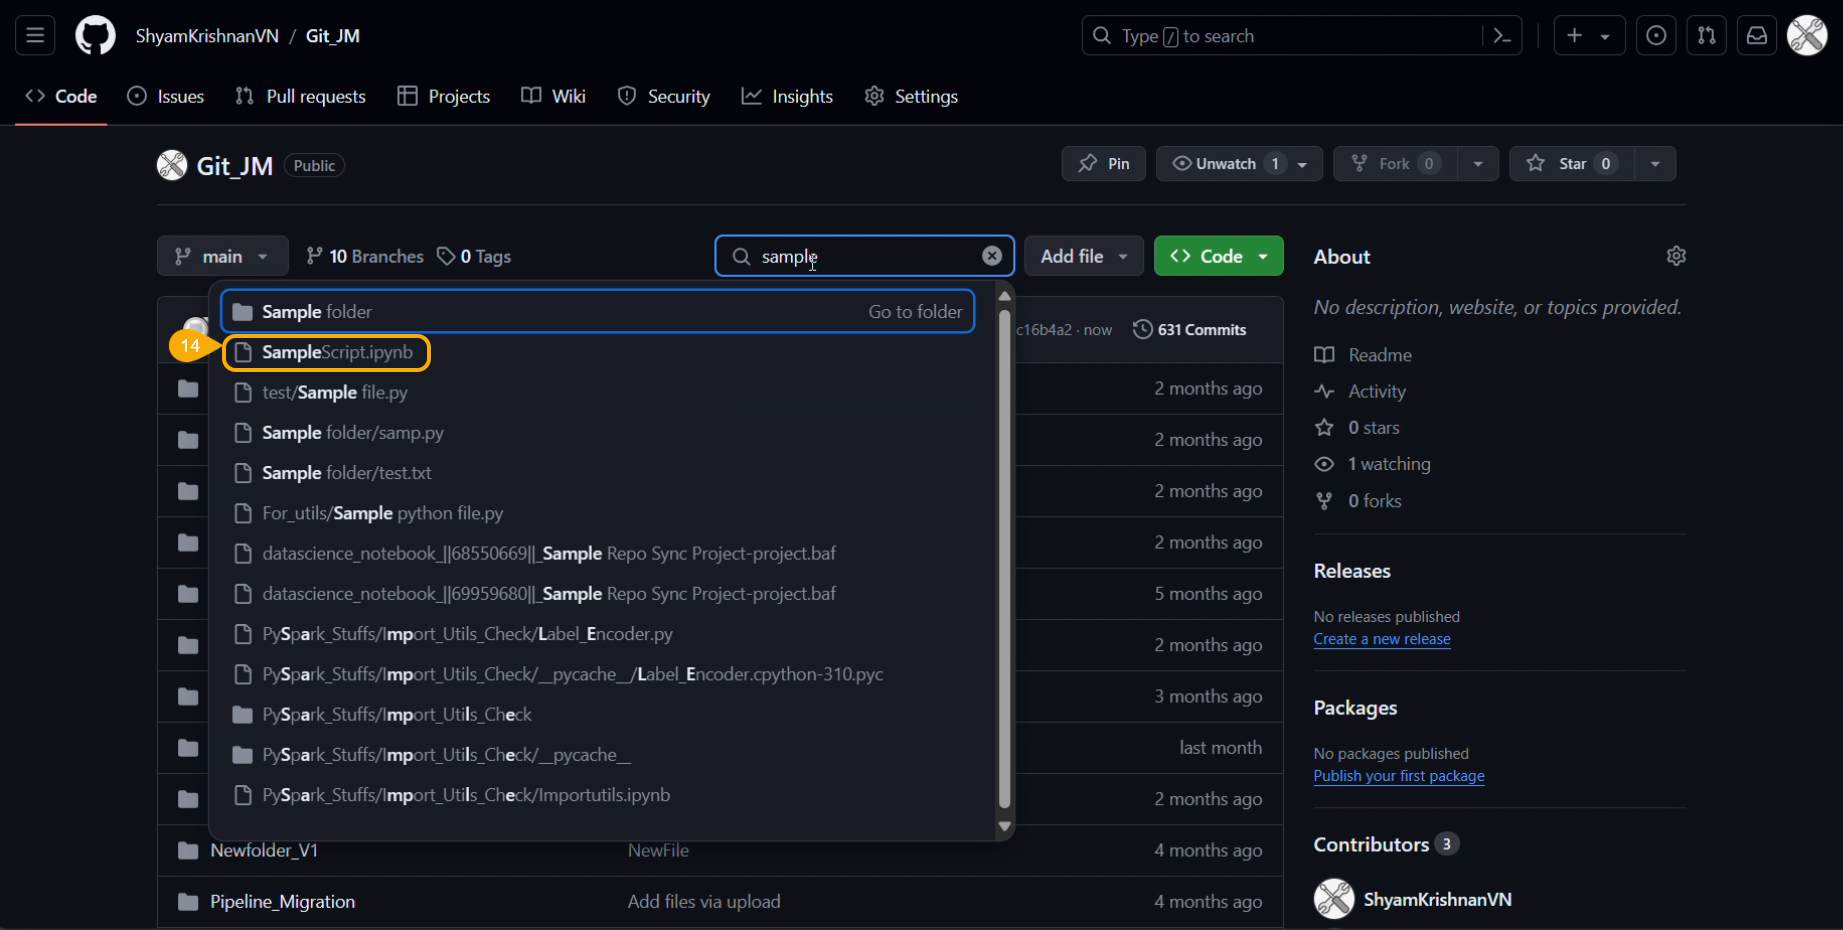
* Navigate to the Git repository and access the pushed version of the Notebook script.
* Open the script. The latest changes will be reflected in the script.
{% hint style="info" %}
*Please Note: The* **Pull from Git** *functionality supports **Git Lab** and **Git Hub**.*
{% endhint %}
## Pull & Push Functionality for Repo Sync Projects
### Pull from Git
{% hint style="success" %}
*Check out the illustration explaining the Pull from Git functionality for a Repo Sync Project.*
{% endhint %}
{% embed url="" %}
***Pull from Git for Repo Sync Project***
{% endembed %}
### Push into Git
{% hint style="success" %}
*Check out the illustration explaining the Push into Git functionality for a Repo Sync Project.*
{% endhint %}
{% embed url="" %}
***Pull into Git for Repo Sync Project***
{% endembed %}