
Notebook Version Control
This page explains the step by step process for Notebook migration and Push to VCS functionality.
Push into Git (Migration)
A Notebook script can be migrated across the space and server using the Push into GIT option.
Prerequisites: Before migrating a DS Lab script or model, the configuration for the Data Science Lab Migration must be set using the Version Control option from the Admin module.
Check out the walk-through on how to migrate/ export a Notebook script to the GIT Repository.
Select a Notebook from the Workspace tab.
Click the Ellipsis icon to get the Notebook list actions.

Click the Push into VCS option for the selected Notebook.

The Push into Git drawer opens.
Select the Git Export (Migration) option.
Provide a Commit Message in the given space.
Click the Push option.

The selected Notebook script version gets migrated to the Git Repository and the user gets notified by a message.

Importing a DSL Script from GIT
After exporting a DSL script, you can sign in to another user account on a different space or server and import the DSL script.
Click the Admin module from the Apps menu.
Select the GIT Migration option from the admin menu panel.

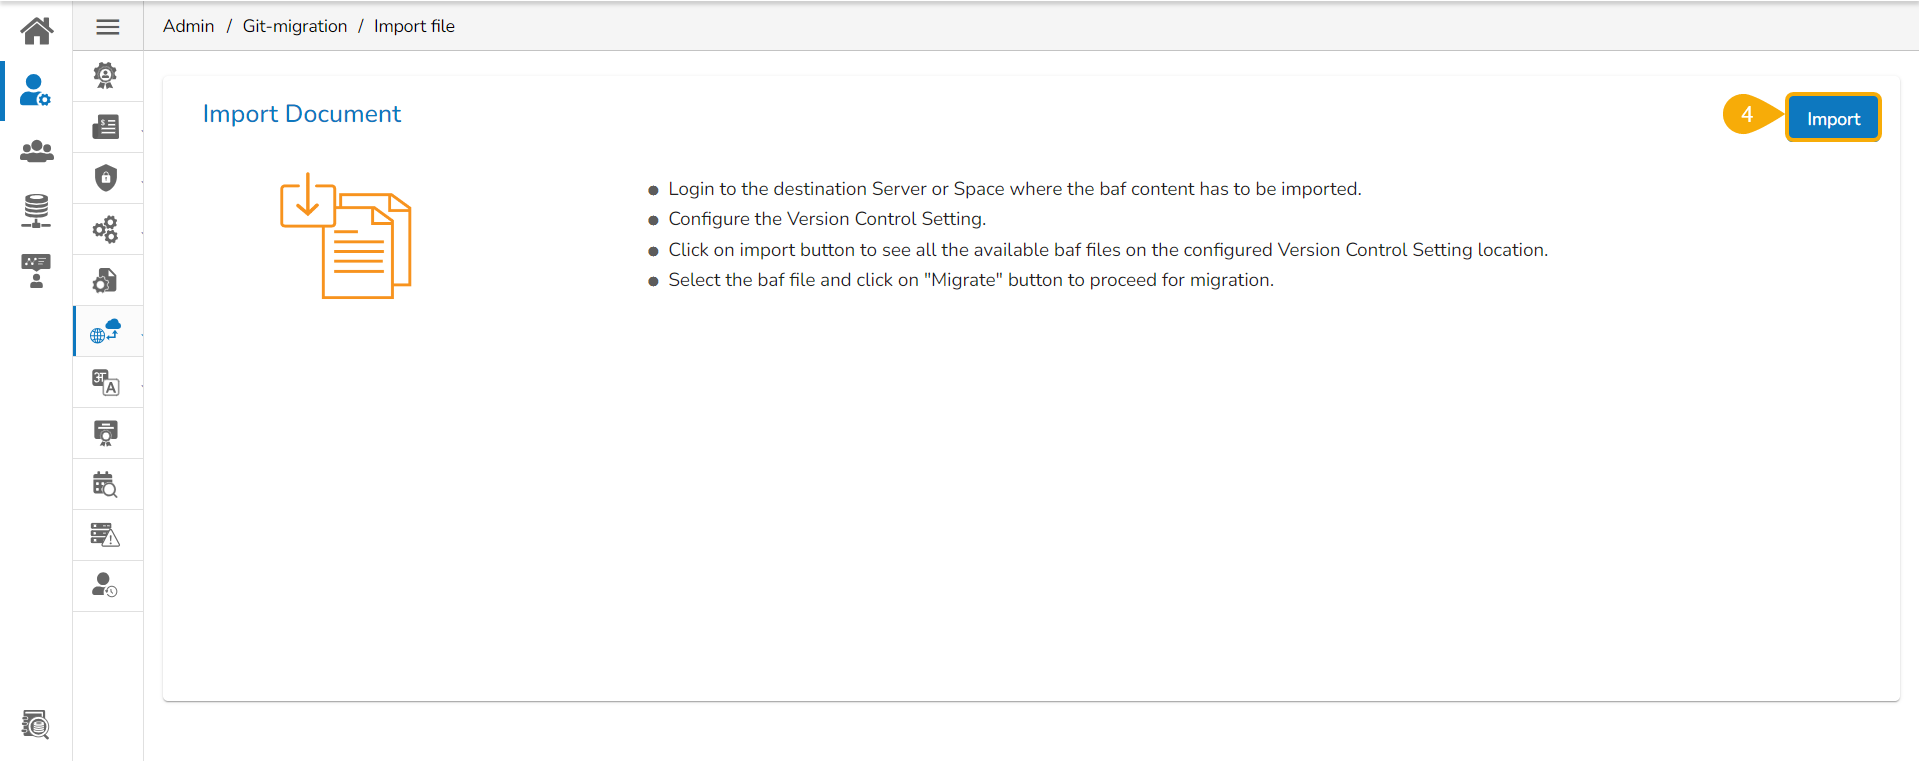
Click the Import File option.

The Import Document page opens, click the Import option as suggested in the following image.
The Migration- Document Import page opens.
Select New VCS as Version Control Configuration.
Select the DSLab option from the module drop-down menu.
Select the Notebook option from the left side panel.
All the migrated Notebooks are listed. The user can use the Search bar to customize the displayed list of the exported Notebooks.

Select a Notebook from the displayed list to open the available versions of that Notebook.

Select a Version that you wish to import.
Click the Migrate option.

A notification message appears informing that the file has been migrated.

Open the Data Science Lab module and navigate to the List Project Page.
The imported Notebook gets listed with the concerned DSL Project.

Please Note:
The user can migrate only the exported scripts (the exported scripts to the Data Pipeline).
While migrating a DSL Notebook/Script using the Export to Git functionality, the concerned Project under which the Notebook is created also gets migrated.
While migrating a DSL Notebook the utility files which are part of the same Project will also get migrated.
Version Control
Check out the illustration to understand the Version Controlling steps for a Notebook file.
Select a Notebook file from the Workspace tab.
Open the Notebook file.

Modify the Notebook script.
Click the Save icon.

A message appears to notify the user that the workflow changes are saved.

Access the Context menu for the Notebook.
Click the Push into VCS option for the selected Notebook.

The Push into Version Controlling System drawer opens.
Select the Version Control option.
Provide a Commit Message.
Click the Push option.

The selected version of the Notebook gets pushed to VCS, and the same is informed by a message.

Open the context menu for the Notebook of which multiple versions are pushed to the VCS.
Click the Pull from VCS option from the Context menu.

The Pull from Version Controlling System drawer opens.
Select a version using the checkbox.
Click the Pull option.

A message appears to notify the user that the Notebook is pulled from the VCS.

Select the same Notebook file from the Repo folder of the Workspace tab, and open it
A message appears to notify that the selected workflow is started.
The user can verify the Notebook script will reflect the modifications done by the user for the pulled version of the Notebook.

Version control for a file Pulled from Git
The Version Control process for a Notebook file that is pulled from Git is different from the Notebook file that has been created by the user in the Data Science Lab module.
Click the Information option provided in the Context menu for a Notebook. It will mention Pulled from git if the selected Notebook is pulled from Git.

Please Note: The Notebook file that has been pulled from Git will overwrite each time when it is pulled. Thus, the Notebook file that is pulled from Git will not allow the end-user to select from multiple versions while pulling it from the VCS, but it pulls the latest version each time the Pull from VCS action is performed.
Check out the illustration to understand the Version control steps for a Notebook file that is pulled from the Git Repo.
Last updated