# PostgreSQL

The following set of steps displays how to create a PostgreSQL Data Connector:
* Click the ‘**PostgreSQL**’ Data Connector icon from the Data Connector page.
* The PostgreSQL Data Connector page opens.
* Provide a name for the data connector.
* Describe the data connection.
* Provide the following information:
* Username
* Password
* IP/Host
* Port
* Database Name
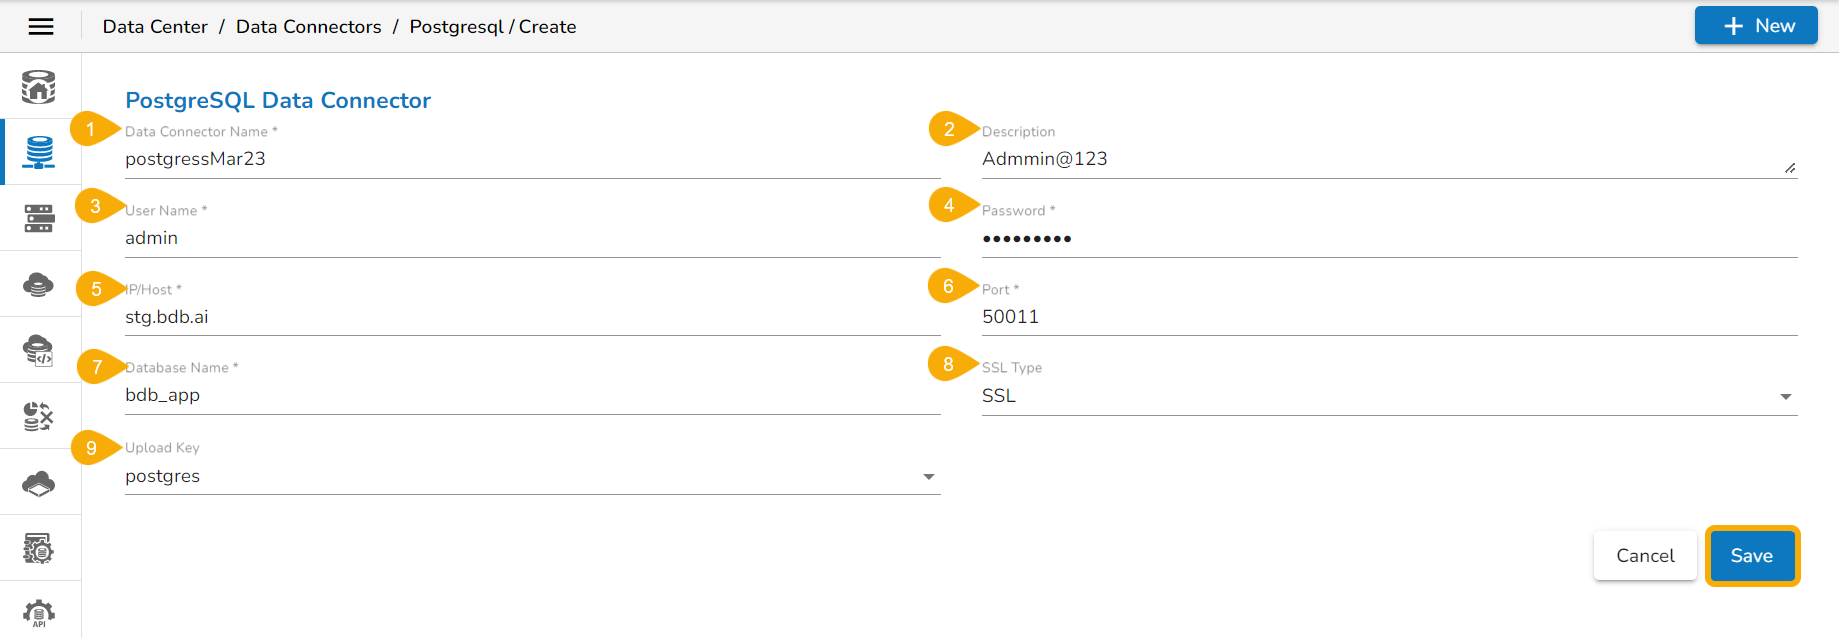
* **Data Connector Name**: Provide a user-defined name to identify the data connector.
* **Description**: Provide connection details (Optional).
* **Username**: Enter a Username (It should be the same as given in the connection server).
* **Password:** Enter the Password (It should be the same as provided in the connection server).
* **IP/Host**: Enter database server details (from where the user wants to fetch data).
* **Port:** Provide the server port number.
* **Database Name:** Name of the database where you wish to store data.
* **SSL Type**: Select SSL or Non SSL as choices.
* **Upload Key:** Select a upload key using the drop-down menu (This field appears only if the SSL option has been selected for the SSL Type field).
* Click the **Save** option.
* A success message appears confirming the connection.

* A success message appears, and the newly created PostgreSQL data connector gets added to the Data Connectors list..

{% hint style="info" %}
*Please Note:*
* *The PostgreSQL Data Connector supports multiple IP/ Host separated by commas.*
* *The PostgreSQL Data Connector supports **single Port number**.*
* *The **Upload Key** field appears only if the selected SSL Type option is SSL.*
{% endhint %}