
Upload Certificate Settings
By default, Platform connectors will not perform any verification of the server certificate. It means that someone can pretend to be the server without the client’s awareness. To prevent this kind of impersonation, the client needs to be able to verify the server's identity through a trusted chain of verification.
Pre-requisites: For SSL support to work, the user must have the following:
A MySQL/ ClickHouse /PostgreSQL server that supports SSL (as currently the SSL implementation has been provided for these data connectors).
A signed client certificate.
Upload a New Certificate
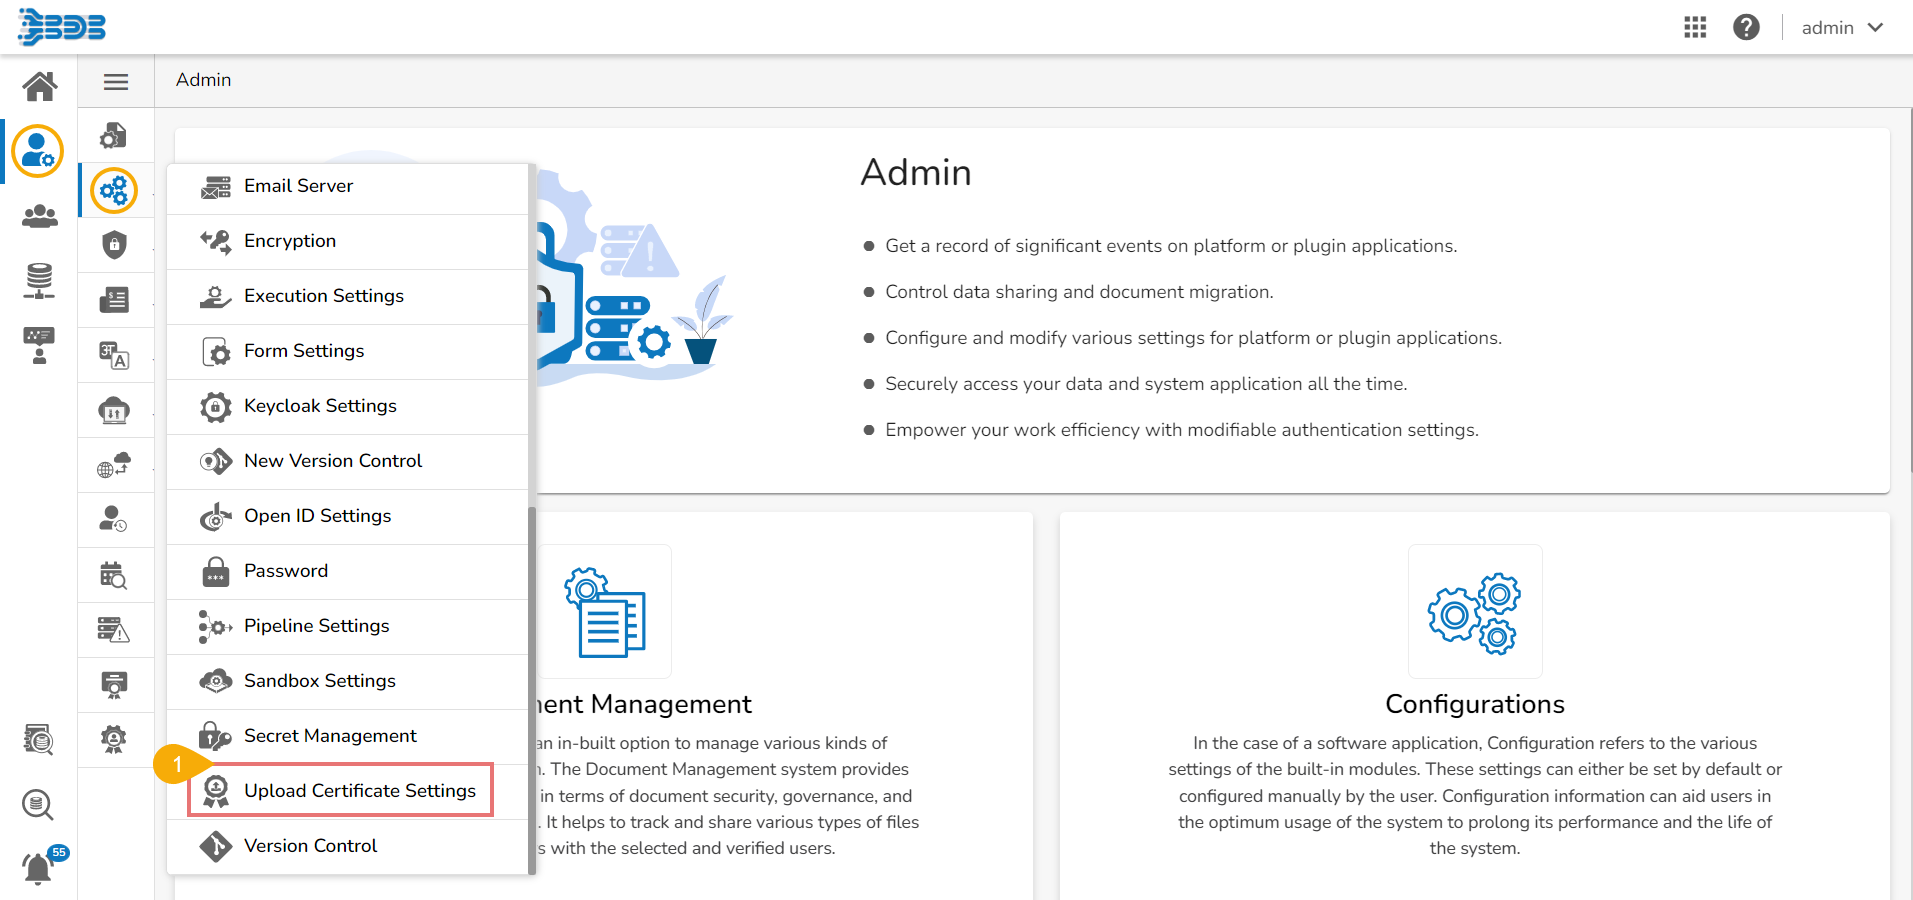
Click the Upload Certificate Settings option from the list of Configurations.
The Upload Certificate Settings page opens (It will be an empty list initially).
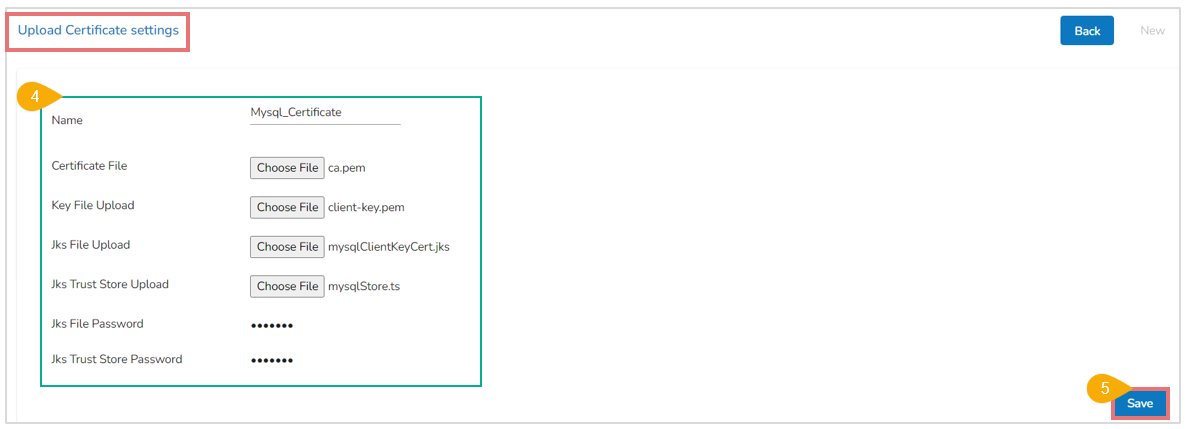
Click the New option to upload settings for a new certificate.

Provide the required details of the SSL Connector.
Name- This name is a key that can be configured for the Respective SSL Connector from the platform.
Certificate File- File with encrypted data that you install on the server for the secure sensitive communications.
Key File Upload- small data files that digitally bind a key.
Jks File Upload- contains the Application Server's trusted certificates.
Jks Trust Store Upload - contains the Application Server's trusted certificates.
Jks File Password- Password used to protect a JKS file
Jks Trust Store Password – To protect a JKS file that contains trusted certificates.
After Uploading the required certificates and details click the Save option to save the details.
A notification message appears.

The uploaded certificate gets listed on the Certificate List page.

Please Note:
In-between space is not allowed in the Name.
Use the Back option to exit the page.
View the Uploaded Certificate
Navigate to the Upload Certificate Settings page.
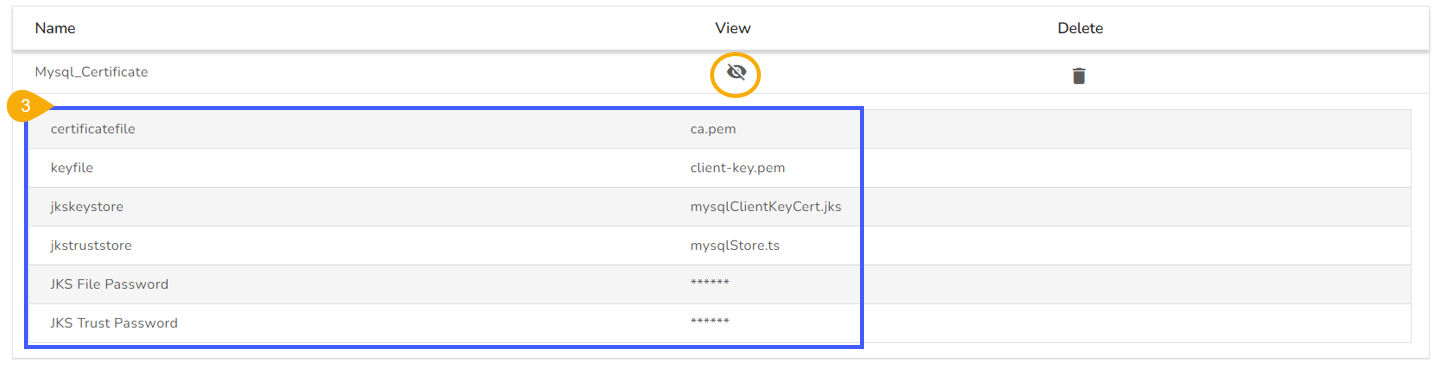
Click the View icon for an uploaded certificate entry.

The details of the selected certificate entry gets displayed.
Delete the Uploaded Certificate
Navigate to the Upload Certificate Settings page.
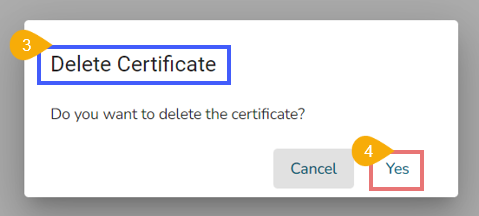
Click the Delete icon for an uploaded entry.

The Delete Certificate confirmation dialog box appears.
Confirm the deletion by clicking the Yes option.
A notification message appears to confirm the deletion of the SSL configuration, and the selected SSL configuration gets deleted.

Please Note: The Admin can choose Cancel option to cancel the deletion.