
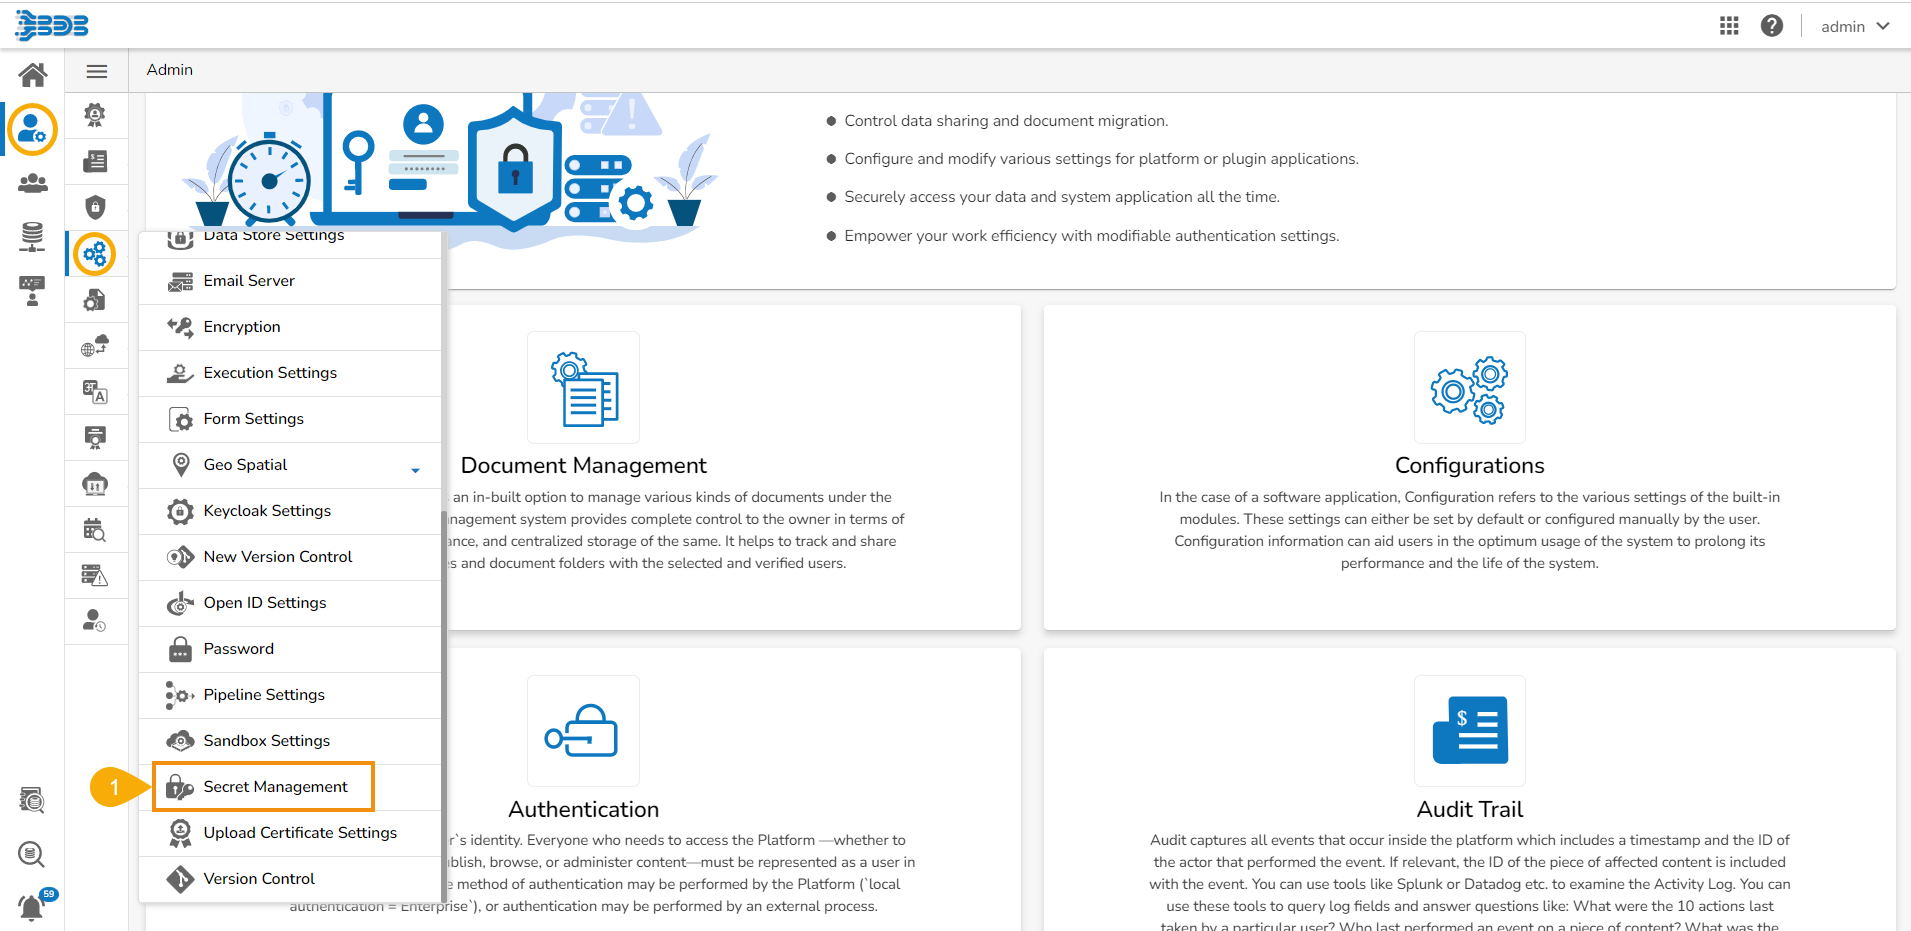
Secret Management
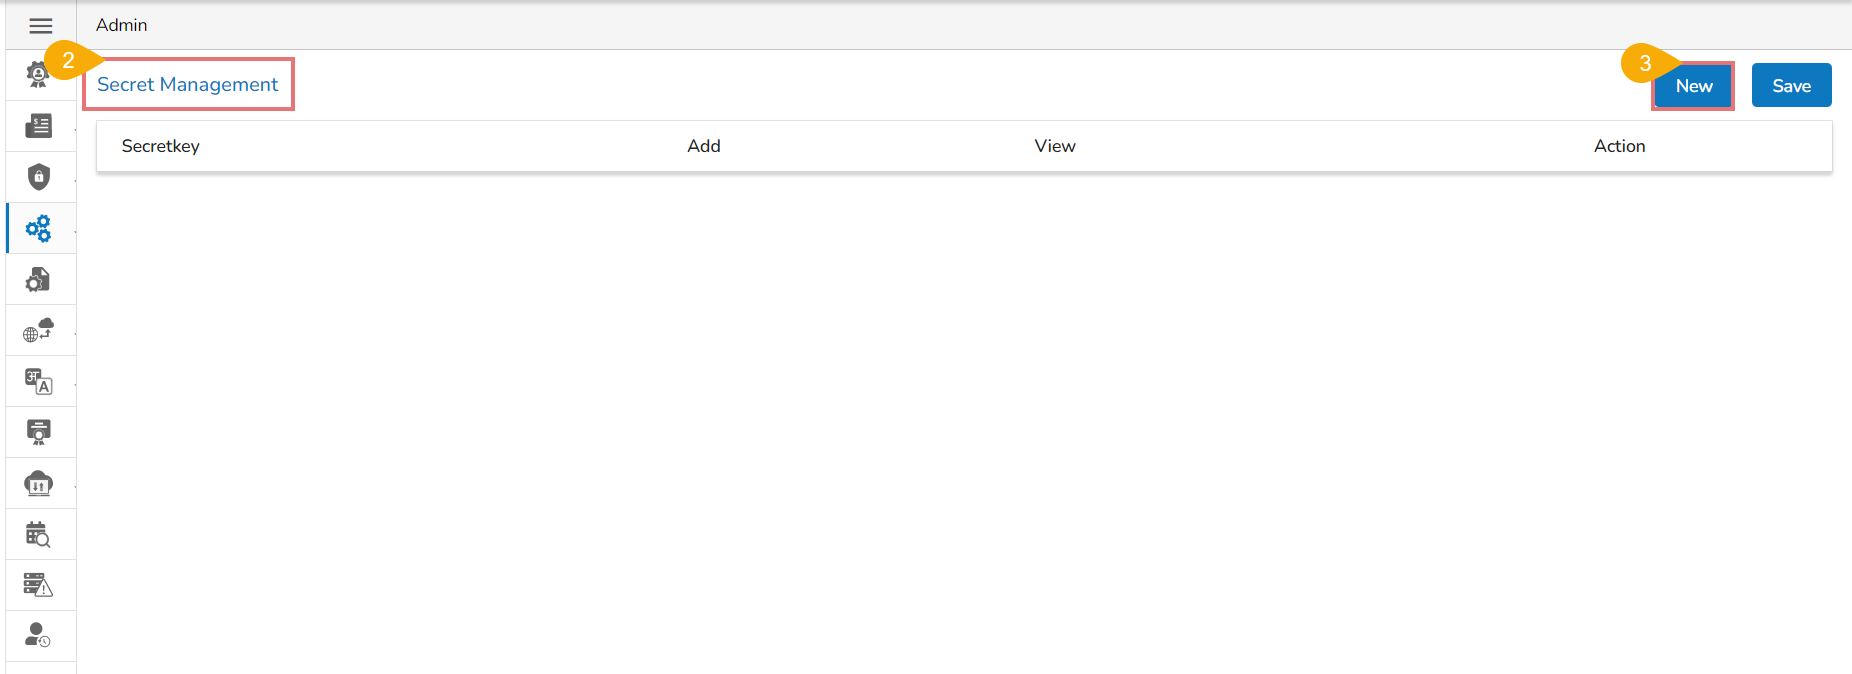
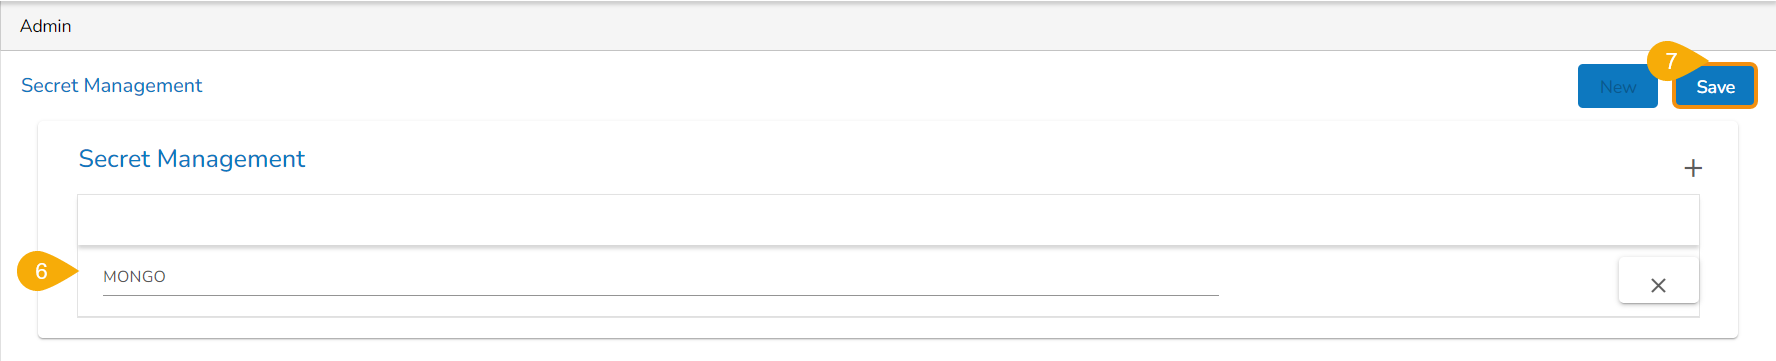
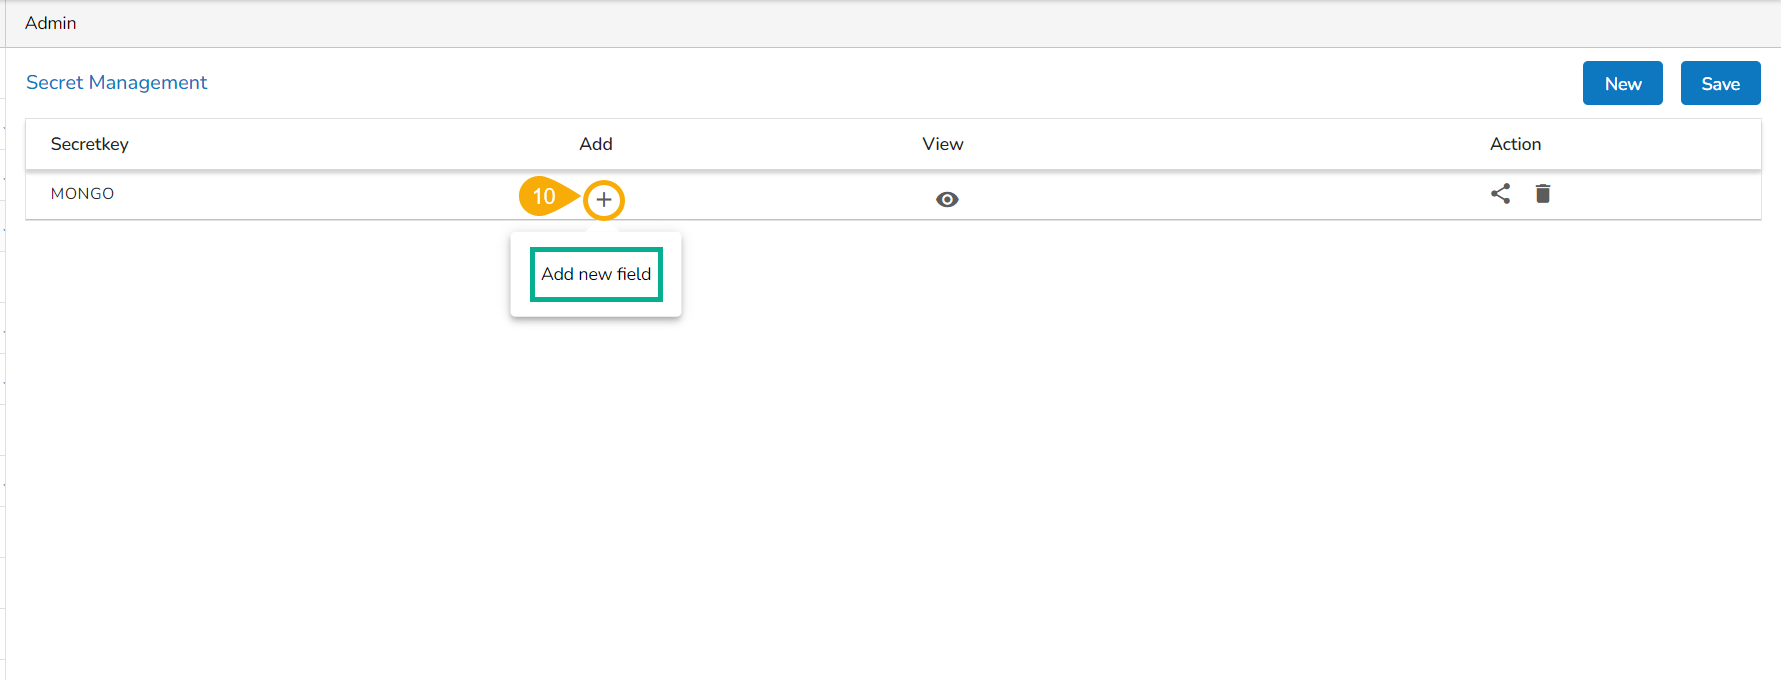
Steps to Add Secret Key


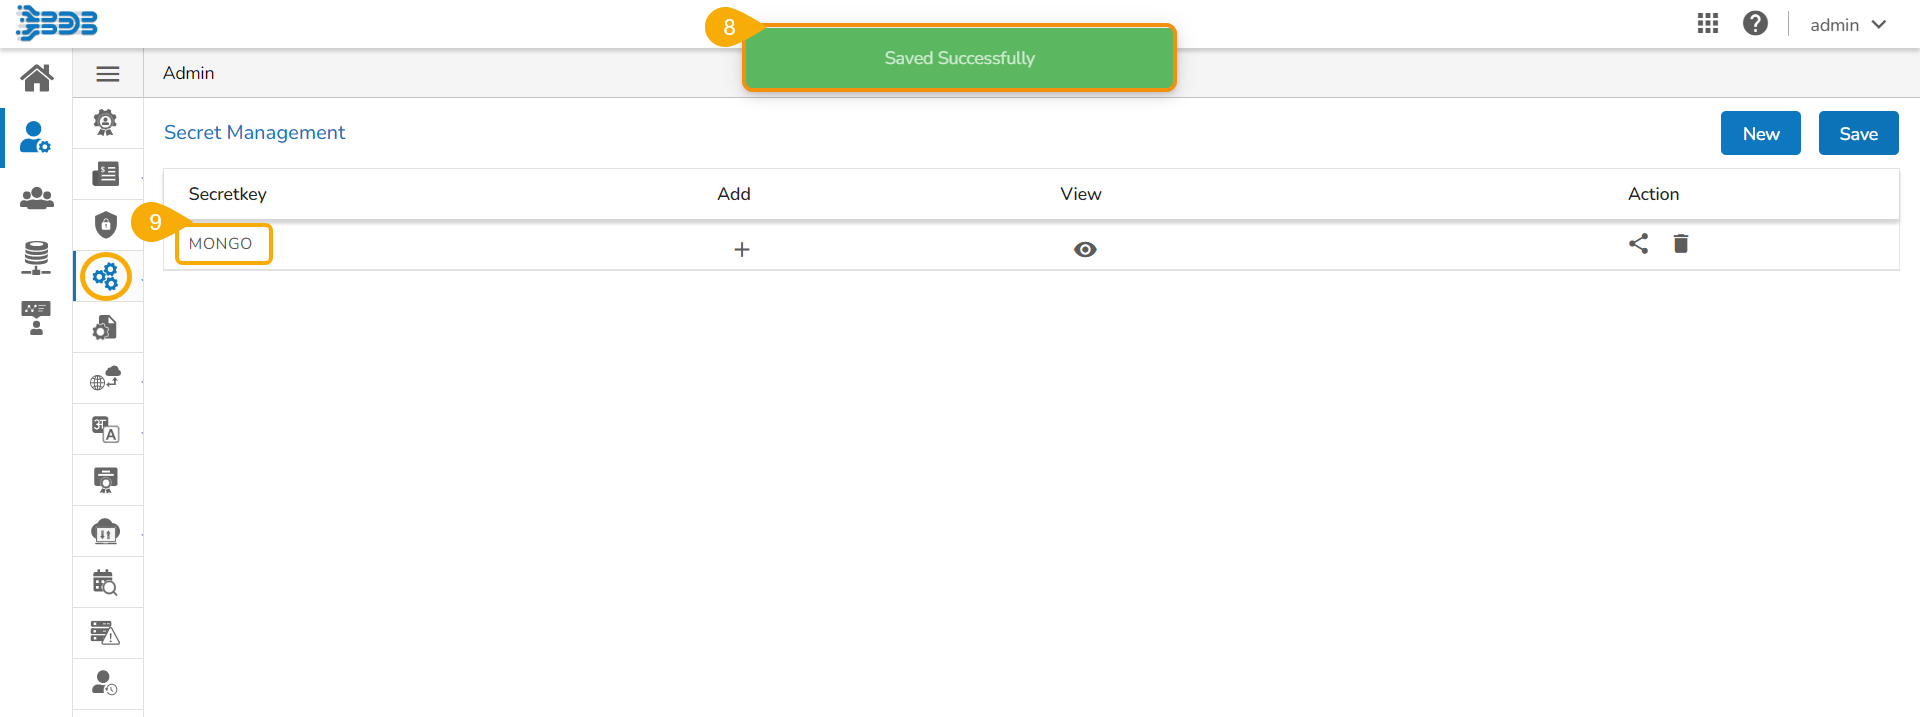
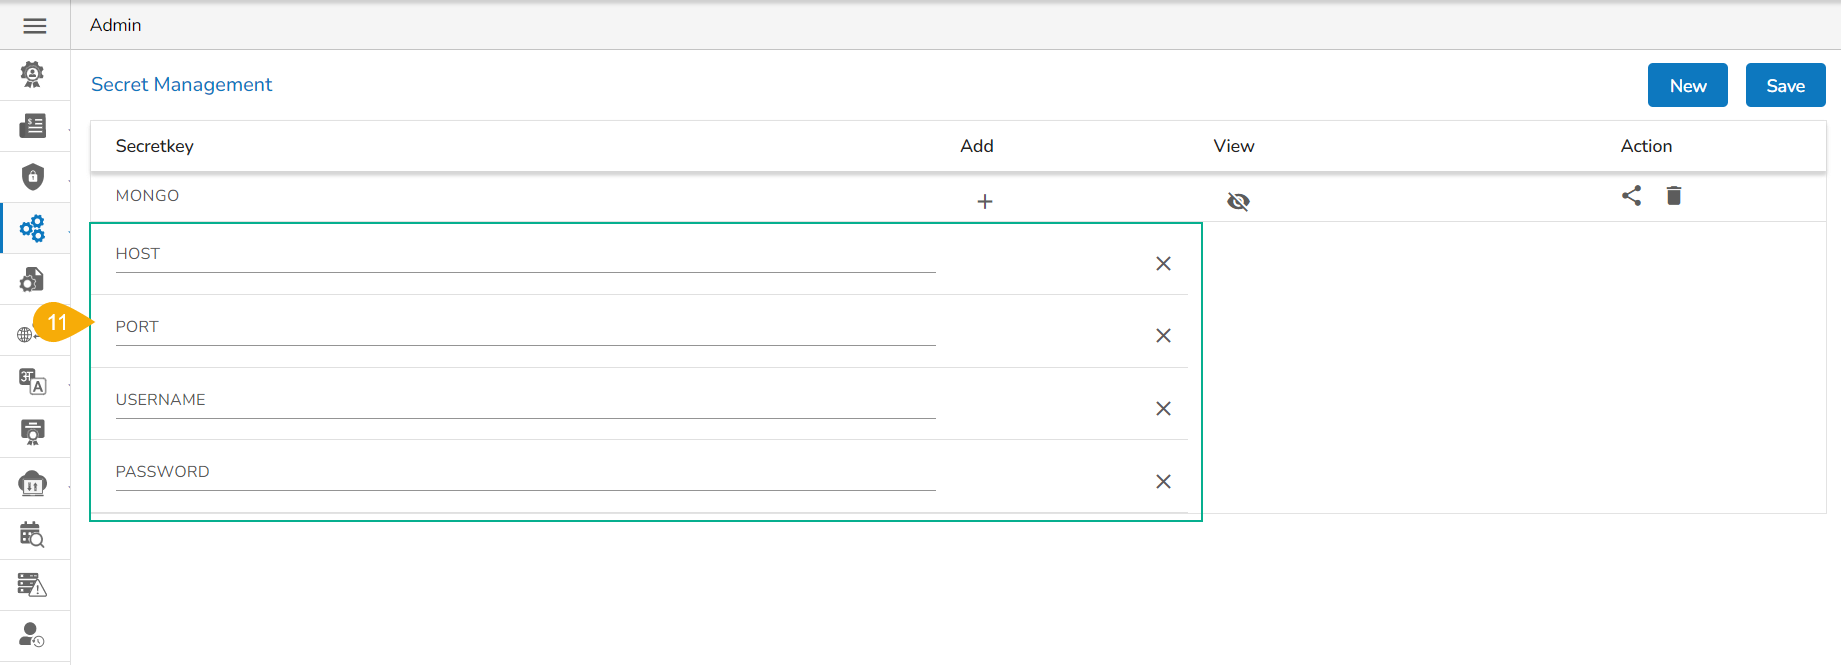
Click the View
 icon to display all the added fields.
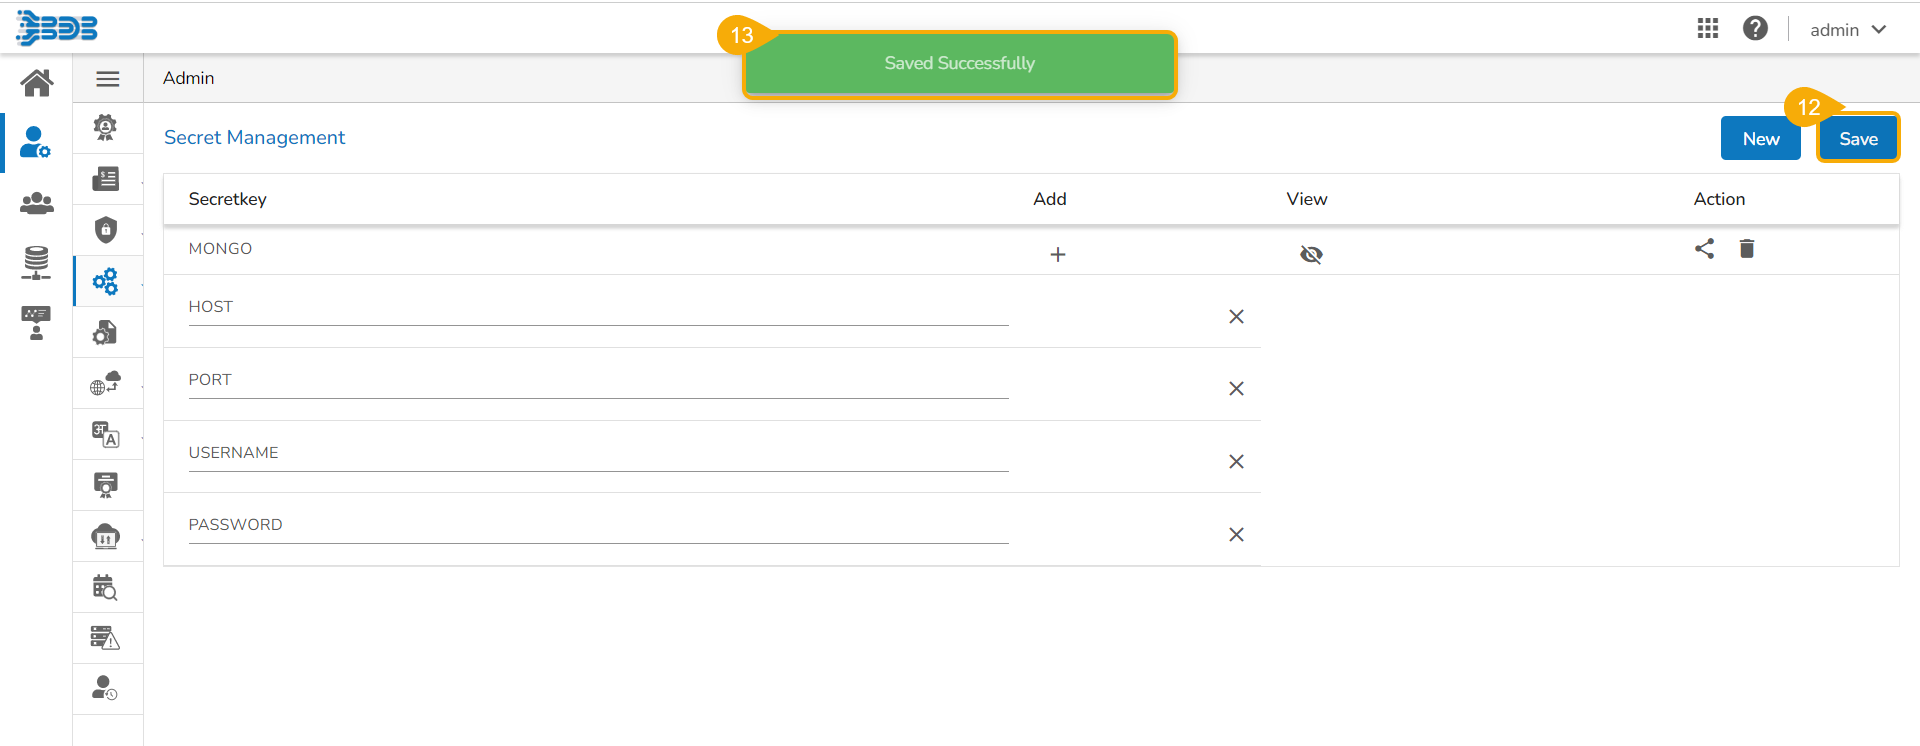
Click the Delete
 icon to remove the added Secret key.
Click the Close
 icon to remove an added field.
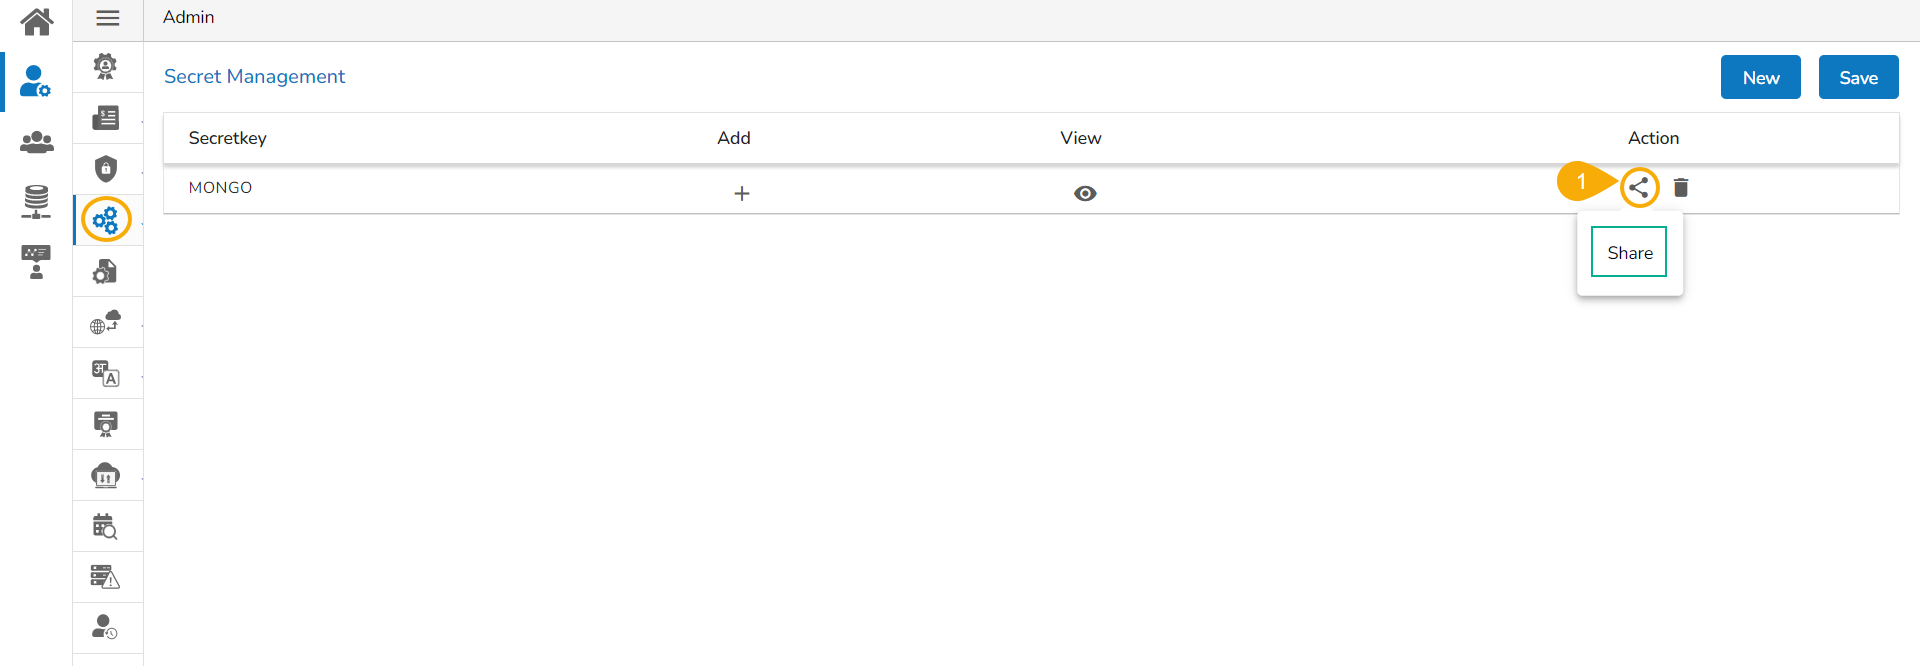
Steps to Share a Secret Key
Once Admin has configured the settings, it is possible to share it to a user/user group to use the encrypted secret keys. Click the Share ![]() icon provided next to a saved Secret Key to share it.
icon provided next to a saved Secret Key to share it.


Last updated