
Migrating a Dashboard
The users can import an exported Dashboard using this feature.
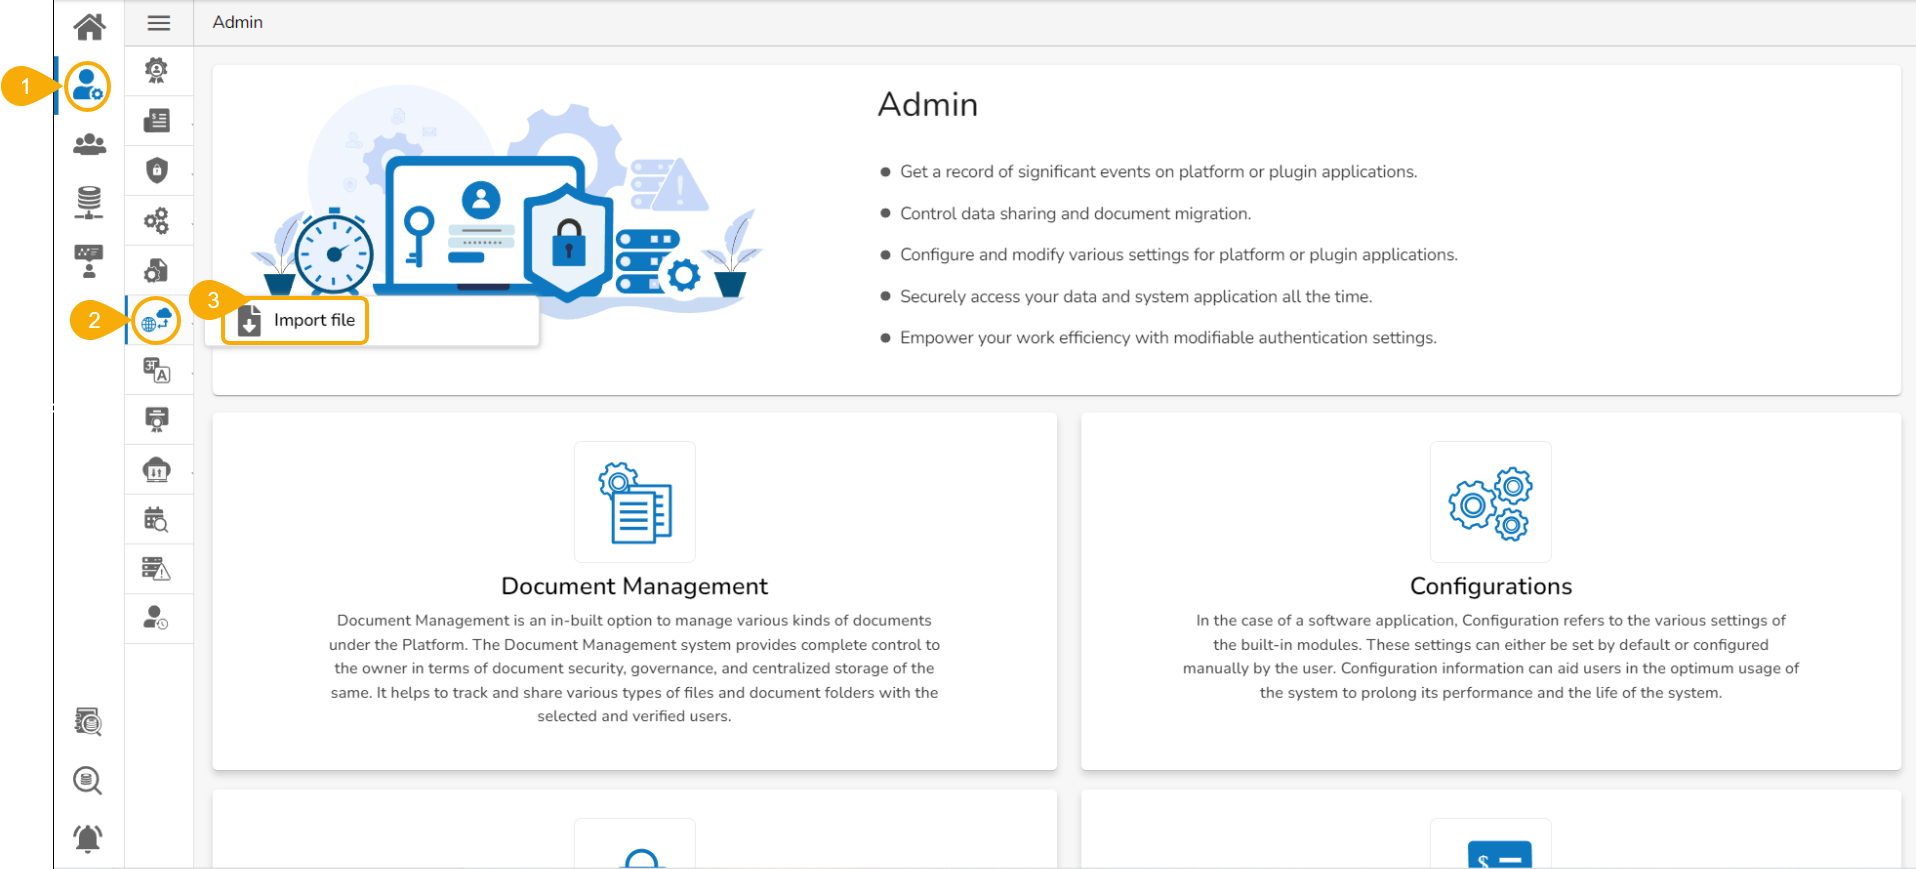
Navigate to Admin Module.
Click the GIT Migration icon from the side navigation bar.
Click the Import file option that appears.
Click the Import option that appears on the next page.

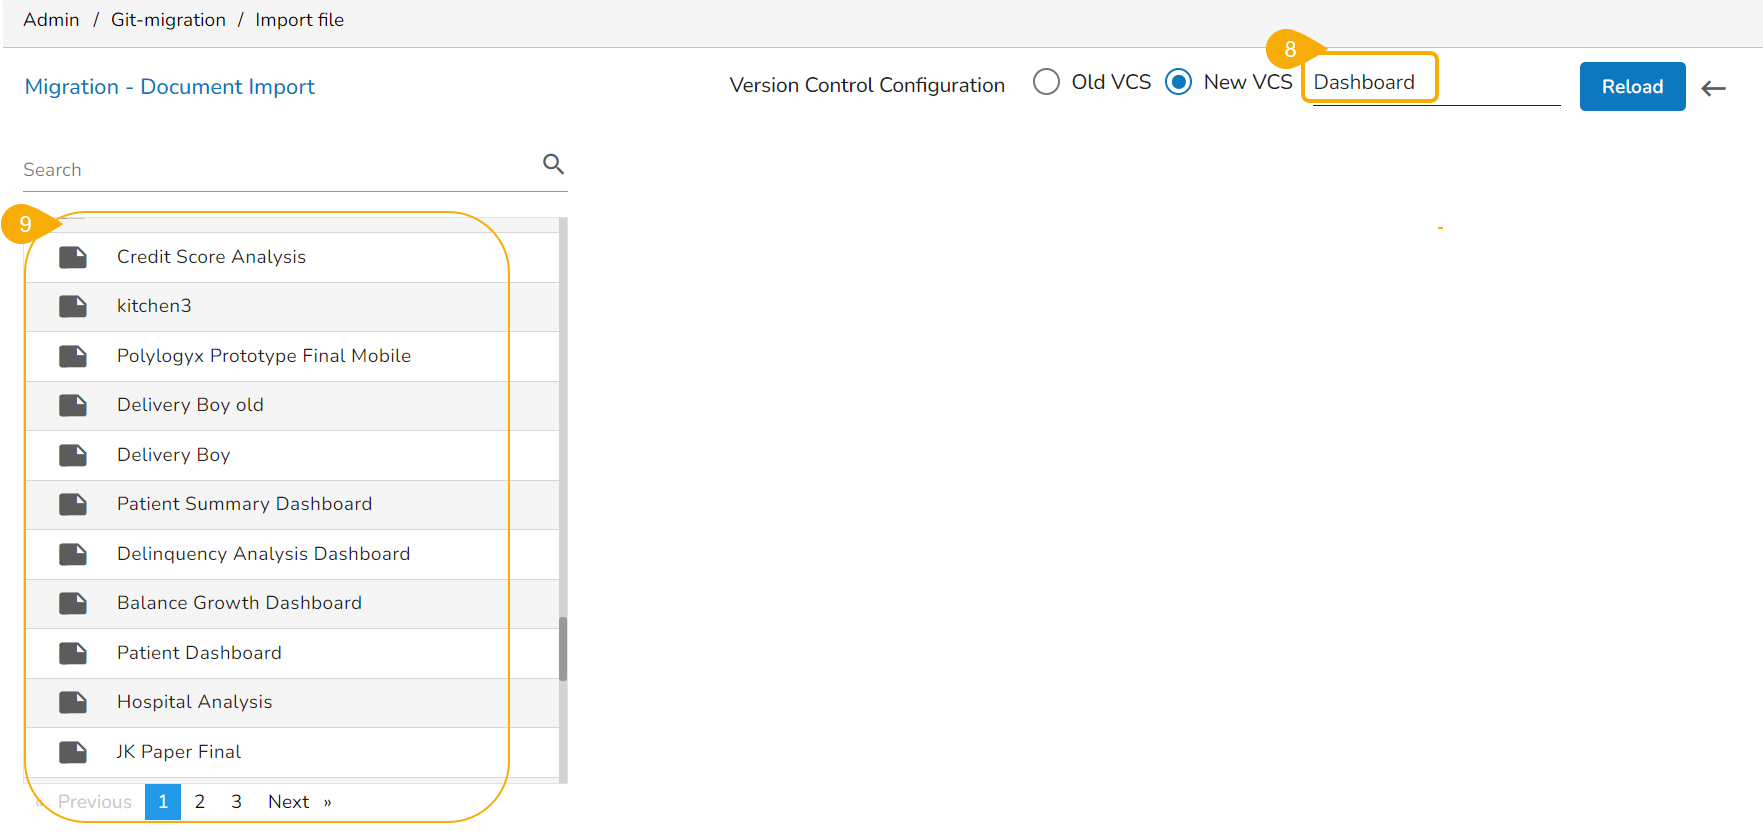
The Migration-Document Import screen appears.
Select the New VCS for the Version Control Configuration.
The Select a Module drop-down menu bar appears at the top-right side of the screen.

Select the Dashboard module.
A list of the exported dashboards appears on the left side of the page.
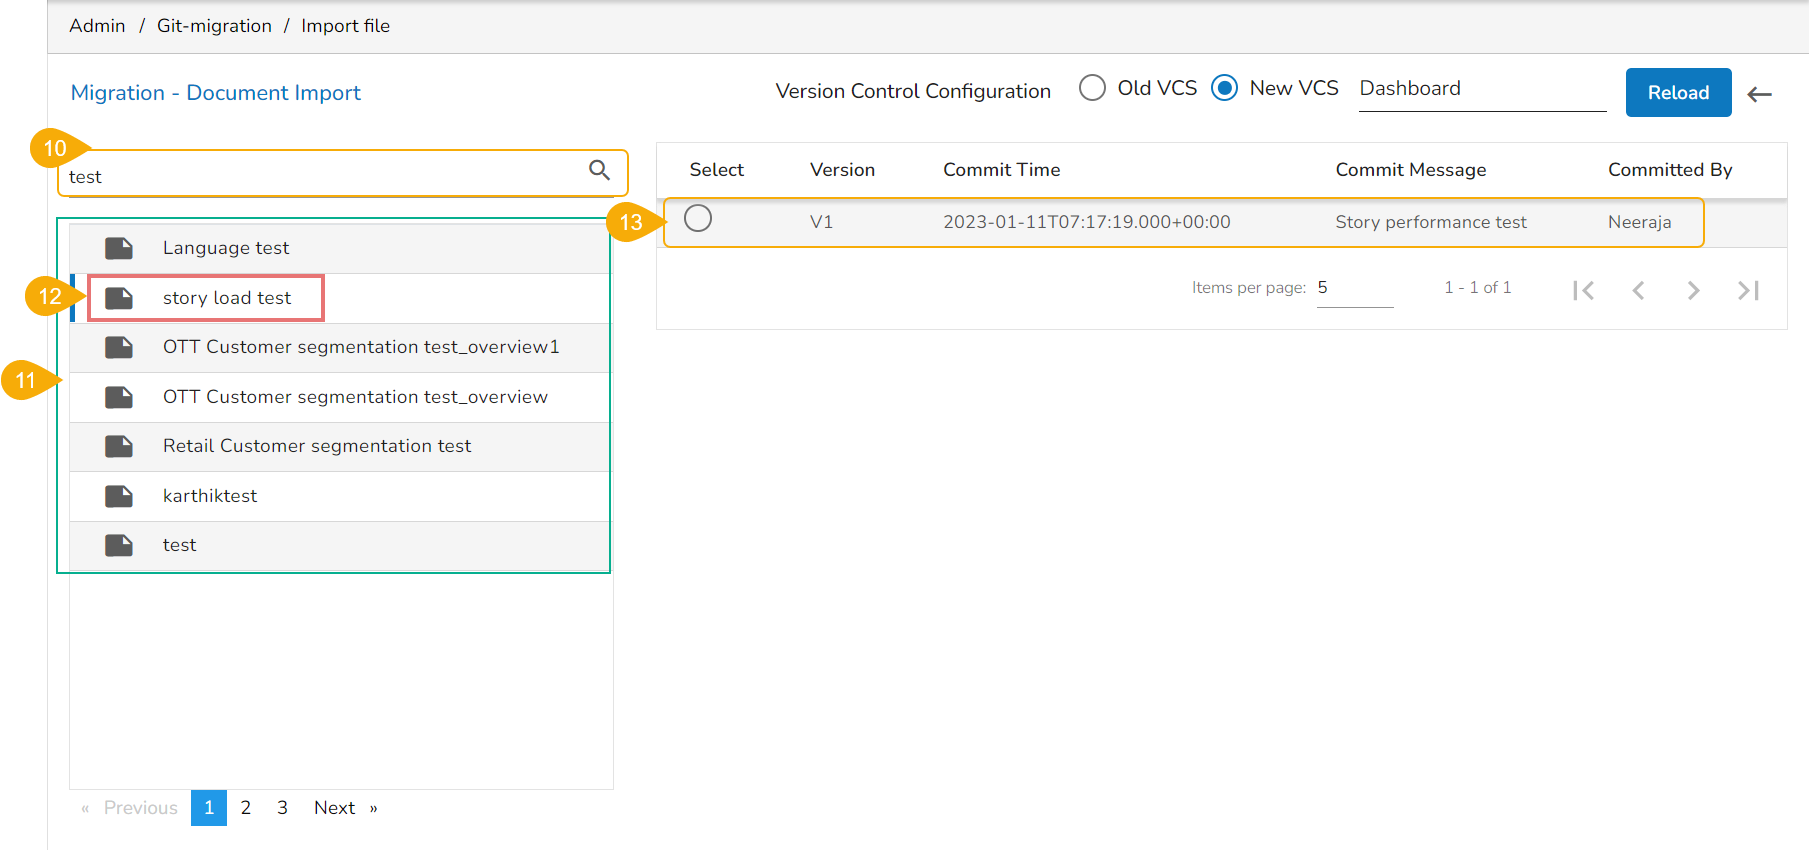
Use the search bar to search for a dashboard. (Ex. vtestdasdboard)
The customized list appears based on the searched term.
Select a dashboard and click to open the details.
The various versions (if available in the GIT) of the selected dashboard appear.
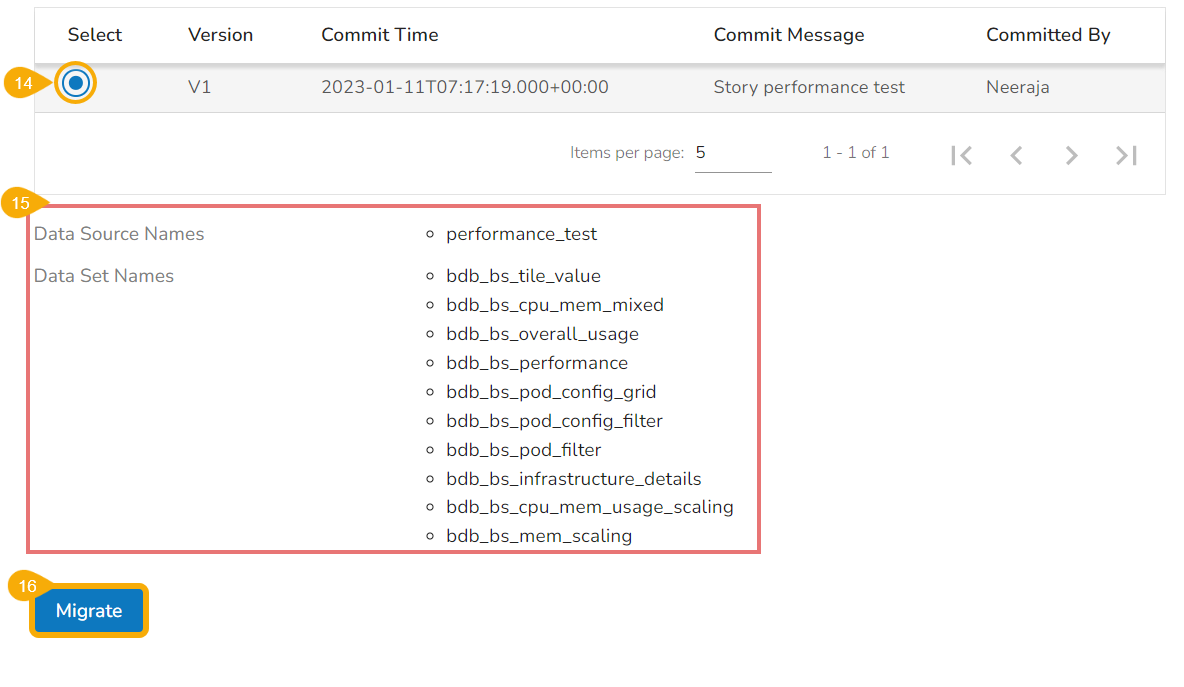
Select a version using the checkbox.
Some more information about the selected dashboard gets displayed.
Click the Migrate option.
The Data Connector Details dialog window appears to configure a data connector.
The user gets two choices to configure the data connector:
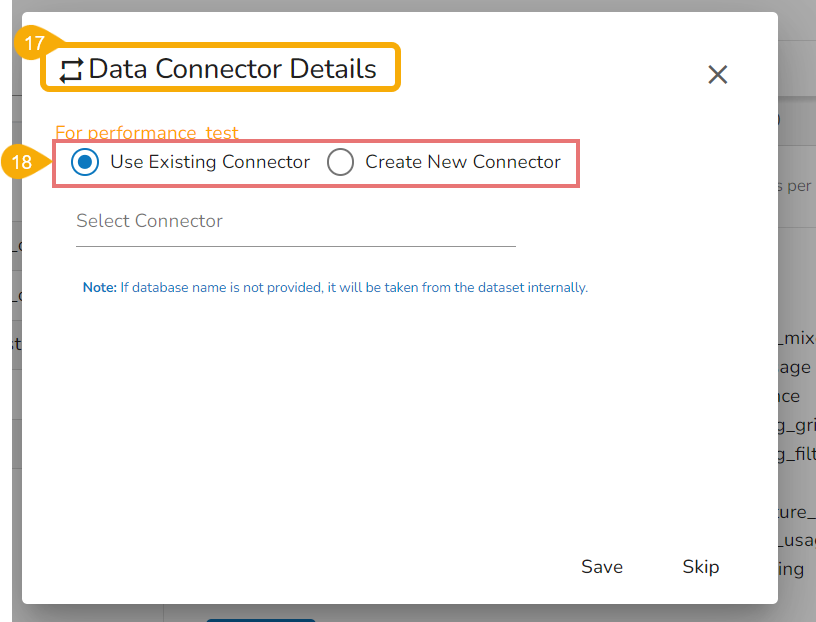
Use Existing Connector
Let the checkmark be in the given checkbox to use an existing connector.
Select a data connector from the drop-down menu.
Click the Save option to save the configured data connector details.
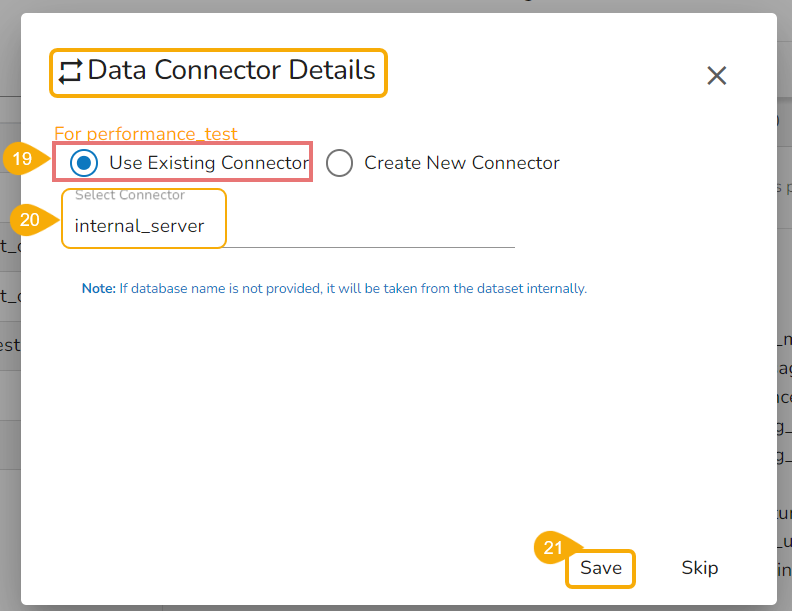
Please Note: When the selected Dashboard displays multiple connectors, the user must select them all with the Use Existing Connector option to load all the charts under the selected Dashboard.
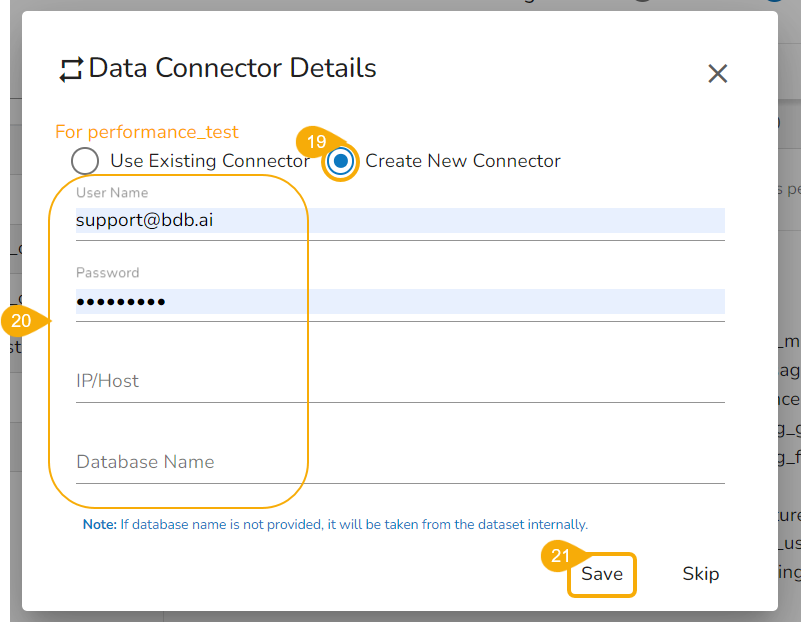
Create a New Data Connector
Select the Create New Connector option.
Provide the required details: Username, Password, PI/Host, Database Name
Click the Save option.
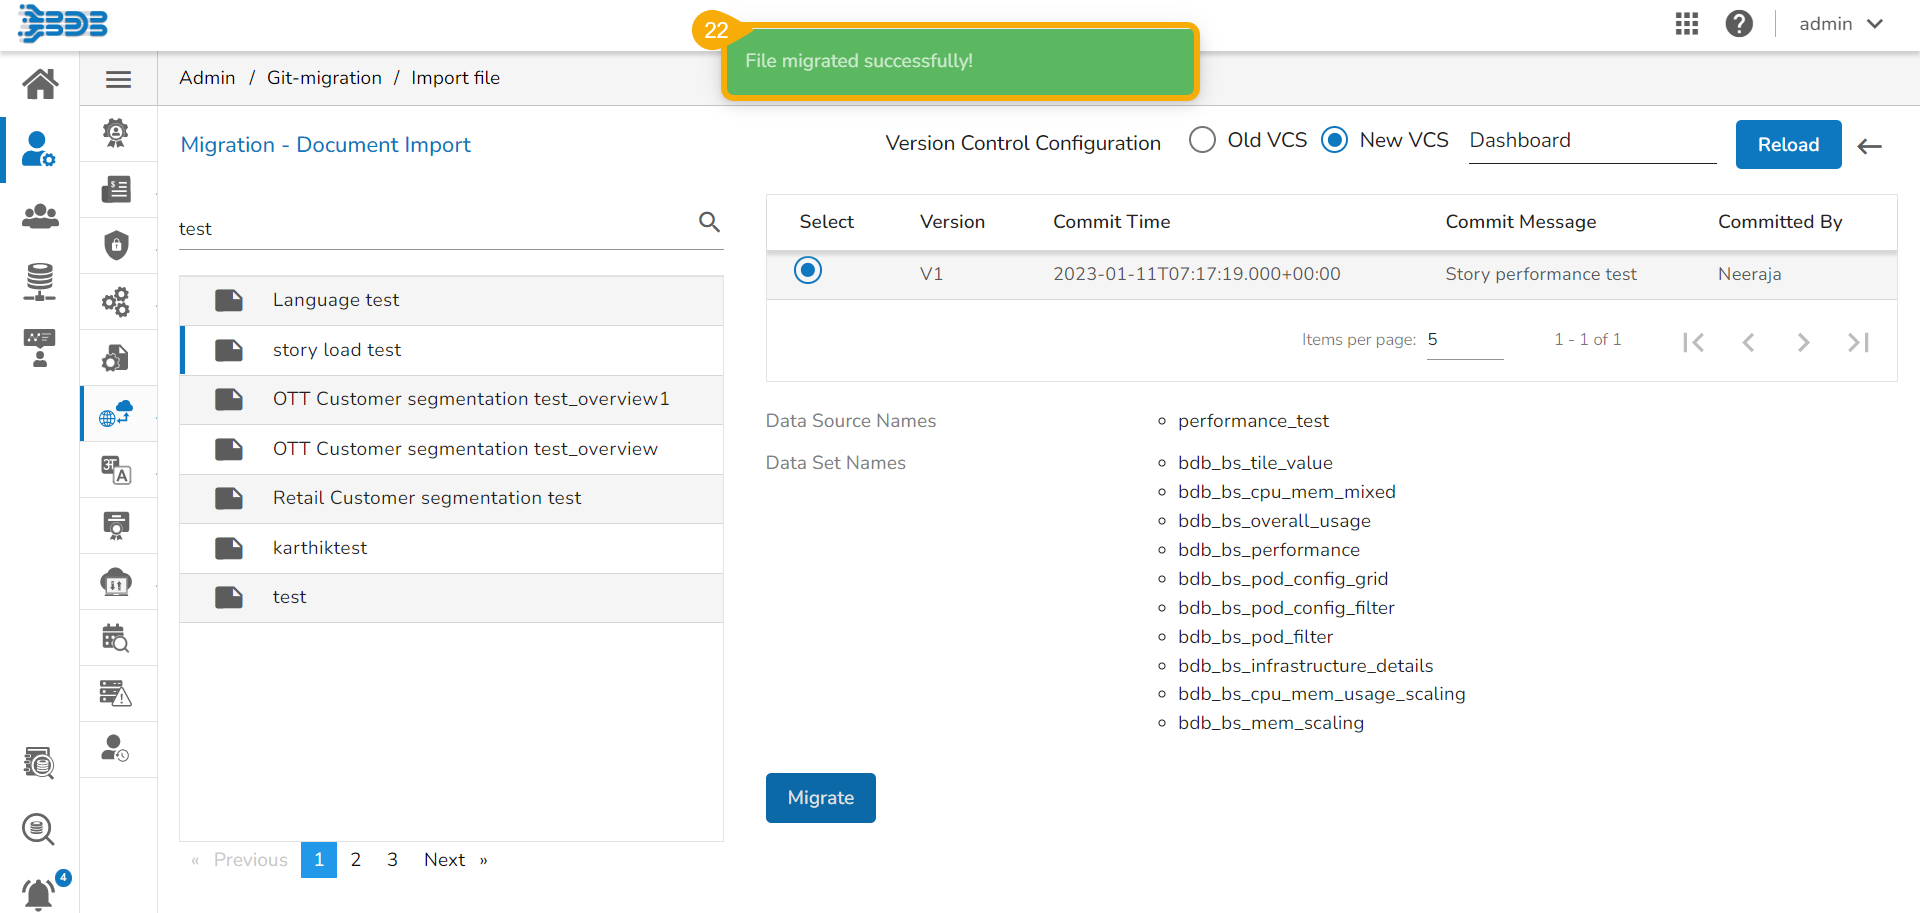
A notification message appears, and the selected dashboard gets migrated to the Designer module.
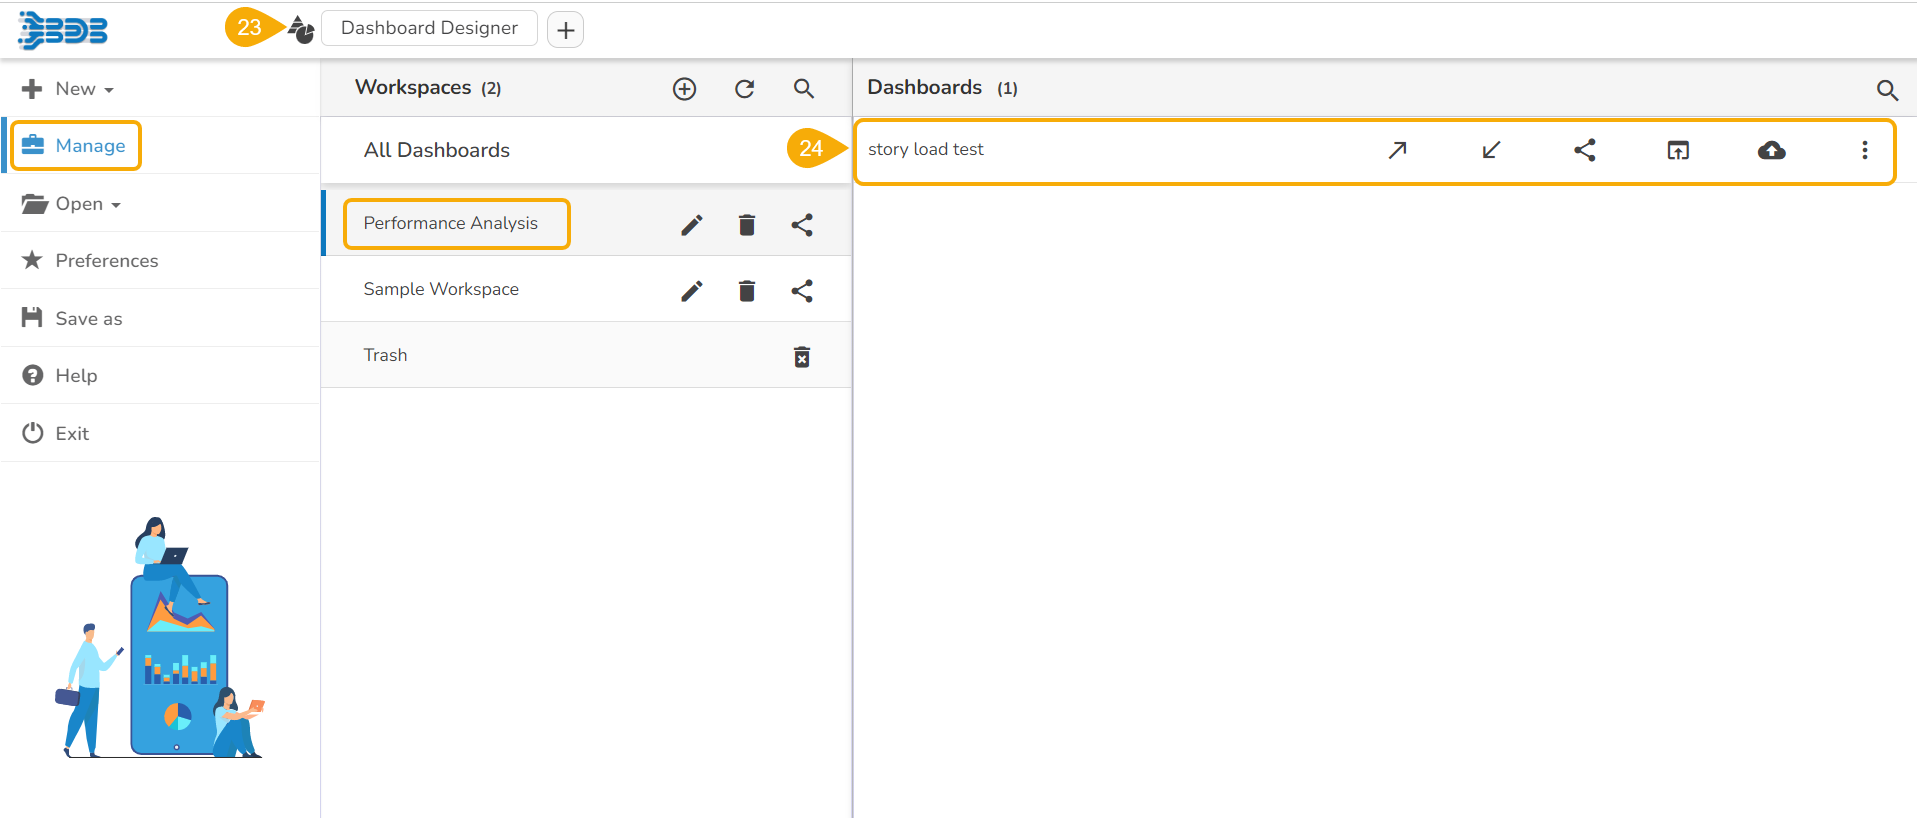
Navigate to the Designer module.
The migrated dashboard gets added to the Manage section.
Please Note: Click the GIT Export icon to export the selected dashboard to GIT. All the exported Dashboards can be imported using the Import File option of the GIT Migration.
Last updated