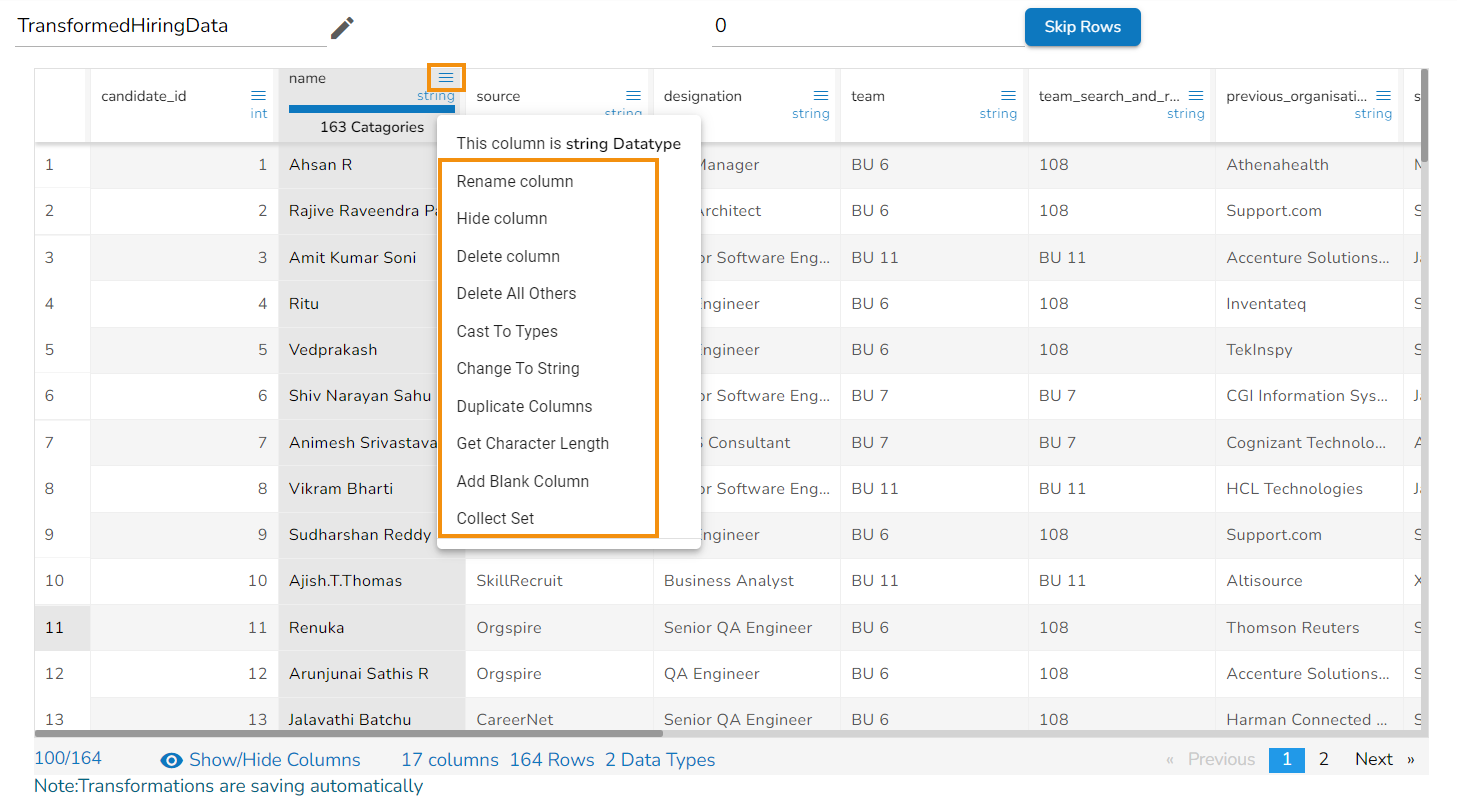
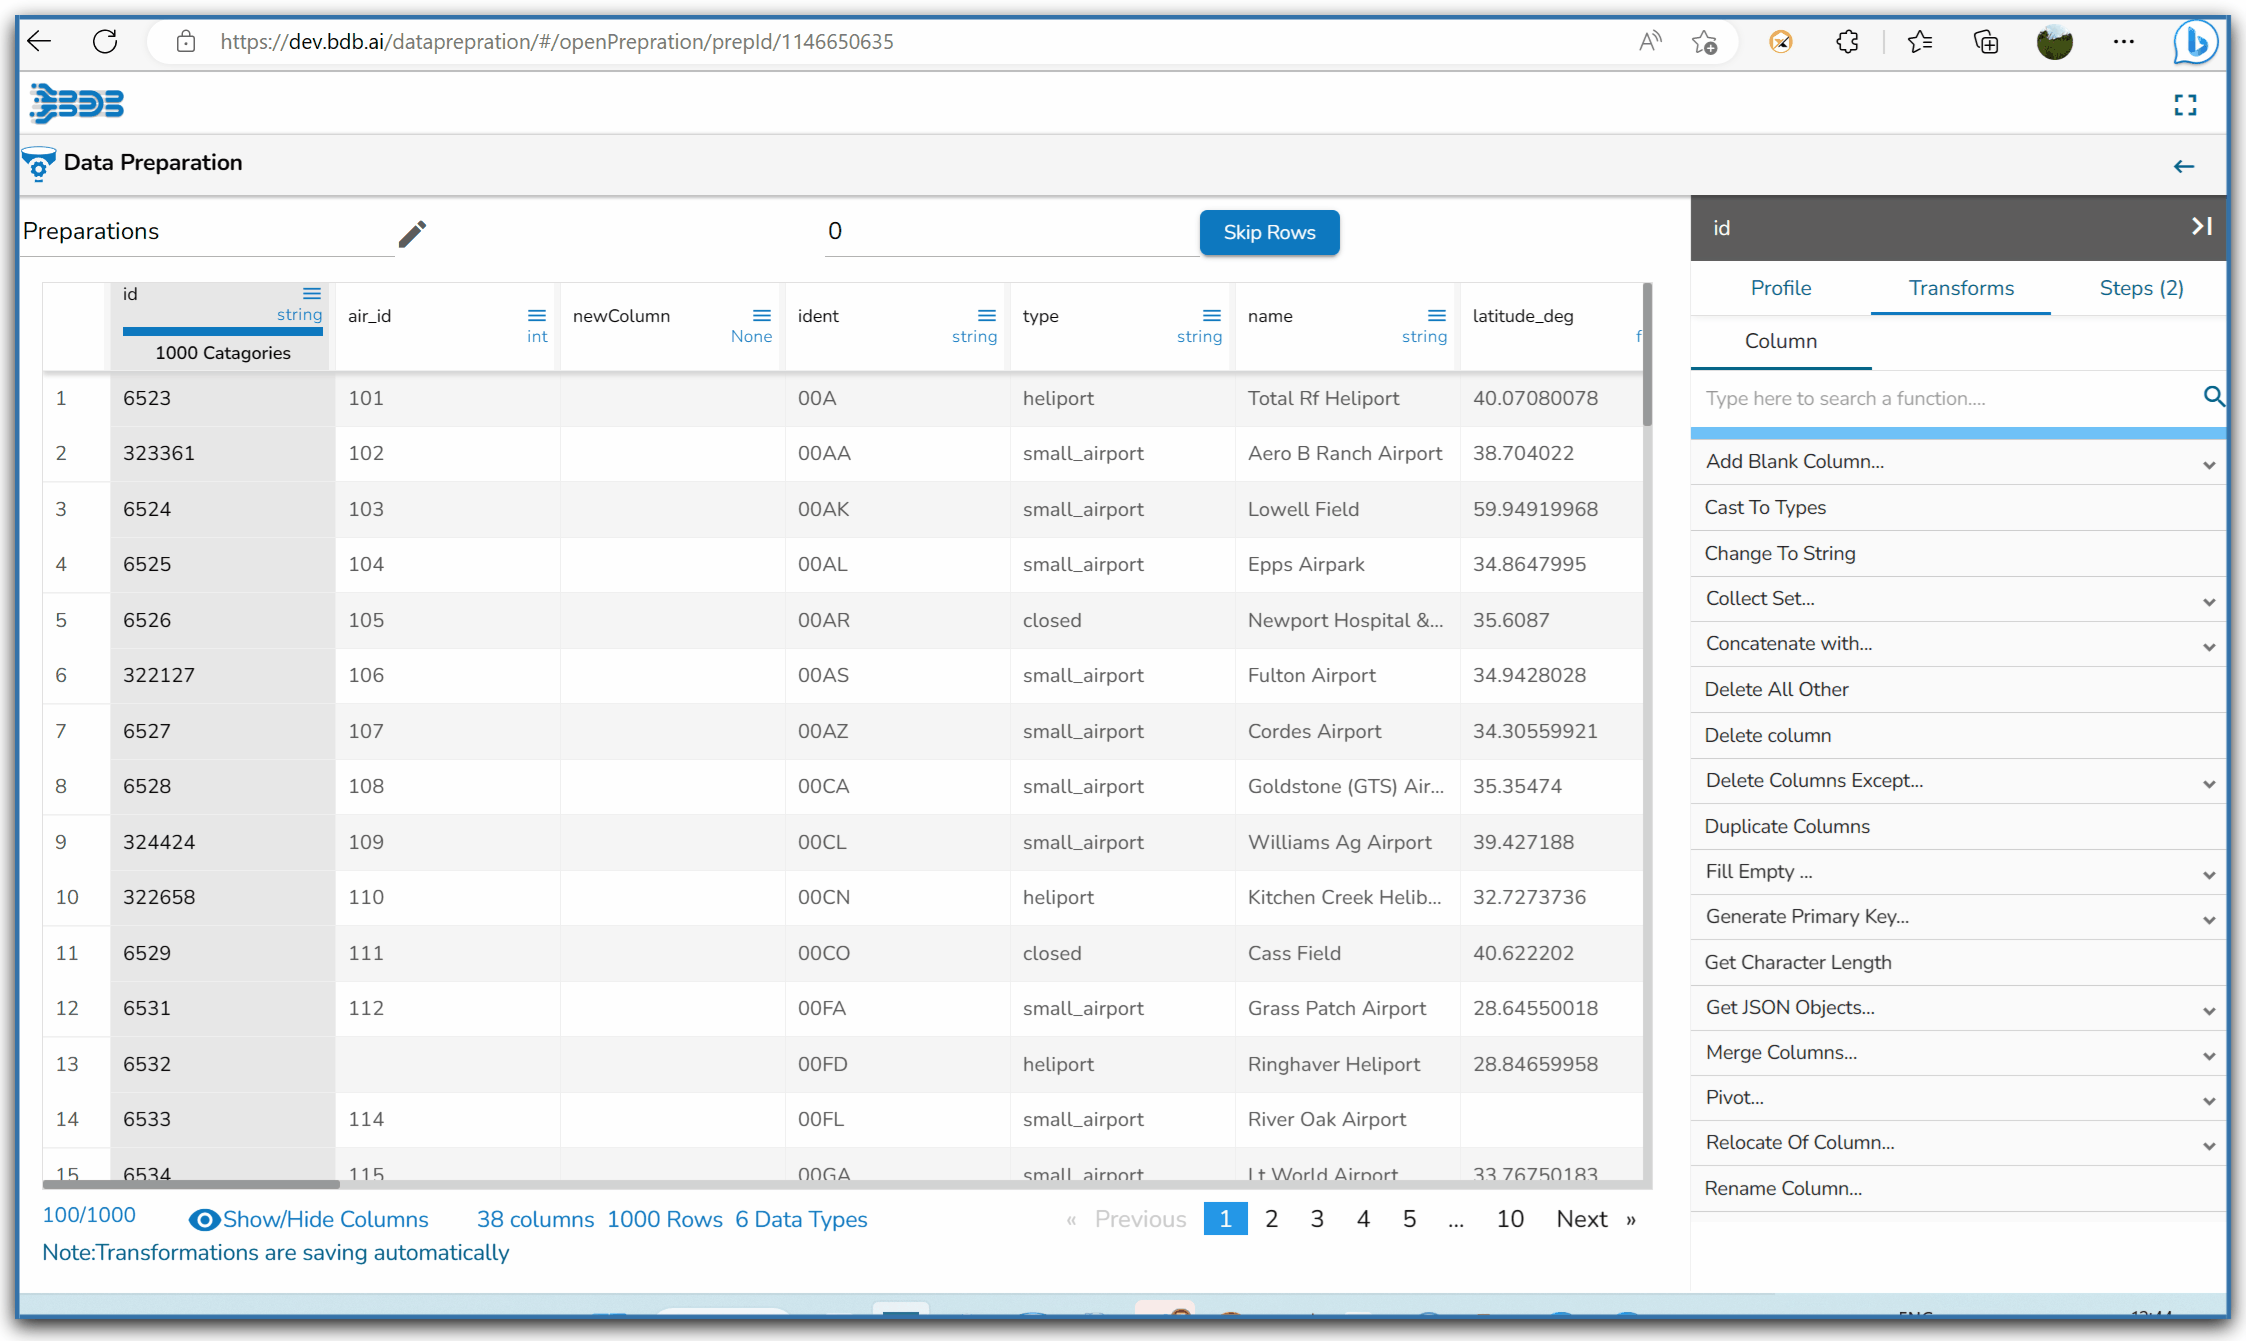
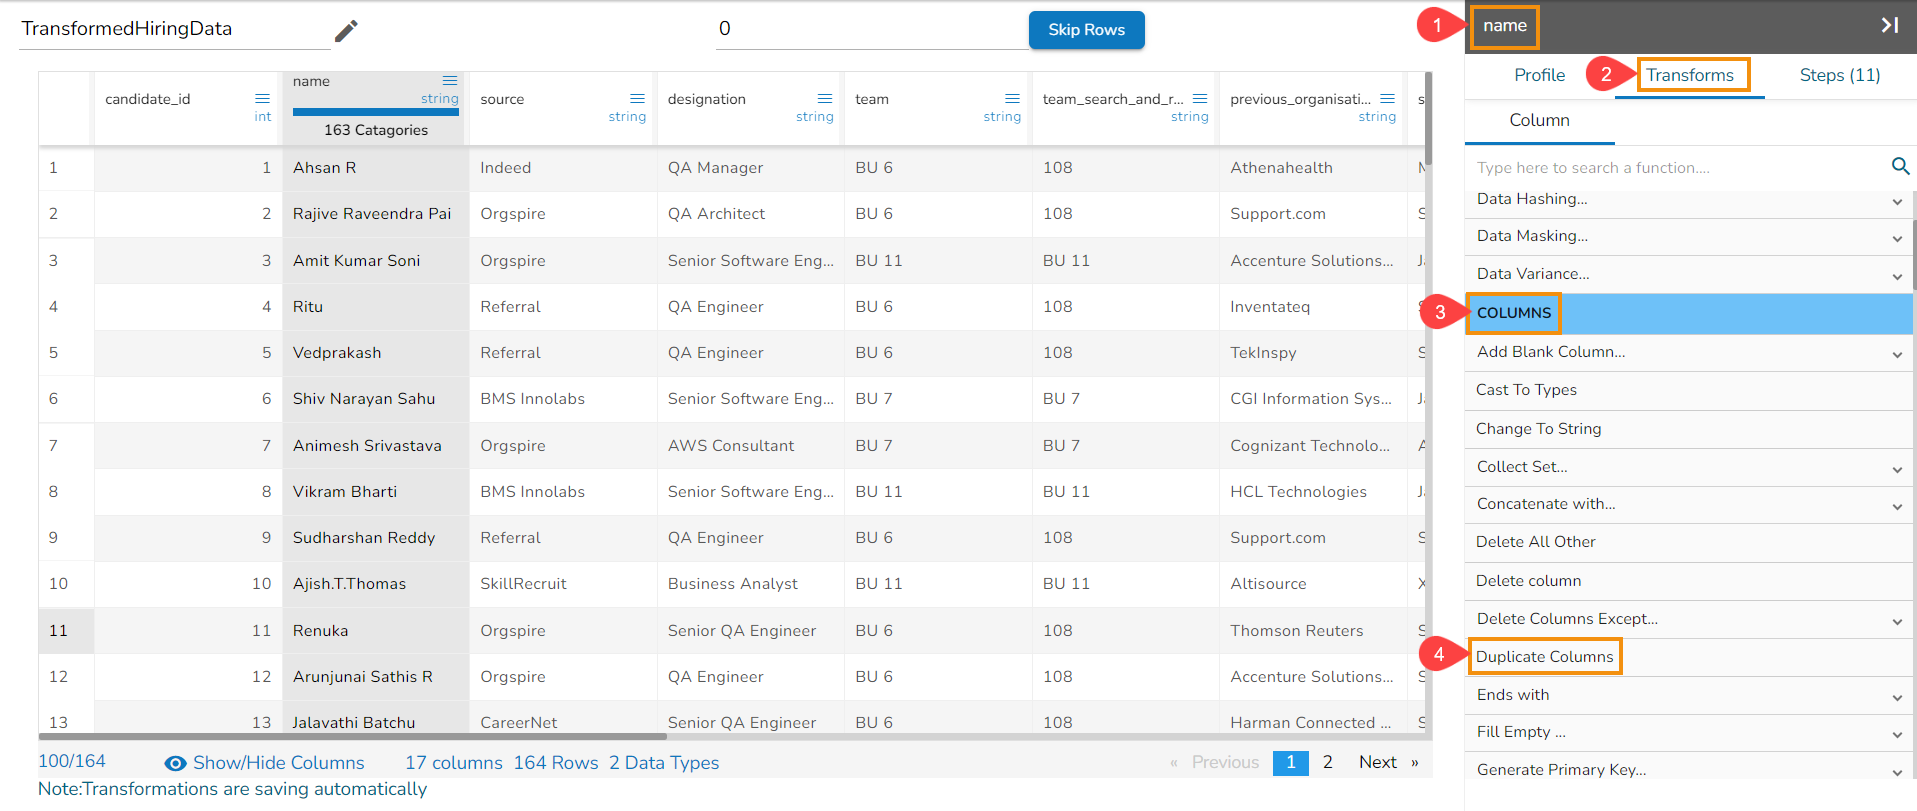
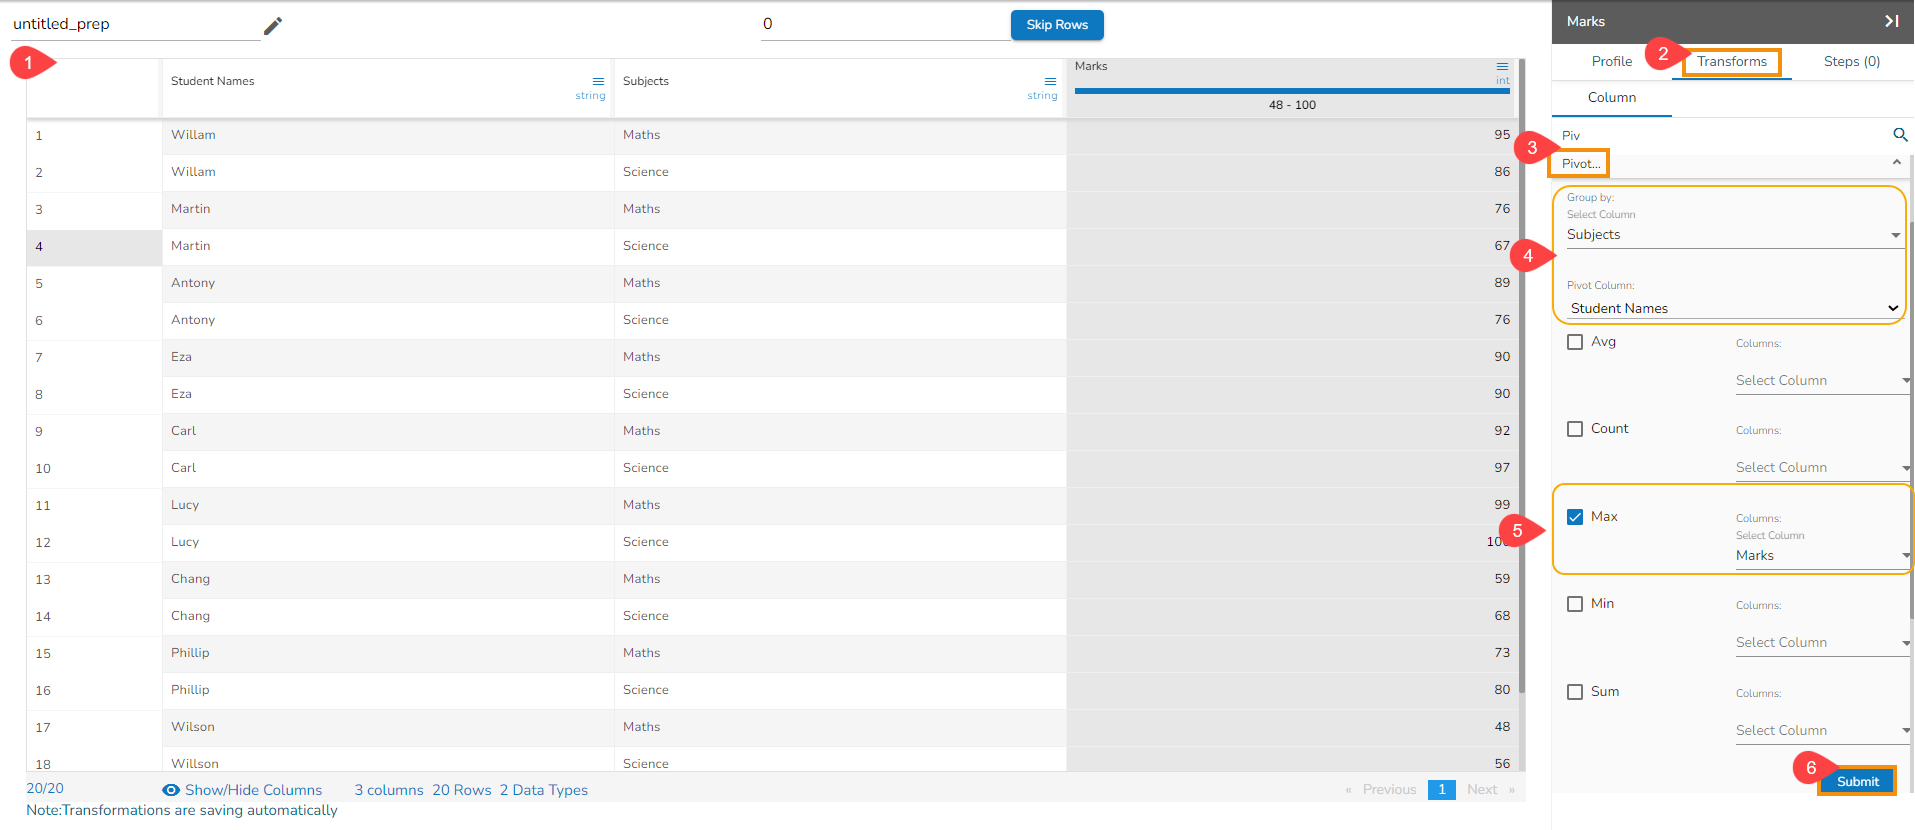
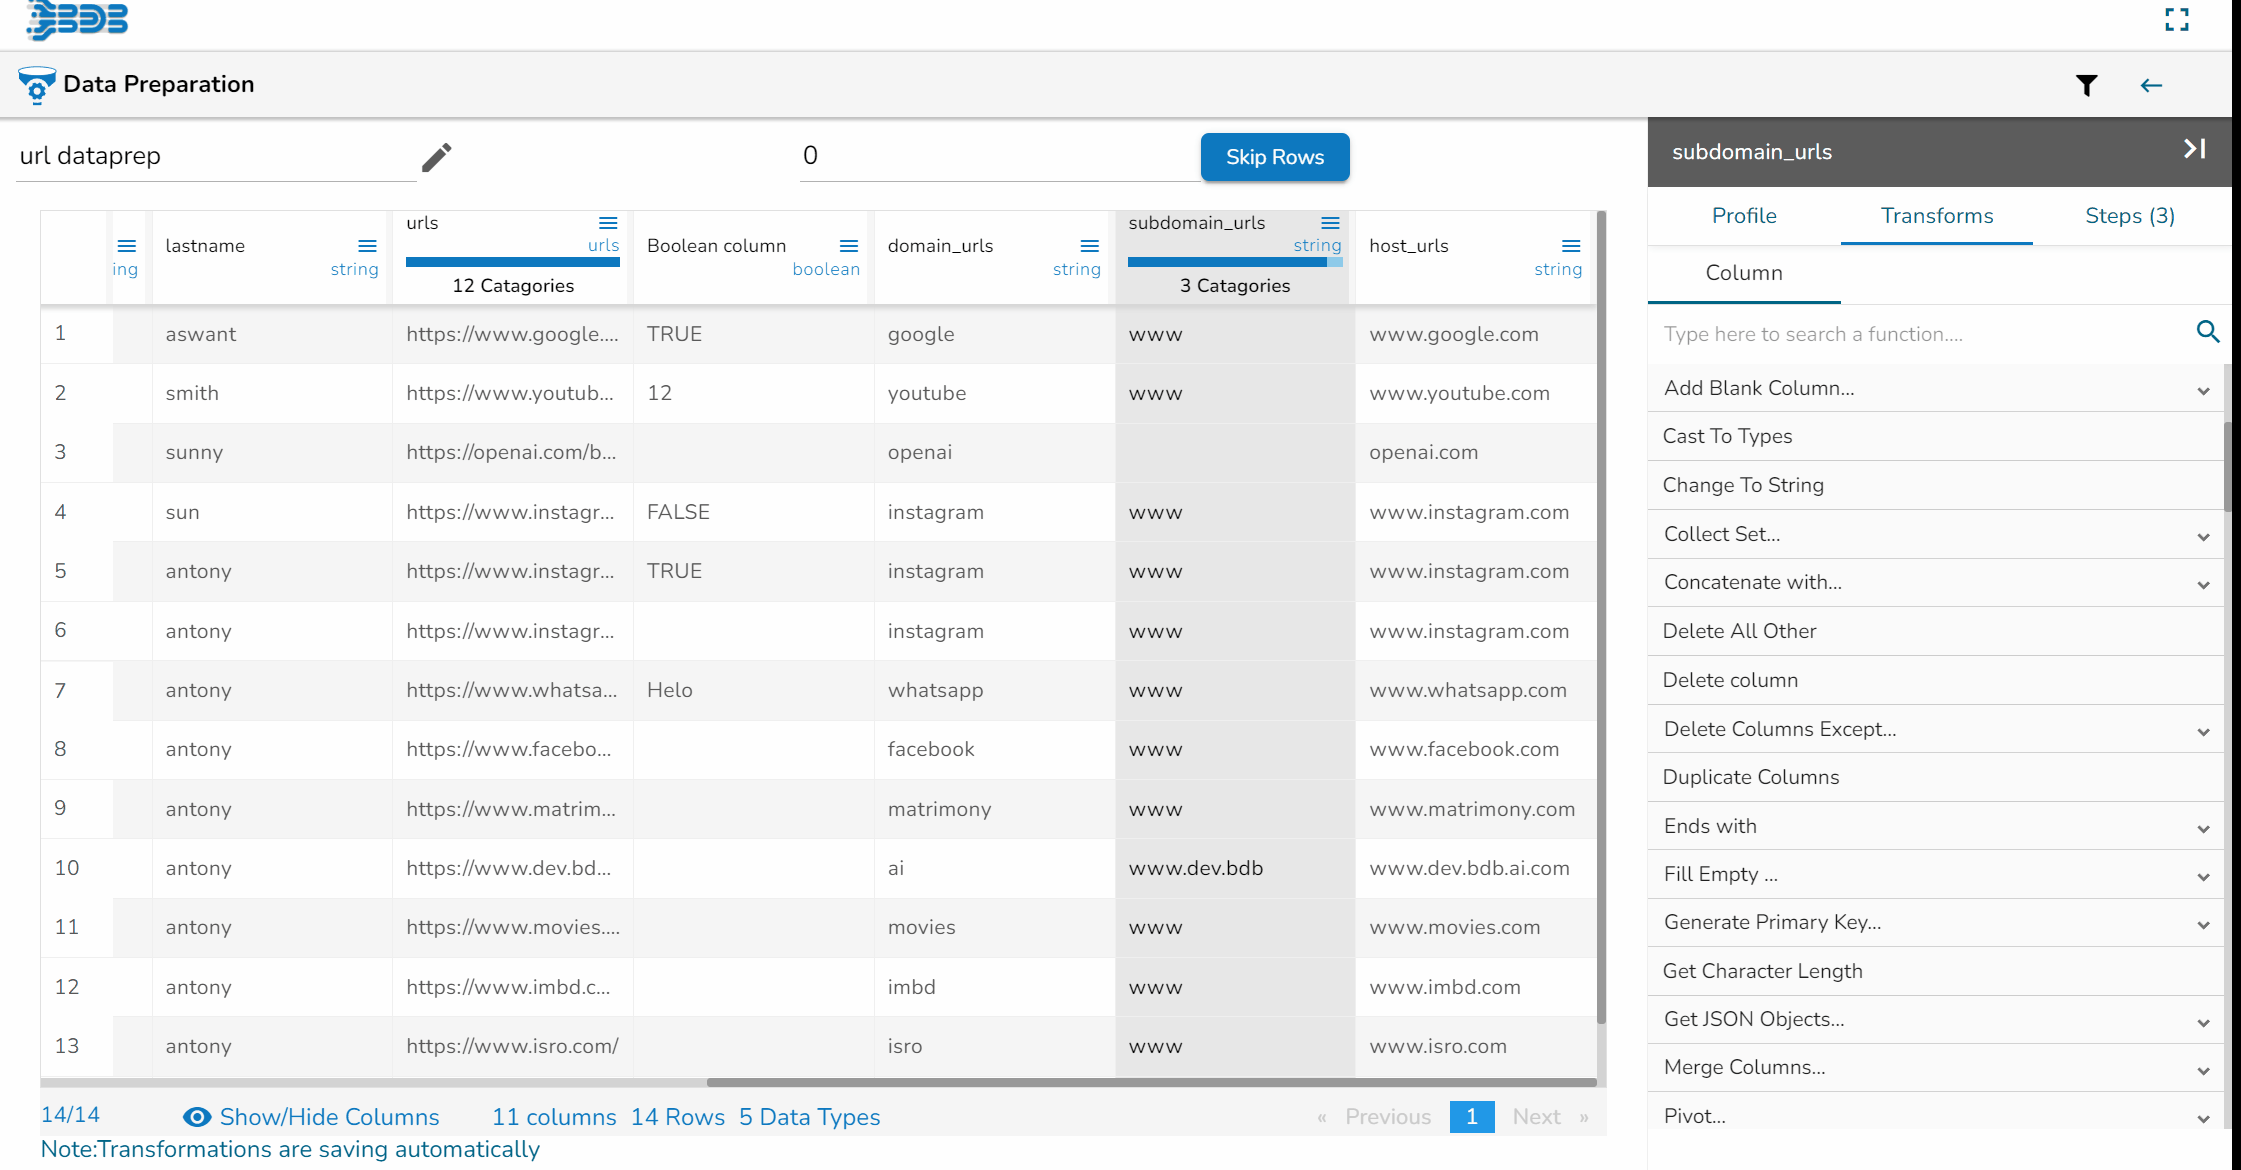
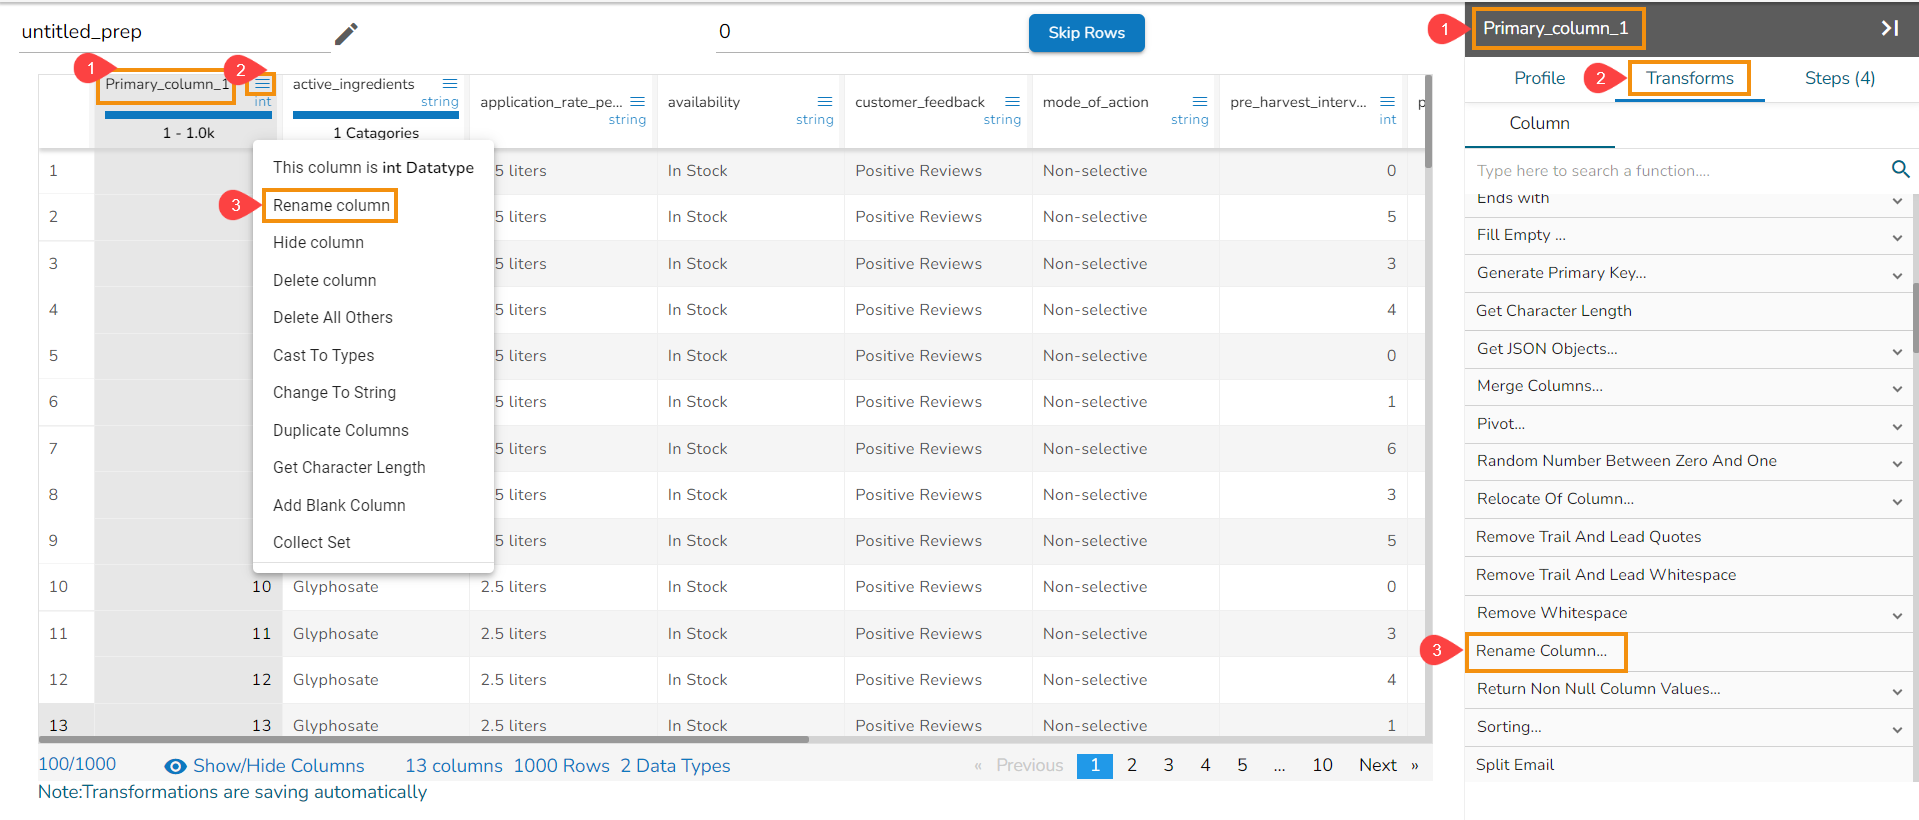
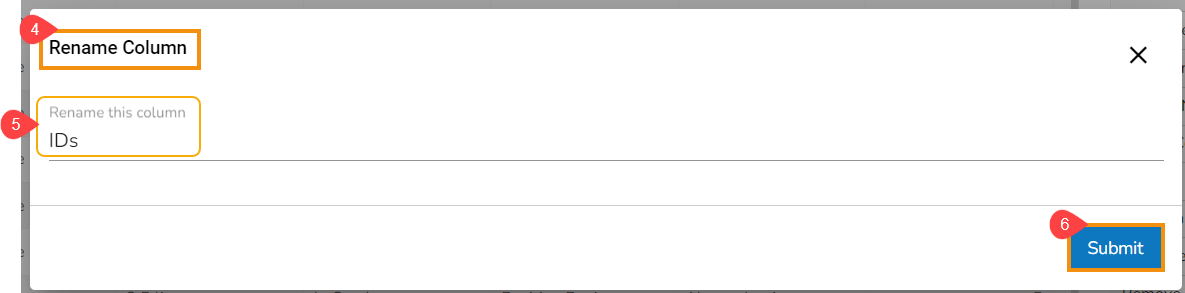
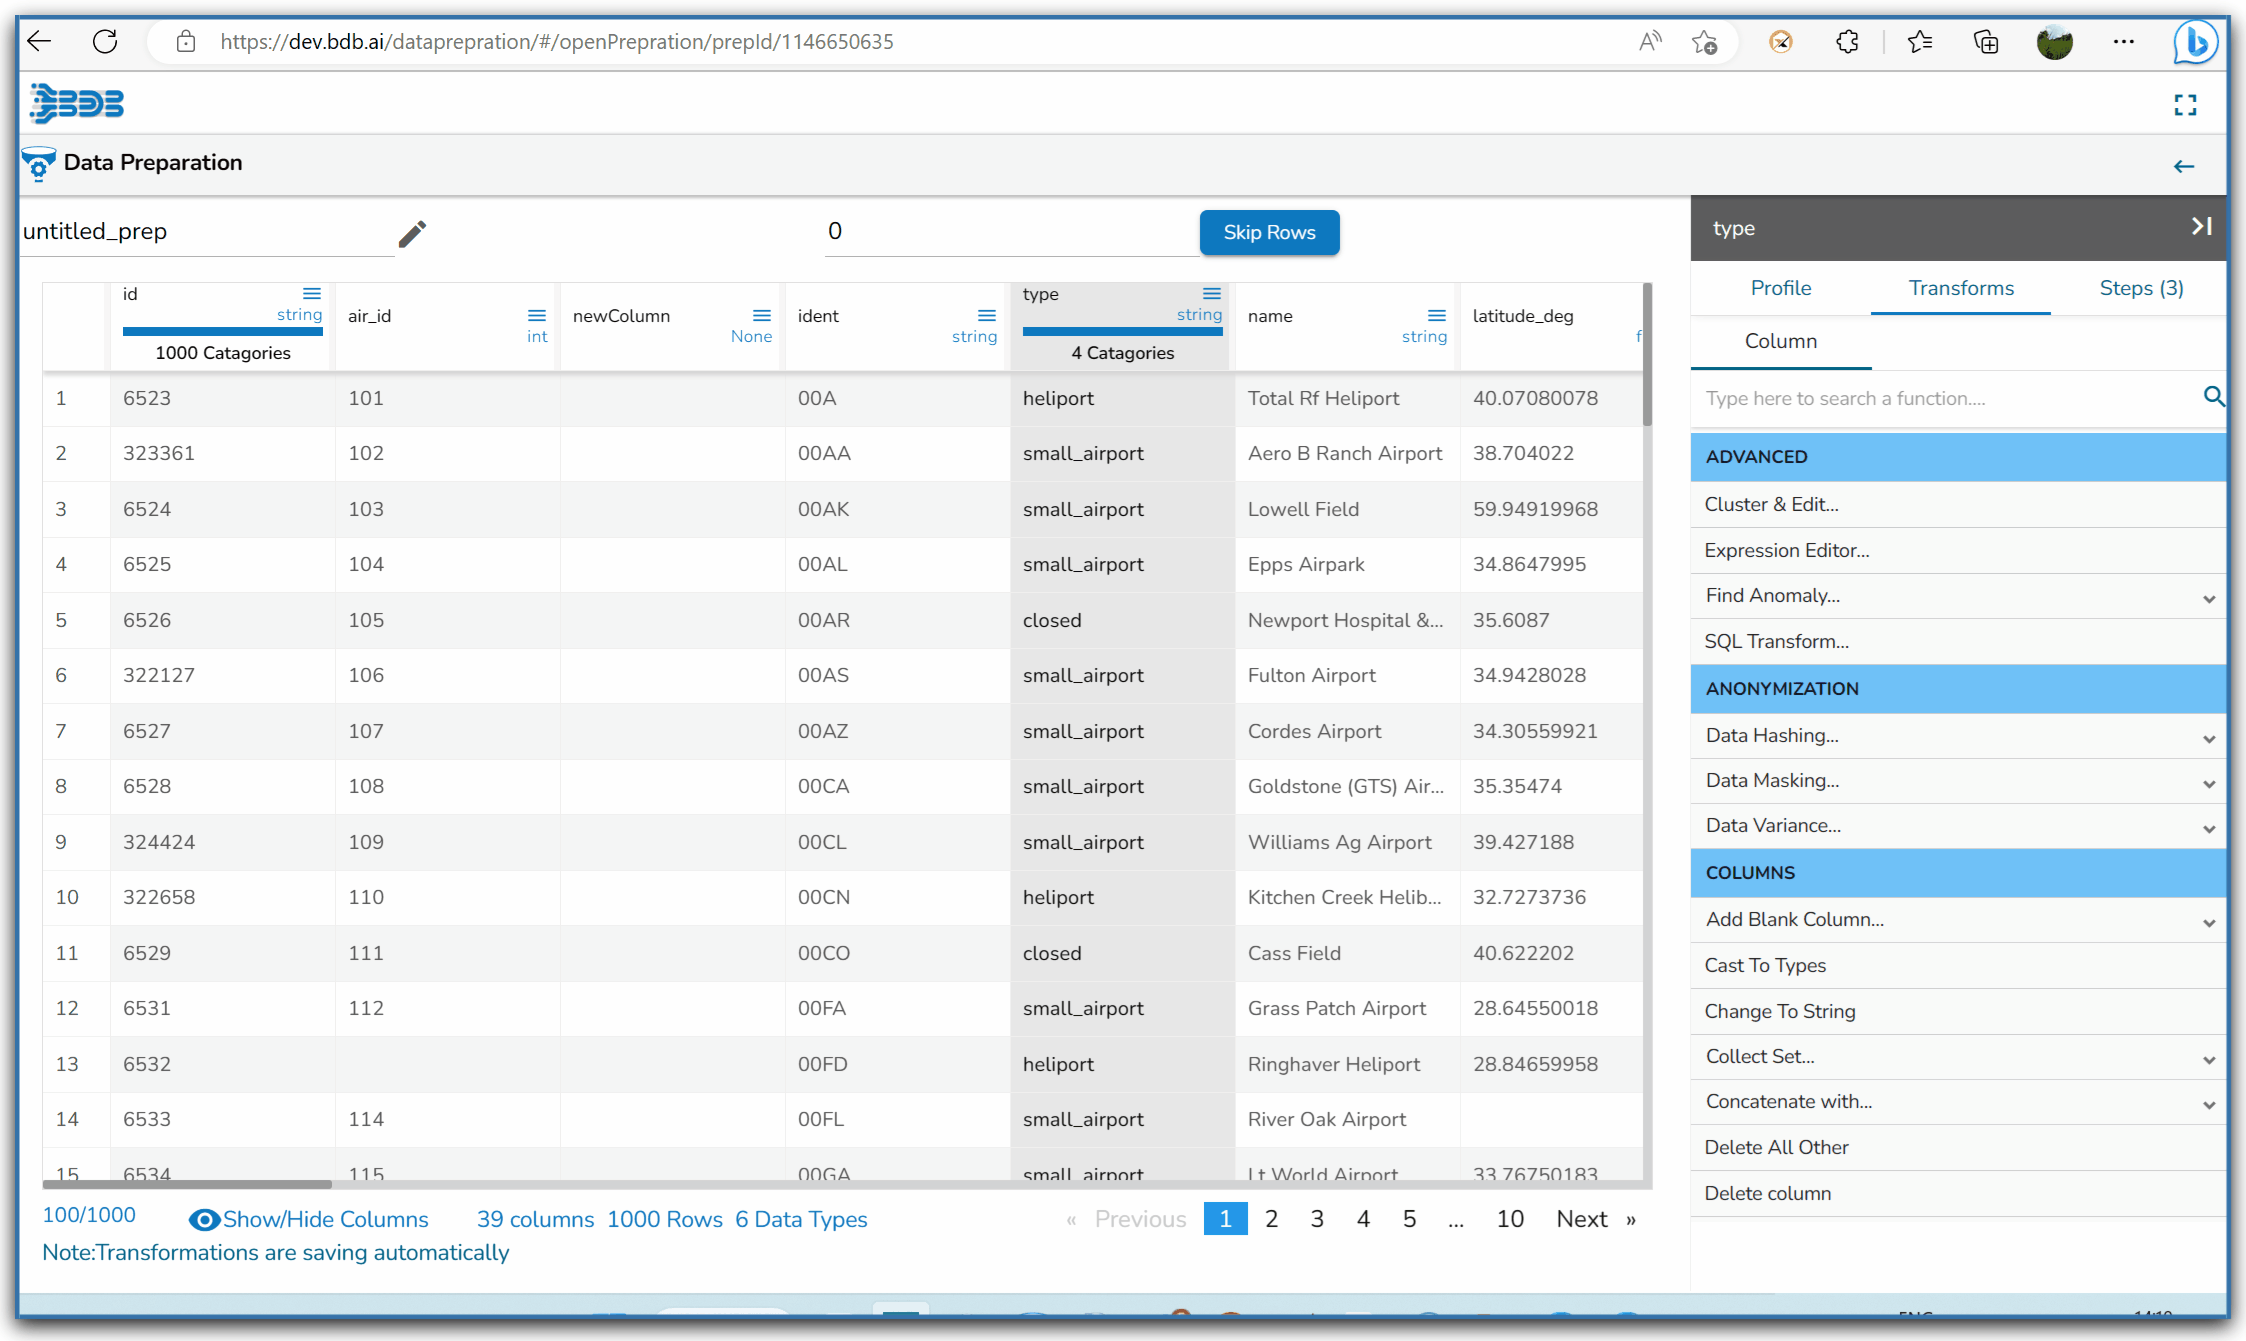
Column Menu listing some of the Column Transforms
Column Menu listing some of the Column Transforms
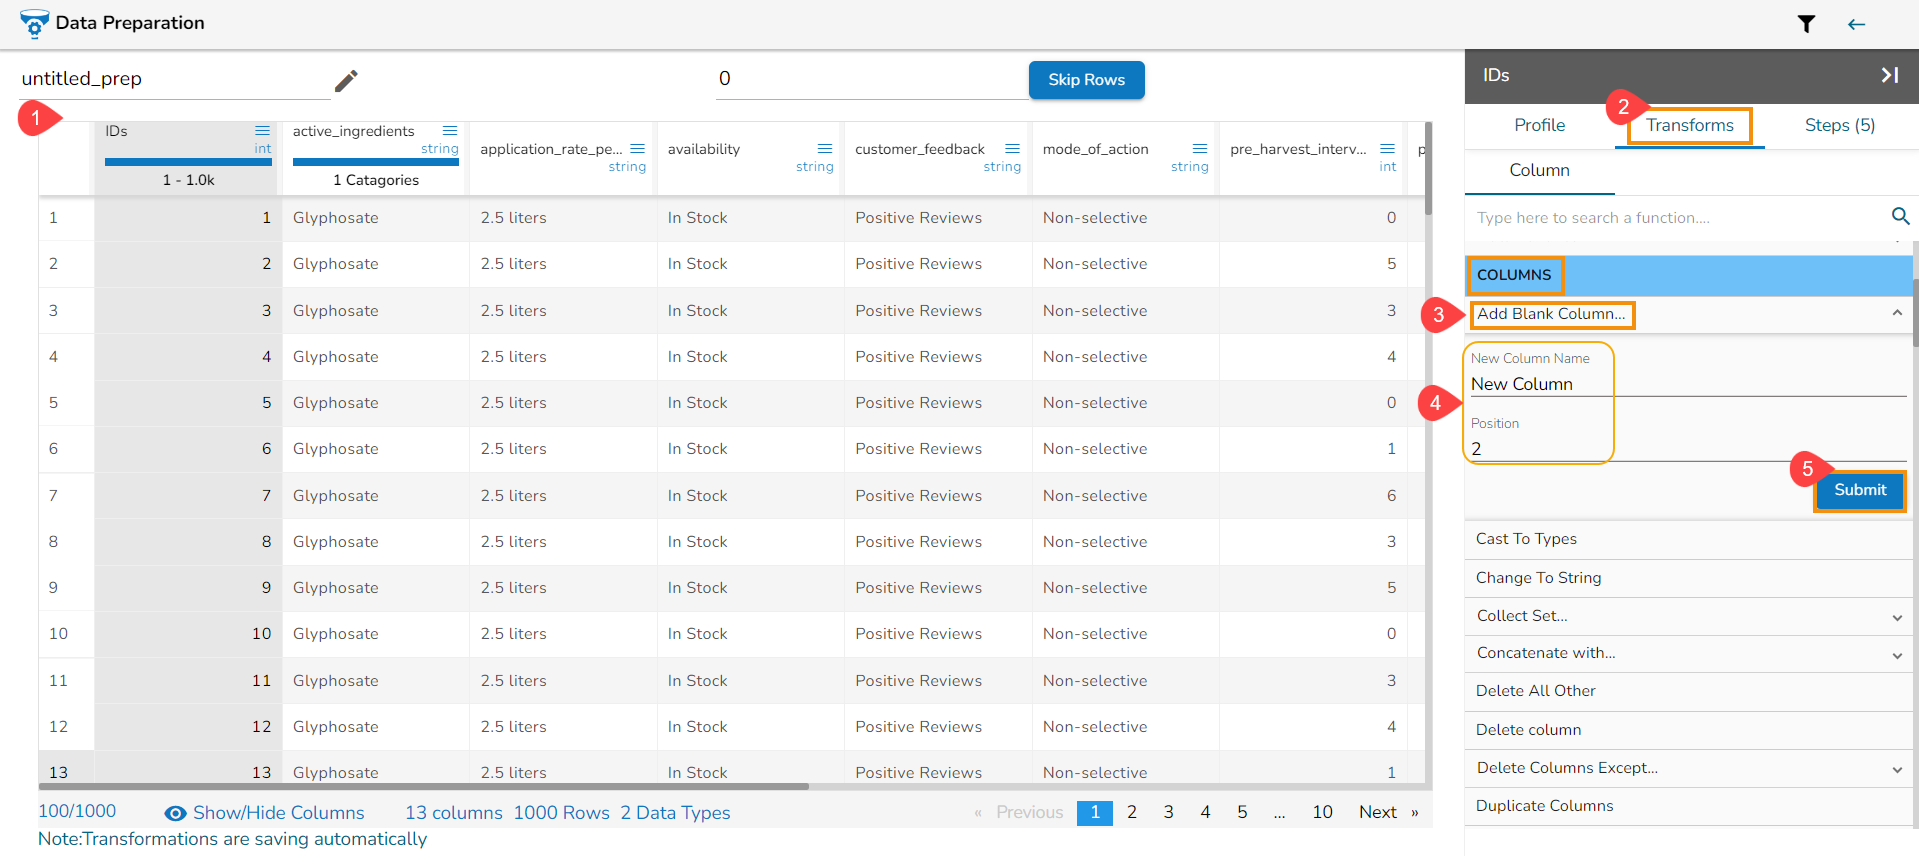
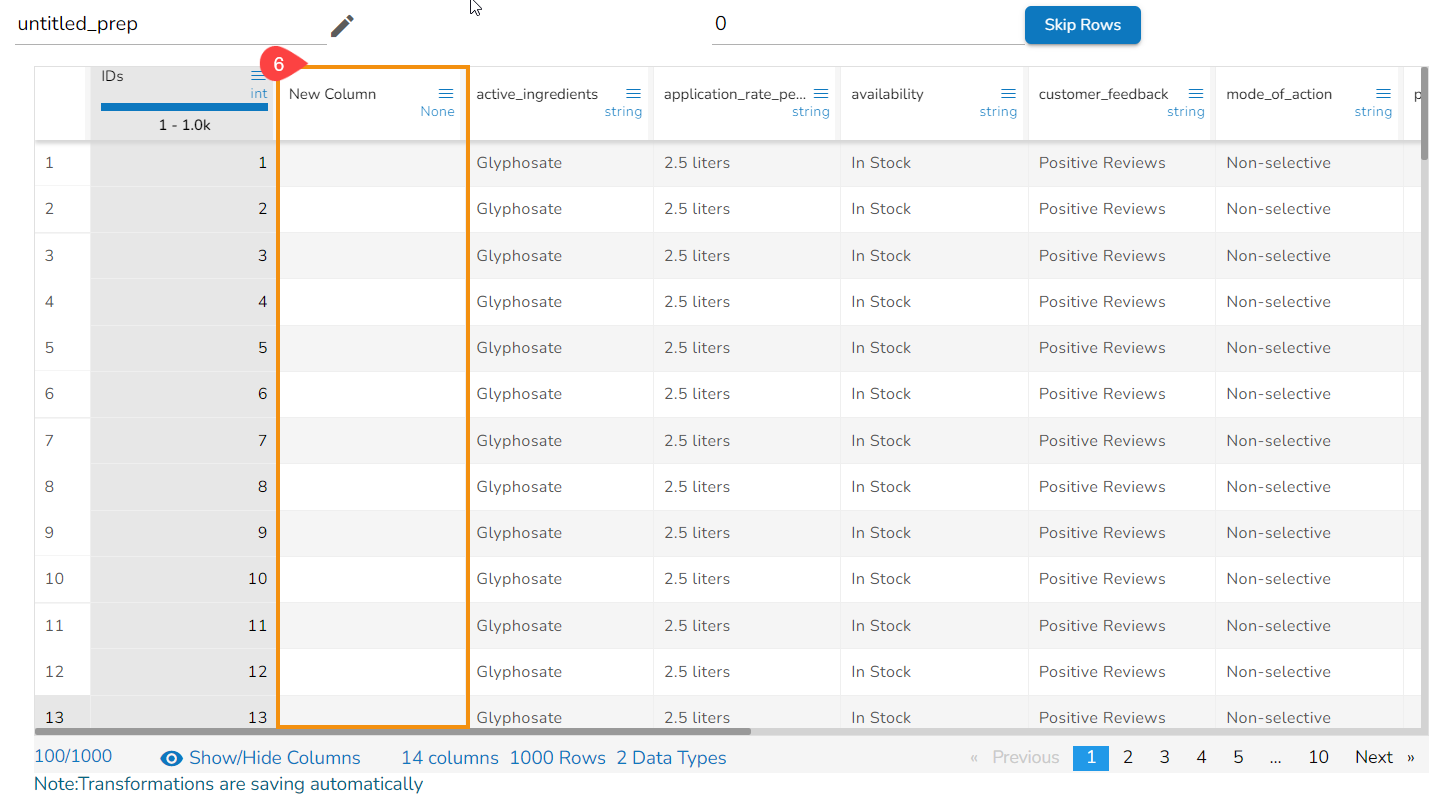
Steps to understand Add Blank Column transform


Steps to use Change to String transform
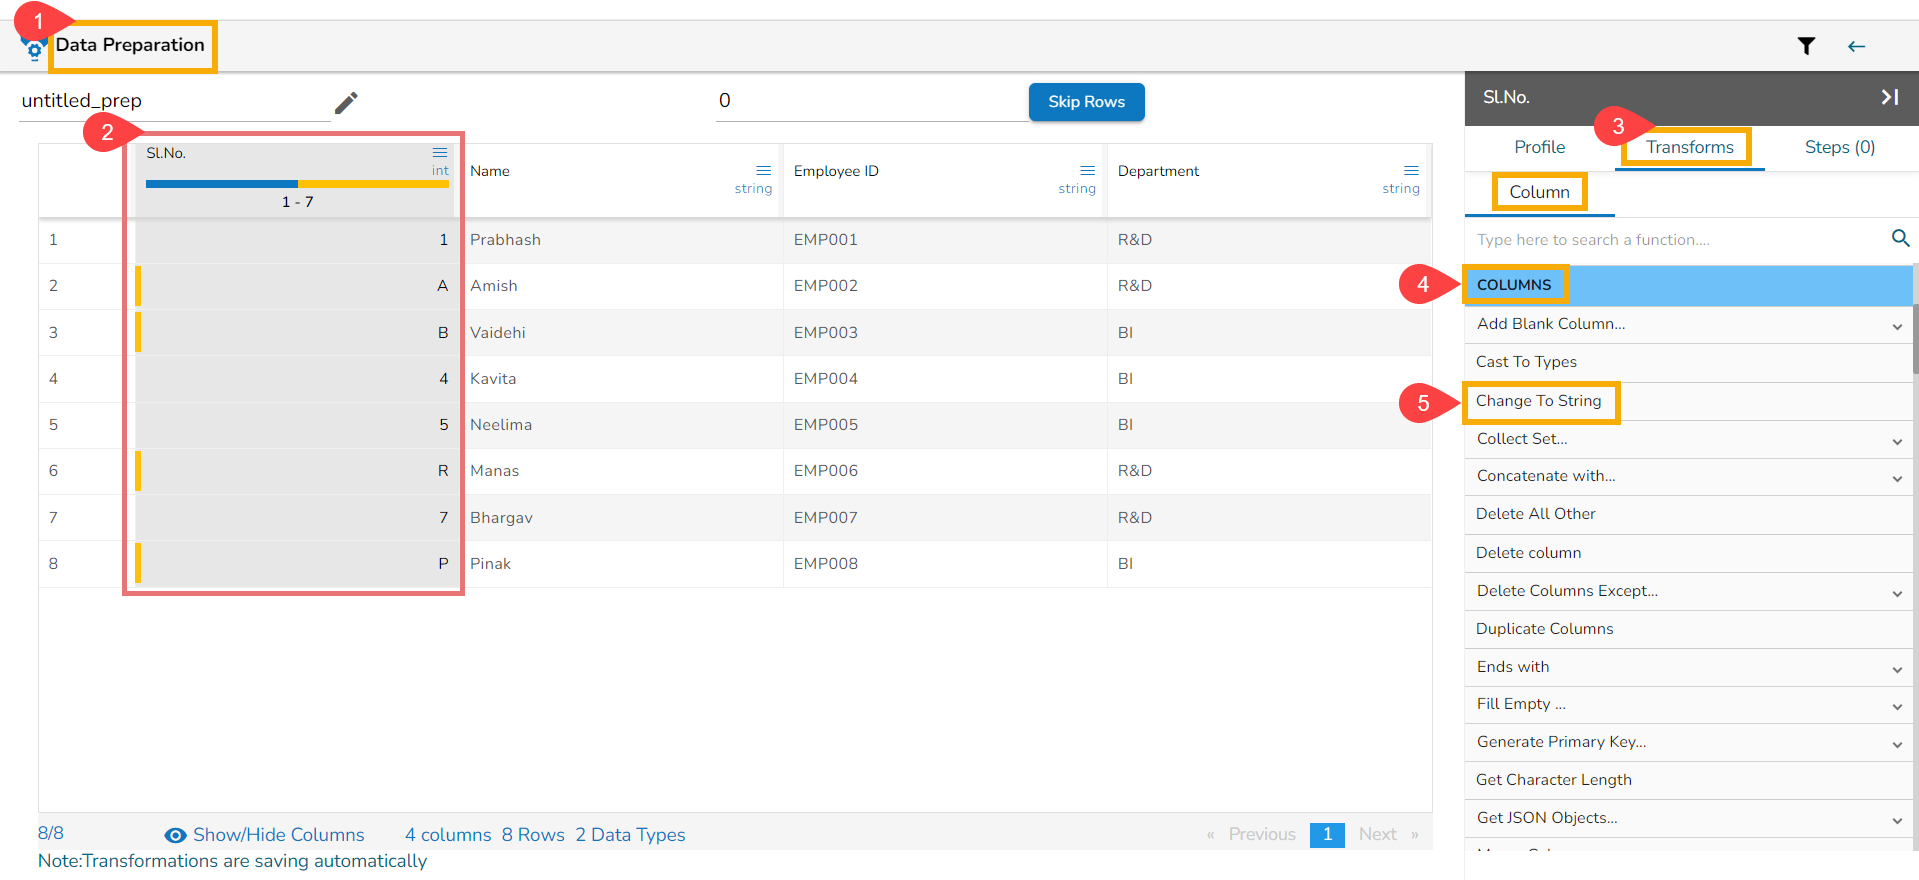
Selecting Change to String transform
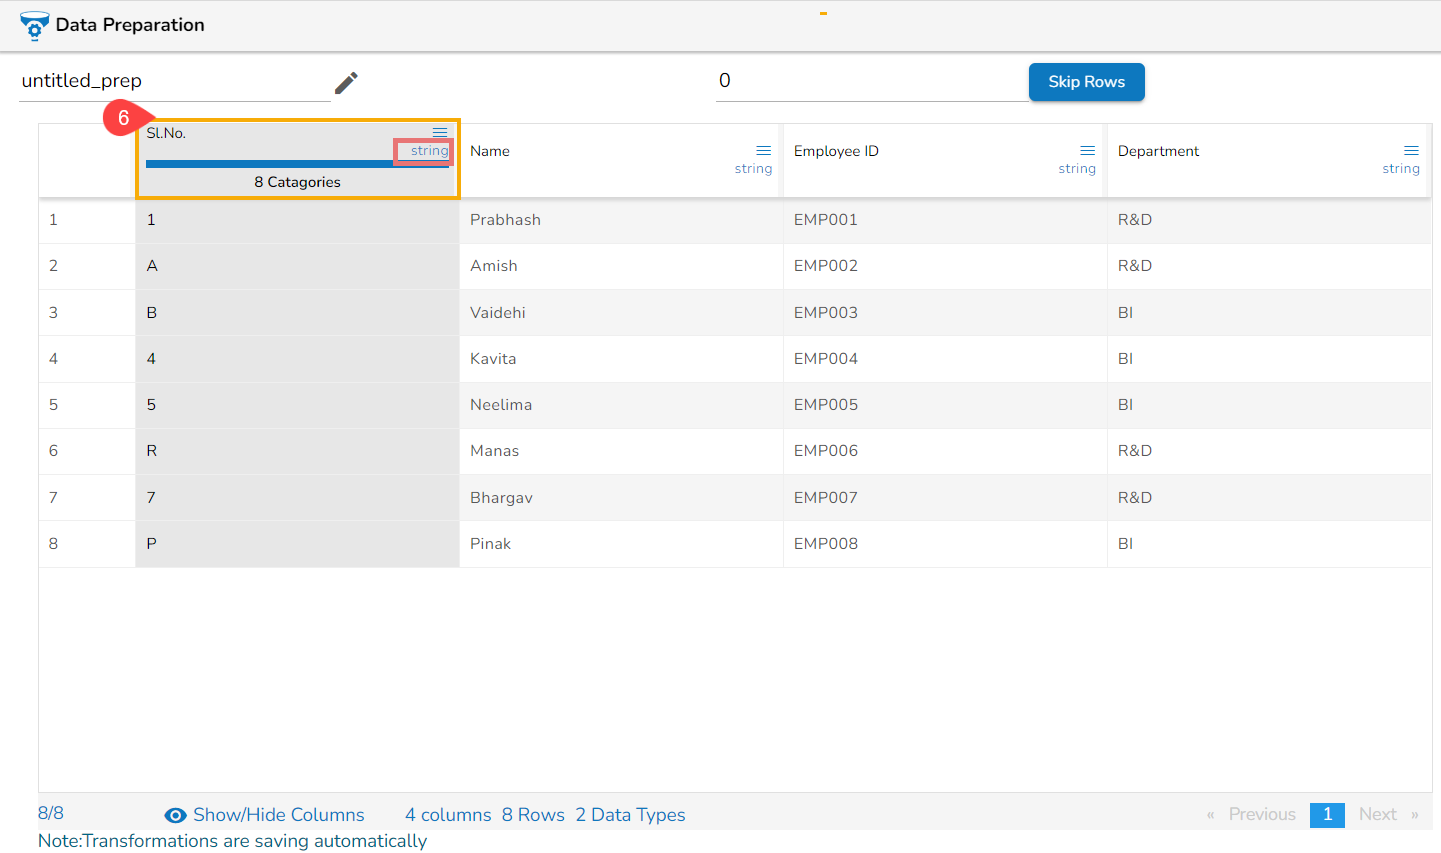
Data Type of the selected column gets changed as String
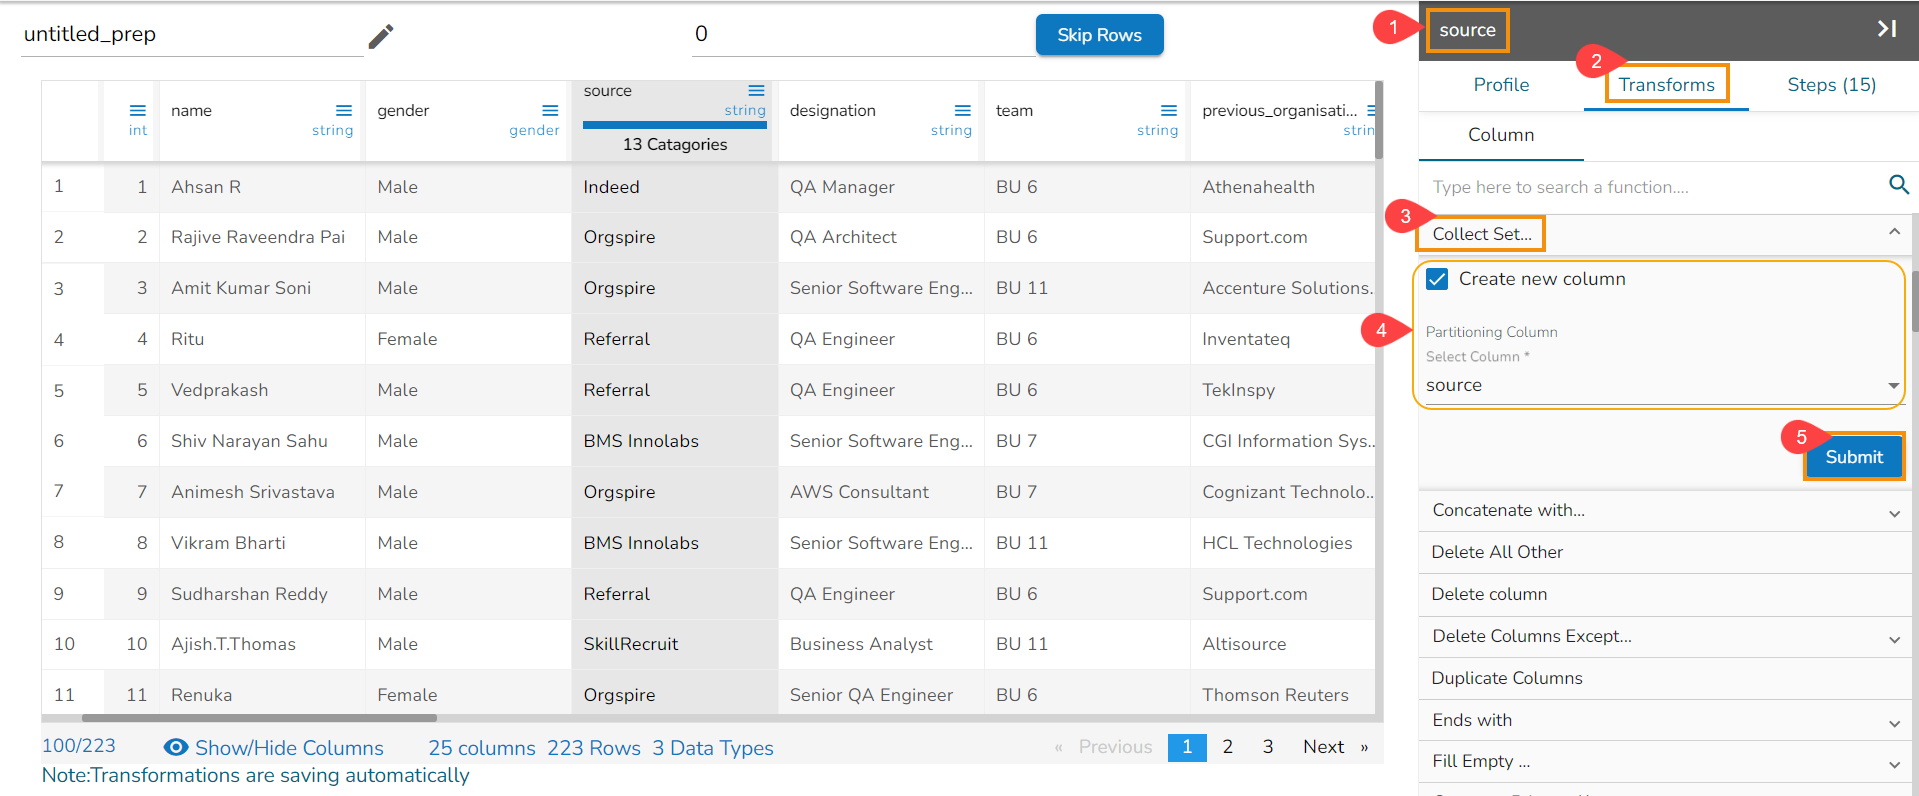
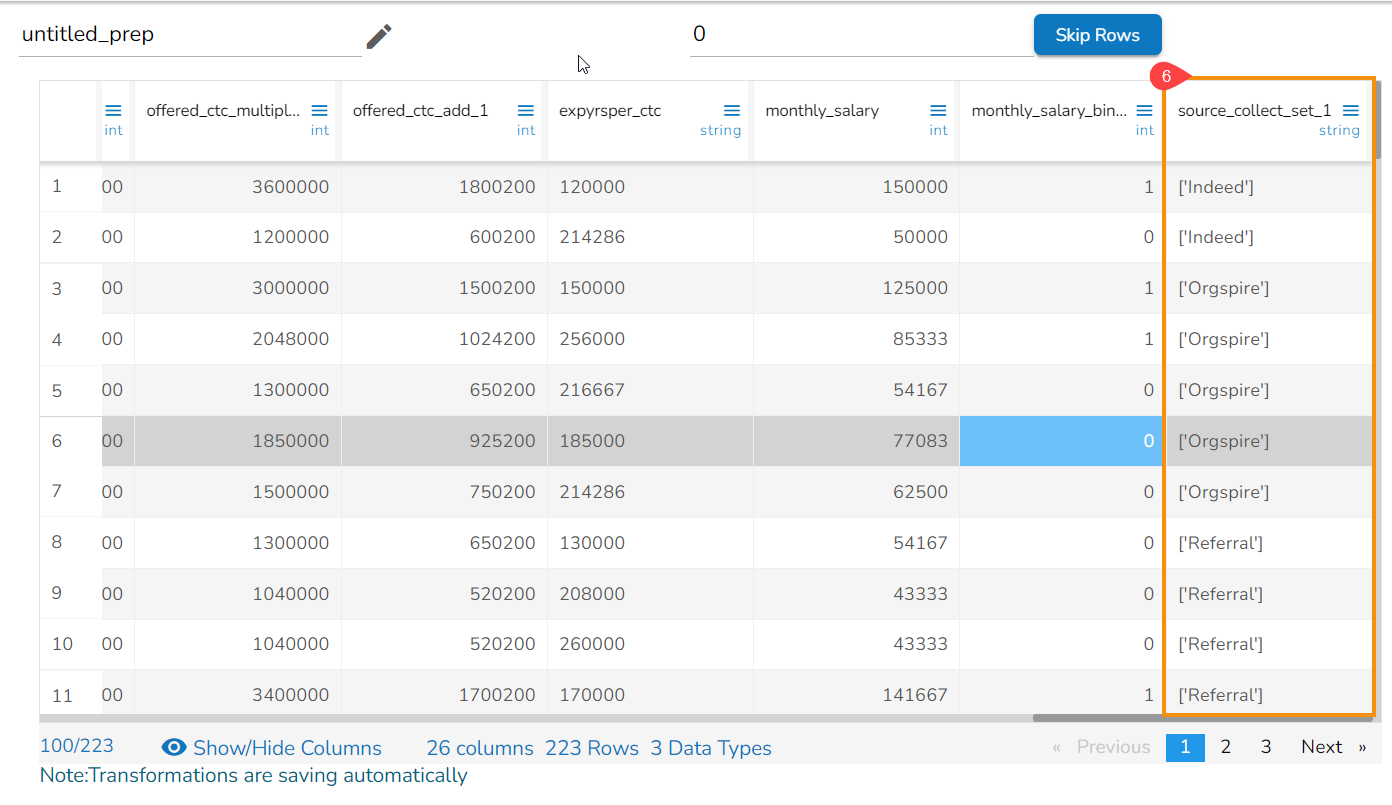
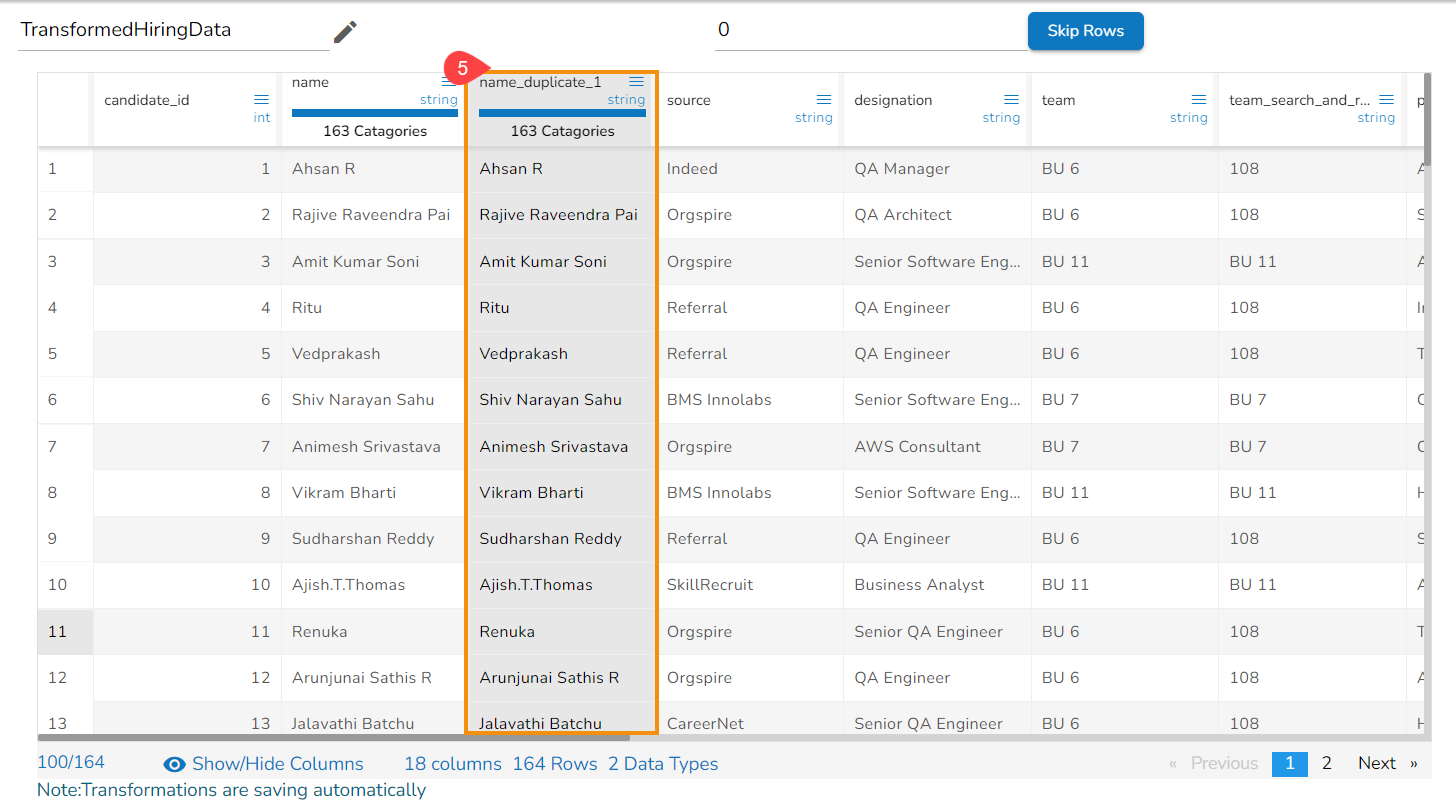
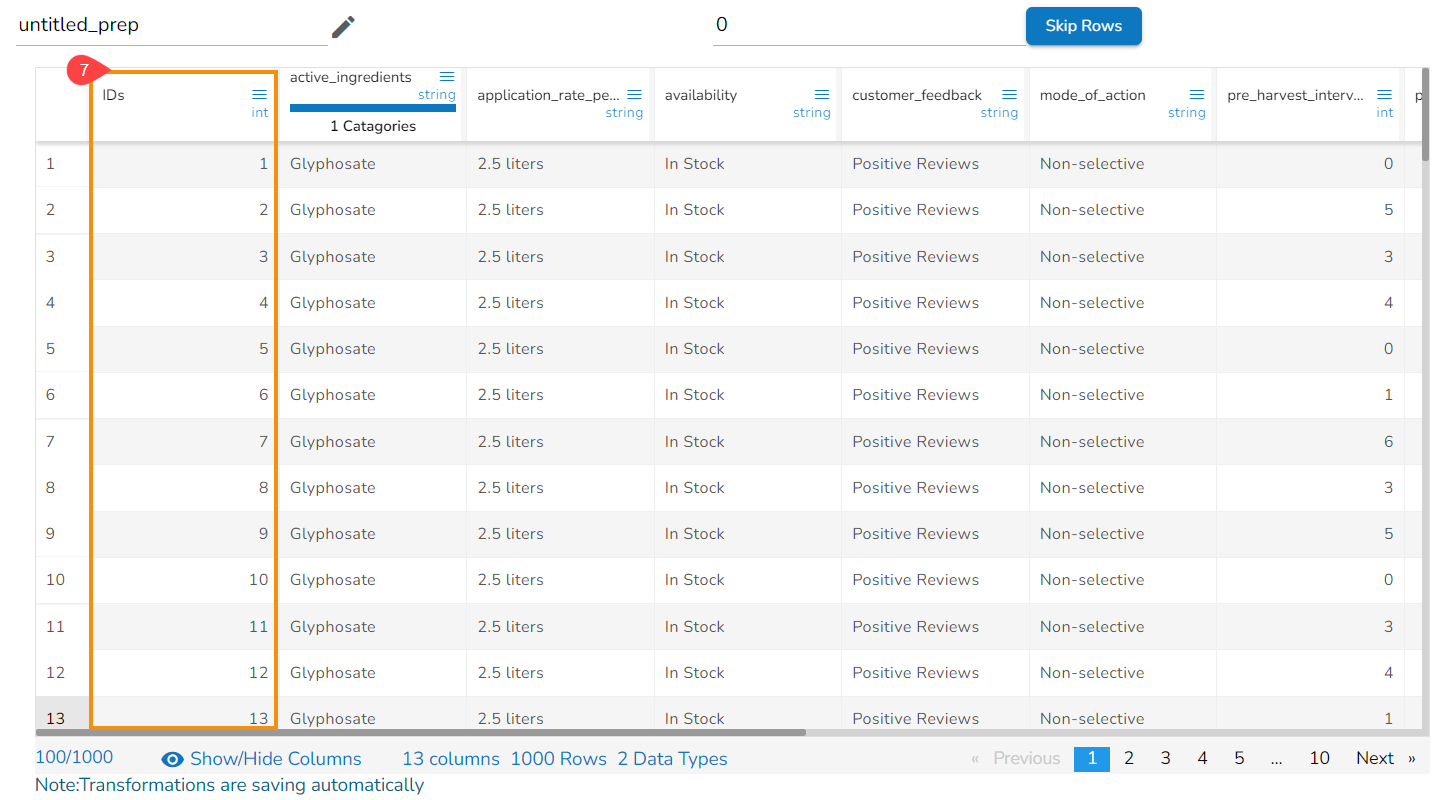
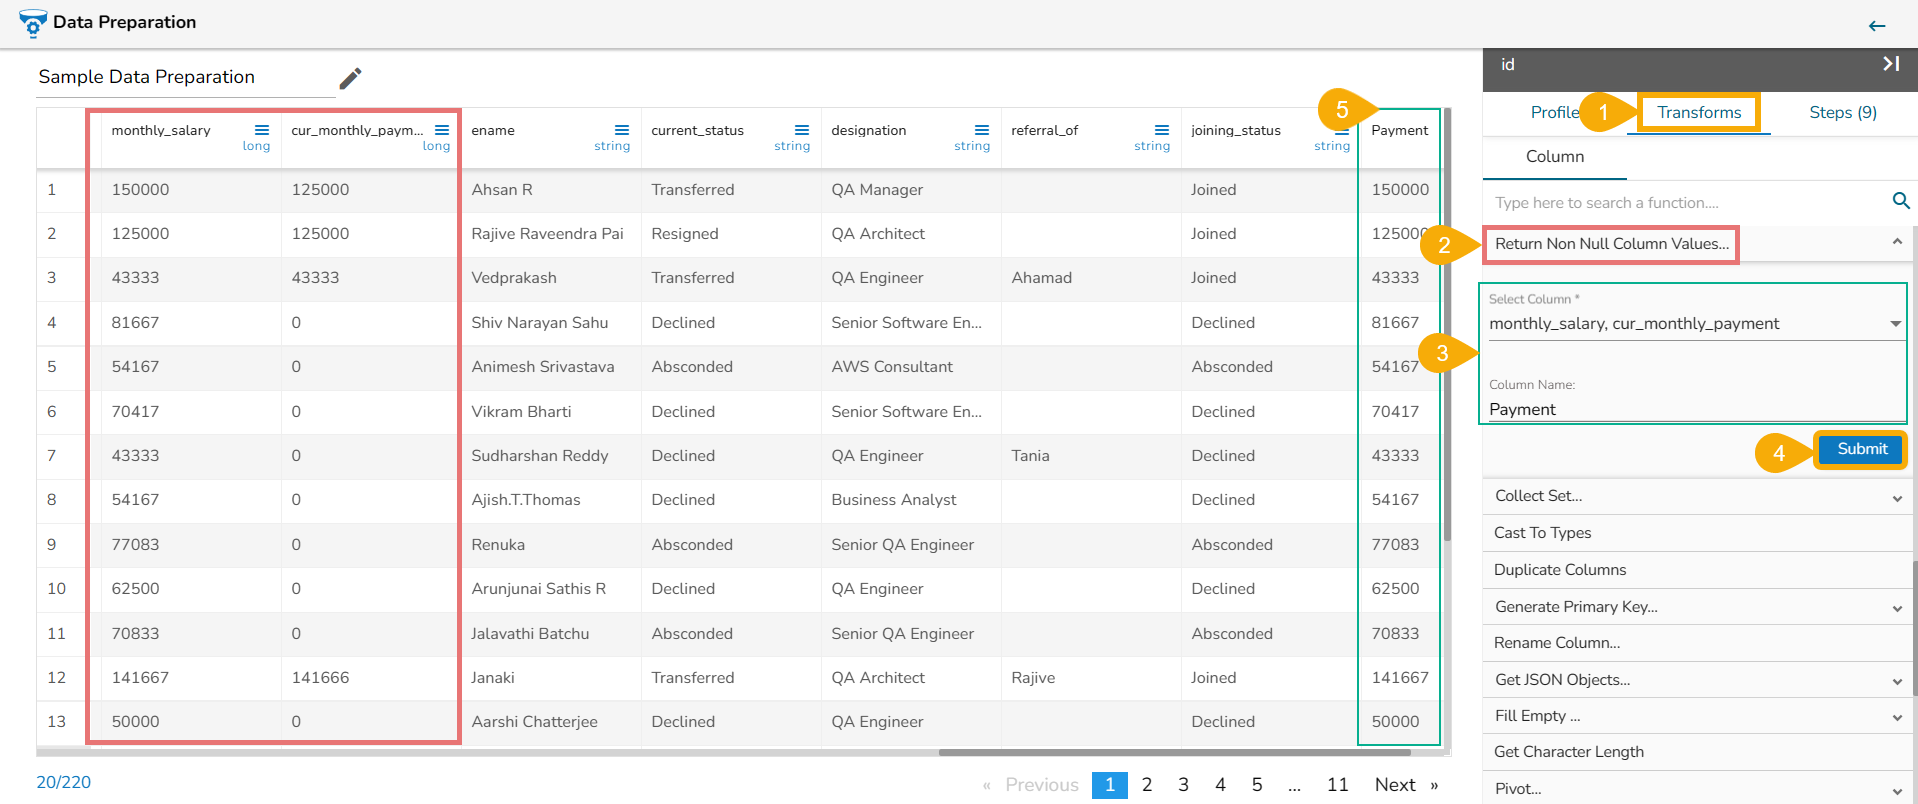
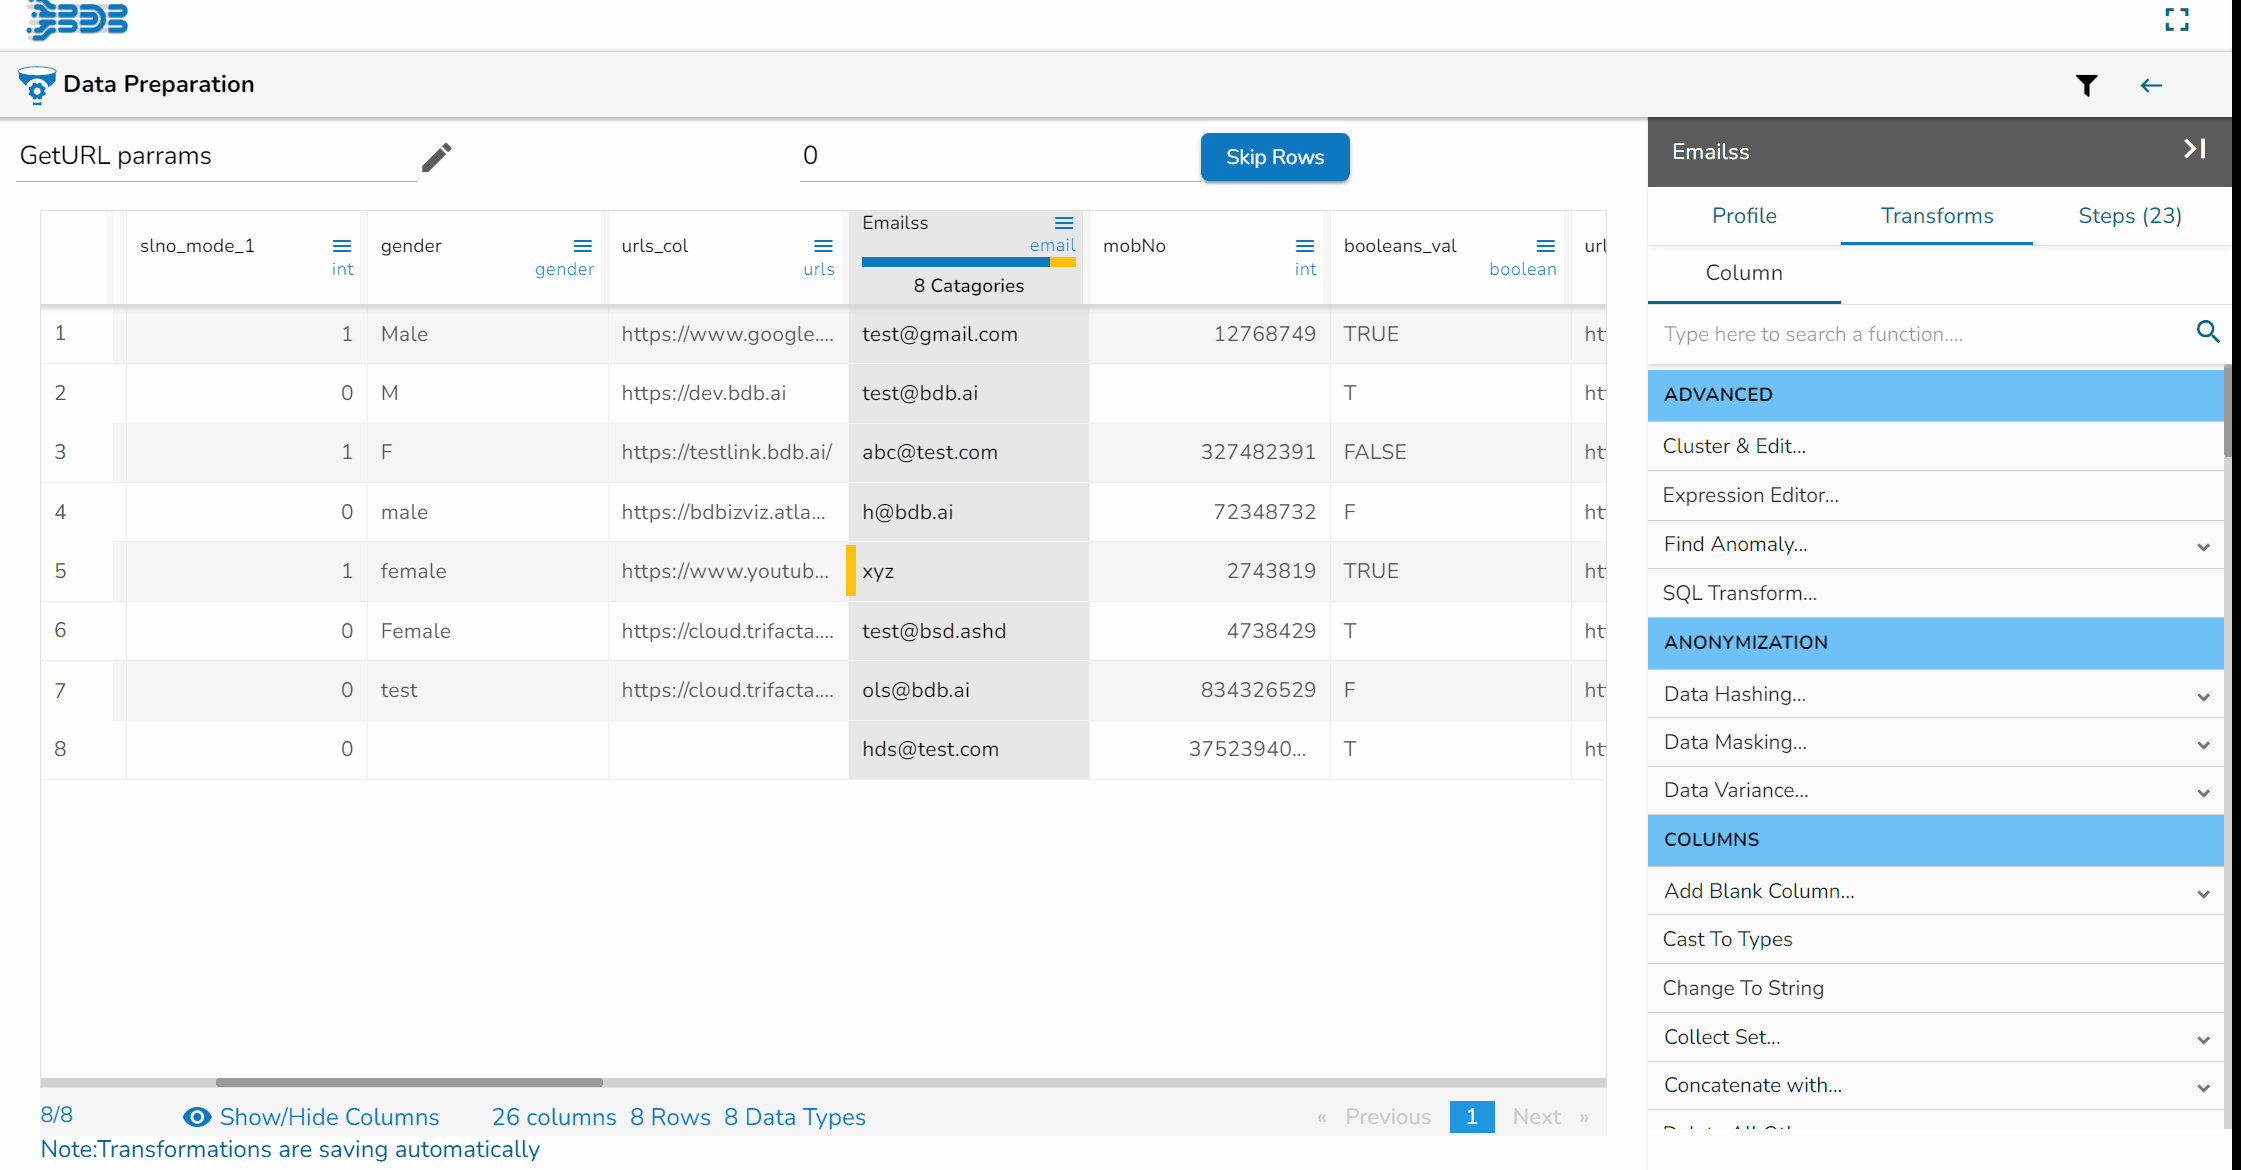
Applying the Collect Set transform on the Source column
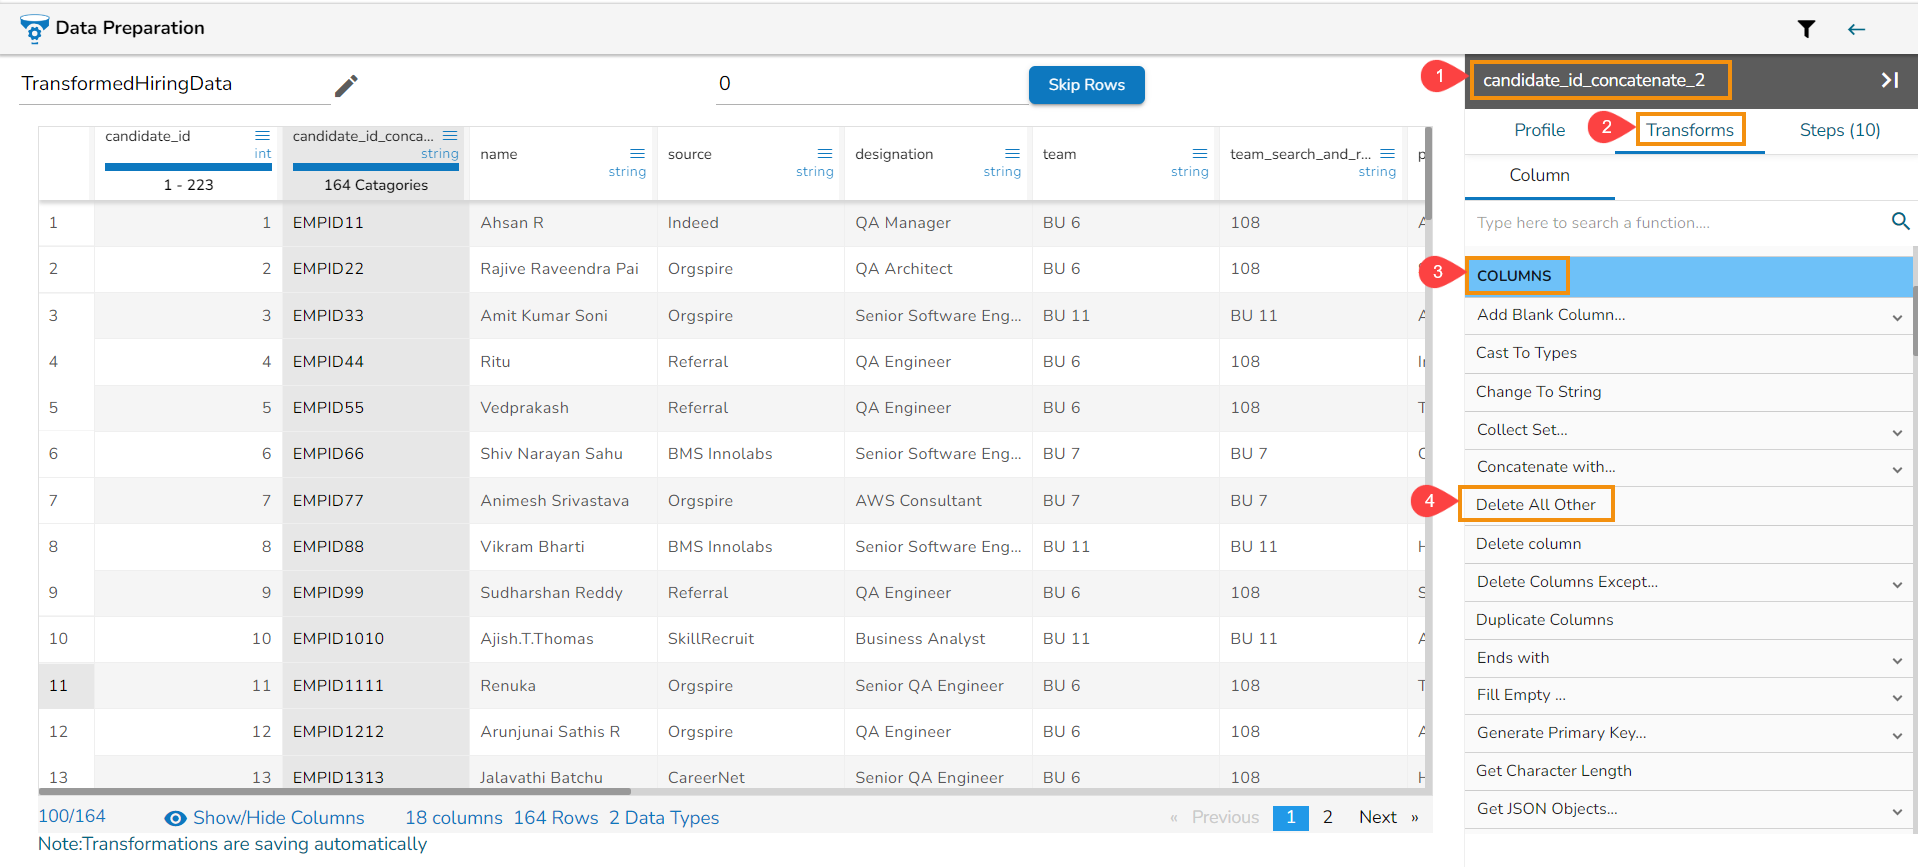
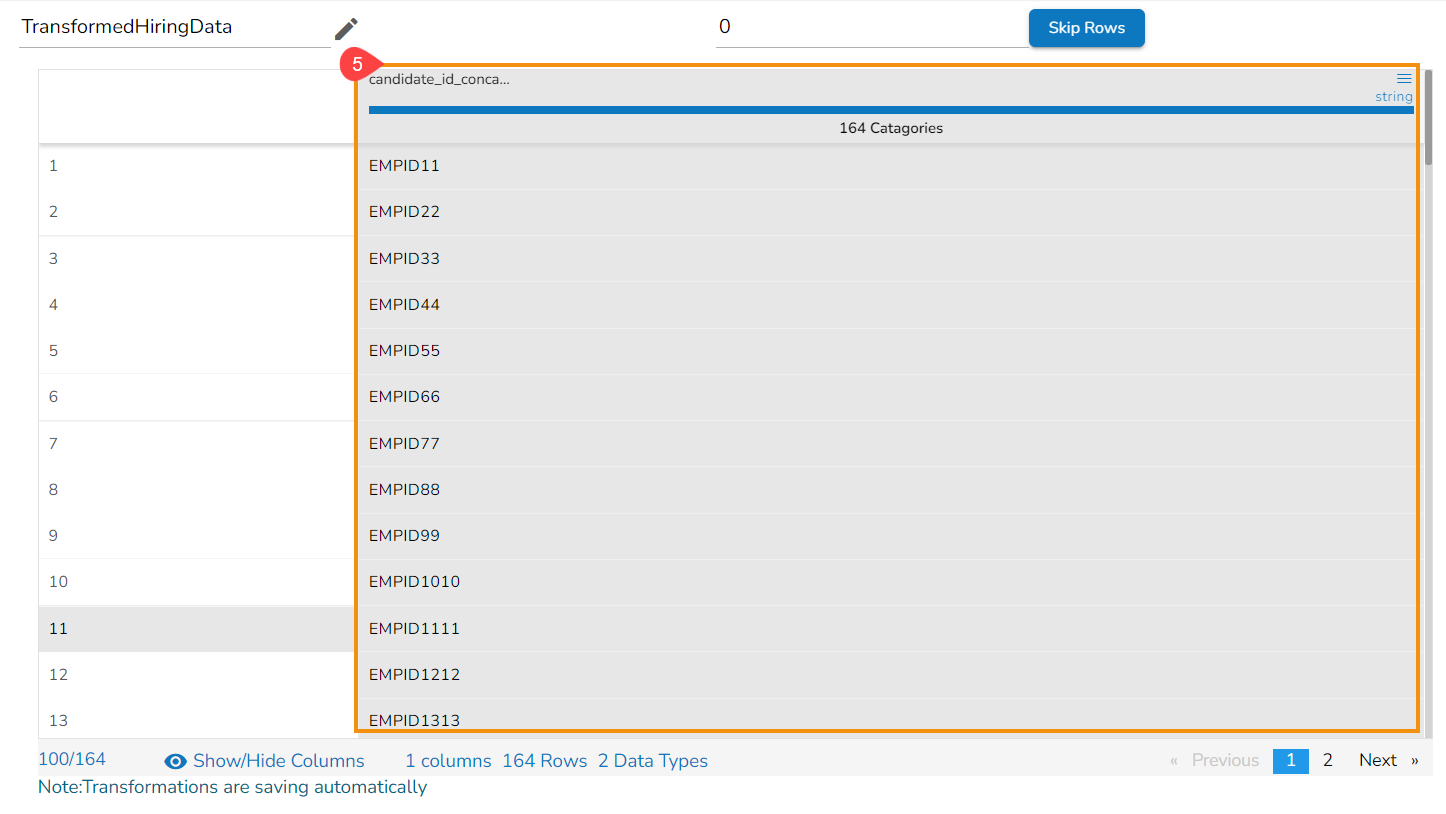
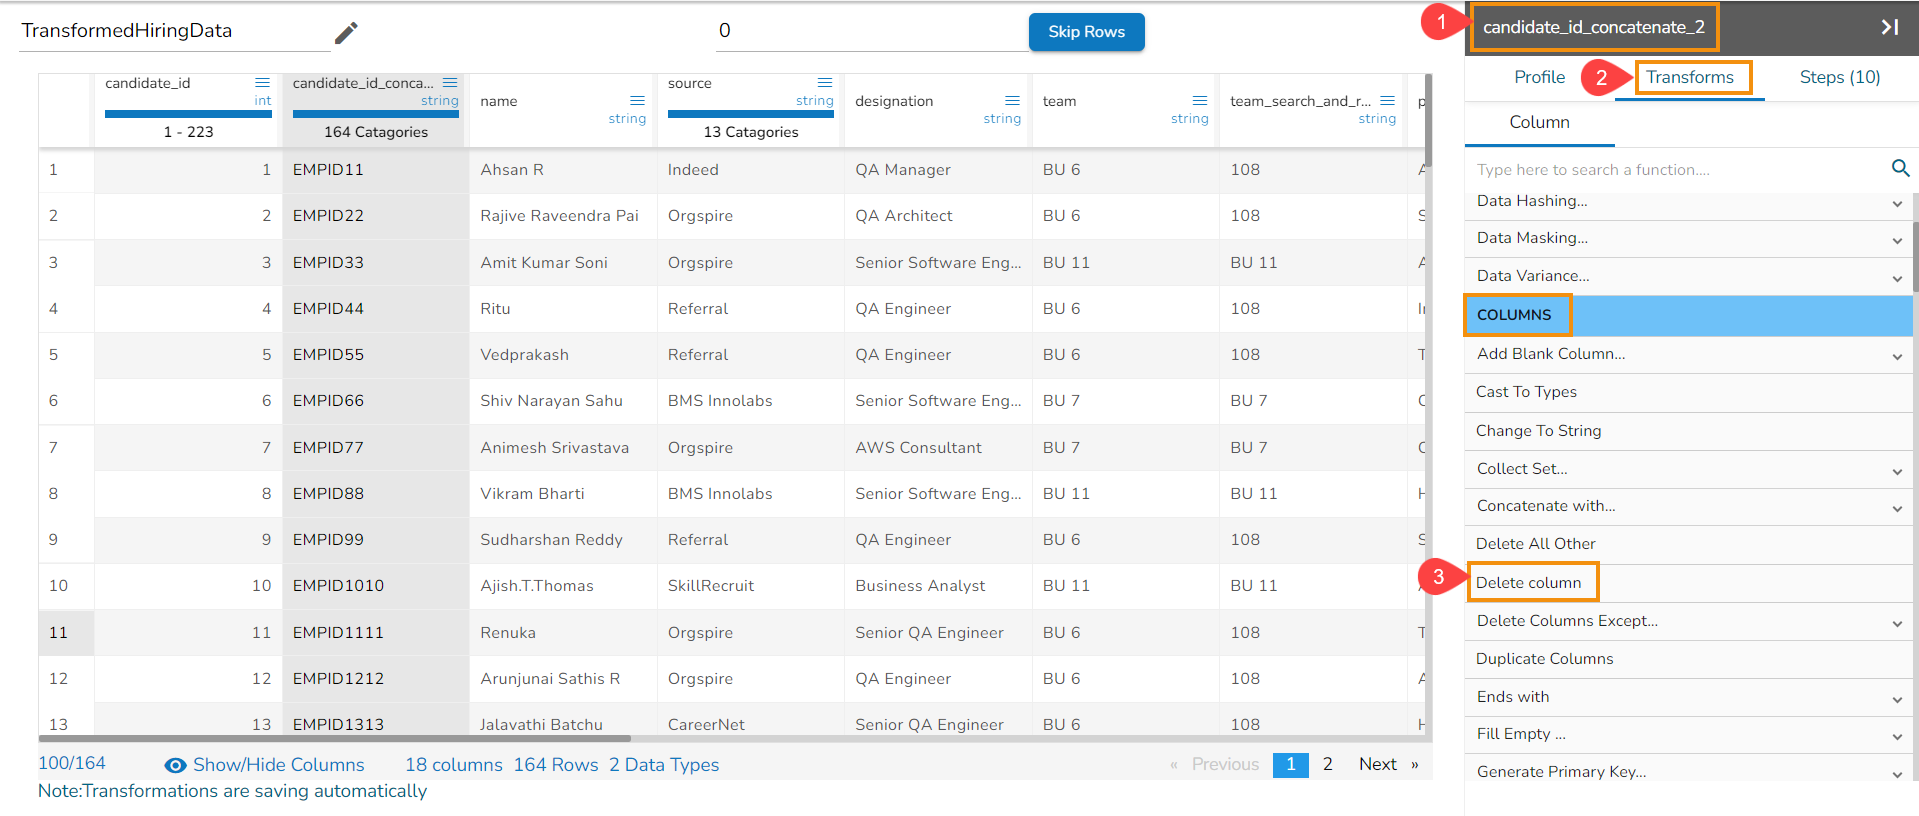
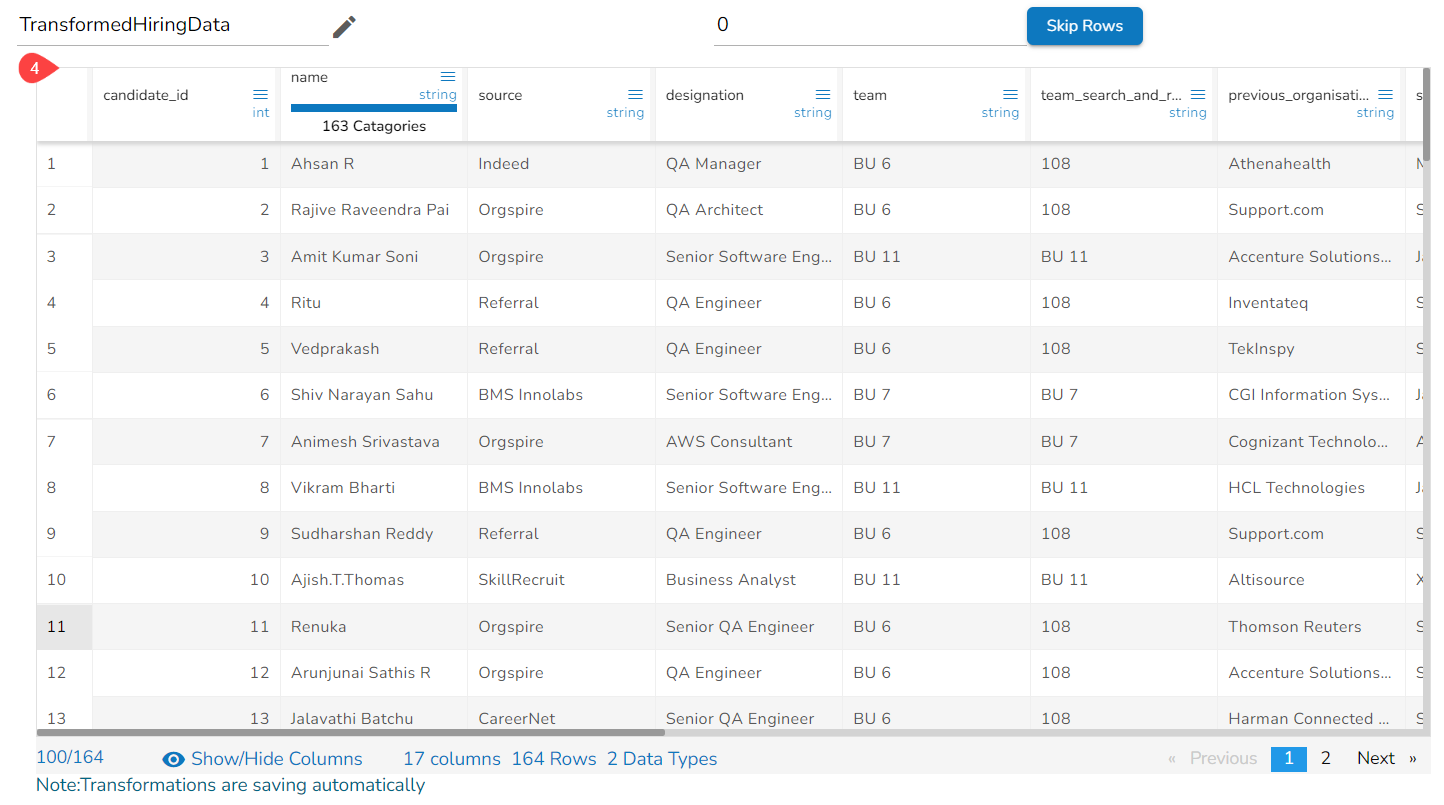
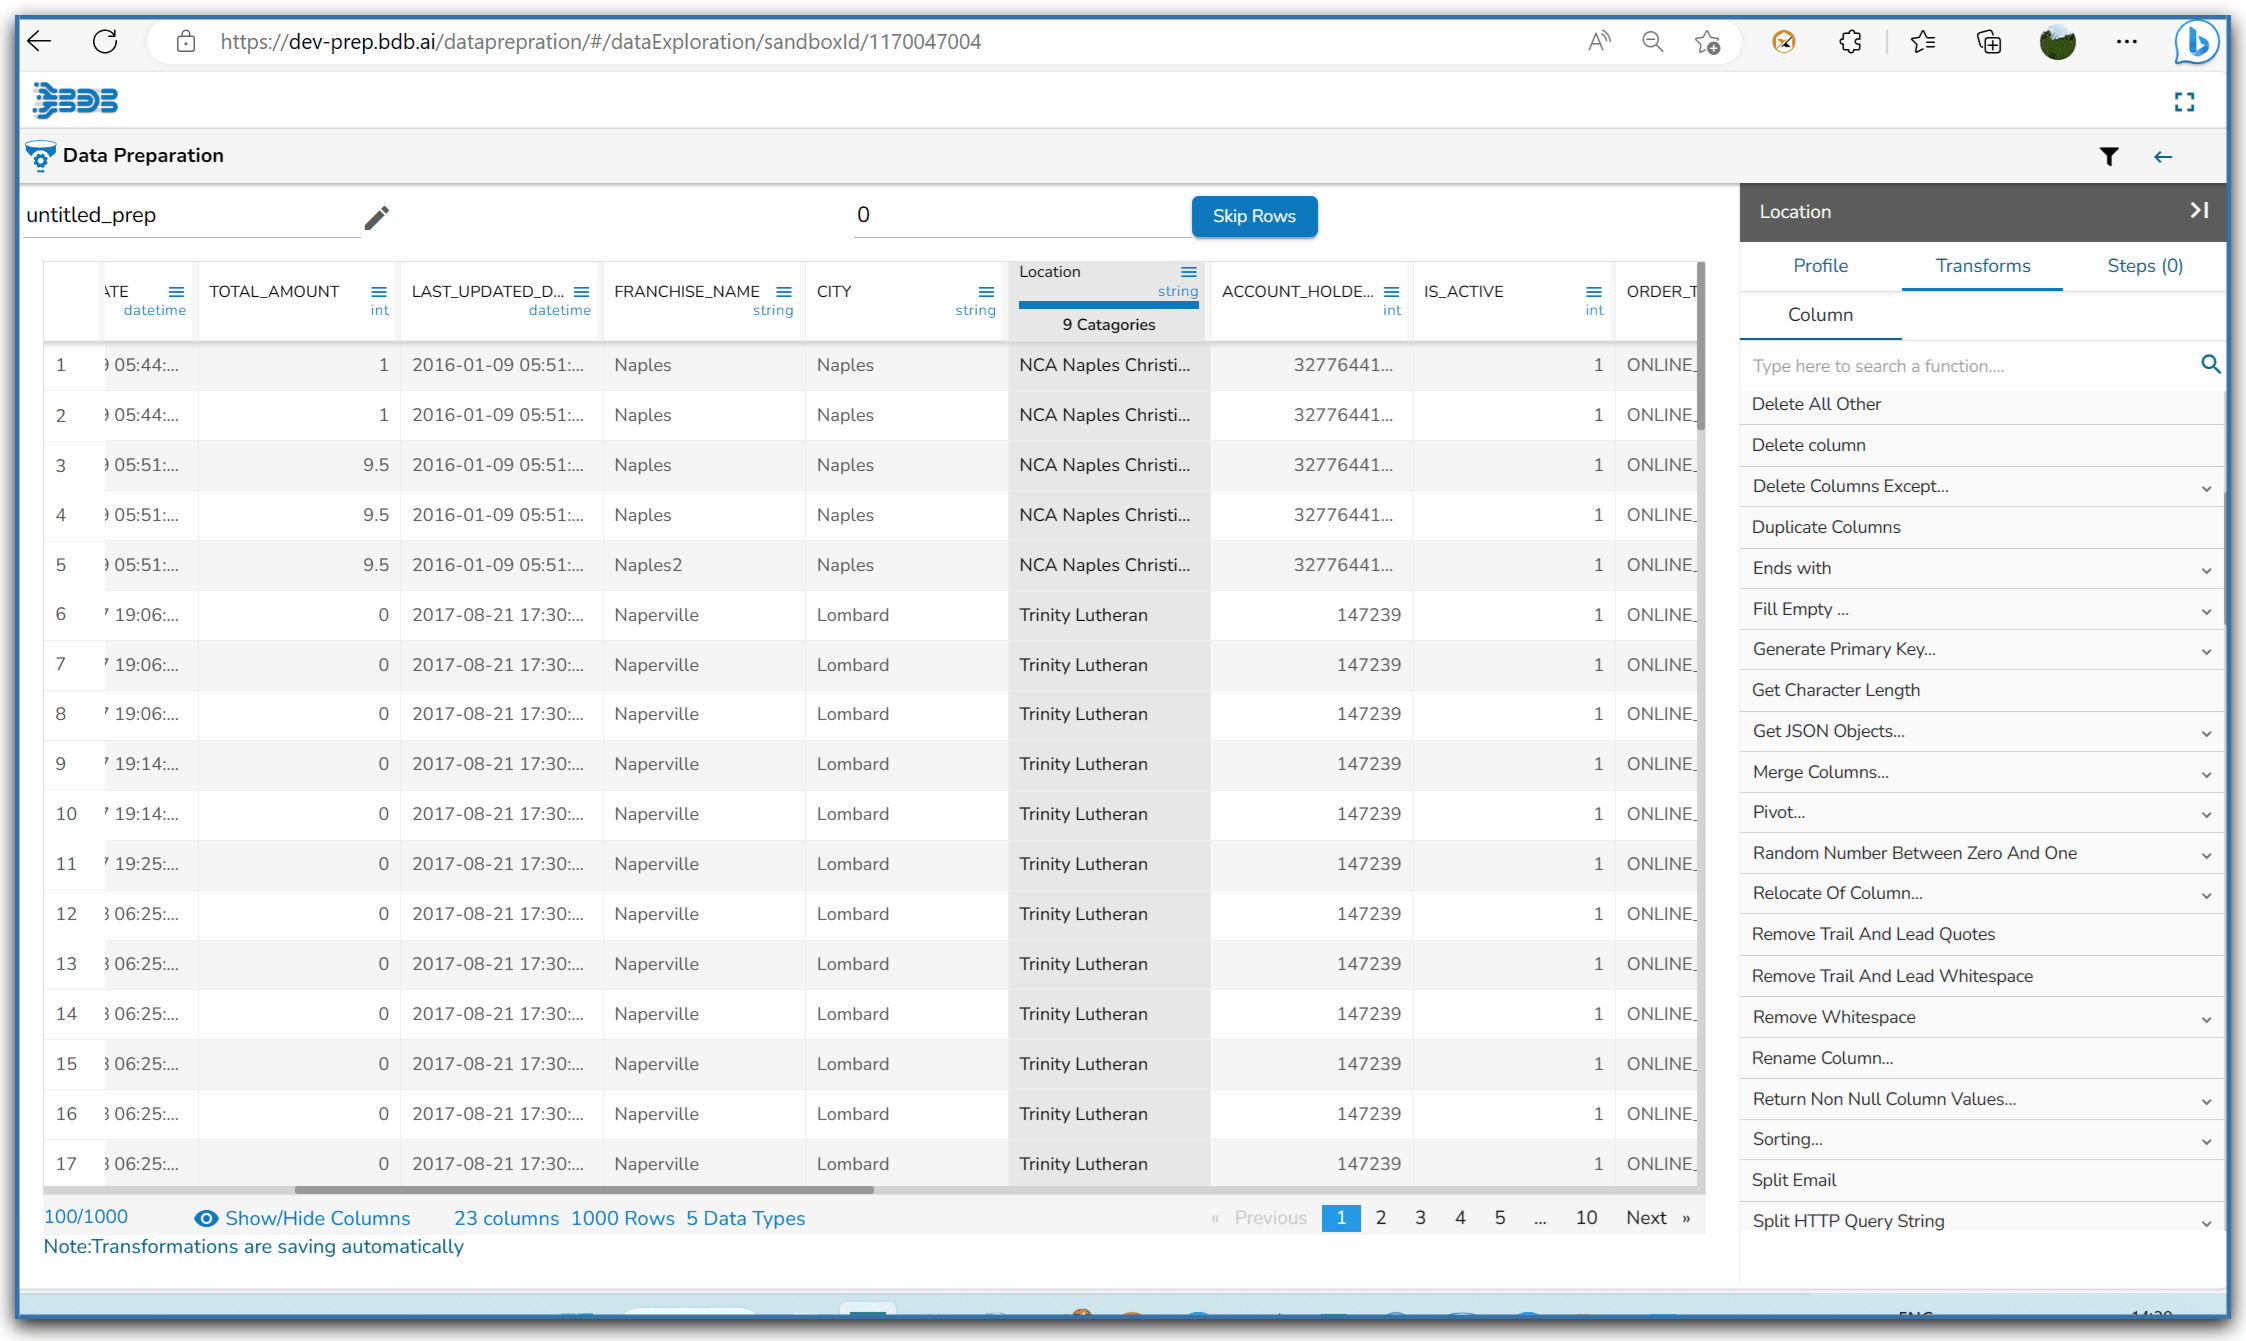
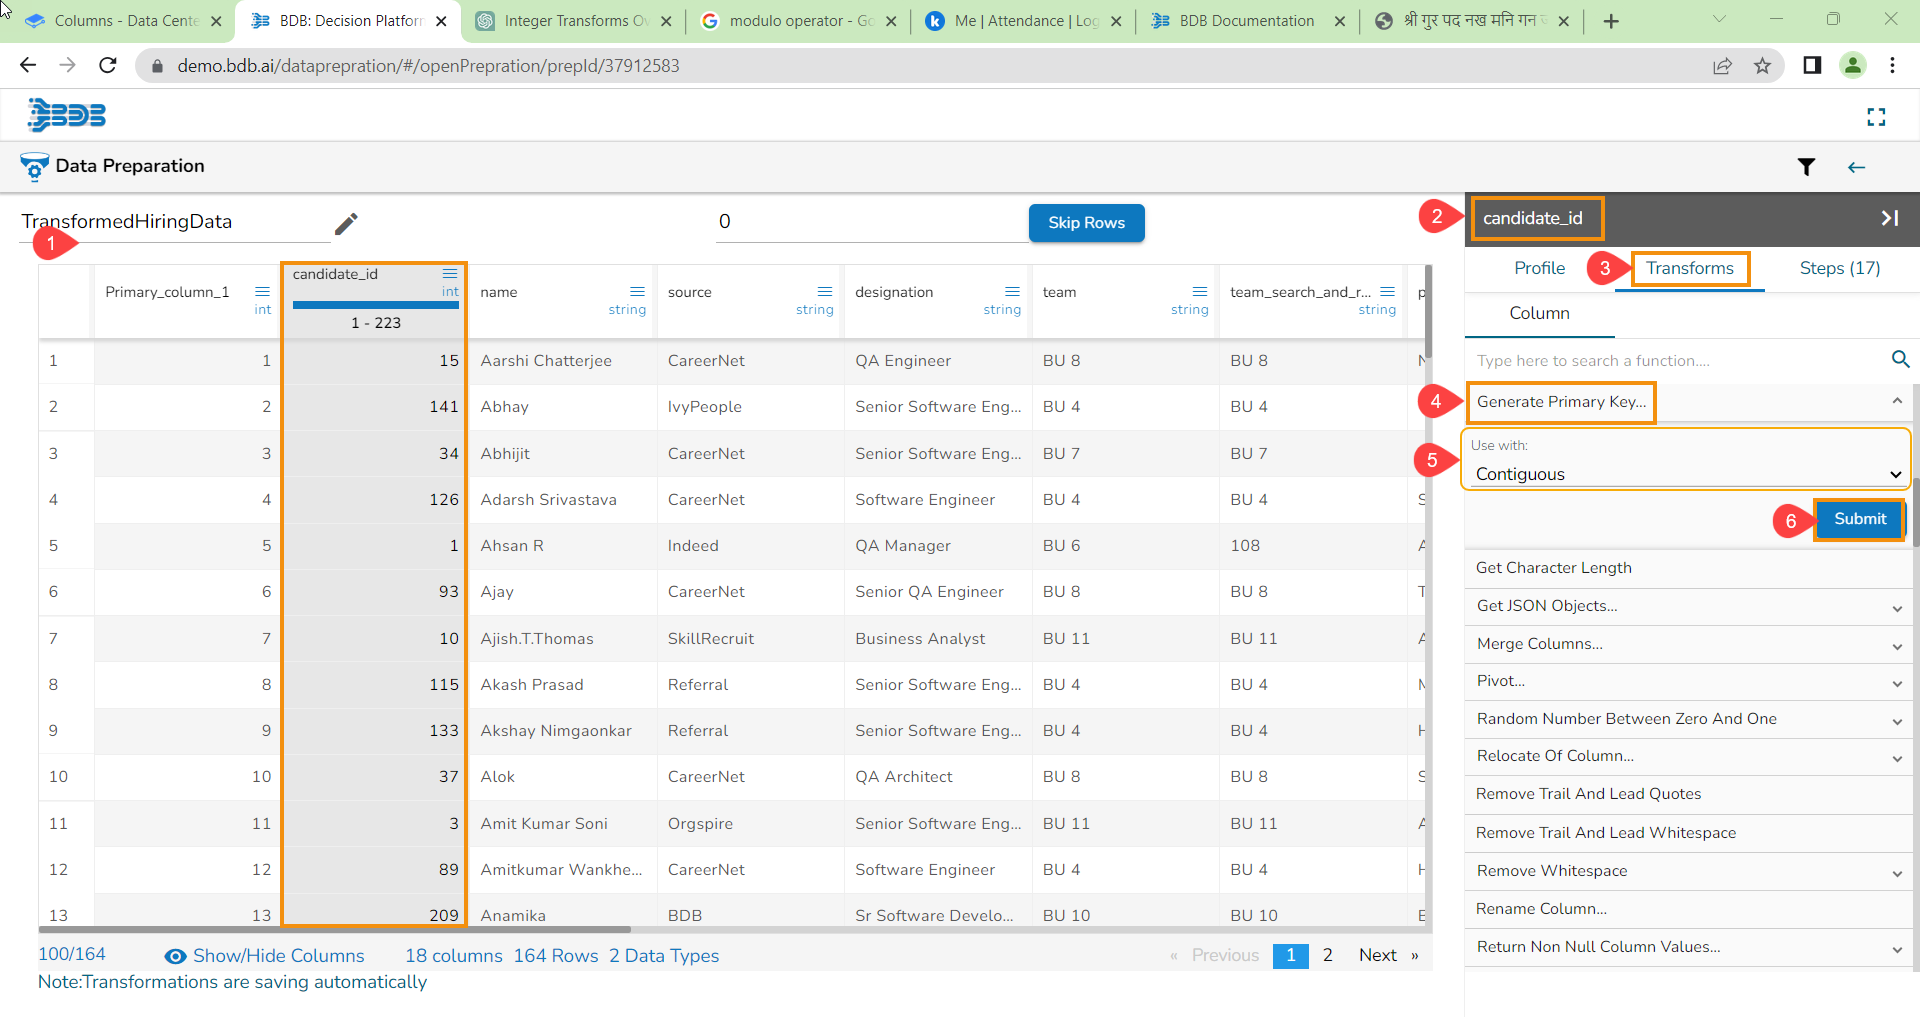
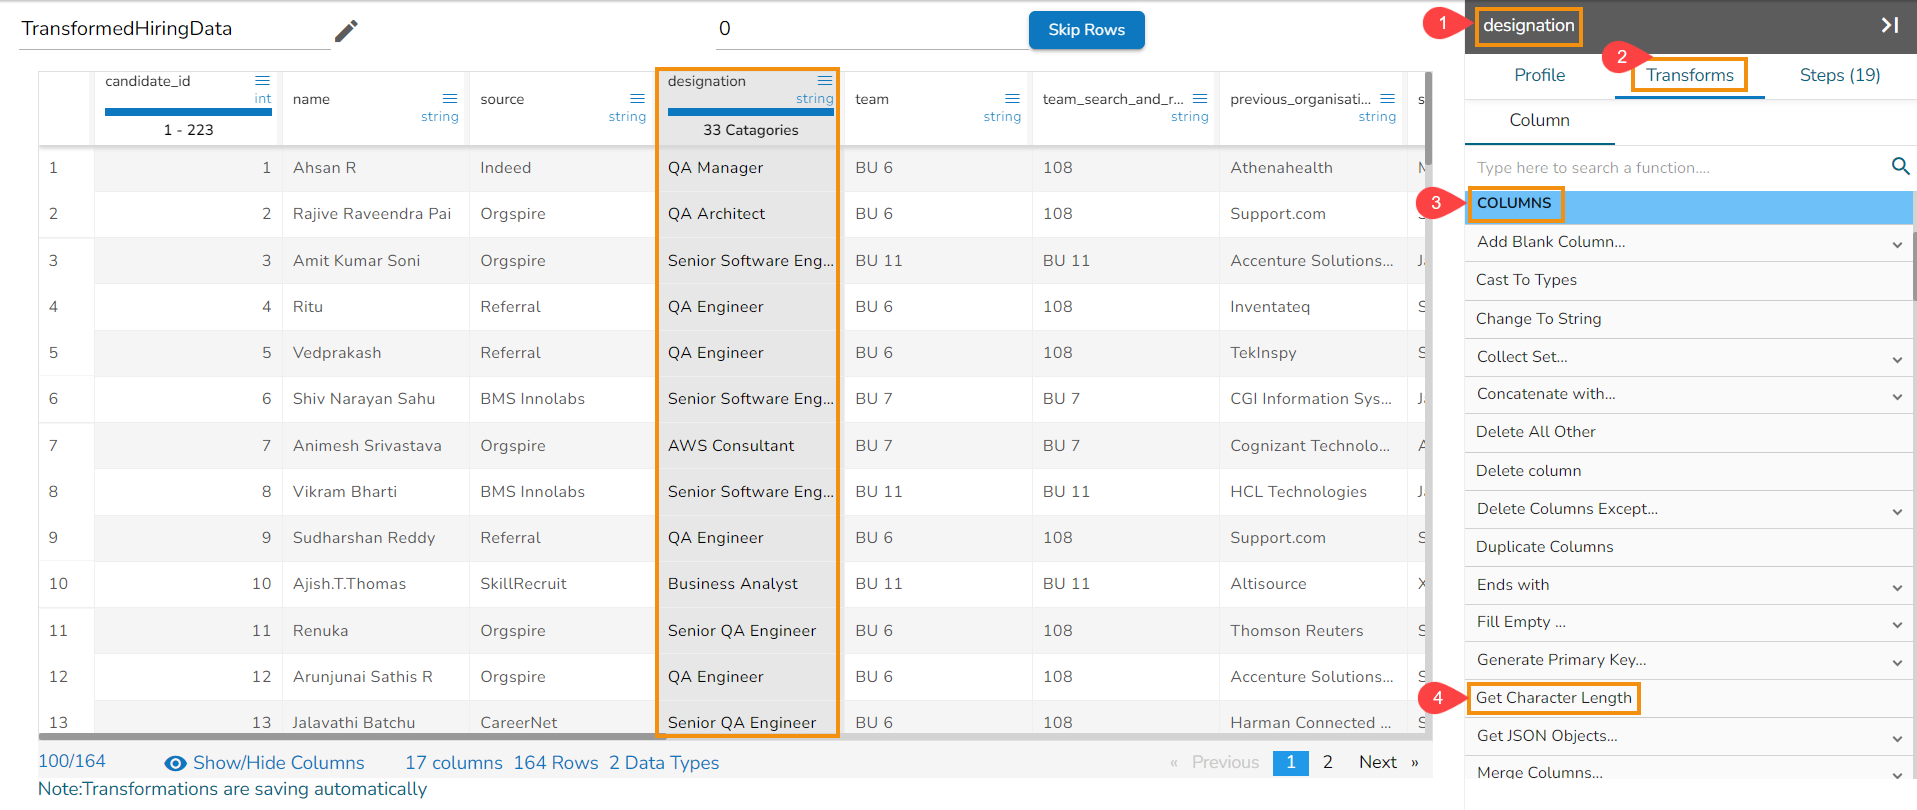
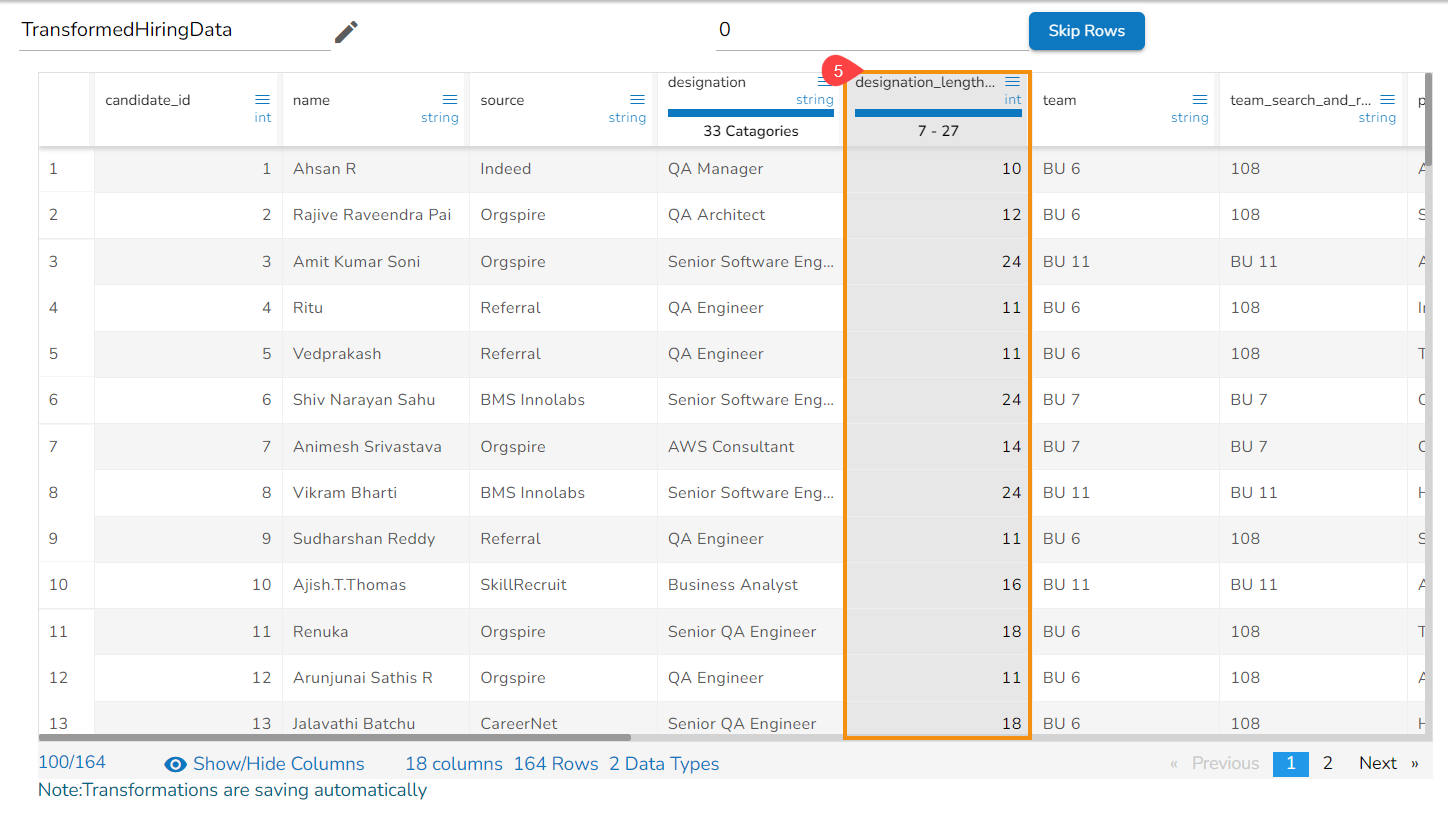
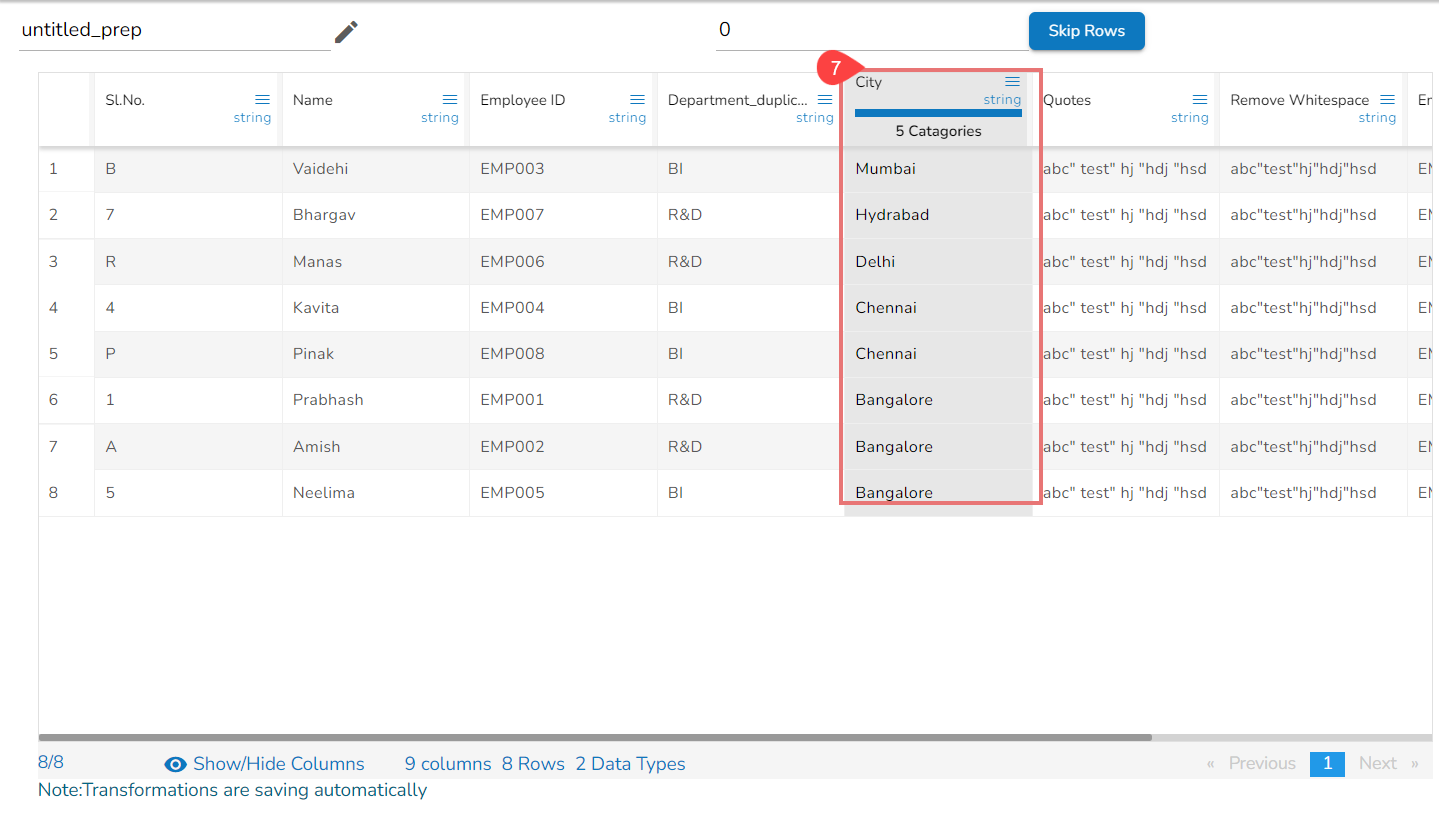
Steps to understand Delete All Other transform
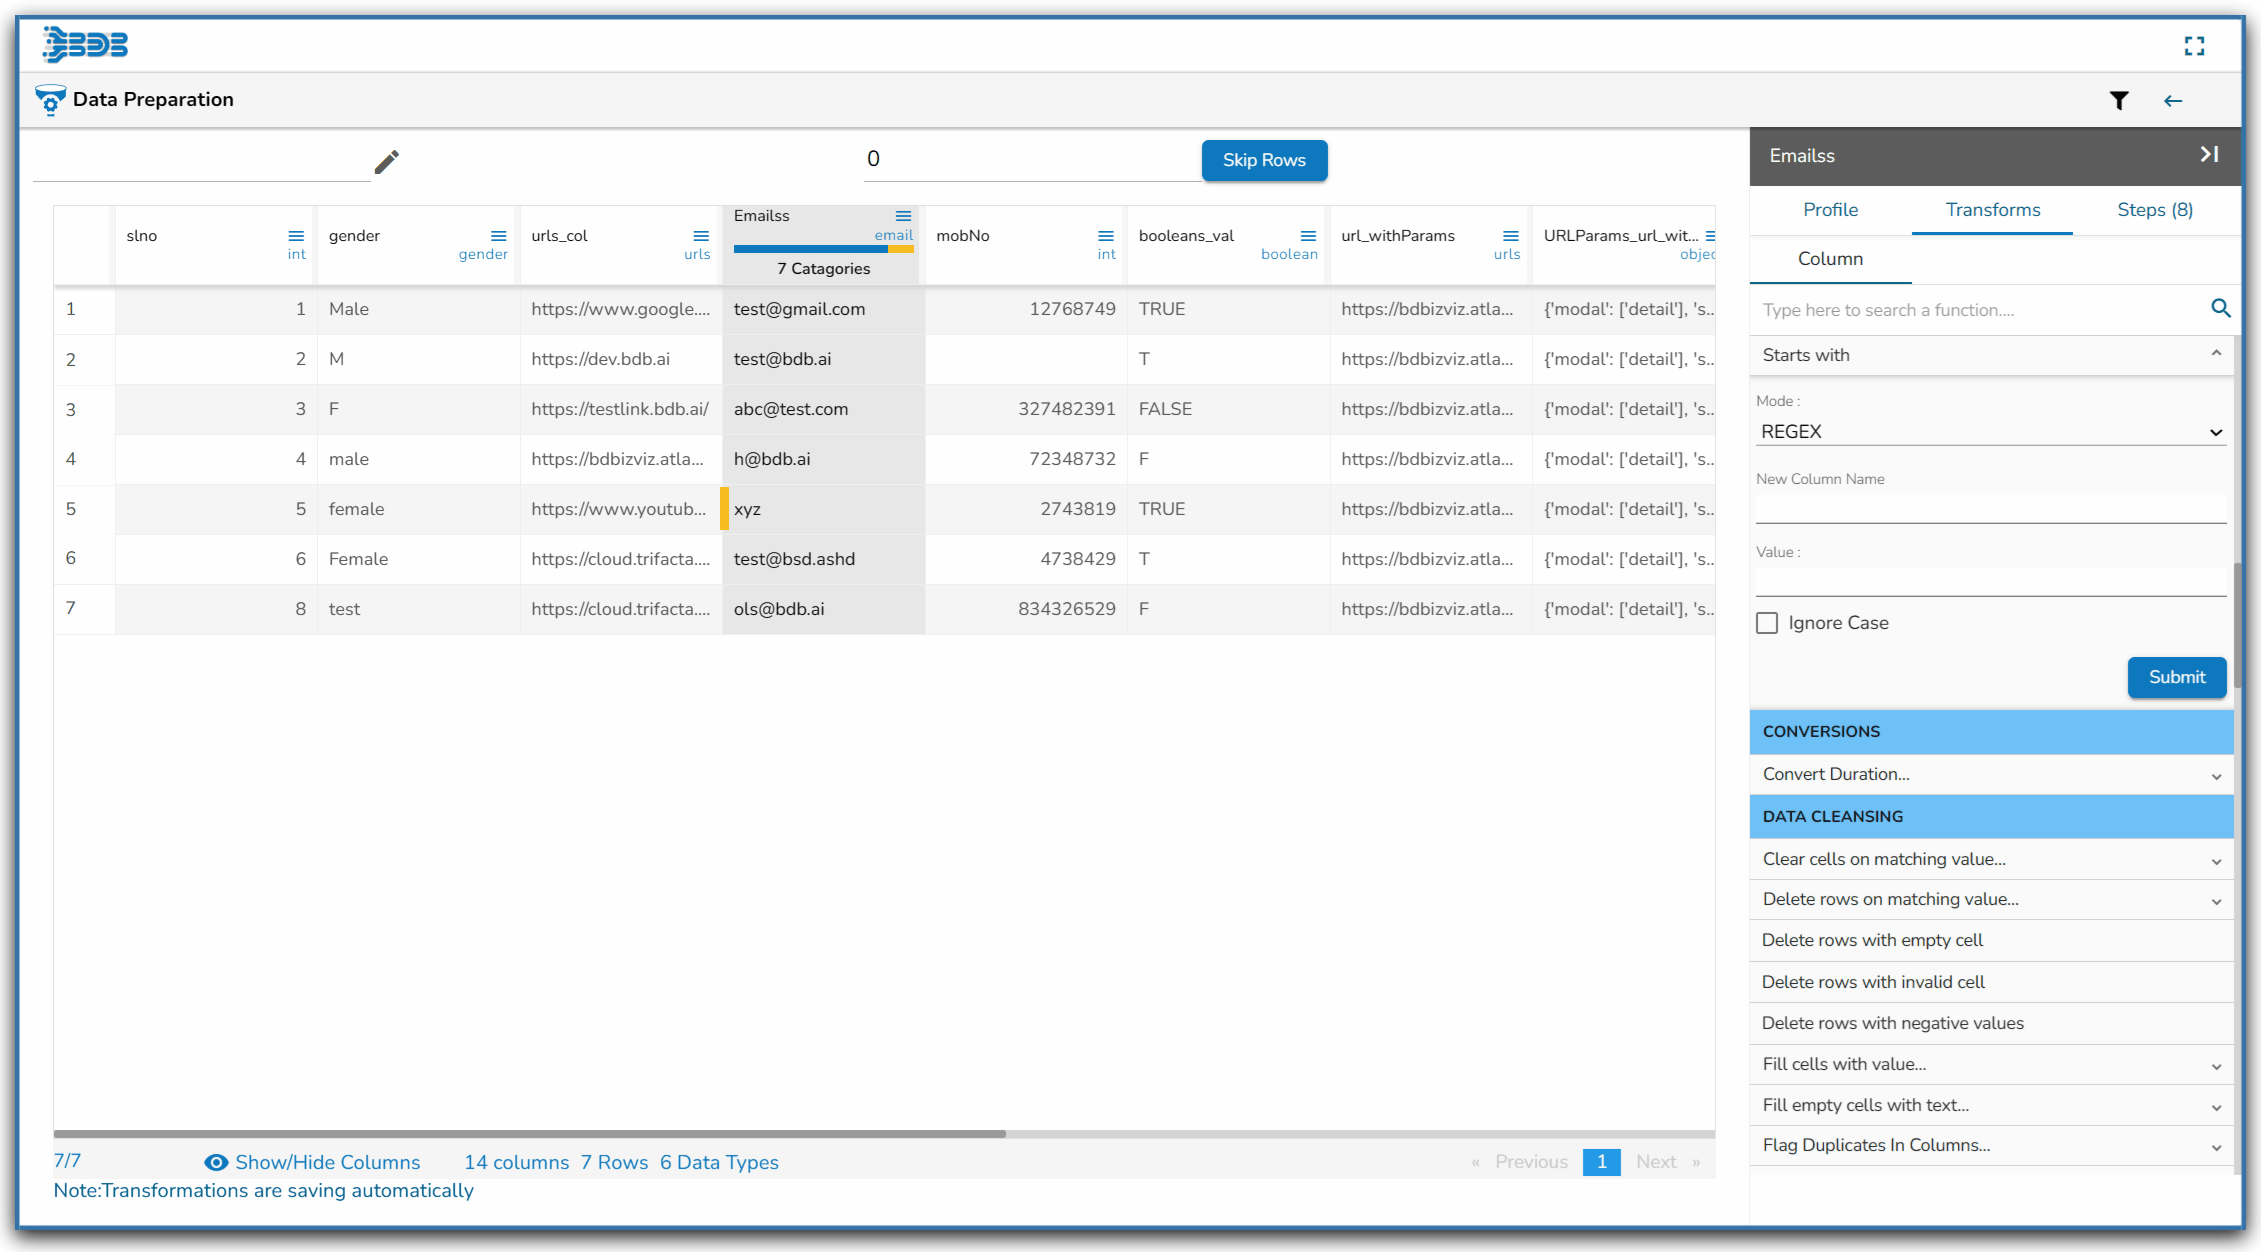
Using the Ends with
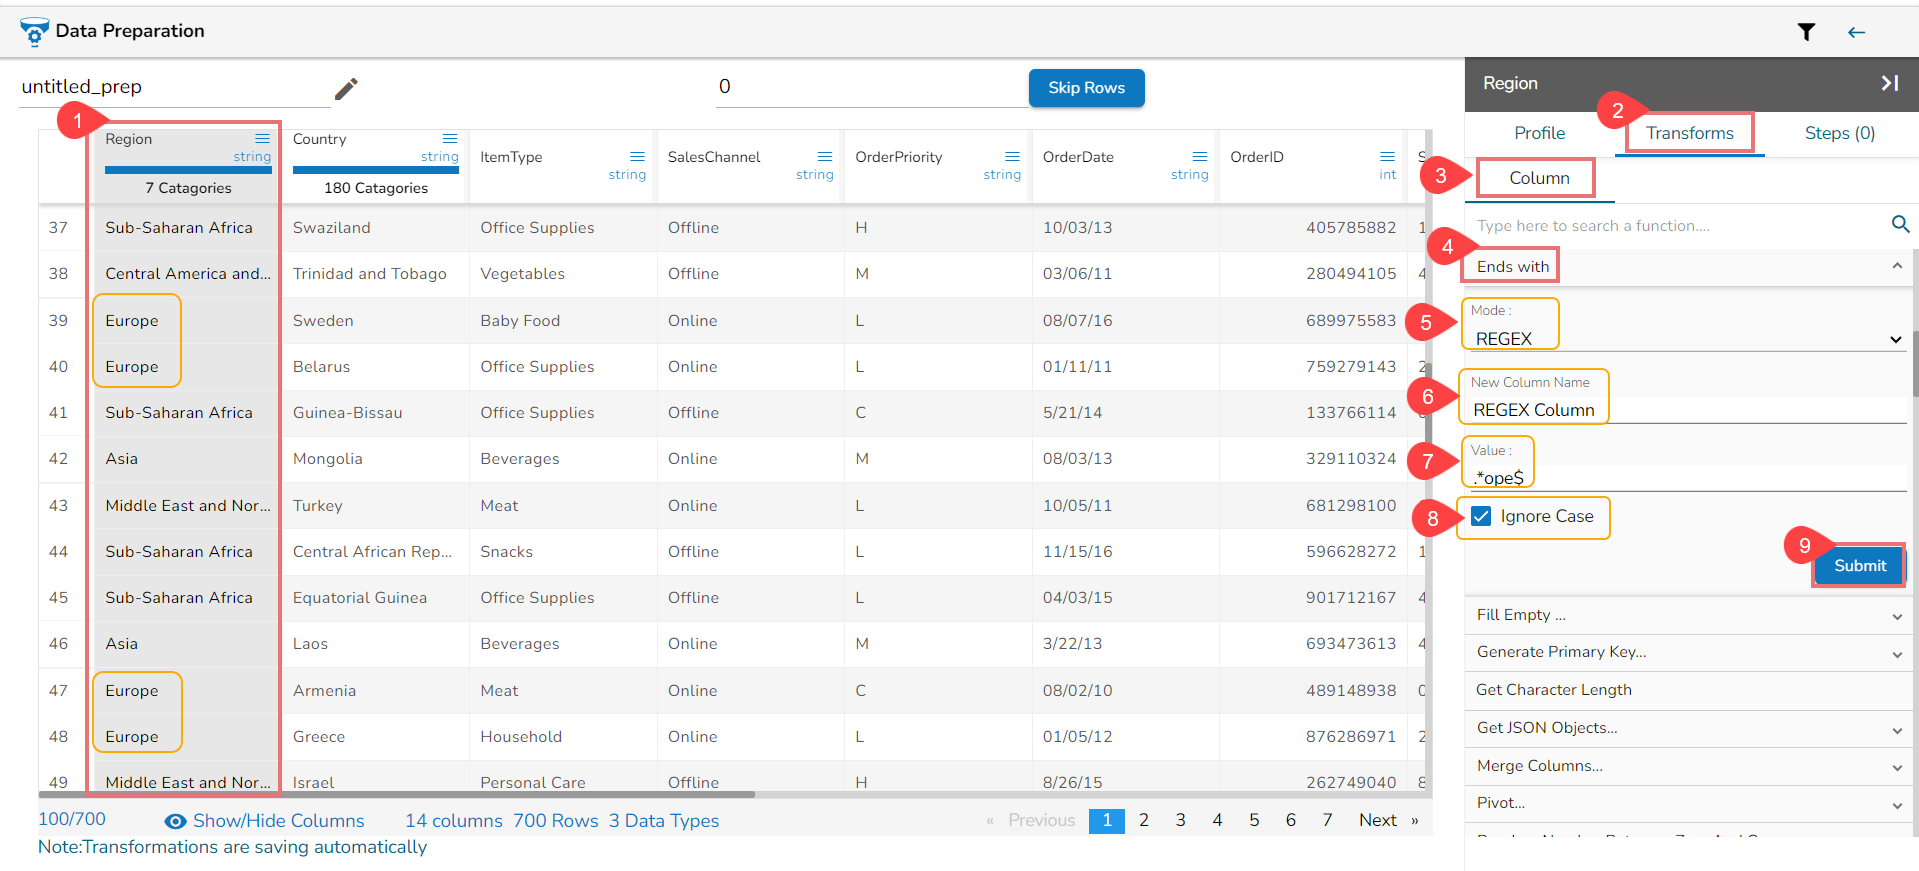
Using the REGEX mode while applying the Ends with transform
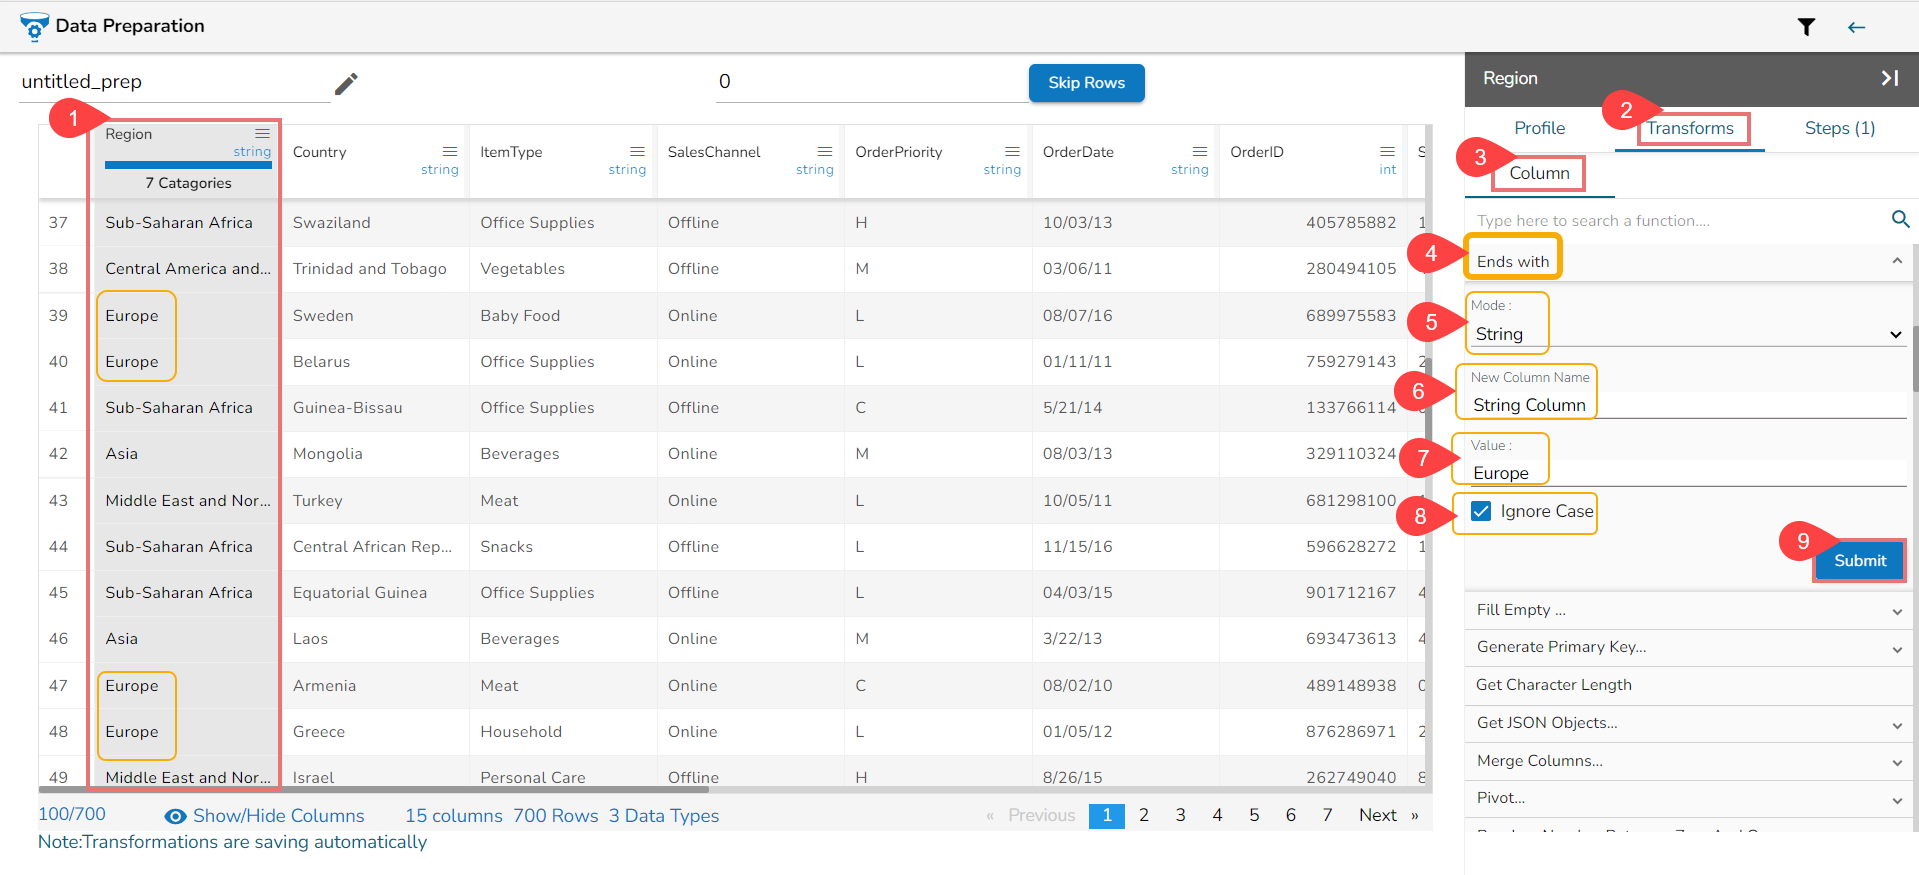
Using the String mode while applying the Ends with transform
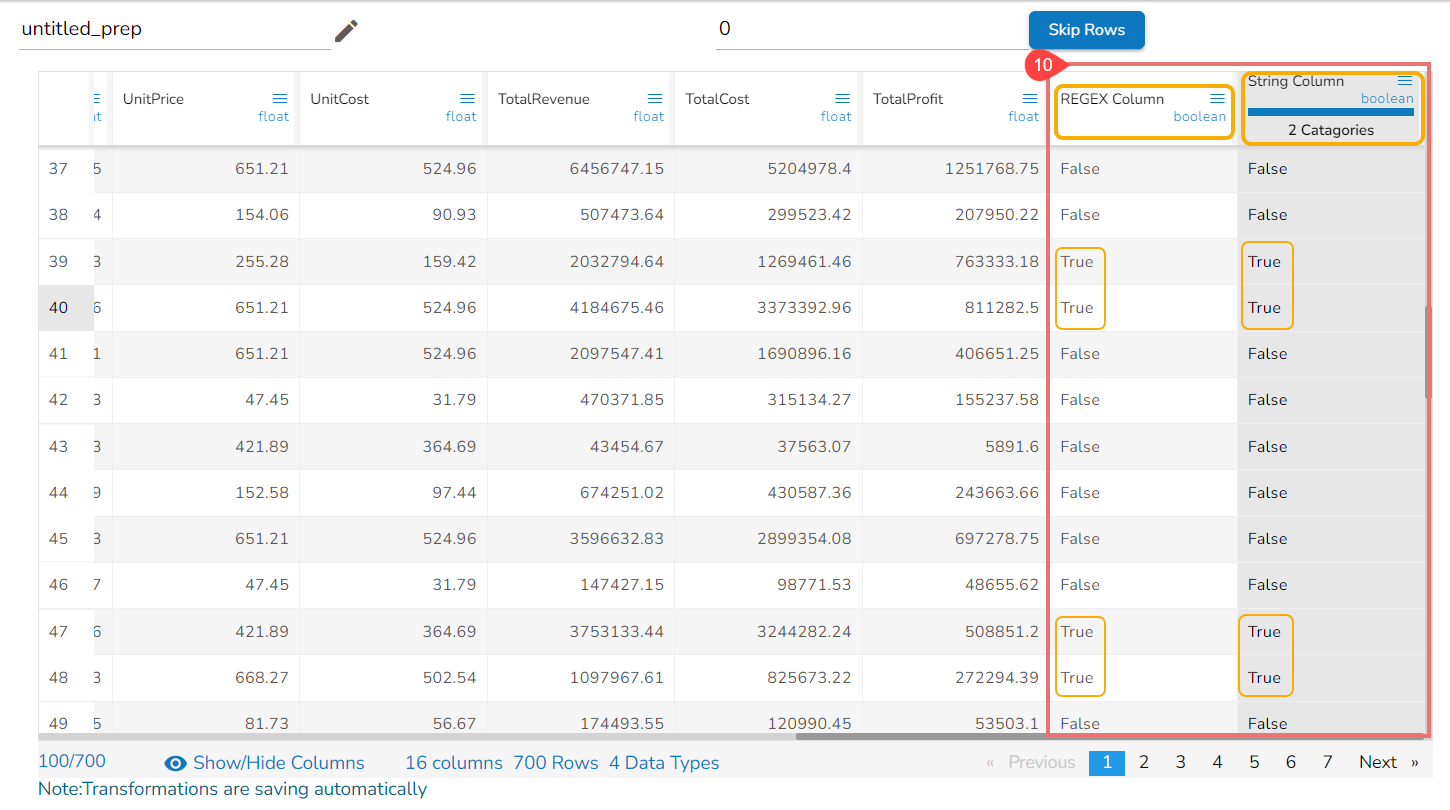
The Result columns for the REGEX and String modes


| Name | Job | Gender | MergedColumn |
| Ram | Teacher | Male | Ram_Teacher_Male |
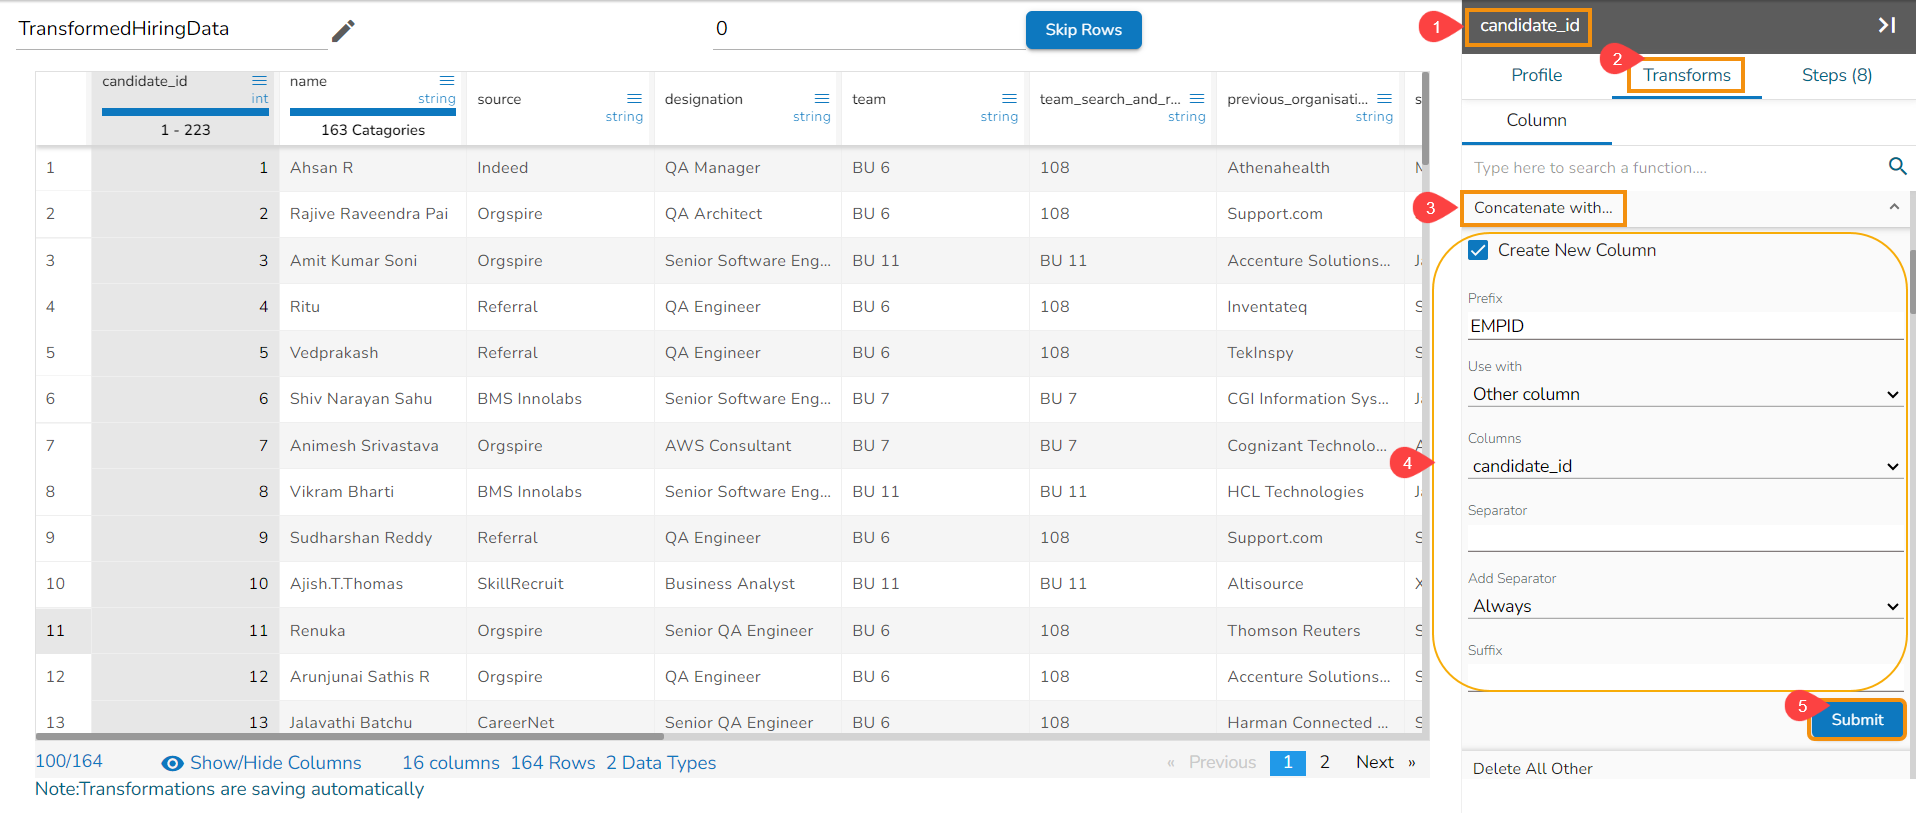
Steps to understand Merge Columns transform
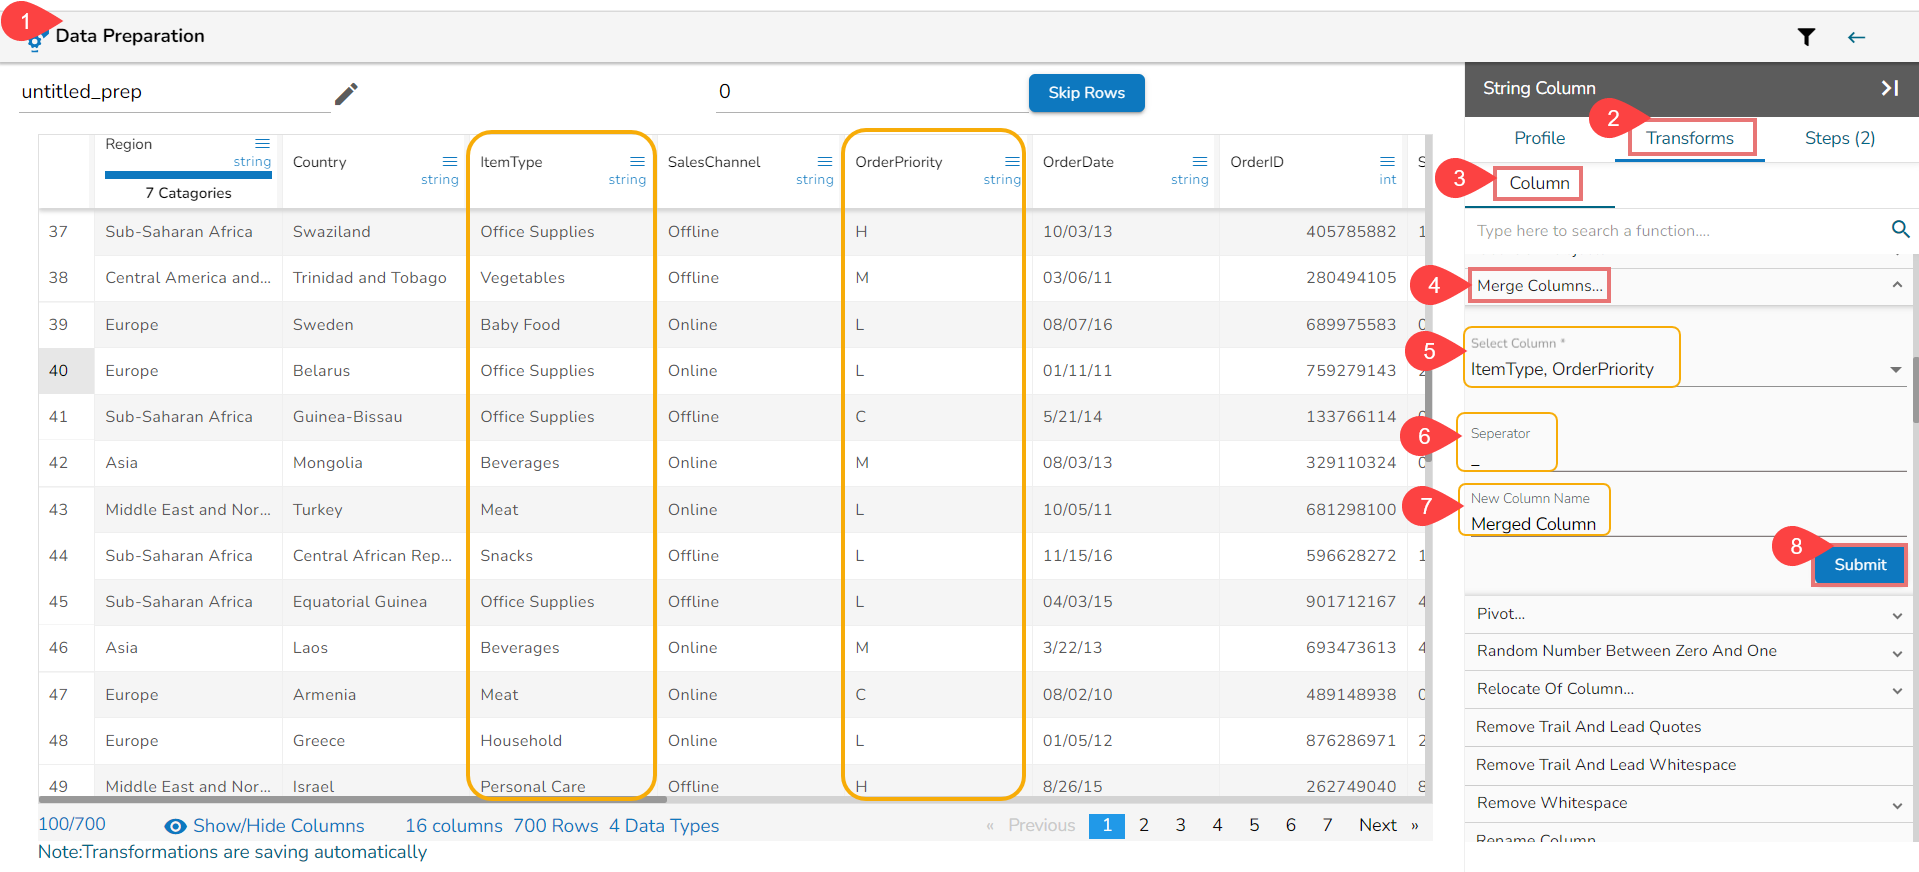
Applying the Merge Columns Transform
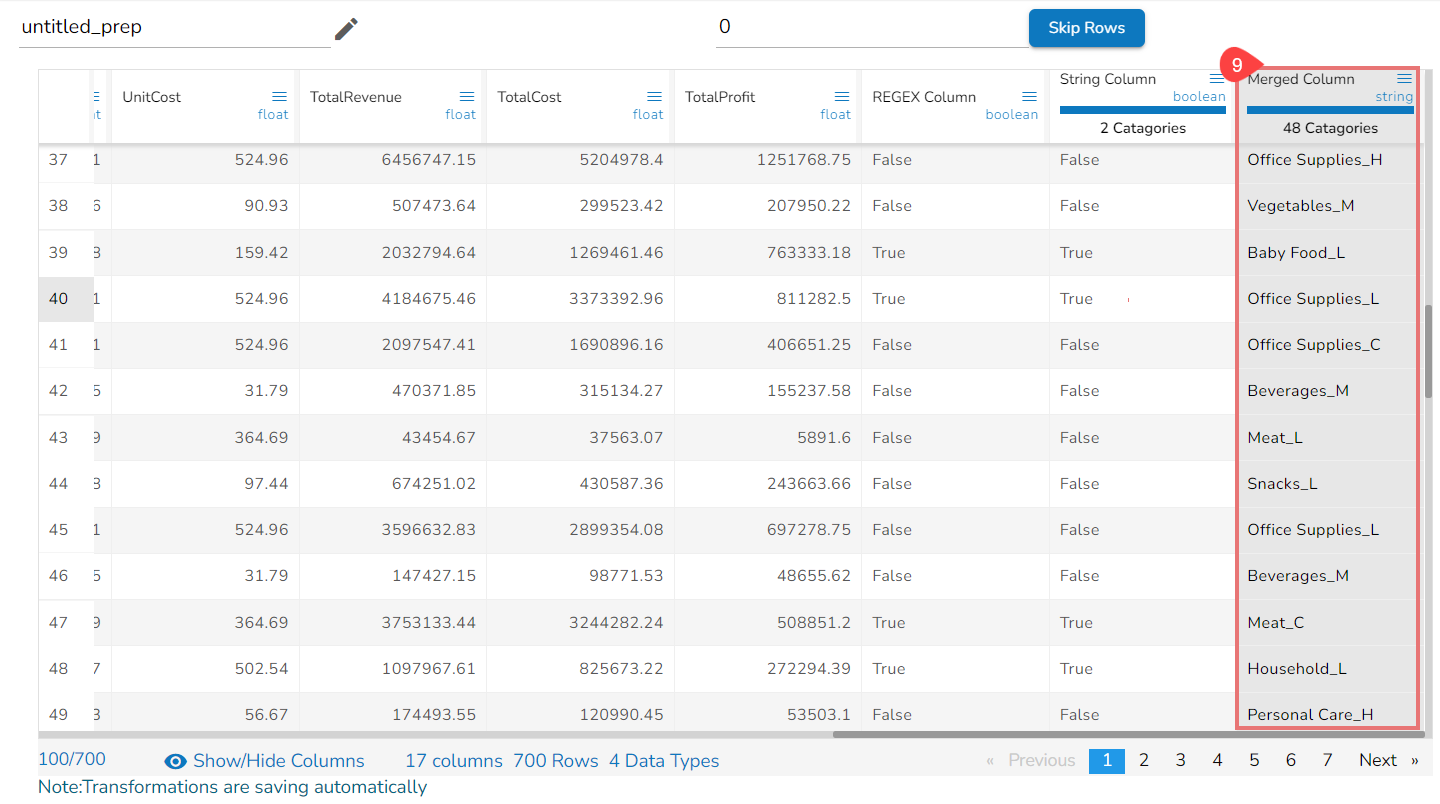
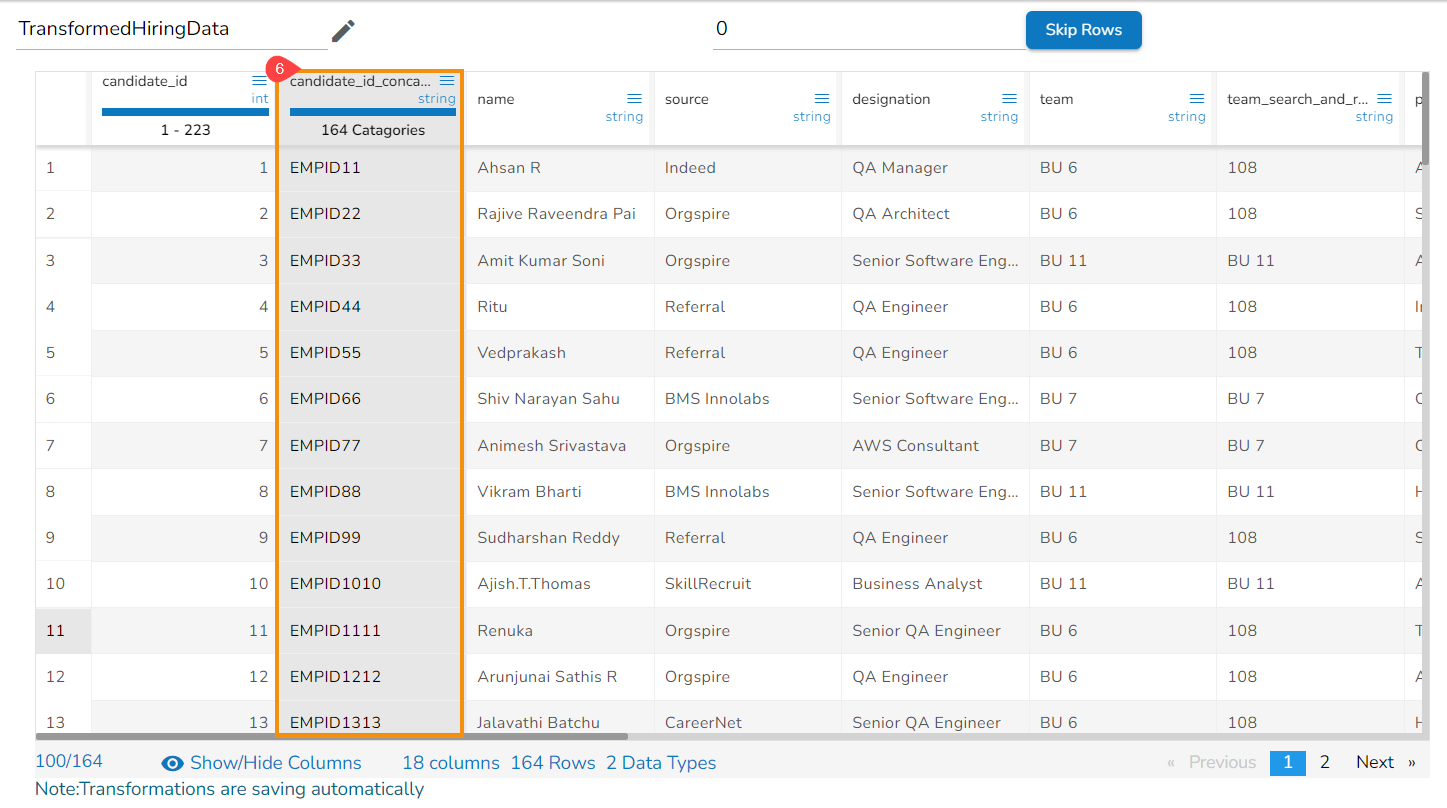
Result column with the Merged values from the selected columns
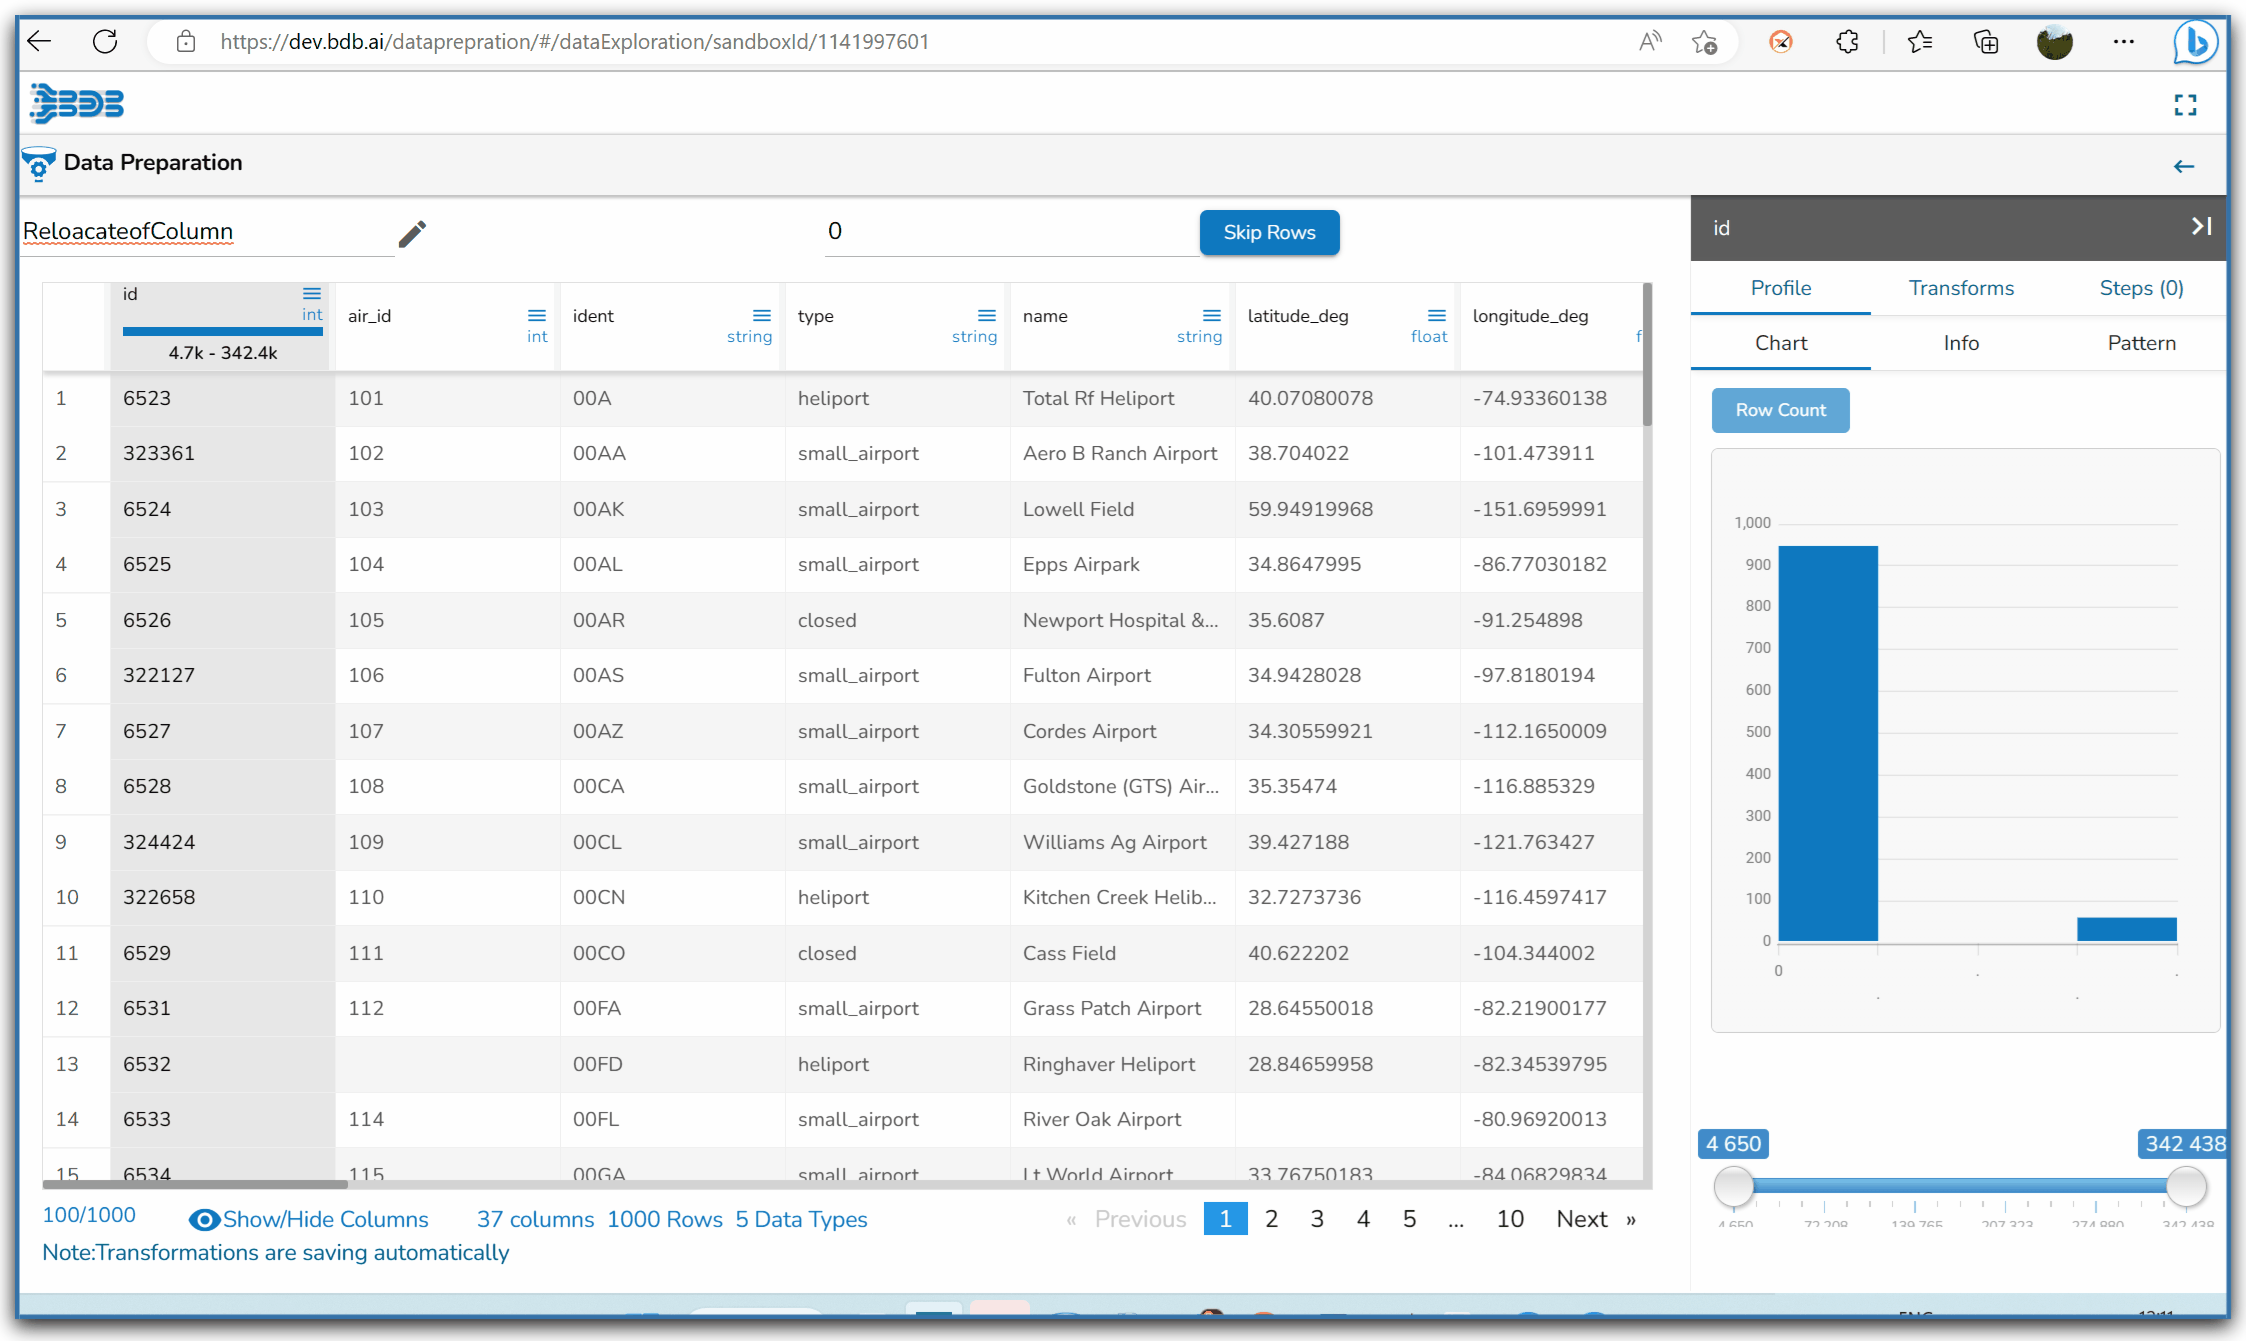
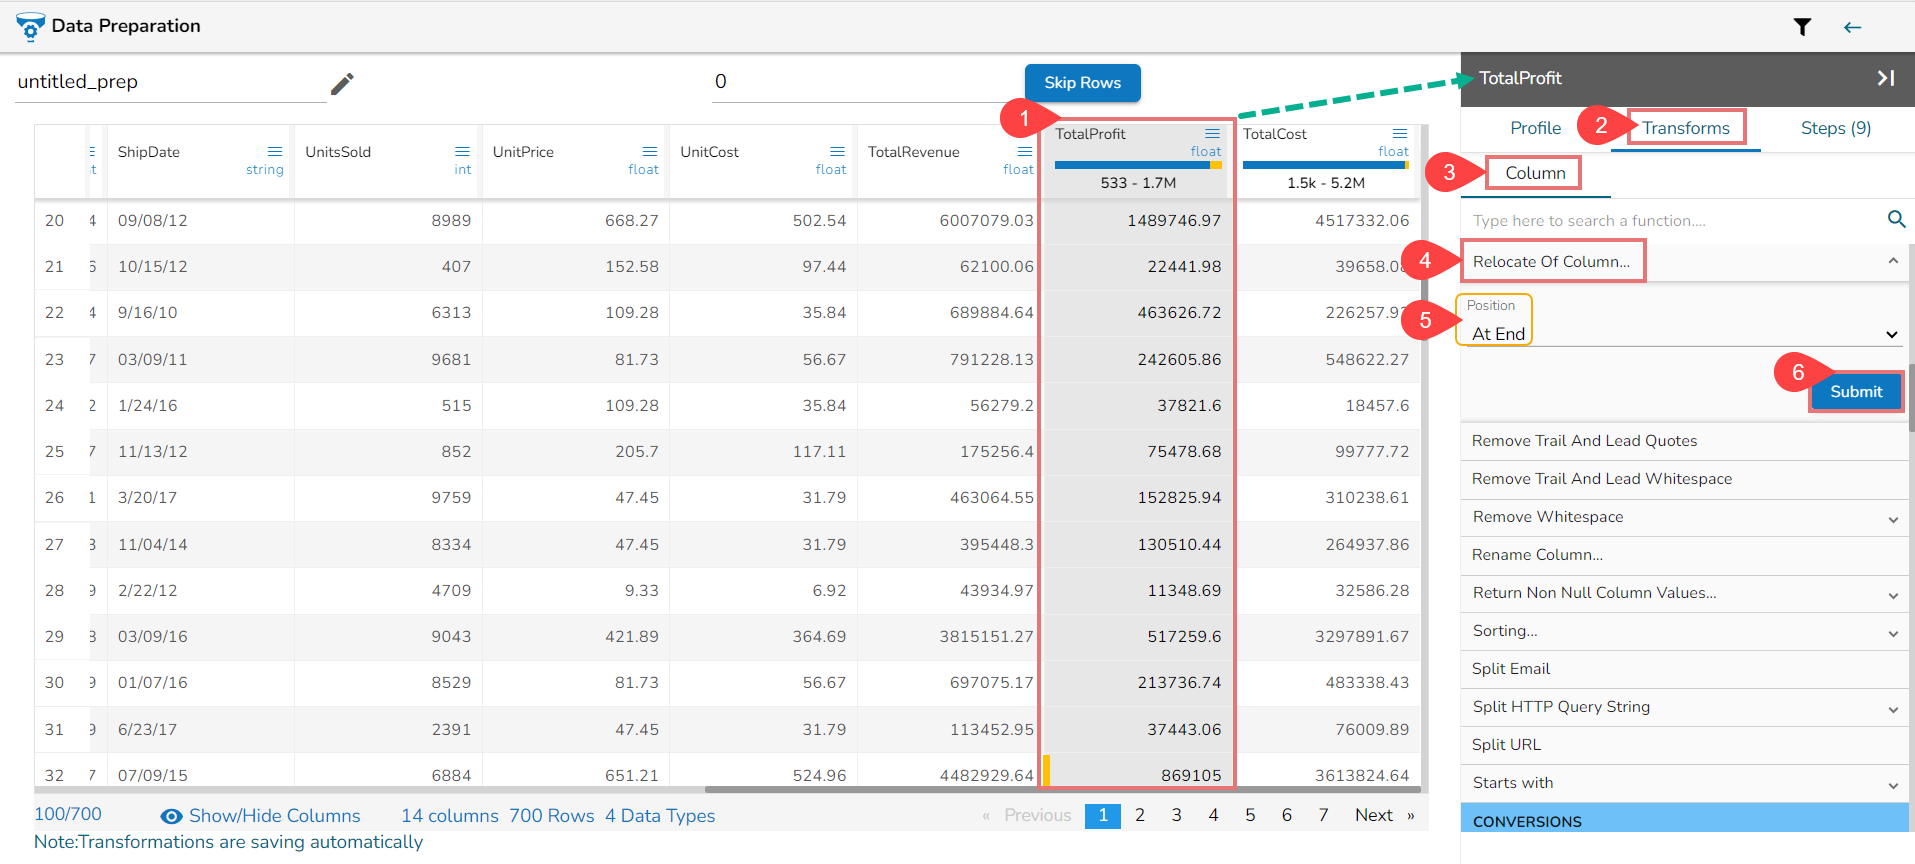
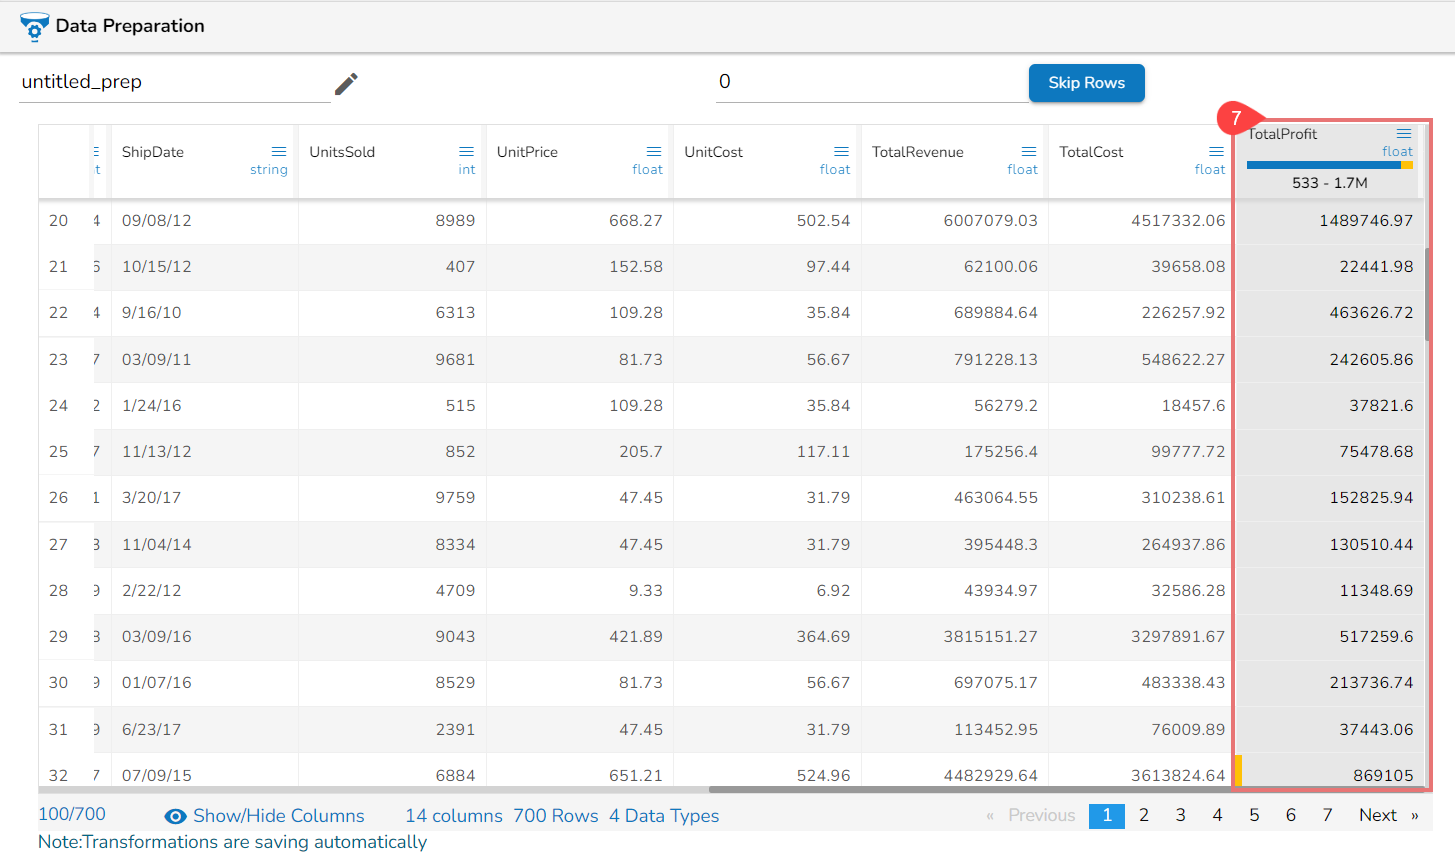
Steps to understand Relocate of Column transform
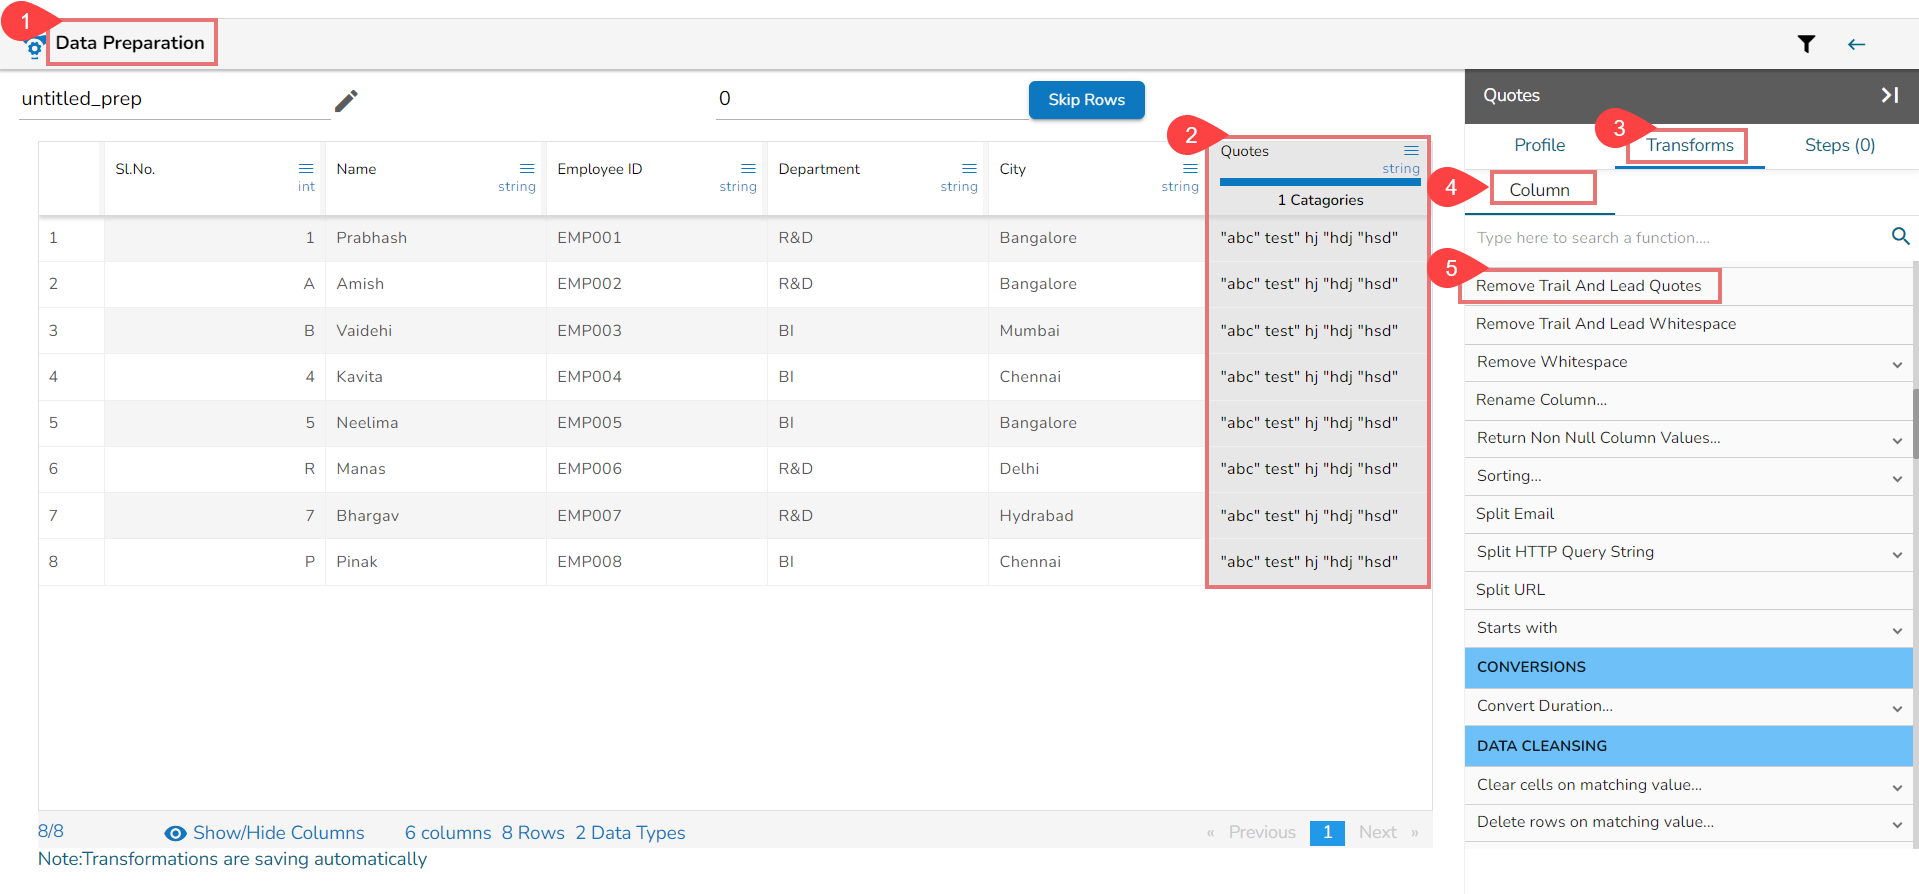
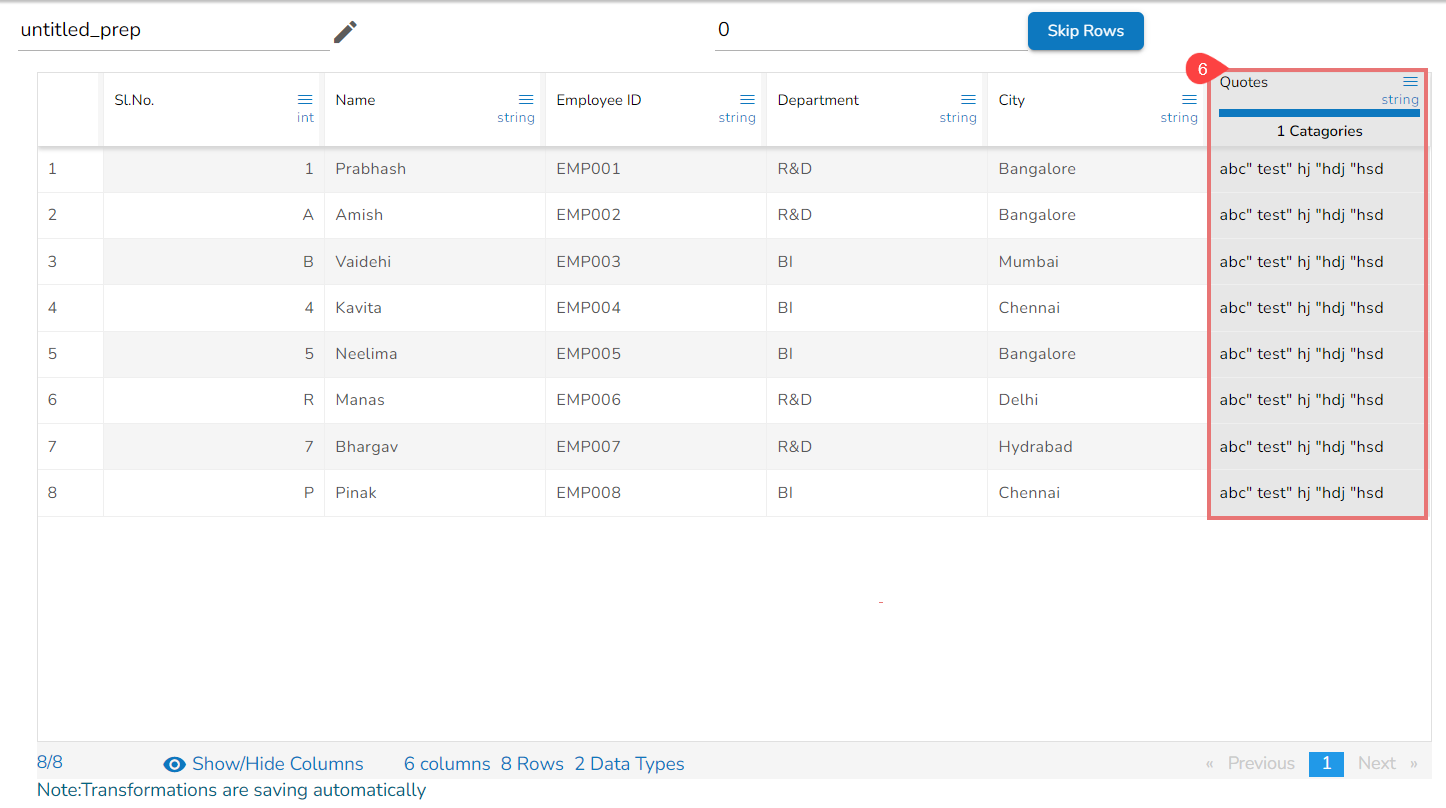
Using the Remove Trail and Lead Quotes
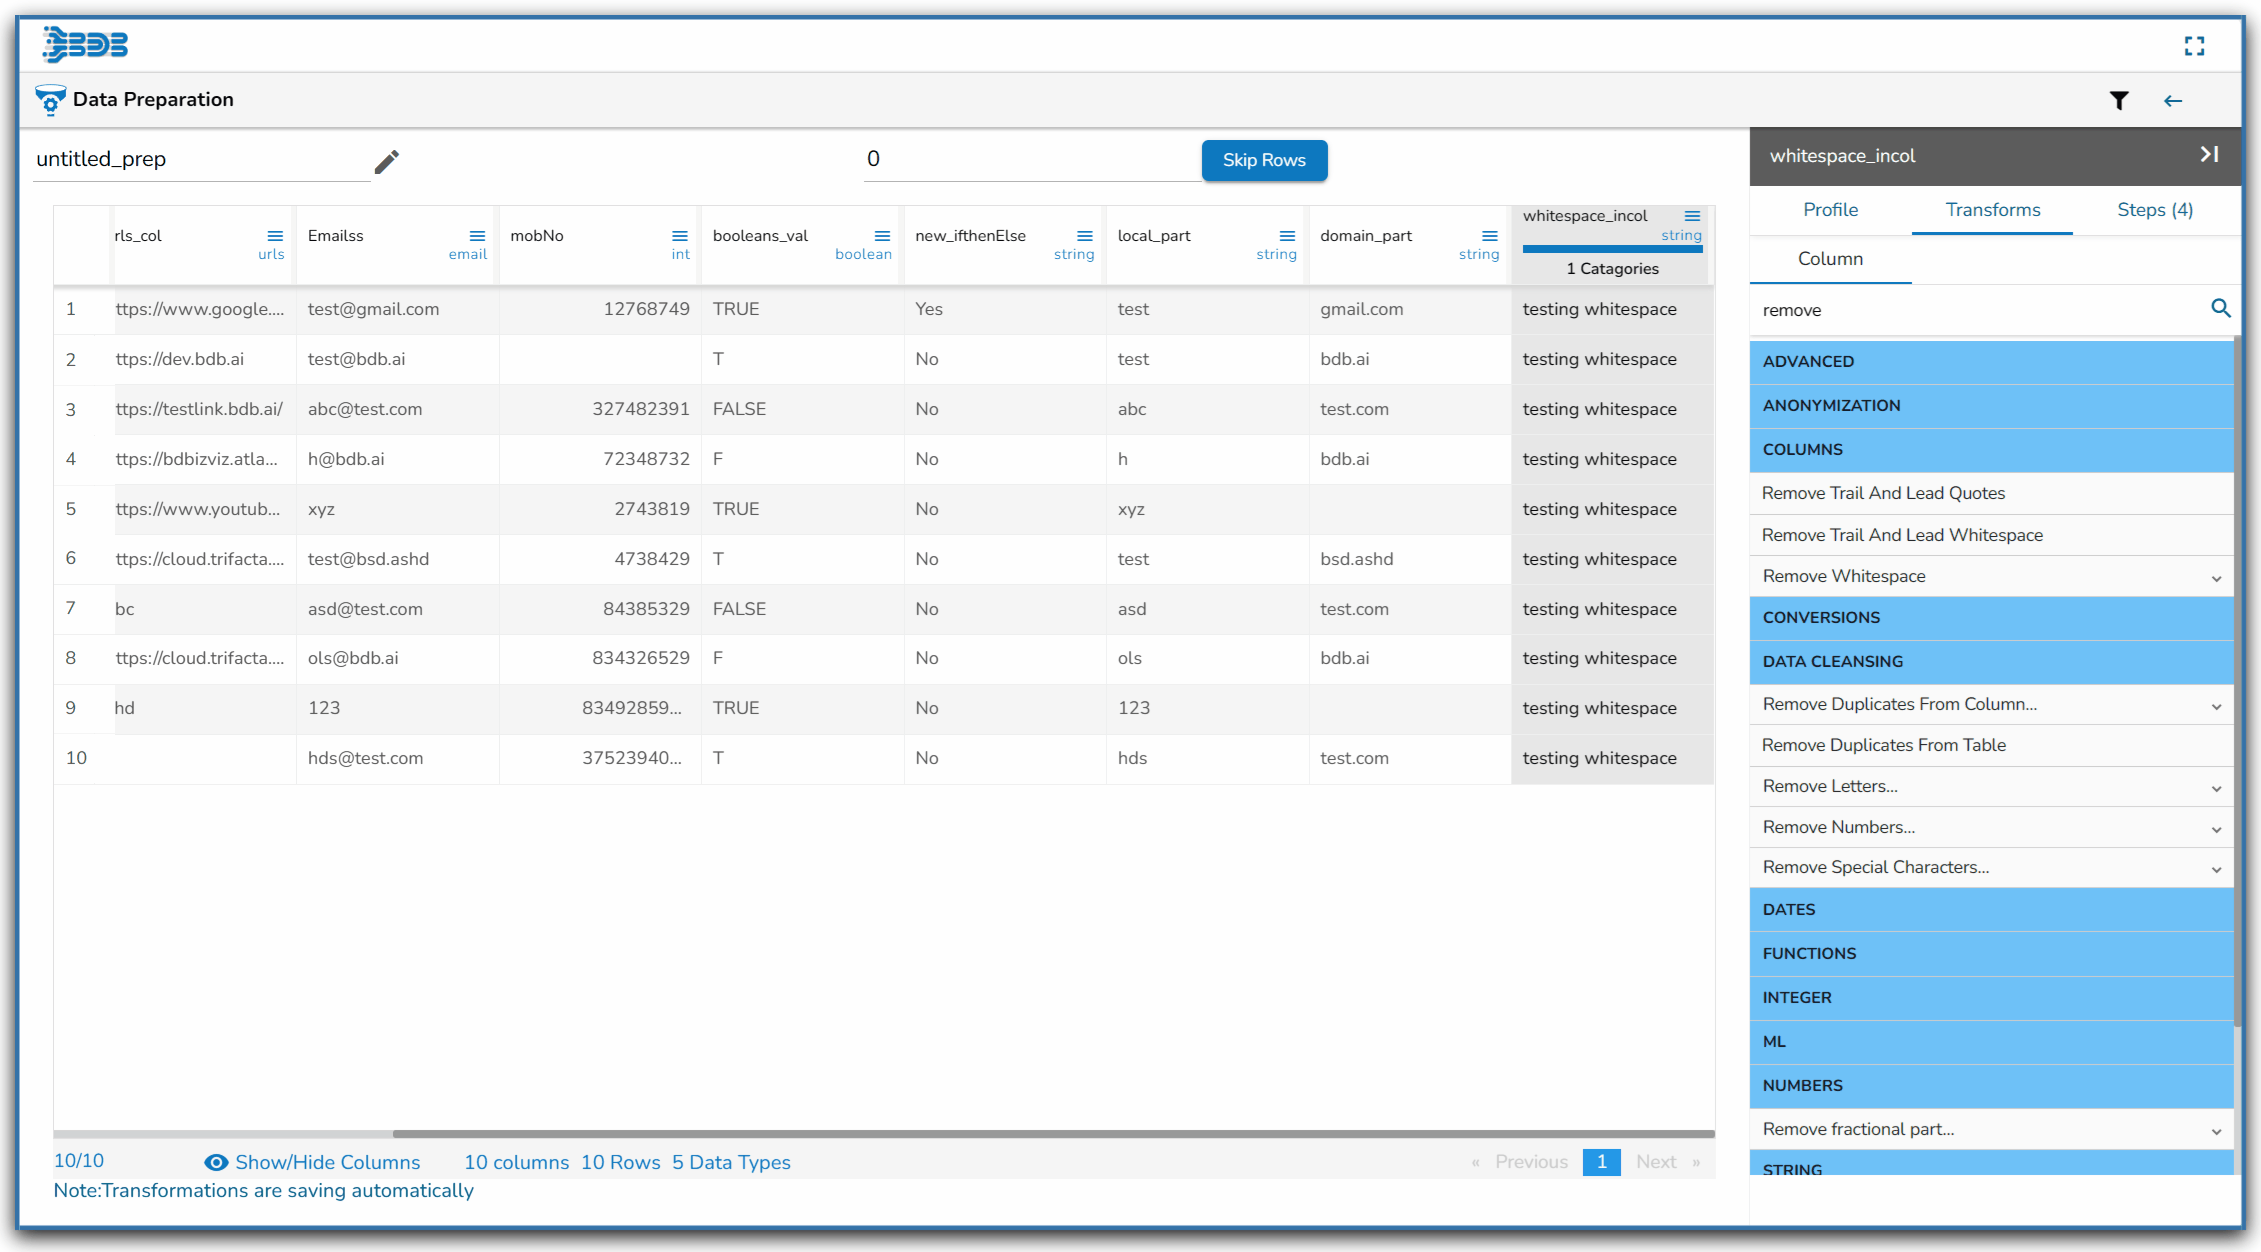
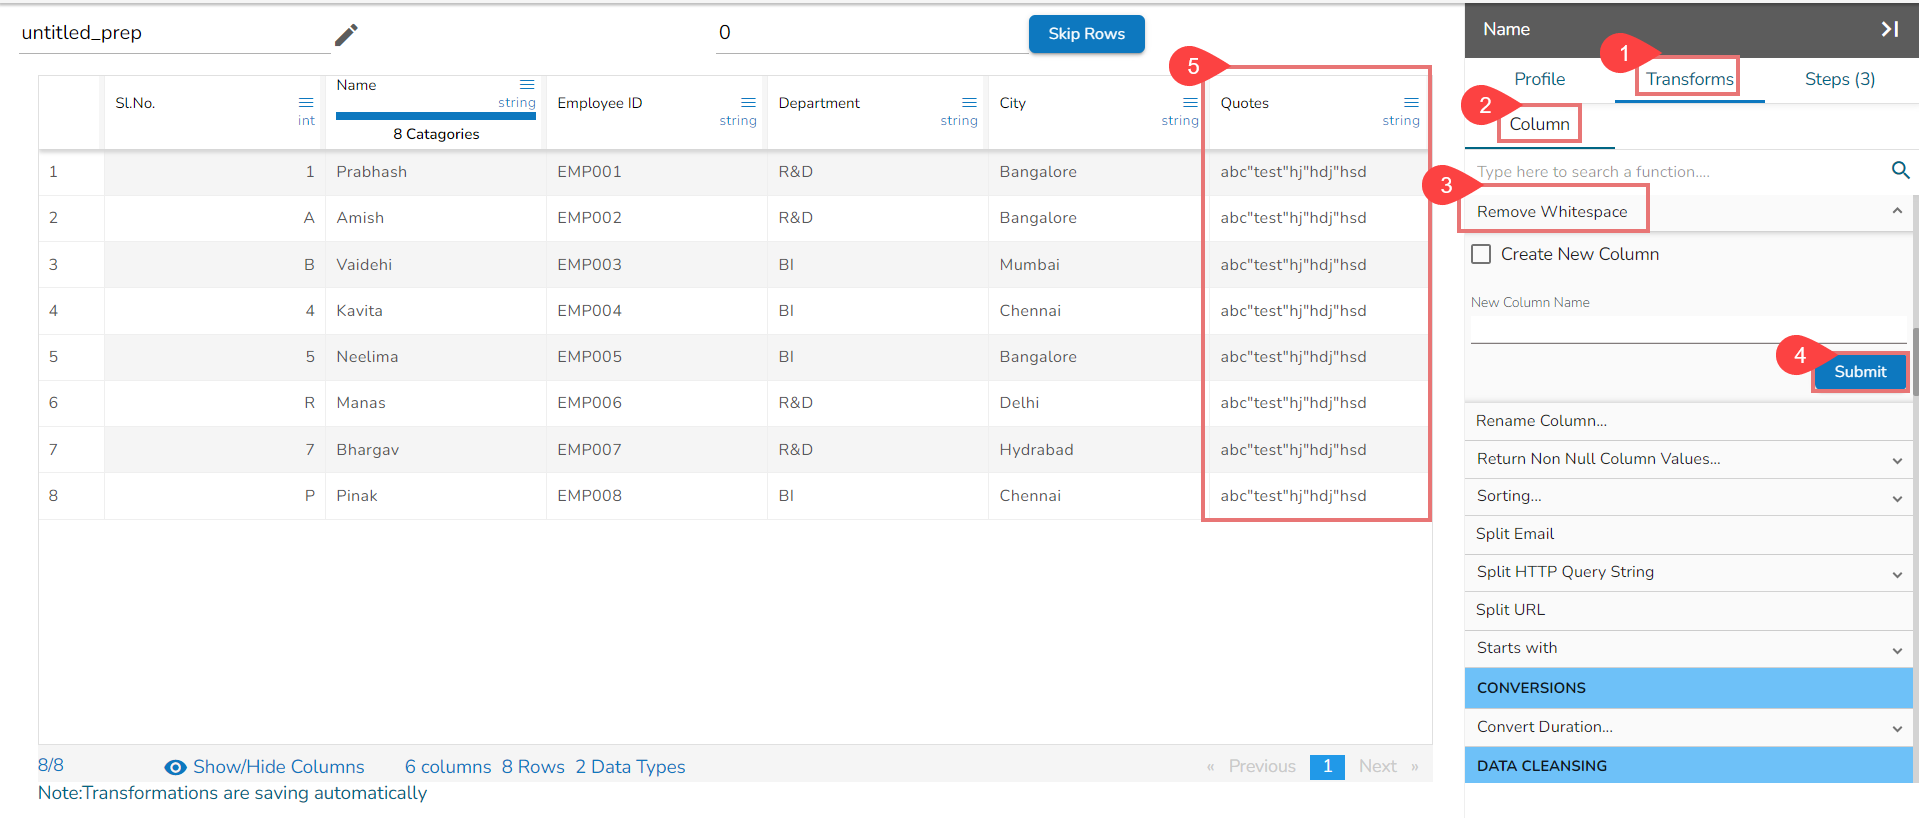
Using the Remove Whitespace transform
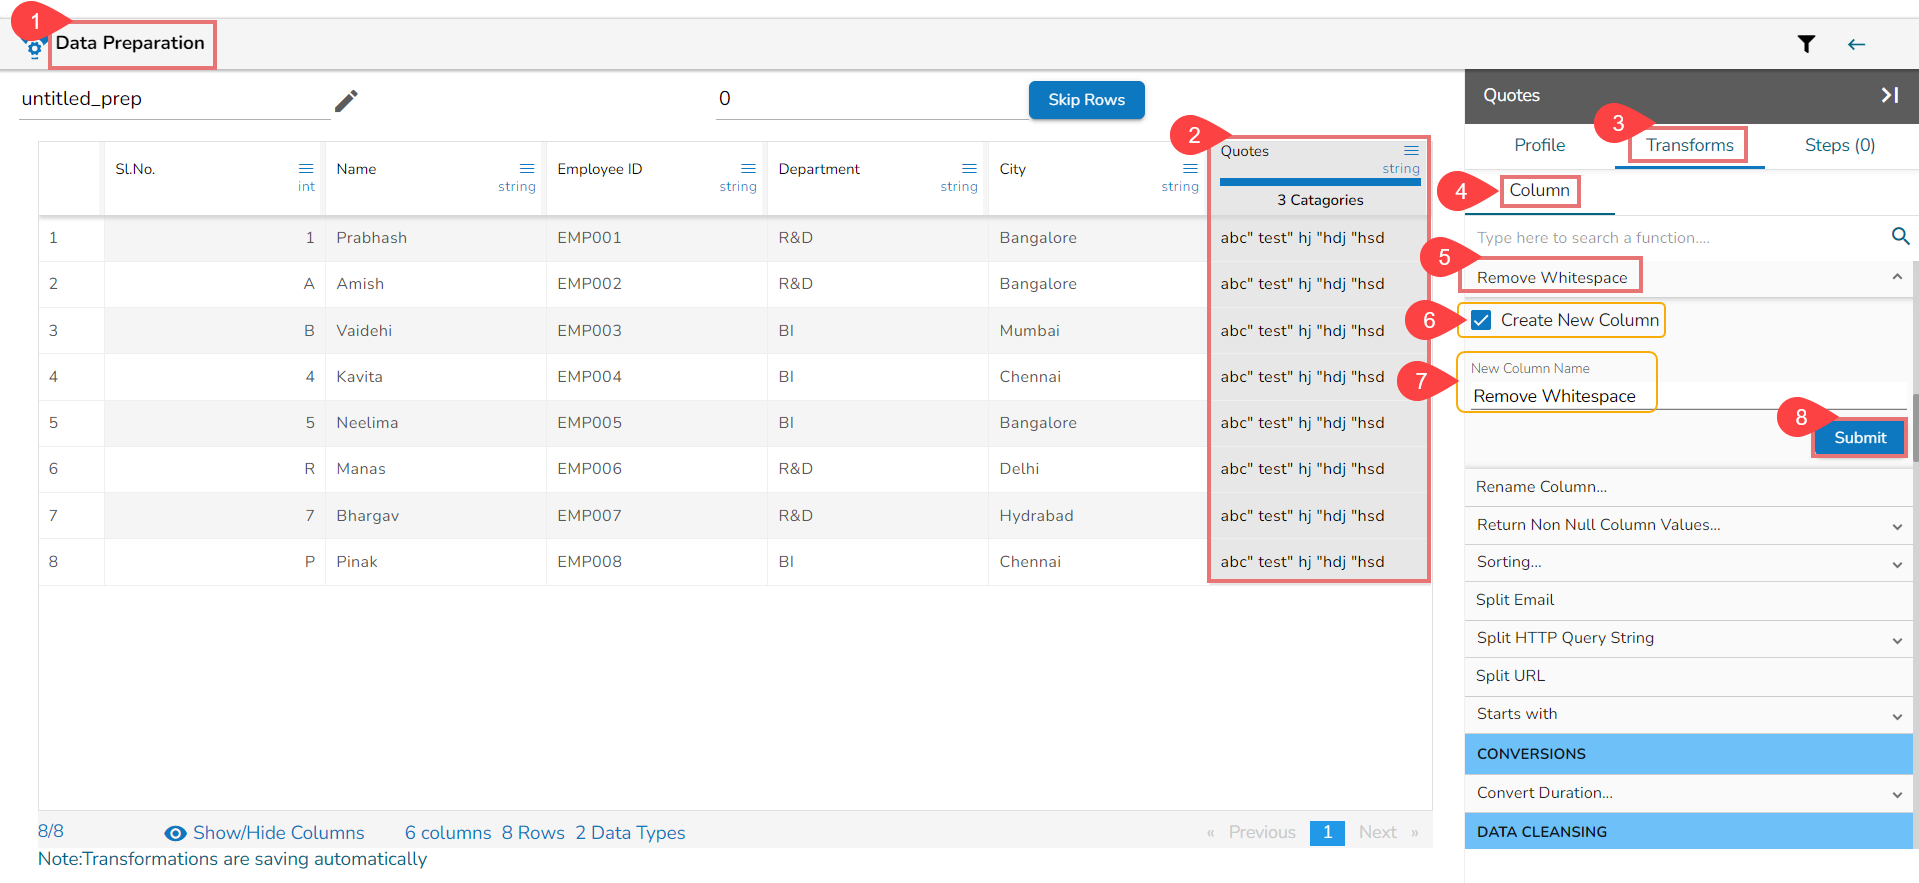
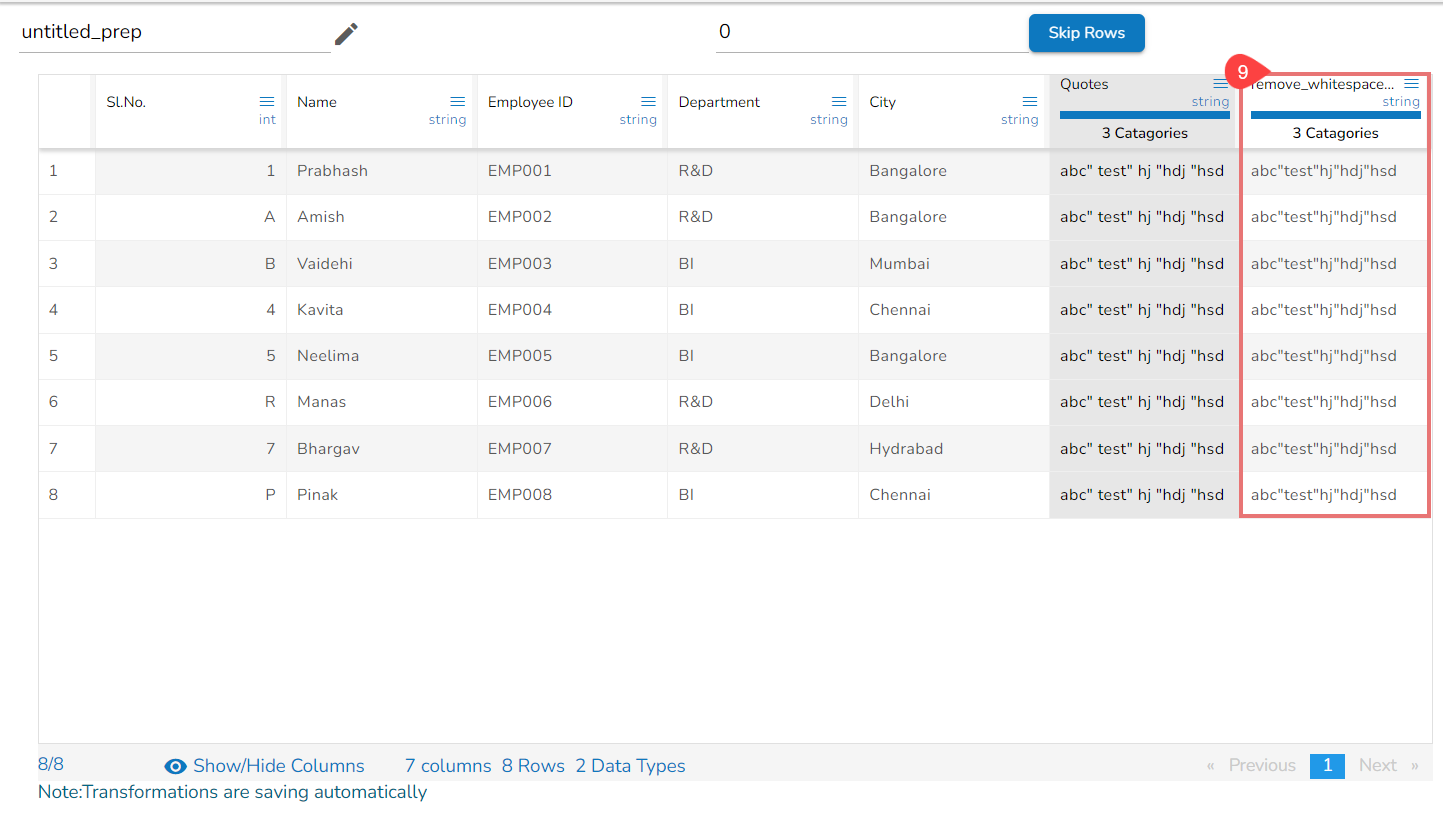
Remove Whitespace transform applied on the Source Column
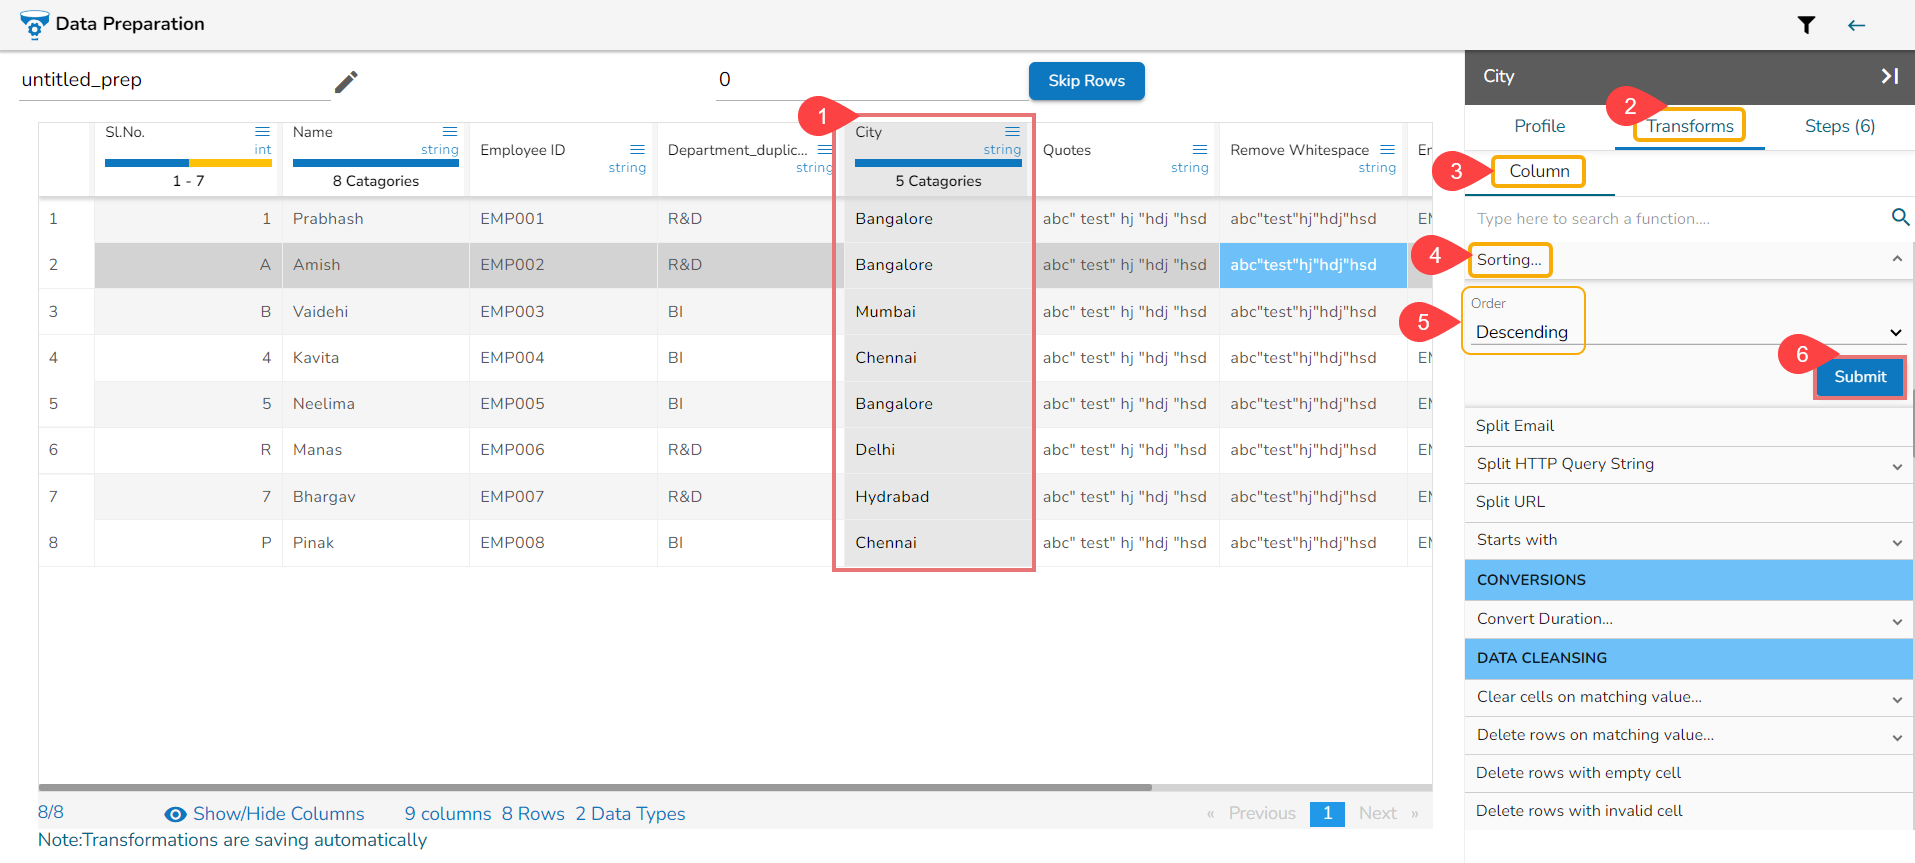
Steps to understand Sorting transform
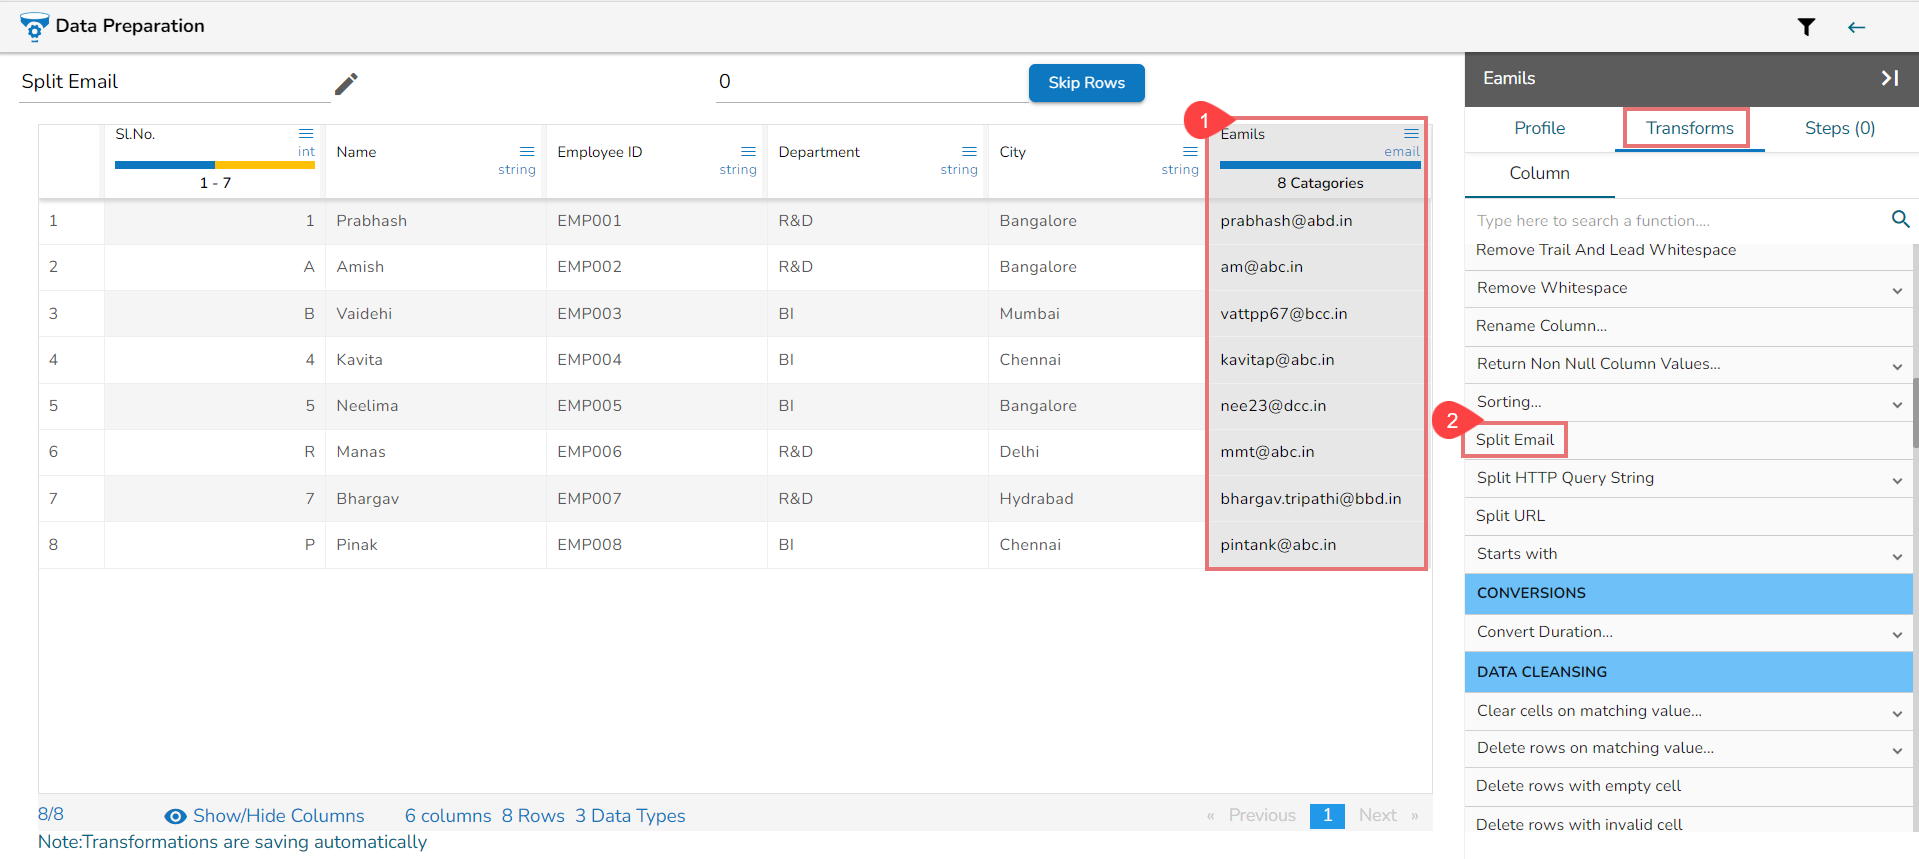
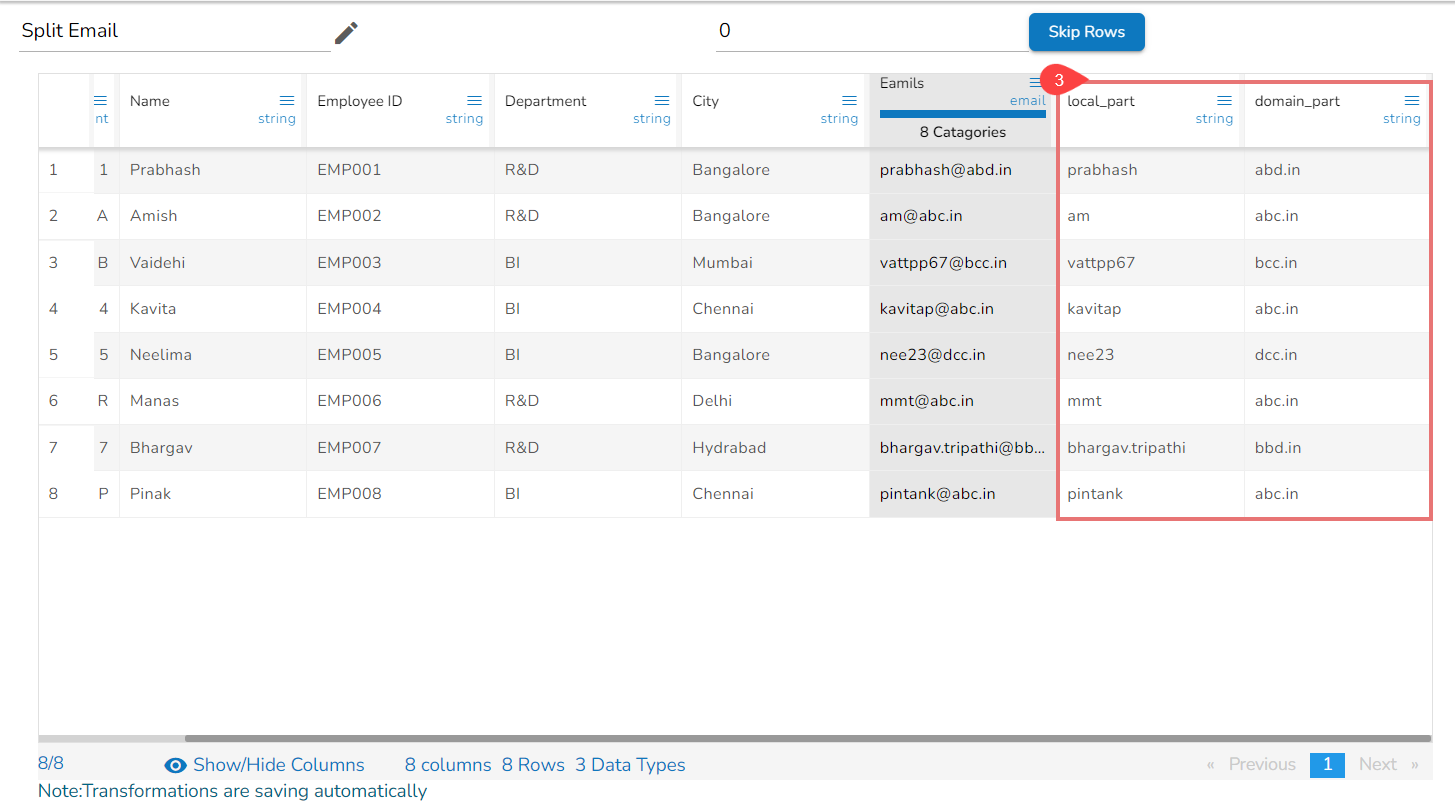
Using the Split Email transform
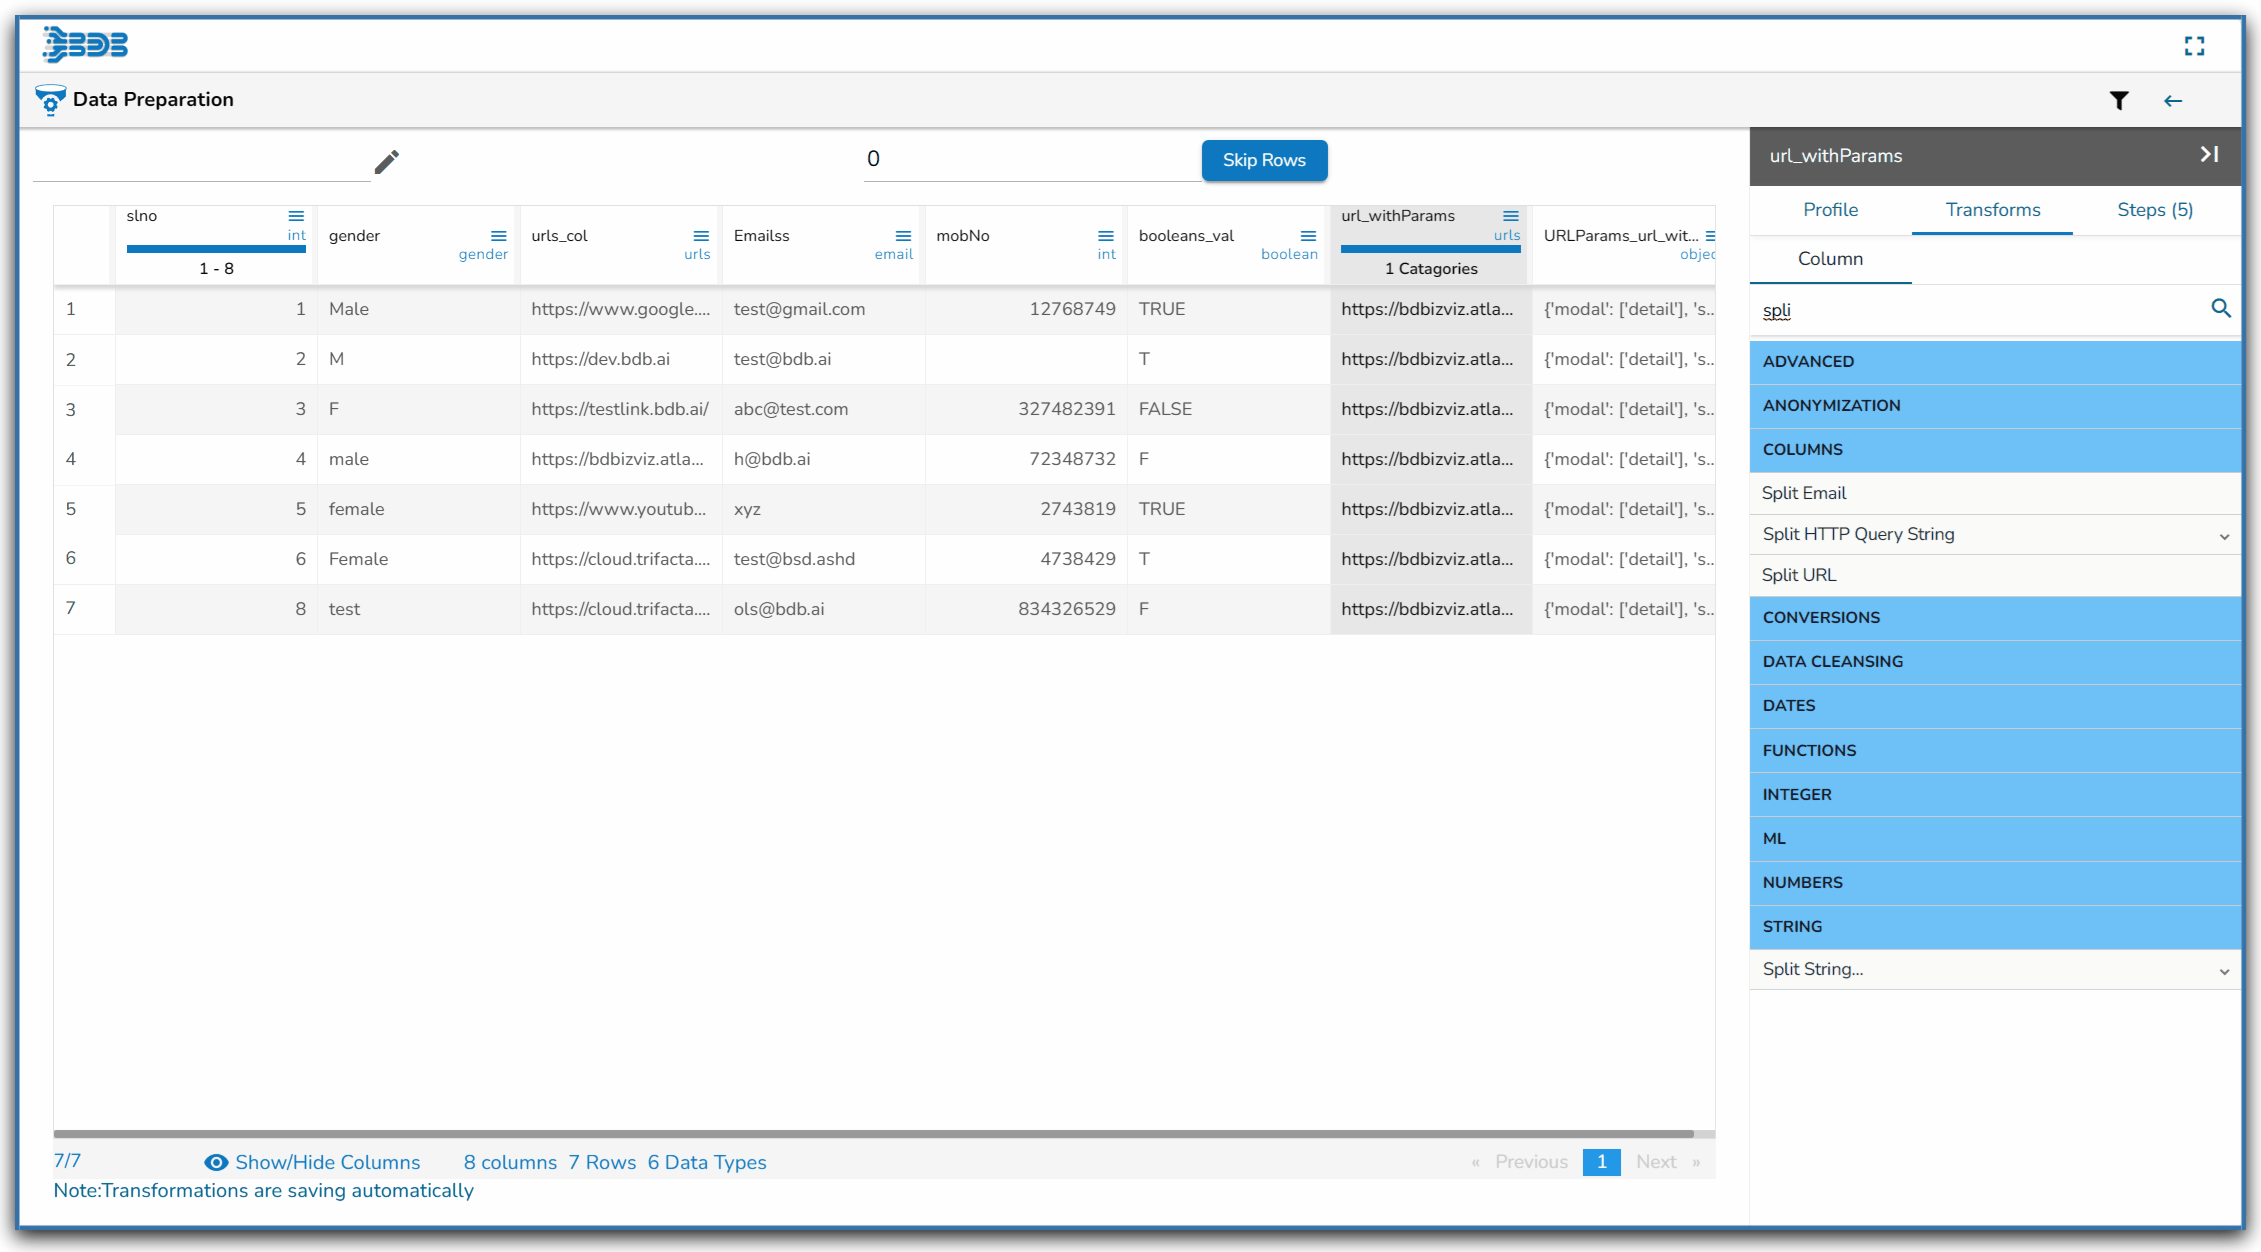
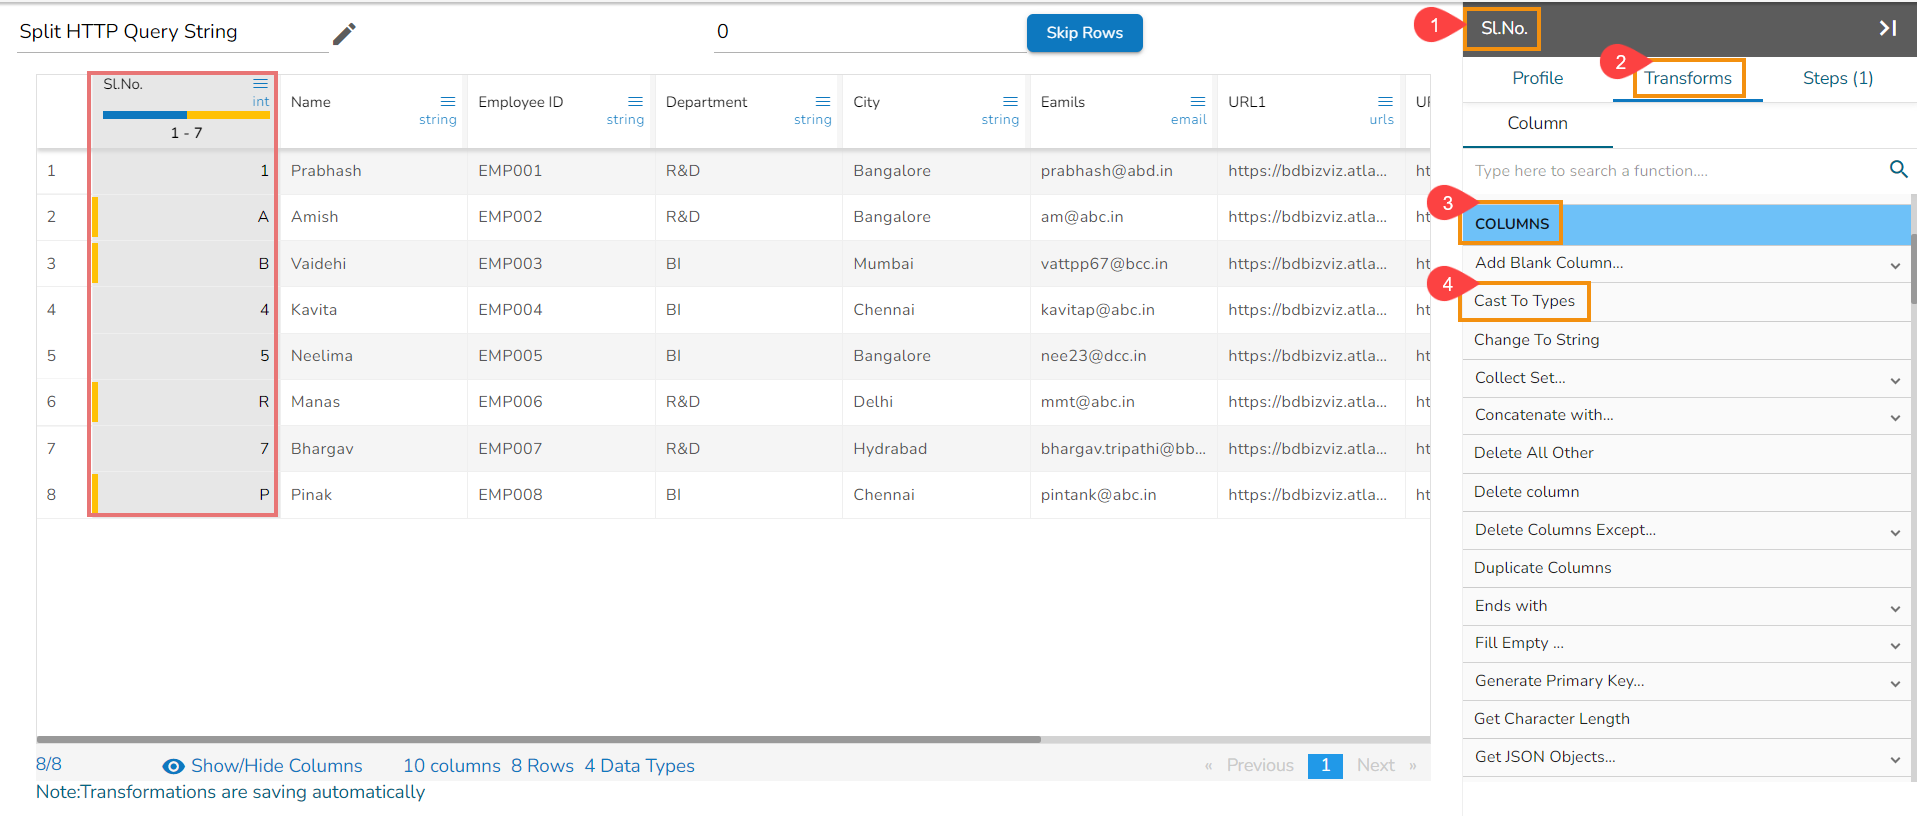
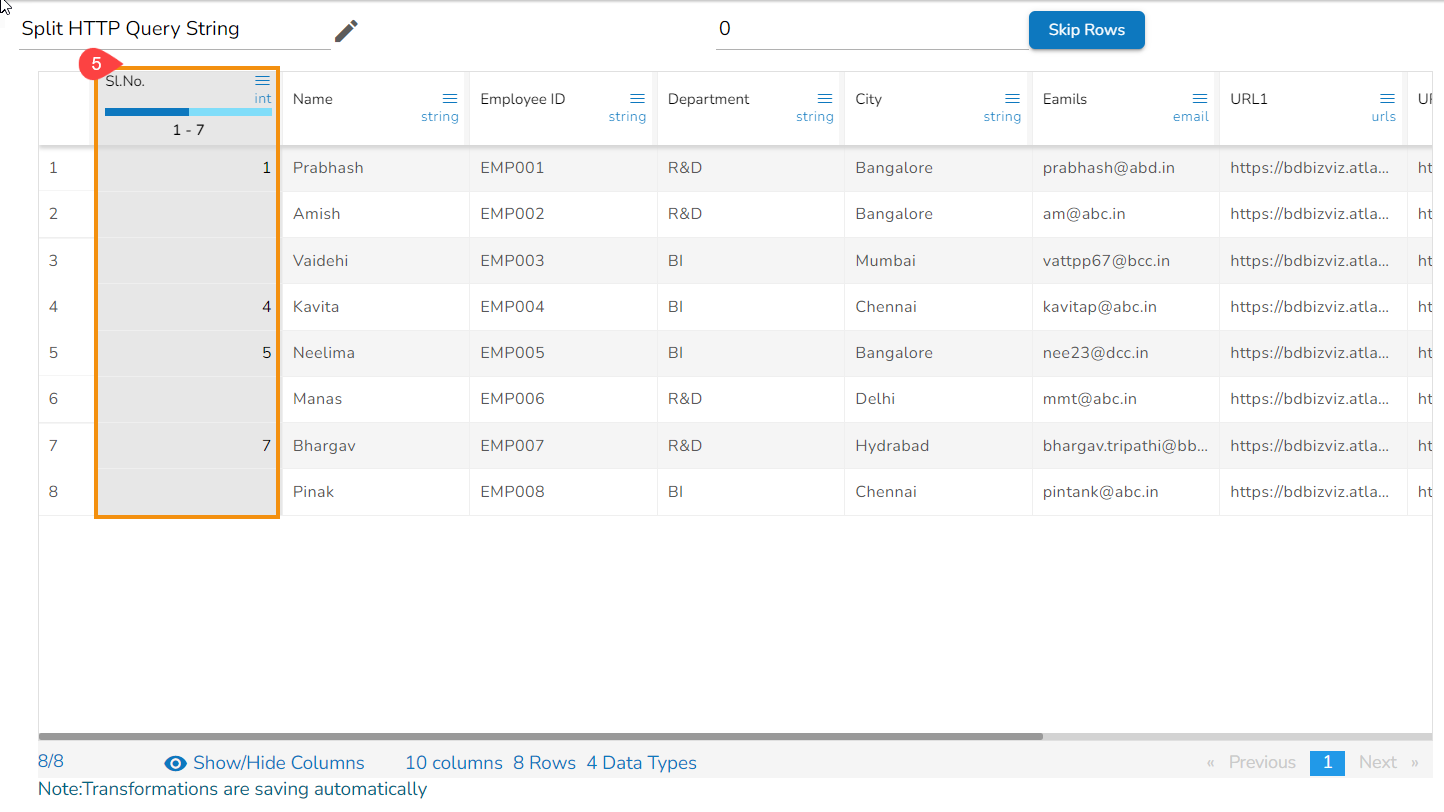
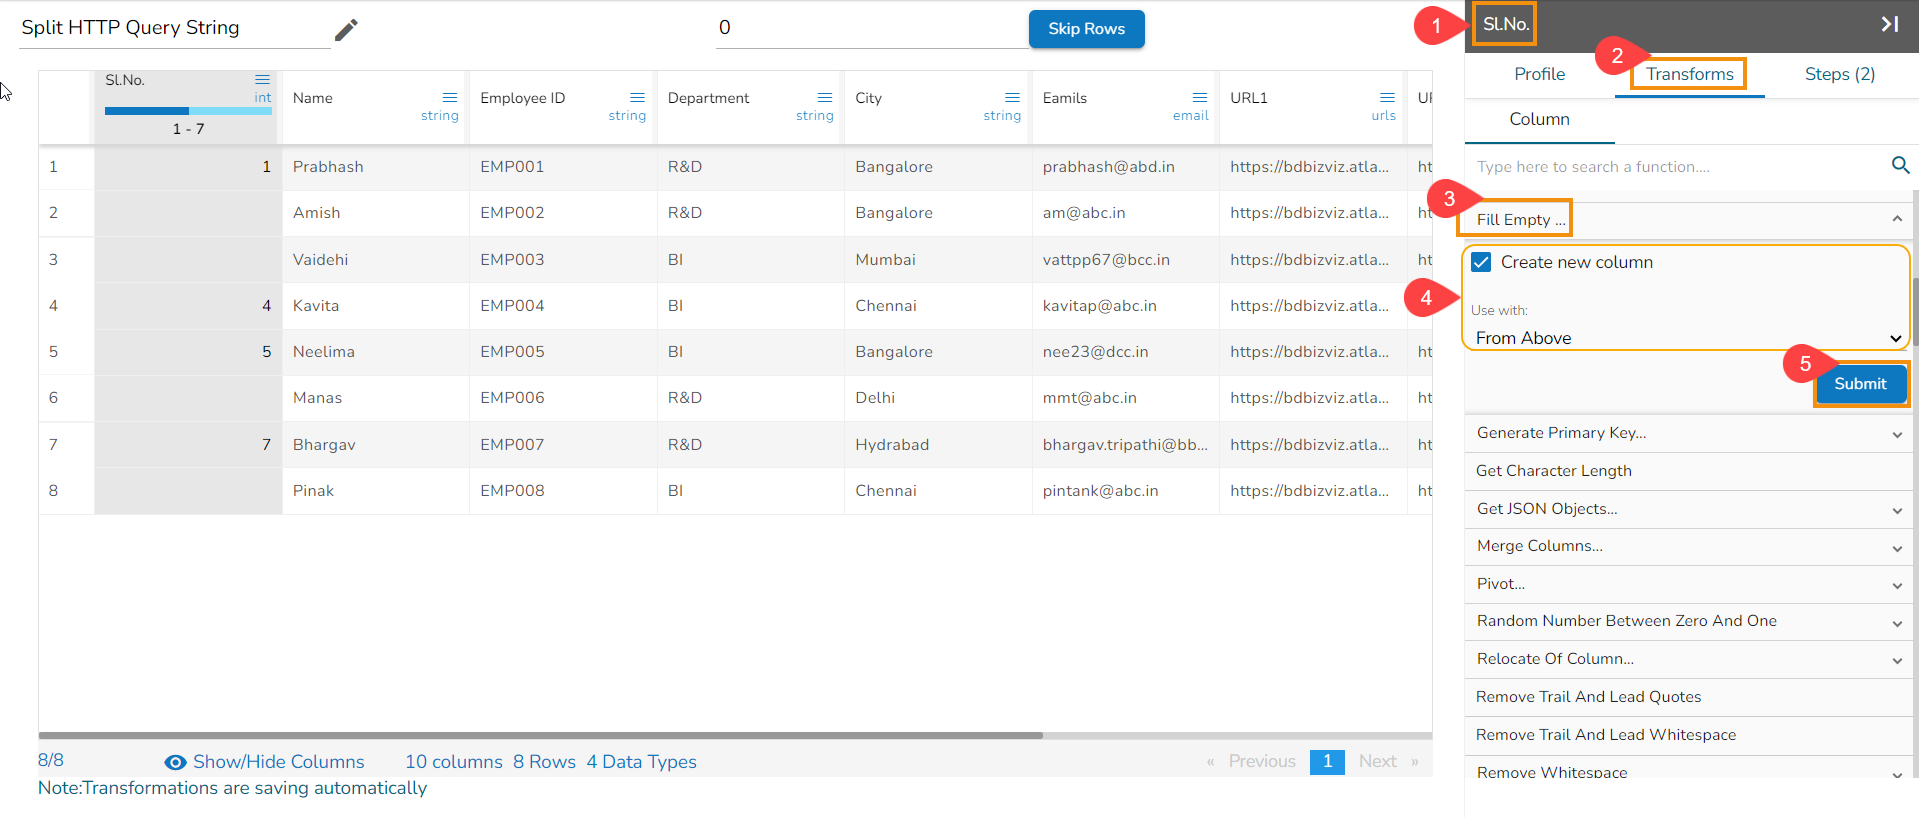
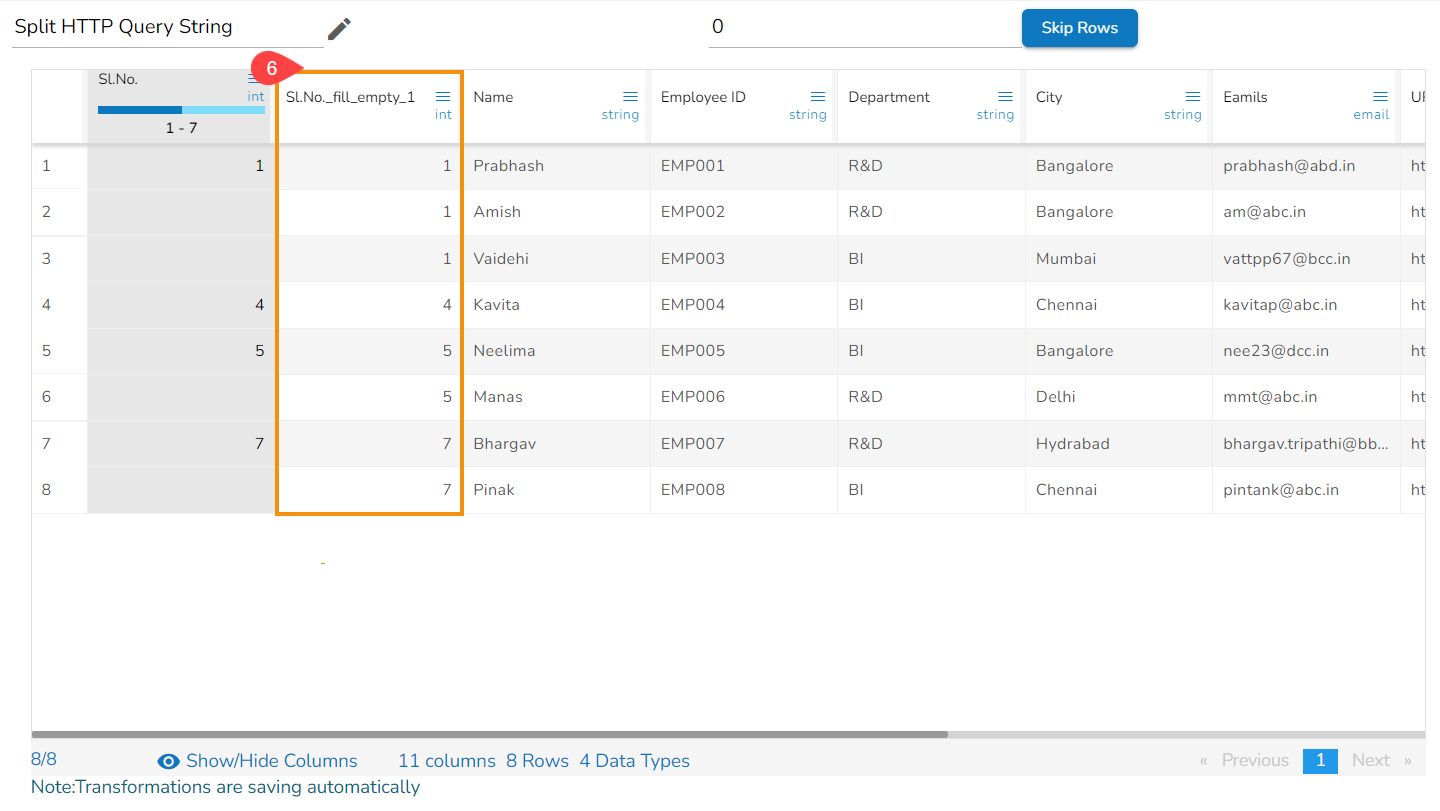
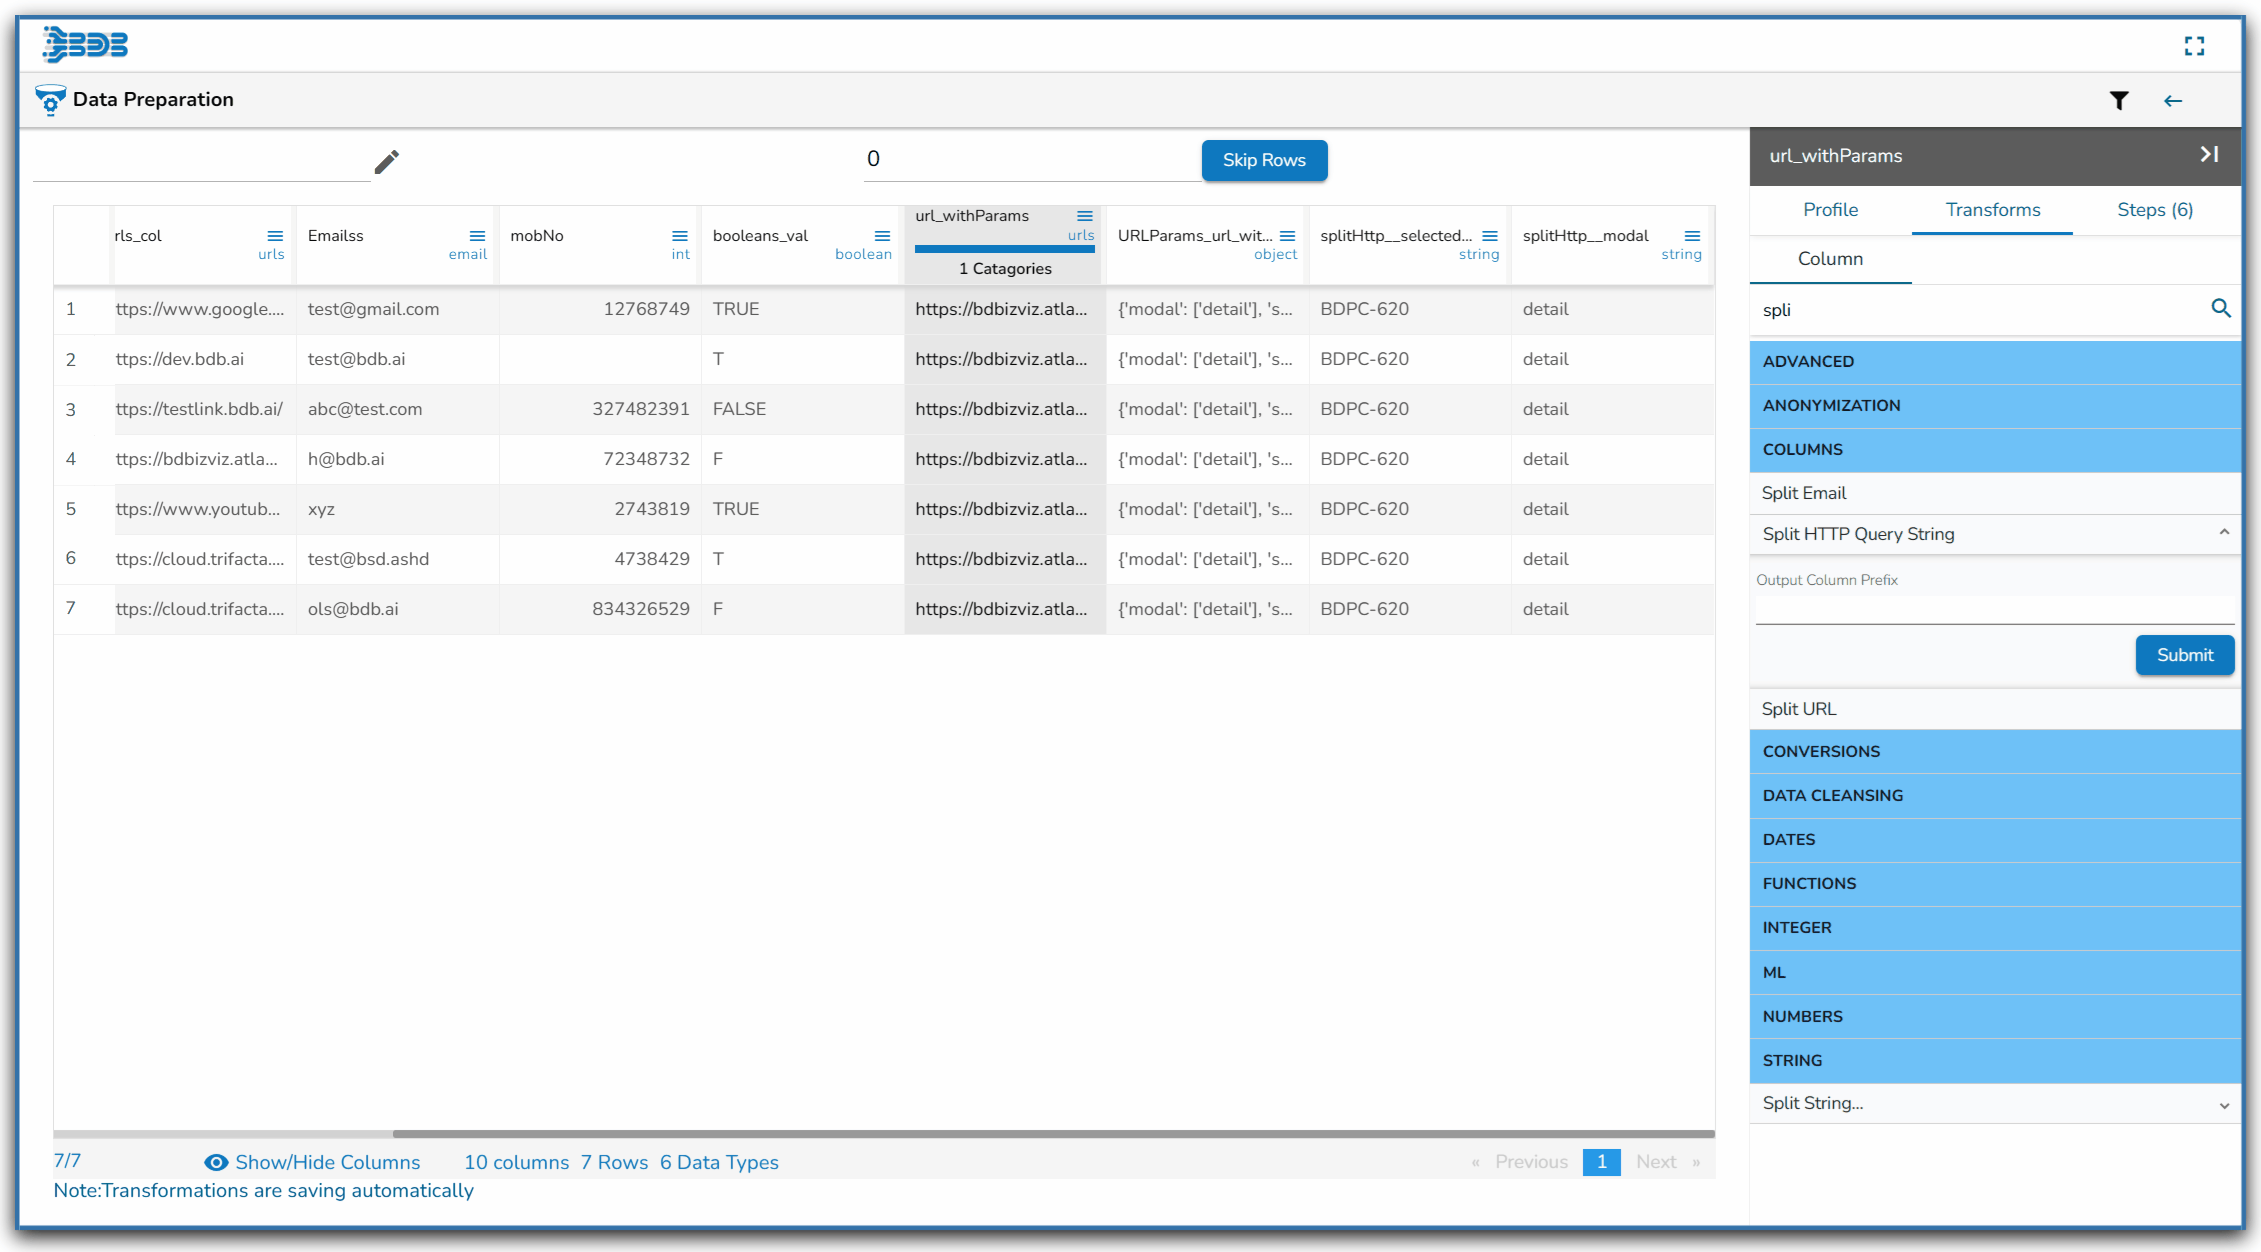
Using the Split HTTP Query String transform
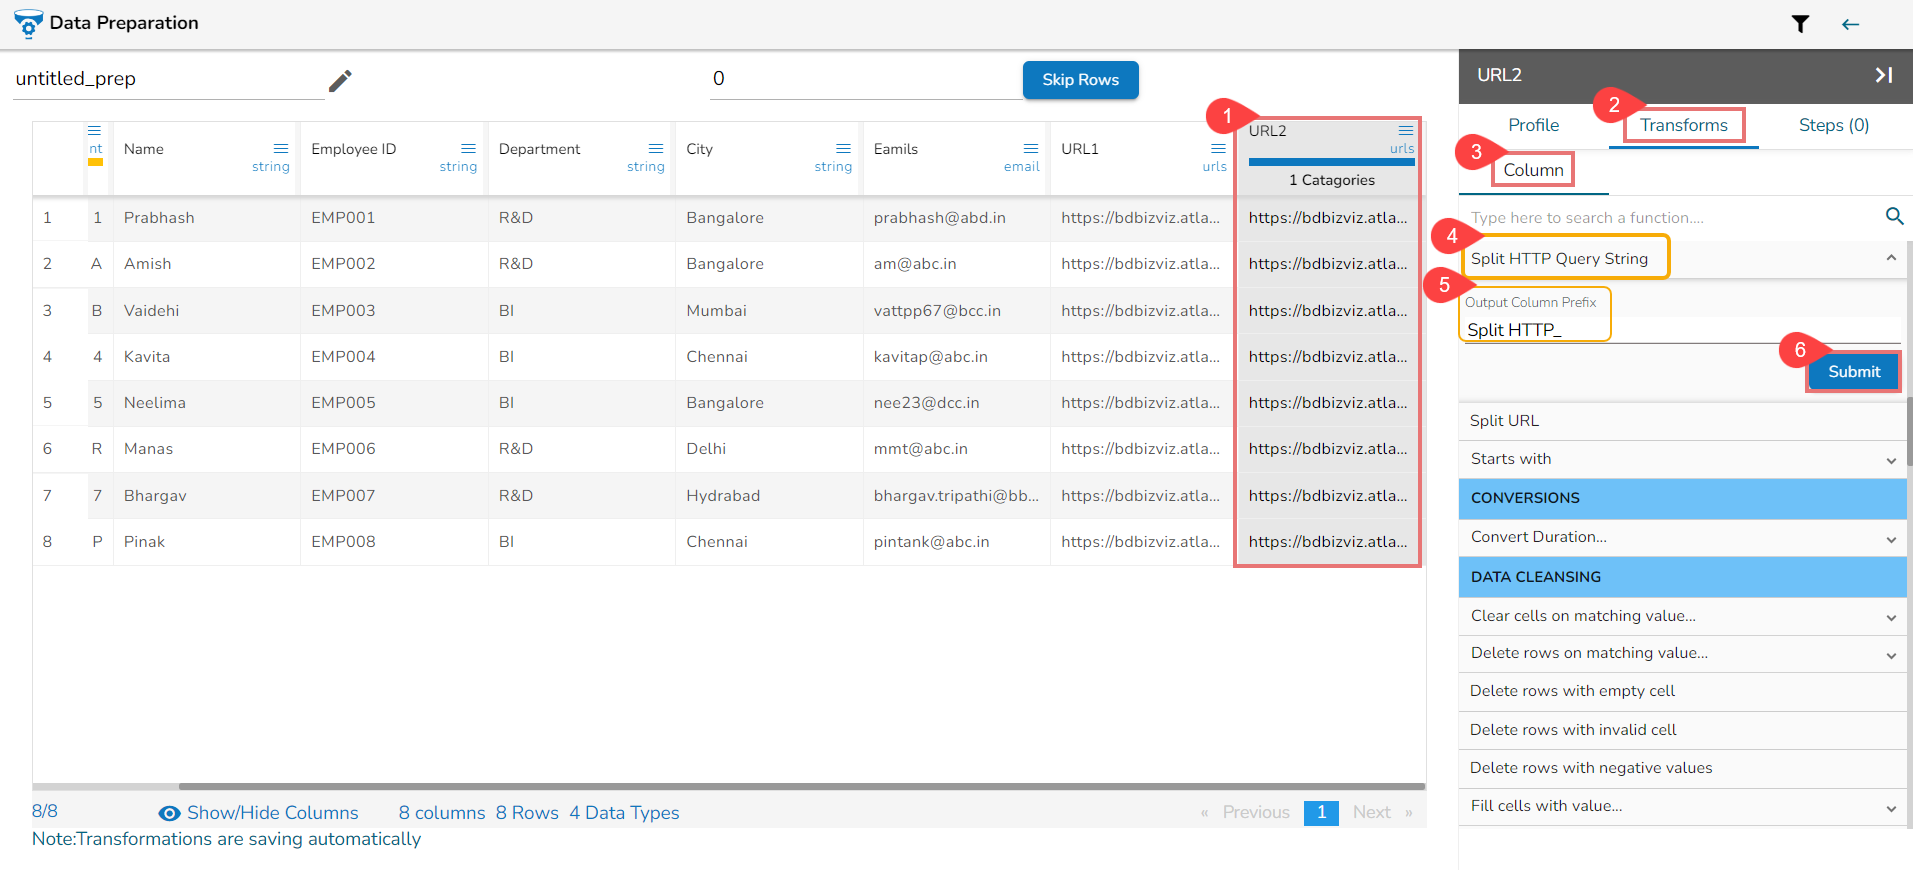
Applying Split HTTP Query String
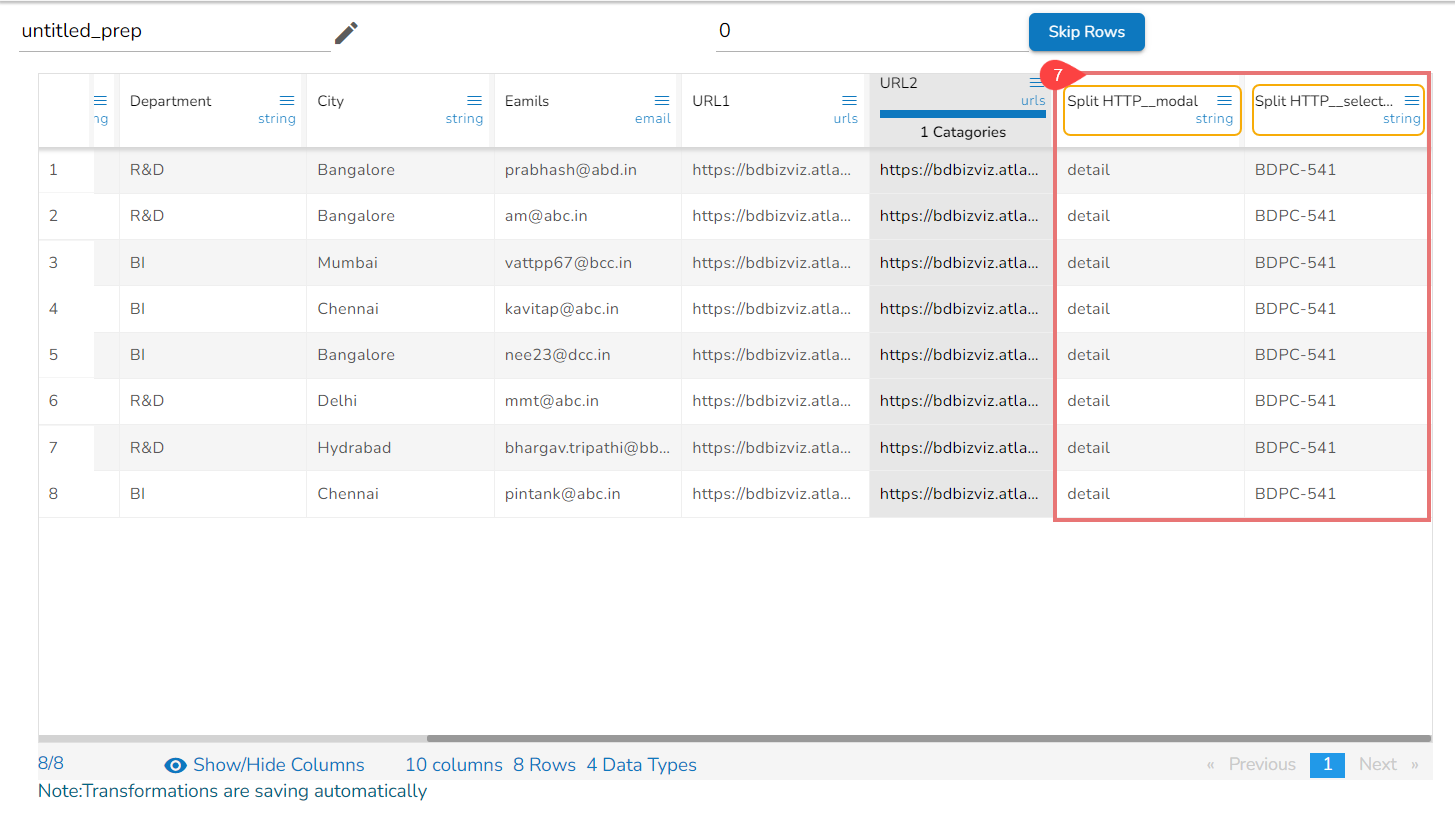
Splitted Columns with Query String
| URL_scheme | URL_domain | URL_path | URL_querystring |
| http | www.google.com | /search | q=query |
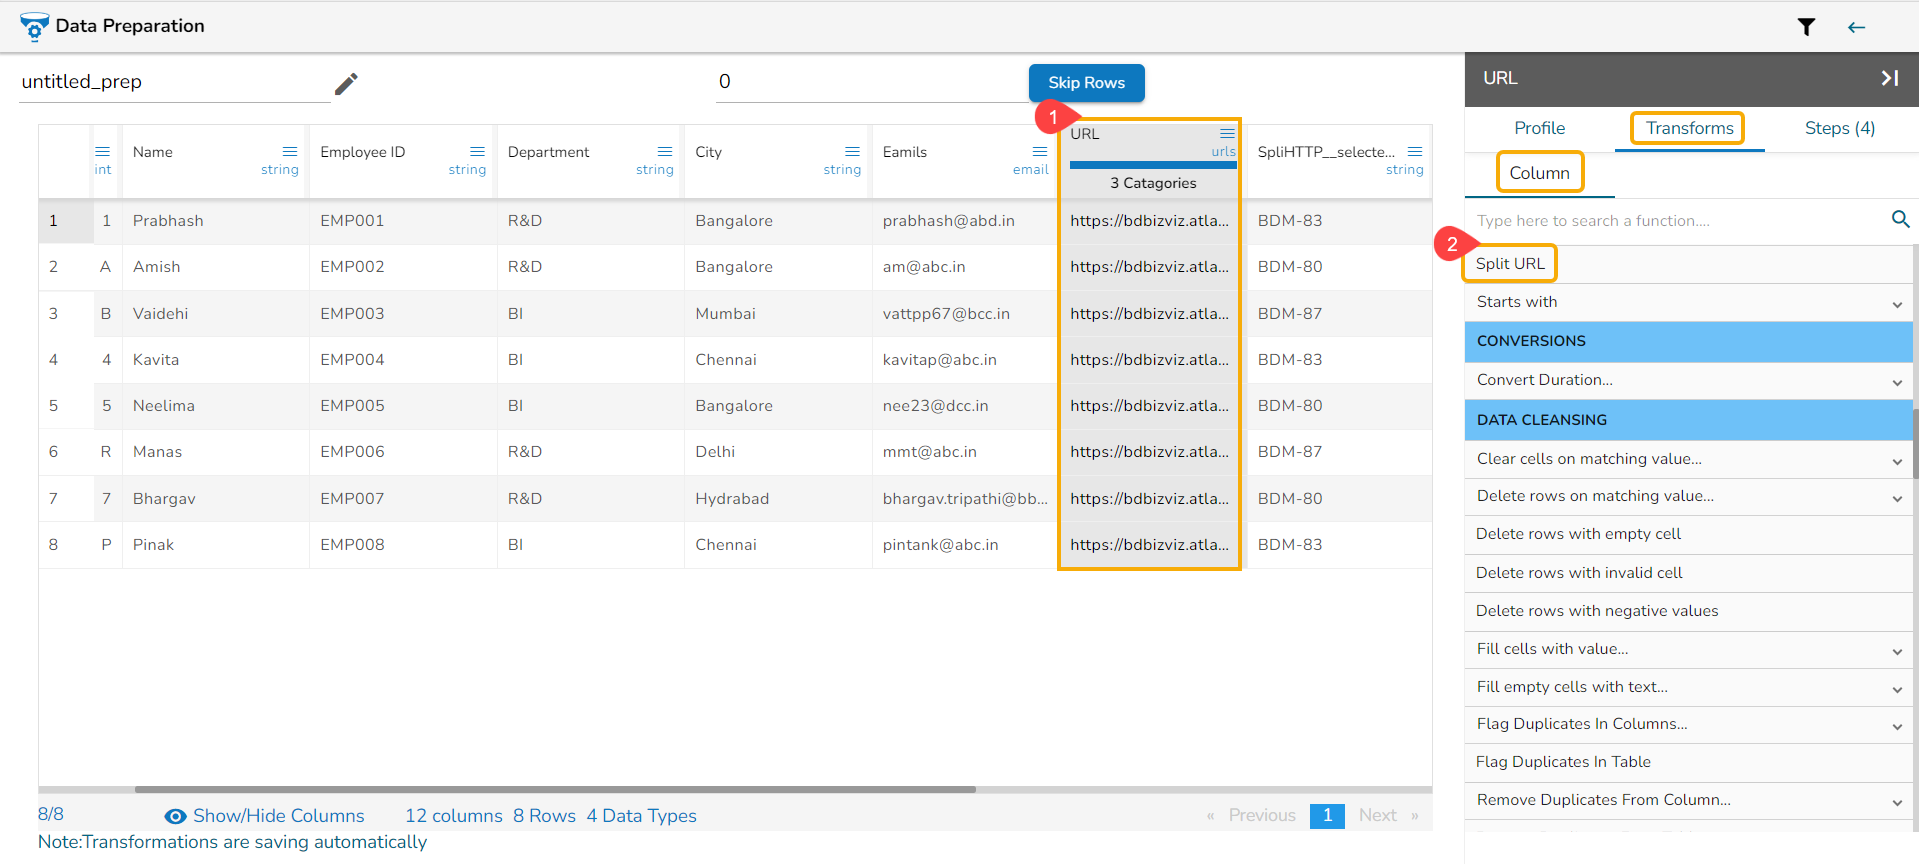
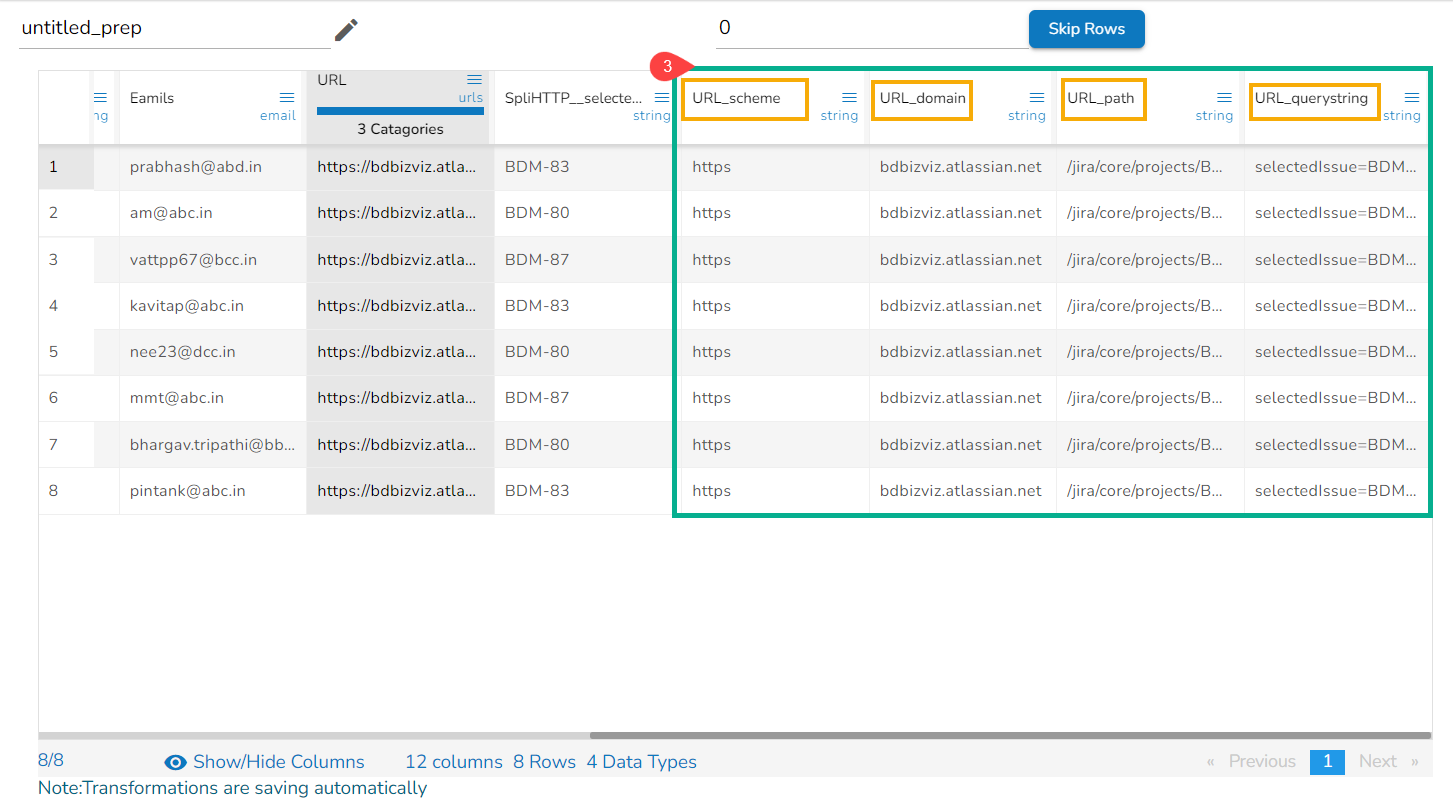
Using the Split URL transform
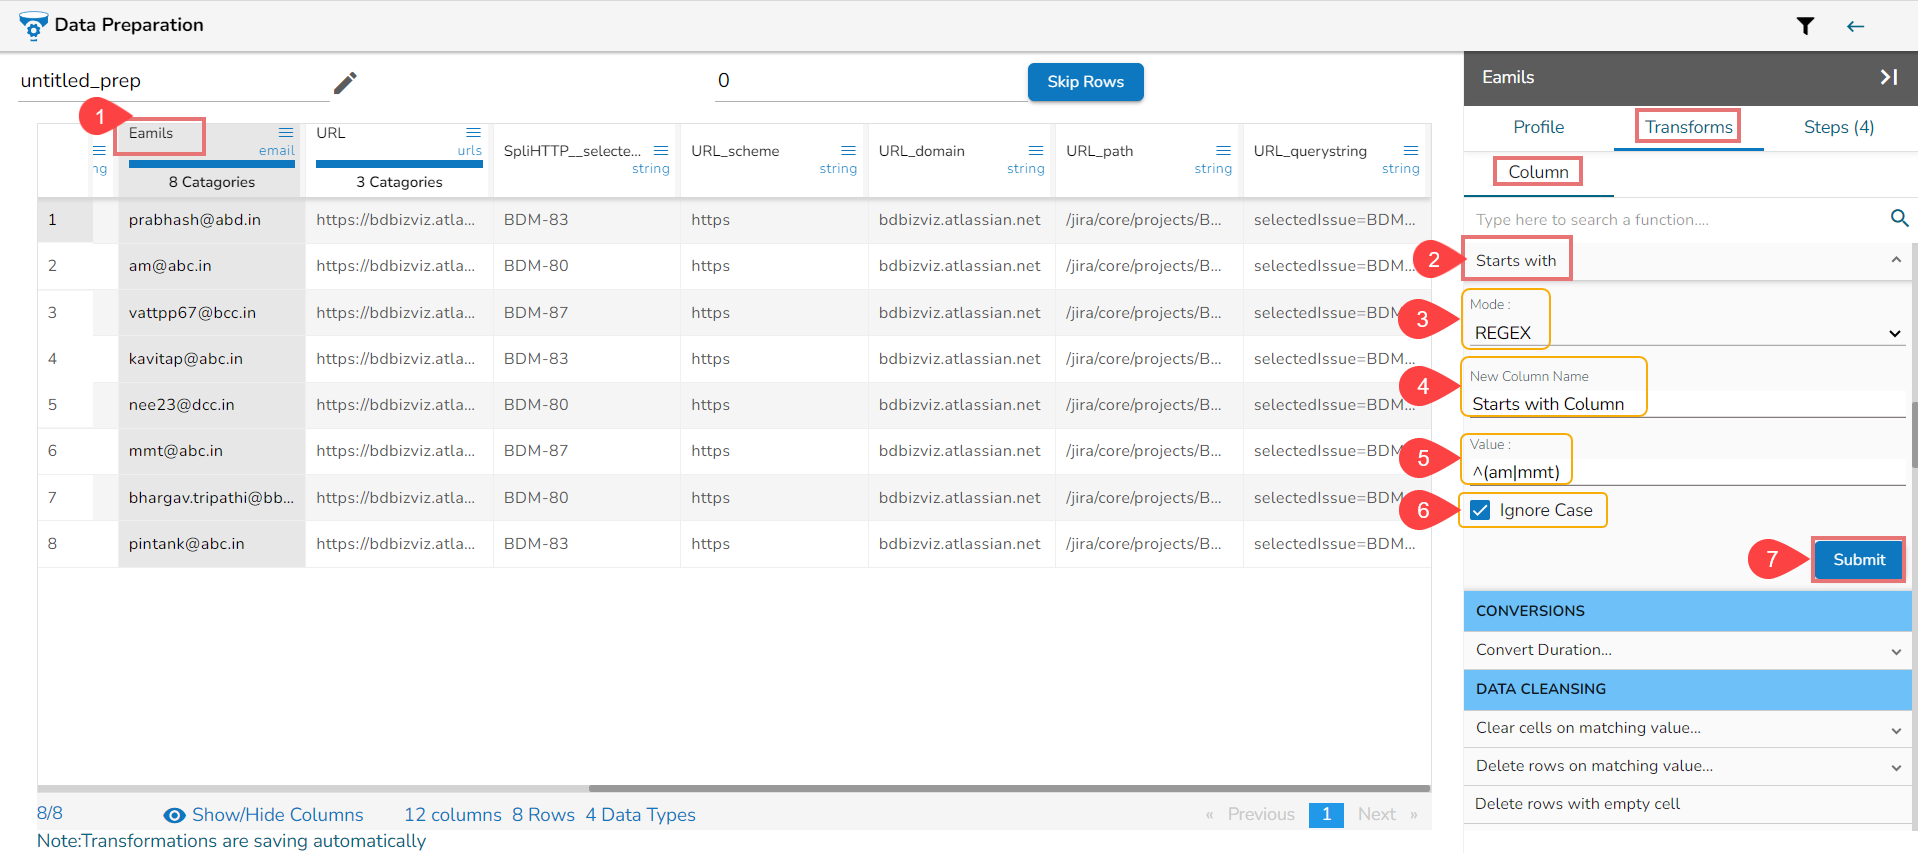
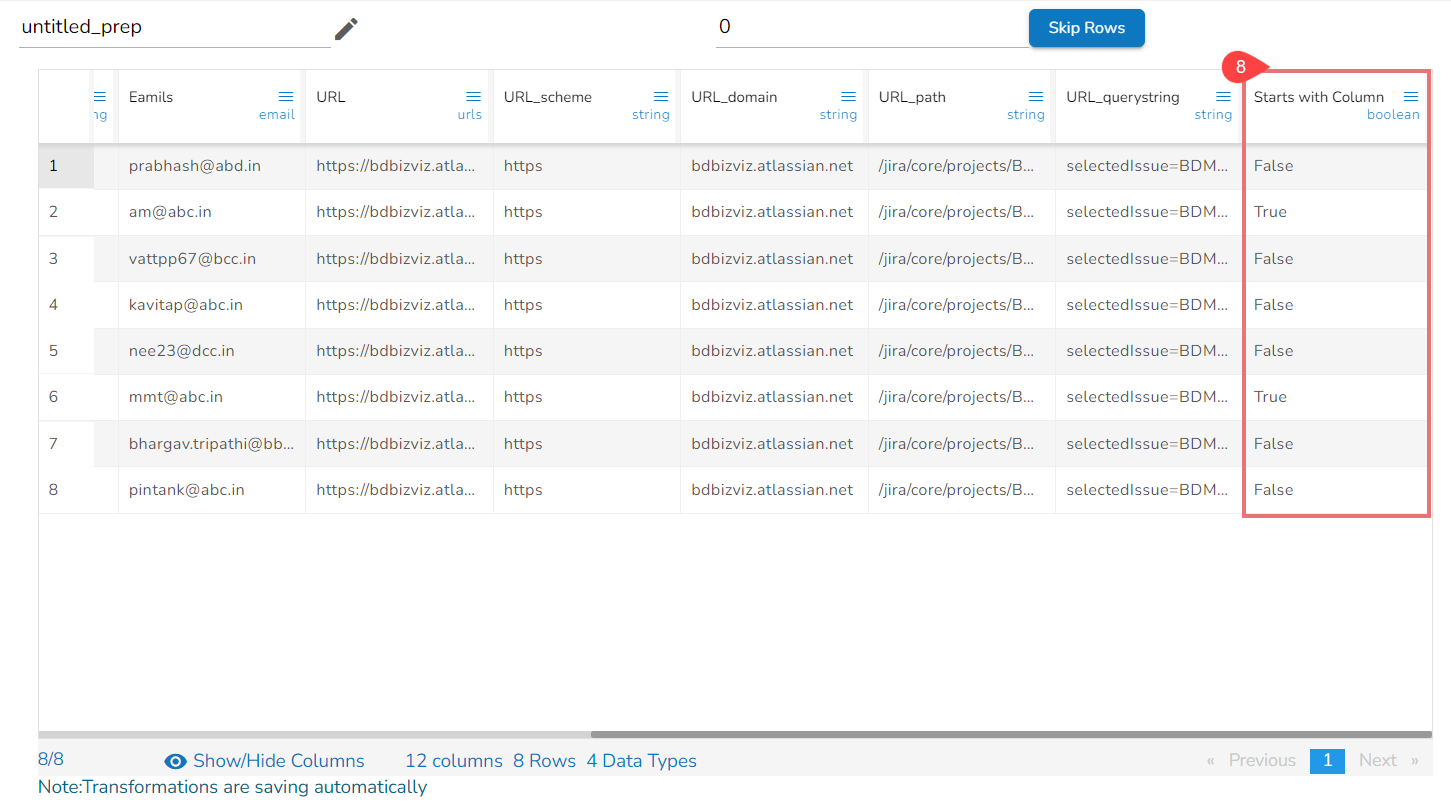
Using the Starts with transform