# Creating a Data Connector
## Creating a Data Connector
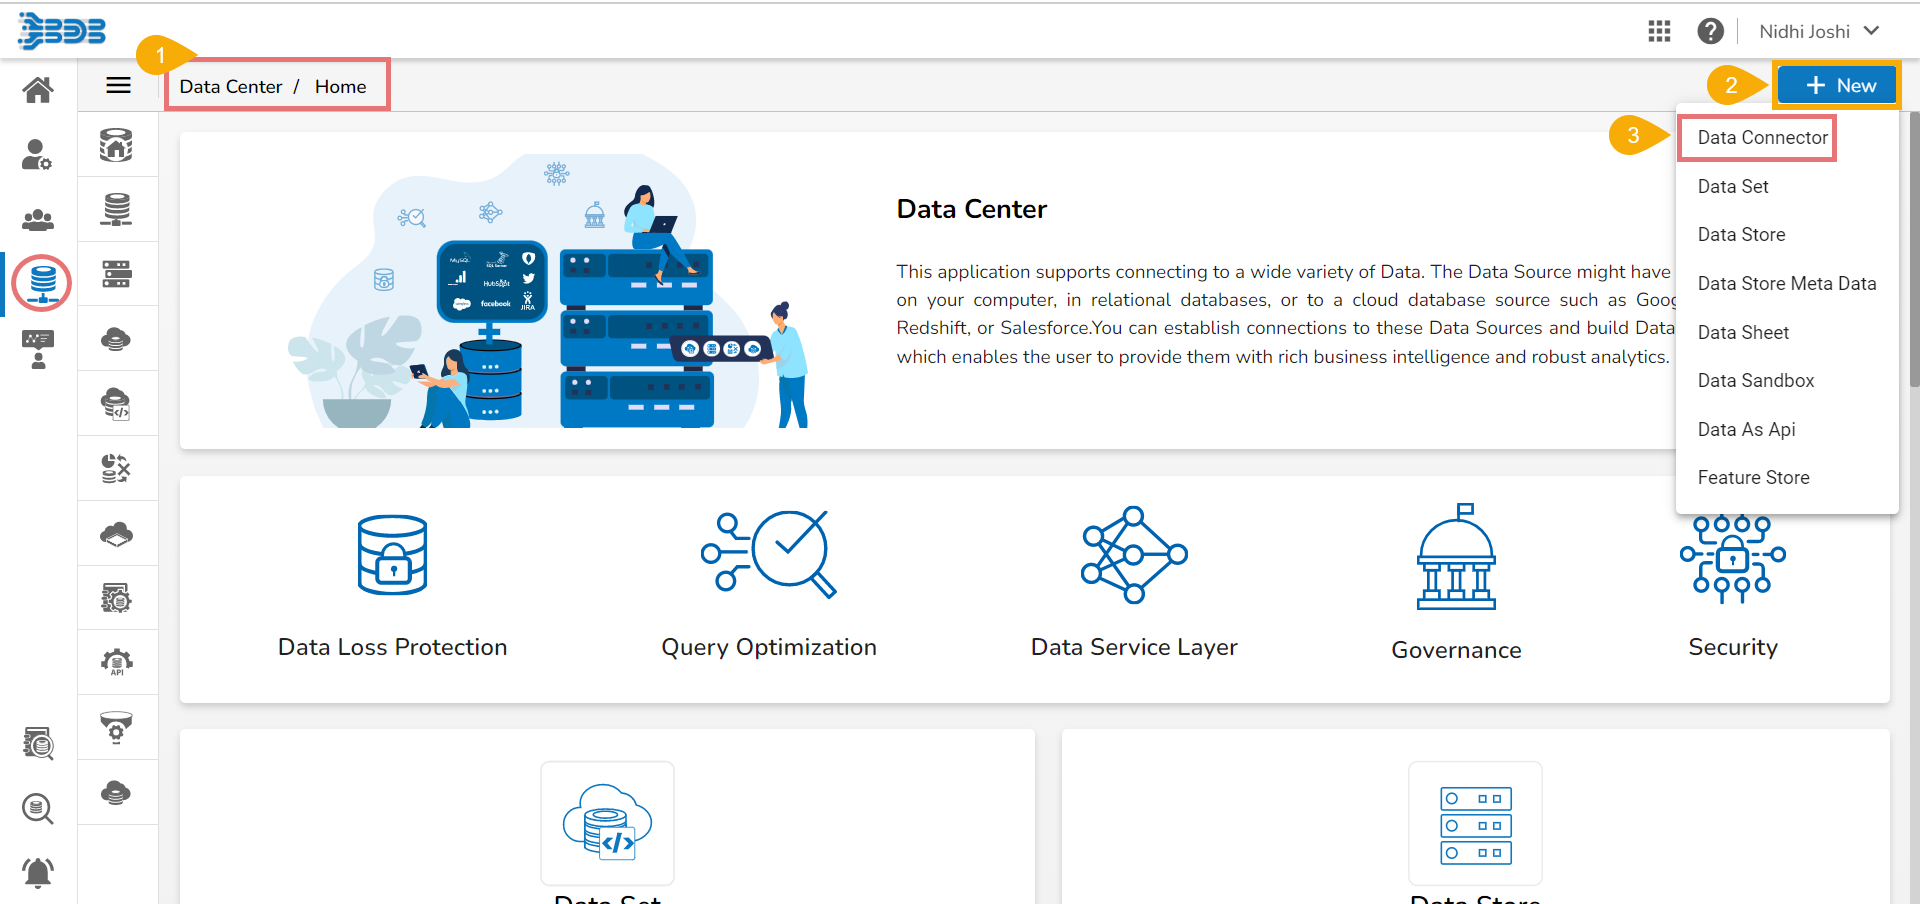
* Navigate to the ***Data Center Homepage***.
* Click the ***New*** option.
* Click the ***Data Connector*** option from the ***New*** context menu (as displayed below).
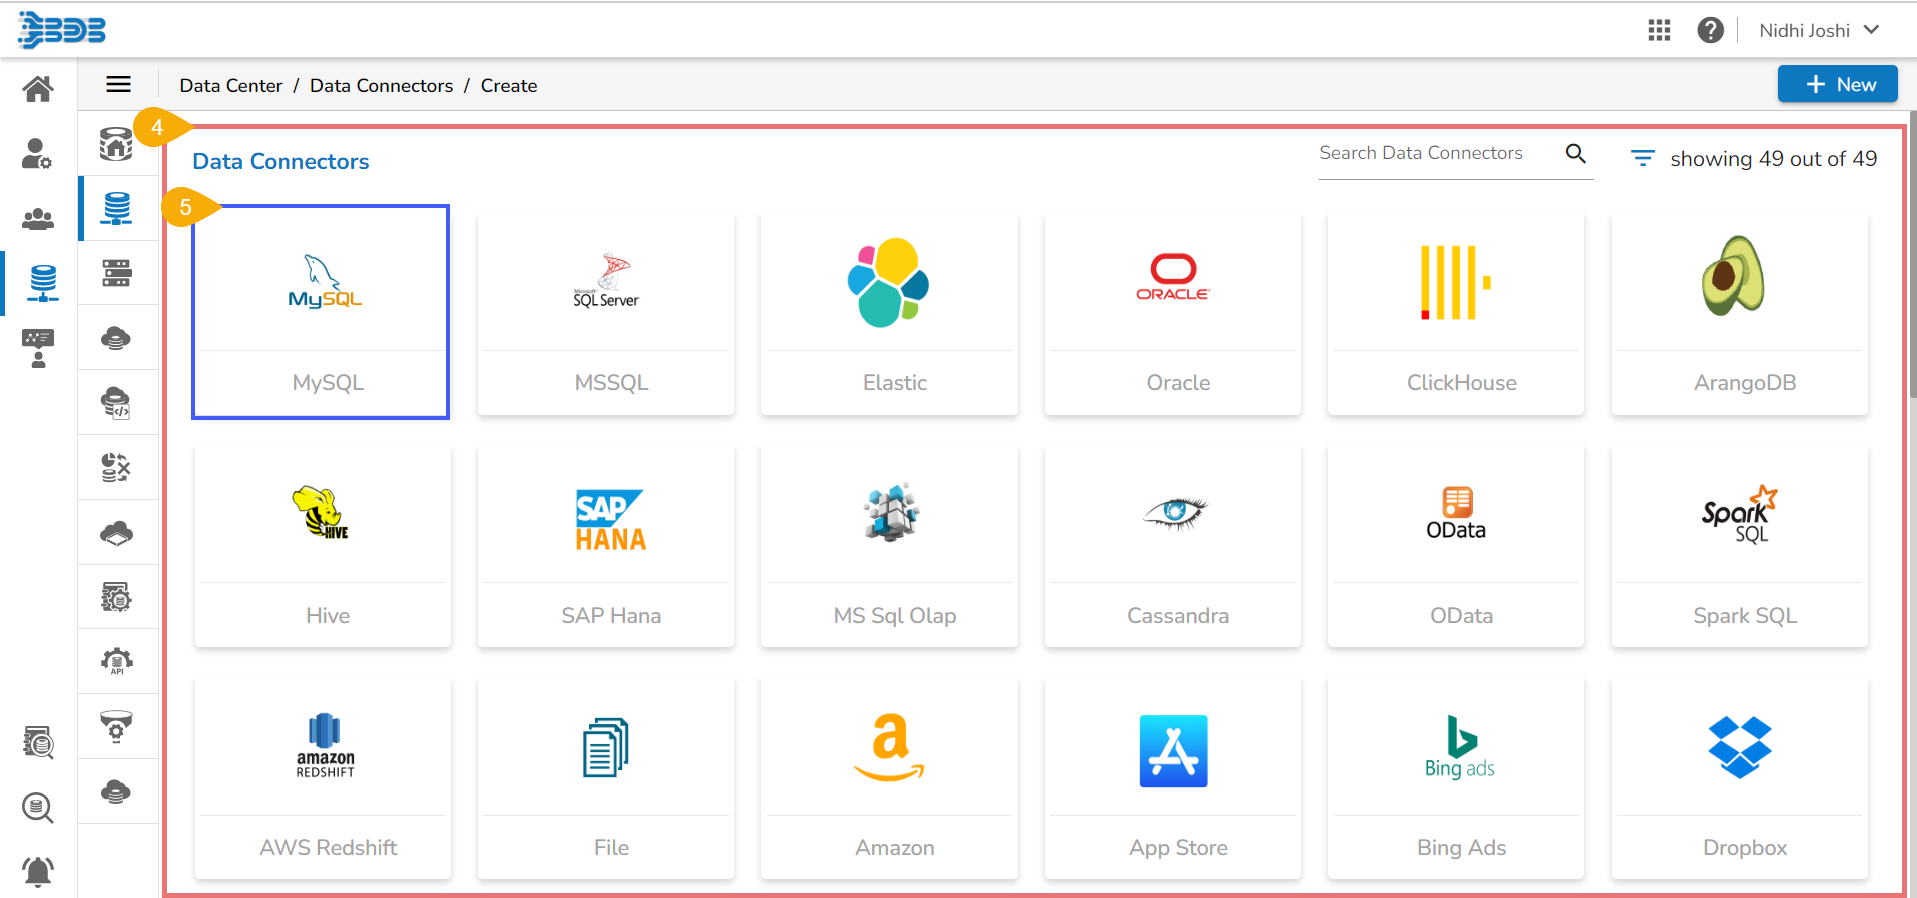
* A page opens with all the available data connector types.
* Click on a ***Connector*** *type*.
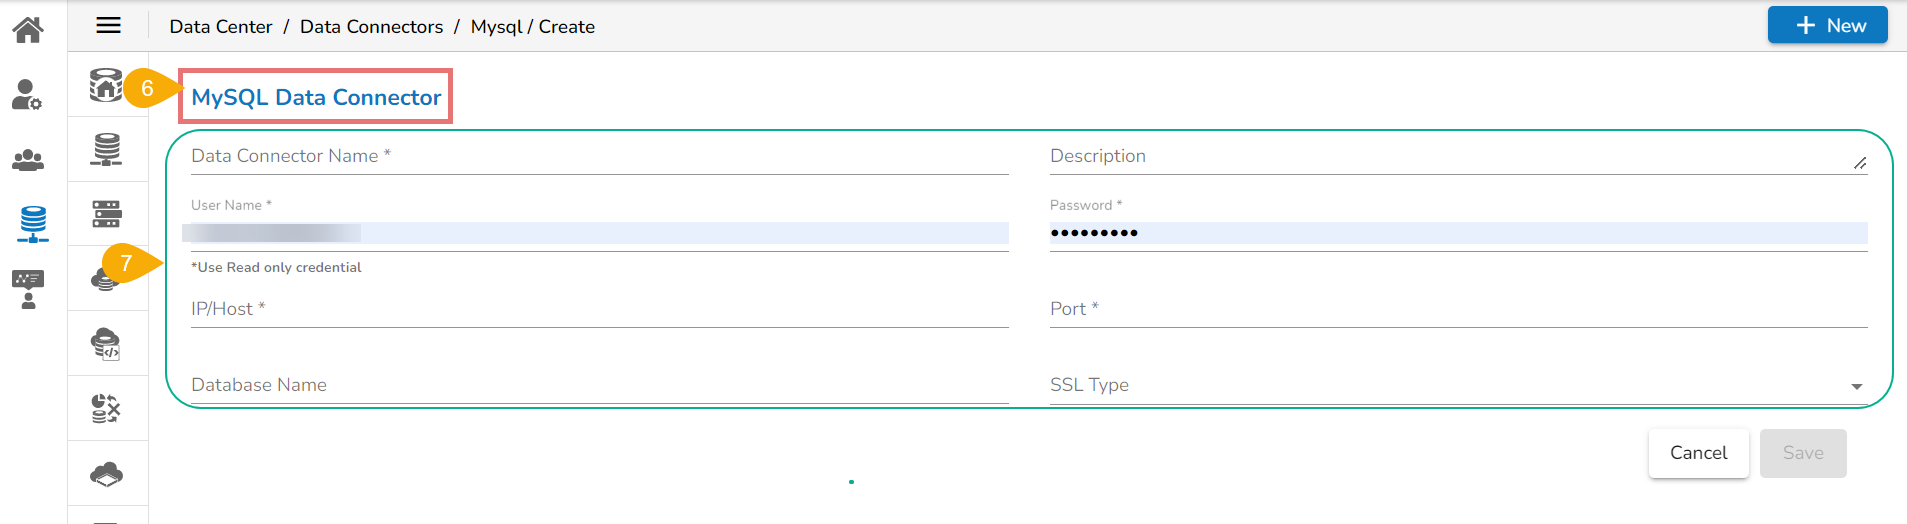
* The Connector specific page opens.
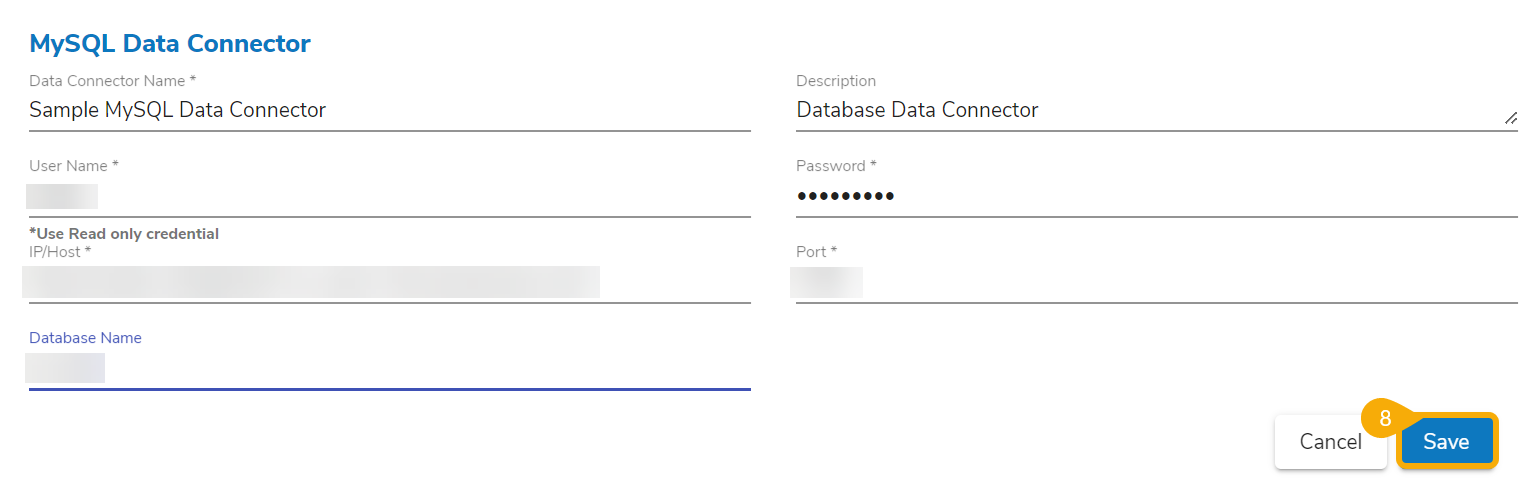
* You need to configure the required details for the selected connector.
* Click the ***Save*** option.

* Another success message appears to inform the user that the data connector has been created successfully.
* A confirmation message appears to confirm the connection (only for the database connectors).

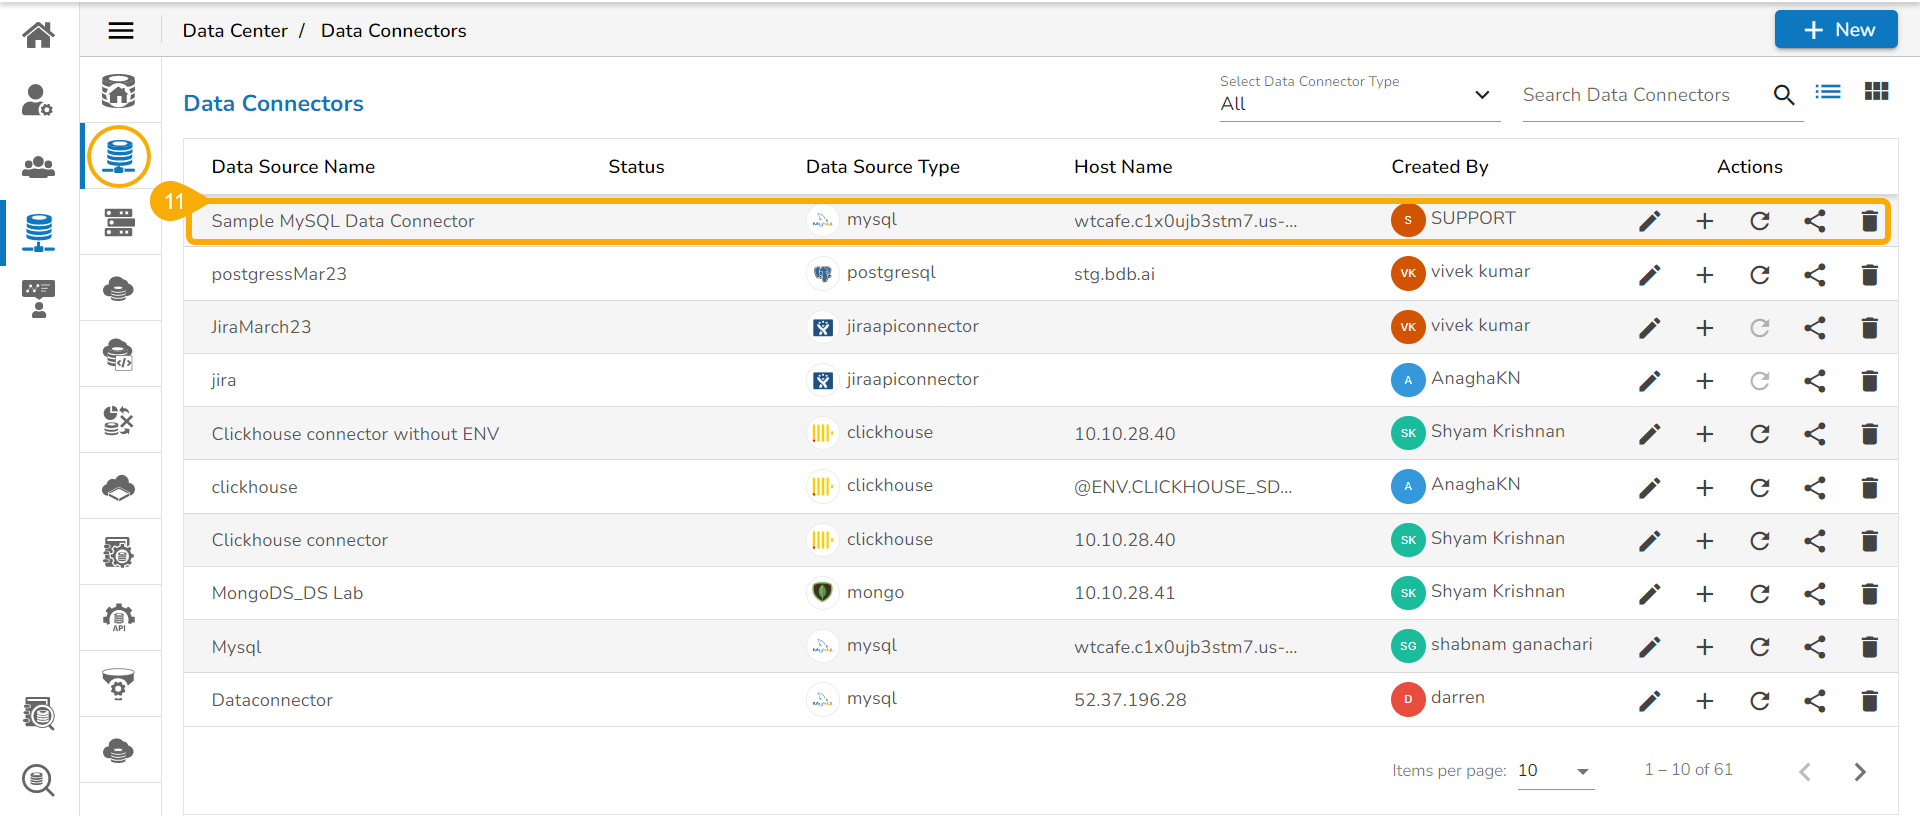
* The newly created data connector gets added to the data connector list.
Filter by Category
* Click the ***Filter by Category*** icon to get various categories of data connectors.
* Select a category from the displayed menu.
* The ***Data Connectors*** page gets customized based on the selected category (E.g., the following image displays all the available data connectors from the ***Database*** category).

Search across the Data Connector options
* Access the Search bar from the Create Data Connector page and type the Connector name that you wish to search for.
* As you start typing based on the searched text the displayed Data Connector icons will change. E.g., by typing the letter '***M***' only it displays all the Data Connector types containing the alphabet '***M***' in them only get displayed on the screen.

---
# Agent Instructions: Querying This Documentation
If you need additional information that is not directly available in this page, you can query the documentation dynamically by asking a question.
Perform an HTTP GET request on the current page URL with the `ask` query parameter:
```
GET https://docs.bdb.ai/data-center-2/data-center/data-connectors/creating-a-data-connector.md?ask=
```
The question should be specific, self-contained, and written in natural language.
The response will contain a direct answer to the question and relevant excerpts and sources from the documentation.
Use this mechanism when the answer is not explicitly present in the current page, you need clarification or additional context, or you want to retrieve related documentation sections.