# Open ID Settings
The admin user can enter the database details for saving data of the open id.
* Click the ***Open ID Settings*** option from the Configurations options of the admin menu.
* The ***Open ID Settings*** page opens.
* The user needs to enter the database details for saving data of the open Id.
* Use the ***Select Saved Open ID*** settings drop-down to access the saved ***Open ID Settings***.
{% hint style="info" %}
*Please Note: Select the saved open ID settings from the **Select Saved Open ID settings** drop-down menu. If no open ID settings is saved before, it will not list any.*
{% endhint %}
* There are two options available to configure the settings under the Open ID Settings page:
* Individual
* Complete URI
{% hint style="info" %}
*Please Note: The user needs to provide the following required details based on the selected configuration option.*
{% endhint %}
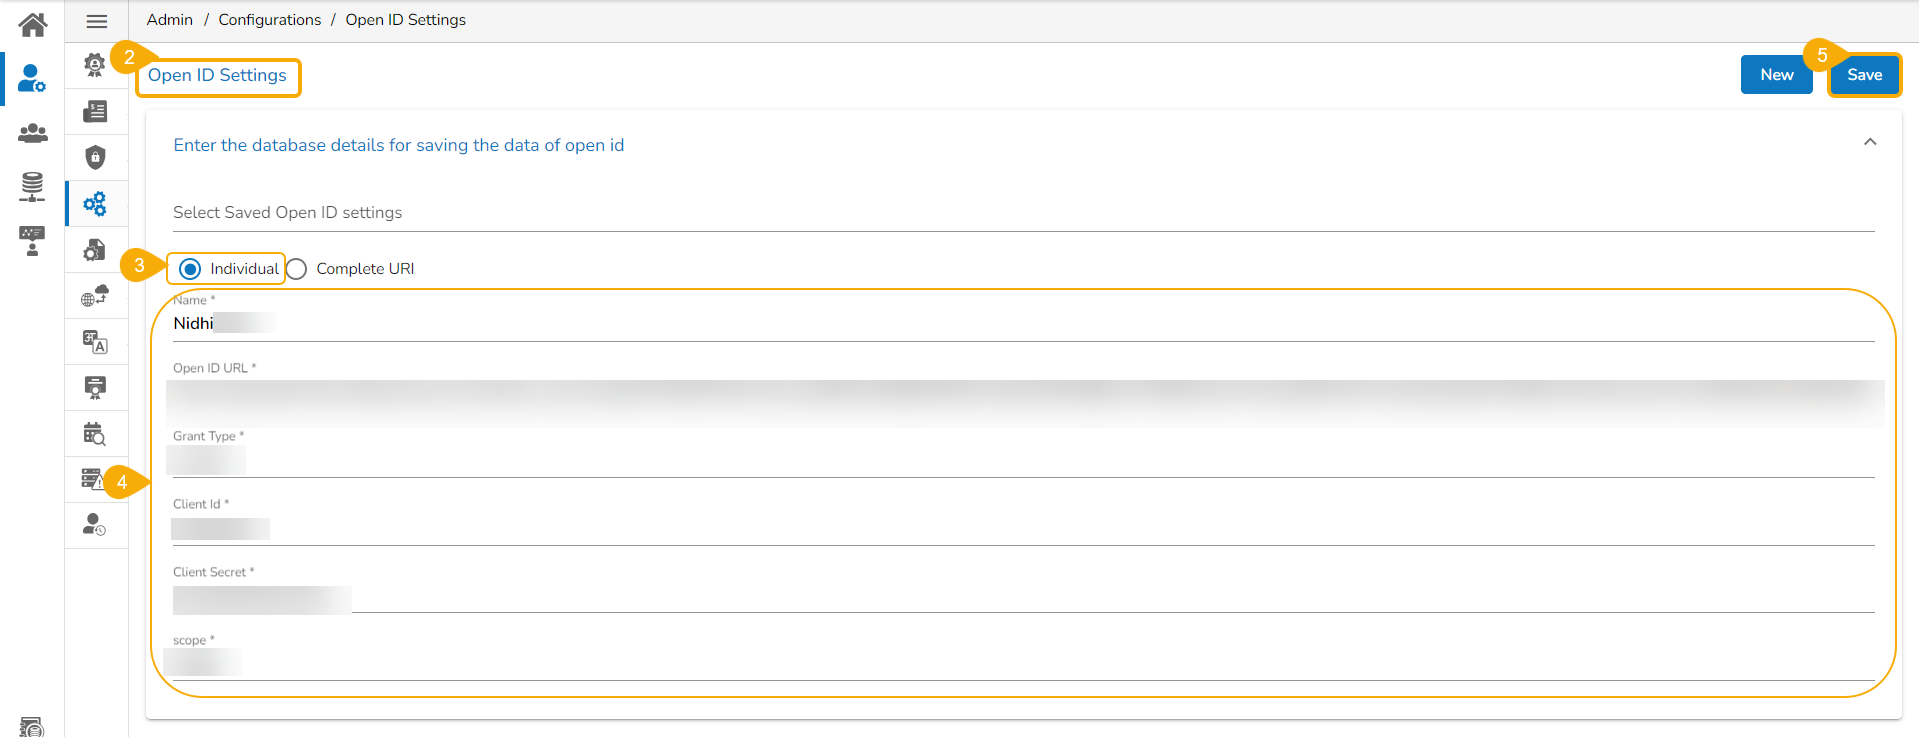
## Fields with the ***Individual*** as the selected option
* Navigate to the Open ID Settings page.
* Select the Individual option.
* Provide the relevant information for the following fields:
* Name
* Open ID URL
* Grant Type
* Client Id
* Client Secret
* Scope
* Click the ***Save*** option.
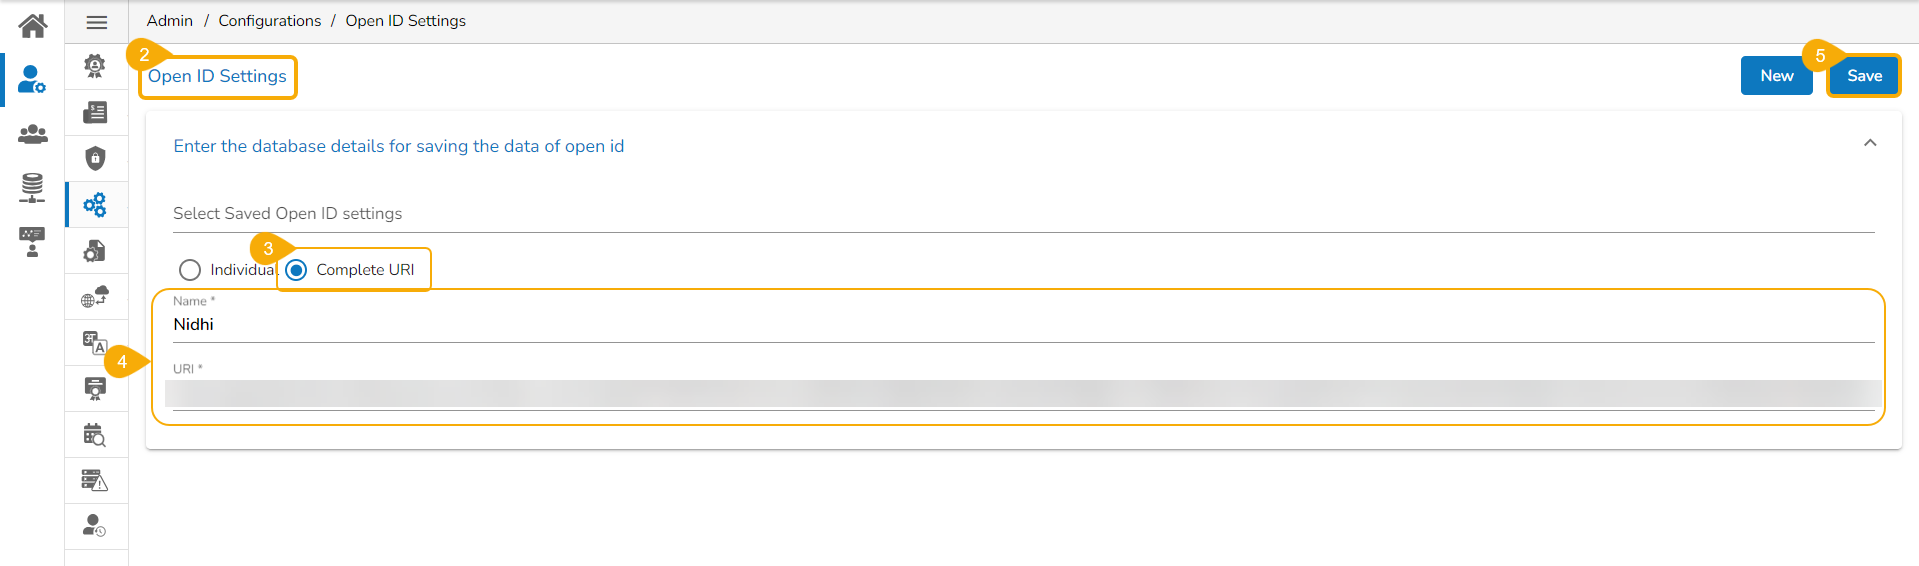
## Fields with the ***Complete UR*****I** as the selected option
* Navigate to the Open ID Settings page.
* Select the Individual option.
* Provide the relevant information for the following fields:
* Name
* URL
* Click the ***Save*** option.
A notification message appears (while configuring with any of the given option) to inform that the Open ID Settings have been updated.