Migrating a Report

The user can export and import a story file by using this feature.

Please Note: The GIT Migration option for the Report module includes both Export and Import options.

Report Migration (Exporting a Report)

Exporting a Report
  • Login to the Platform with a specific space. The story space has been used in this case to export a report.

  • Navigate to the Admin option.

  • Open the GIT Migration option.

  • Click the Report Migration option from the GIT Migration.

Accessing Report Migration from the Admin Module
  • The user gets redirected to the Export Document page.

  • Click the Export option.

the Export Document option
  • The user gets redirected to the Migration - Story Document Export page.

  • Select an option to choose the Report from the available documents options (My Documents, Public Documents, Favorites).

  • The user can search for the specific file from the list.

  • Select a Report from the displayed list.

  • Click the Push to VCS icon for the selected Story file.

Accessing the Push to VCS option for a Report
  • The Report Migration- Export dialog box appears.

  • Provide a Commit Message.

  • Click the Export option.

Report Migration - Export dialog box
  • A notification message appears to ensure the users about the success of the export action.

Notification message after the Report file gets Exported

Importing Story

Importing a Report

The Excel Report has been selected in the previous section to display the export steps. This section aims to display steps involved in importing the same report file to another user space.

  • Use another user's credentials or another space.

  • The selected user tenant space in this case is ds-labs that displays the steps to import the same exported report.

Signing In to Platform with a different user space
  • Navigate to the Admin module.

  • Open the GIT Migration option.

  • Select the Import File option from the GIT Migration context menu.

Accessing Import File option for Story Migration
  • The Import Document page opens.

  • click the Import option.

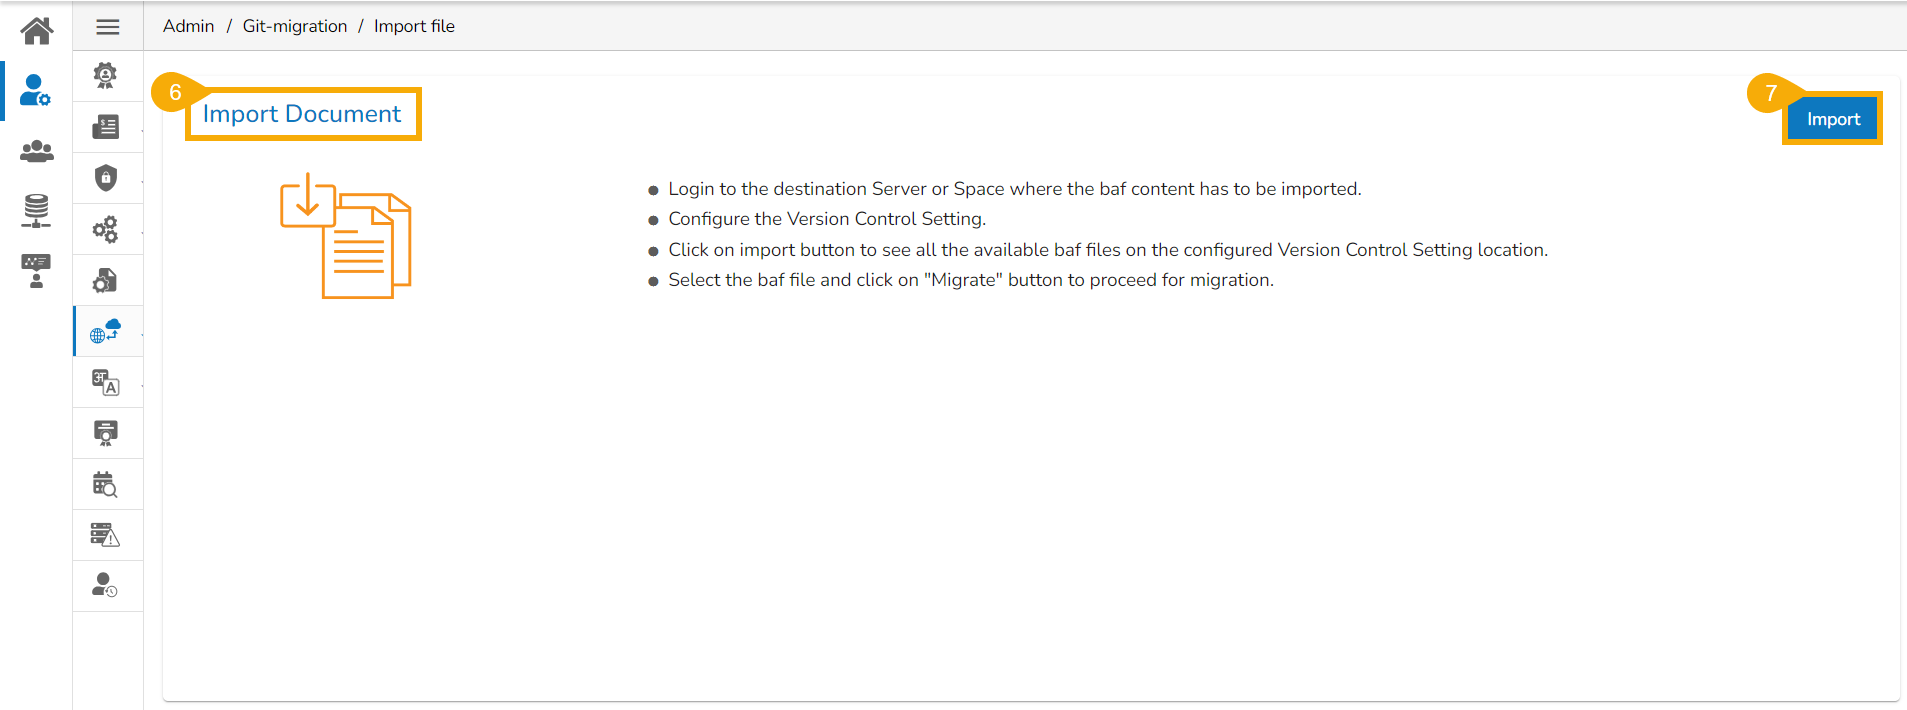
Import Document Page
  • The Migration - Document Import page appears.

  • Select a module using the given drop-down menu.

  • Use the Search bar to search for a specific story file.

  • A customised list of the exported stories appears based on the search.

Customised list of the Exported Report files
  • Select a Story file from the displayed list.

  • Available versions of the selected Story appears.

Selecting a specific Report file
  • Select a Version by using the given checkbox.

  • Click the Migrate option.

Selecting an exported version for Migration
  • A notification message appears to ensure completion of the migration process.

the notification message after the import process gets completed.
  • Navigate to Platform Homepage.

  • The My Documents space opens by default.

  • The migrated Report gets added to the My Documents space.

the imported Report Document

Last updated