# AD Configuration
The user can authenticate the Windows AD accounts through this admin option.
* Click the ***Authentication*** option from the list of admin options.
* The following authentication options appear:
* AD Configuration
* CA PPM Configuration
* AWS Cognito Configuration
* Select the ***AD Configuration*** authentication option.
Selecting the AD Configuration Authentication option
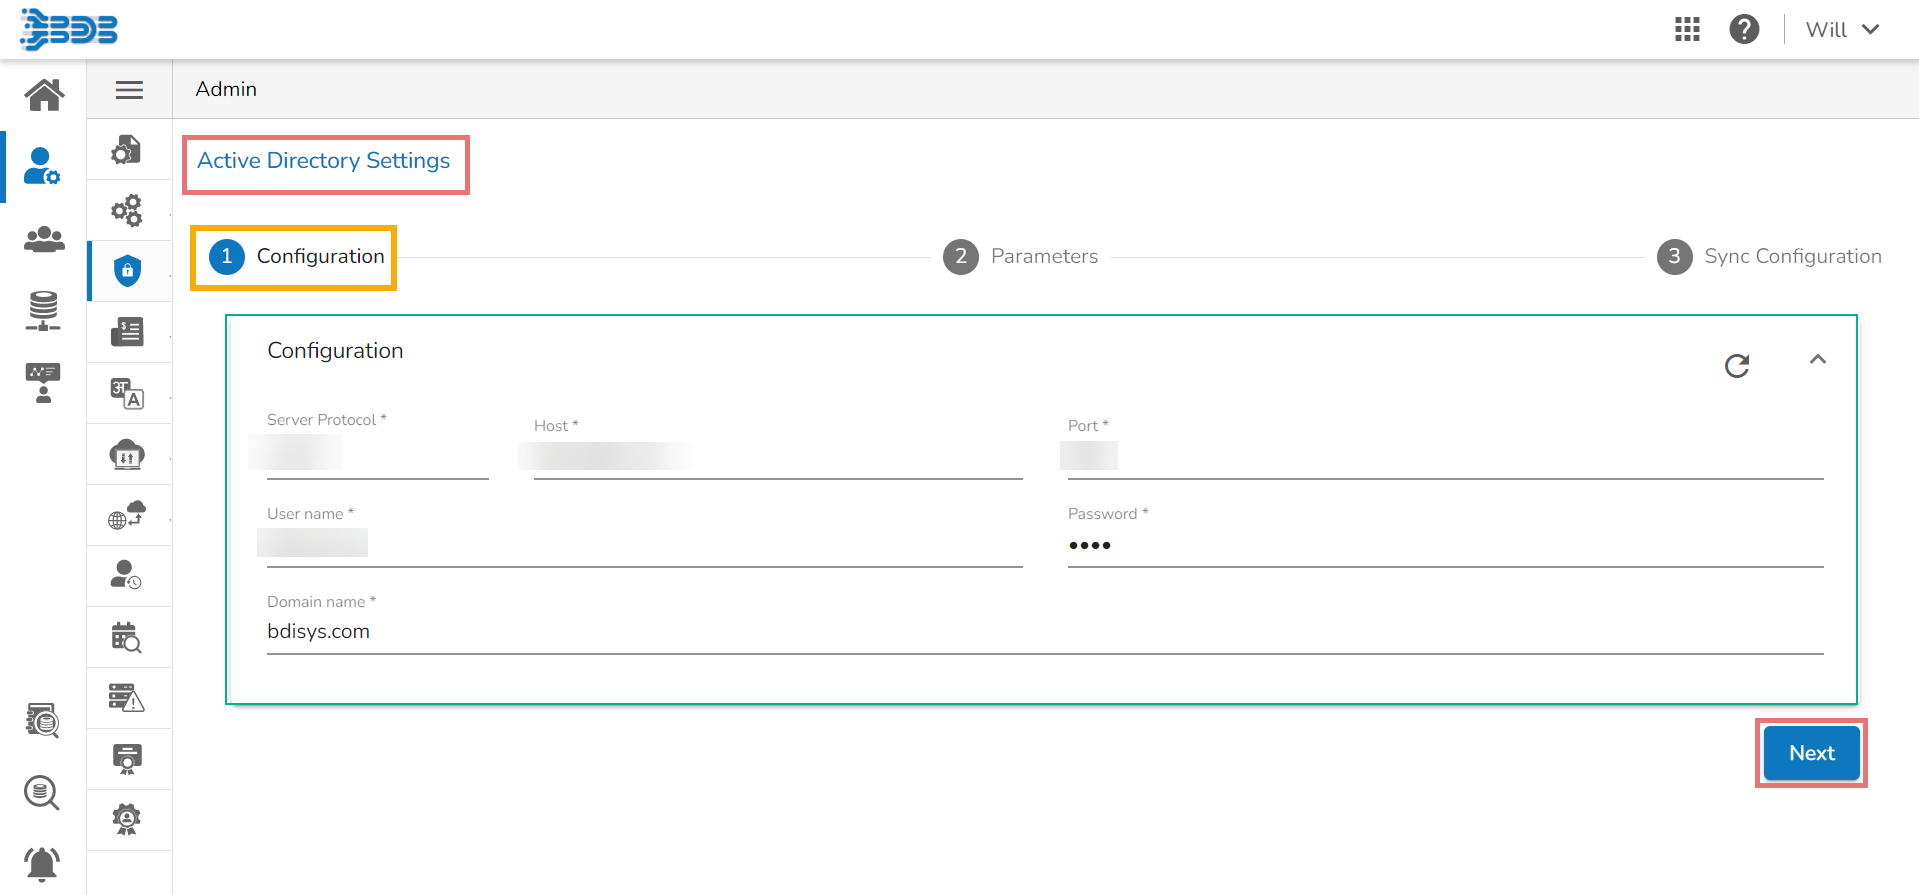
* The ***Active Directory*** ***Settings*** page opens.
* The ***Configuration*** tab for the ***Active Directory Settings*** opens by default.
* Provide Server Protocol.
* Provide ***IP address/Host*** of the Windows AD server.
* Provide the ***Port*** number of Windows AD.
* Provide the ***Username*** of the Windows AD service account.
* Enter the secured ***Password*****.**
* Enter the ***Domain name*****.**
* Click the ***Next*** option to proceed.
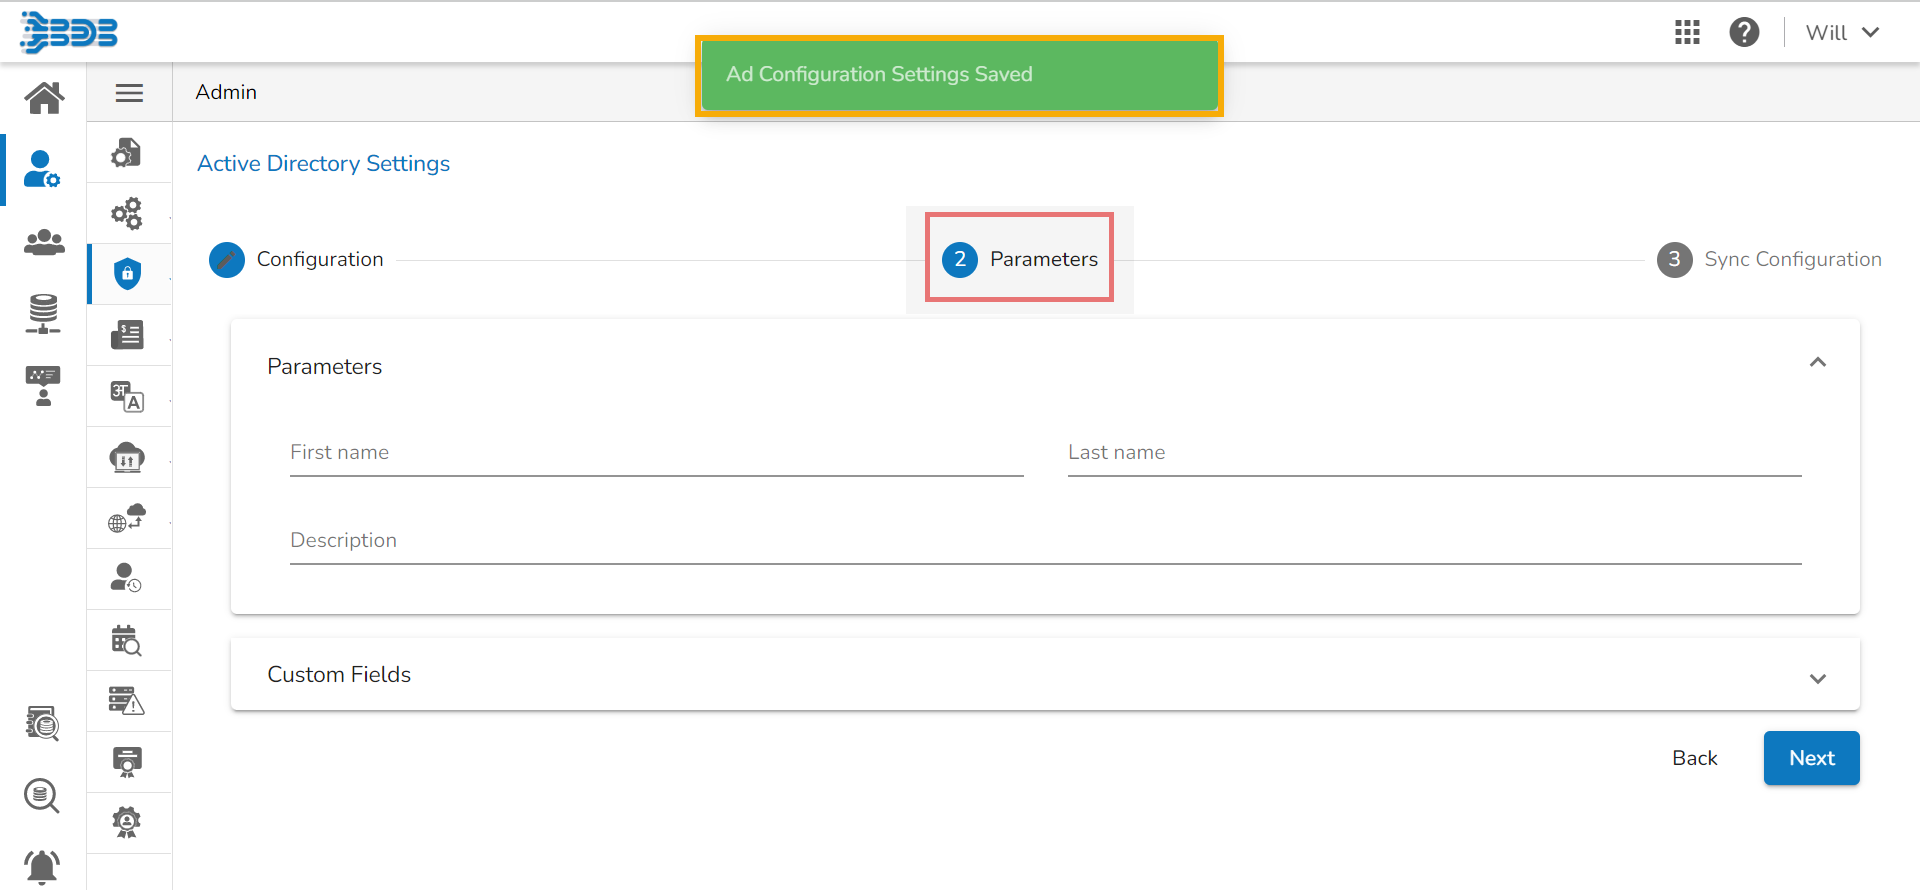
* A message appears to confirm the action and leads to the ***Parameters*** tab.
* Set the user ***Parameters*** by using this tab.
* Provide the ***first name*** of the user.
* Provide the ***last name*** of the user.
* Add description.
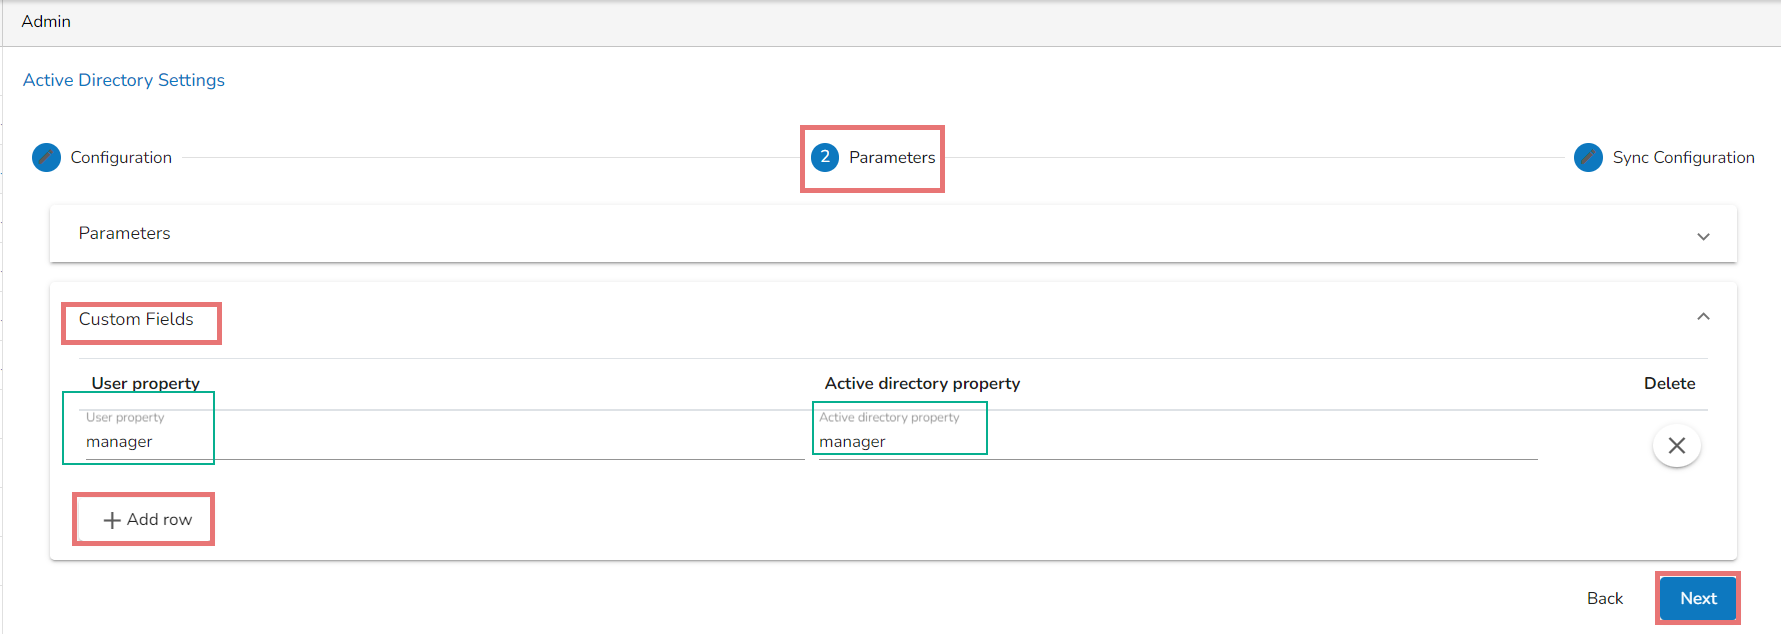
* Open the ***Custom fields*** from the drop-down menu.
* Select an option from the available context menu.
* Enter ***Active Directory*** Property.
* Add a new custom field by clicking the ***Add row*** icon.
* Click the ***Next*** option.
* A success message appears to confirm the action and leads to the ***Sync Configuration*** tab.
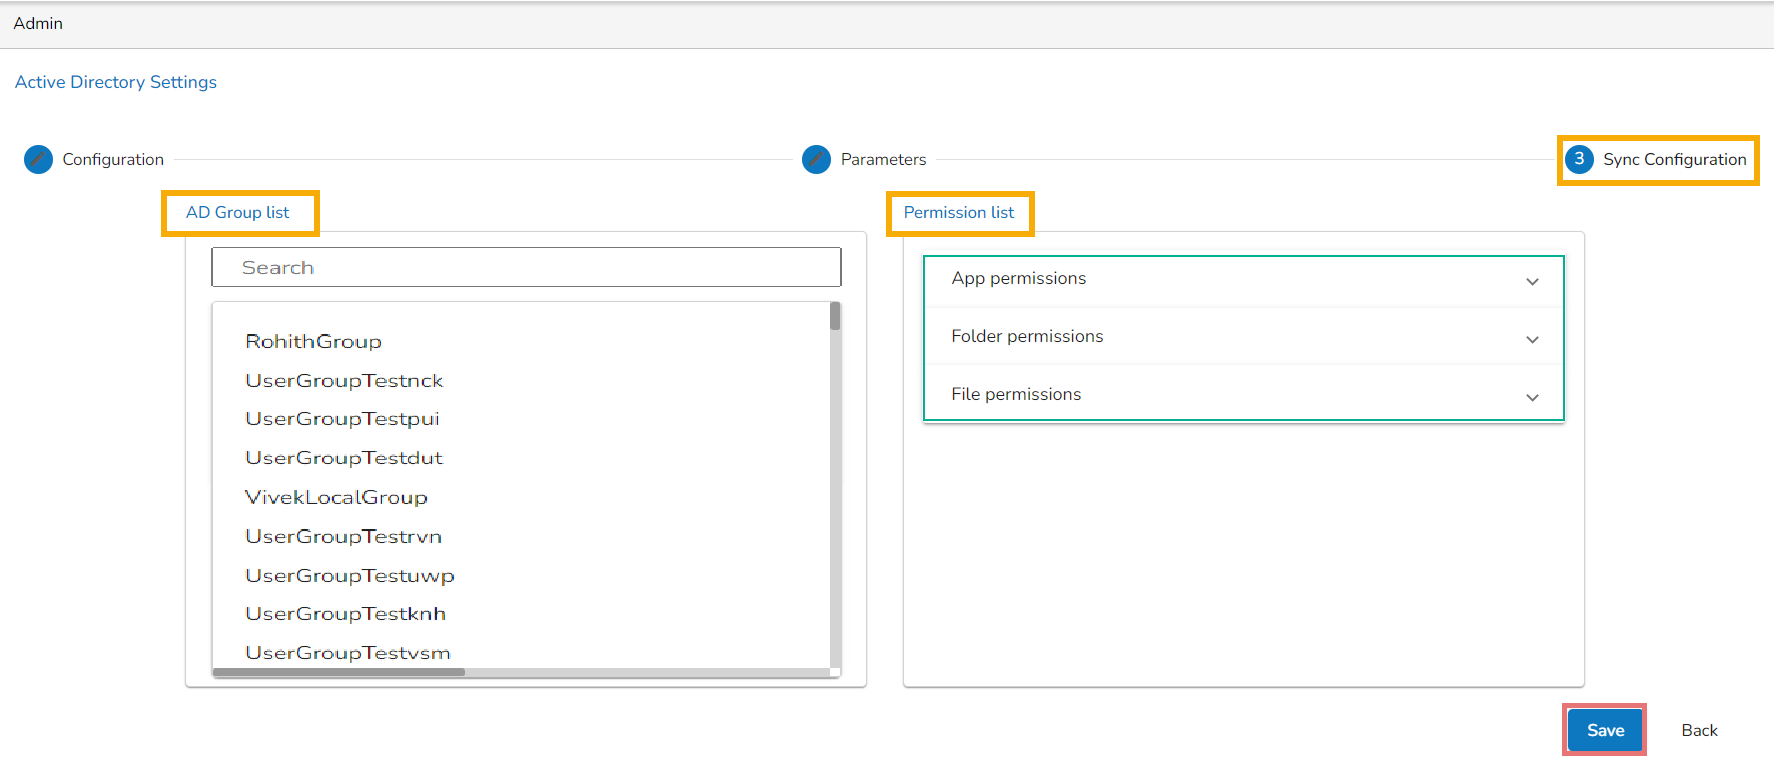
* Select a user group using the displayed AD Group list.
* Select users from the AD User list by putting the checkmarks in the boxes given next to the usernames.
* Click the ***Next*** option to proceed.
* A success message appears to confirm that the user list has been updated.

* The ***Group Configuration*** tab opens.
* The selected AD user list appears.
* Select any user group from the AD Group list.
* Click the ***Save*** option.
* A success message appears confirming that the user group is updated successfully.

{% hint style="info" %}
*Please Note: Open the* [***Security***](https://docs.bdb.ai/security-users-and-roles-4/) *module for the selected AD user the configured group gets listed in the* [***Add Users to Group***](https://docs.bdb.ai/security-users-and-roles-4/creating-a-new-user-group#add-user-to-group) *list.*
{% endhint %}