
Creating a New Data Set using RDBMS Connector
Check out the given walk-through on how to create a Data Set using the RDBMS Data Connector.
Data Set Creation
Navigate to the Data Center homepage.
Click the New option.
Select the Data Set option from the context menu.

The Data Source page opens.
The Data Connectors list is displayed.
Search for a Data Connector using the Search Data Connectors bar.
with the Create Data Set Action icon (+) for all the available data connectors.

The Data Set page opens.
Service Name: Enter any user-defined name for the new data set.
Description: Provide a brief description of the Data Set (optional).
Data Connector Name: This is a pre-defined field based on the selected data connector.
Database Name: This is a pre-defined field based on the data connector chosen earlier.
Query: Write a valid query service in the given space (Use Ctrl+ Space keys for assistance in writing a query).
Table Information: On the right side of the page Table information is displayed and will contain all the tables in the Database and the Column name in the table. Double-clicking on the Table or Column will auto-generate a sample query so the user can validate and get data.
Click the Validate option to execute the new Data Set.

A notification message appears to inform the successful execution.

The Preview appears under the RESULT tab at the bottom of the page.

The DATA PROTECTION tab allows users to protect the data by entering some Rule type.
The Save option gets enabled. Click it.

A notification message appears to ensure the completion of the action.
The newly created Data Set gets added to the Data Sets List.

Please Note: The Publish icon ![]() beside a Data Set name suggests the data set has been published.
beside a Data Set name suggests the data set has been published.
![]()
Edit/View
Opens the Data Set form in the editable mode for the user to edit or view the Data Set fields.
![]()
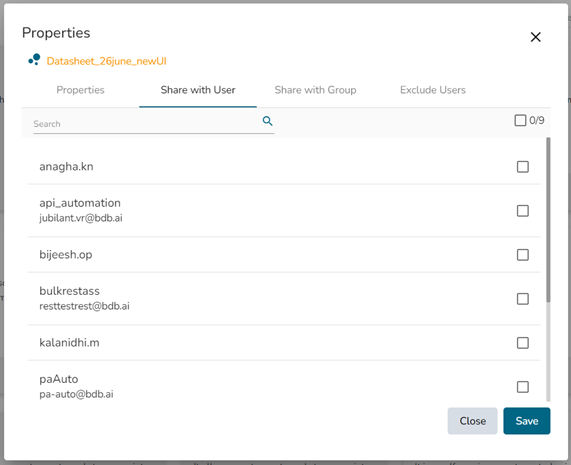
Share
Shares the Data Set to the selected user(s) or group(s) or to exclude the selected user(s)/user group(s) from the rights to see a Data Set.
![]()
Publish
Publishes the selected Data Set.
![]()
Push to VCS
User can push different versions of the same data set, this can be downloaded and replaced with the existing Data Set for the future use, if required.
![]()
Pull from VCS
This is to pull a specific version of the Data Set from the version control system.
![]()
Delete
Removes the selected Data Set from the list
![]()
Data Preparation
Opens the data from the selected Data Set in the Data Preparation framework.
![]()
Visualize
Redirects the user to create a Widget
Please Note: The Edit, Publish, and Deleted icons are provided under the More Actions icon.
Applying Dynamic Filter in an RDBMS Data Set
The user can insert dynamic filter conditions via the query service to an RDBMS Data Set.
Navigate to the Data Set form for any RDBMS connector.
Enter the filter condition in the Query section. Use the @text@ syntax inside the query to define the filter.
Click the Validate option.
A Filter List dialog window opens, asking for the filter value.
Enter a filter value.
Click the Continue option.

A notification message appears.
The data preview of the filter data is displayed at the bottom of the page.
Click the Save option to save the Data Set form.

A notification message informs the users that the Dataset has been created.
The newly created dataset gets saved with the filter value under the Data Sets list.

Please Note:
Use the CTRL+ Space keys to get assistance while writing a query.
Click the ‘Help Center’ icon from the Data Set form to get rules regarding the formation of a query. The query formation rules are displayed in a new pop-up screen.
Users can customize the Data Sets list by Data Connector Type, Data Connector, and Publish Status. These customization options are provided at the top of the Data Sets List page.
DATA Protection
In the data set validation page, there is one more option available for Data protection, This will provide different types of security for the Data we are providing.
Rule Types
Redaction
Full/ Partial reduction is available
Redaction Type/Mask Type partial option user can decide the length and the starting point

Masking
Users can apply the masking and decide the length and starting point for masking
The Masking character can be decided.

Hashing
Three types of Hashing are available.
SHA 25
SHA 384
SHA 512

Date Generalization
Year, Month, Quarter, and Week Options are available for data generalization.

Apply the Data protection fields.

Restricting Displayed Data for End Users via Data Set
BDB Platform provides an option to control data display for the Dashboard end-users.
Please Note: Data Restriction through Data Service (Data Set) is interconnected with multiple platform plugins. The precondition for this feature is that the users should possess a good understanding of all the involved BDB Platform modules and the Dashboard Designer plugin.
Create a Custom Field using the Configuration and Settings admin section.

Create a Data Set using the ENV with the selected Custom Field Key.

Create a Dashboard using the Data Set.
Publish the Dashboard to the portal.
Open the Dashboard (it opens in preview mode by default as displayed below).

Create a new user (using the Security module) and pass the Custom Field Value/ Update an existing user passing the Custom Field Value.

Share it with another Platform user via the Share with User option.
Access the dashboard from the updated user’s account to whom it was shared.
Open the shared dashboard; the dashboard displays only permitted data by the admin.
Last updated