# Anonymization
Anonymization is a type of information sanitization whose intent is privacy protection. It is a data processing technique that removes or modifies personally identifiable information.
The below-mentioned transforms are available under the Dates category:
## **Data Hashing**
Data Hashing is a technique of using an algorithm to map data of any size to a fixed length. Every hash value is unique.
Data Hashing is a data transformation technique used to convert raw data into a fixed-length representation in the form of a hash value. This transformation is often employed as part of the data preprocessing stage before using the data for various purposes such as analysis, machine learning, or storage. The main objective of data hashing as a data transform is to provide a more efficient and secure way to handle and process sensitive or large datasets.
{% hint style="success" %}
*Check out the given illustration on how to use Data Hashing transform.*
{% endhint %}
{% embed url="" %}
***Anonymization Transform***
{% endembed %}
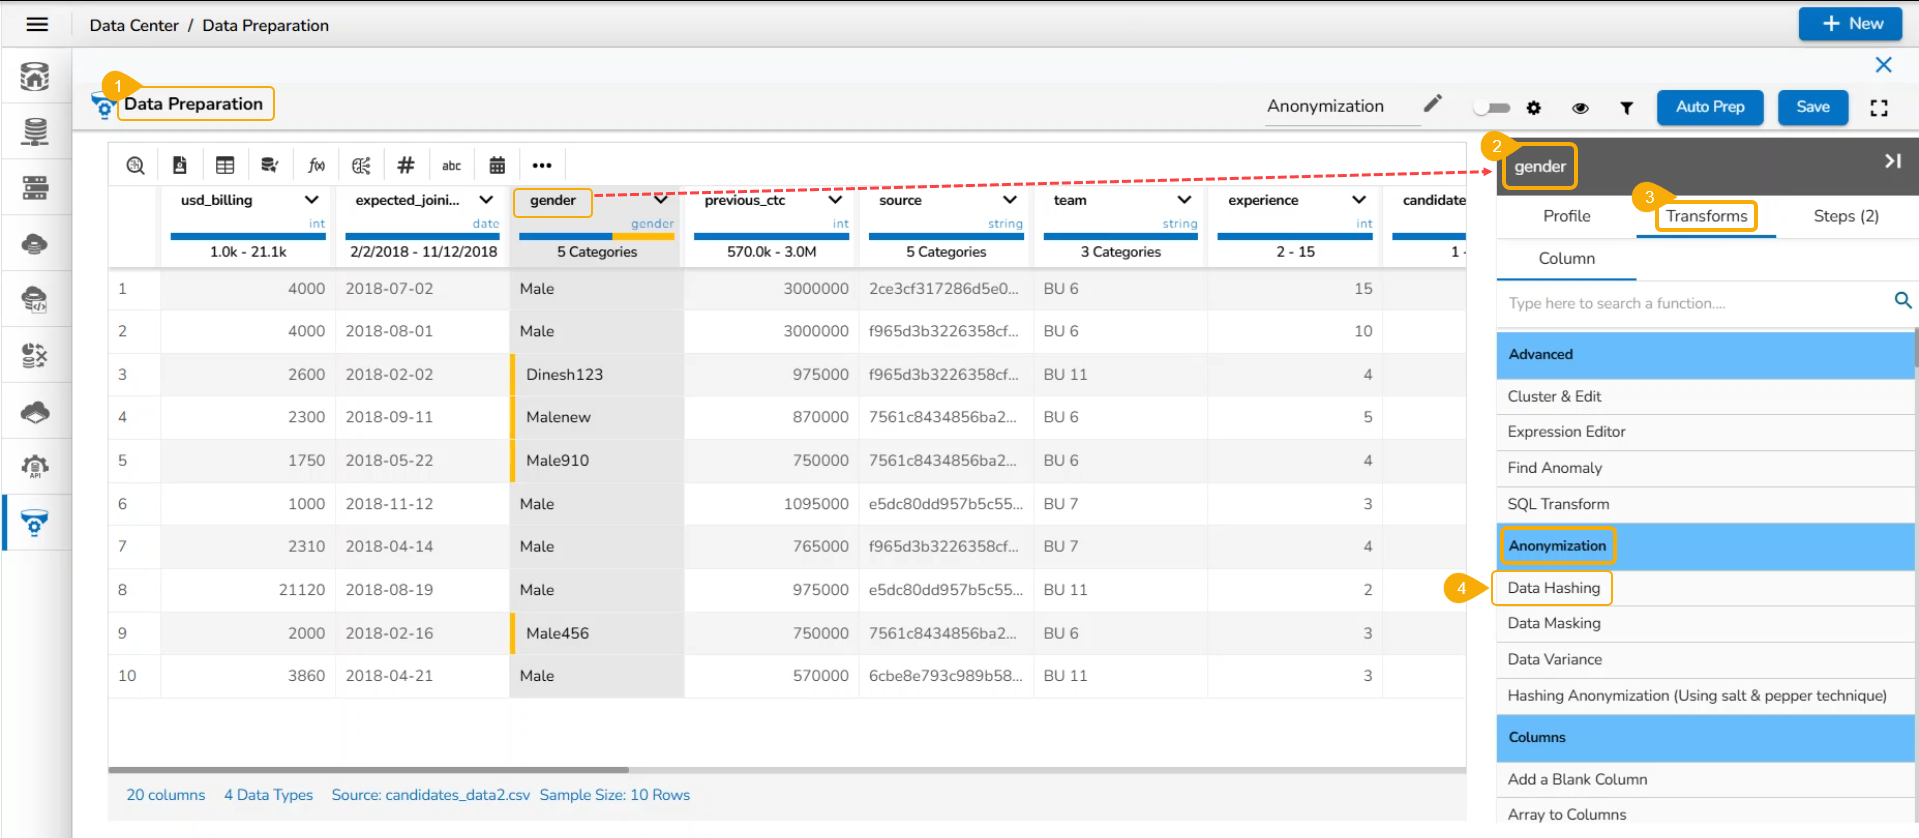
Steps to perform the ***Anonymization*** Transform:
* Navigate to a dataset within the Data Preparation framework, and select a column.
* Select one column that needs to be protected.
* Select the ***Transforms*** tab.
* Select the ***Data Hashing*** transform from the ***Anonymization*** category.
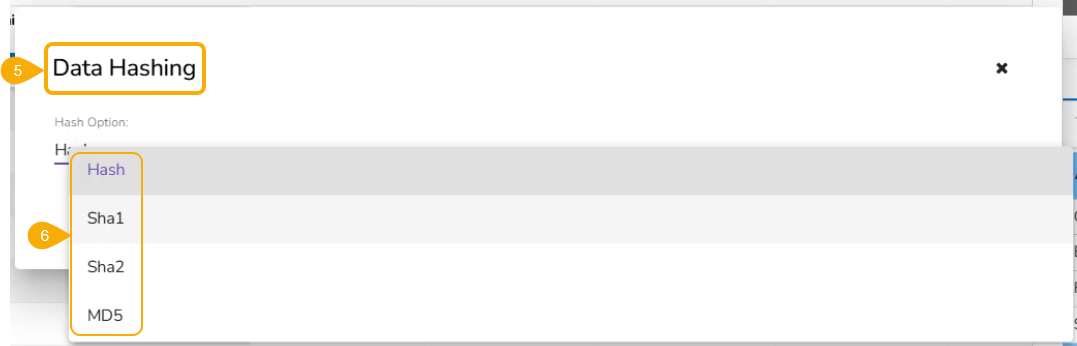
* The Data Hasing window opens.
* Use the drop-down menu to get the available hashing options.
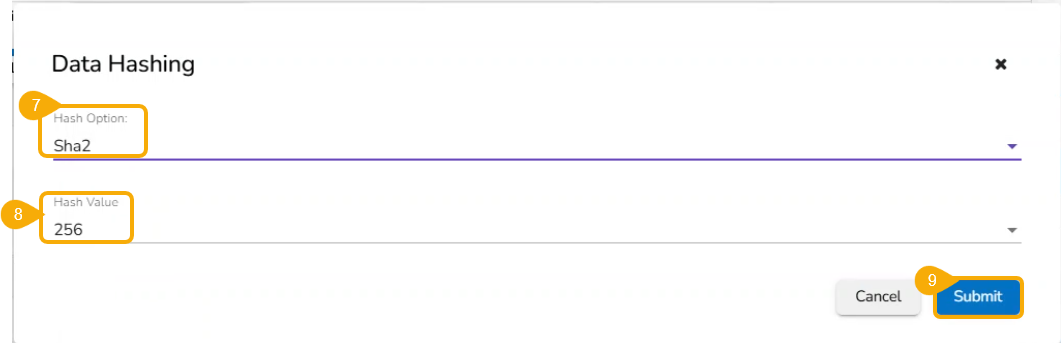
* Select a Hash option (E.g., Sha2 hash option has been selected).
* Set the ***Hash Value*** using the drop-down menu. The default Hash Value is 256 for the Sha2 hash option.
* Click the ***Submit*** option.
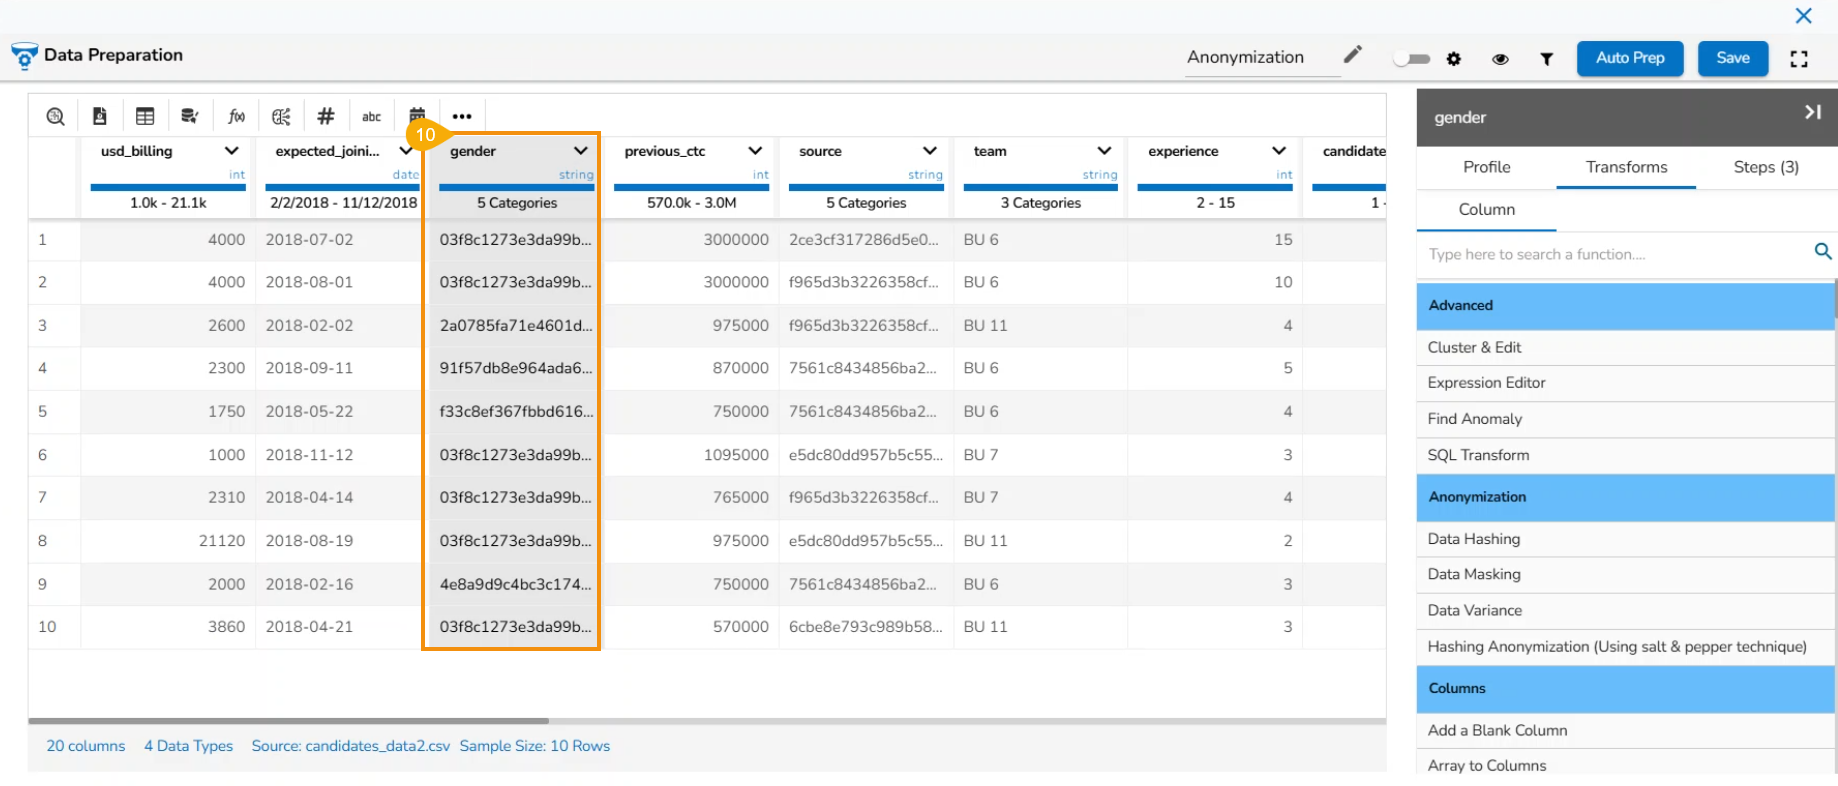
* Data in the selected column will be transformed using the hashed format.
{% hint style="info" %}
*Please Note:*
* A suitable hashing algorithm is chosen based on the specific requirements and security considerations as ***Hash Options***. *The supported Hash options are **Hash**, **Sha-1**, **Sha-2,** and **MD-5**.*

* The hash options displayed in the UI map to the following actual hashing algorithms on the backend:
* Sha1 (UI) → SHA-256 (Backend)
* Sha2 (UI) → SHA-512 (Backend)
* Hash (UI) → MD-5 (Backend)
* MD5 (UI) → MD-5 (Backend)
{% endhint %}
Data Hashing with Sha1 Hash Option
* Select a column from the given dataset within the ***Data Preparation*** framework.
* Open the ***Transforms*** tab.
* Select the ***Data Hashing*** transform from the ***ANONYMIZATION*** category.
* Select a column from data grid for transformation.
* Select ***Sha1*** as Hash Option.
* Click the ***Submit*** option.

* The selected column gets converted based on the hashing option.

Data Hashing with Sha2 Hash Option
* Select a column from the given dataset within the ***Data Preparation*** framework.
* Open the ***Transforms*** tab.
* Select the ***Data Hashing*** transform from the ***ANONYMIZATION*** category.
* Select a column from data grid for transformation.
* Select ***Sha2*** as Hash Option.
* Select a Hash Value from the drop-down (The supported values are 256, 384, and 512).
* Click the ***Submit*** option.

* The selected column gets converted based on the hashing option.

Data Hashing with MD5 Hash Option
* Select a column from the given dataset within the ***Data Preparation*** framework.
* Open the ***Transforms*** tab.
* Select the ***Data Hashing*** transform from the ***ANONYMIZATION*** category.
* Select a column from data grid for transformation.
* Select ***MD5*** as Hash Option.
* Click the ***Submit*** option.

* The selected column gets converted based on the hashing option.

## **Data Masking**
Data masking transform is the process of hiding original data with modified content. It is a method of creating a structurally similar but inauthentic version of actual **data.**
{% hint style="success" %}
*Check out the given walk-through on the Data Masking transform.*
{% endhint %}
{% embed url="" %}
Data Masking
{% endembed %}
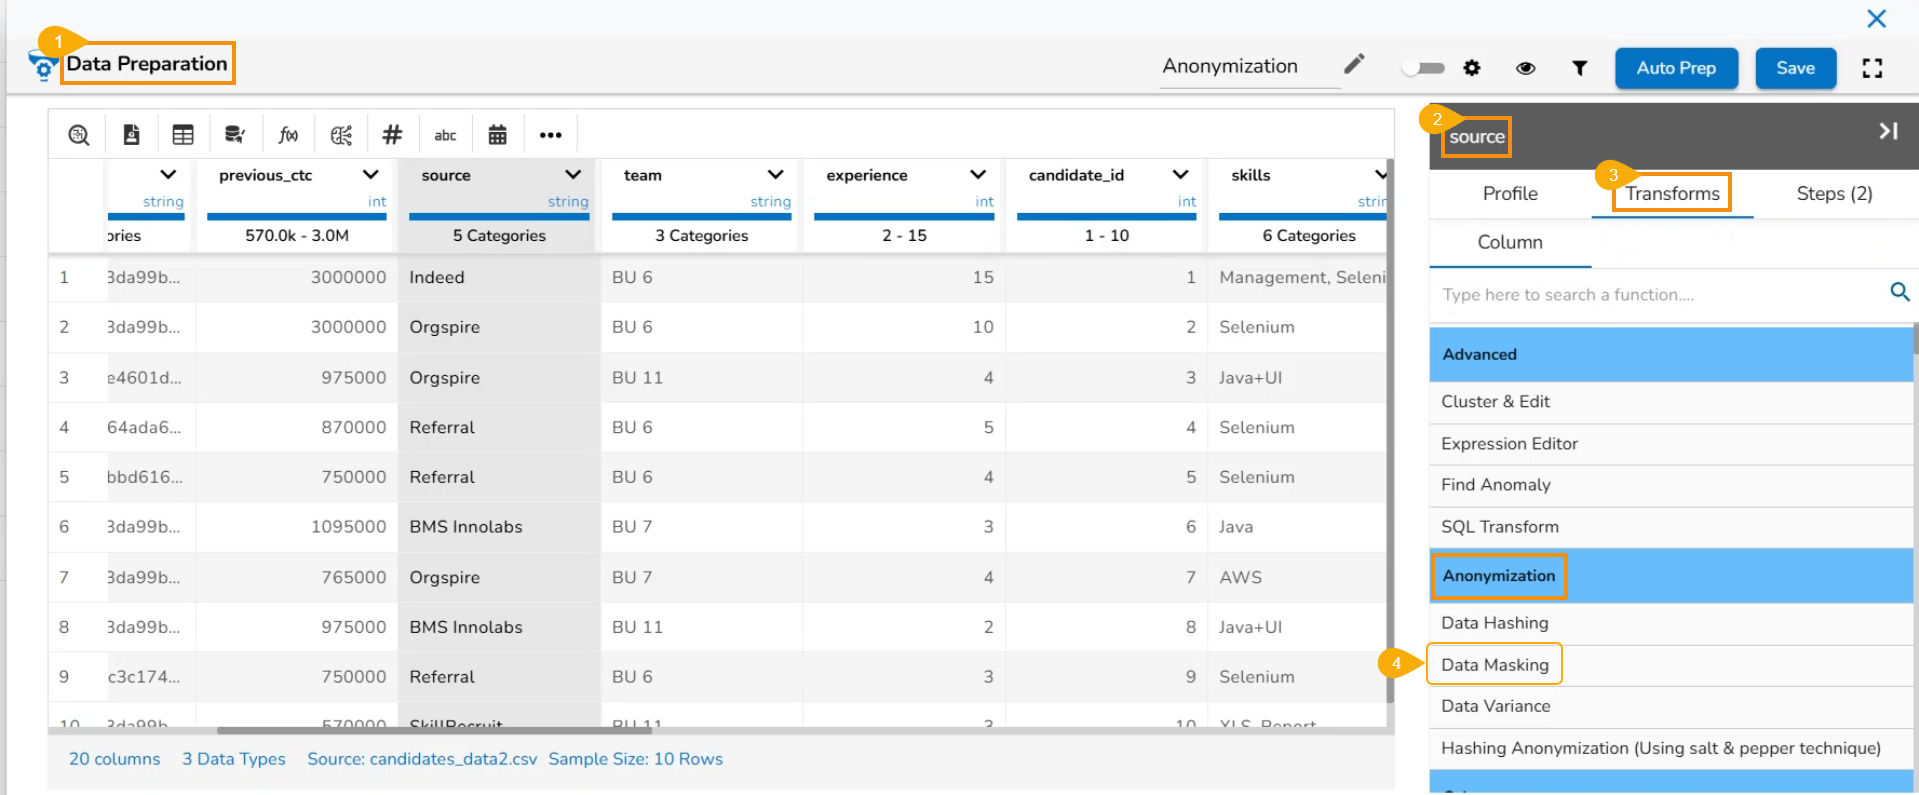
Steps to perform the ***Data Masking*** Transform:
* Navigate to a dataset within the Data Preparation framework, and select a column.
* Select one column that needs to be protected.
* Select the ***Transforms*** tab.
* Select the ***Data Masking*** transform from the ***Anonymization*** category.
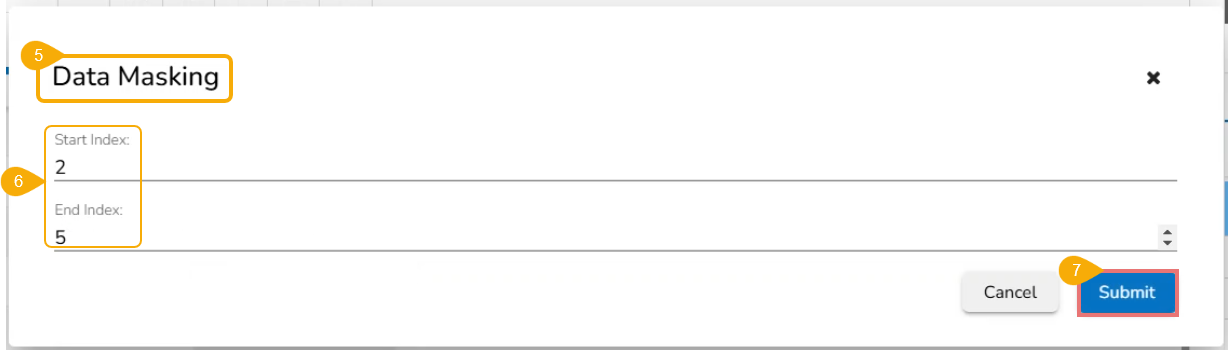
* The ***Data Masking*** dialog box opens.
* Provide the ***Start Index*** and ***End Index*** to mask the selected data.
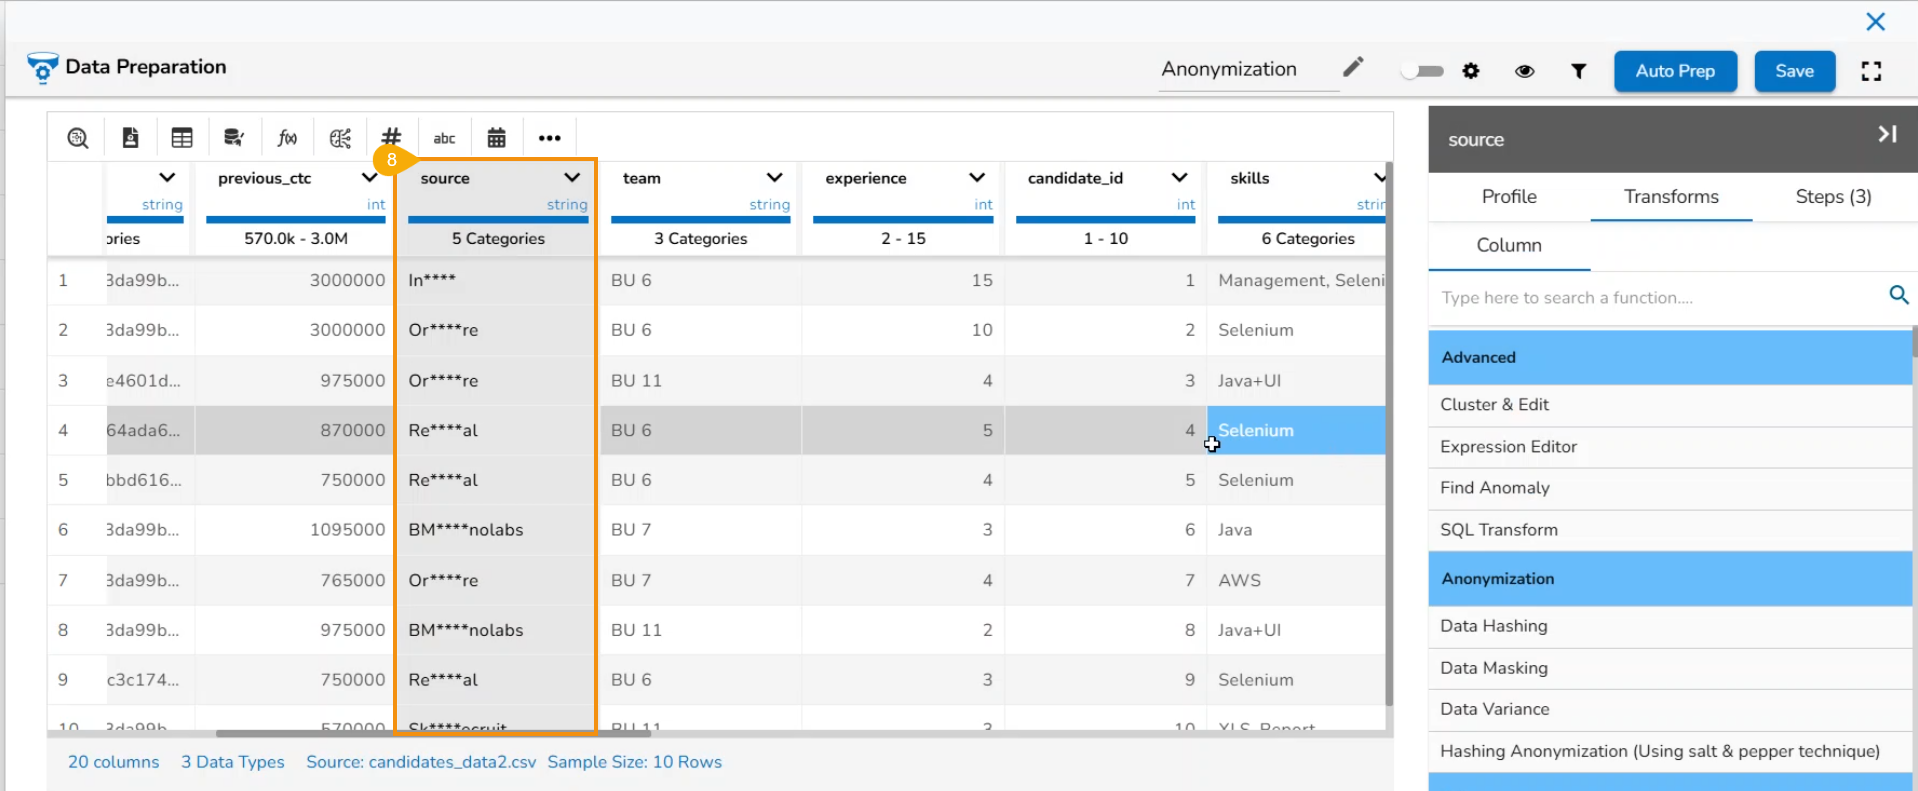
* Click the ***Submit*** option.
* The image displays how the ***Data Masking*** transform (when applied to the selected dataset) converts the selected data:
## **Data Variance**
The Data Variance transform allows the users to apply data variance to the Numeric and Date columns.
### Applying the Data Variance transform to a Number Column
{% hint style="success" %}
*Check out the illustration on how to use the Data Variance on a numeric column.*
{% endhint %}
{% embed url="" %}
***Data Variance on a Numeric column***
{% endembed %}
* Select a numeric column within the Data Preparation framework.
* Open the ***Transforms*** tab.
* Select the ***Data Variance*** transform from the ***Anonymization*** category.
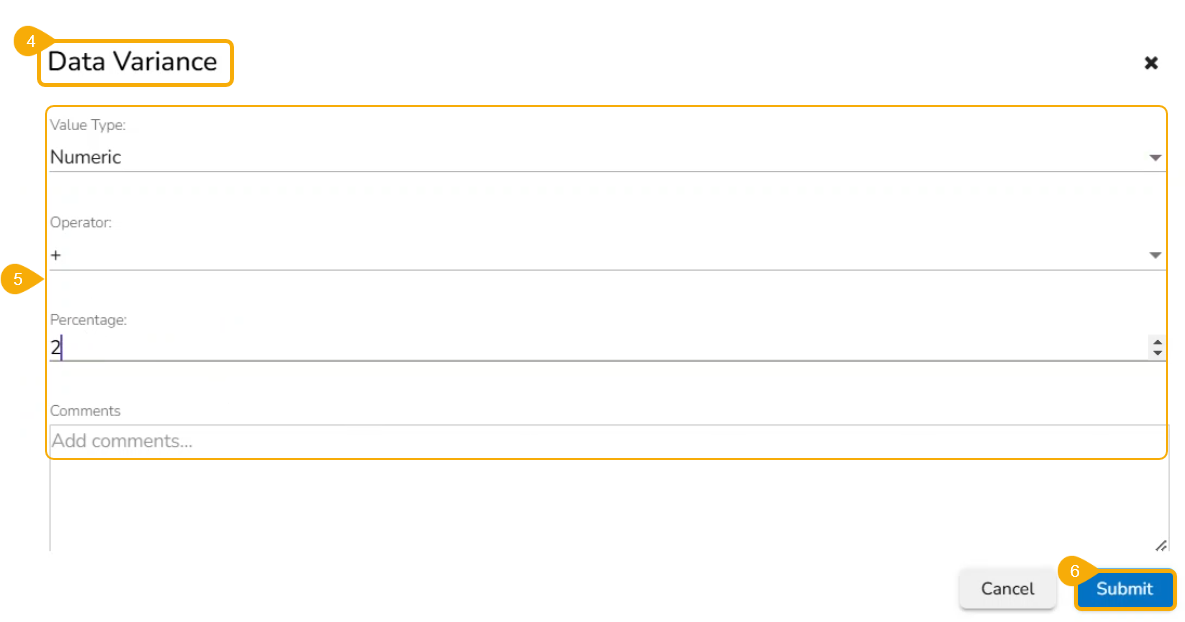
* The ***Data Variance*** dialog box opens.
* Configure the following information:
* Select ***Numeric*** as the ***Value Type***.
* Select an Operator using the drop-down option.
* Set percentage.
* Provide a comment in the given section.
* Click the ***Submit*** option.
* The data of the selected column gets transformed based on the set of numeric values.
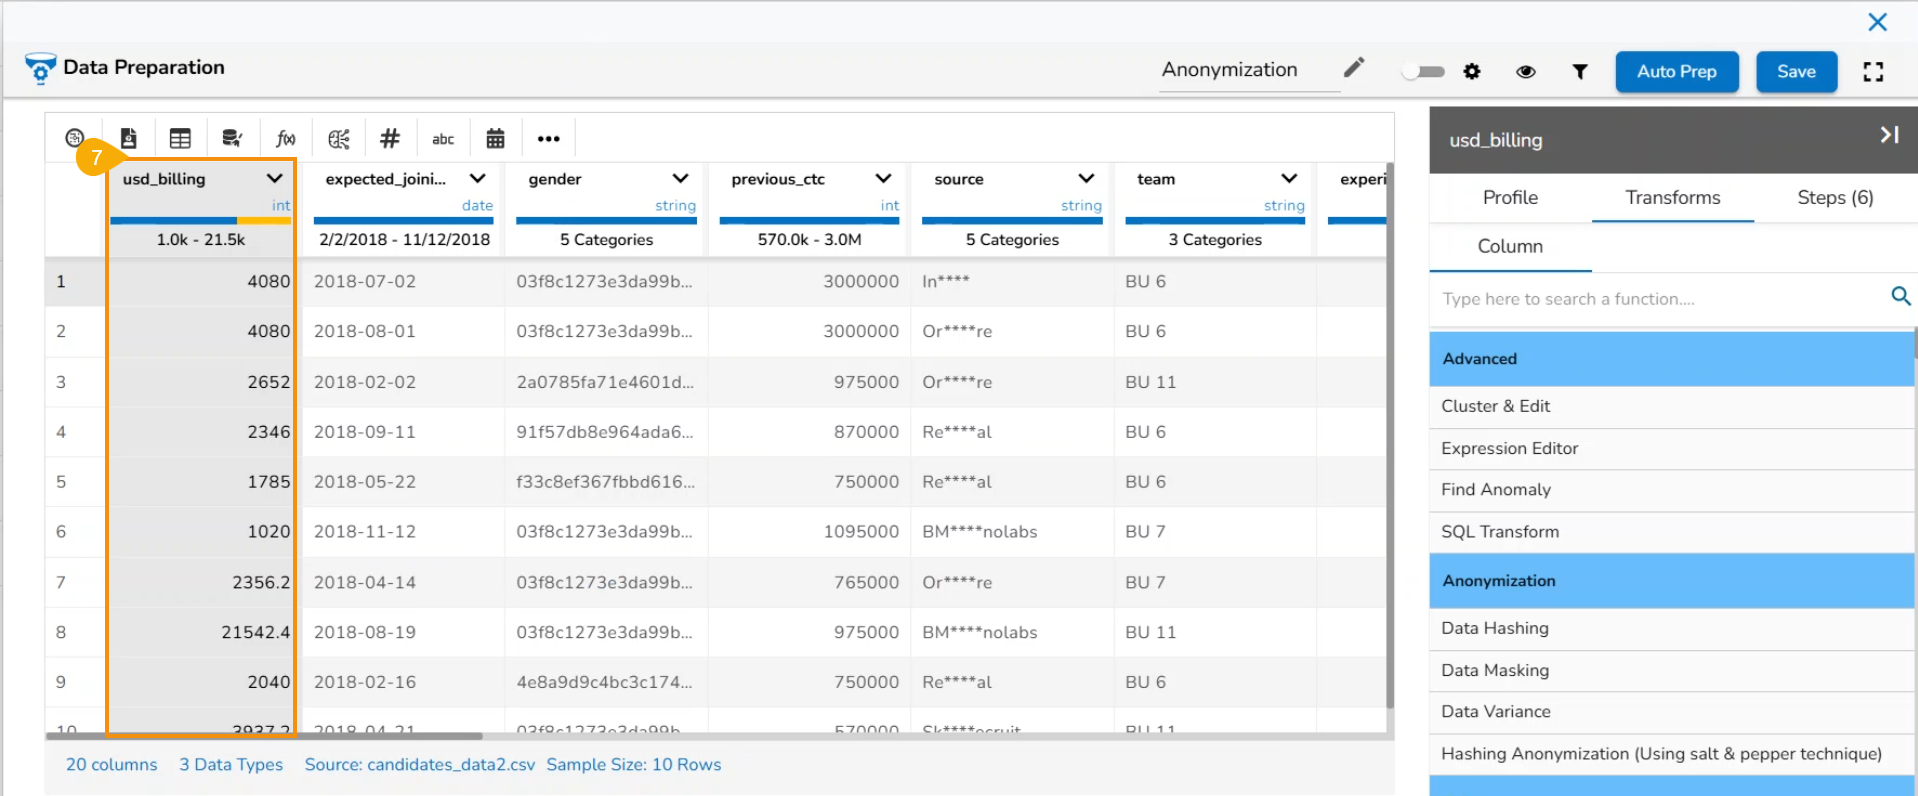
### Applying the Data Variance transform to a Date Column
{% hint style="success" %}
*Check out the illustration on how to use the Data Variance on a date column.*
{% endhint %}
{% embed url="" %}
Data Variance Transform on a Date Column
{% endembed %}
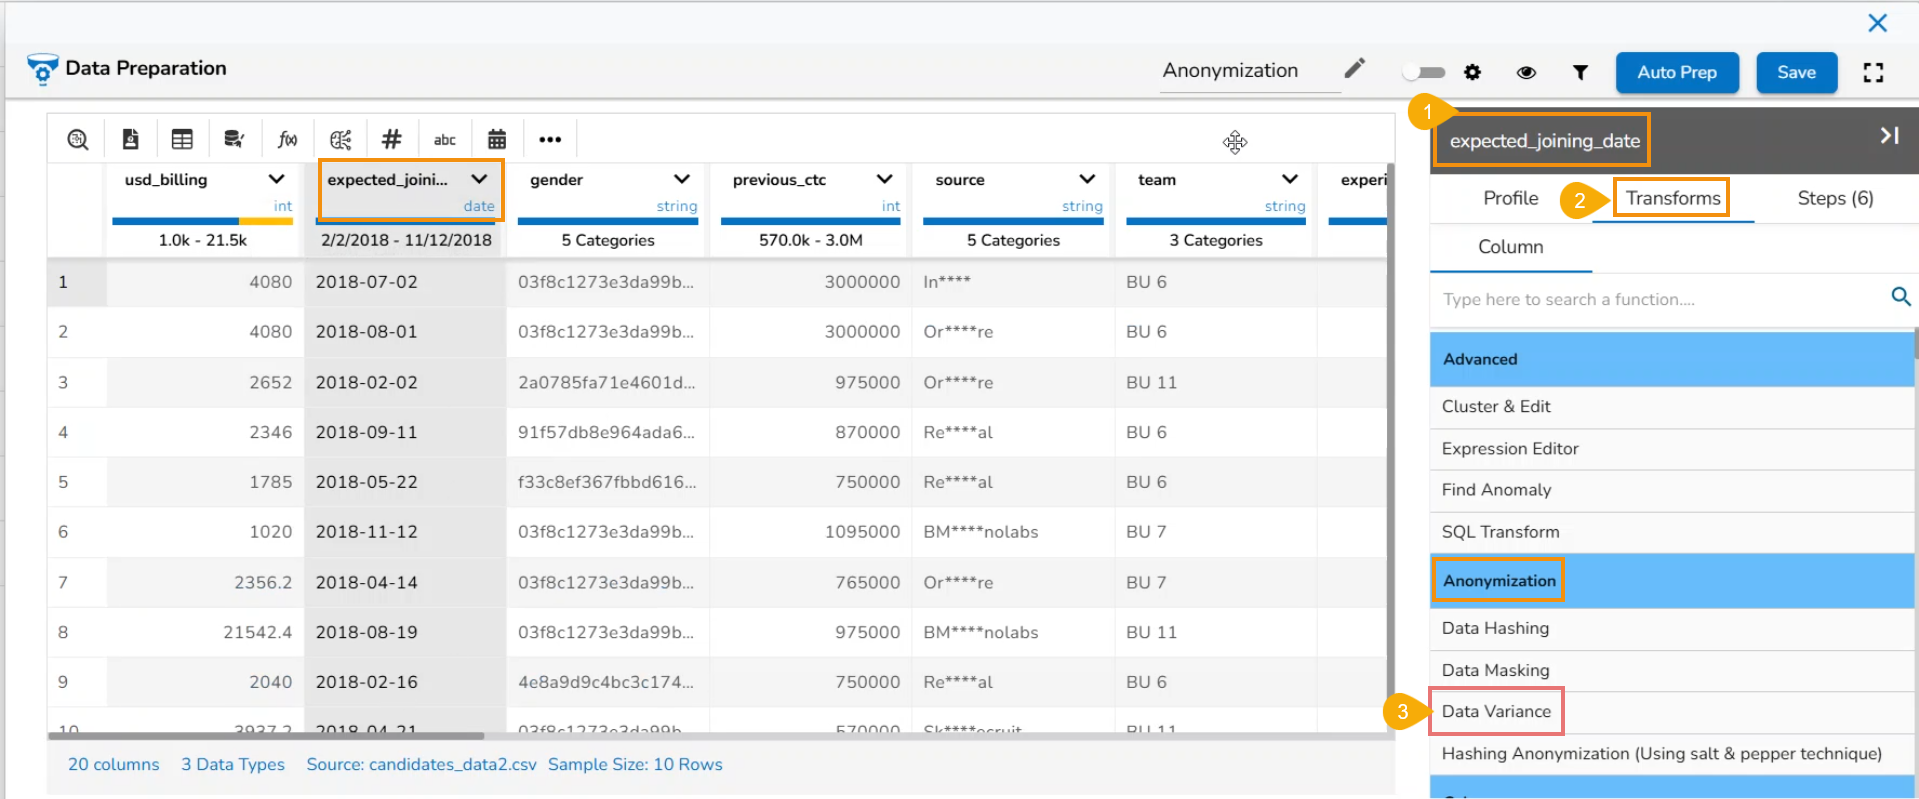
* Select a column containing Date values from the given dataset within the Data Preparation framework.
* Open the ***Transforms*** tab.
* Select the ***Data Variance*** transform from the ***Anonymization*** category.
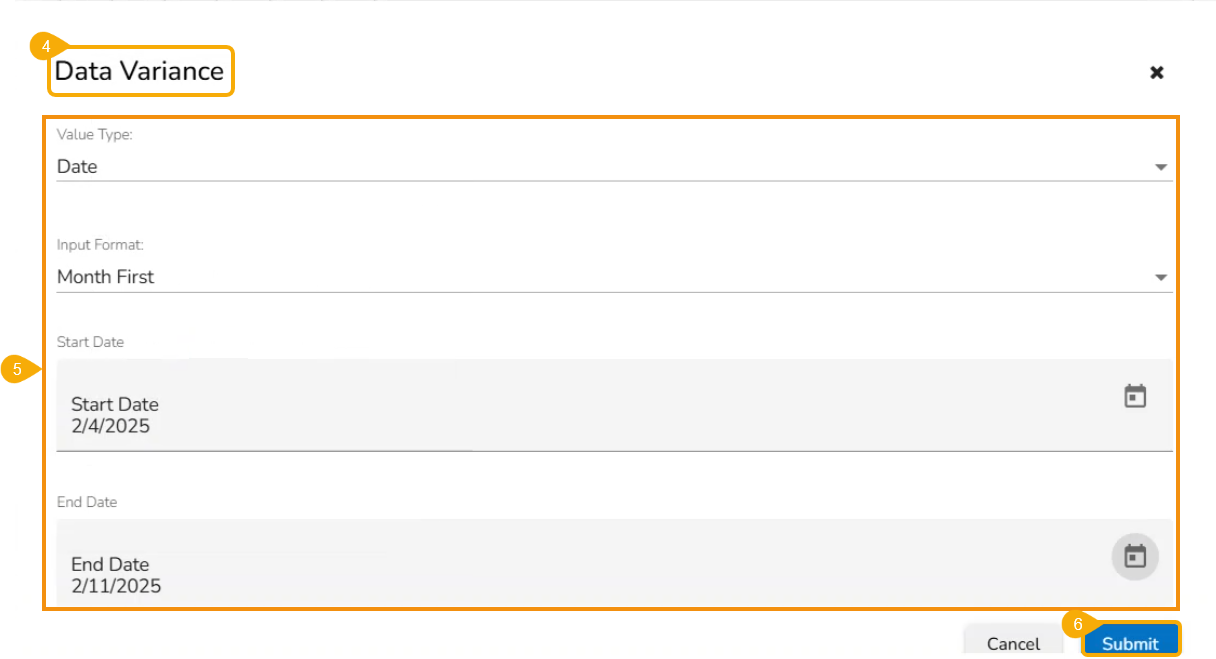
* The ***Data Variance*** dialog box opens.
* Configure the following information:
* Select ***Date*** as the ***Value Type***.
* Select an ***Input Format*** from the drop-down list.
* Select a ***Start Date*** using the Calendar option.
* Select an ***End Date*** using the Calendar option.
* Provide a comment in the given section.
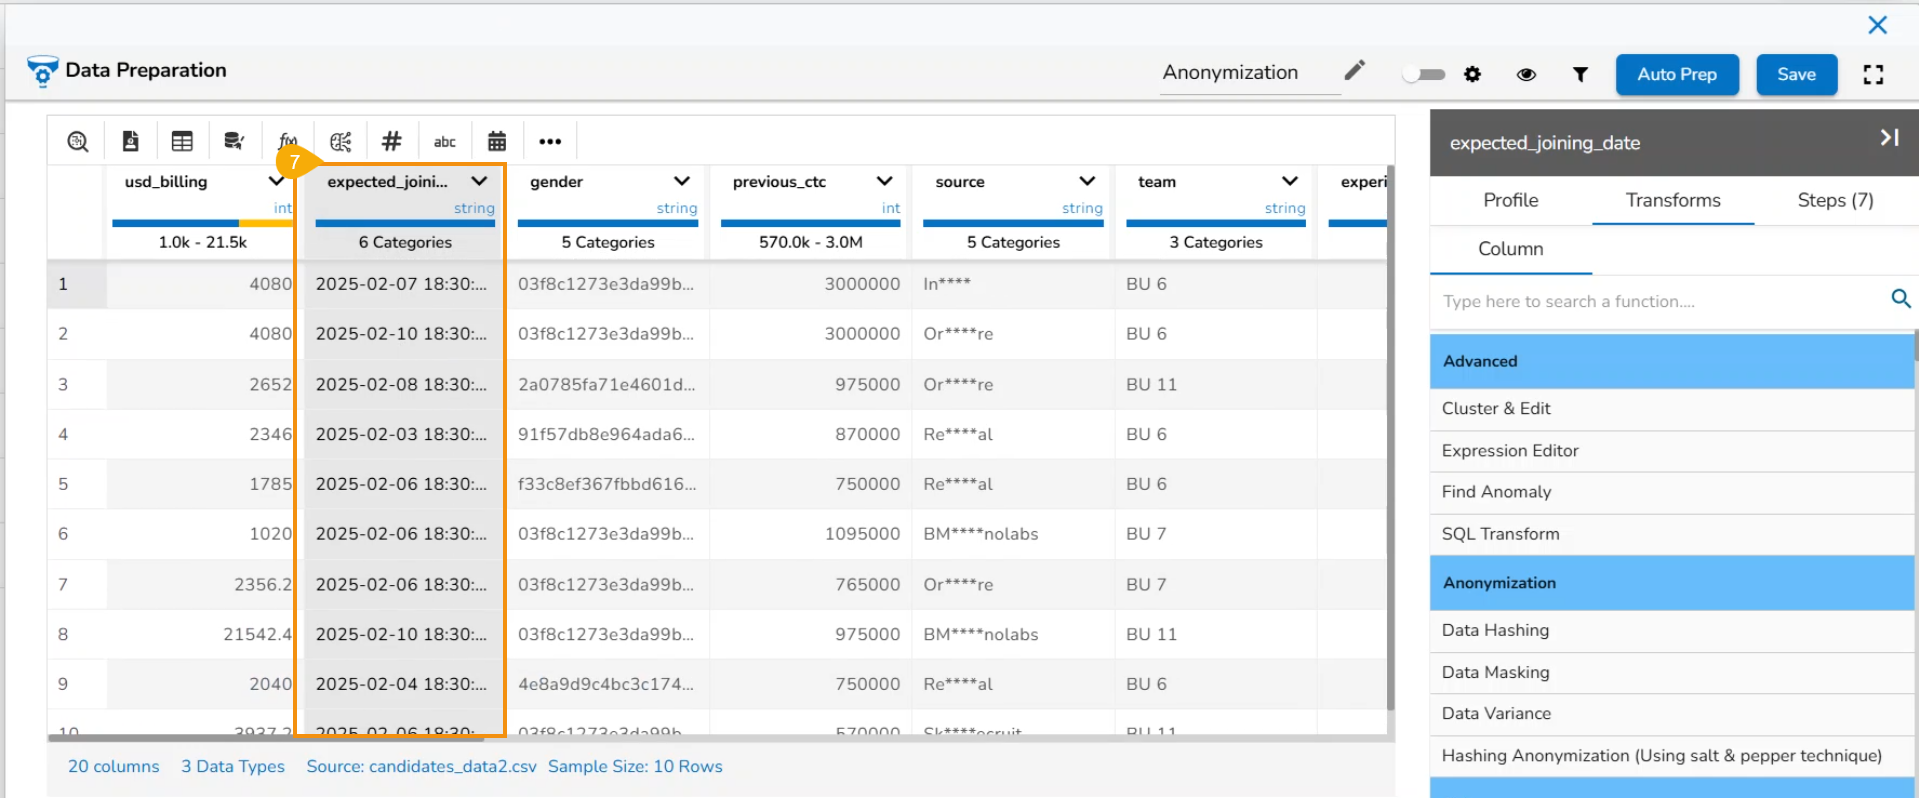
* Click the ***Submit*** option.
* The selected Date column will display random dates from the selected date range.
{% hint style="info" %}
*Please Note: The **Data Variance** transform also provides space to add description while configuring the transformation information.*
{% endhint %}
## **Hashing Anonymization (using Salt and Pepper technique)**
This transformation using the ***Salt and Pepper*** technique is a method to protect sensitive data by introducing random noise or fake data points into a dataset while preserving its statistical properties.
{% hint style="success" %}
*Check out the illustration on the Hashing Anonymization transform.*
{% endhint %}
{% embed url="" %}
Hasing Anonymization (using Salt and Pepper Technique)
{% endembed %}
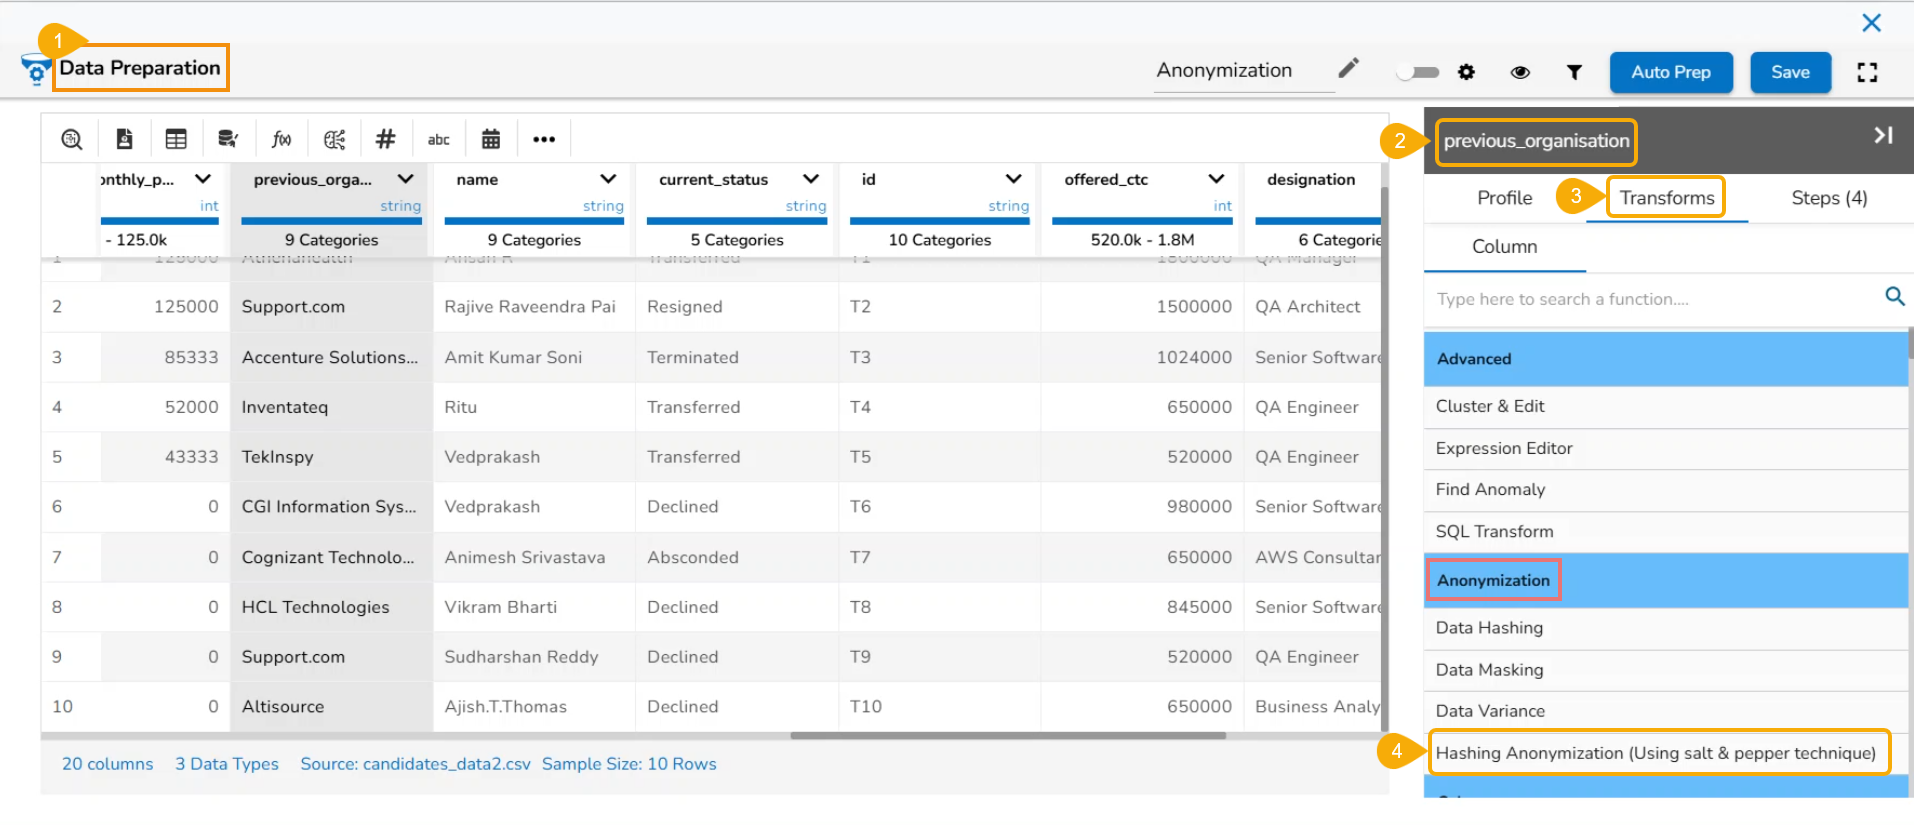
* Navigate to a dataset within the Data Preparation framework, and select a column.
* Select one column that needs to be protected.
* Select the ***Transforms*** tab.
* Select the ***Hashing Anonymization*** (using salt & pepper technique) transform from the ***Anonymization*** category.
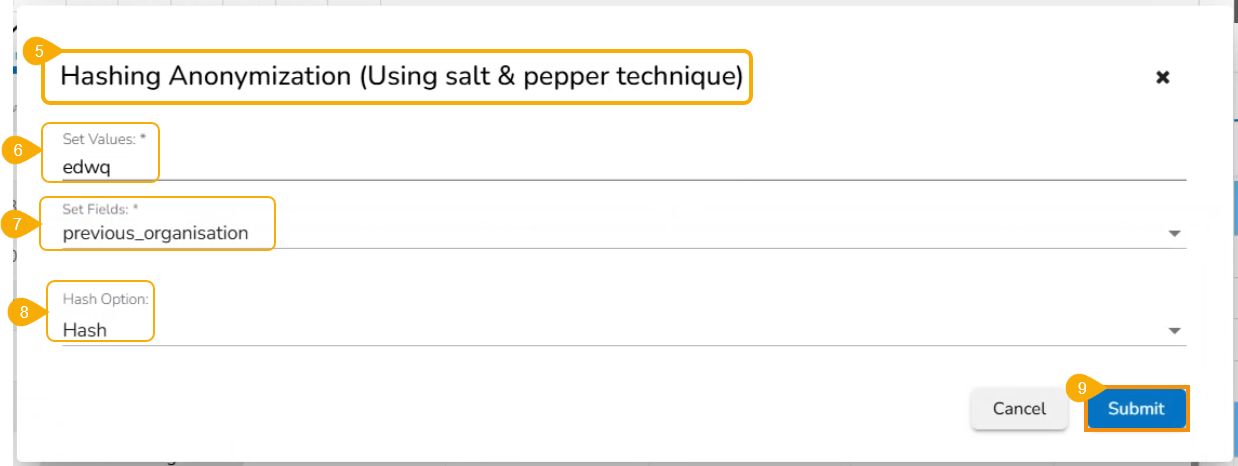
* The ***Hashing Anonymization (Using the salt & pepper technique)*** dialog window opens.
* Provide a value using the ***Set Values*** space.
* Select a field using the ***Set Fields*** drop-down menu.
* Select a hashing option using the ***Hash Option*** drop-down menu.
* Click the ***Submit*** option.
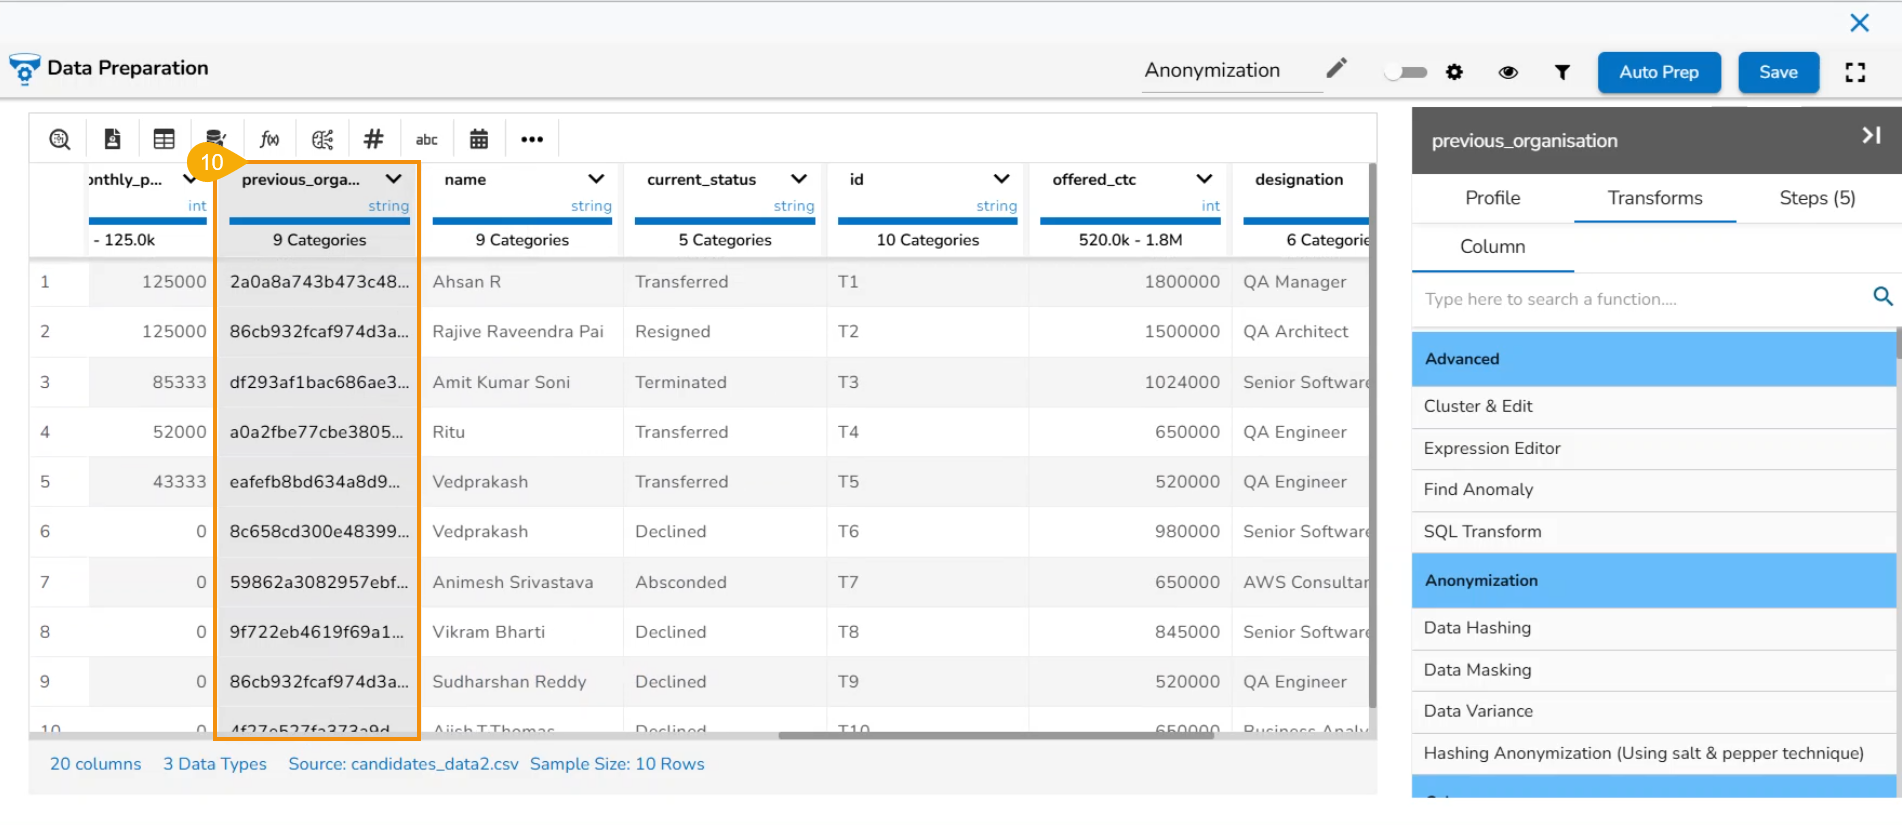
* The target column data will be displayed after applying the selected hashing option.
{% hint style="info" %} Please Note:
1. *The first user-provided value (entered in the "Set Values" field) acts as the pepper.*
2. *Selected column values will act as the salt.*
3. *The hash options displayed in the UI map to the following actual hashing algorithms on the backend:*
1. Sha1 (UI) → SHA-256 (Backend)
2. Sha2 (UI) → SHA-512 (Backend)
3. Hash (UI) → MD-5 (Backend)
4. MD5 (UI) → MD-5 (Backend)
{% endhint %}