> For the complete documentation index, see [llms.txt](https://docs.bdb.ai/administrative-settings-5/llms.txt). Markdown versions of documentation pages are available by appending `.md` to page URLs; this page is available as [Markdown](https://docs.bdb.ai/administrative-settings-5/admin-panel-options/authentication/ca-ppm-configuration.md).
# CA PPM Configuration
This section explains how to configure Clarity.
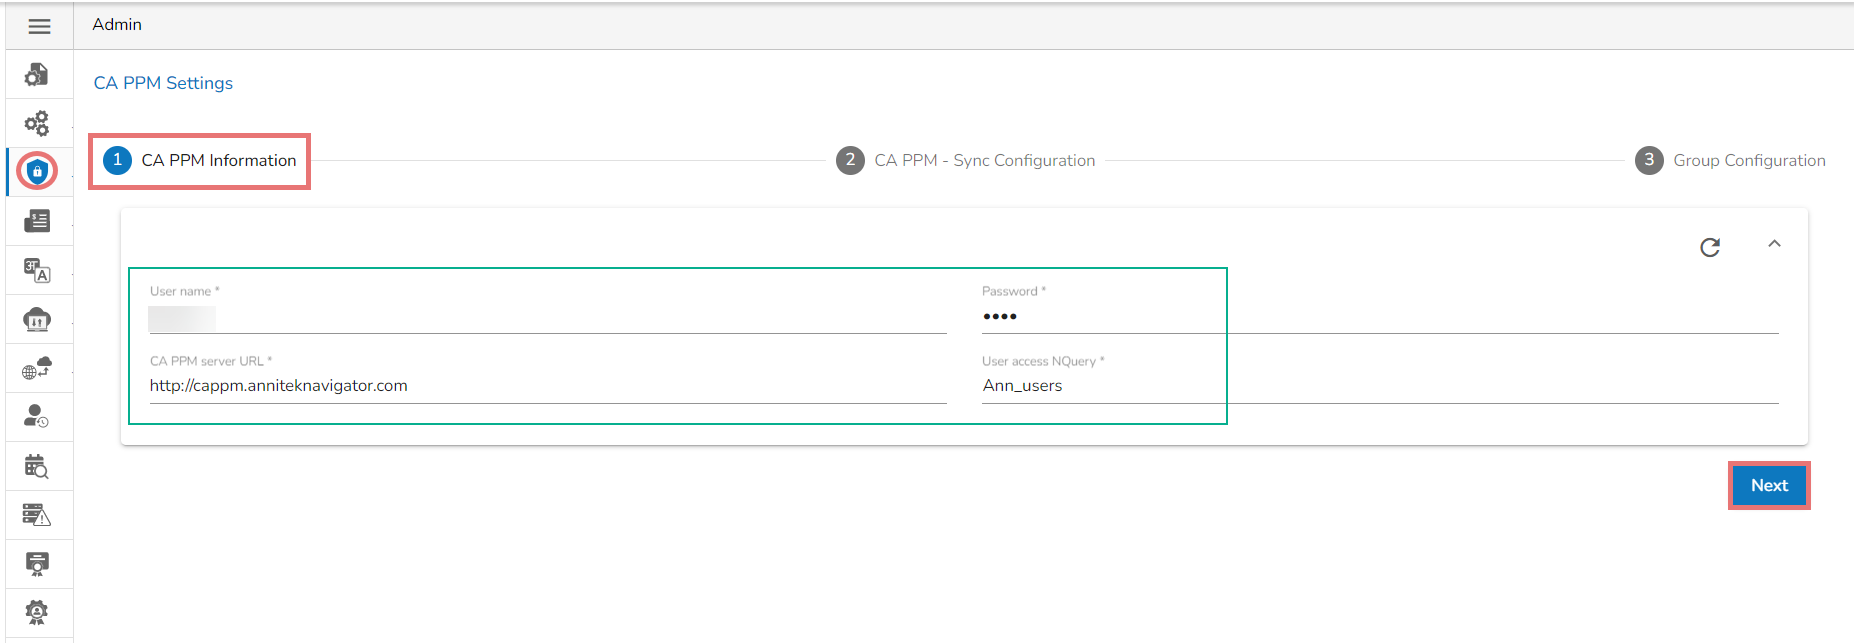
* Select the **CAPPM Configuration** using the **Authentication** Admin option.
* A new page opens with 3 steps mentioned on it.
* The fields for CA PPM Settings get displayed by default.
* Provide a ***Username*** of a ***CAPPM*** account**.**
* Enter the valid ***Password*** for the selected CAPPM account.
* Enter the CAPPM server URL**.**
* Provide the query name that fetches a list of the Clarity users in the ***User access NQuey*** field.
* Click the **Next** option to proceed.
* A success message appears, and the administrator gets directed to the CA PPM Sync Configuration tab.
* The ***CA PPM Sync Configuration*** tab opens, displaying the Clarity User list.
* Select a user.
* Click the ***Next*** option.
* A success message appears to confirm the user list update and the administrator gets directed to the ***Group Configuration*** tab.
* Select a clarity user from the ***Group List*** and add to the ***Selected Clarity User list***.
* Select clarity user from the List.
* Click the **Save** option.
{% hint style="info" %}
*Please Note:*
* *Click the **Clear all setting****icon to erase the entered CA PPM Information.*
* *Click the **Back** option to go back on the CA PPM Settings page.*
{% endhint %}