This page is for the Advanced configuration of the Data Pipeline. The following list of the configurations get displayed on the Settings Page:
Logger
Default Configuration
System Component Status
Data Sync
Job BaseInfo
List Components
Logger
This gives the info and config details of the Kafka topic that is set for logging.
Logger Configuration
Default Configuration
This is for setting the Default component configuration for Low, Medium and, High configuration Pipelines.
Please Note:The Non-Spark means Docker under the Default Configuration section.
System Component Status
The SystemComponent Status page under the Settings option gives us monitoring capability on the health of the System Components.
System Component Status
The System Component Status page presents the following details for the System Components:
Name: Name of the system component.
Status: Pod status, indicated by green color if up and red color if not.
Created At: Date and time when the Pod was created.
Age: Age of the System pod.
Version: Version of the system components.
Restarts: Number of restarts.
CPU: Used and requested CPU amount in cores.
Memory: Used and requested Memory amount in MB.
Please Note: The system components should be up for proper functionality of the Pipeline module.
Data Sync
Data Sync in Settings is given to globally configure the Data Sync feature. This way the user can enable a DB connection and use the same connection in the pipeline workflow without using any extra resources.
Data Sync page under the Pipeline Settings option
Please Note:The supported drivers are:
MongoDB
Postgres
MySQL
MSSQL
Oracle
ClickHouse
Snowflake
Redshift
Creating a new Data Sync Connection:
Creating a new data sync connection
Go to the Settings page.
Click the Data Sync option.
The Data Sync page opens.
Click the Plus icon.
The Create Data Sync Connection dialog box appears.
Specify all the required connection details.
Click the Save option.
Please Note:
Please use TCP Port If you are using ClickHouse as a Driver in Data Sync.
A success notification message appears on the top stating that Data Sync Setting Creating Successfully.
Enable the action button to activate the Data Sync connection.
Activating the Data Sync Connection
Edit Setting
Go to the Settings page.
Click the Data Sync option.
The DB Sync Settings page opens.
Click the Edit Setting icon.
The Edit Settings dialog box opens.
Edit the connection details if required.
Click the Update option.
Edit Data Sync
Disconnecting Data Sync
Go to the Settings page.
Click the Data Sync option.
The Data Sync Settings page opens.
Click on the Disconnect button to disconnect.
The Disconnect Setting confirmation dialog box appears.
Click the DISCONNECT option.
A success notification message appears on the top when DB Sync gets disconnected.
Disconnecting Data Sync
Data Sync in a Pipeline
All the Pipelines containing the DB Sync Event component get listed under the Pipeline using DB Sync section.
The user can see the following information:
Name: Name of the pipeline where Data Sync is used.
Running status: This indicates if the pipeline is active or deactivated.
Actions: The user will be able to view the pipeline where Data Sync is used.
Pipeline using data sync
Job BaseInfo
There are two types of Jobs used in Pipeline module:
Python Job
Spark Job
PySpark Job
These two types of are configured in the Job BaseInfo page under the settings menu.
Please Note:The Job BaseInfo has been created from the admin side, and the user is not supposed to create it in the settings menu.
Steps to create new Job BaseInfo:
Click on the Plus icon on the Job BaseInfo details page as shown in the below image.
Once clicked, it will redirect to the page for creating a new Job BaseInfo and the user will be asked to fill details in the following Tabs:
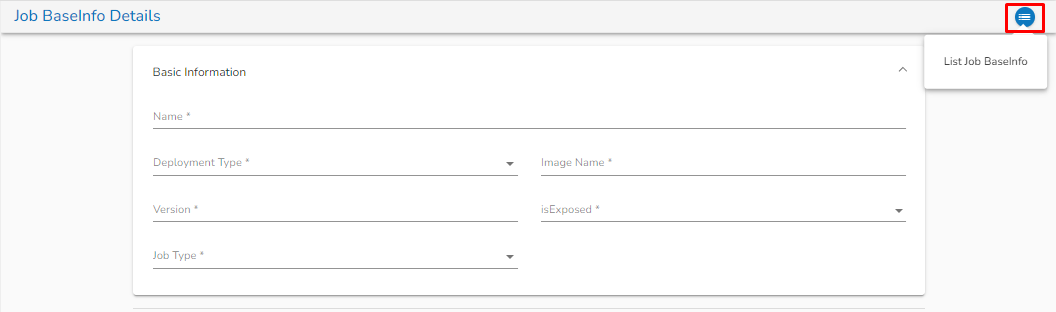
Basic Information Tab:
Basic Information Tab while Creating Job BaseInfo
Name: Provide a Name for the Job BaseInfo.
Deployment type: Select the Deployment type from the drop-down.
Image Name: Enter the Image name for the Job BaseInfo.
Version: Specify the version.
isExposed: This option will be automatically filled as True once the deployment type is selected
Job type: Select the job type from the drop down.
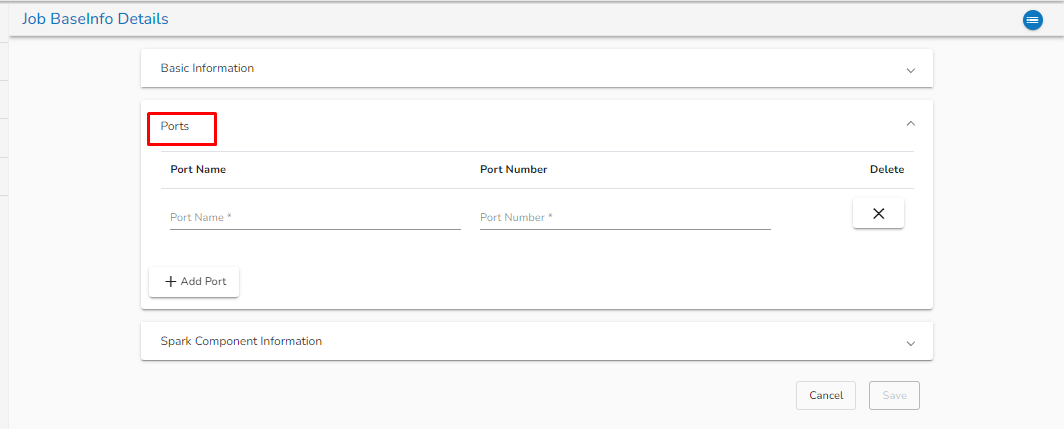
Ports Tab:
Ports Tab
Port Name: Enter the Port name.
Port Number: Enter the Port number.
Delete: The user can delete the port details by clicking on this option.
Add Port: The user can add the Port by clicking on this option.
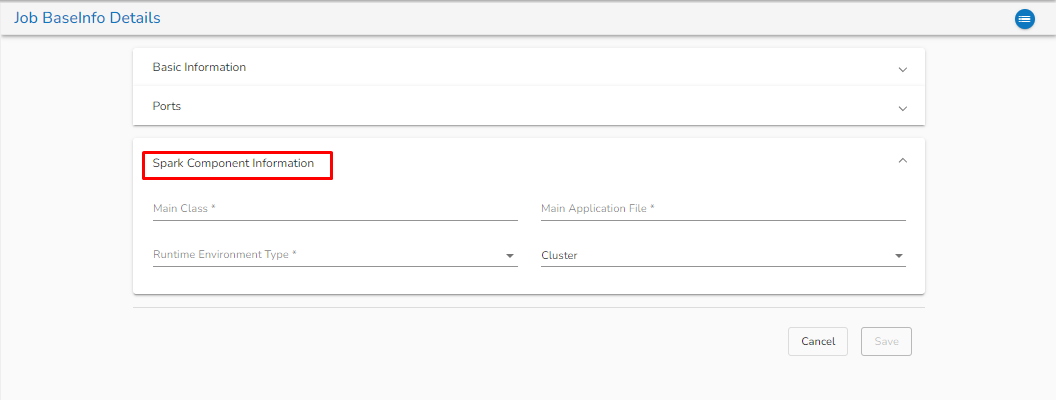
Spark component information:
Main class: Enter the Main class for creating the Job BaseInfo.
Main application file: Enter the main application file.
Runtime Environment Type: Select from the drop-down. There are three options available: Scala, Python and R.
Now, click on Save option to create the Job BaseInfo.
Once the Job BaseInfo is created, the user can redirect to the List Job BaseInfo page by clicking on the List Job BaseInfo icon as shown in the below image:
List Job BaseInfo Page:
This Page will show the list of all created Job BaseInfo as shown in the below image:
The Name column represents the Name of the Job BaseInfo.
The Status column will display the status of the Job BaseInfo.
The Version column displays the version of the Job BaseInfo.
The user can see the details of Job Baseinfo by clicking on View icon . Once clicked on view icon, the user can see the details of Job BaseInfo which were provide at the time of creating of that Job BaseInfo.
The user can delete the Job BaseInfo by clicking on delete icon.
List Components
On this page, all the components that are being used in the pipeline are listed.
Please Note:Please go through the below given walk through for the list components page.
List Component Page
There is a provision to create a component. At the top right corner, we have a Create Component icon.Clicking on this takes you to a different page where you can configure your component.
Creating a system Component
Check out the given steps in the below-shared walk-through to configure the custom component.
Creating a custom component
Please Note: You should have your own docker image created and stored in the docker repository where all other pipeline components are present. Little Help from DevOps will be required to push those images.


 on the Job BaseInfo details page as shown in the below image.


 . Once clicked on view icon, the user can see the details of Job BaseInfo which were provide at the time of creating of that Job BaseInfo.
 icon.
icon.