Create a Report with Data Preparation- Partly from Data Center
The page explains Report creation based on a Data Store (selected from the Data Center) that contains Data Preparation steps.
Check out the given walk-through on a Report creation workflow with a Data Store that contains saved Data Preparation steps in it.
Please follow the below-given steps to create a new Report based on a Data Sandbox file with Data Preparation Steps:
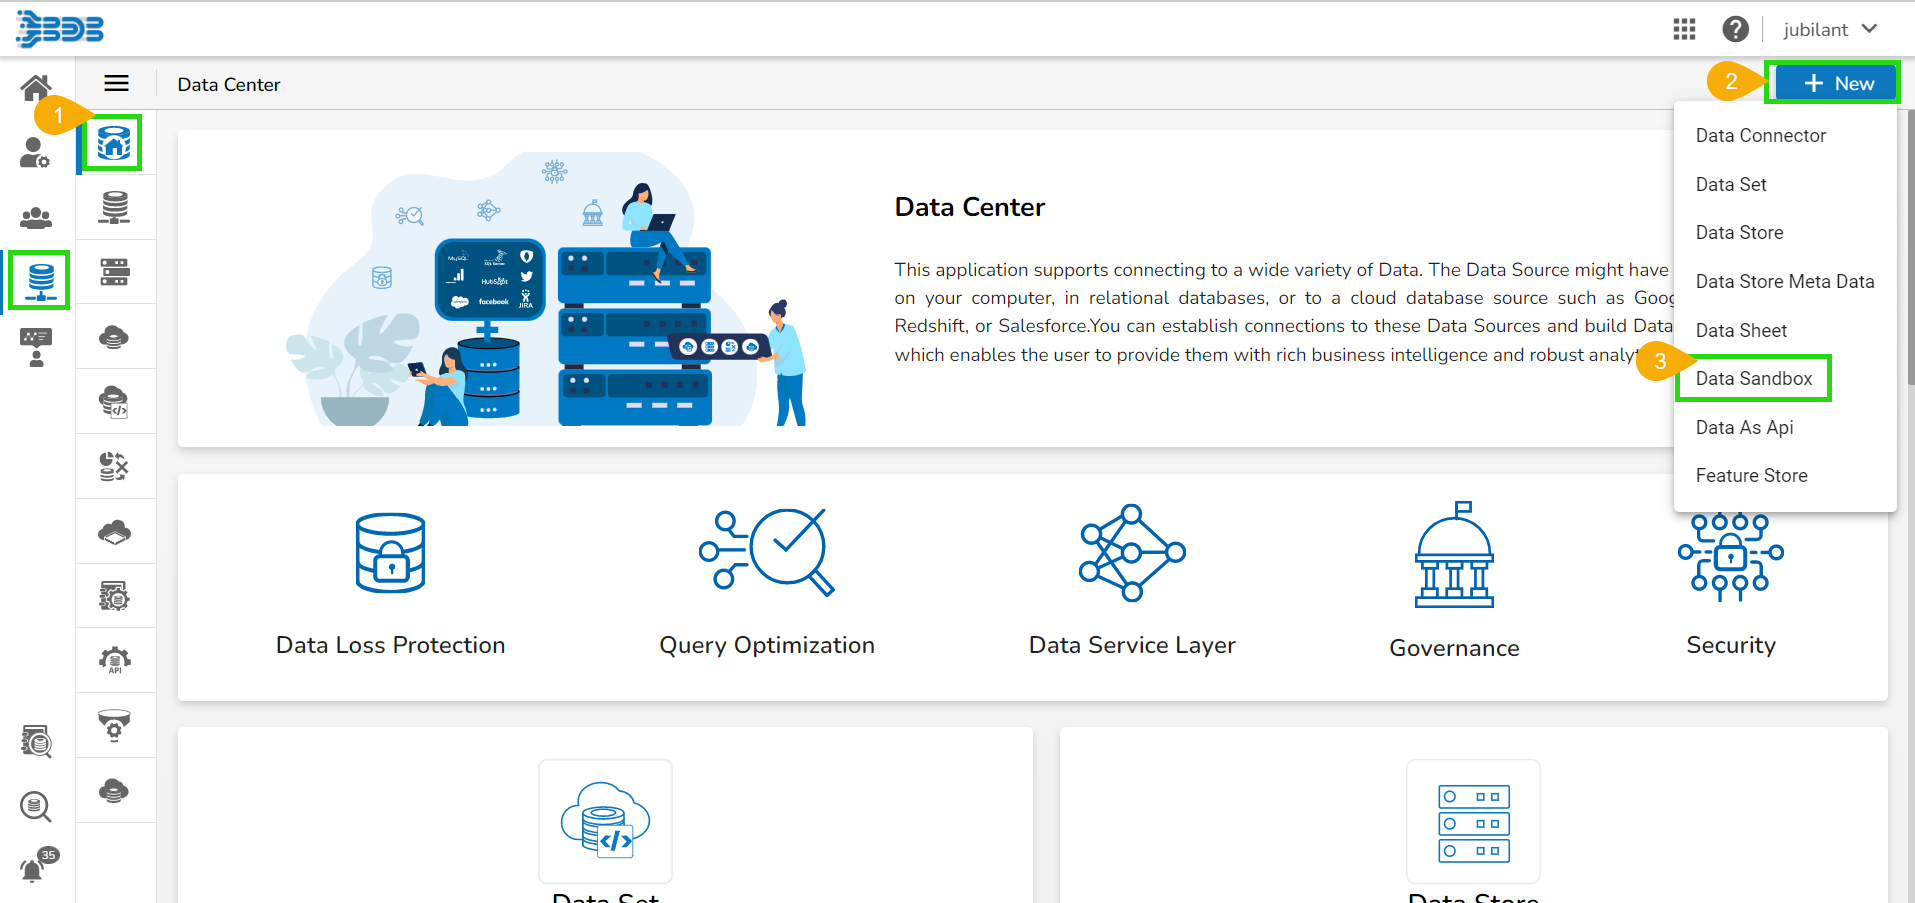
Go to the Data Center homepage.
Click on the New tab.
Click the Data Sandbox option to upload a file to Data Sandbox.

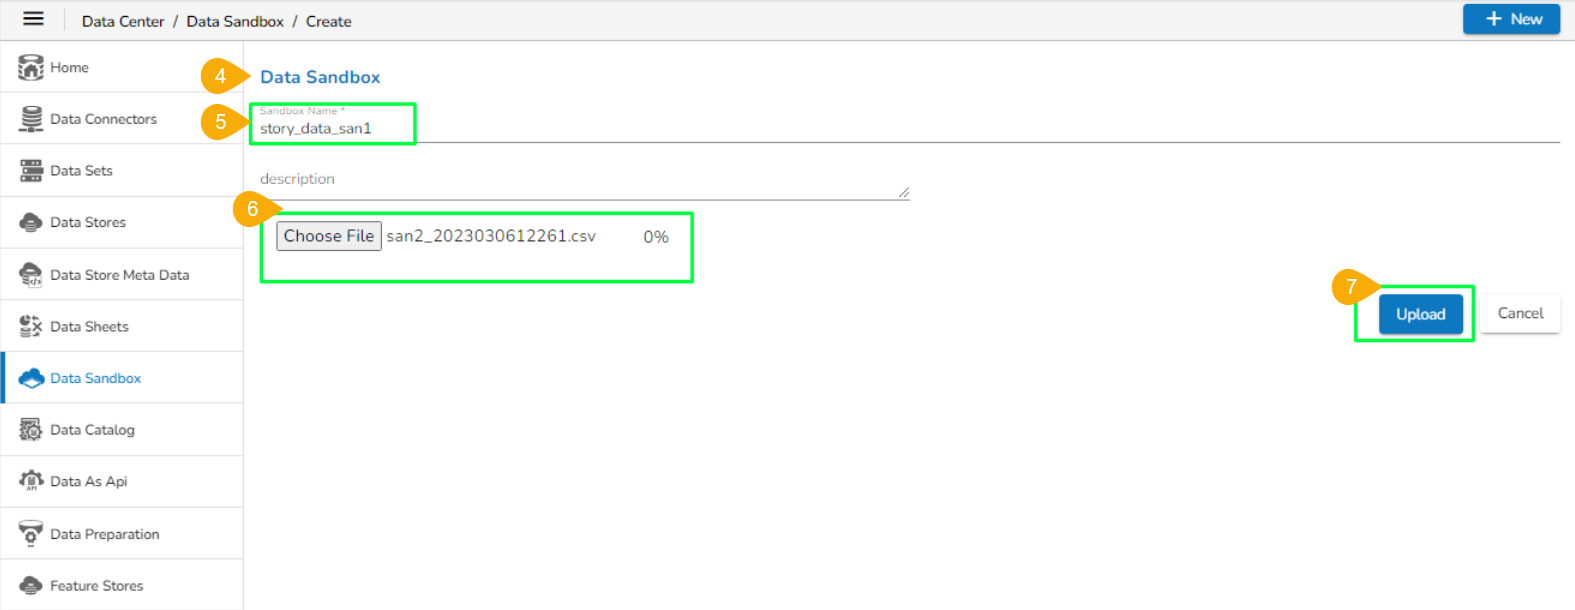
The Data Sandbox form opens for the user.
Provide a name to the Data Sandbox.
Choose a file from the system.
Click the Upload option.

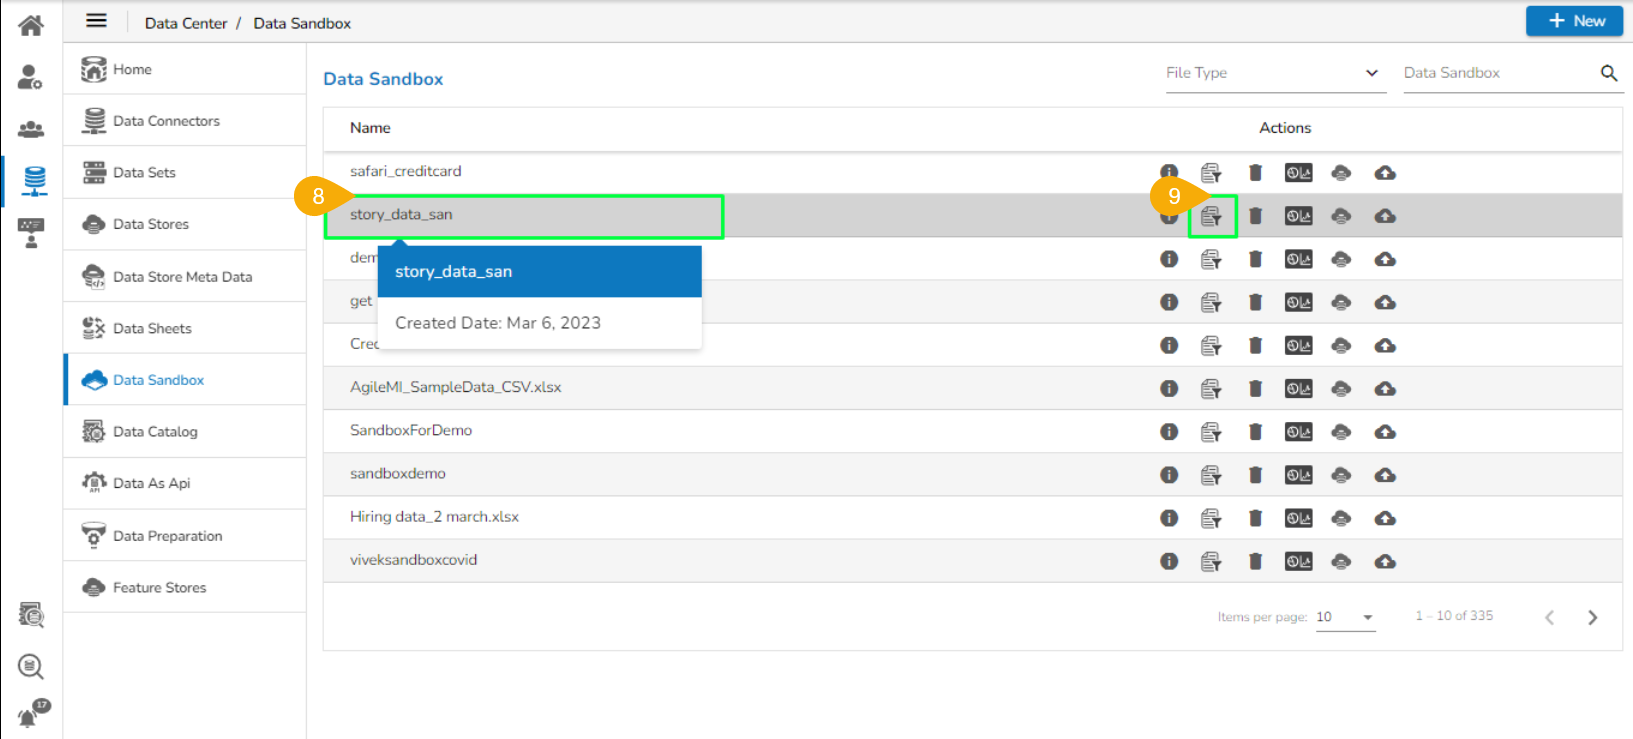
Now, the uploaded file gets listed on the Data Sandbox List page.
Click on the Data Preparation icon to create a Data Preparation and make some transformations on the uploaded file.

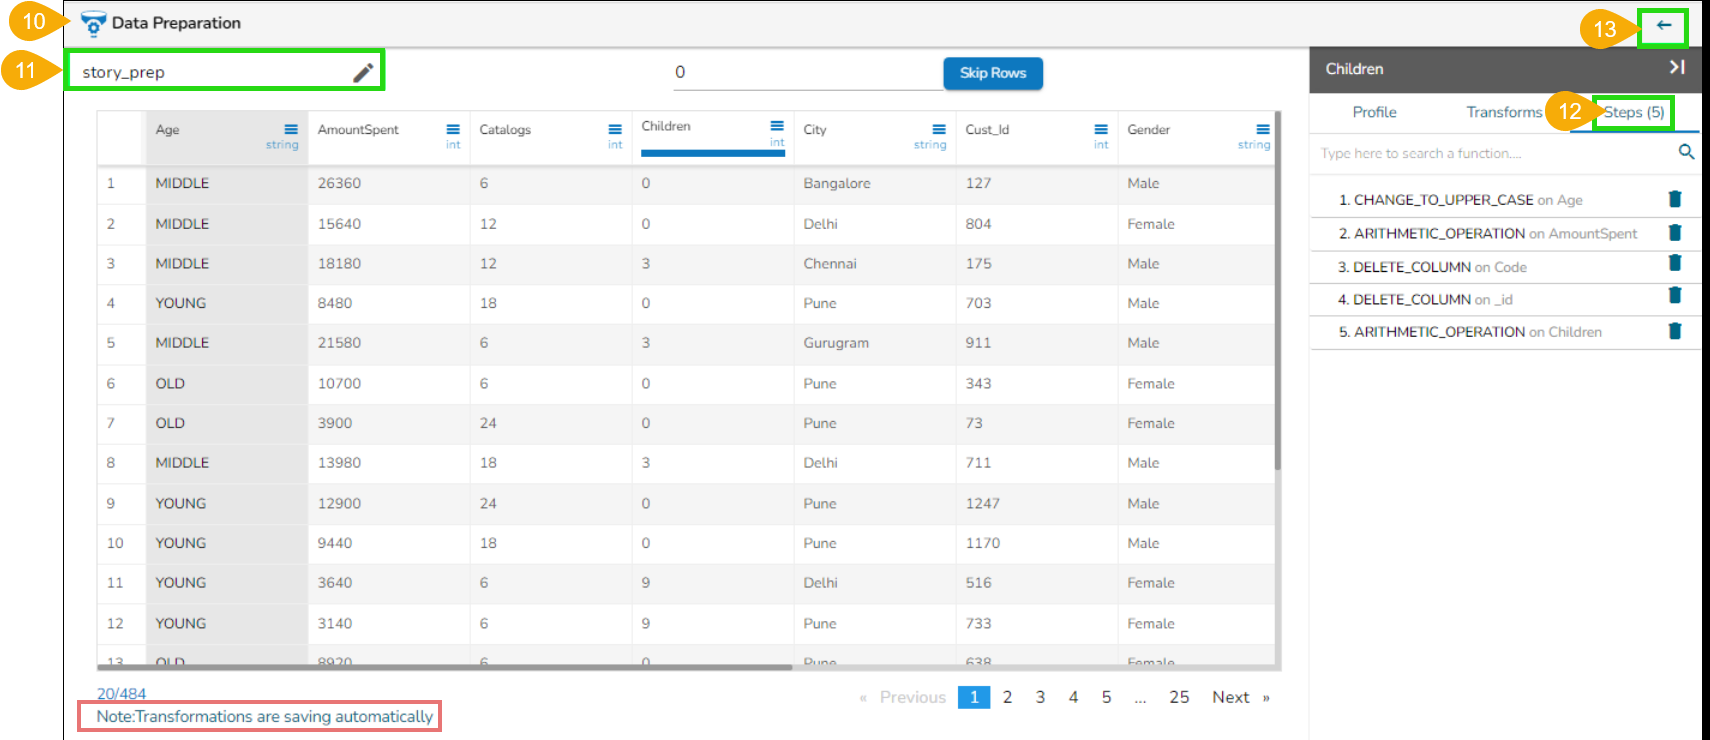
The user gets redirected to the Data Preparation module.
Provide a name to the Data Preparation.
Apply various transformations as per the requirements as mentioned in the given image under the Steps tab.
Click on the Back icon suggested as arrow icon to auto-save the Data Preparation.

Open the Data Center module.
Navigate to the Data Sandbox List page.
Select a Data Sandbox from the list.
Click the Data Preparation icon.

The existing Preparation List for the selected Data Sandbox appears.
Select the Data Preparation from the list.
Click the View/Edit option for that Data Preparation.

The selected Data Preparation entry opens in the Data Preparation frame work. Click the Steps tab to see the applied preparation steps (In the following image the transforms part of the Auto Prep are applied, so they are counted as a single step only).

Click the Create Datastore option for the same Sandbox file that has been saved with the Data Preparation steps.

The Create Data Store dialog box opens.
Provide the following information:
Datastore name
Description
Data Preparation: Select the Data Preparation that appears in the drop-down menu by using the check box.
Click the Validate option.

A notification appears to inform the users that the Data Preparation is applied and the unsupported headers are modified.
Click the Save option.

A notification message appears stating that the Datastore creation has been initiated and it may take a few minutes to create the Data Store.

The Datastore will be created successfully added to the Data Stores list.

Click the Report icon (You may choose any way to initiate the Report creation).
The Create New Report dialog box opens.
Provide a name for the Report.
Description of the Report.
Select the Select Existing Datastore option to begin with the Report creation.

Select the Datastore from the list that has been recently created from the Sandbox list page.
Click the Create Story option to create a new story.

The user gets redirected to the Design canvas of the Report module with the selected Data Store reflecting the Dimensions and Measures.

Drag and drop the Dimensions and Measures to the Dimensions/Measures tab to create a View.
Click the Save icon for the View.

A notification message appears.
The View gets saved to the final screen of the Report.

Last updated