Creating Range
This section provides steps to create a range using the calculated field option.
Check out the walk-through on creating a Range using the Create Formula window.
The user can create a new calculated field in the selected data store using the Range tab.
Navigate to the Design Workspace.
Click the Formula Field Editor icon.
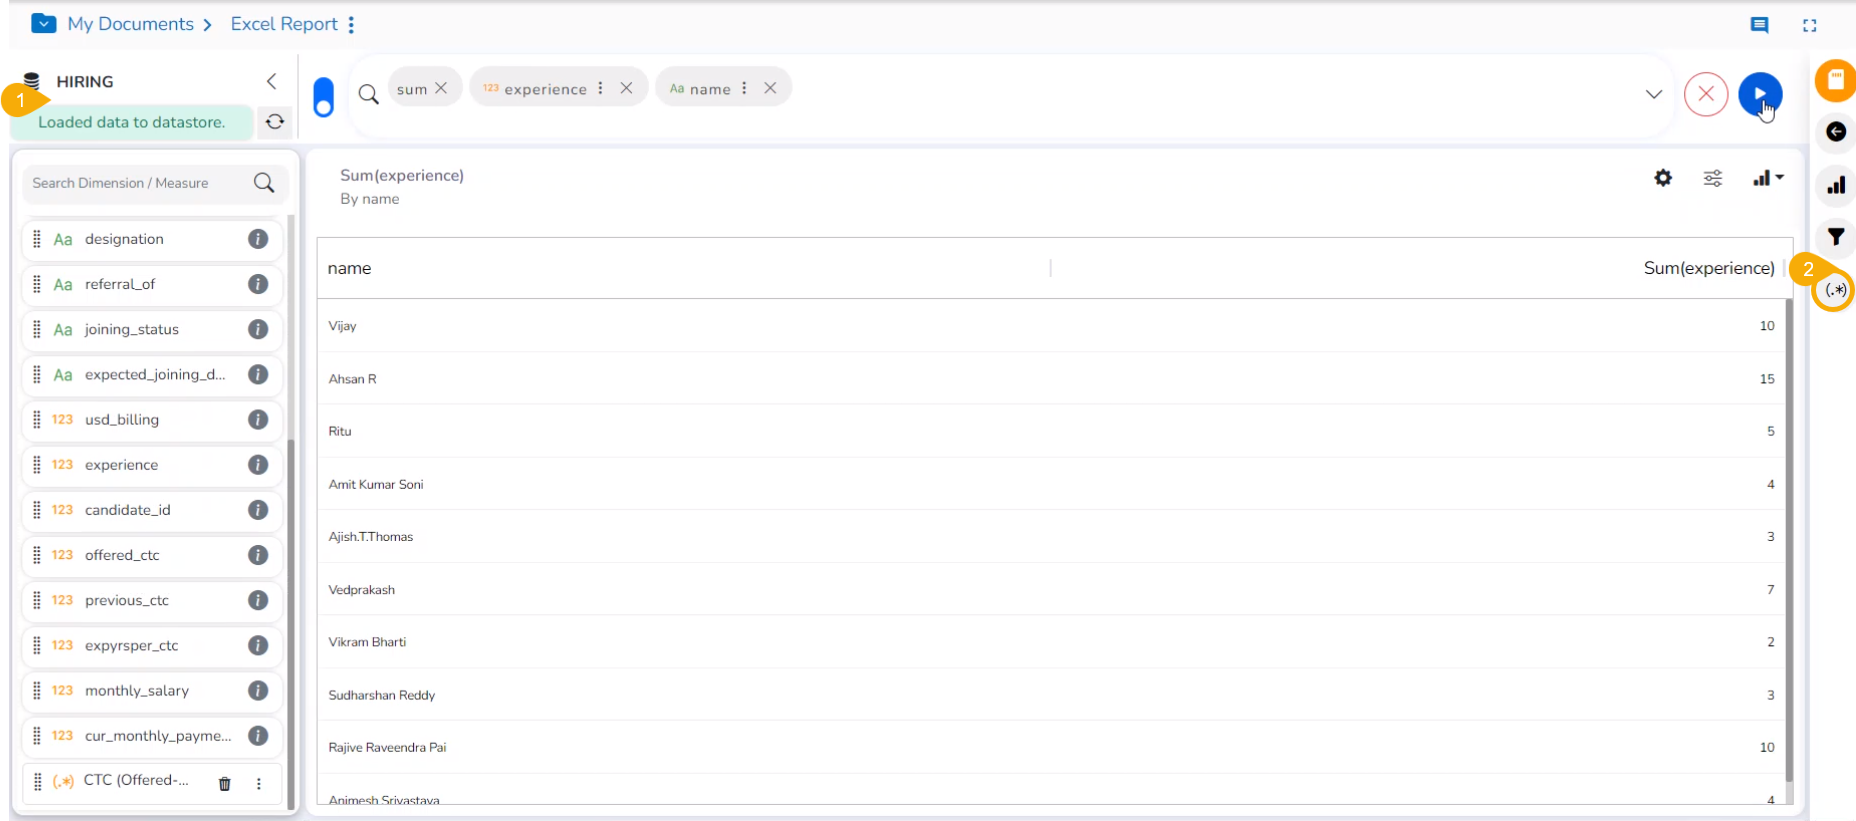
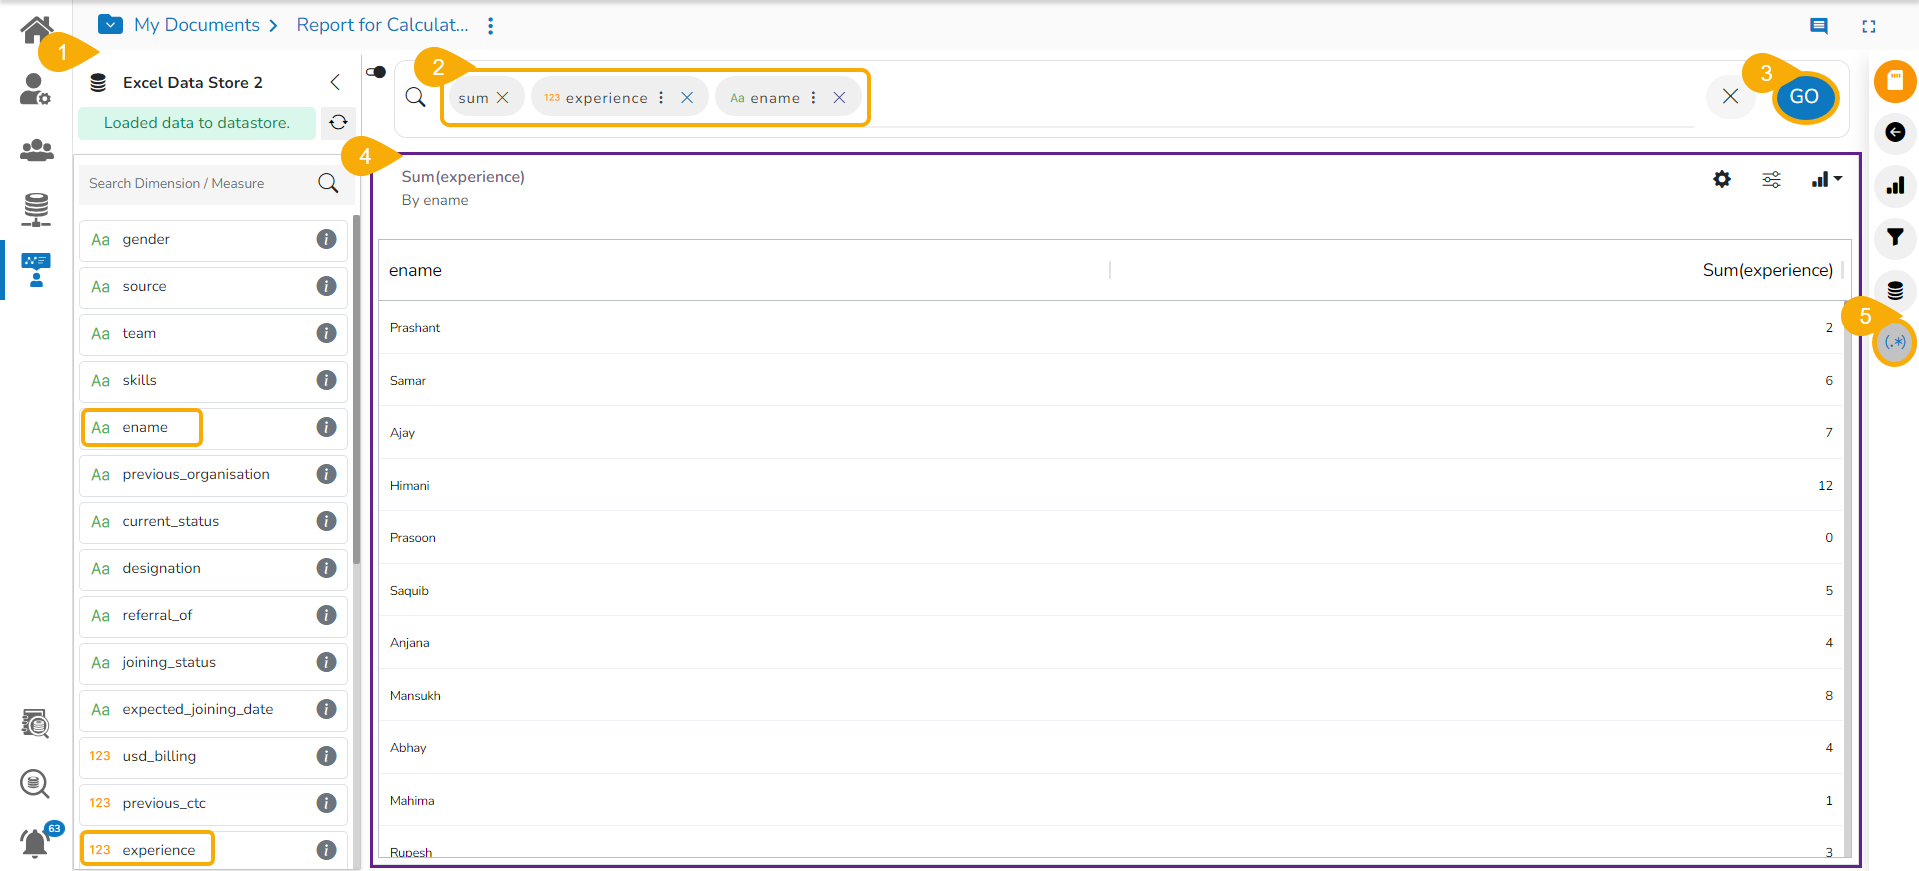
The Create Calculated Field window opens.
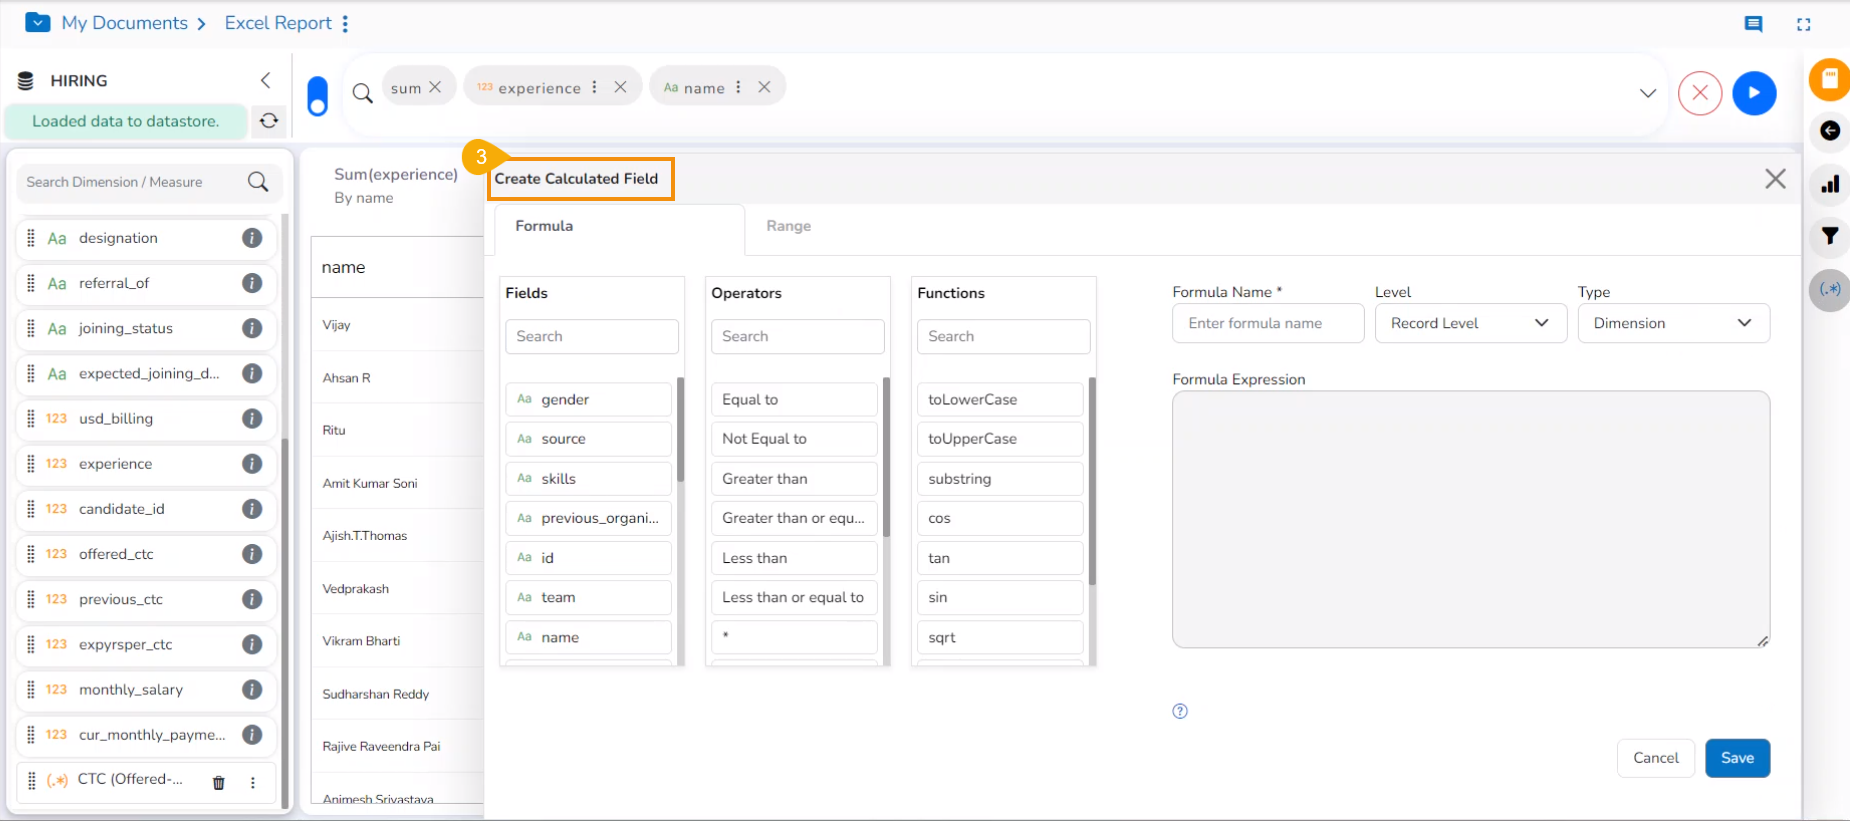
Select the Range tab.
Name: Provide a title for the formula field.
Measure: Select a Measure field using the drop-down menu.
Click the ADD ROW option.
Provide the following information to create a range:
Name: Provide a name for the defined range.
From: Set a minimum value to define a specific range.
To: Set a maximum value to define a range.
Click the Add icon.
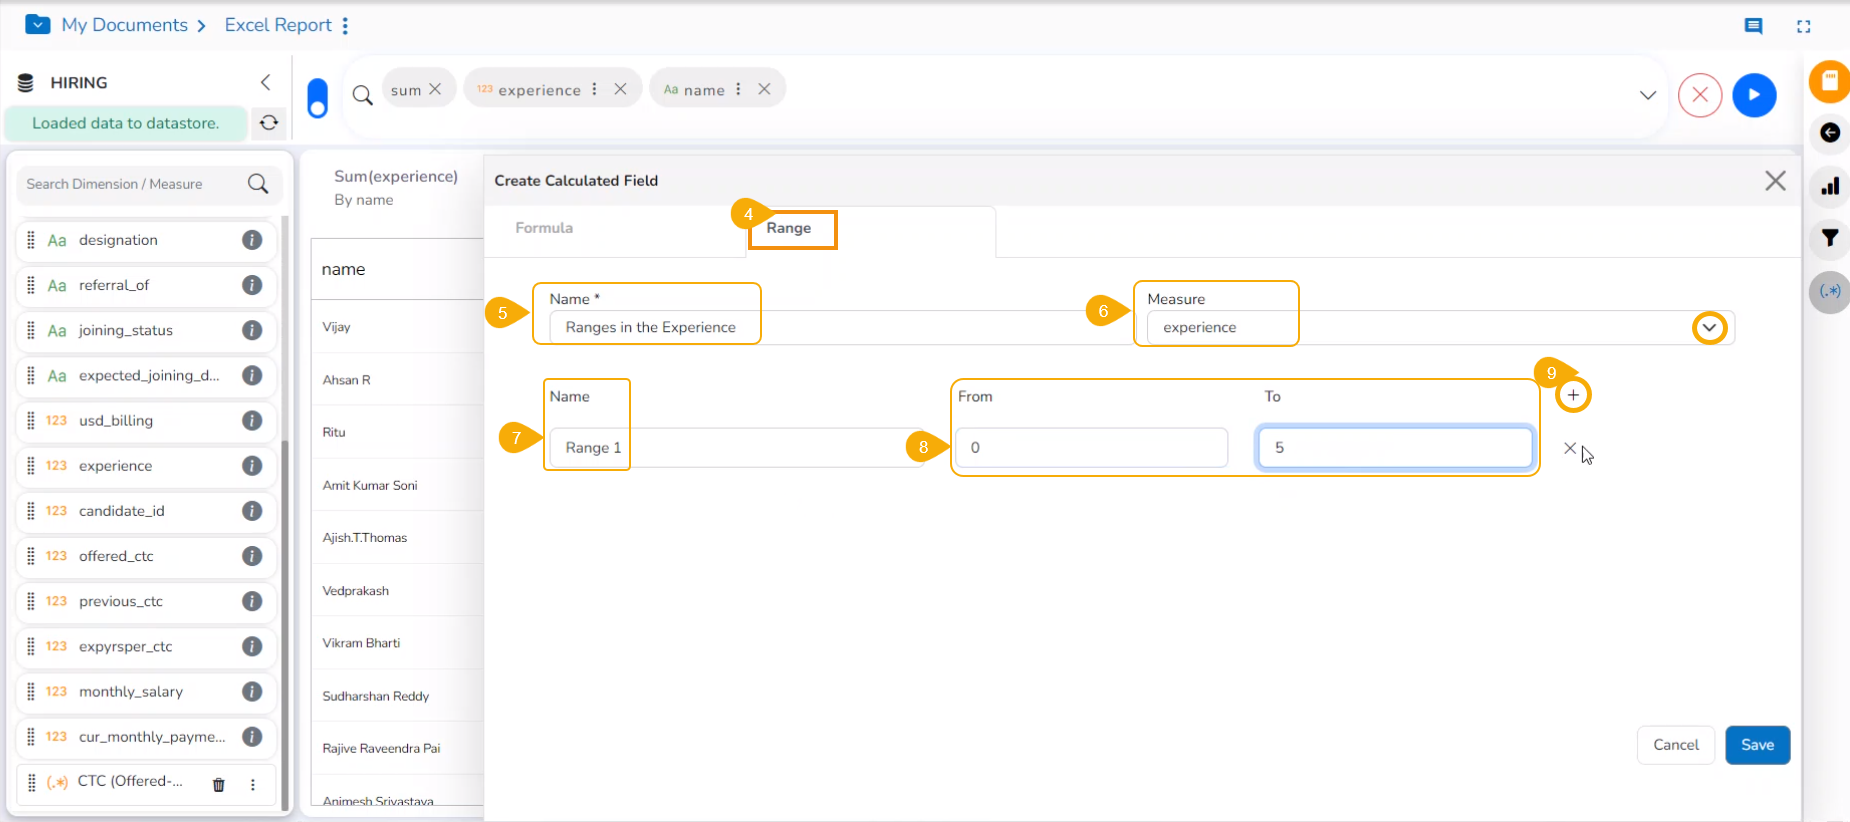
A new field gets added to create a new Range.
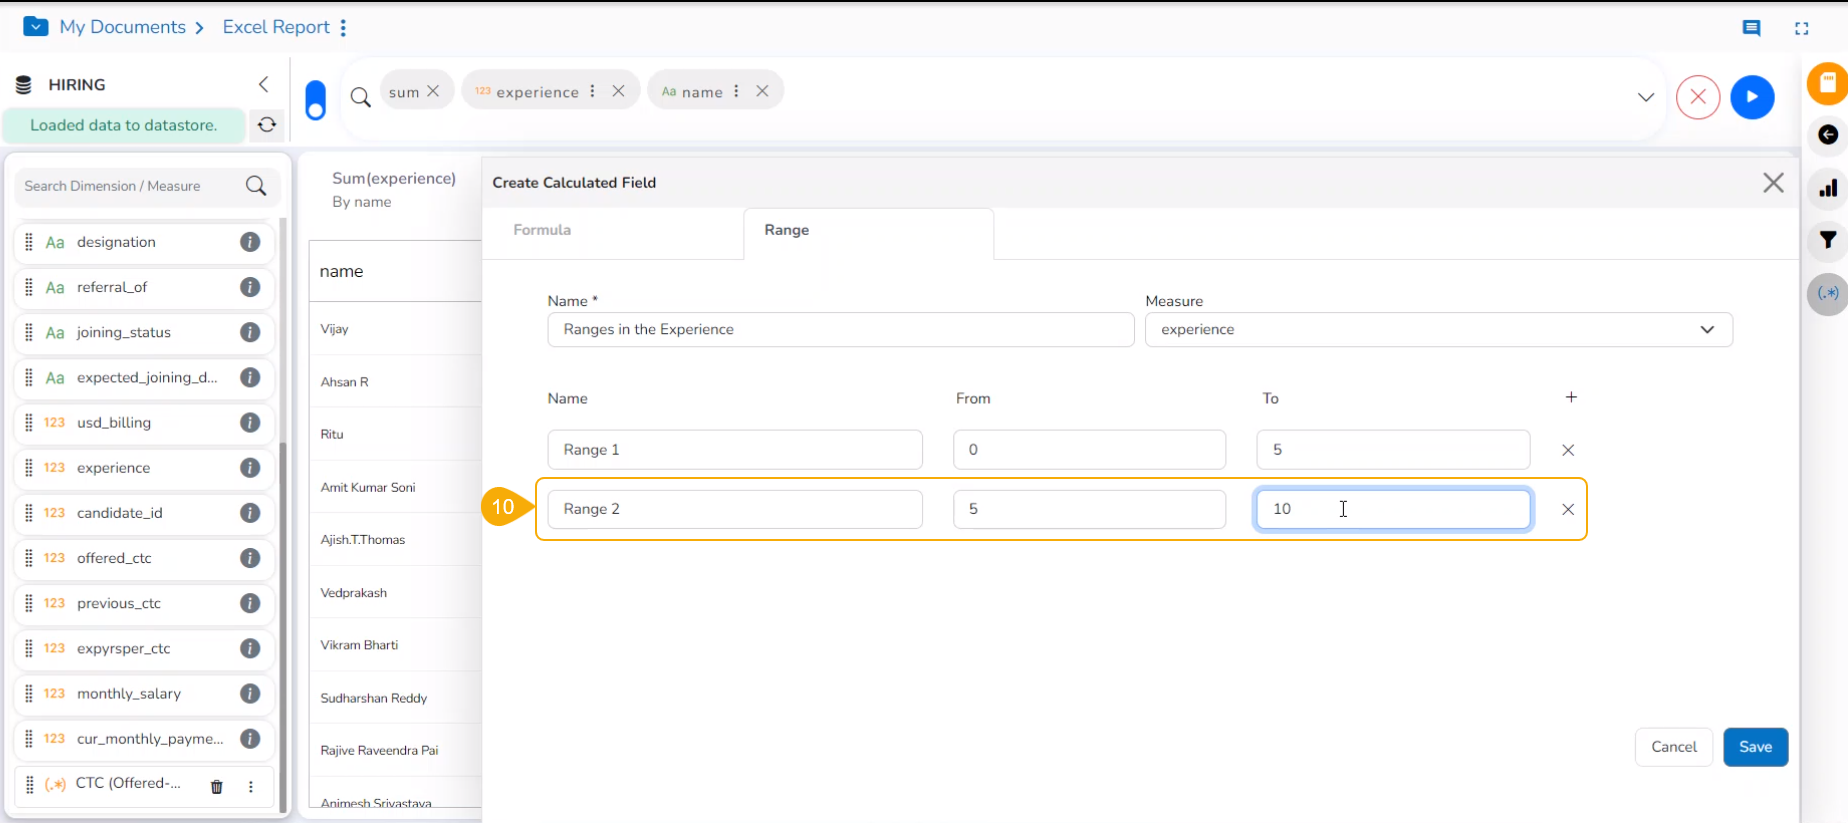
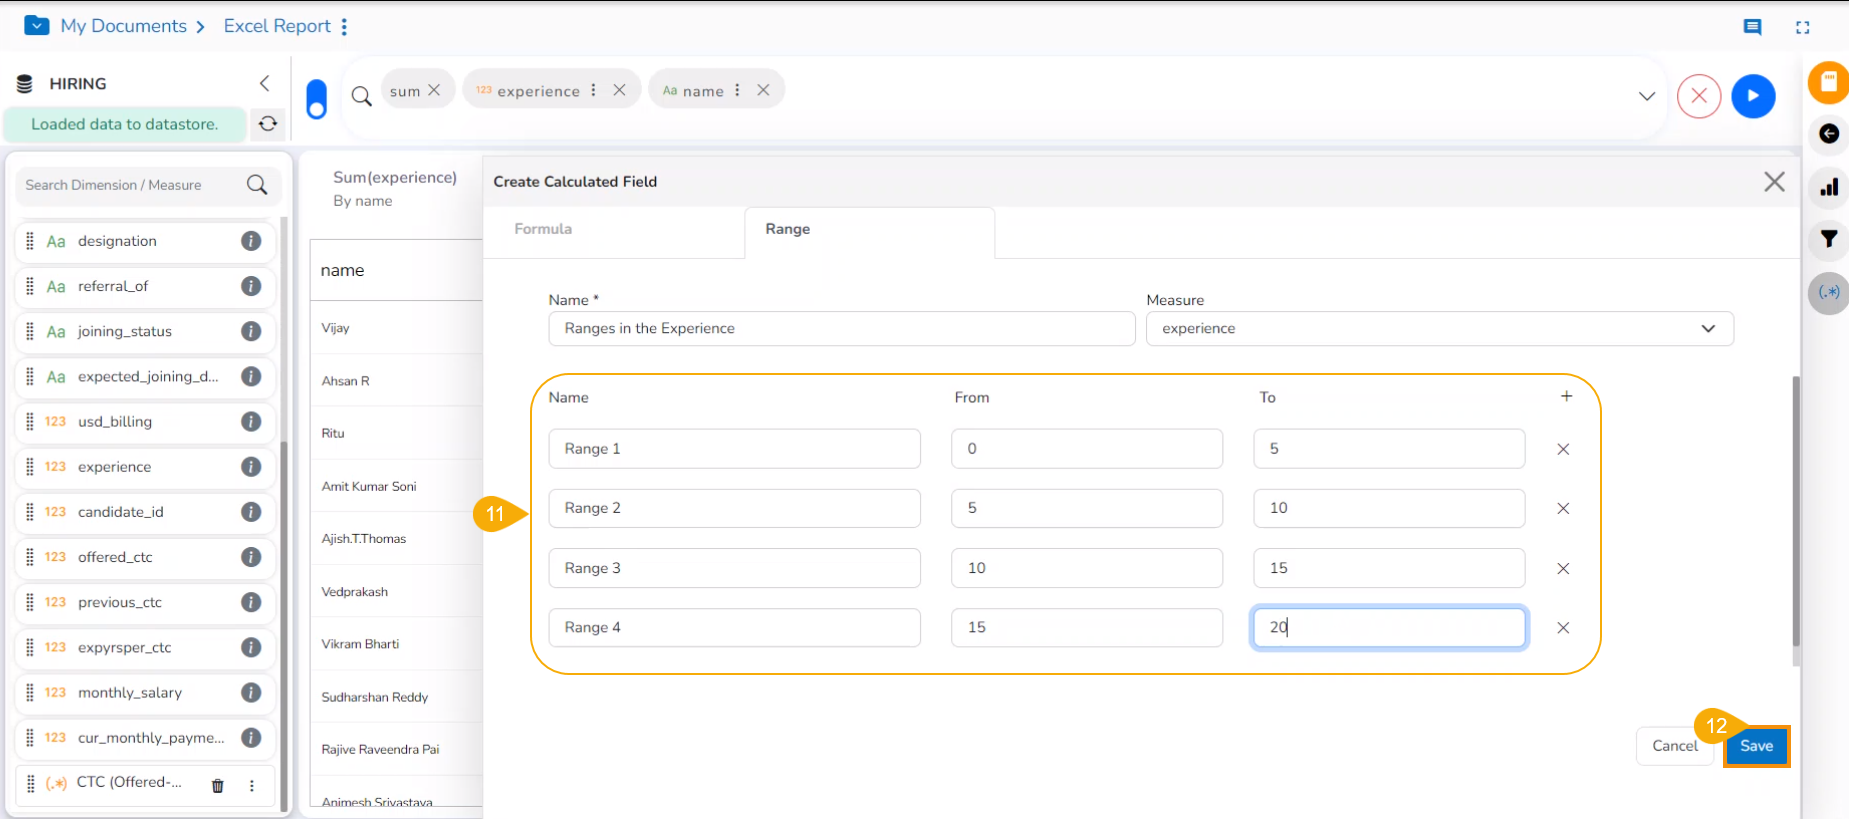
You may insert multiple ranges and define them.
Click the Save option.
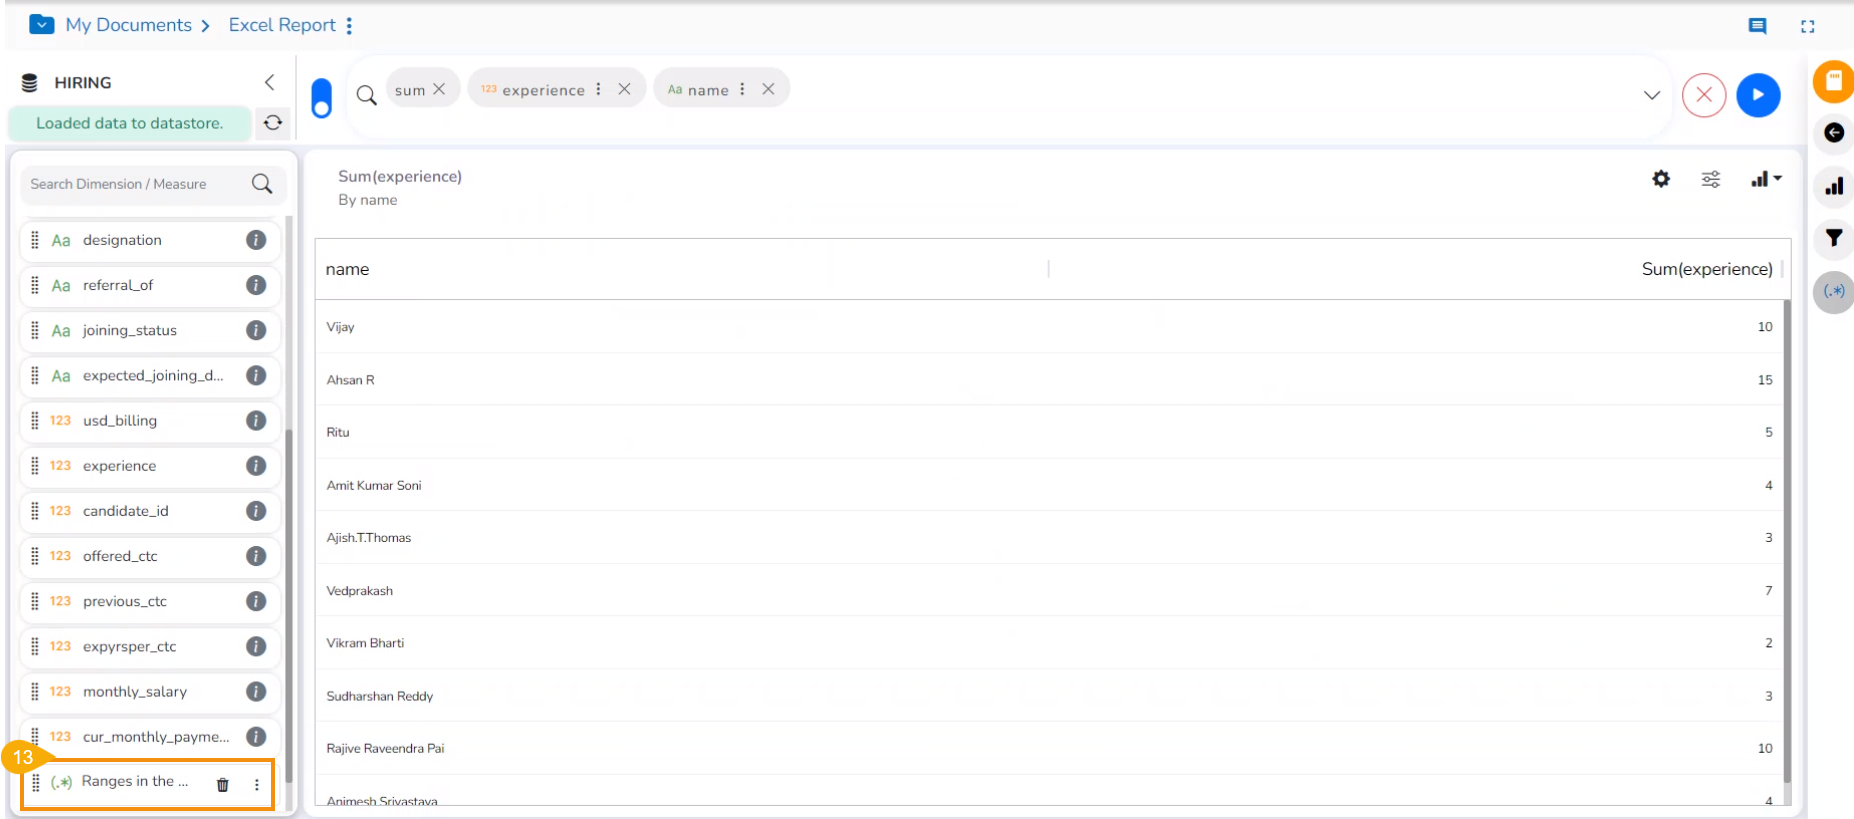
A new calculated field gets added to the selected Data Store.
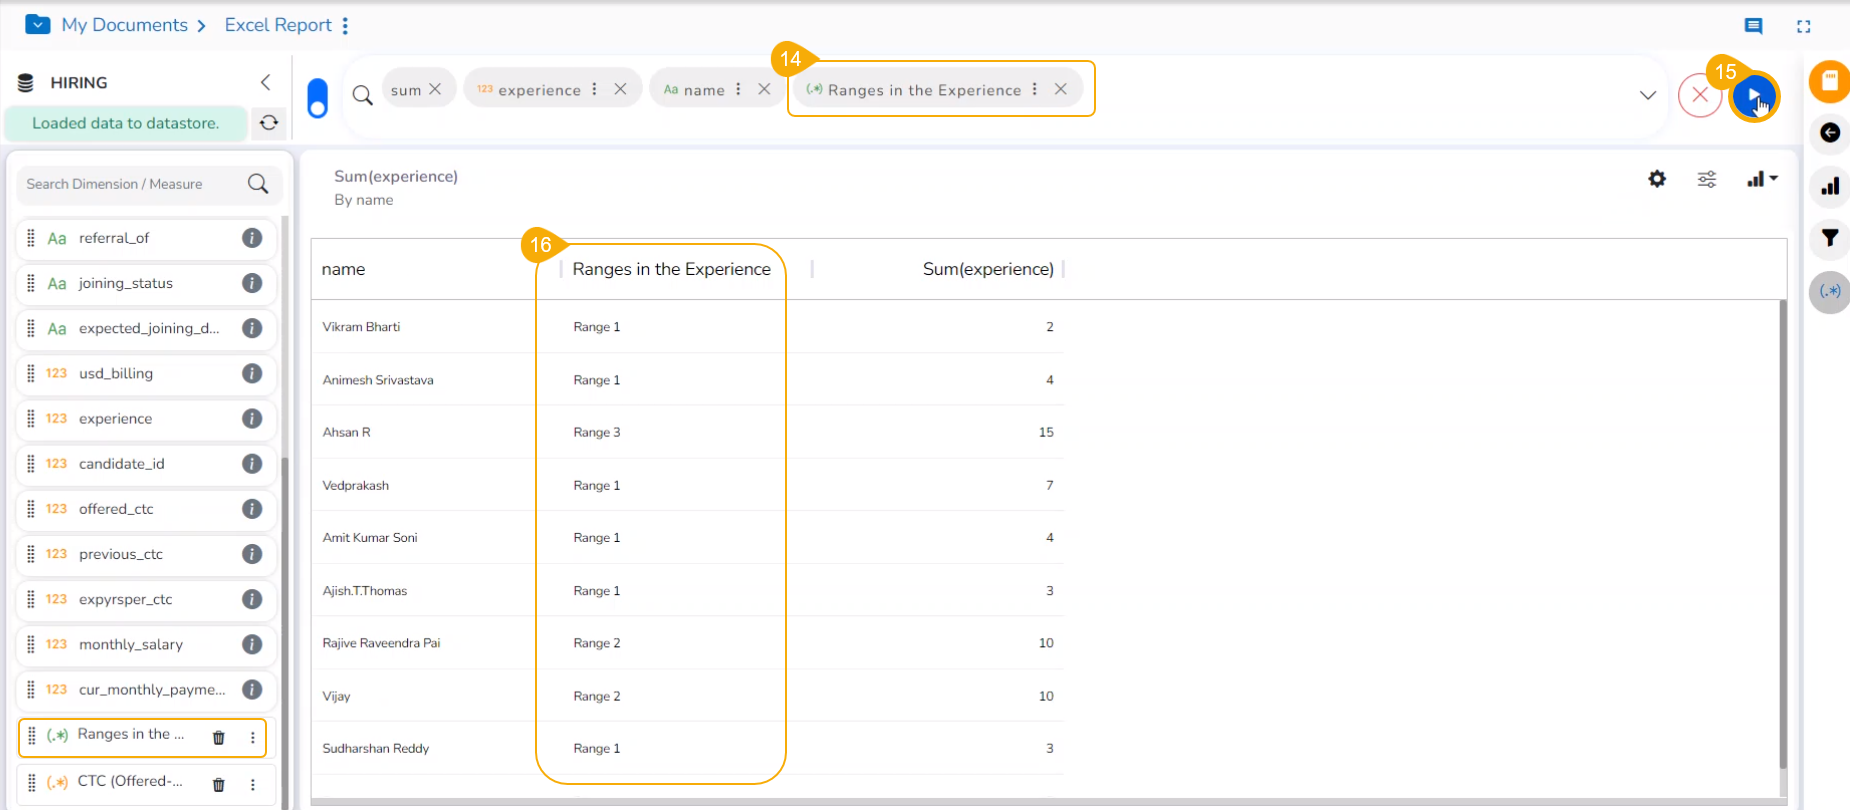
Select the newly created calculated field and add it to the top menu bar.
Click the GO option.
The calculated field will display the range based on the experience value.
Please Note:
The Range option will not be listed for the space where the MongoDB server is configured in the Admin Settings. The Range functionality is available only if the Elastic Search configuration is done from the Admin Settings.
The Calculated Field with various ranges gets added a Dimension by default.