> For the complete documentation index, see [llms.txt](https://docs.bdb.ai/security-users-and-roles-4/llms.txt). Markdown versions of documentation pages are available by appending `.md` to page URLs; this page is available as [Markdown](https://docs.bdb.ai/security-users-and-roles-4/creating-a-new-user/restrict-data-access.md).
# Restrict Data Access
## Configuring the Custom Fields Settings
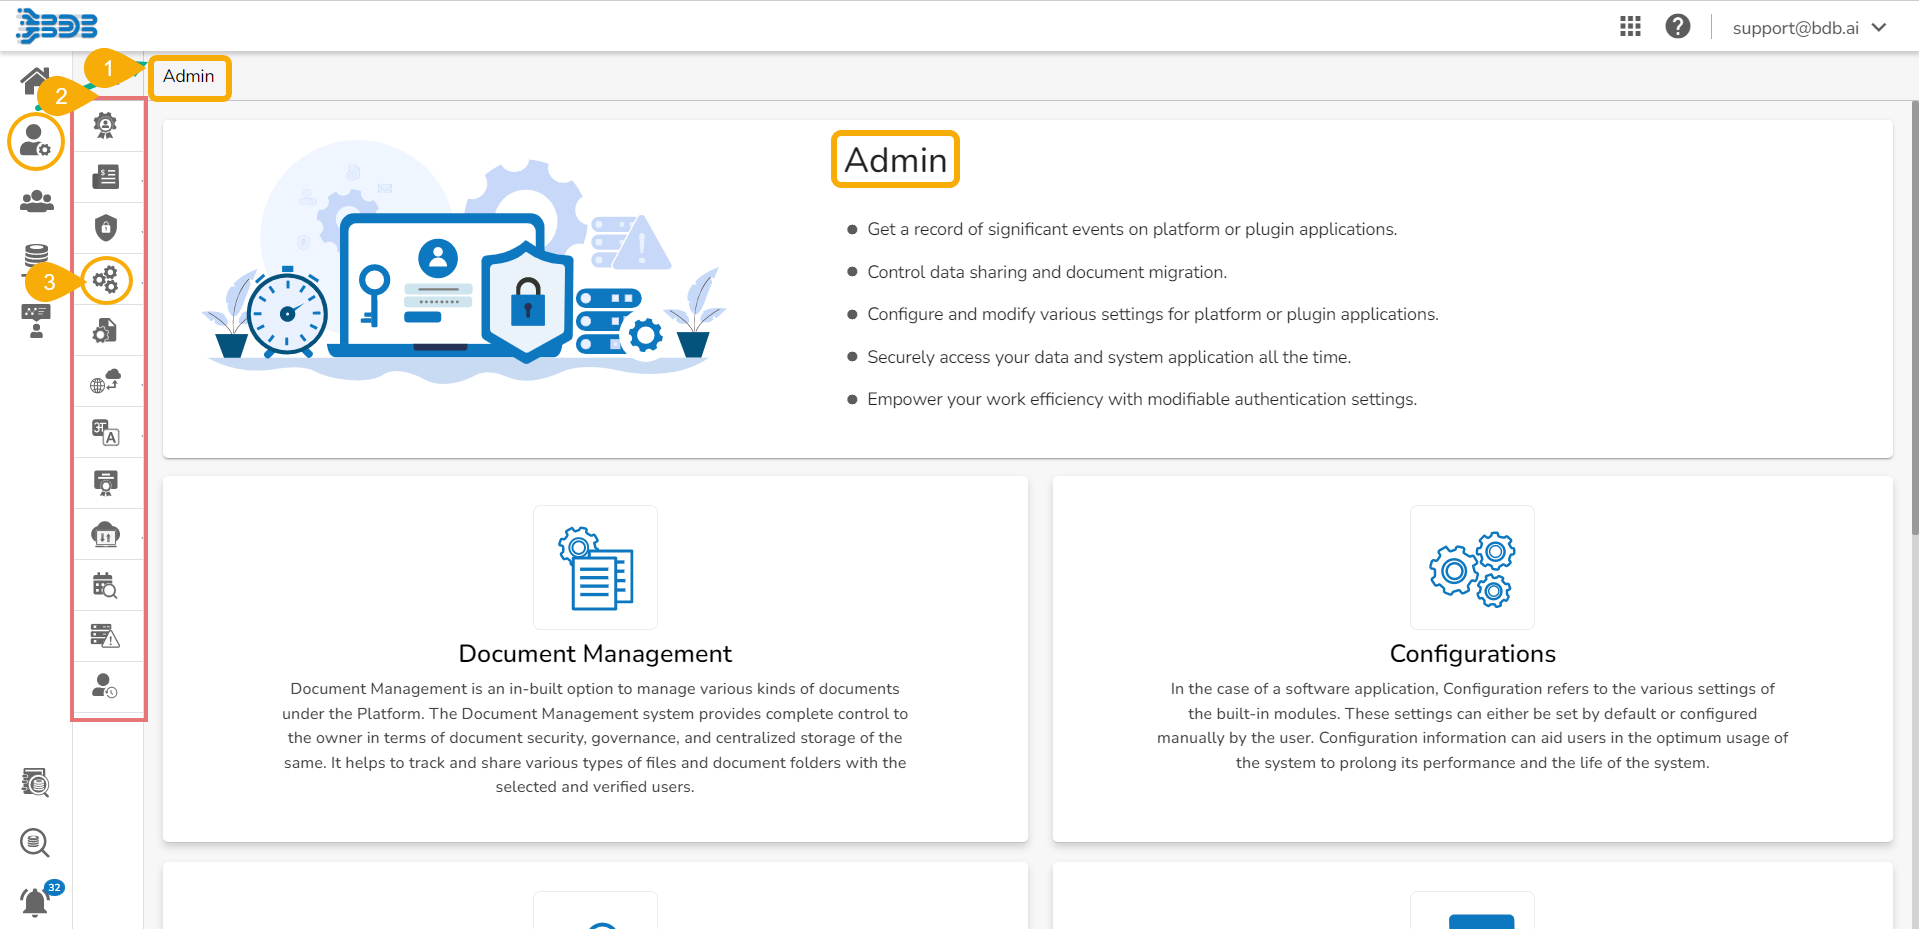
* Navigate to the ***Admin Module***.
* Access the ***Admin*** panel.
* Click the ***Configurations*** option.
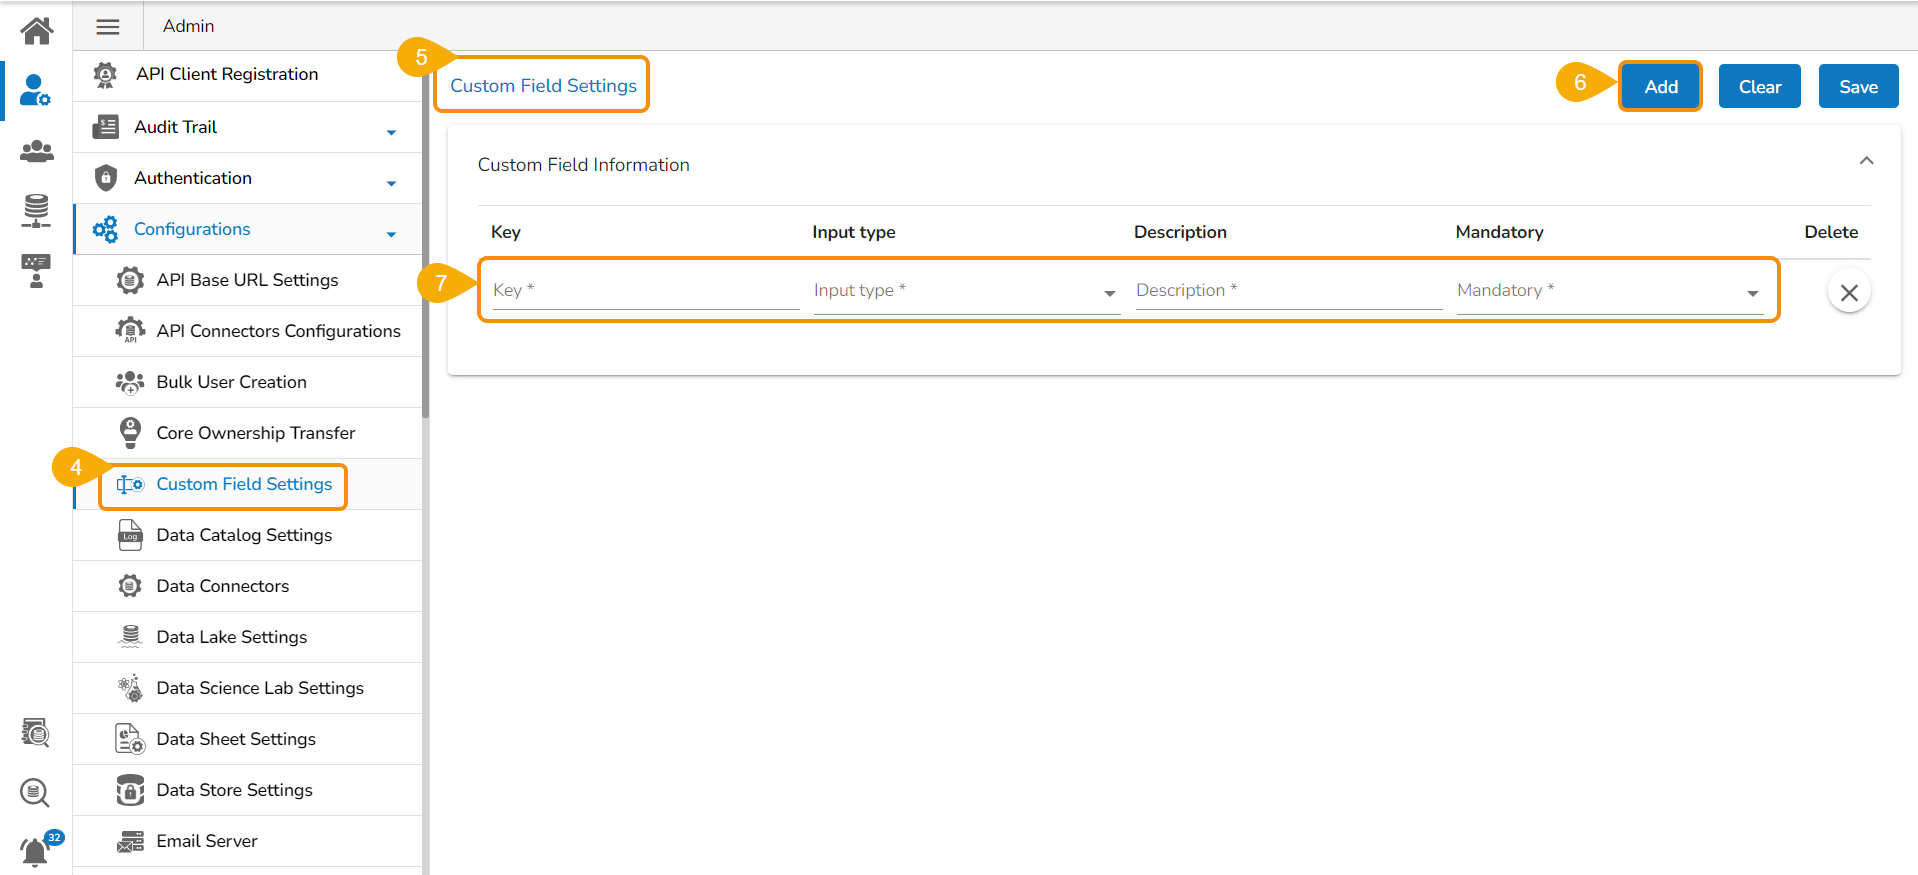
* Click on the ***Custom Field Settings*** option.
* The ***Custom Field Settings*** page opens.
* Click the ***Add new field*** icon to insert a new field.
* A new field gets added.
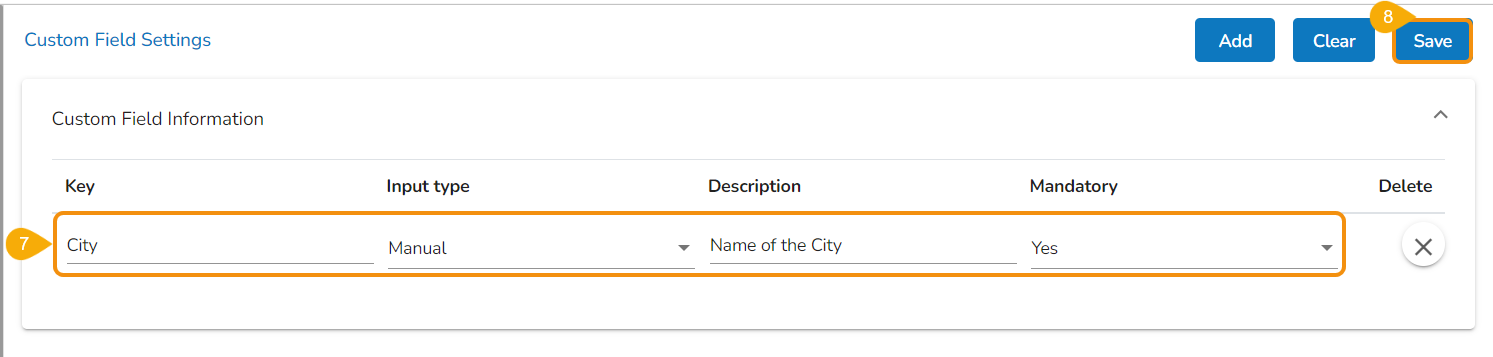
* Provide the required information to create new Custom Fields. E.g., Provide information / select an option for each given column such as Key, Input type (select any one option out of ***Manual*** or ***Lookup***), Description, and Mandatory (select any one option out of ***Yes*** or ***No***).
* Click the ***Save*** icon to save the configured Custom Fields.
Saving a new Custom Field
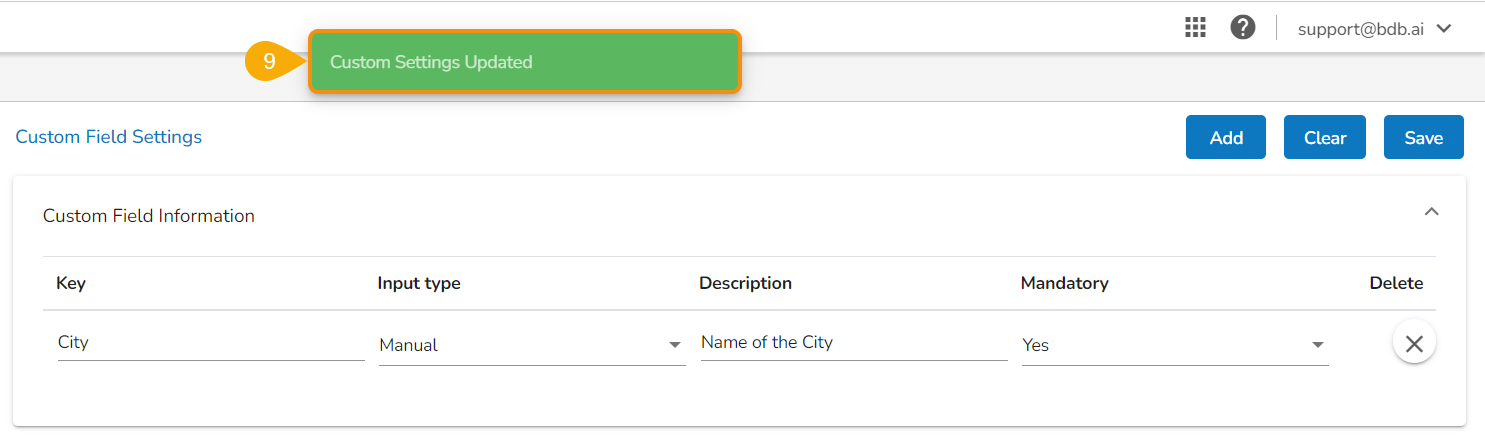
* A confirmation message appears when the newly created ***Custom Field(s)*** gets added***.***
{% hint style="info" %}
*Please Note: The user can also access the Admin module from the Apps menu.*
{% endhint %}
## ***Accessing the saved Custom Fields under the New User Form***
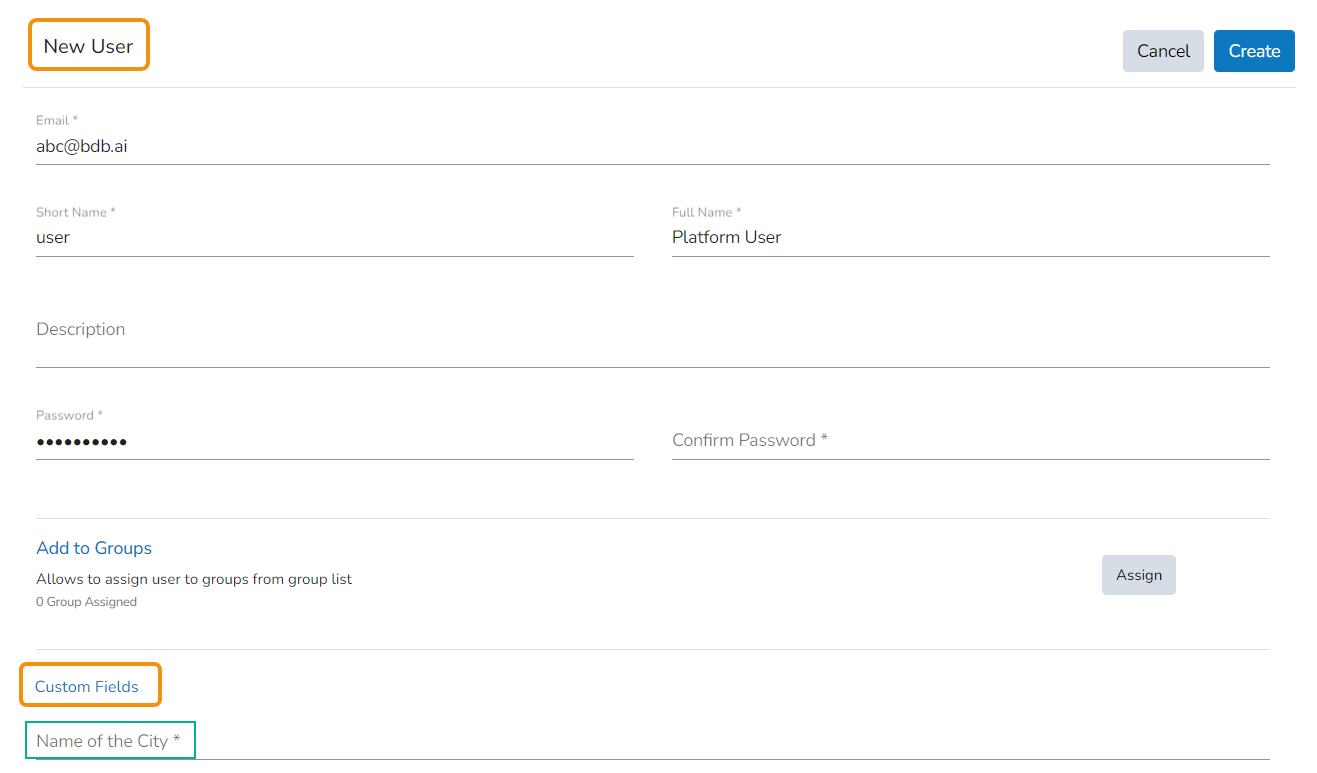
* The saved Custom Fields appear under the New User form.
The added Custom Fields appear under the New User creation form
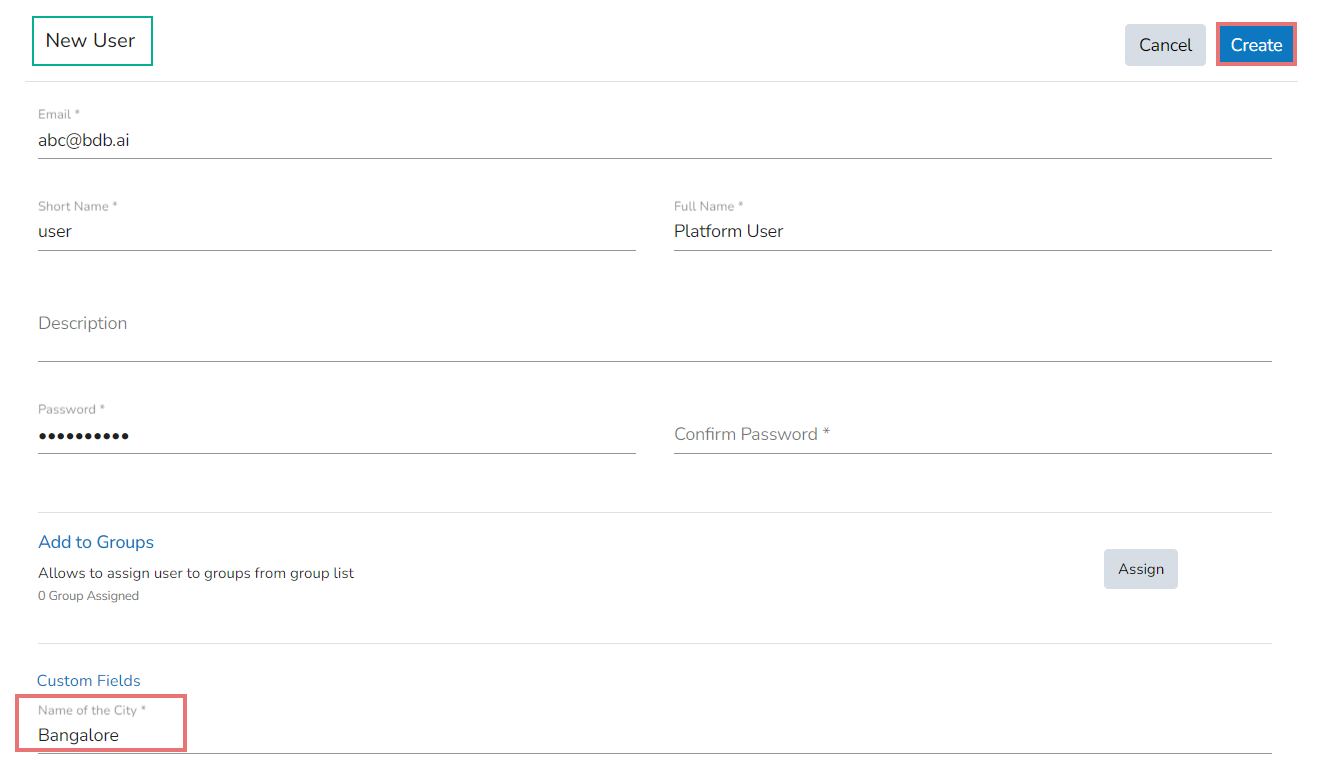
* You need to pass the values for the mandatory custom fields to complete the new user creation.
* Click the ***Create*** option.
Passing the Custom Field value while creating a new user
{% hint style="info" %}
*Please Note: The data access of the user gets restricted based on the given Custom fields. E.g., In this case, the newly created user will only have access to see data limited to Bangalore city.*
{% endhint %}