
User Profile
The administrator can edit basic information, set preferences, change the password, set API token access, deregister the mobile device, navigate to the default Platform page, and sign off from the BDB Platform by using the User Profile icon provided on the Platform homepage.
Accessing the User Profile Menu
Navigate to the Platform homepage.
Click the User Profile option.
Displays the following options:
My Account: Displays account details of the logged-in user.
About: Displays a welcome page of the BDB Platform.
Sign Out: Allows to sign out from the Platform.

My Account
This section covers three options to manage settings for a user account.
Click the User Profile icon from the Platform homepage.
The existing user profile will be loaded by default.
Click the My Account option.

A notification message appears, and the user profile gets loaded.

Profile
The Profile tab displays personal information about the logged-in user.
The Profile tab opens by default displaying the following fields:
Email (not editable)
Full Name
Mobile Number
Landline Number
Address
The user can modify/change the required details and click the Update option.

The profile changes get saved, and the same gets communicated through a confirmation message.

Password
The user can reset the password for his account using this segment.
Click the Password tab using the My Account page.
The Change Password window opens.
Enter the Password, New Password, and Confirm Password (the newly set password).
Click the Update option.
A confirmation message appears and the password gets changed for the concerned User Account.

Preferences
The Administrator can change the users' preference settings using this module from the left side of the pane.
Follow the below-given steps to change preference settings:
Click the Preferences tab using the My Account menu row.
The right-side panel displays the option to set the preferred view for the user's homepage.
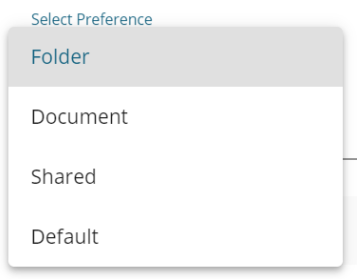
Select an option using the Select Preference drop-down option. The following choices will get displayed:
Folder- the user can set any folder as the preferred view for the homepage.
Document- the user can set any document as the preferred view for the homepage.
Shared- the user can set any document from the Shared folder as the preferred view for the homepage.
Default – it opens the My Documents page for the user as the default homepage.
Use the Search space to customize the list (In this case, the list of folders gets customized based on the searched folder).
As per the selected choice, a drop-down menu appears (E.g., The following image displays all the available folders since the Folder option is selected from the Select Preference drop-down).
Select a specific folder/document from the below-displayed choices using a tick mark in the radio button.
Click the Save option.
A pop-up confirmation message appears to ensure that the preferences have been updated.

Please Note: Folders or documents get displayed to the users as per the set preferences by the Administrator.
Configuration
The configuration tab allows the user to create or reset the API Token and set the Password Expiry configuration.
API Token Configuration
The API Token is used to expose the document as an open document.
Navigate to the API Token Configuration option using the Configuration tab.
Click the Generate icon to generate an API token.

The API token gets generated and displayed below with the mention of the last reset date and time.
A notification message appears to convey the completion of the action.

Resetting API Token
Click the Reset icon from the API Token Configuration window to reset the API Token.

The Reset Token Confirmation window opens with a warning that a reset of the API token using the Reset option will convert the old open doc dashboards as invalid.
Click the YES option from the warning message window to reset the API Token.

A confirmation message appears to inform that the API token has been reset.
The API Token gets reset displaying the recent Date and time under the API Token Configuration window.

Please Note: The last reset date and time are also updated under the API Token Configuration window.
Password Expiry Configuration
The password expiry limit can be configured via this option.
Navigate to the Password Expiry Configuration option using the Configuration tab.

Select the Password Never Expires option by putting a tick mark in the given checkbox.
Click the Apply Changes icon to save the changes.

A notification message appears to confirm the update and the selected configuration gets saved.

Please Note: The Git Token and Git Username fields must be configured to access the Git Pull-Push and Repo Sync Project functionalities under the DS Lab module.
Git Token
The user can configure Git Token using this option.
Navigate to the Git Token section under the Configuration tab.
Provide the Git Token provided by your deployment team.
Click the Save icon.

A notification message appears to ensure that the Git Token has been saved.

Git Username
The user can configure Git Token using this option.
Navigate to the Git Username section under the Configuration tab.
Provide the Git Username.
Click the Save icon.

A notification message appears to ensure that the Git Username has been saved.

Please Note: The user can also configure the Git Token and Git Username through the Security module. These fields can be accessed as Custom Fields while creating a new user. Users can specify the Custom Fields using the Custom Field Settings admin option.
Last updated