Data Pipeline
  • Data Pipeline
    • About Data Pipeline
    • Design Philosophy
    • Low Code Visual Authoring
    • Real-time and Batch Orchestration
    • Event based Process Orchestration
    • ML and Data Ops
    • Distributed Compute
    • Fault Tolerant and Auto-recovery
    • Extensibility via Custom Scripting
  • Getting Started
    • Homepage
      • List Pipelines
      • Create
        • Creating a New Pipeline
          • Adding Components to Canvas
          • Connecting Components
            • Events [Kafka and Data Sync]
          • Memory and CPU Allocations
        • Creating a New Job
          • Job Editor Page
          • Task Components
            • Readers
              • HDFS Reader
              • MongoDB Reader
              • DB Reader
              • S3 Reader
              • Azure Blob Reader
              • ES Reader
              • Sandbox Reader
            • Writers
              • HDFS Writer
              • Azure Writer
              • DB Writer
              • ES Writer
              • S3 Writer
              • Sandbox Writer
              • Mongodb Writer
              • Kafka Producer
            • Transformations
          • PySpark Job
          • Python Job
      • List Jobs
      • List Components
      • Delete Orphan Pods
      • Scheduler
      • Data Channel
      • Cluster Event
      • Trash
      • Settings
    • Pipeline Workflow Editor
      • Pipeline Toolbar
        • Pipeline Overview
        • Pipeline Testing
        • Search Component in Pipelines
        • Push Pipeline (to VCS/GIT)
        • Pull Pipeline
        • Full Screen
        • Log Panel
        • Event Panel
        • Activate/Deactivate Pipeline
        • Update Pipeline
        • Failure Analysis
        • Pipeline Monitoring
        • Delete Pipeline
        • Pipeline Component Configuration
        • Pipeline Failure Alert History
      • Component Panel
      • Right-side Panel
    • Testing Suite
    • Activating Pipeline
    • Monitoring Pipeline
    • Job Monitoring
  • Components
    • Adding Components to Workflow
    • Component Architecture
    • Component Base Configuration
    • Resource Configuration
    • Intelligent Scaling
    • Connection Validation
    • Readers
      • S3 Reader
      • HDFS Reader
      • DB Reader
      • ES Reader
      • SFTP Stream Reader
      • SFTP Reader
      • Mongo DB Reader
        • MongoDB Reader Lite (PyMongo Reader)
        • MongoDB Reader
      • Azure Blob Reader
      • Azure Metadata Reader
      • ClickHouse Reader (Docker)
      • Sandbox Reader
      • Azure Blob Reader
    • Writers
      • S3 Writer
      • DB Writer
      • HDFS Writer
      • ES Writer
      • Video Writer
      • Azure Writer
      • ClickHouse Writer (Docker)
      • Sandbox Writer
      • MongoDB Writers
        • MongoDB Writer
        • MongoDB Writer Lite (PyMongo Writer)
    • Machine Learning
      • DSLab Runner
      • AutoML Runner
    • Consumers
      • SFTP Monitor
      • MQTT Consumer
      • Video Stream Consumer
      • Eventhub Subscriber
      • Twitter Scrapper
      • Mongo ChangeStream
      • Rabbit MQ Consumer
      • AWS SNS Monitor
      • Kafka Consumer
      • API Ingestion and Webhook Listener
    • Producers
      • WebSocket Producer
      • Eventhub Publisher
      • EventGrid Producer
      • RabbitMQ Producer
      • Kafka Producer
      • Synthetic Data Generator
    • Transformations
      • SQL Component
      • Dateprep Script Runner
      • File Splitter
      • Rule Splitter
      • Stored Producer Runner
      • Flatten JSON
      • Email Component
      • Pandas Query Component
      • Enrichment Component
      • Mongo Aggregation
      • Data Loss Protection
      • Data Preparation (Docker)
      • Rest Api Component
      • Schema Validator
    • Scripting
      • Script Runner
      • Python Script
        • Keeping Different Versions of the Python Script in VCS
    • Scheduler
  • Custom Components
  • Advance Configuration & Monitoring
    • Configuration
      • Default Component Configuration
      • Logger
    • Data Channel
    • Cluster Events
    • System Component Status
  • Version Control
  • Use Cases
Powered by GitBook
On this page
  • Configuration Steps for PyMongo Writer (Mongodb Writer Lite):
  • Basic Information Tab
  • Meta Information Tab
  • Selected Columns
  • Saving the Component Configuration

Was this helpful?

  1. Components
  2. Writers
  3. MongoDB Writers

MongoDB Writer Lite (PyMongo Writer)

PreviousMongoDB WriterNextMachine Learning

Was this helpful?

The PyMongo writer component is designed to write the data in the Mongo collection. It is a docker based component.

All component configurations are classified broadly into the following sections:

  • ​​

  • Meta Information

  • ​​

  • ​​

Please follow the demonstration to configure the component.

Configuration Steps for PyMongo Writer (Mongodb Writer Lite):

The PyMongo Writer writes the data to the Mongo Database.

  • Drag & drop the PyMongo Writer component to the Pipeline Workflow Editor.
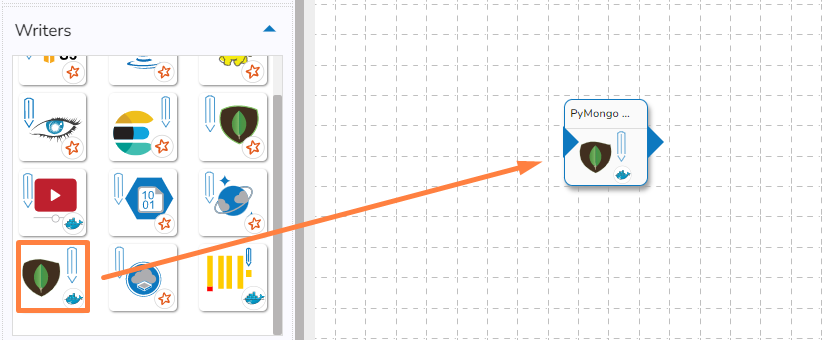
  • Click the dragged PyMongo Writer component to open the component properties tabs below.

Basic Information Tab

It is the default tab to open for the PyMongo Writer while configuring the component.

  • Select an Invocation type from the drop-down menu to confirm the running mode of the reader component. Select ‘Real-Time’ or ‘Batch’ from the drop-down menu.

  • Deployment Type: It displays the deployment type for the component. This field comes preselected.

  • Container Image Version: It displays the image version for the docker container. This field comes pre-selected.

  • Failover Event: Select a failover Event from the drop-down menu.

  • Batch Size: Provide the maximum number of records to be processed in one execution cycle.

Meta Information Tab

Open the Meta Information tab and configure all the connection-specific details for the PyMongo Writer.

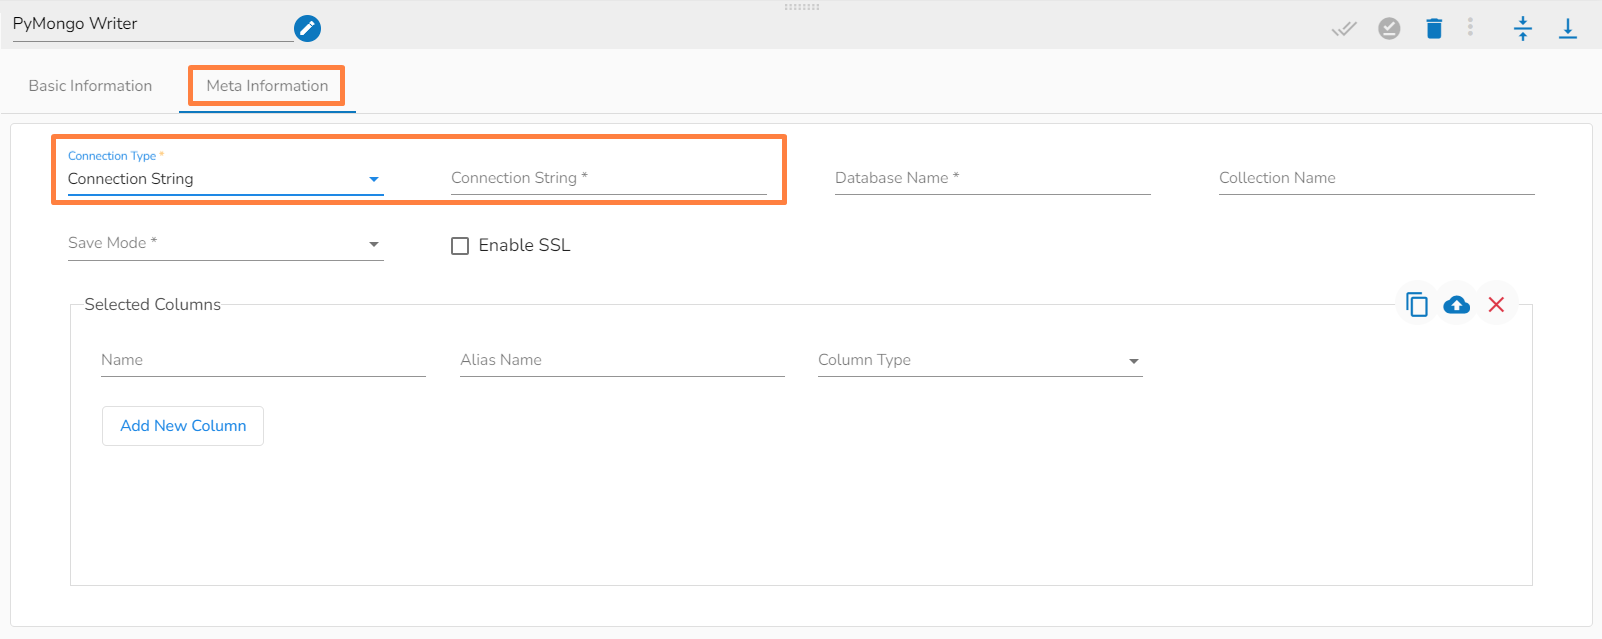
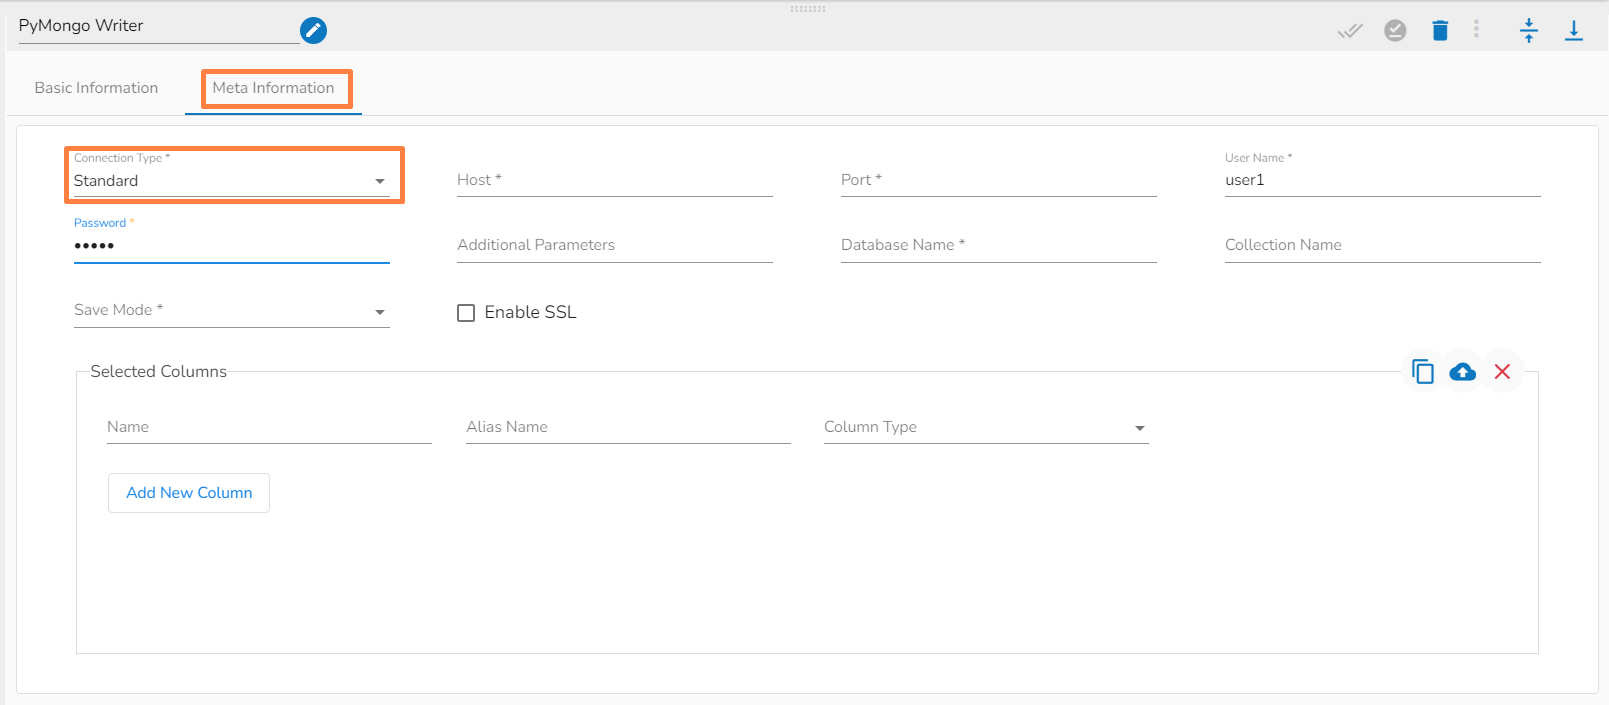
  • Connection Type: Select either of the options out of ‘Standard’, ‘SRV’, and ‘Connection String’ connection types.

  • Port number(*): Provide the Port number (It appears only with the ‘Standard’ connection type).

  • Host IP Address(*): IP address of the host.

  • Username(*): Provide username.

  • Password(*): Provide a valid password to access the MongoDB.

  • Database Name(*): Provide the name of the database where you wish to write data.

  • Collection Name (*): Provide the name of the collection.

  • Save Mode: Select an option from the drop-down menu (the supported options are Upsert and Append).

  • Enable SSL: Check-in this box to enable SSL feature for PyMongo writer.

Please Note: Credentials will be different if this option is enabled.

  • Composite Keys (*): This field appears only when the selected save mode is ‘Upsert’. The user can enter multiple composite keys separated by commas on which the 'Upsert' operation has to be done.

  • Additional Parameters: Provide details of the additional parameters.

  • Connection String (*): Provide a connection string.
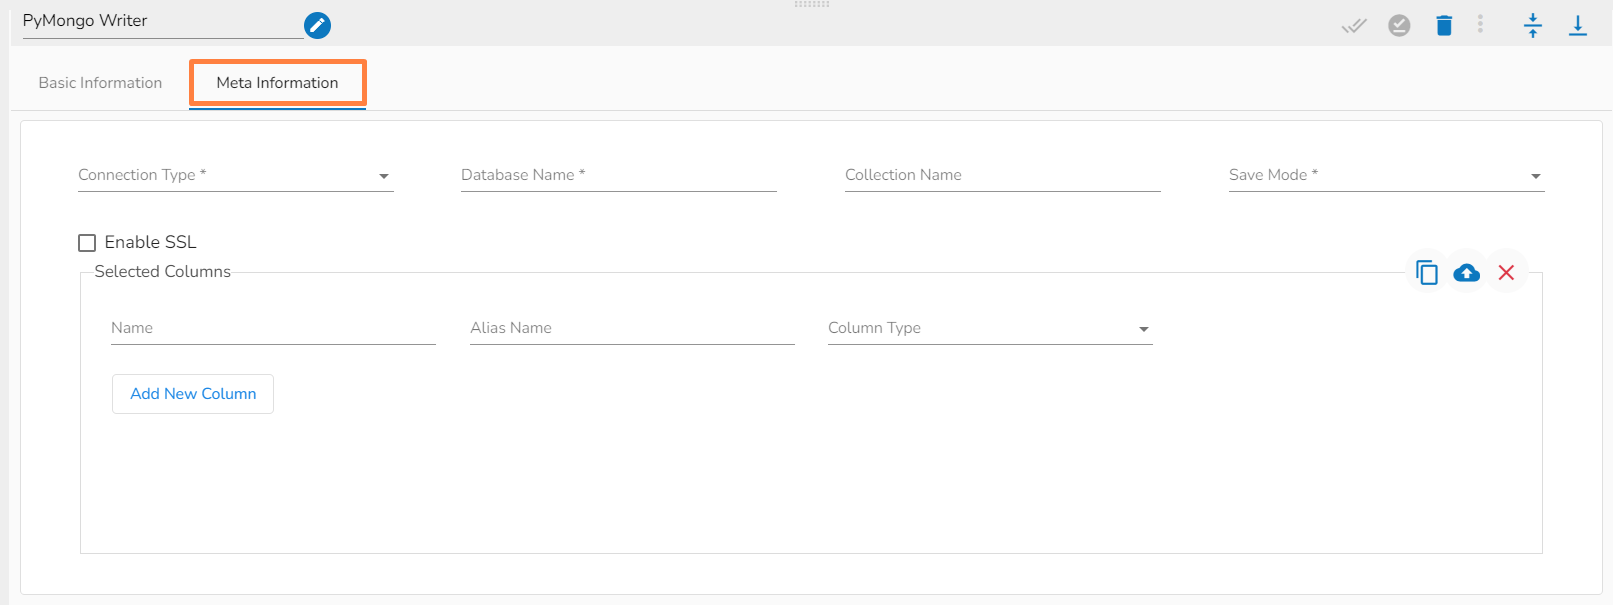
The Meta Information fields vary based on the selected Connection Type option.
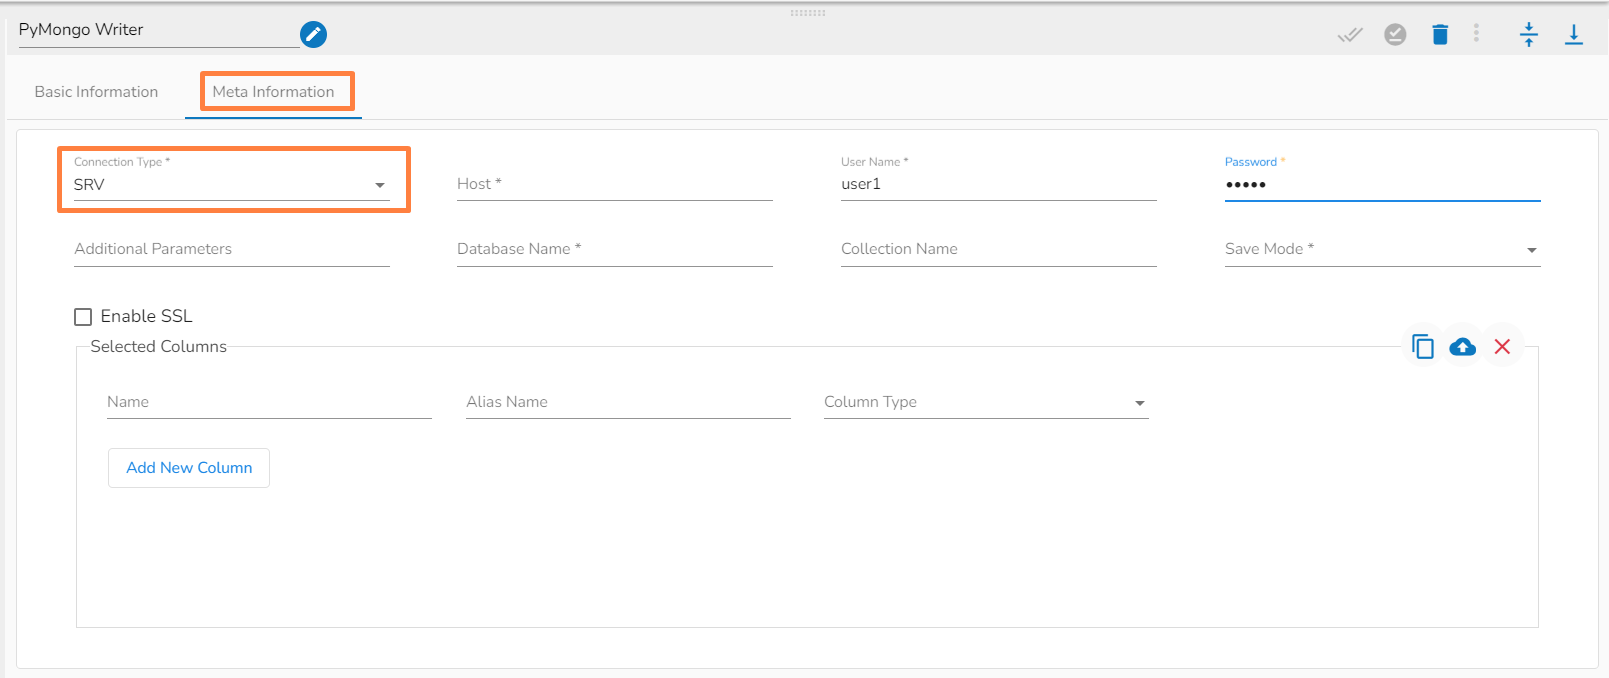
Selected Columns

The users can select some specific columns to change the column name or data type while writing it to the collection. Users have to type the name of the column in the name field that has to be modified. If you went to change the name of the column, then put the name of your choice in the alias name section otherwise keep it the same as of column name. Then select the Column Type from the drop-down menu into which you want to change the datatype of that particular column. Once this is done, while writing the selected column data type and column name will be converted to your given choice.

or

Use the Download Data and Upload File options to select the desired columns.

  1. Upload File: The user can upload the existing system files (CSV, JSON) using the Upload File icon (file size must be less than 2 MB).

  2. Download Data (Schema): Users can download the schema structure in JSON format by using the Download Data icon.

Saving the Component Configuration

  • Click the Save Component in Storage icon for the PyMongo Writer component.

  • A message appears to notify the successful update of the component.

  • Click on the Activate Pipeline icon.

  • The pipeline will be activated and the PyMongo writer component will write the in-event data to the given MongoDB collection.

​Basic Information​
Resource Configuration​
Connection Validation
Basic Information Tab