Loading...
Loading...
Loading...
Loading...
The Platform offers Keycloak and Azure/ OAuth options for SSO Configuration.
Loading...
Loading...
The administrator can do basic settings for windows AD, CA Clarity, and AWS Cognito accounts by applying the given Authentication settings.
The user can authenticate the Windows AD accounts through this admin option.
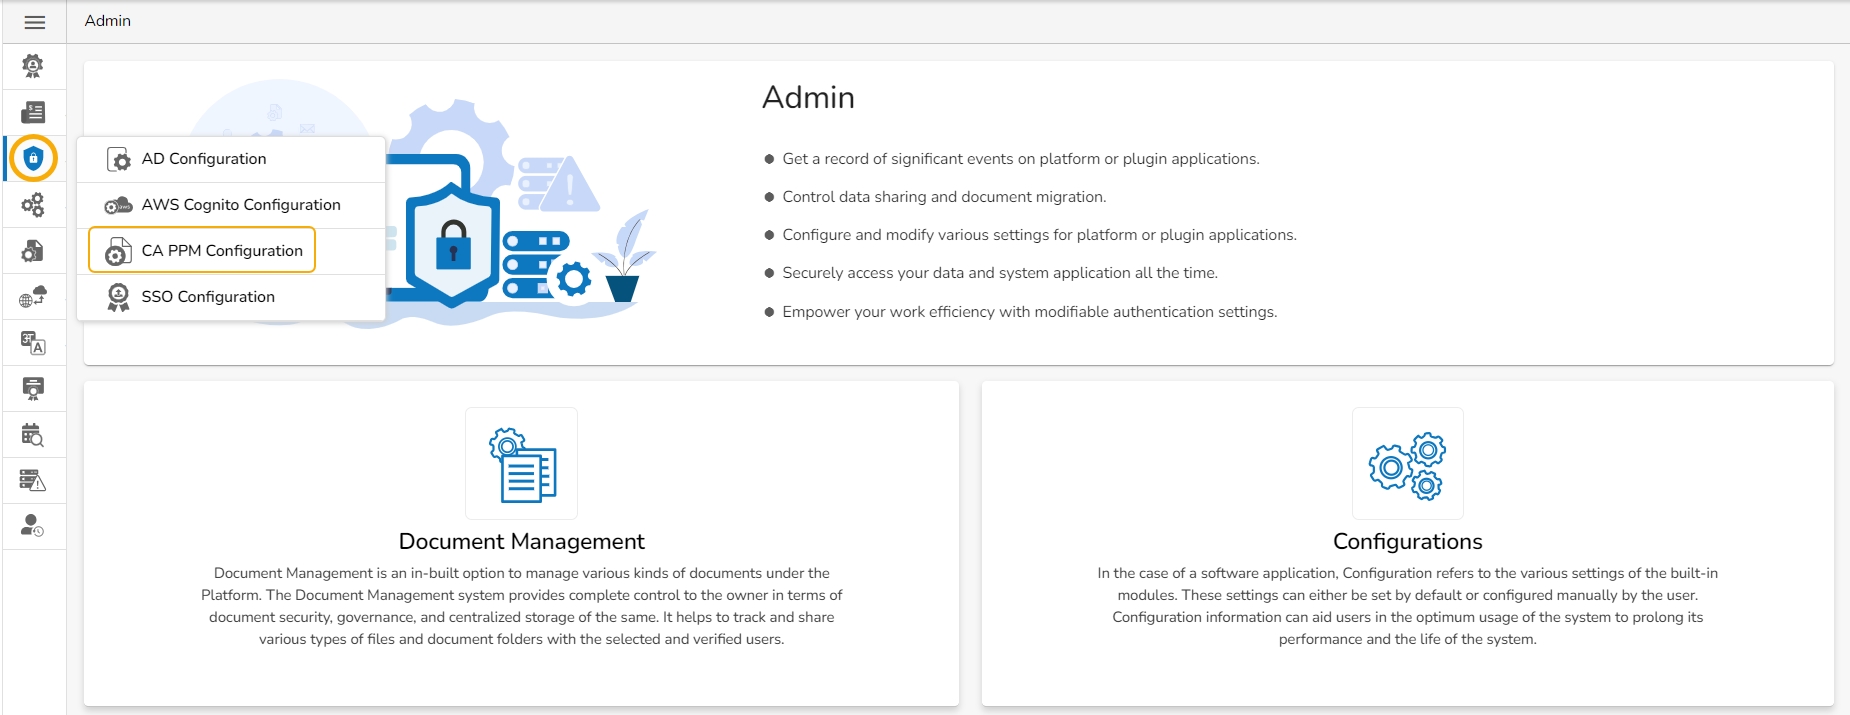
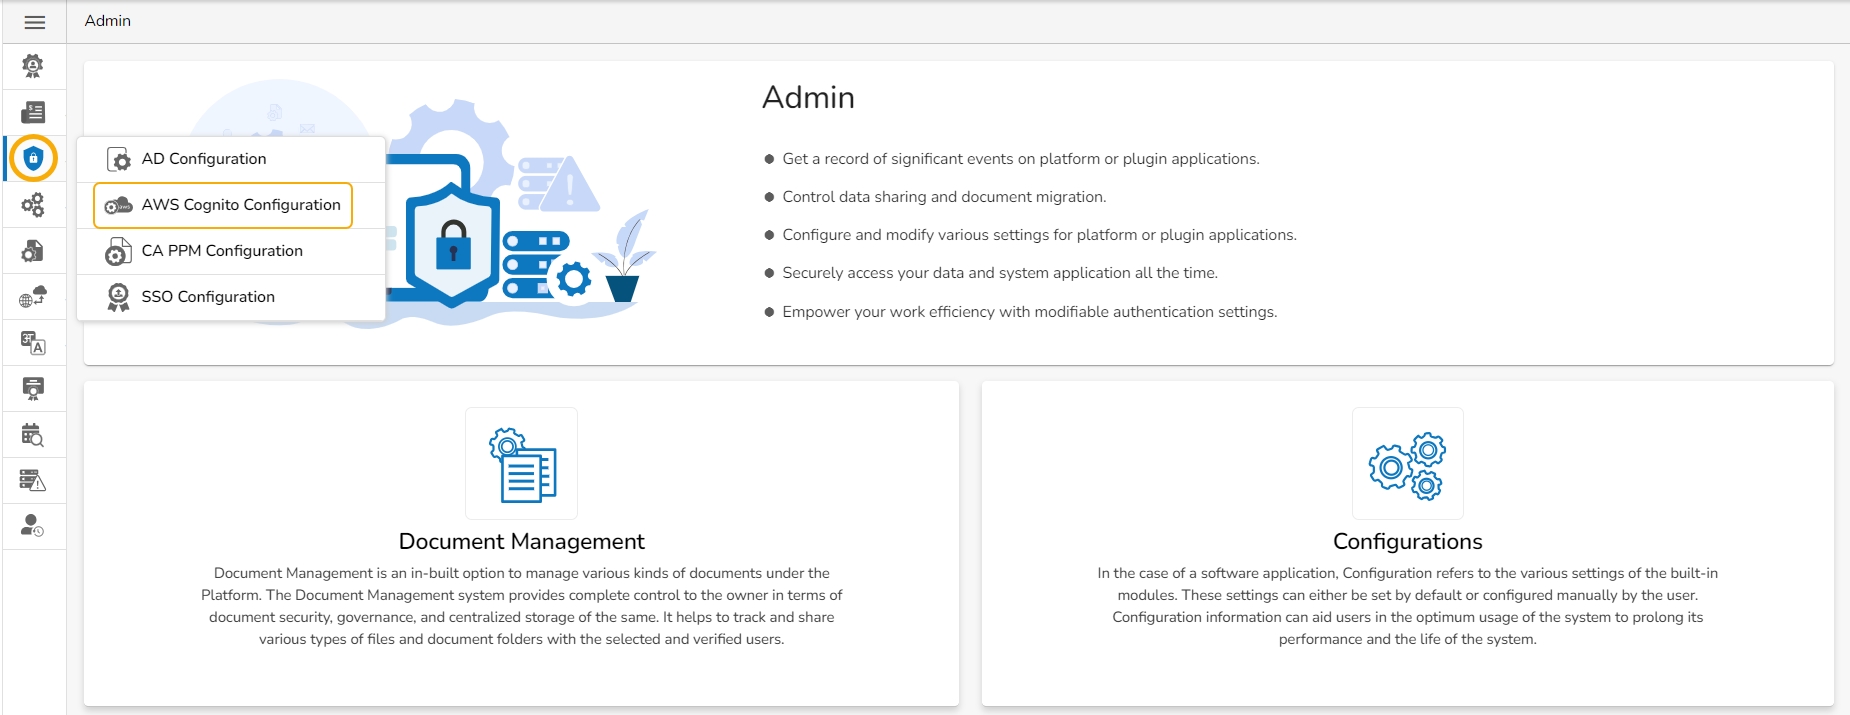
Click the Authentication option from the list of admin options.
The following authentication options appear:
AD Configuration
CA PPM Configuration
AWS Cognito Configuration
Select the AD Configuration authentication option.
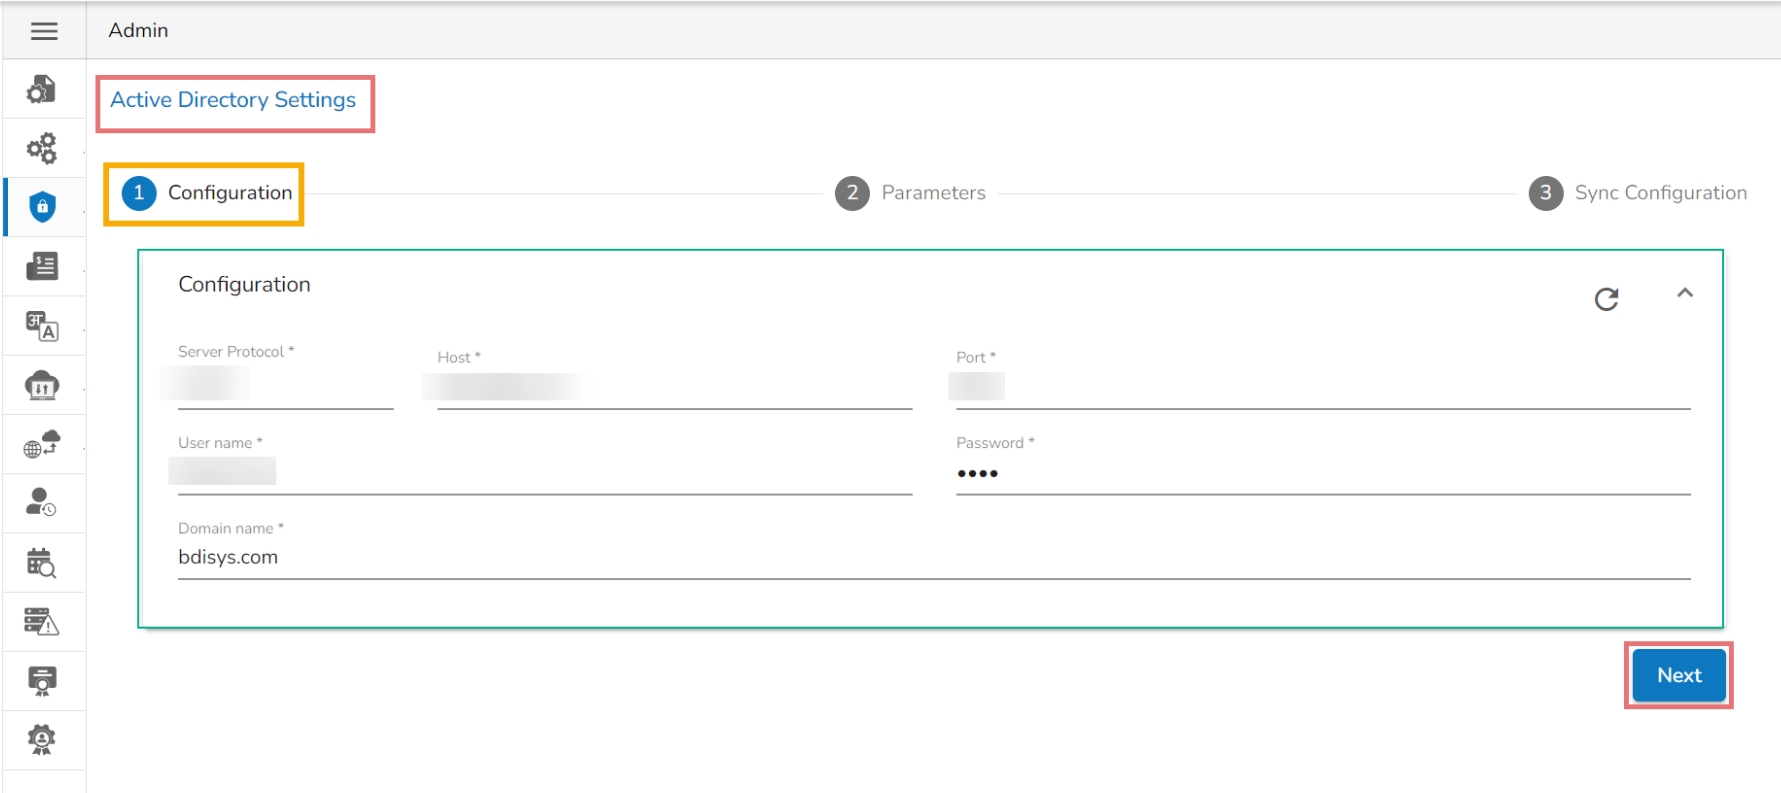
The Active Directory Settings page opens.
The Configuration tab for the Active Directory Settings opens by default.
Provide Server Protocol.
Provide the IP address/Host of the Windows AD server.
Provide the Port number of Windows AD.
Provide the Username of the Windows AD service account.
Enter the secured Password.
Enter the Domain name.
Click the Next option to proceed.
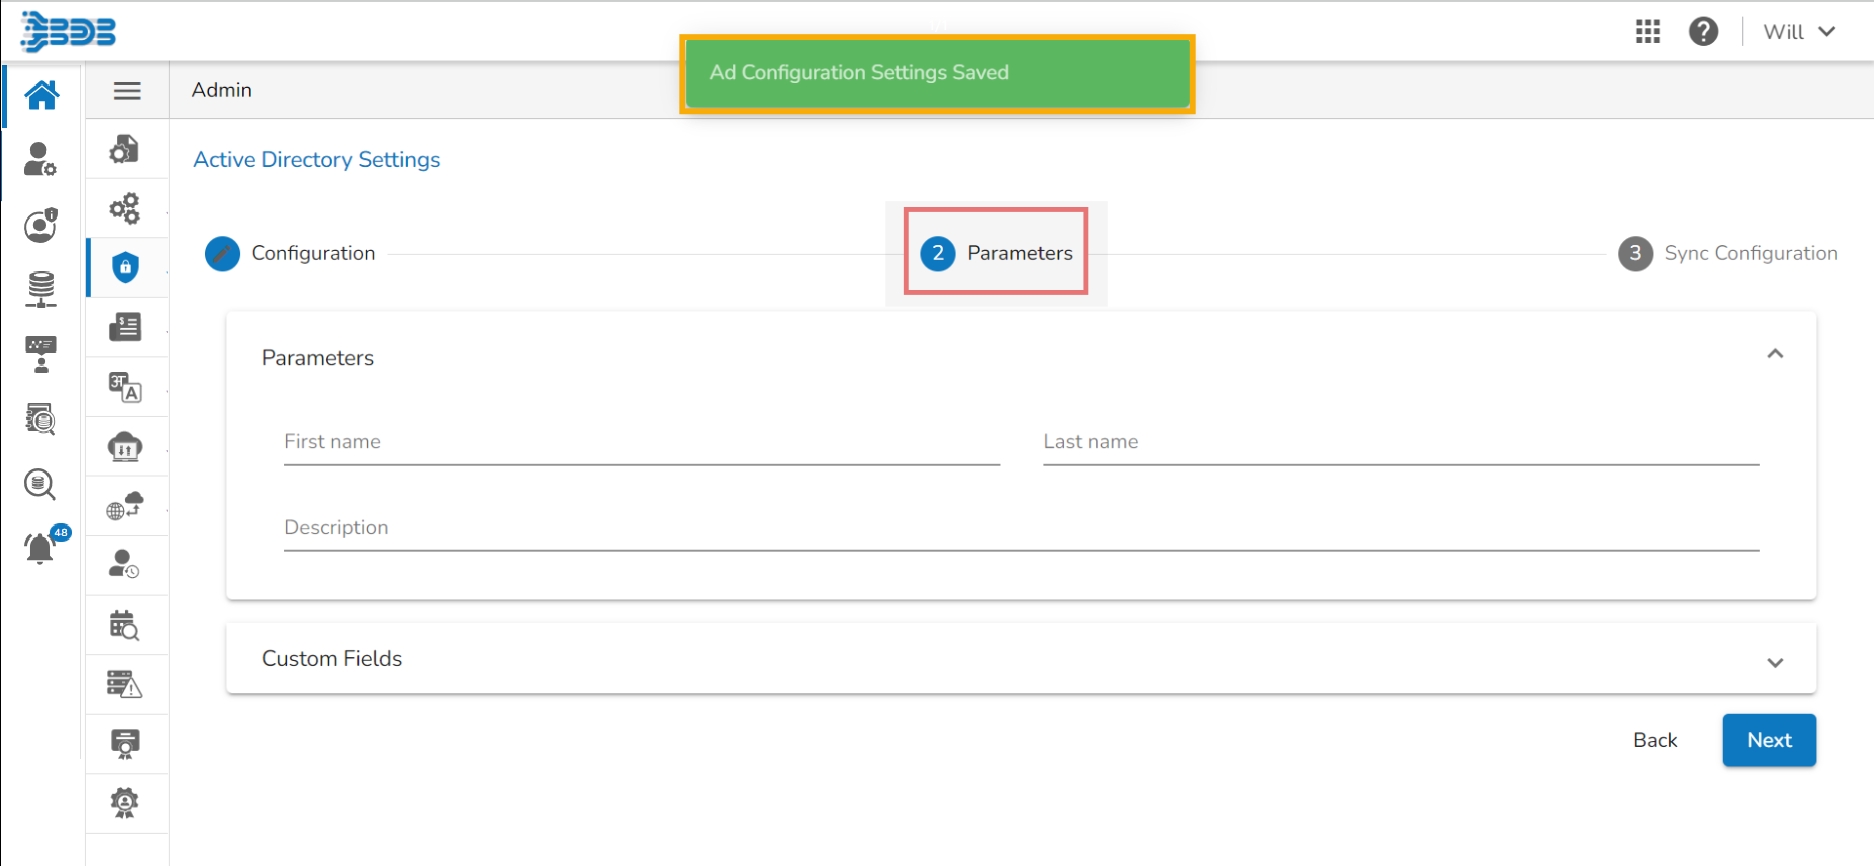
A message appears to confirm the action and leads to the Parameters tab.
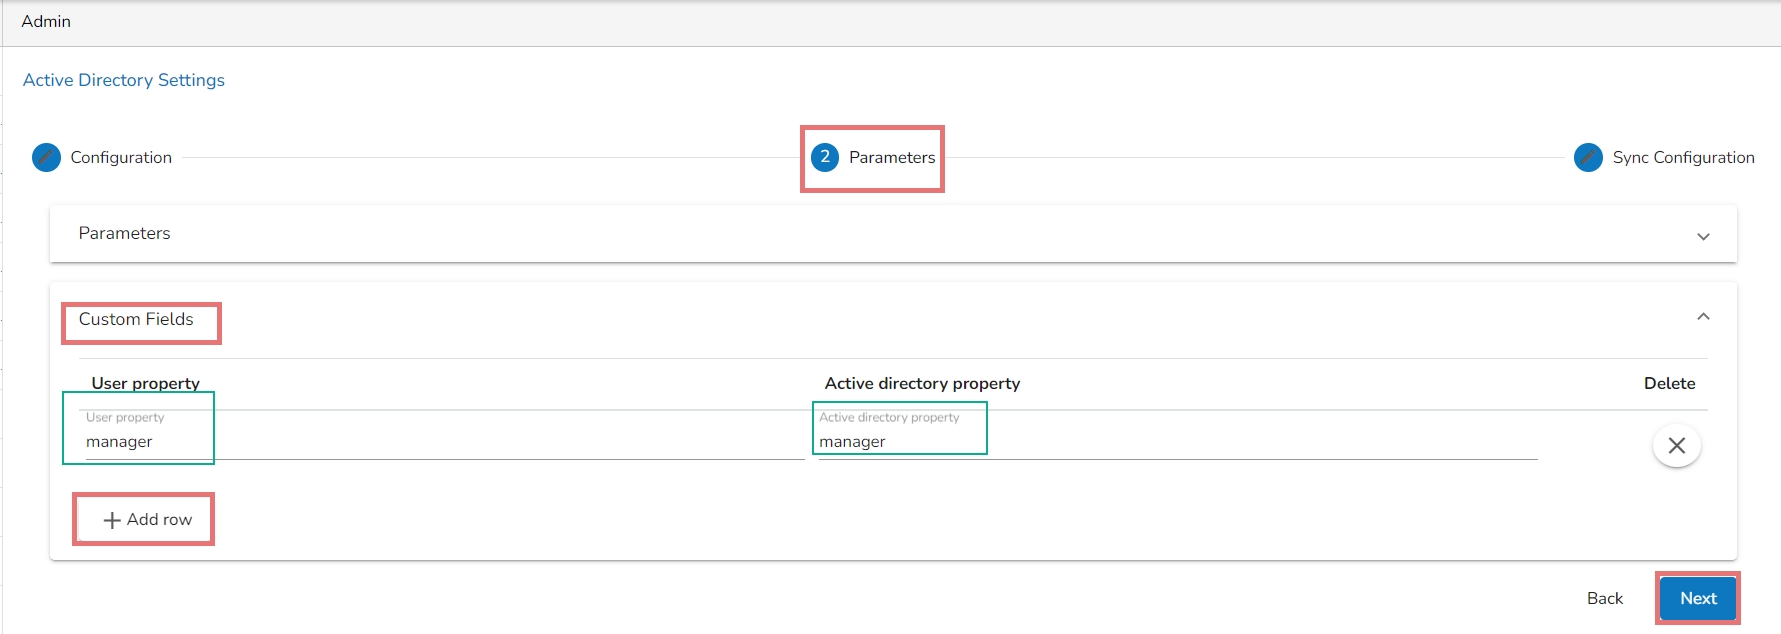
Set the user Parameters by using this tab.
Provide the first name of the user.
Provide the last name of the user.
Add description.
Open the Custom fields from the drop-down menu.
Select an option from the available context menu.
Enter Active Directory Property.
Add a new custom field by clicking the Add row icon.
Click the Next option.
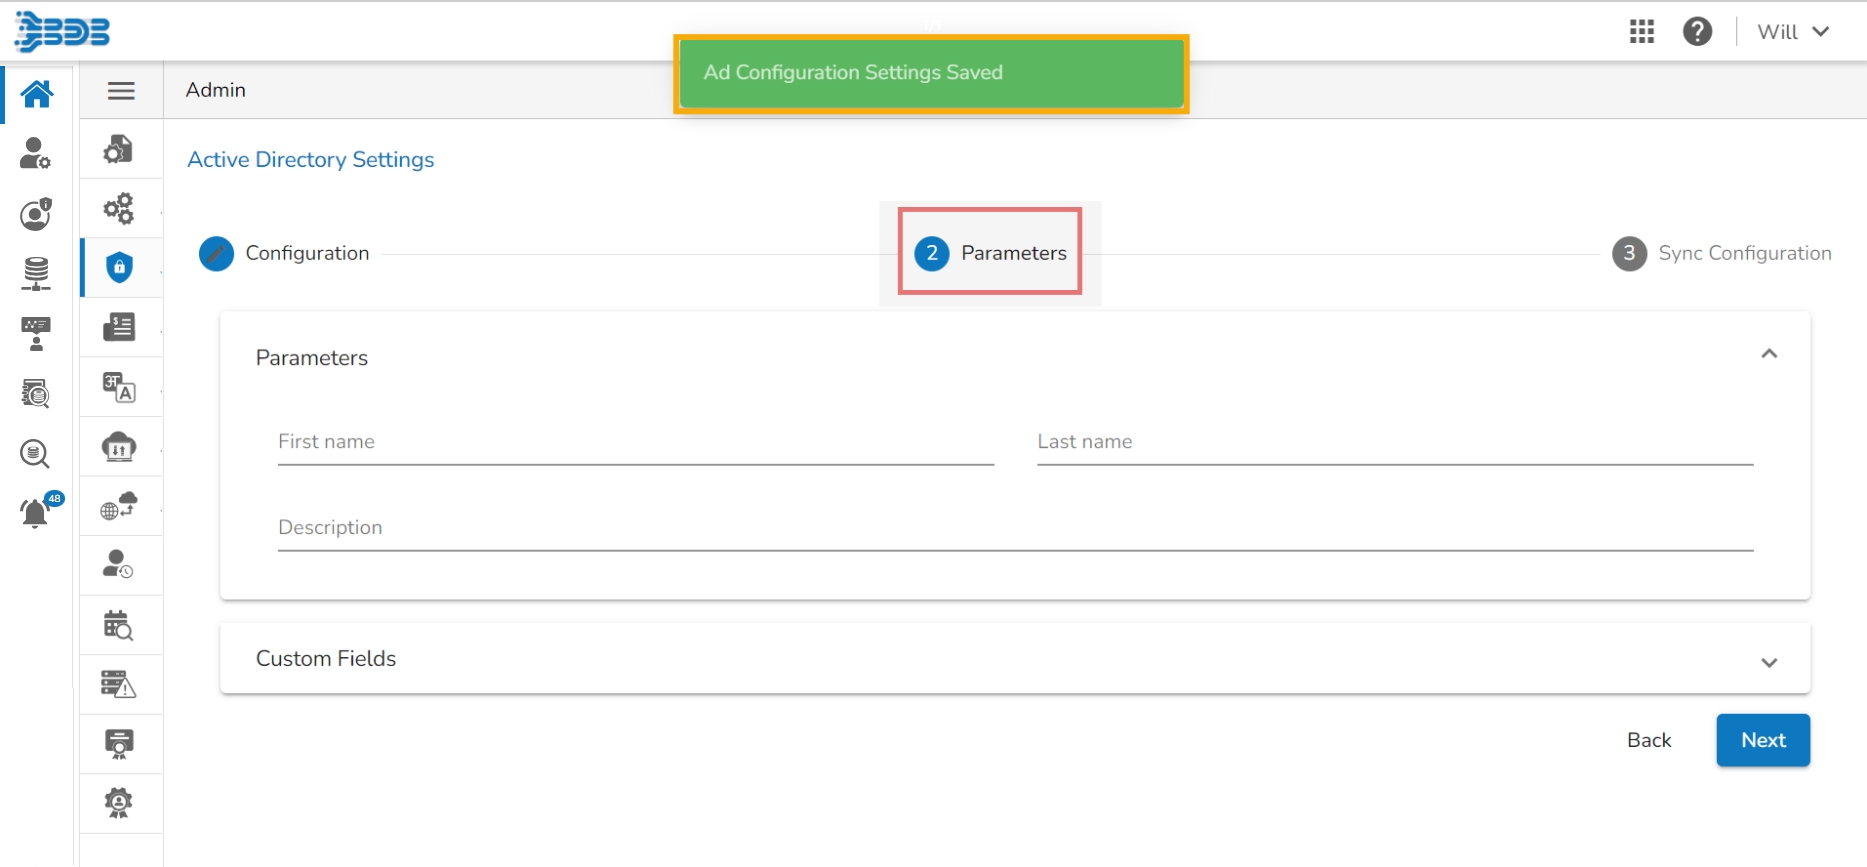
A success message appears to confirm the action and leads to the Sync Configuration tab.
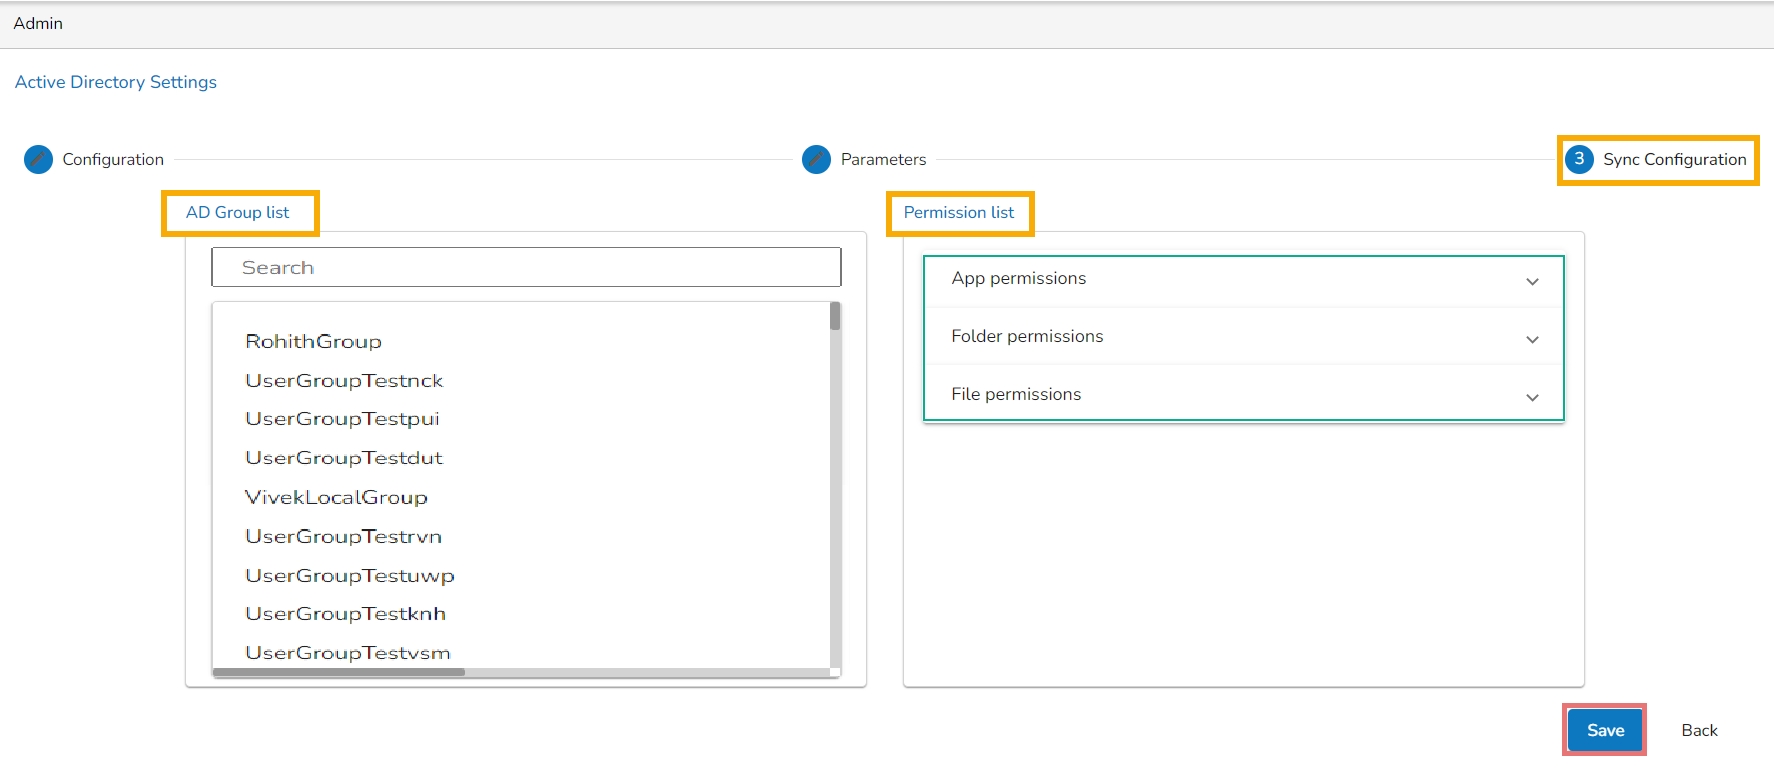
Select a user group using the displayed AD Group list.
Select users from the AD User list by putting the checkmarks in the boxes given next to the usernames.
Click the Next option to proceed.
A success message appears to confirm that the user list has been updated.
The Group Configuration tab opens.
The selected AD user list appears.
Select any user group from the AD Group list.
Click the Save option.
A success message appears confirming that the user group is updated successfully.
Please Note: Open the Security module for the selected AD user the configured group gets listed in the Add Users to Group list.
This section explains how to configure Clarity.
Select the CAPPM Configuration using the Authentication Admin option.
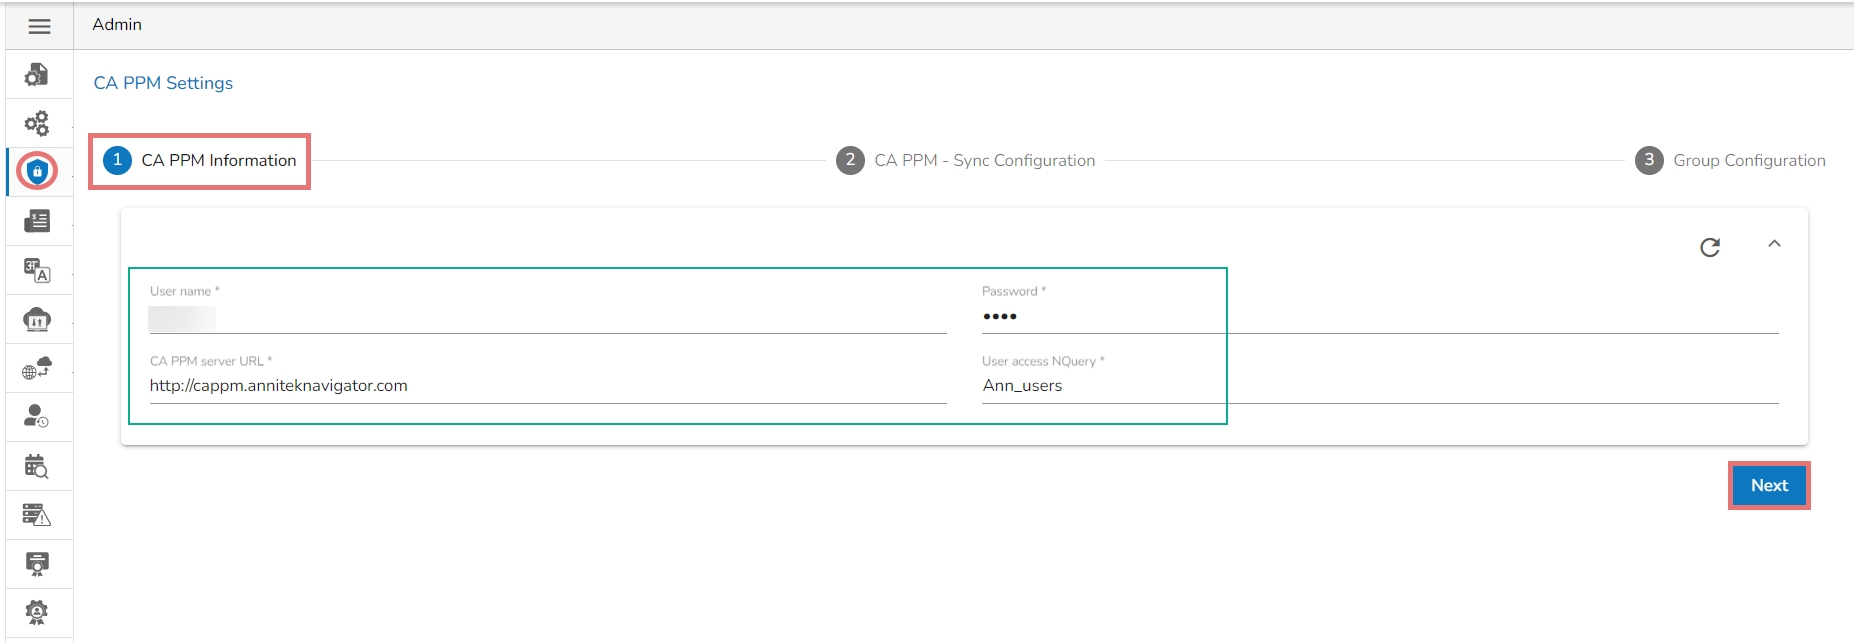
A new page opens with 3 steps mentioned on it.
The fields for CA PPM Settings get displayed by default.
Provide a Username of a CAPPM account.
Enter the valid Password for the selected CAPPM account.
Enter the CAPPM server URL.
Provide the query name that fetches a list of the Clarity users in the User access NQuey field.
Click the Next option to proceed.
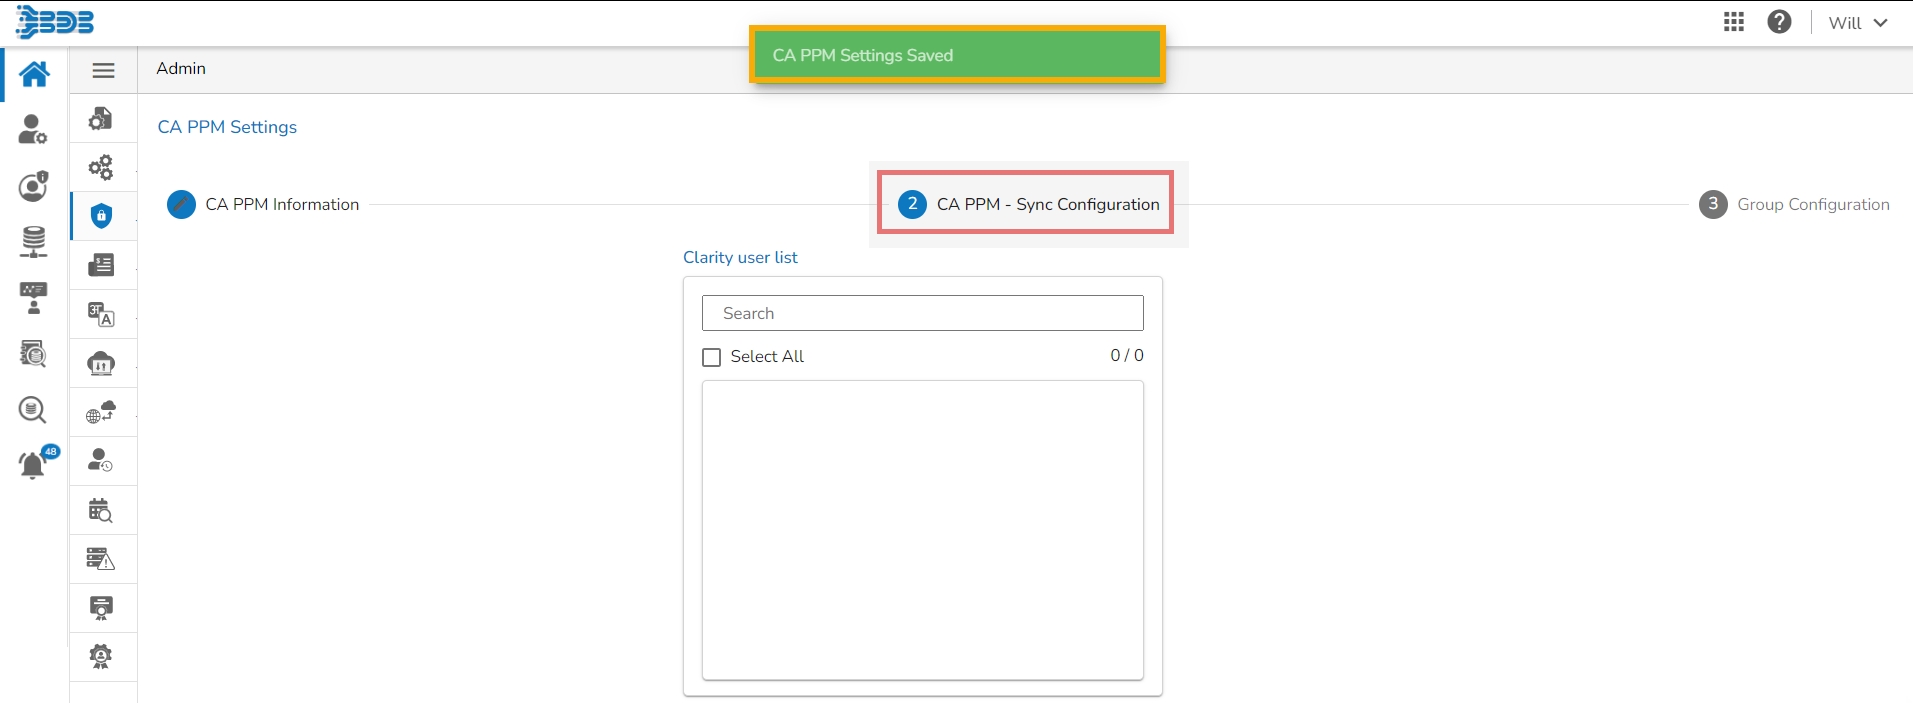
A success message appears, and the administrator gets directed to the CA PPM Sync Configuration tab.
The CA PPM Sync Configuration tab opens, displaying the Clarity User list.
Select a user.
Click the Next option.
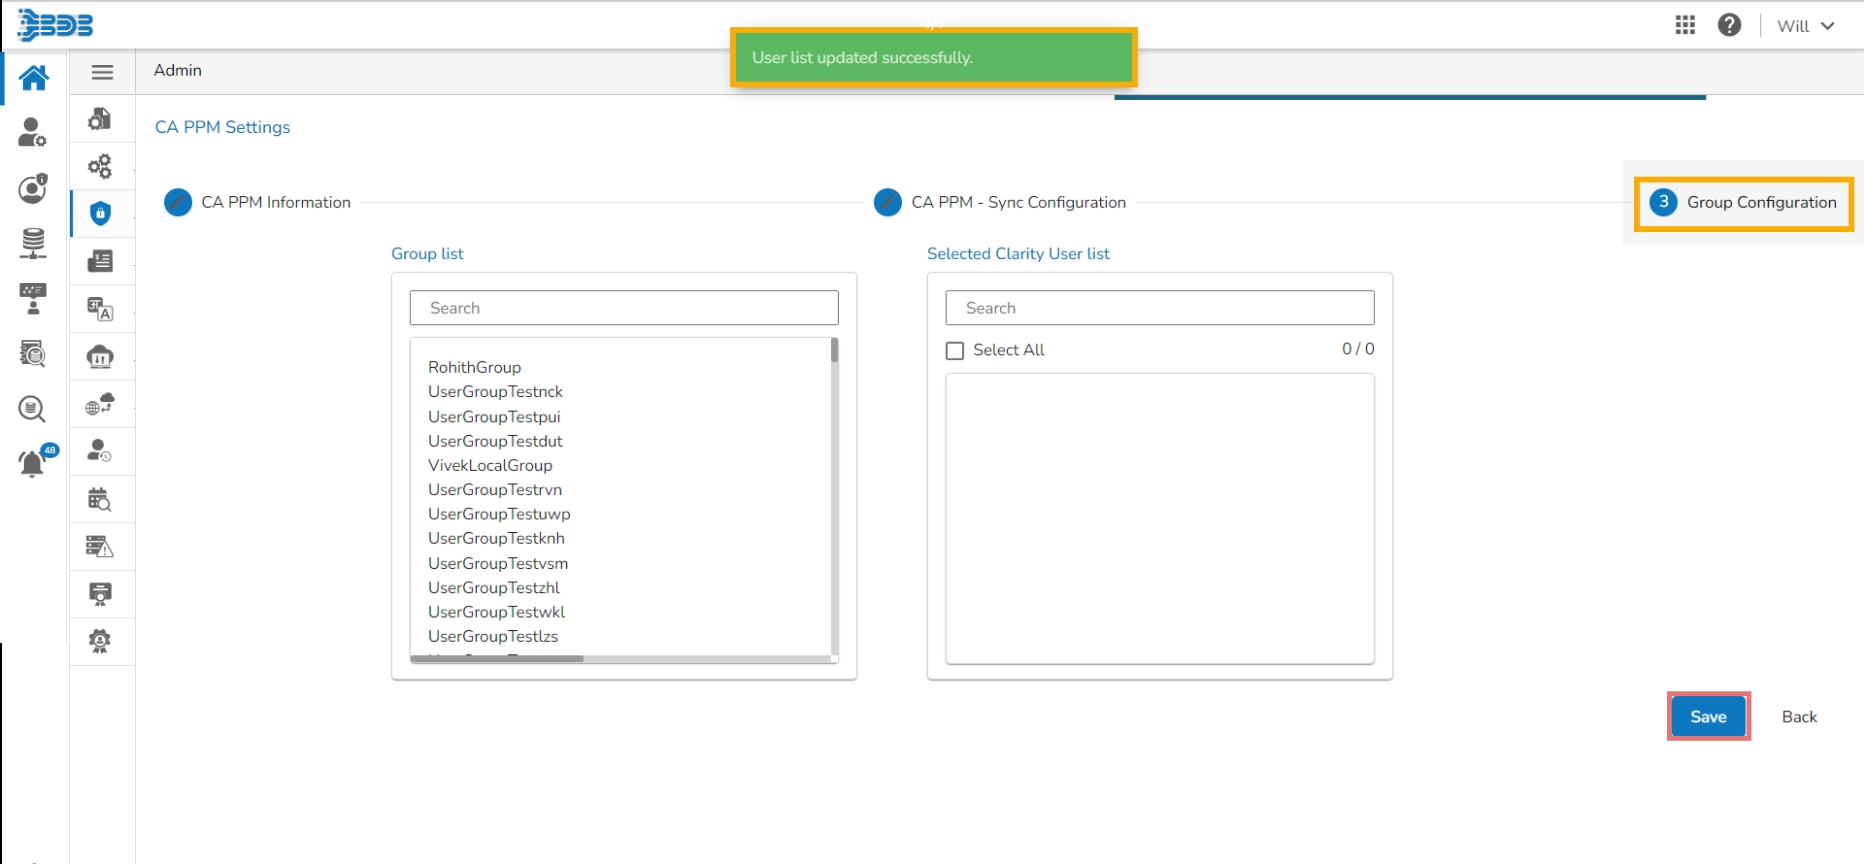
A success message appears to confirm the user list update and the administrator gets directed to the Group Configuration tab.
Select a clarity user from the Group List and add to the Selected Clarity User list.
Select clarity user from the List.
Click the Save option.
Please Note:
Click the Back option to go back on the CA PPM Settings page.
This page describes steps configuring the Keycloak for SSO configuration.
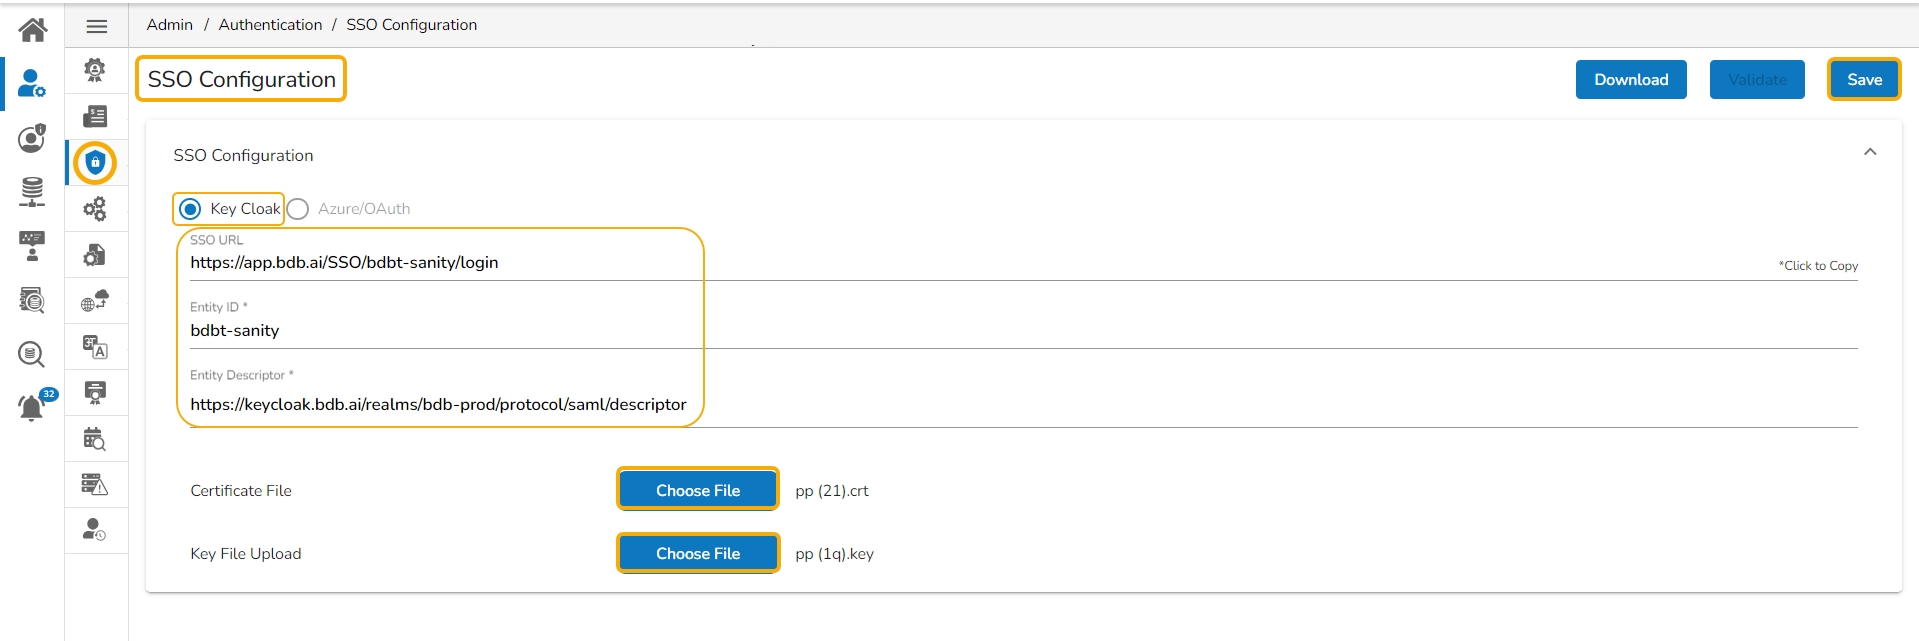
Navigate to the SSO Configuration admin option using the Authentication options.
Select the Keycloak option.
Provide the following options:
SSO URL
Entity ID
Entity Descriptor
Certificate File: Choose a certificate file.
Key File Upload: Choose a Key File certificate file.
Click the Save option.
A notification appears and the Keycloak option gets saved.
Please Note: Please keep the following points in mind while working with Keycloak.
Group Deletion: Groups deleted in Keycloak must also be manually removed from the Platform.
Group Renaming: Rename groups only through the Platform.
User Removal from Group: Users must be deleted in Keycloak and the Platform.
Certificate File Download: Only admins have access to download certificate files.
Follow the below-given steps to configure the AWS Cognito settings:
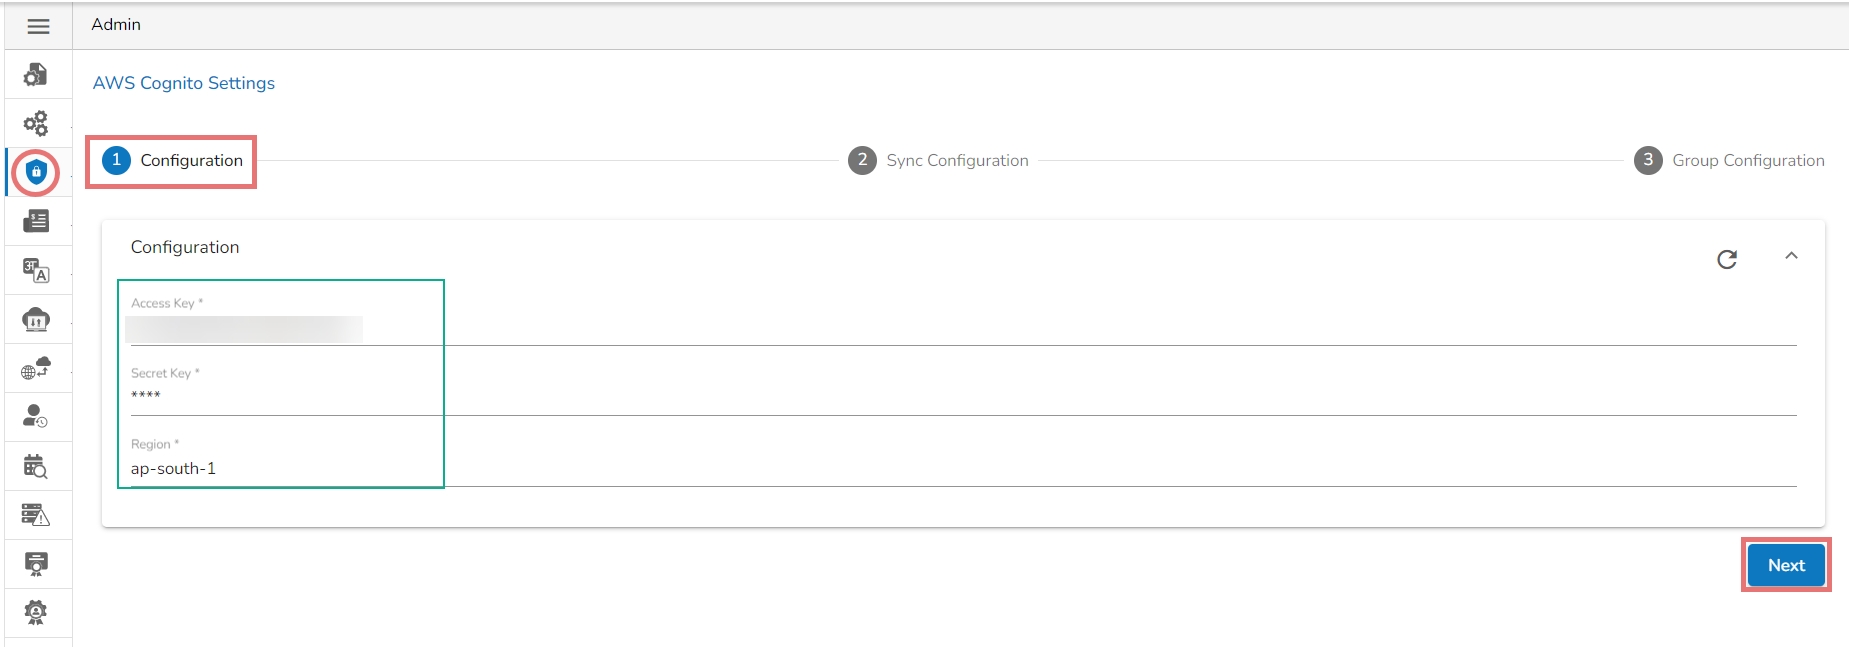
Select the AWS Cognito Configuration option from the Authentication drop-down menu.
The AWS Cognito Settings page opens displaying the Configuration tab.
Provide the following information to configure the AWS Cognito Settings:
Access Key
Secret Key
Region
Click the Next option.
A success message appears to confirm the action.
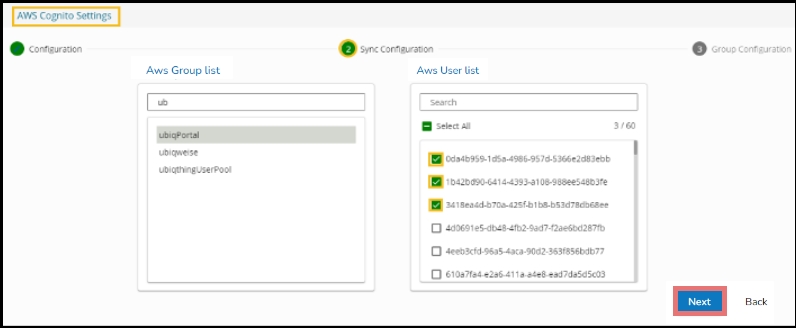
The user gets redirected to the Sync Configuration tab.
Select a user group from the displayed AWS Group list.
Select users from the AWS User list by putting the checkmarks in the boxes given next to the usernames.
Click the Next option to proceed.
A success message appears to confirm that the user list has been updated.
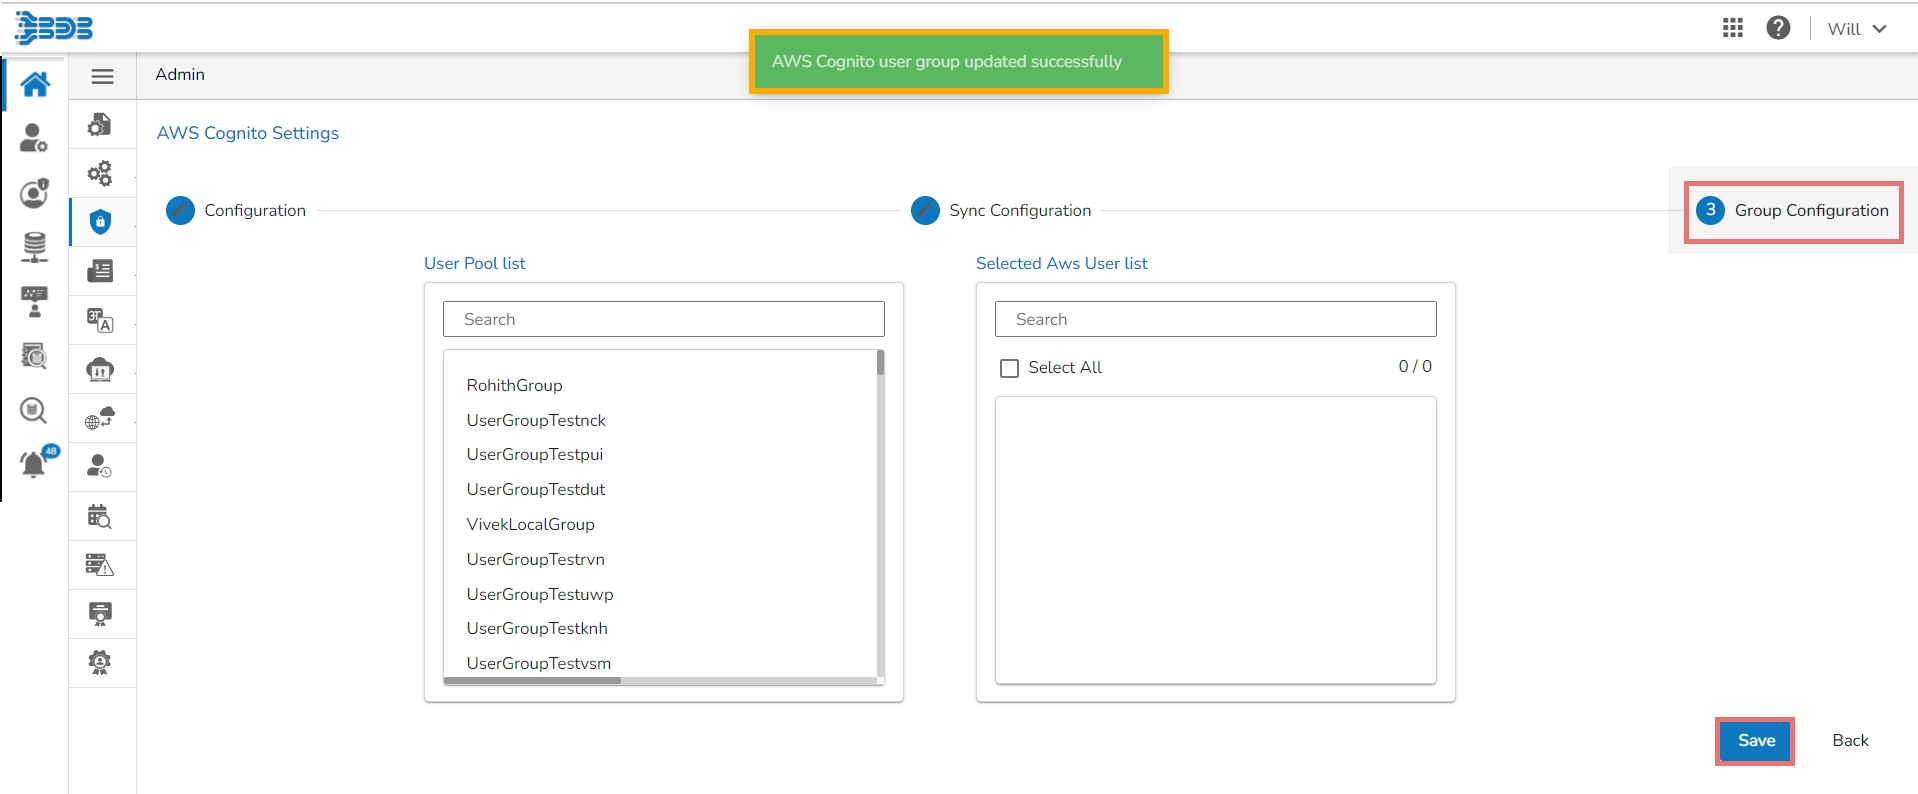
The Group Configuration tab opens.
The User Pool list appears.
Add the user to the Selected AWS user list.
Click the Save option.
A success message appears to confirm the action.
Please Note:
Click the Back option to go back to the AWS Cognito Configuration page.
Click the Clear all settingicon to erase the entered CA PPM Information.
Click the Clear all settingicon to erase the entered AWS Cognito information.
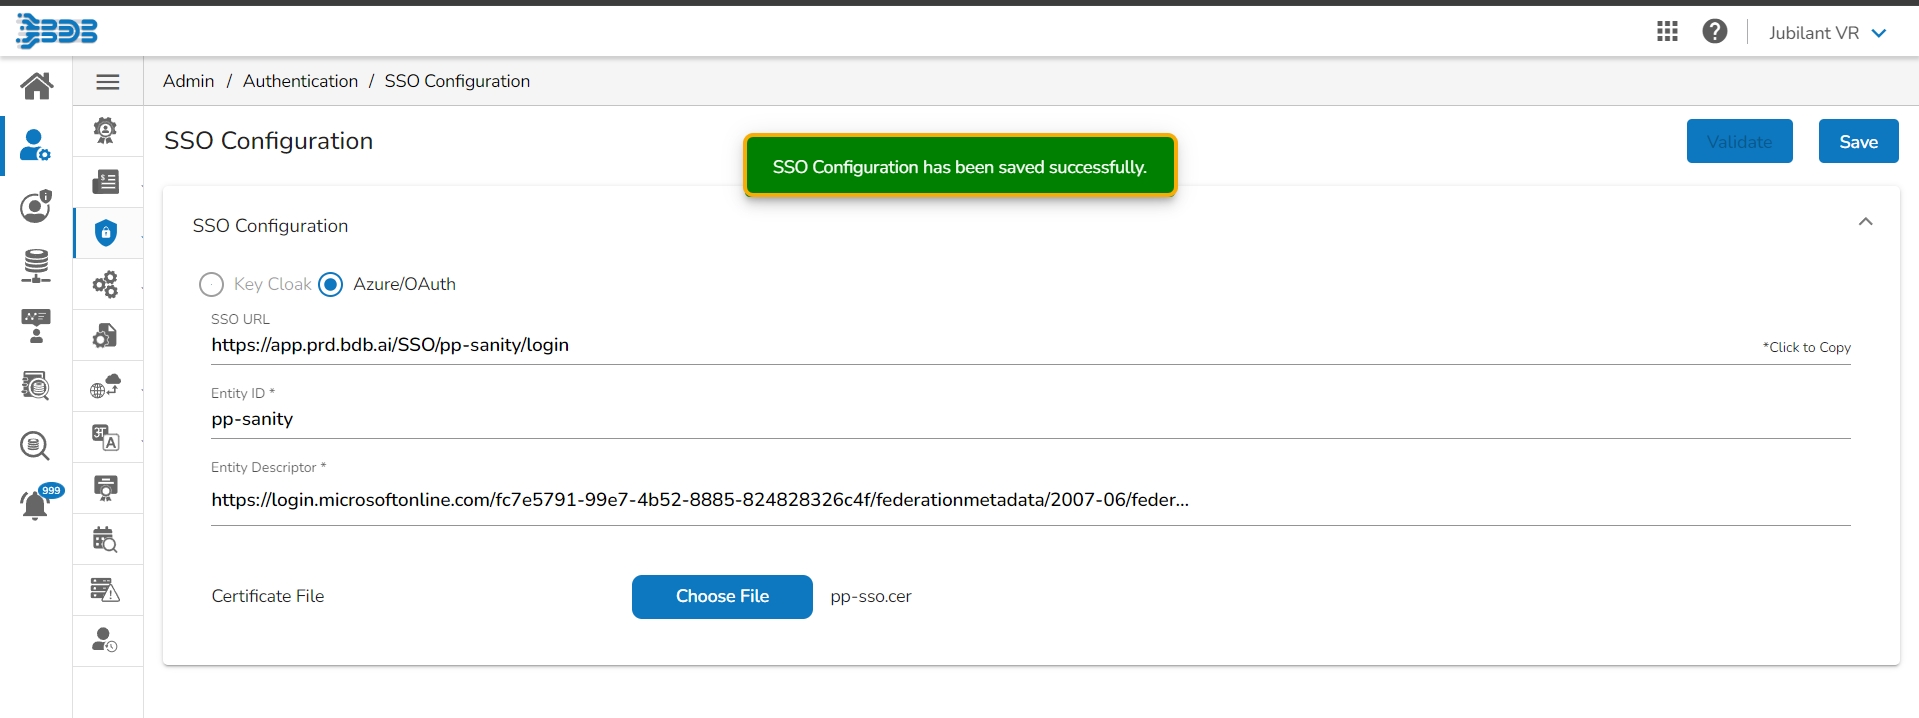
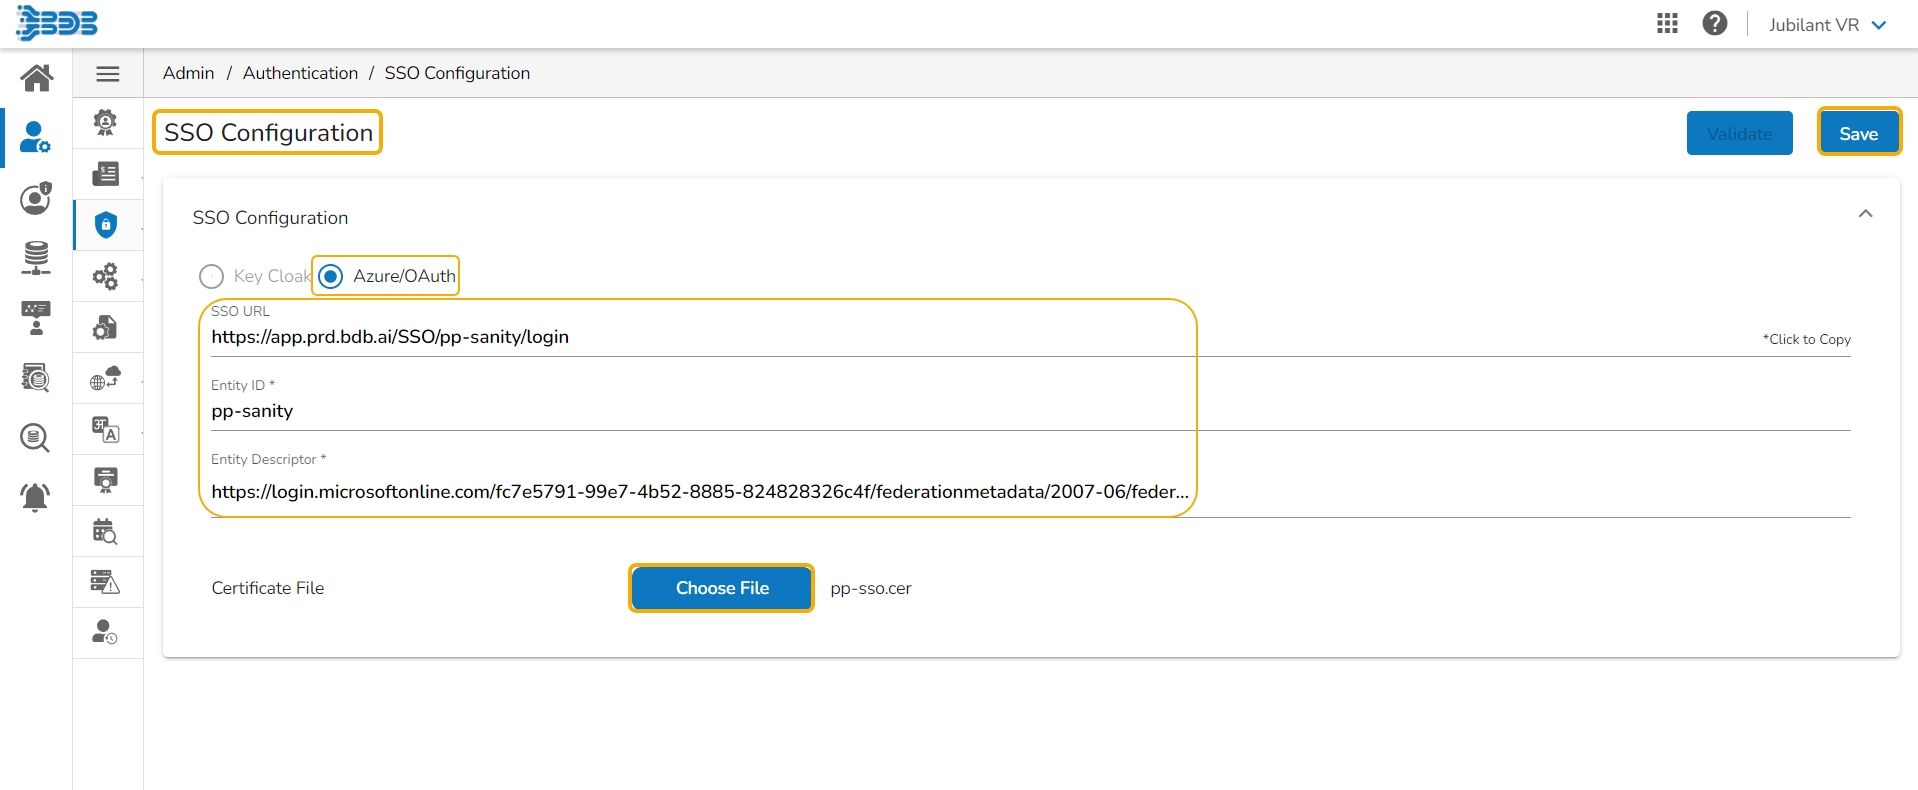
This page describes steps configuring the Azure/ OAuth for SSO configuration.
Navigate to the SSO Configuration admin option using the Authentication options.
Select the Azure/ OAuth option.
Provide the following options:
SSO URL
Entity ID
Entity Descriptor
Certificate File: Choose a certificate file.
Key File Upload: Choose a Key File certificate file.
Click the Save option.
A notification appears and the Azure/ OAuth option gets saved.

