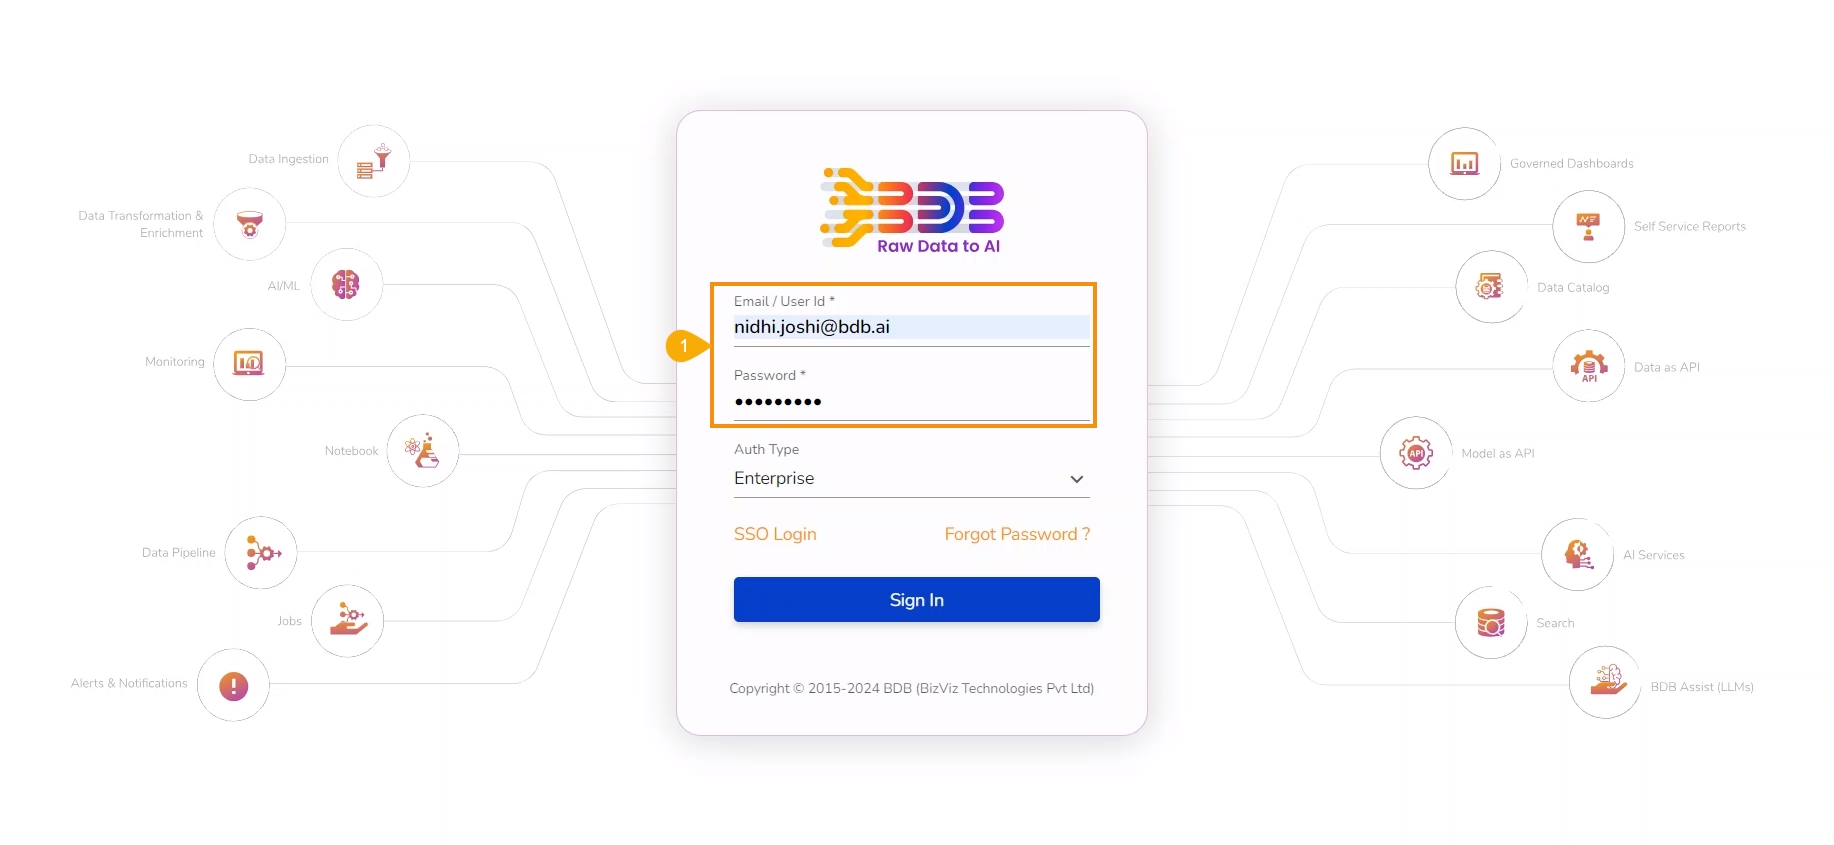
The admin users or the other users with permission to access Admin module can use the GIT Migration option to import the exported various modules.
The users can import an exported Dashboard using this feature.
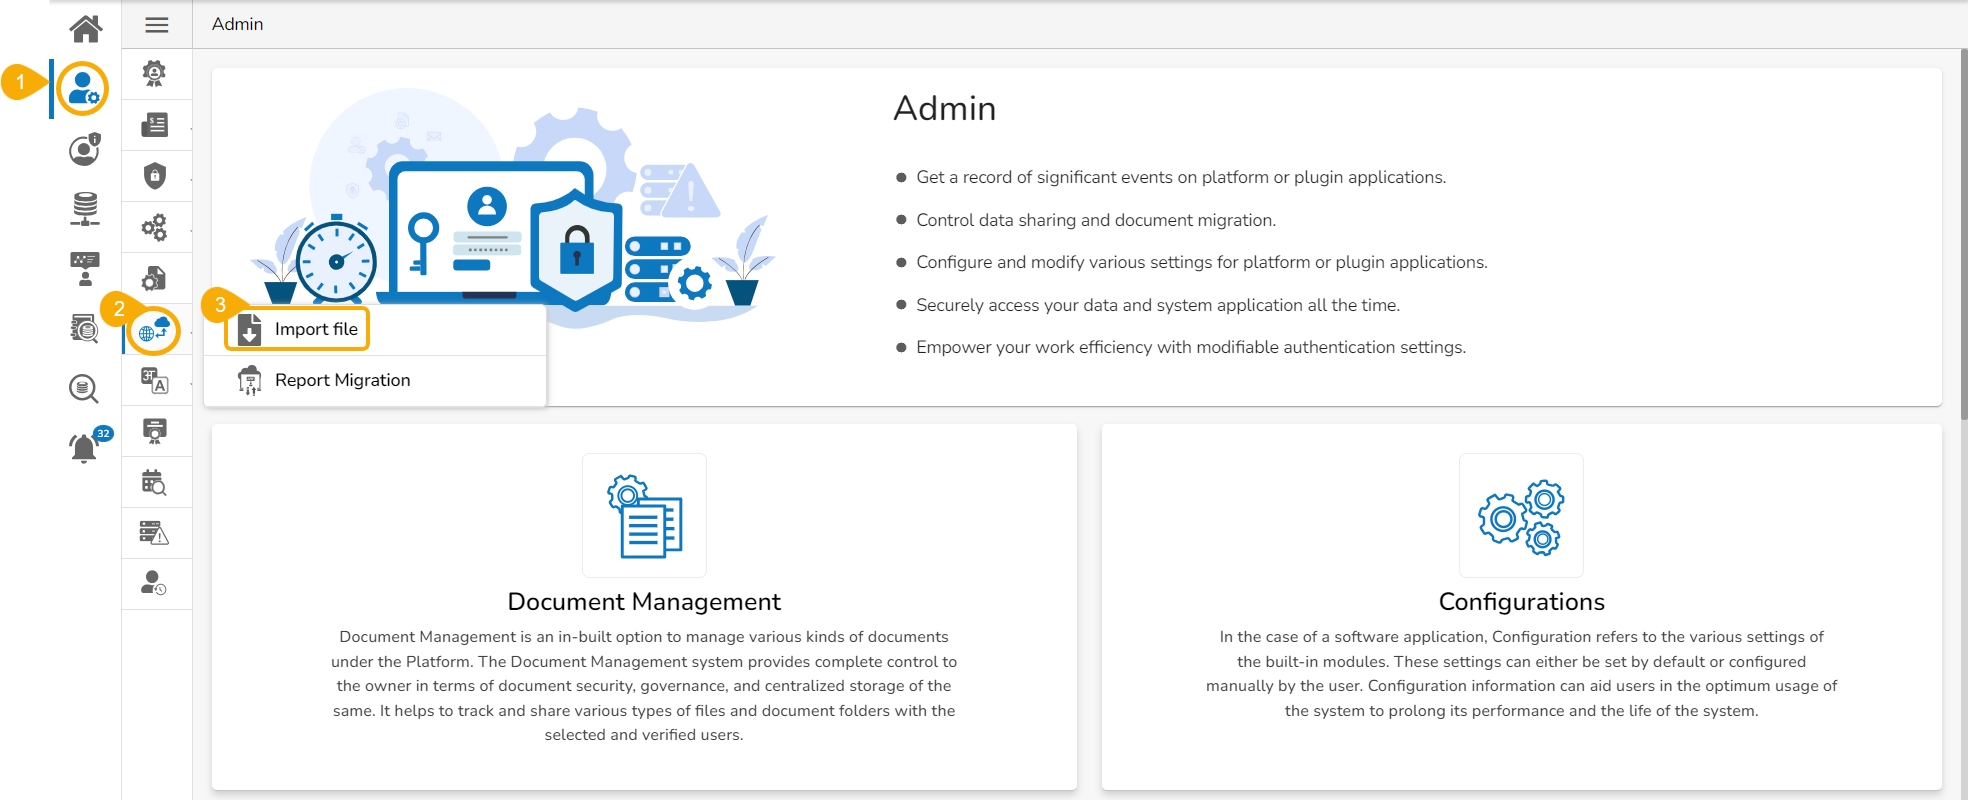
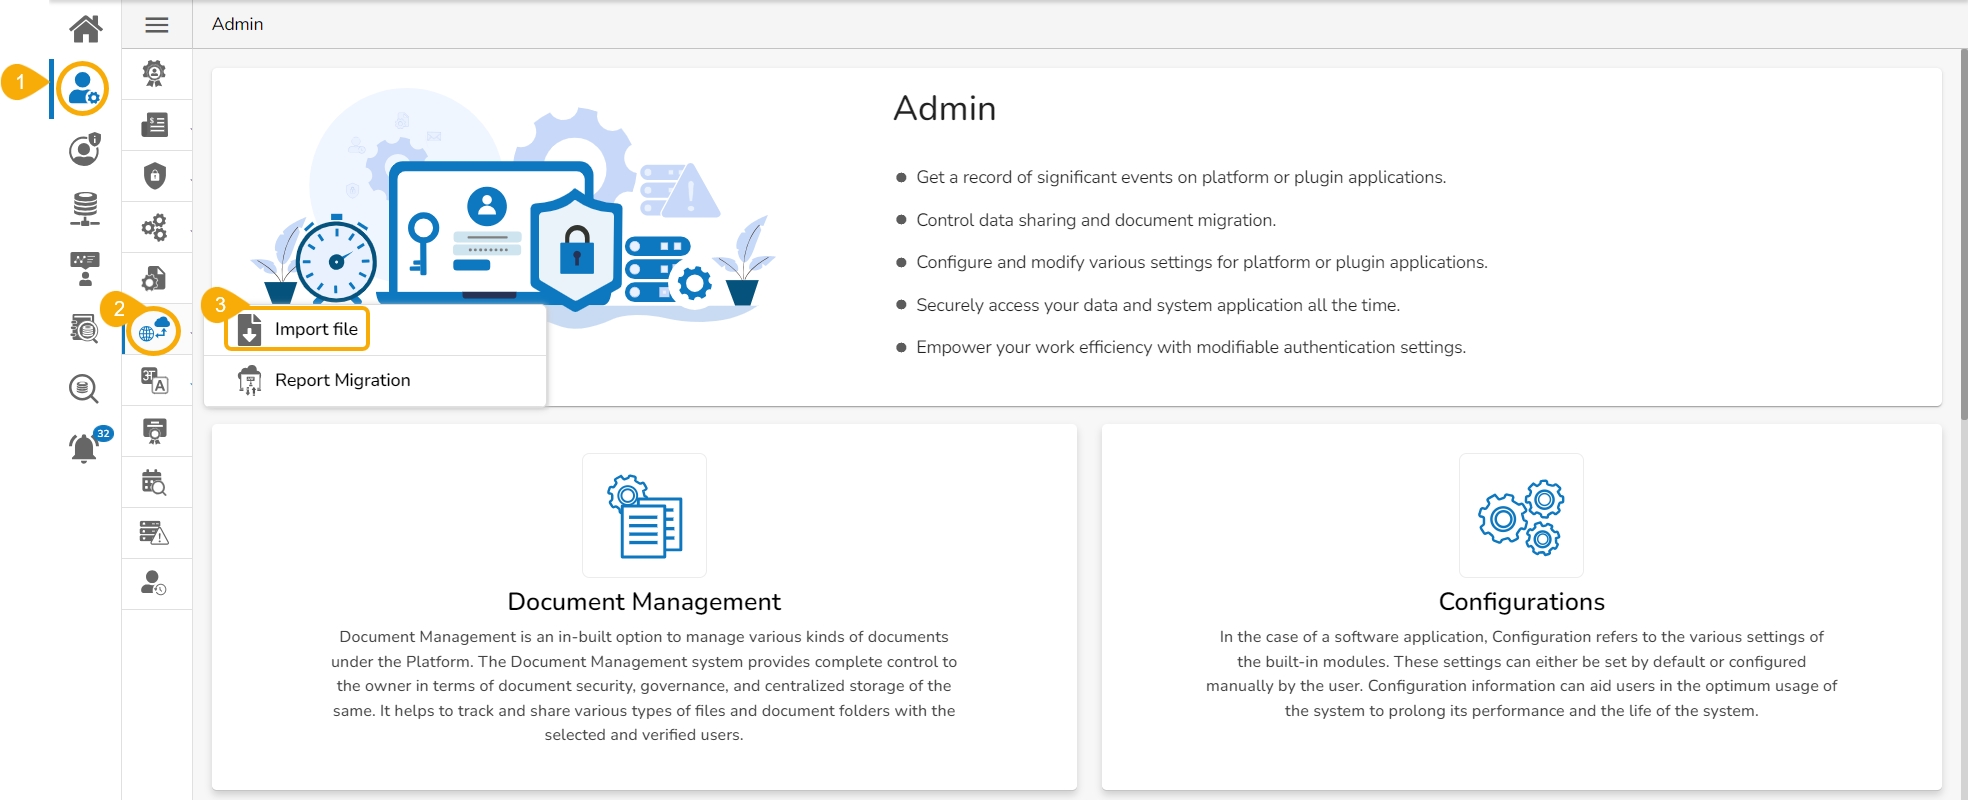
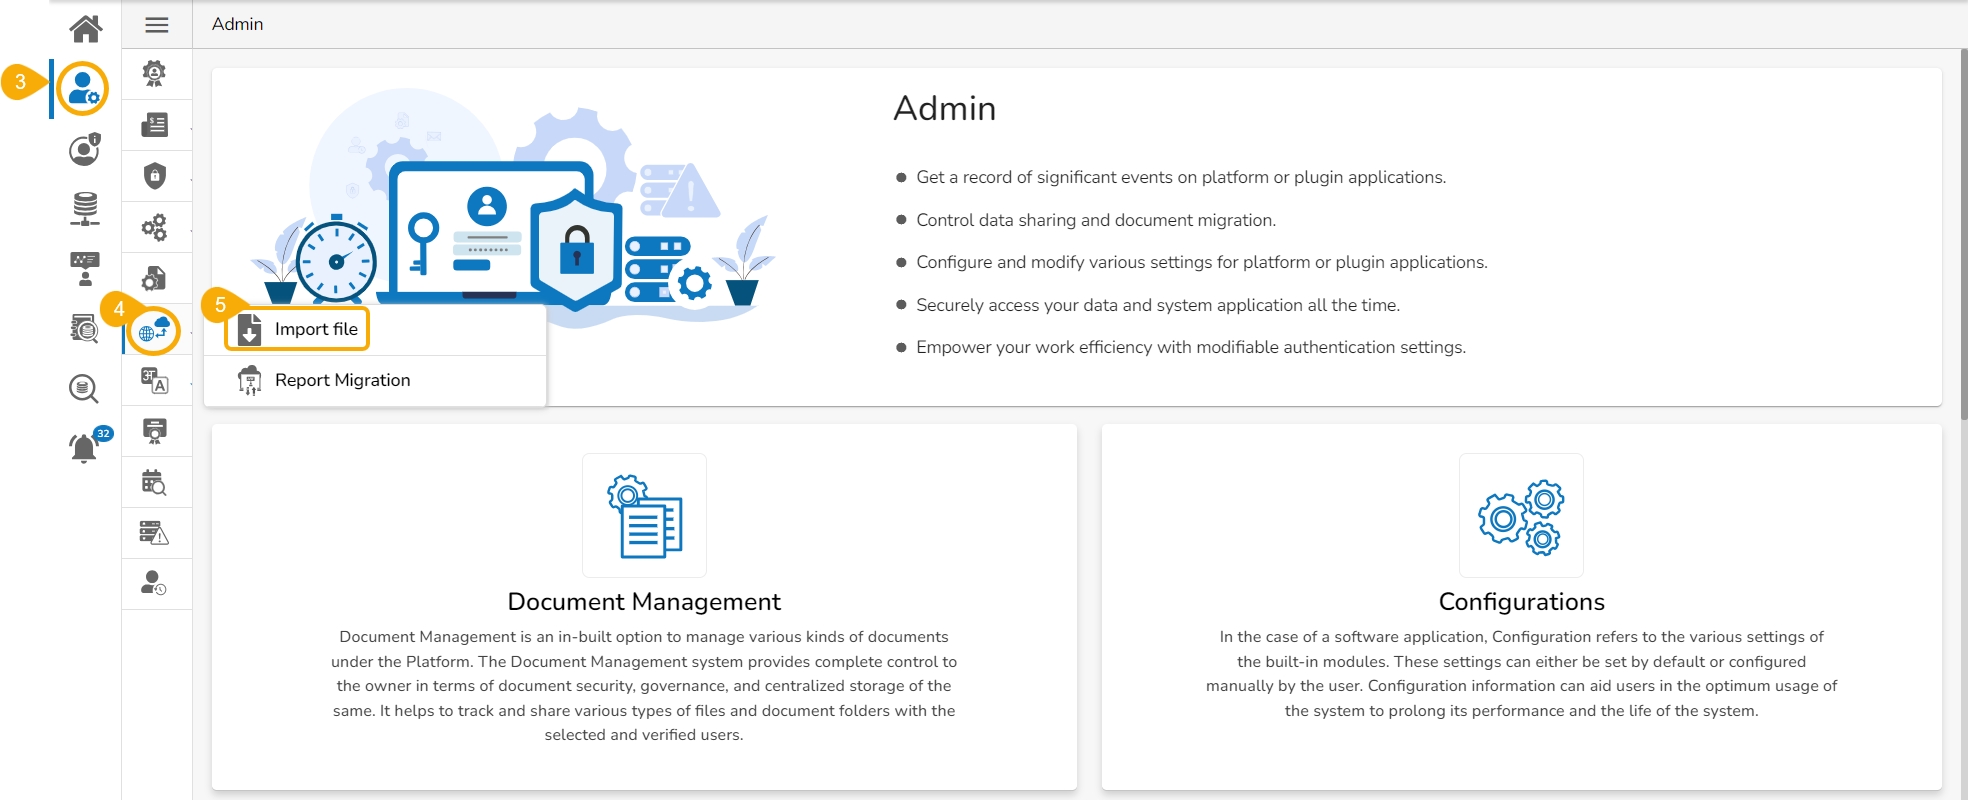
Navigate to the Admin Module.
Click the GIT Migration icon from the side navigation bar.
Click the Import File option that appears.
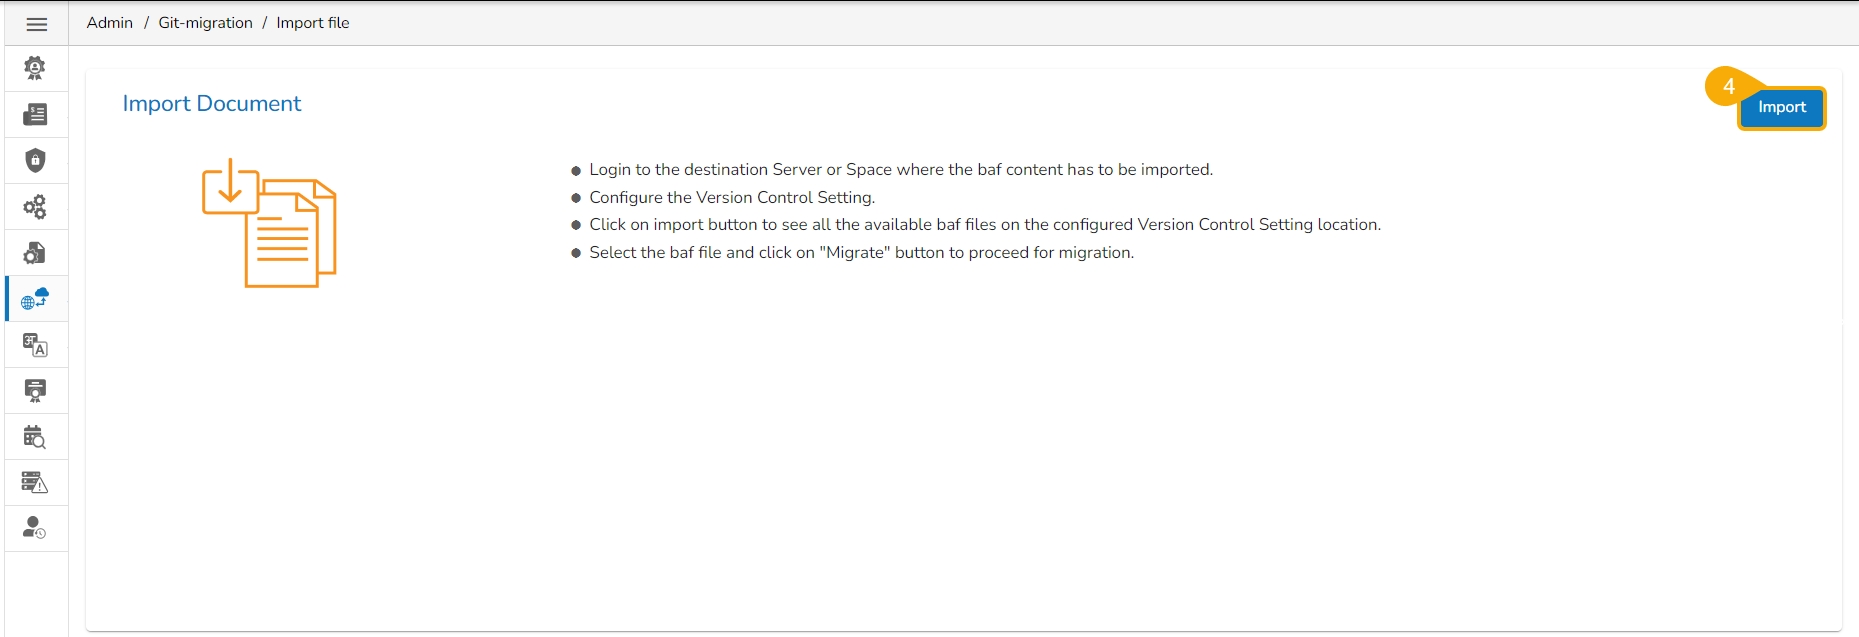
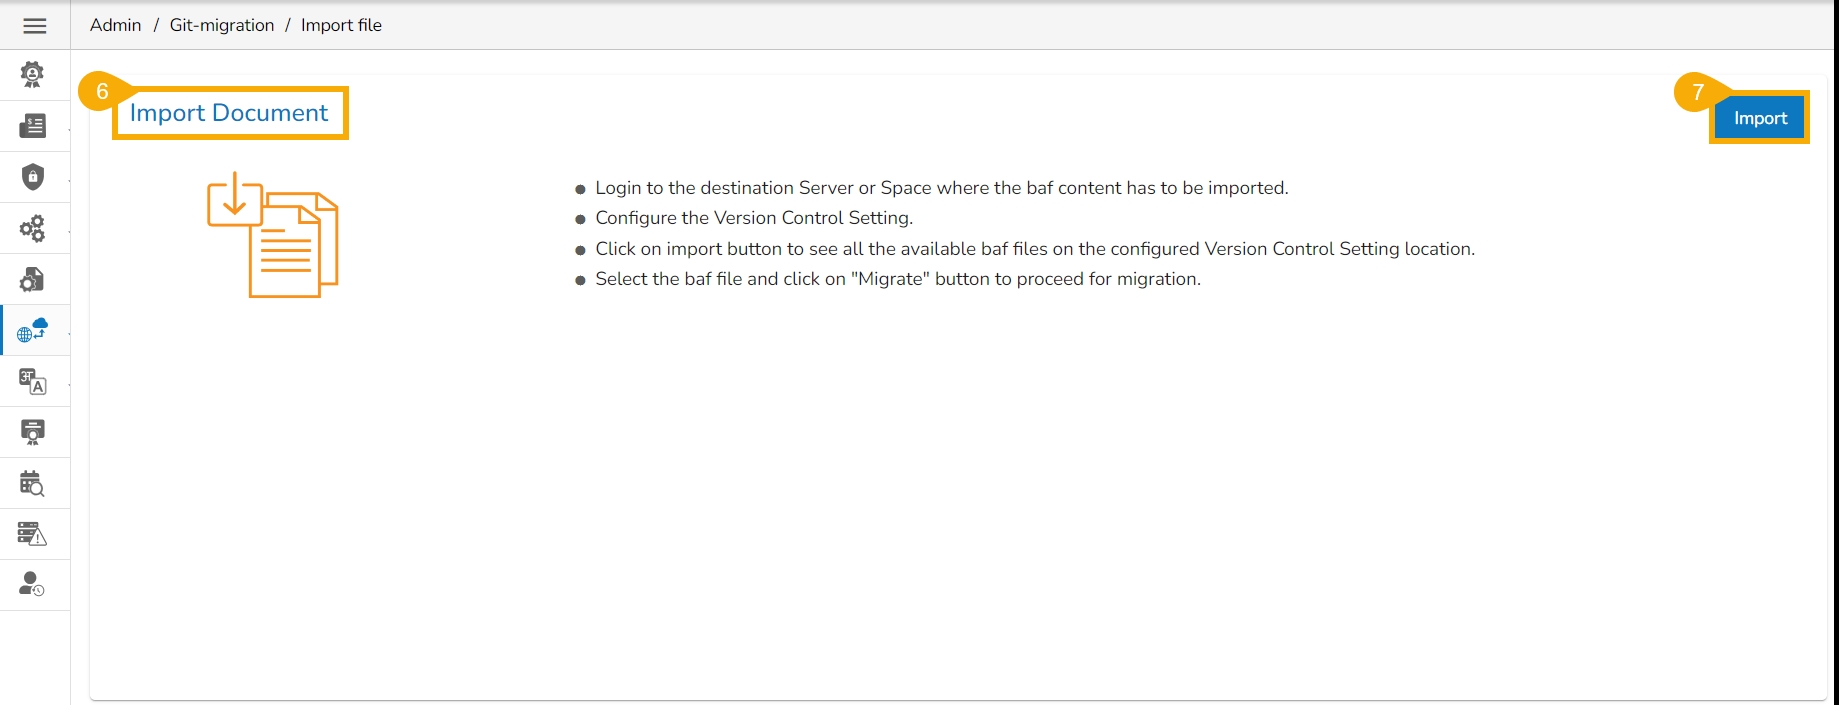
Click the Import option that appears on the next page.
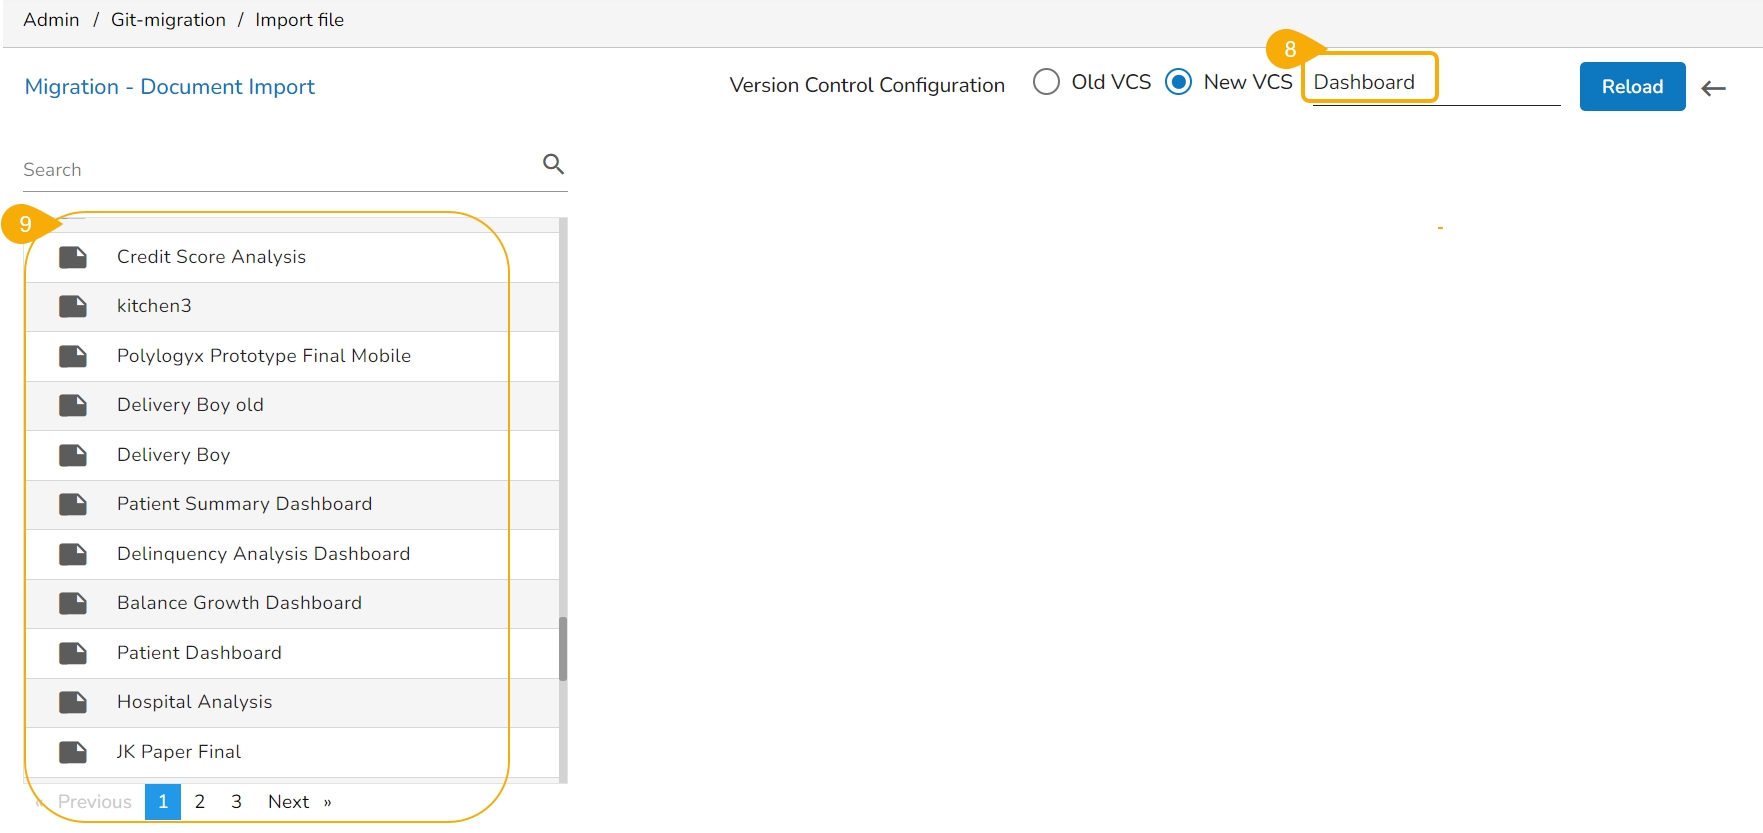
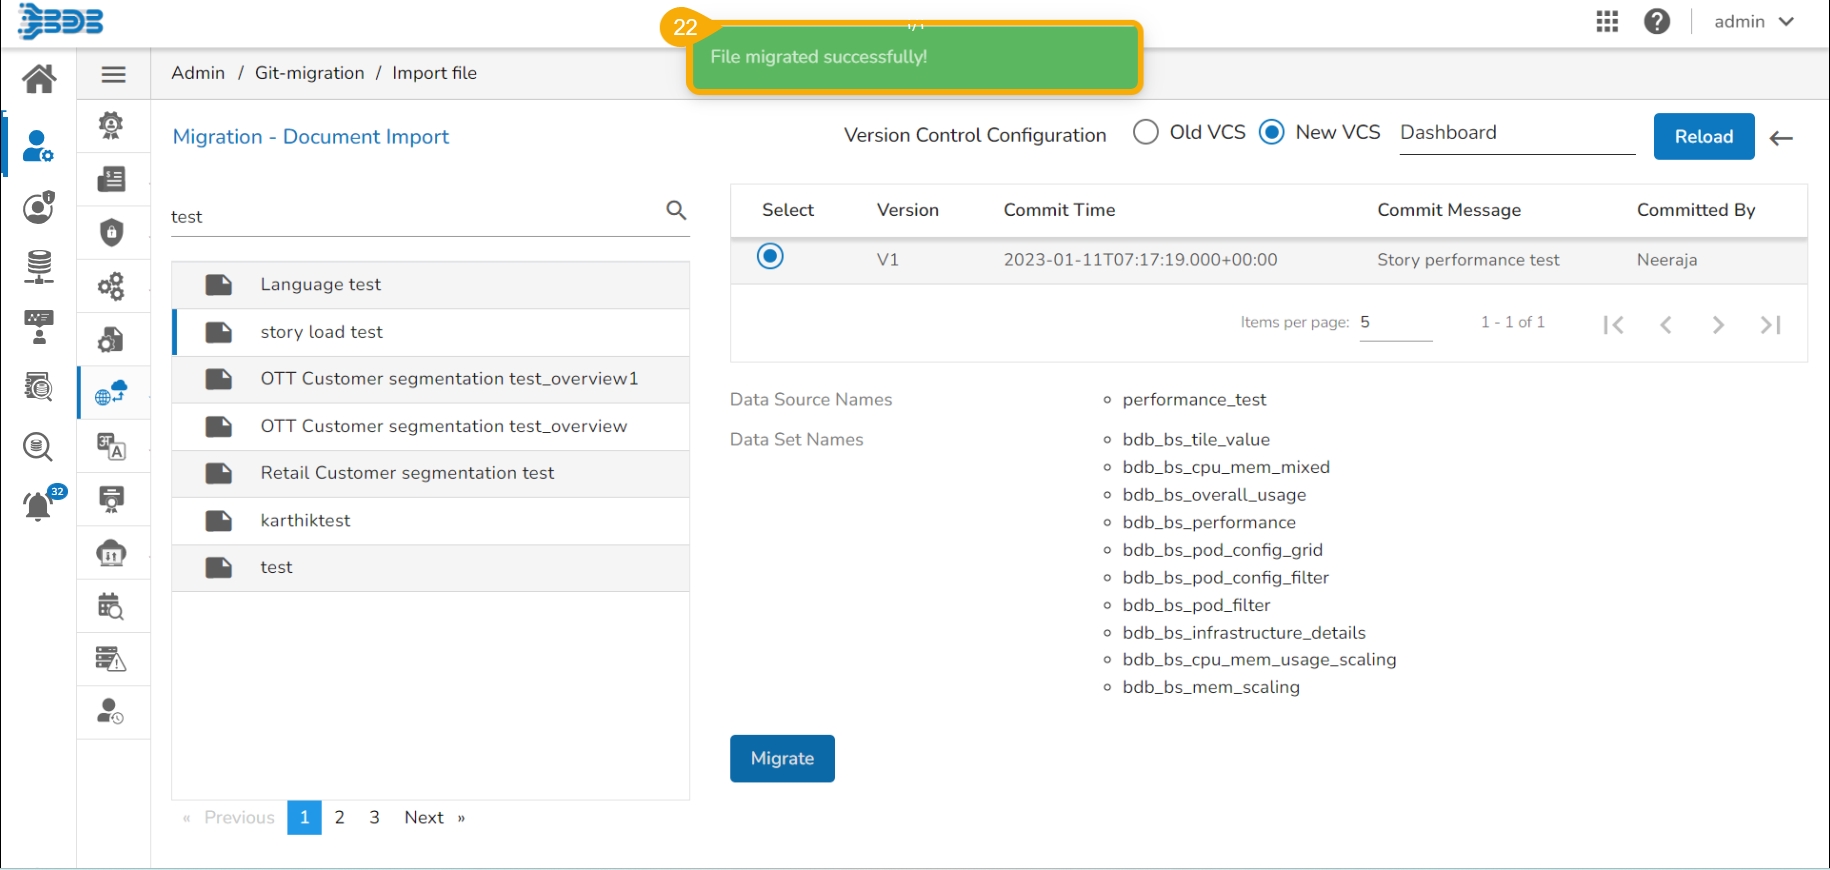
The Migration-Document Import screen appears.
Select the New VCS for the Version Control Configuration.
The Select a Module drop-down menu bar appears at the top-right side of the screen.
Select the Dashboard module.
A list of the exported dashboards appears on the left side of the page.
Use the search bar to search for a dashboard. (Ex. vtestdasdboard)
The customized list appears based on the searched term.
Select a dashboard and click to open the details.
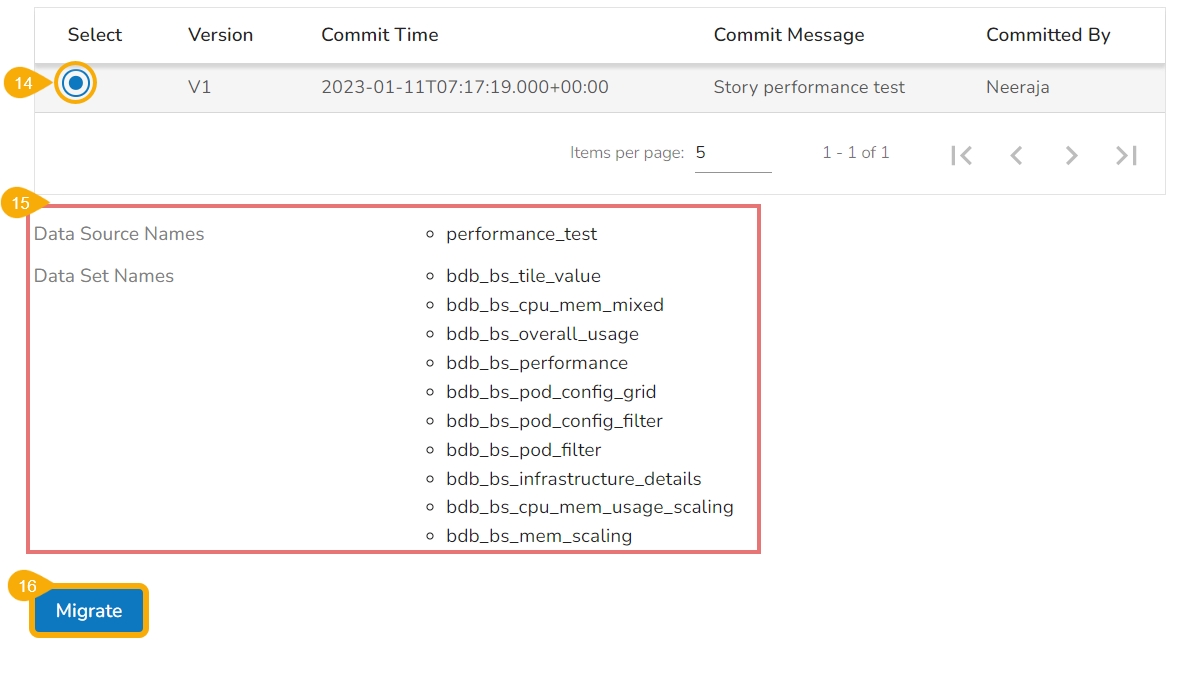
The various versions (if available in the GIT) of the selected dashboard appear.
Select a version using the checkbox.
Some more information about the selected dashboard gets displayed.
Click the Migrate option.
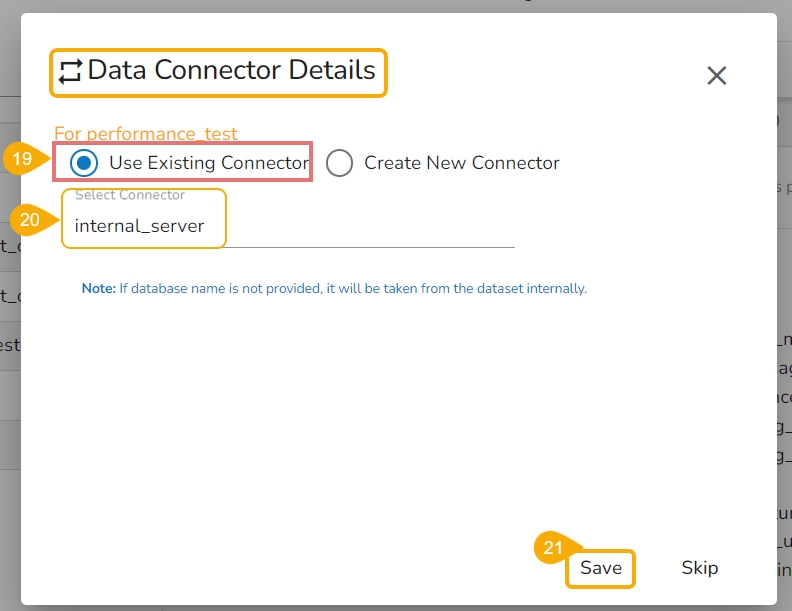
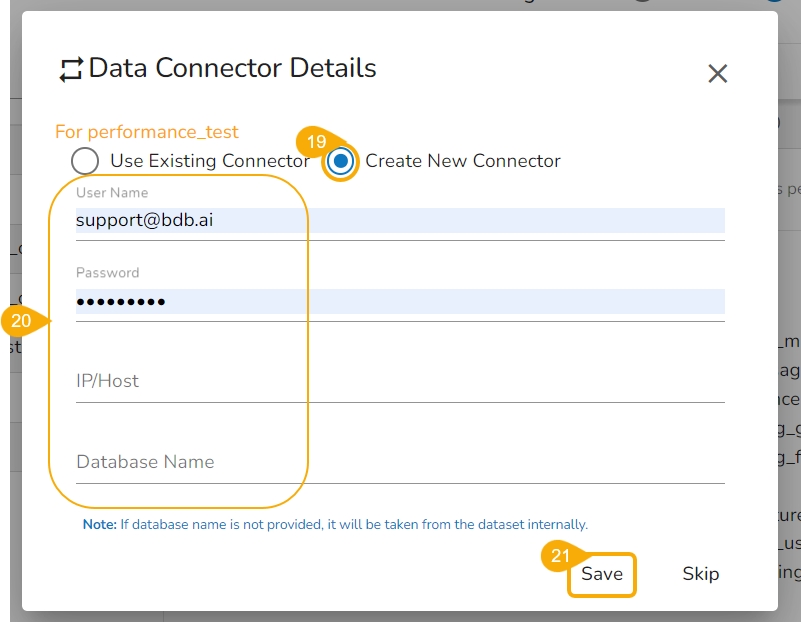
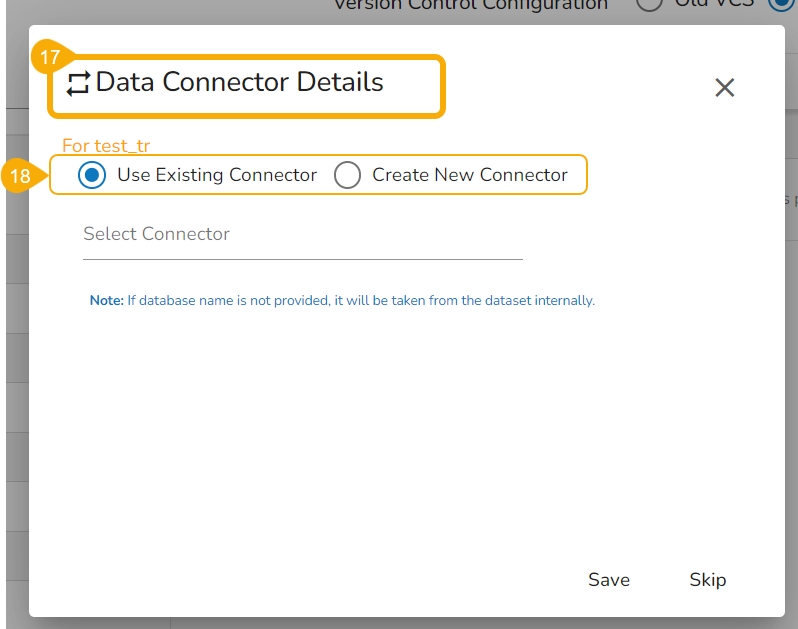
The Data Connector Details dialog window appears to configure a data connector.
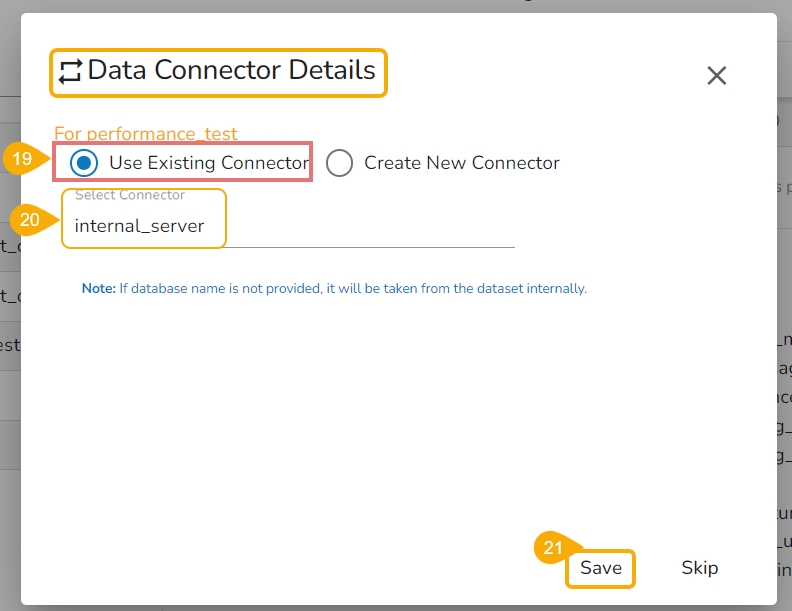
The user gets two choices to configure the data connector:
Let the checkmark be in the given checkbox to use an existing connector.
Select a data connector from the drop-down menu.
Click the Save option to save the configured data connector details.
Please Note: When the selected Dashboard displays multiple connectors, the user must select them all with the Use Existing Connector option to load all the charts under the selected Dashboard.
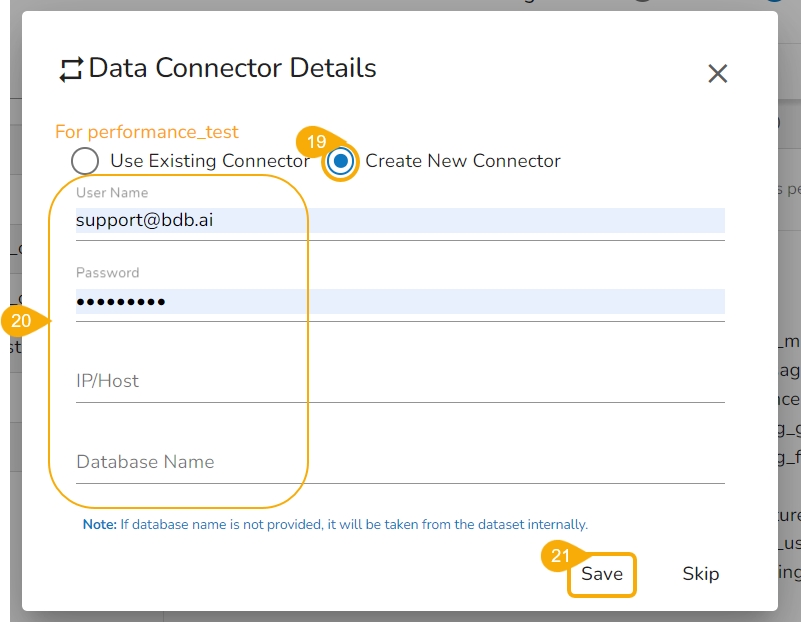
Select the Create New Connector option.
Provide the required details: Username, Password, PI/Host, Database Name
Click the Save option.
A notification message appears, and the selected dashboard gets migrated to the Designer module.
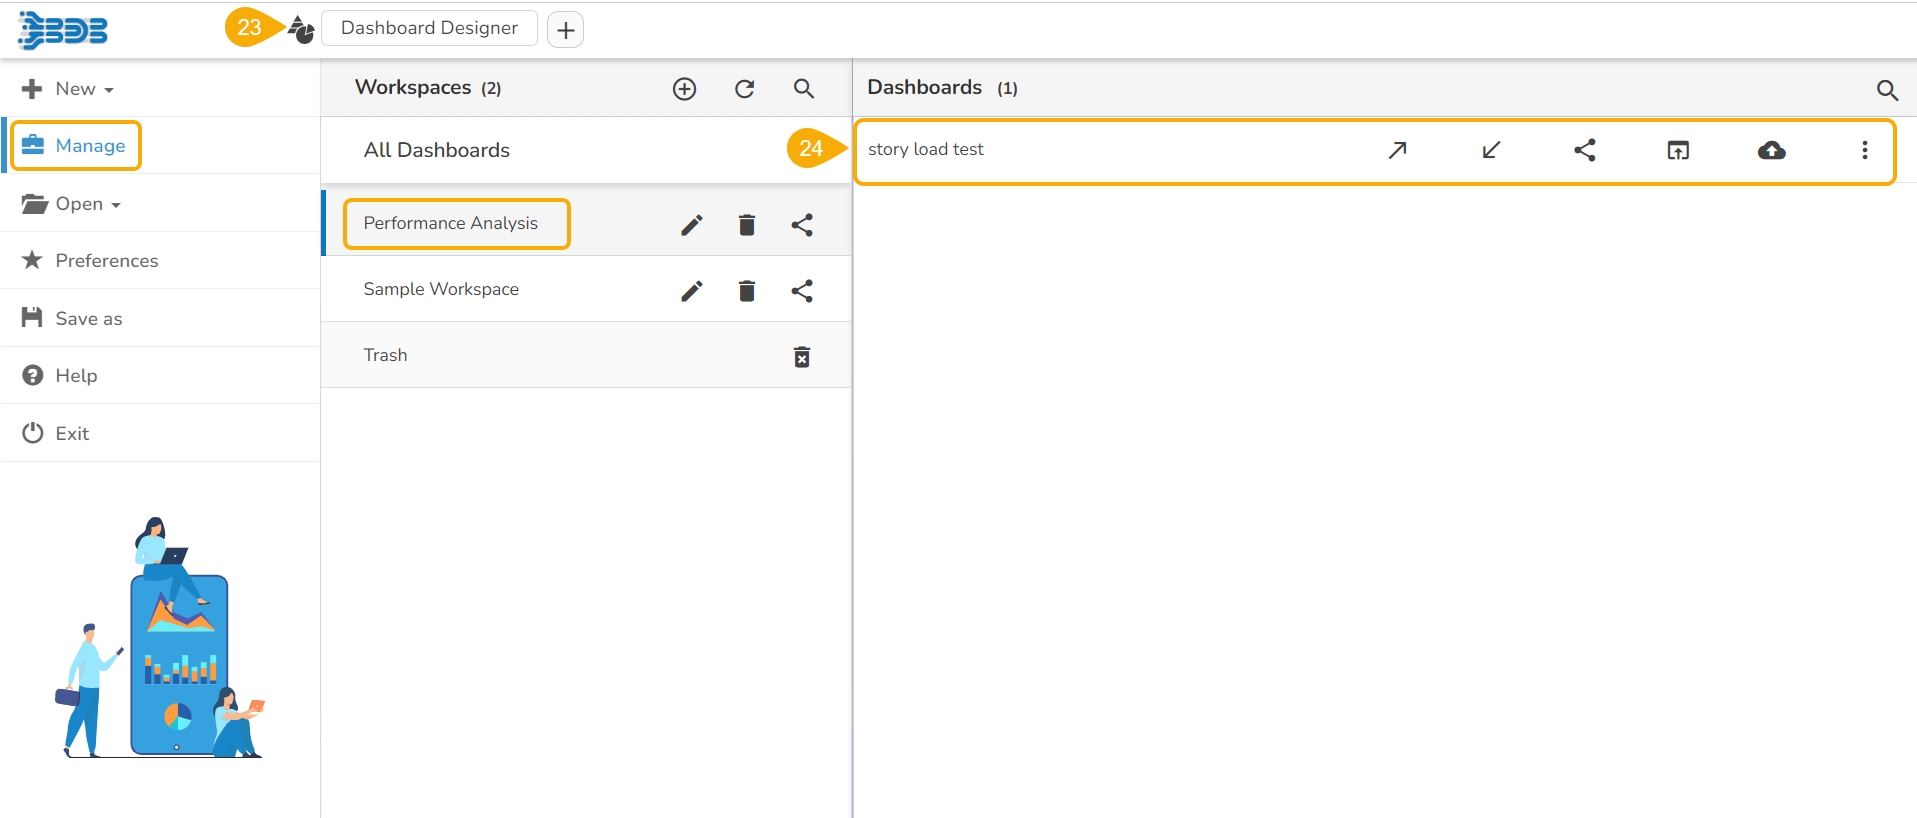
Navigate to the Designer module.
The migrated dashboard gets added to the Manage section.
Please Note: Click the GIT Export icon to export the selected dashboard to GIT. All the exported Dashboards can be imported using the Import File option of the GIT Migration.
This Admin option allows to migrate Notebooks, Models, and Project (Repo Sync) from the Data Science Lab.
The GIT Migration Admin option allows the users to import exported Notebook, Models, and Repo Sync Projects from the Data Science Lab module.
Please refer to the Exporting a Project page to understand the export repo sync project functionality.
The user can import an exported repo Sync project from a different space by following the given set of steps:
Navigate to the Admin Module.
Click the GIT Migration icon from the side navigation bar.
Click the Import file option that appears.
Click the Import option from the Import Document page.
The Document Import page opens.
Select the New VCS option.
Choose the Dslabs module.
Click the Project from the Migration- Document Import drop-down menu.
Please Note: The DS Lab module appears as Dslabs to import documents.
Use the search bar to Search for a specific Project from the displayed list.
Click the Project from the displayed list.
Available versions of the selected Project appears on the right side of the page.
Select a version of the Project by putting a checkmark in the given checkbox.
The Project name and Project URL will be displayed below.
Select a branch using the Branch drop-down option.
Click the Migrate option.
A notification message appears to ensure that the file is migrated successfully.
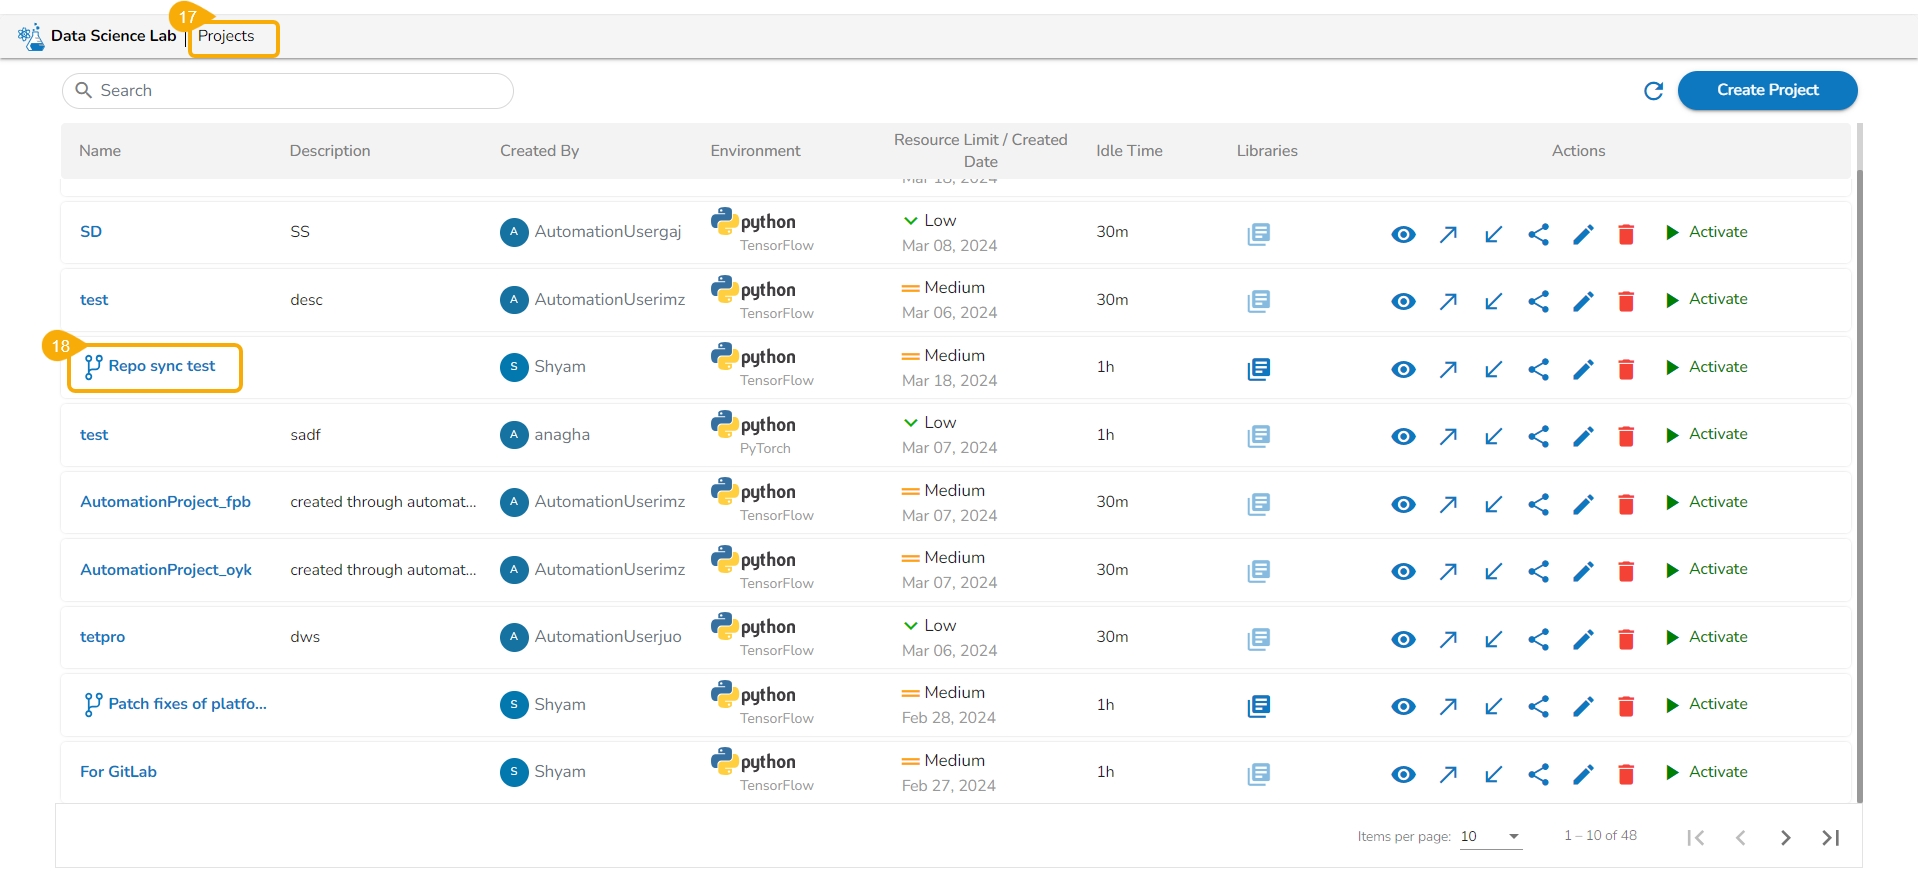
Navigate to the Projects page of the Data Science Lab module.
The migrated Project gets added at the top of the Projects list.
Please Note:
Refer to the Importing a DSL Script from GIT page to understand the steps to import an exported Data Science Lab Notebook/script.
Refer to the Import a DSL Model from GIT section to understand the steps to import an exported Data Science Lab model.
The user can export and import a story file by using this feature.
Please Note: The GIT Migration option for the Report module includes both Export and Import options.
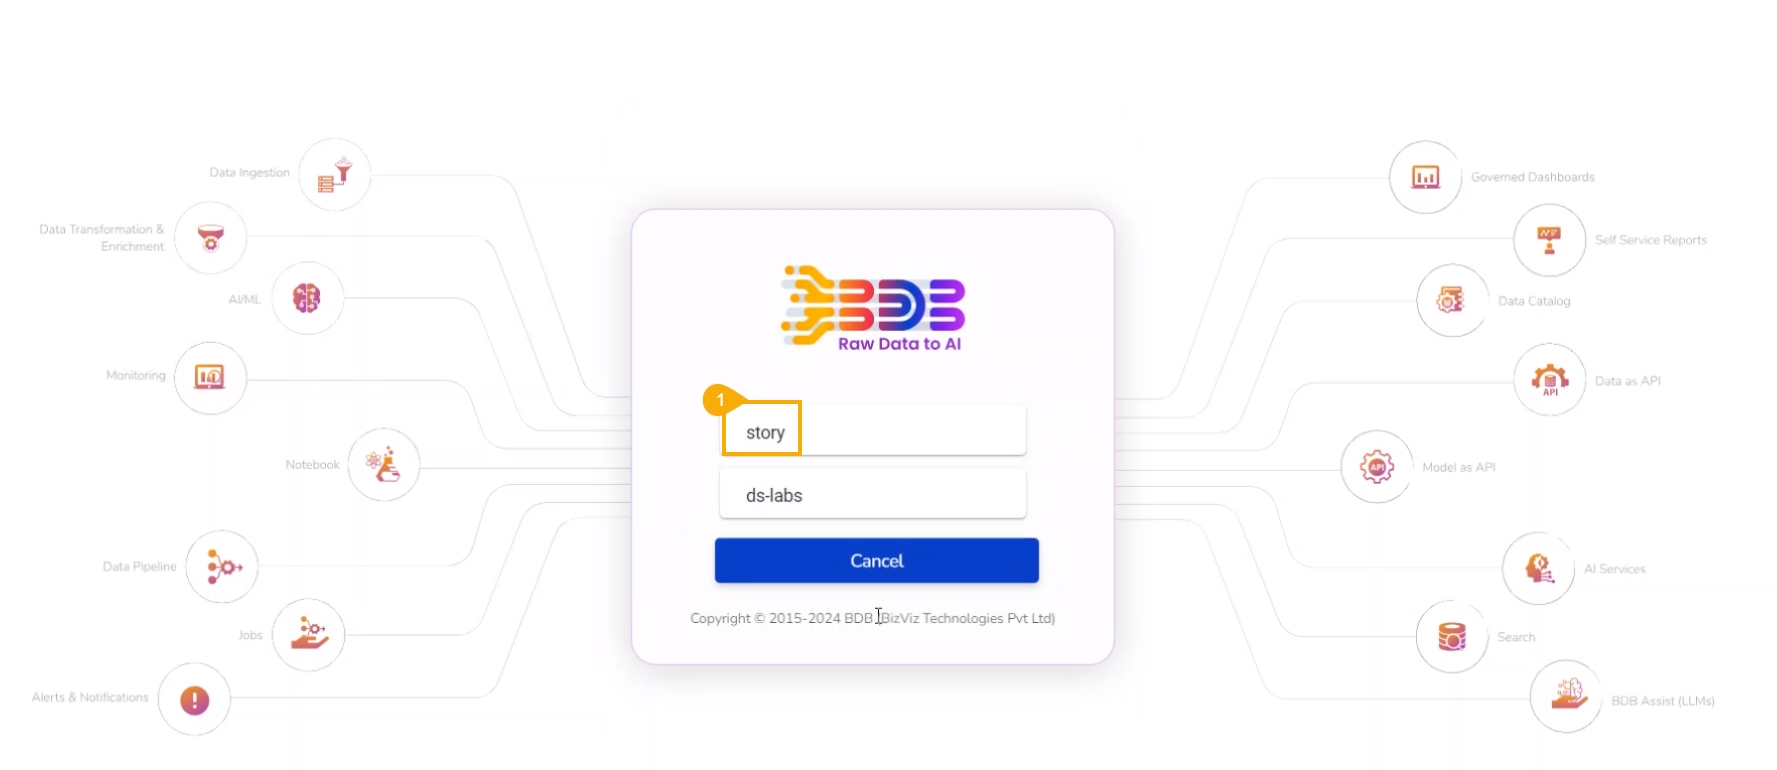
Login to the Platform with a specific space. The story space has been used in this case to export a report.
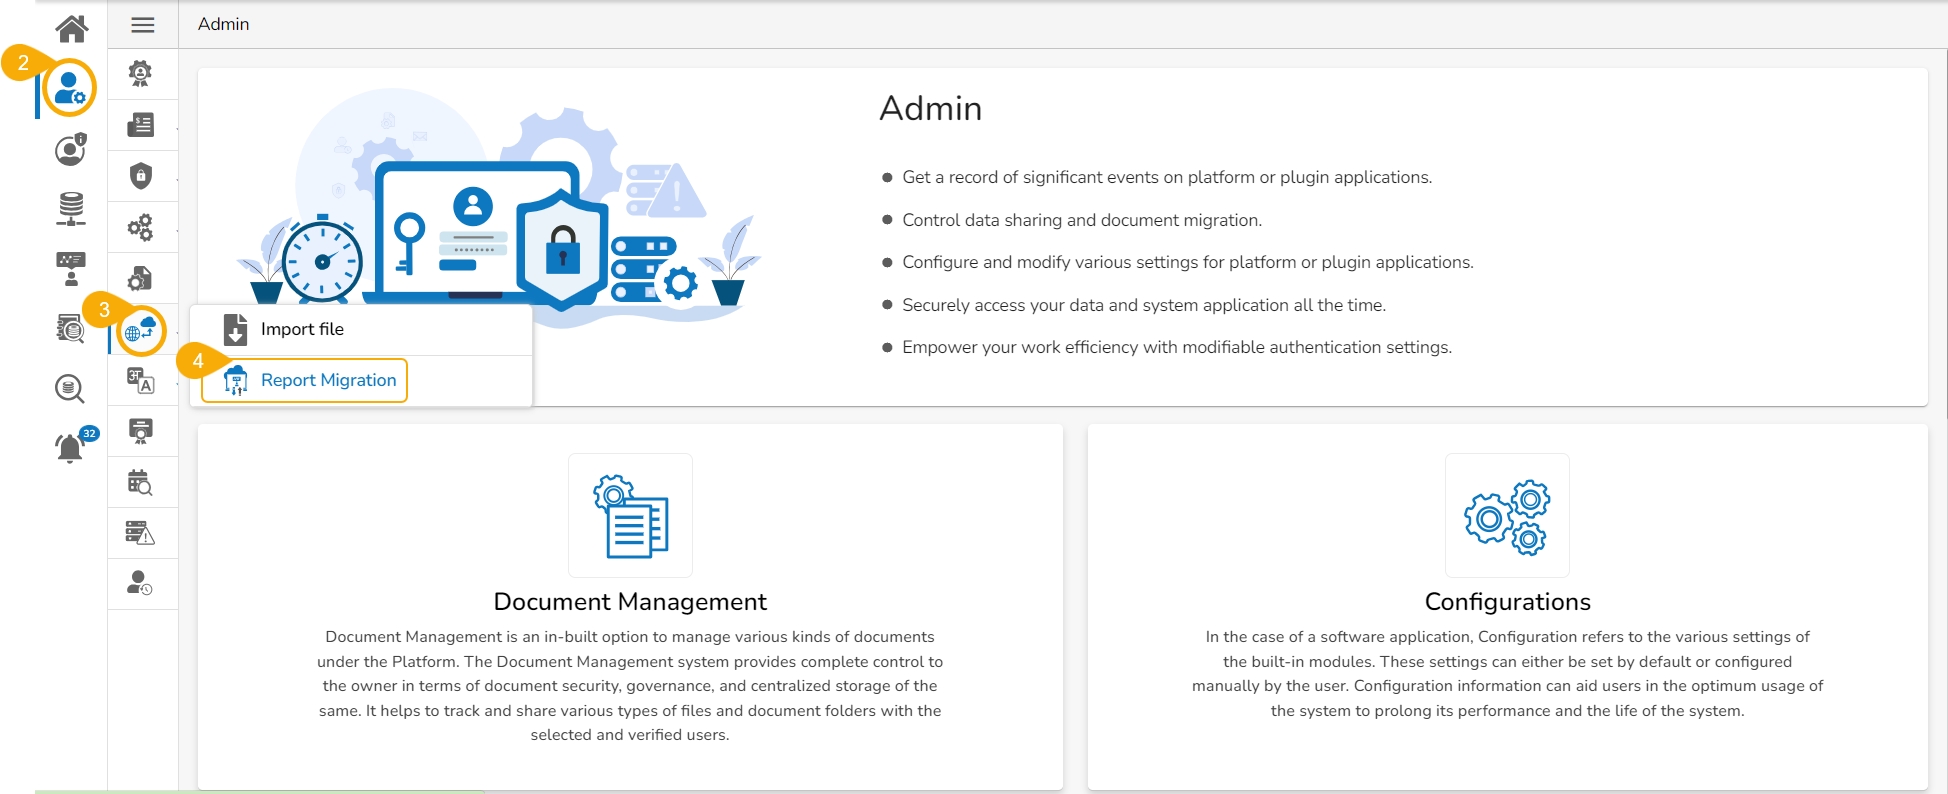
Navigate to the Admin option.
Open the GIT Migration option.
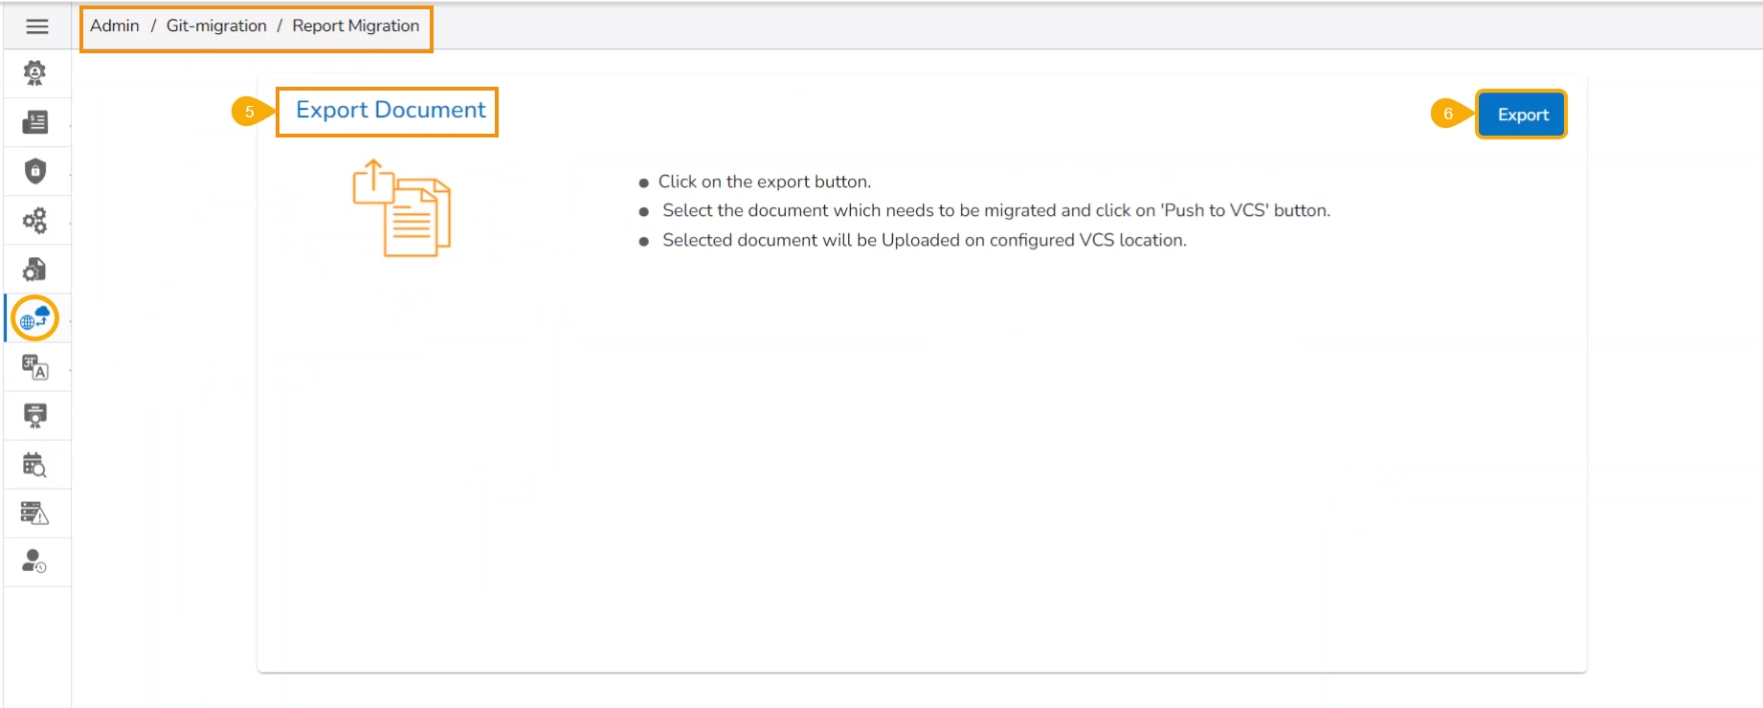
Click the Report Migration option from the GIT Migration.
The user gets redirected to the Export Document page.
Click the Export option.
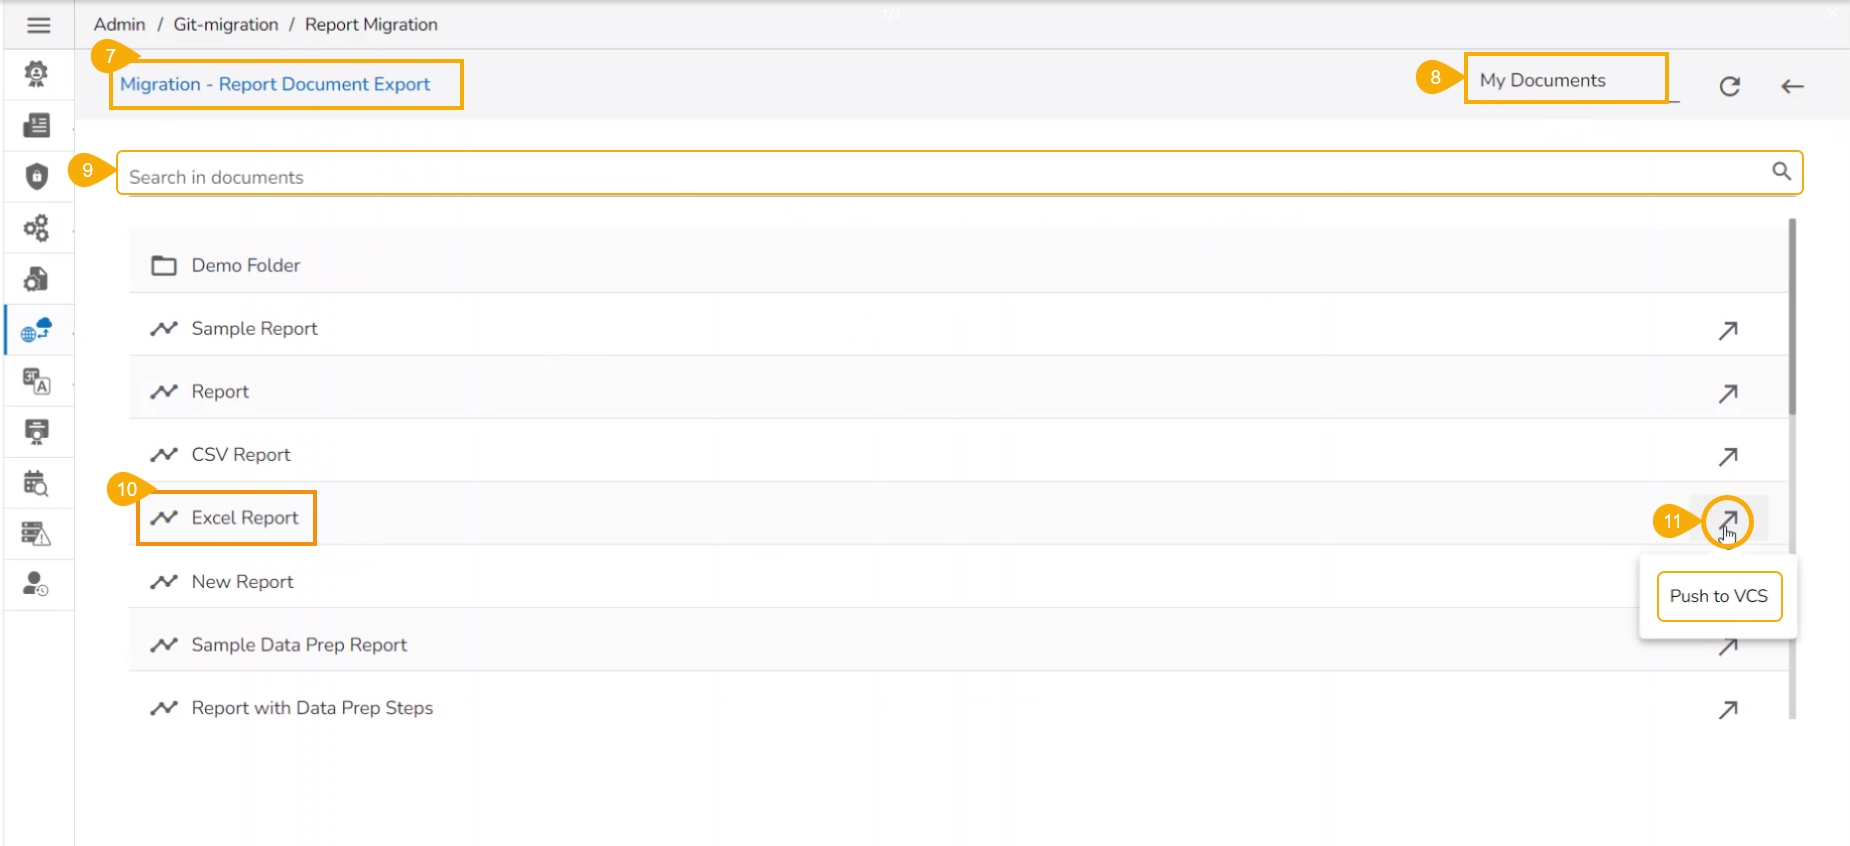
The user gets redirected to the Migration - Report Document Export page.
Select a document space to choose the Report from. The available document spaces are My Documents, Public Documents, and Favorites.
The user can Search for the specific file from the list.
Select a Report from the displayed list.
Click the Push to VCS icon for the selected Story file.
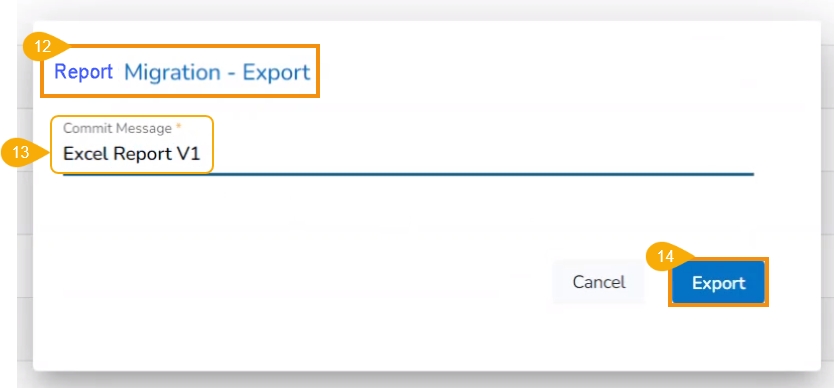
The Report Migration- Export dialog box appears.
Provide a Commit Message.
Click the Export option.
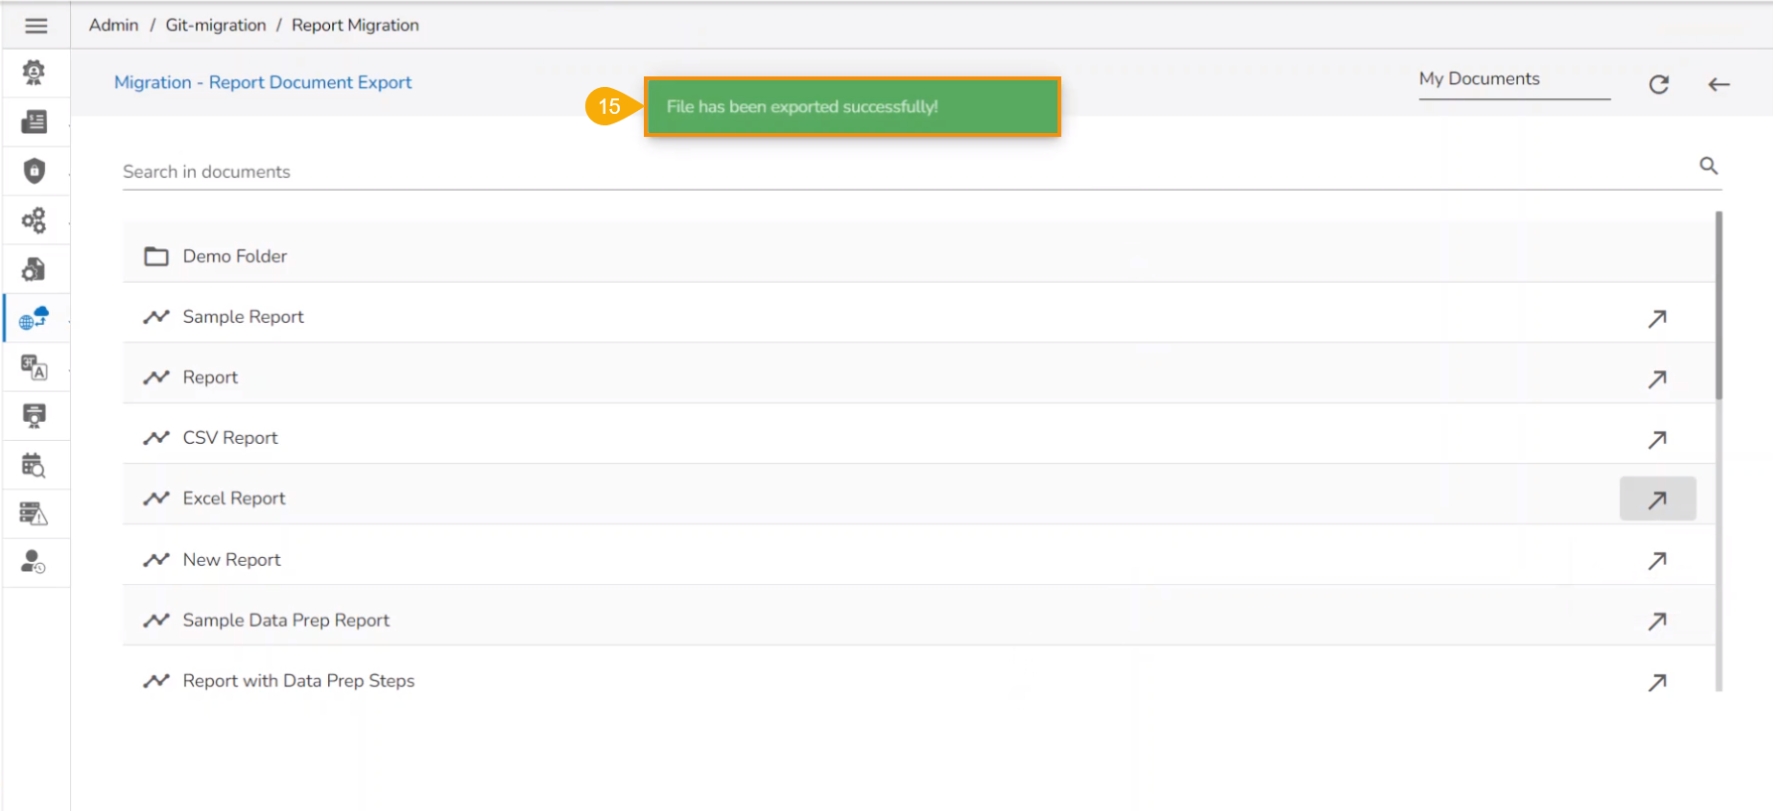
A notification message ensures the users of the success of the export action.
The Excel Report has been selected in the previous section to display the export steps. This section displays the steps for importing the same report file to another user space.
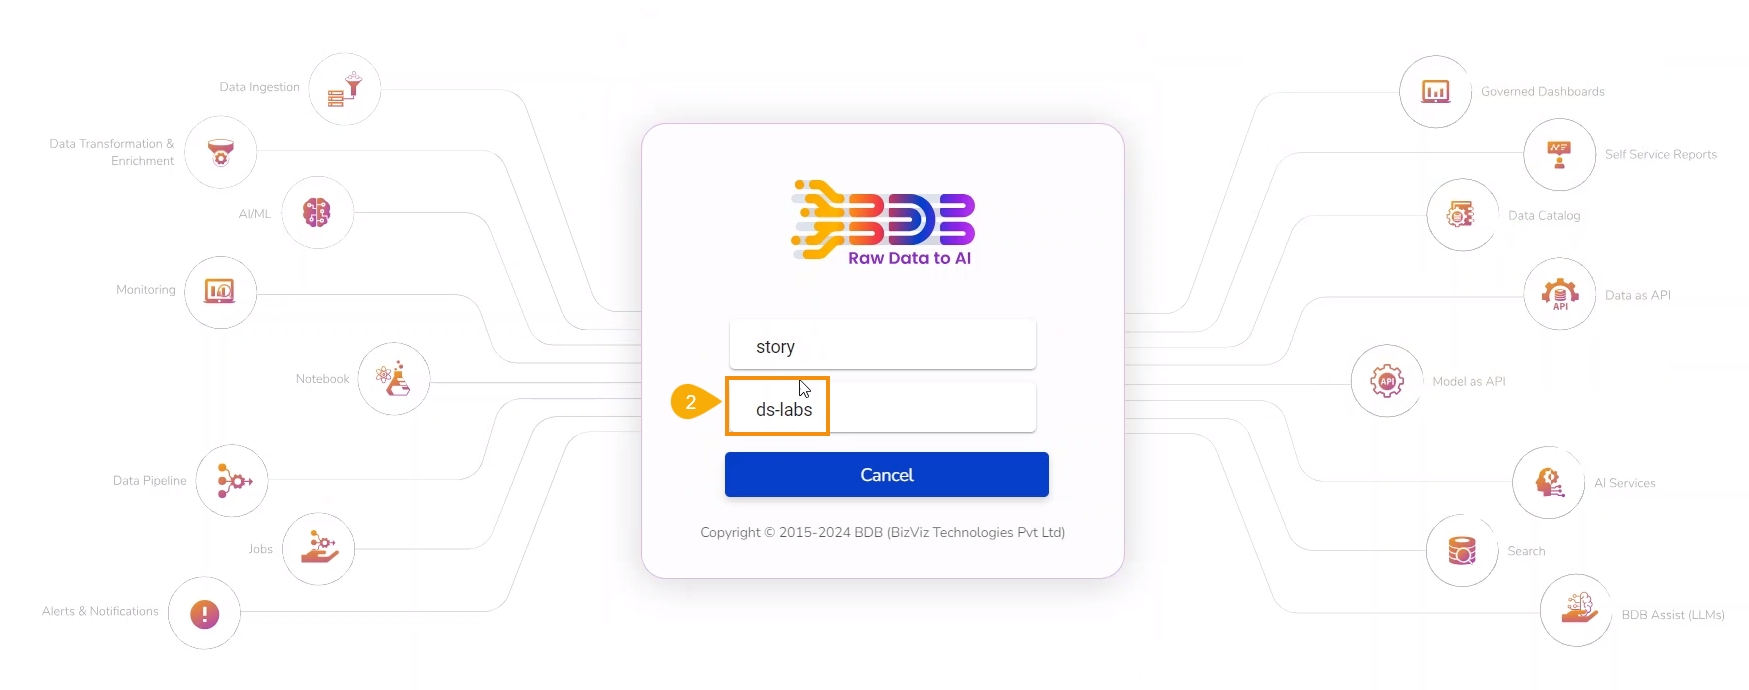
Use another user's credentials or another space.
The selected user tenant space is ds-labs which displays the steps to import the same exported report.
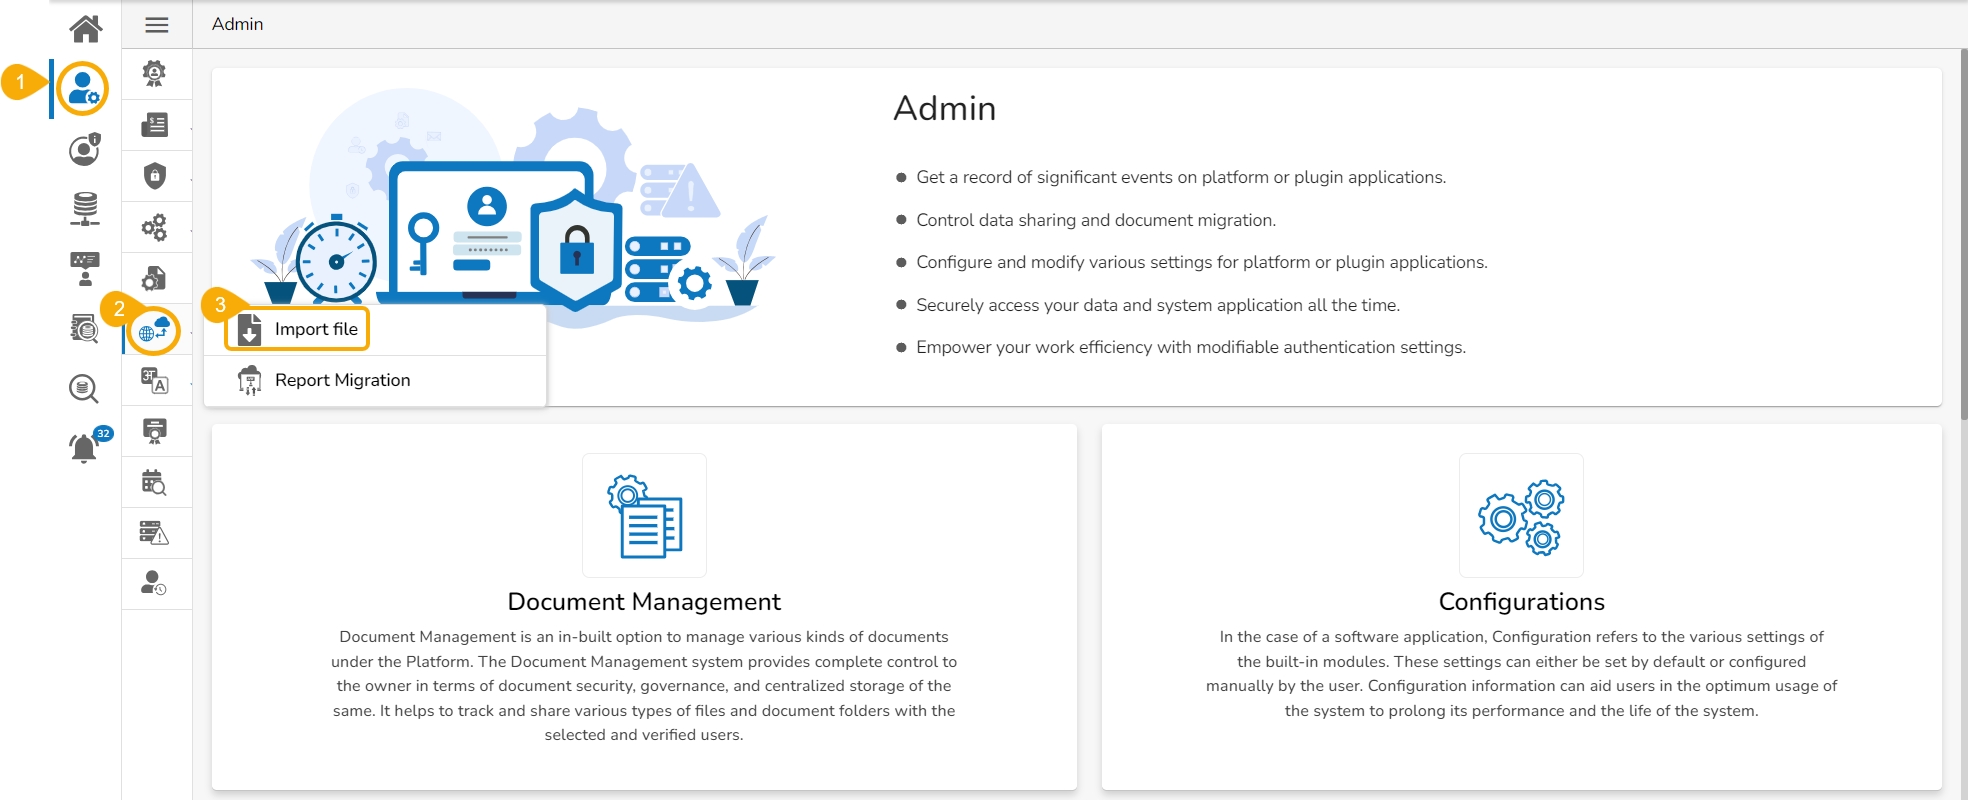
Navigate to the Admin module.
Open the GIT Migration option.
Select the Import File option from the GIT Migration context menu.
The Import Document page opens.
click the Import option.
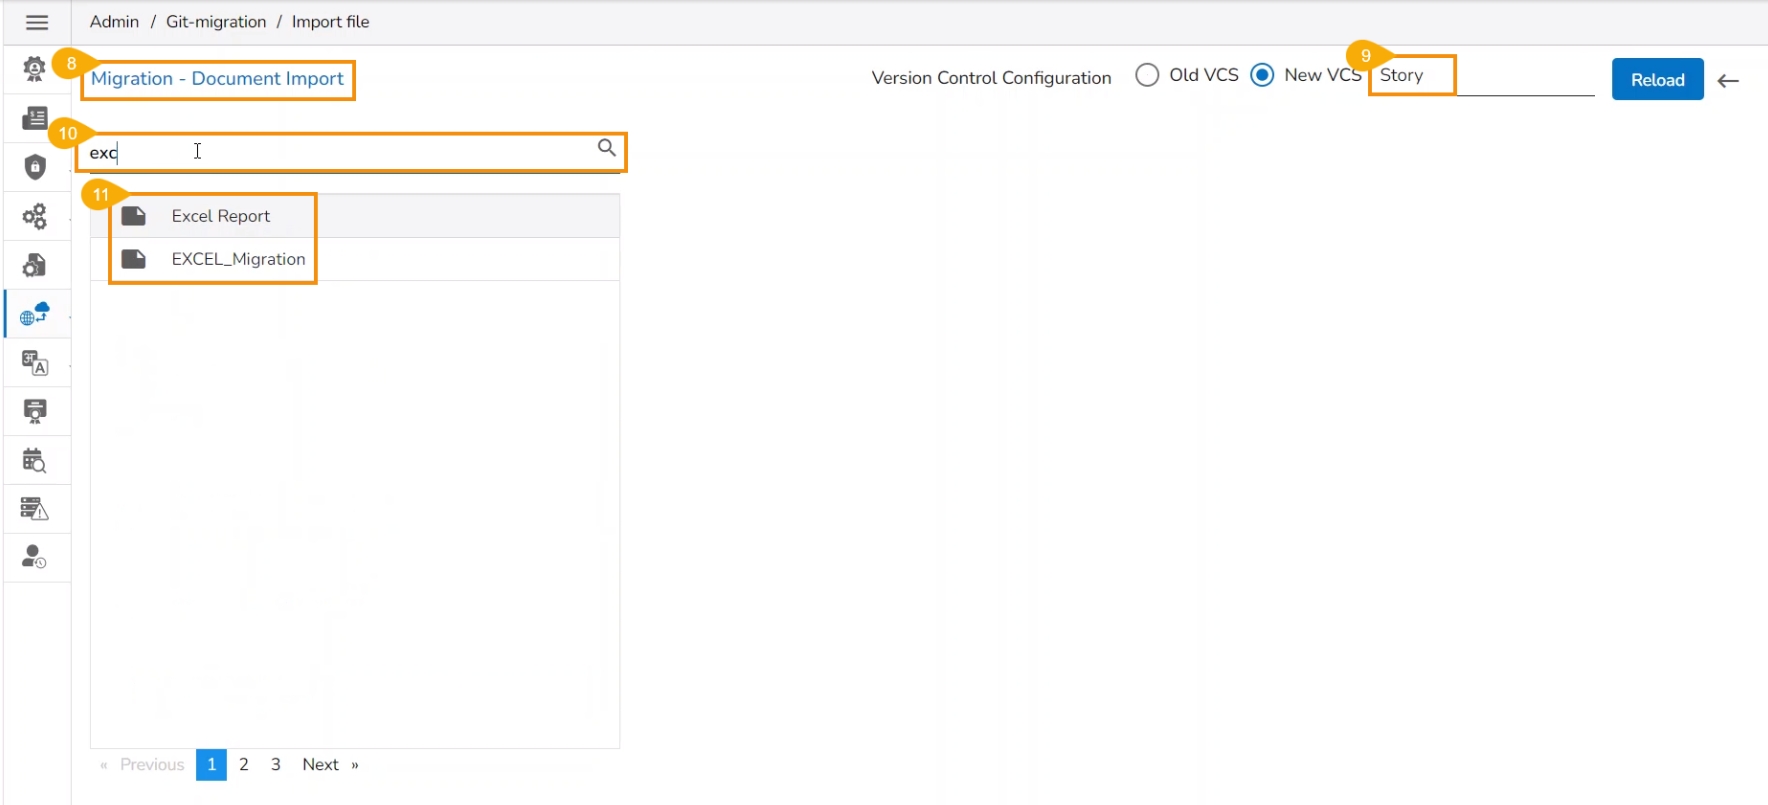
The Migration - Document Import page appears.
Select a module using the given drop-down menu.
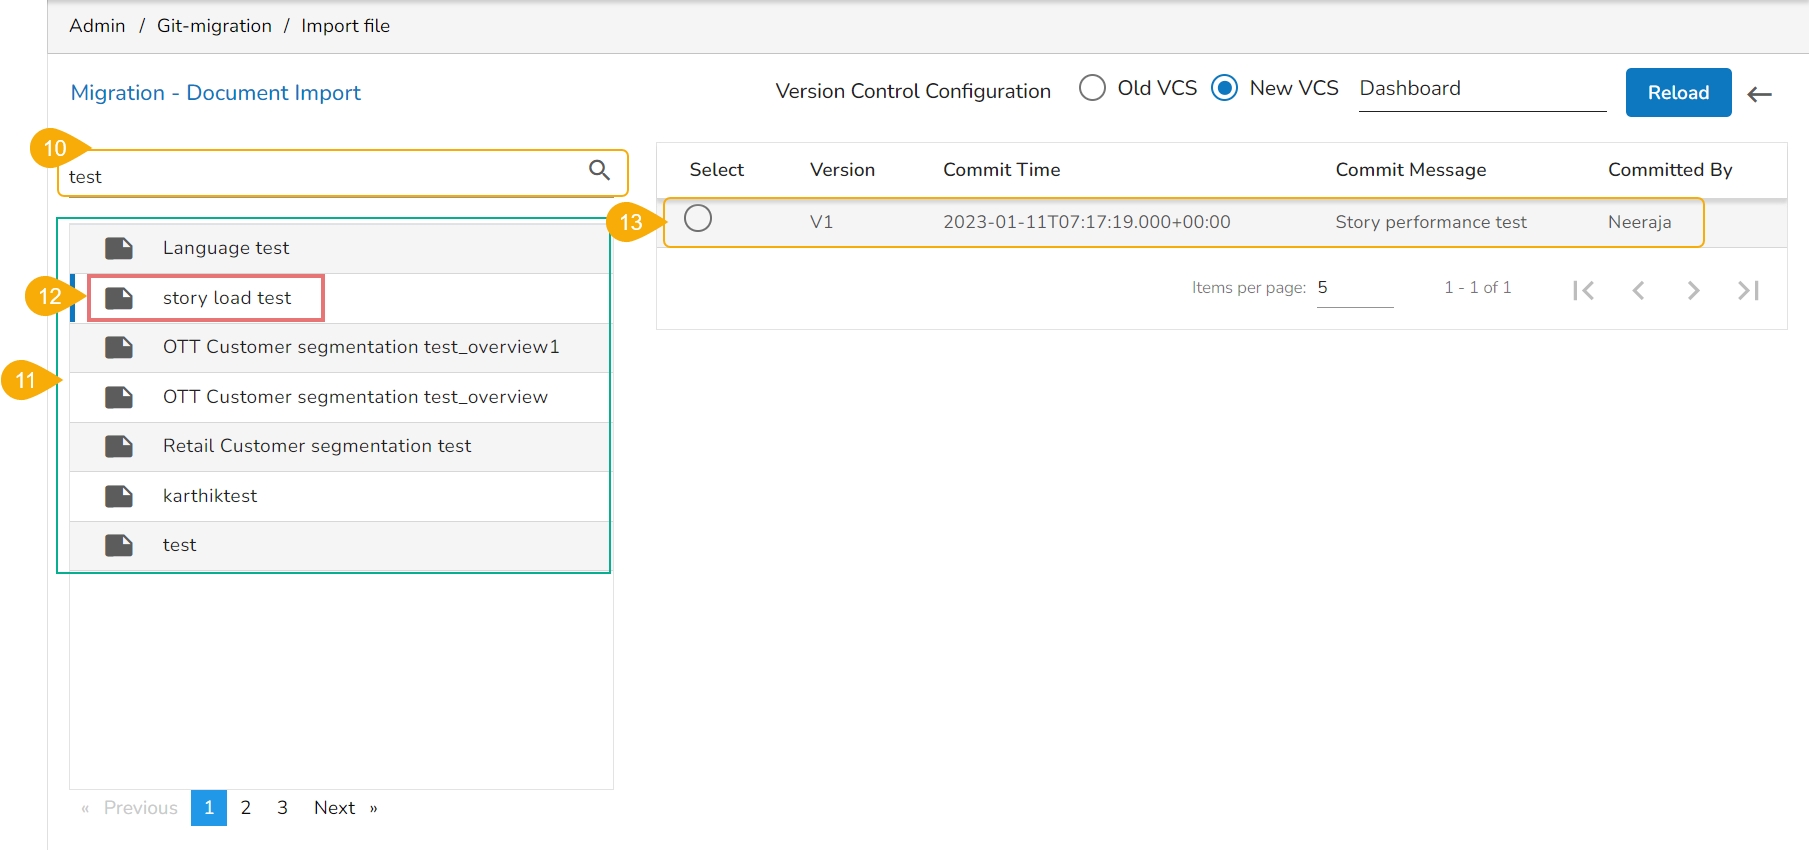
Use the Search bar to search for a specific story file.
A customised list of the exported stories appears based on the search.
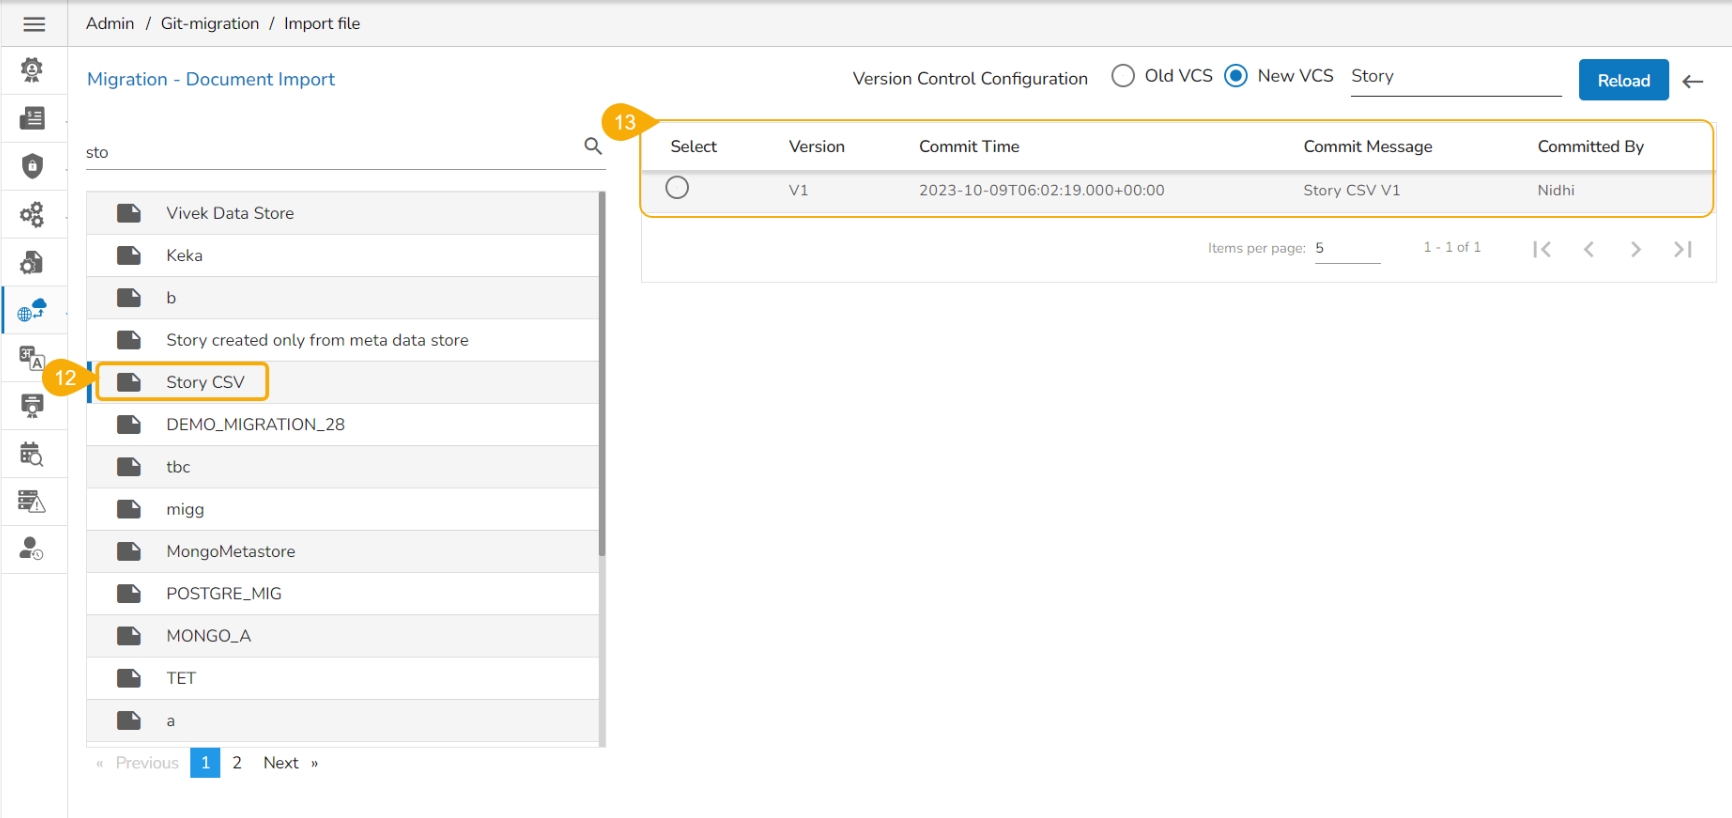
Select a Story file from the displayed list.
Available versions of the selected Story appears.
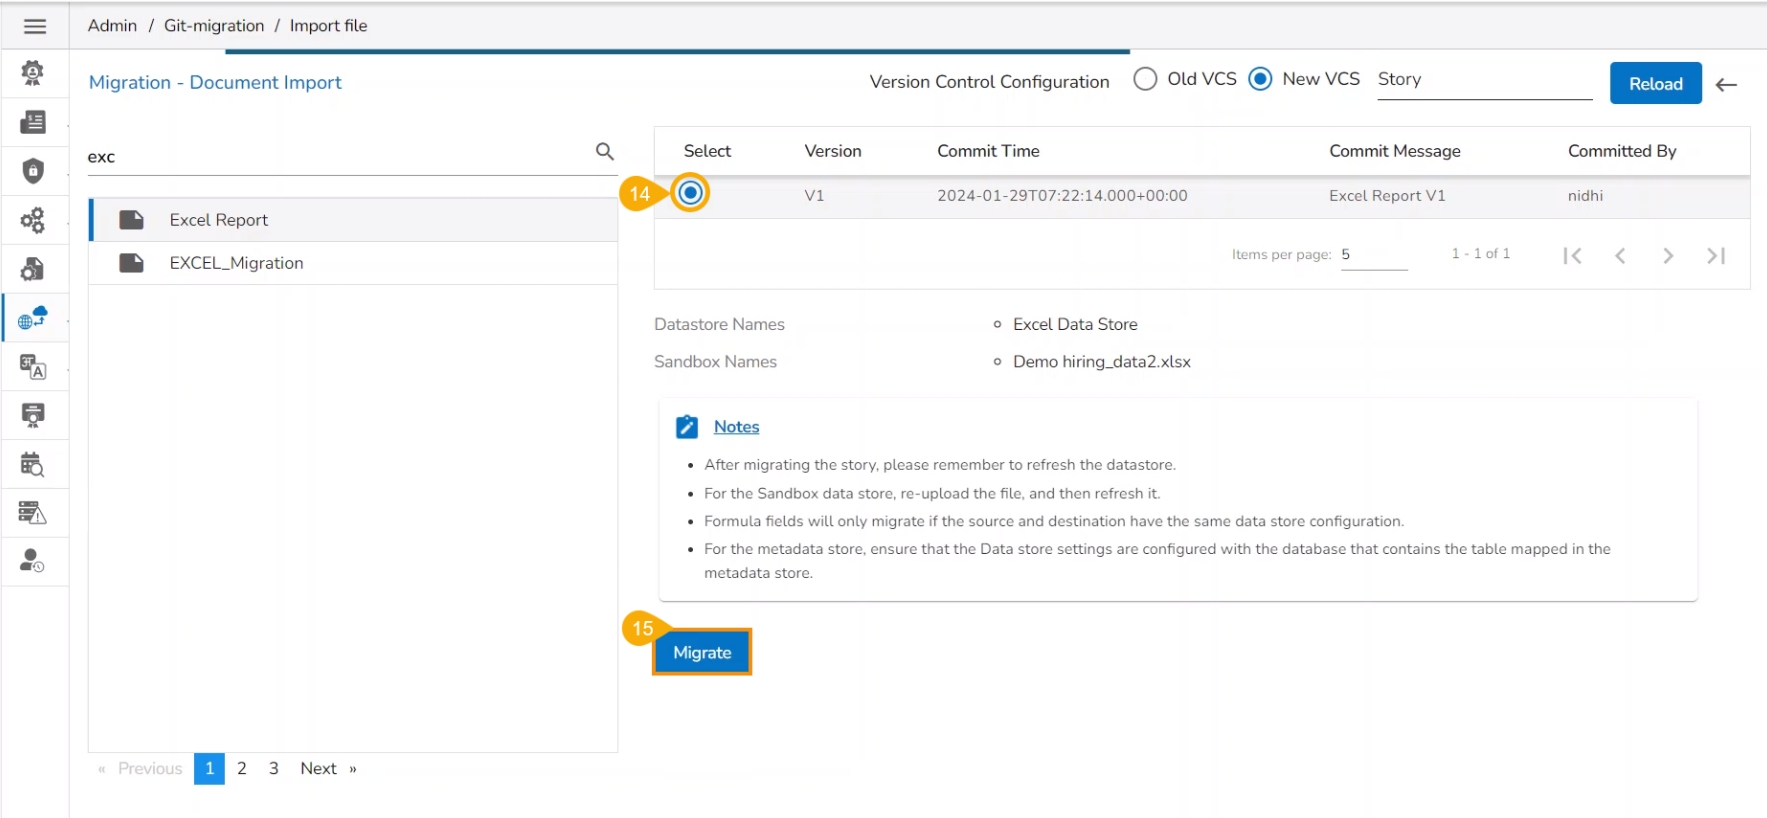
Select a Version by using the given checkbox.
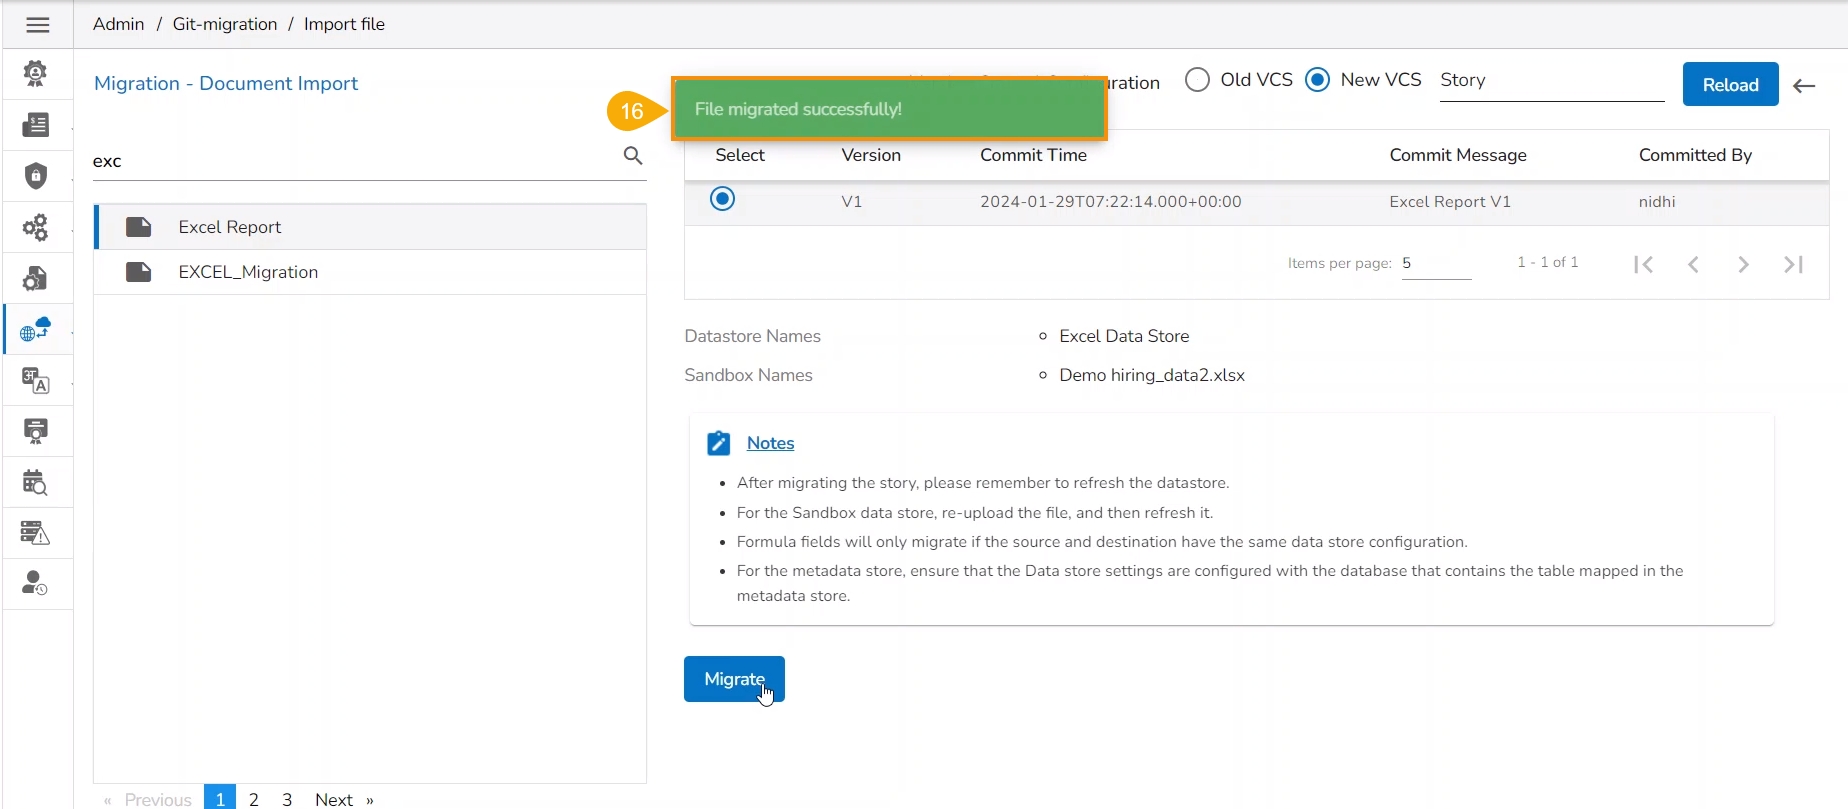
Click the Migrate option.
A notification message appears to ensure completion of the migration process.
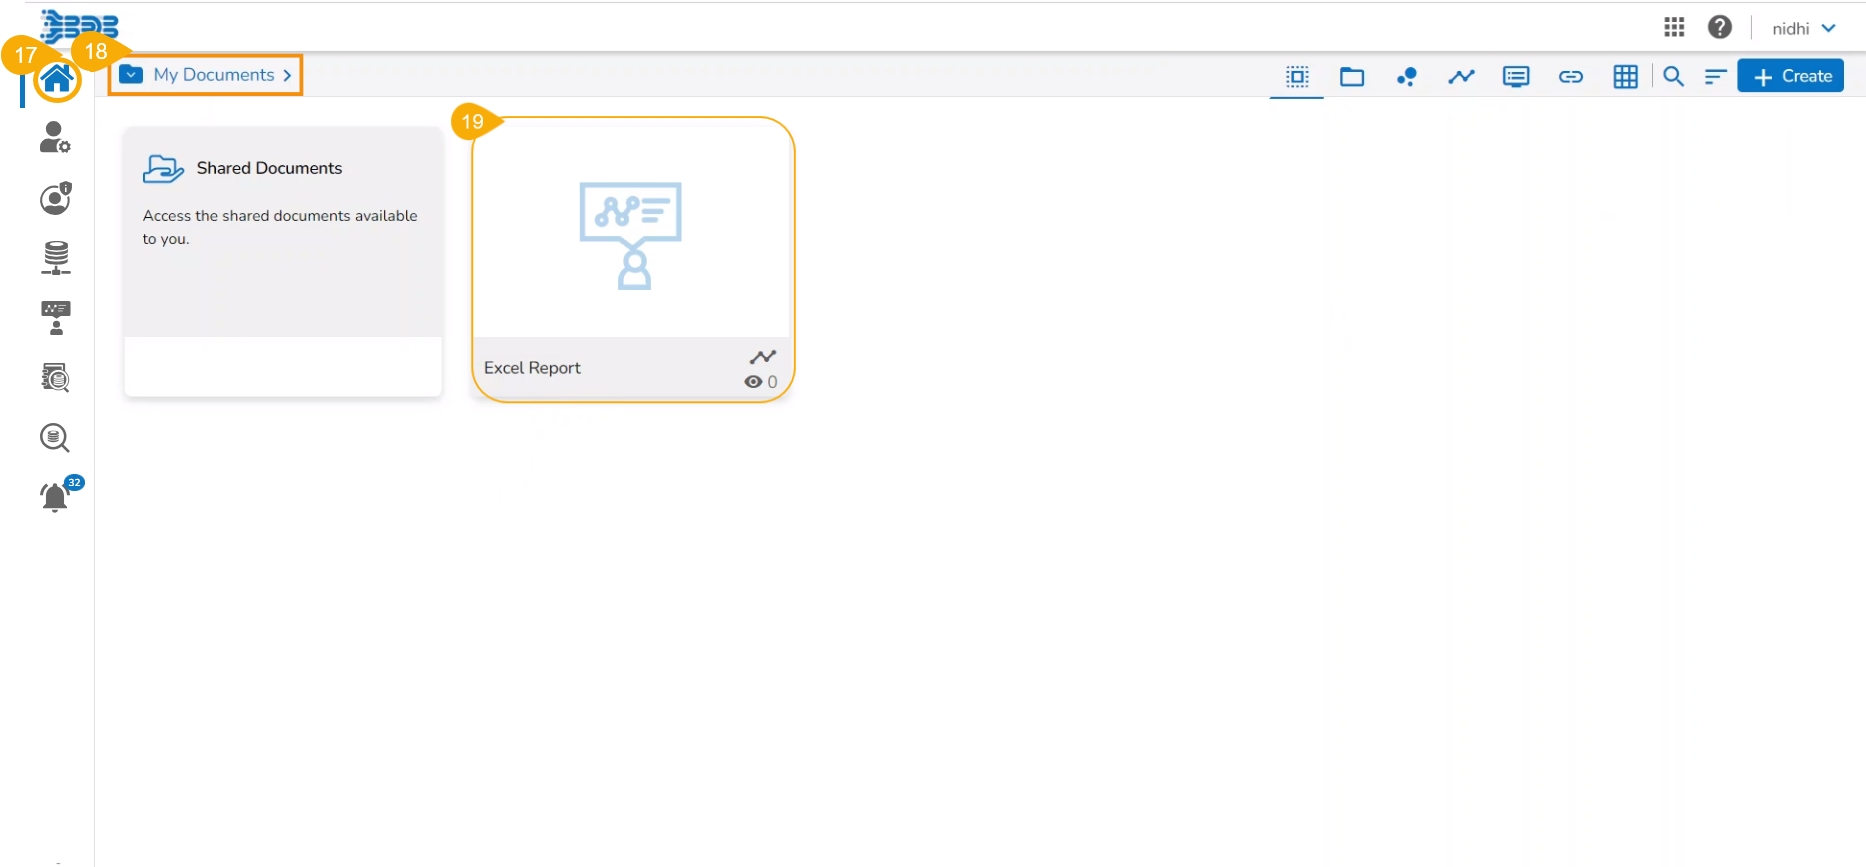
Navigate to the Platform Homepage.
The My Documents space opens by default.
The migrated Report gets added to the My Documents space.
The users can import an exported pipeline using this feature.
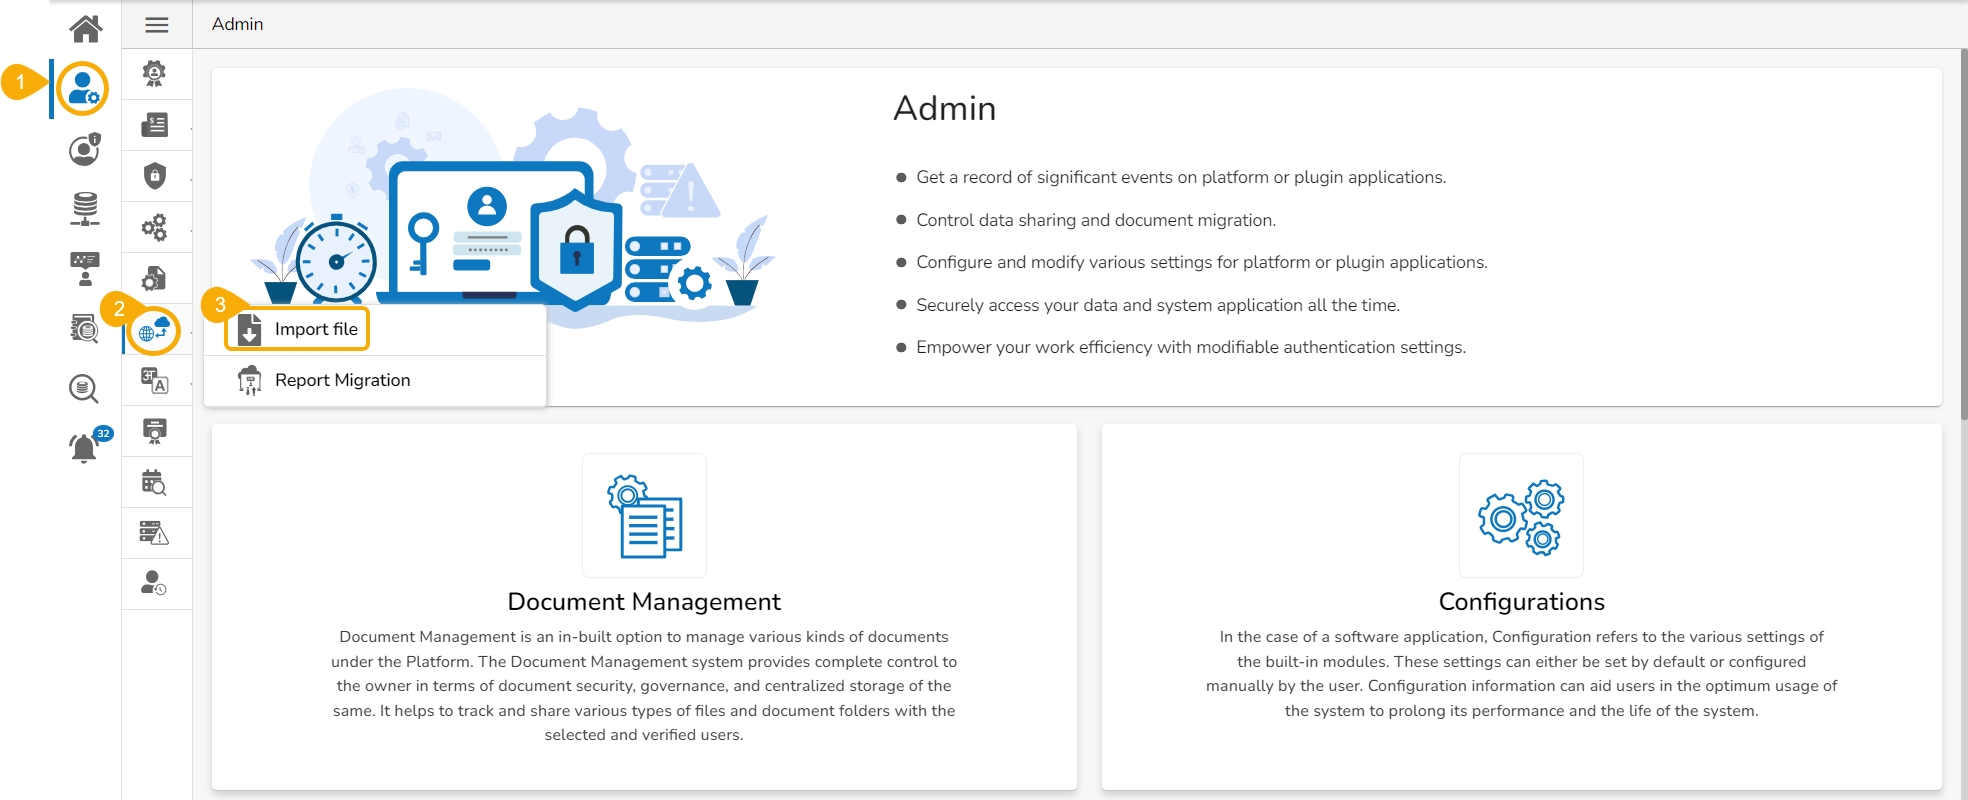
Navigate to the Admin Module.
Click the GIT Migration from the side navigation bar.
Click the Import File option that appears.
Click the Import option, that appears on the Import Document page.
The Migration – Document Import page opens.
Select the New VCS option for the Version Control Configuration.
Select the Pipeline module from the Select a Module drop-down menu.
Select the Pipelines option from the another drop-down menu given on the left side of the page.
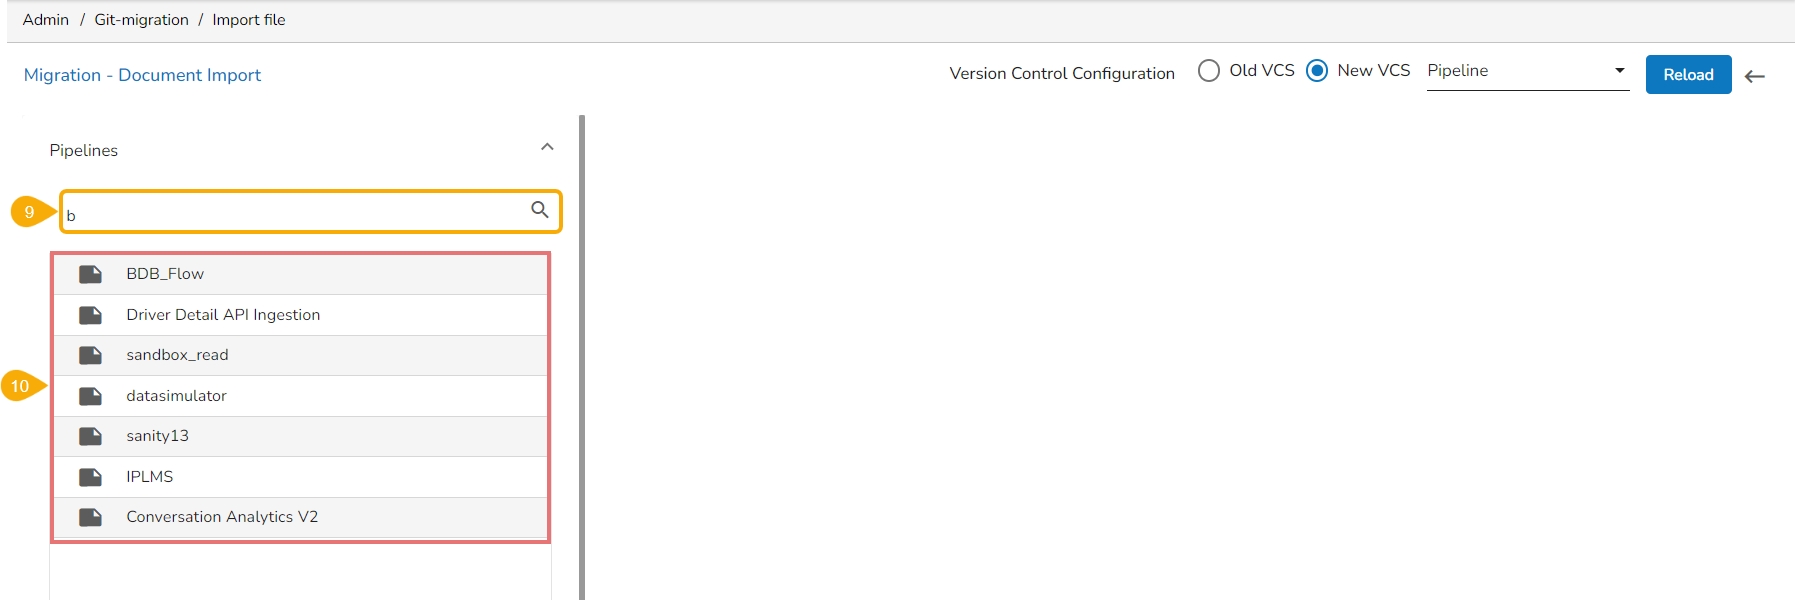
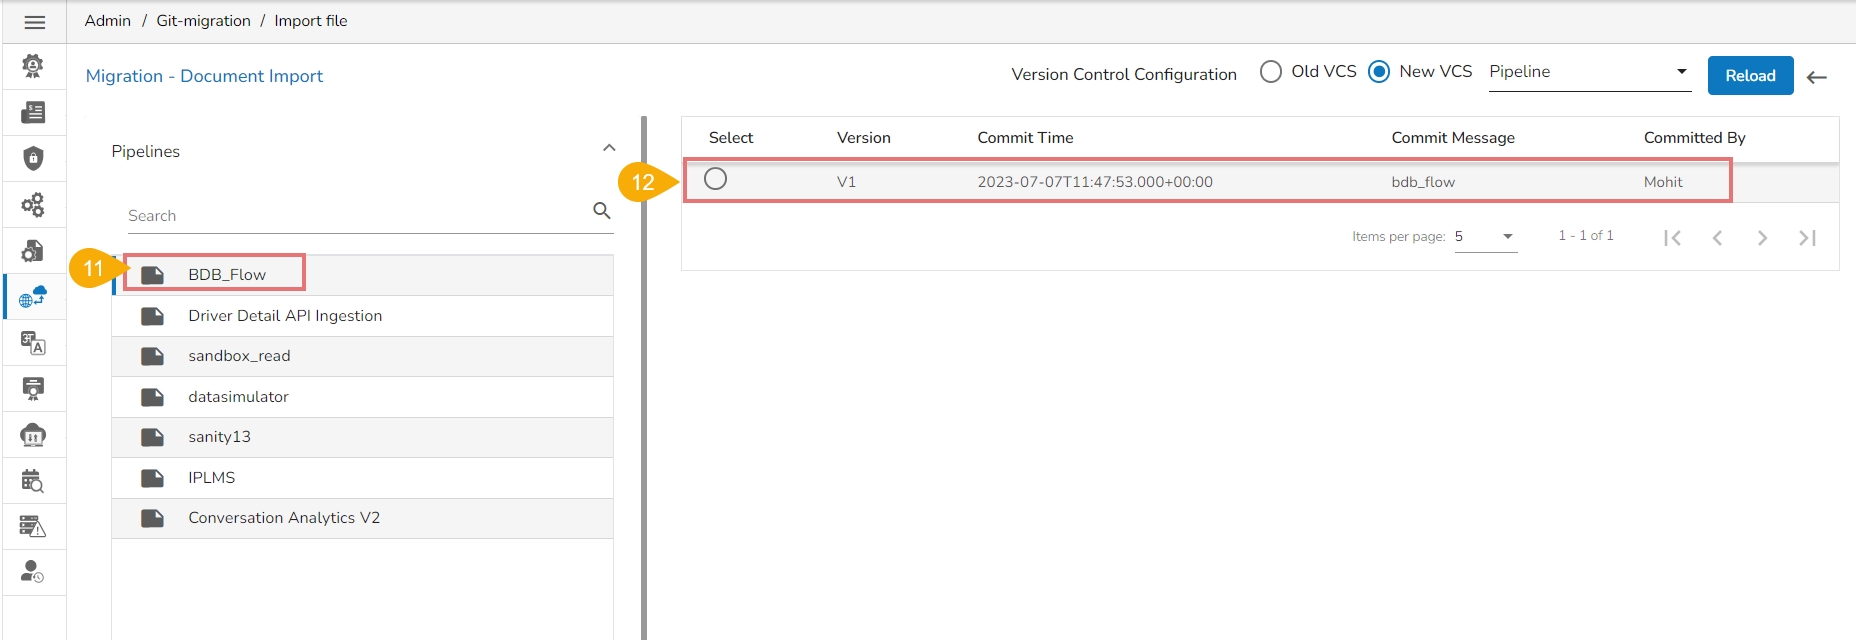
Search a pipeline name in the given Search bar.
A customised list of the imported pipelines appears.
Select a pipeline from the displayed list.
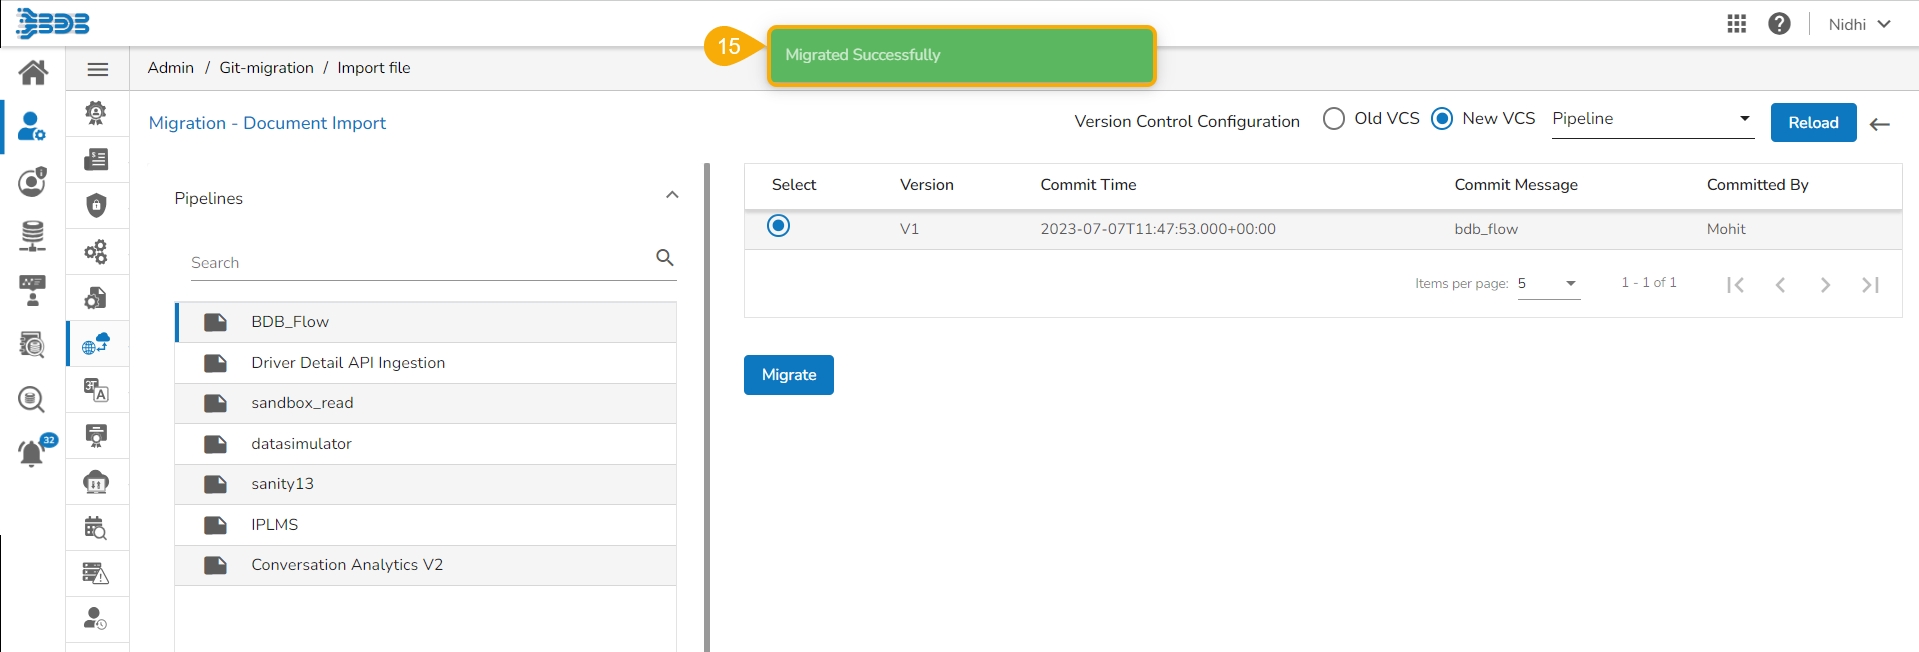
Available versions of the selected pipeline appear.
Select a version using the given checkbox.
The Migrate option appears below, click it.
A success message appears to confirm the completion of the migration action.
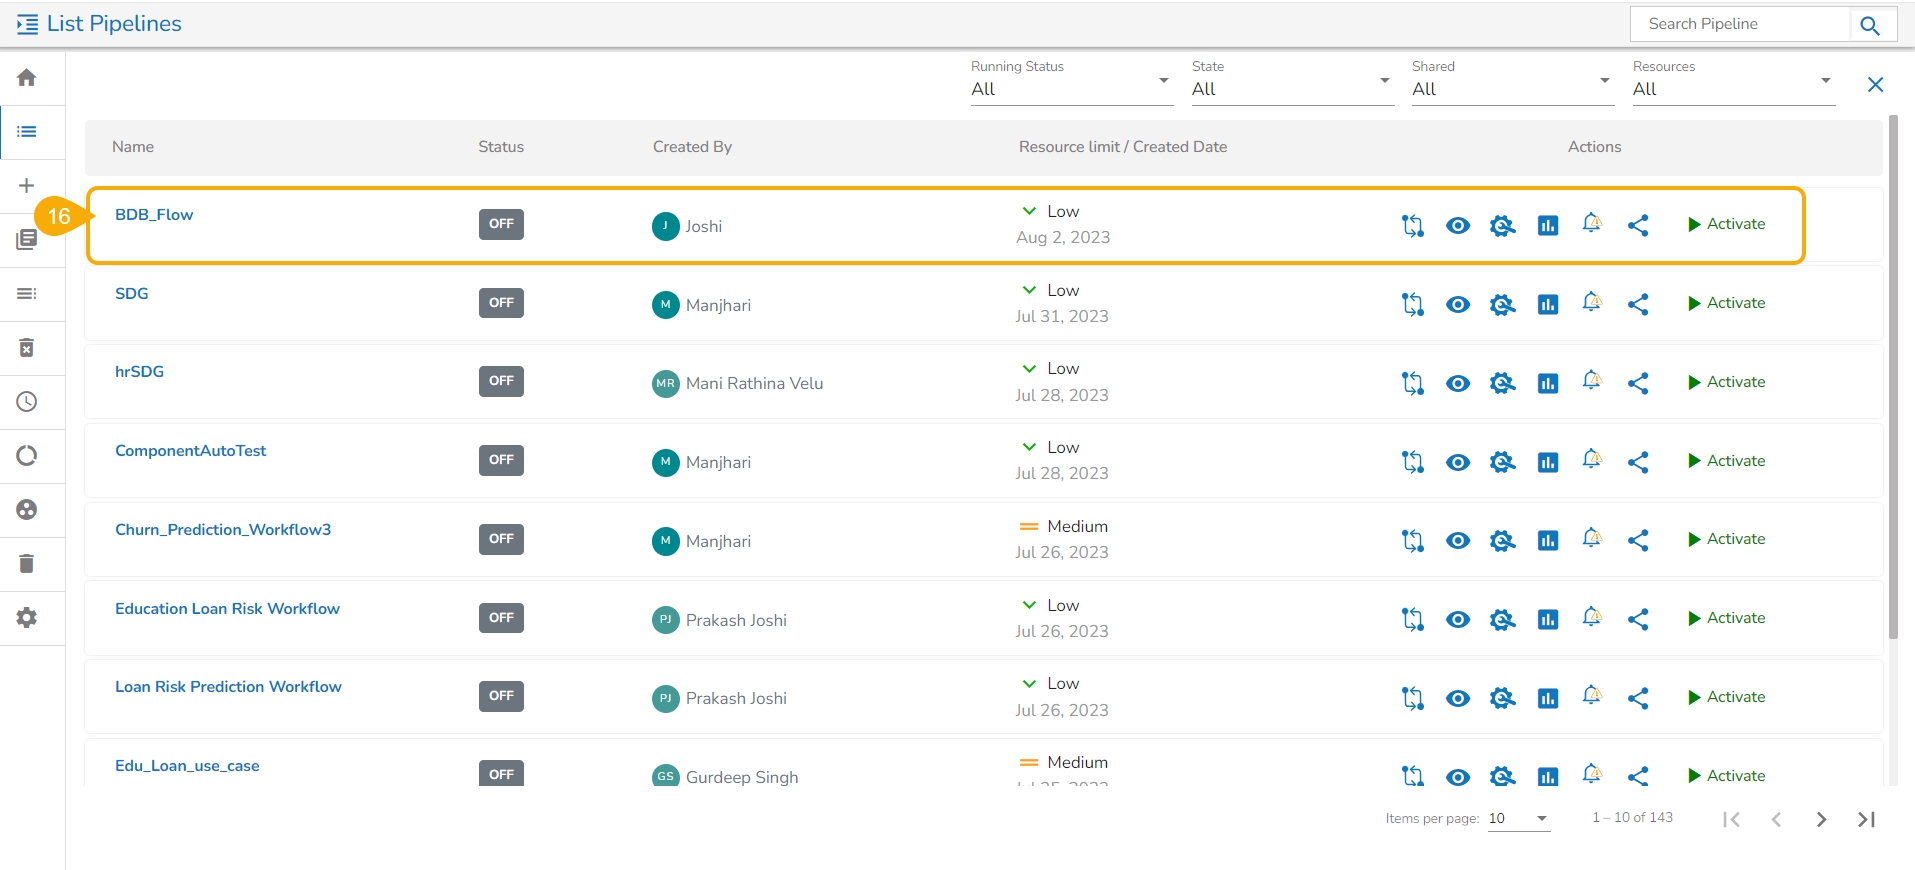
The migrated pipeline can be seen on the List Pipelines page under the Data Pipeline module.
Navigate to Admin Module.
Click the GIT Migration from the side navigation bar.
Click the Import File option that appears.
Click the Import option that appears on the Import Document page.
The Migration – Document Import page opens.
Select the New VCS option for the Version Control Configuration.
Select the Pipeline module from the Select a Module drop-down menu.
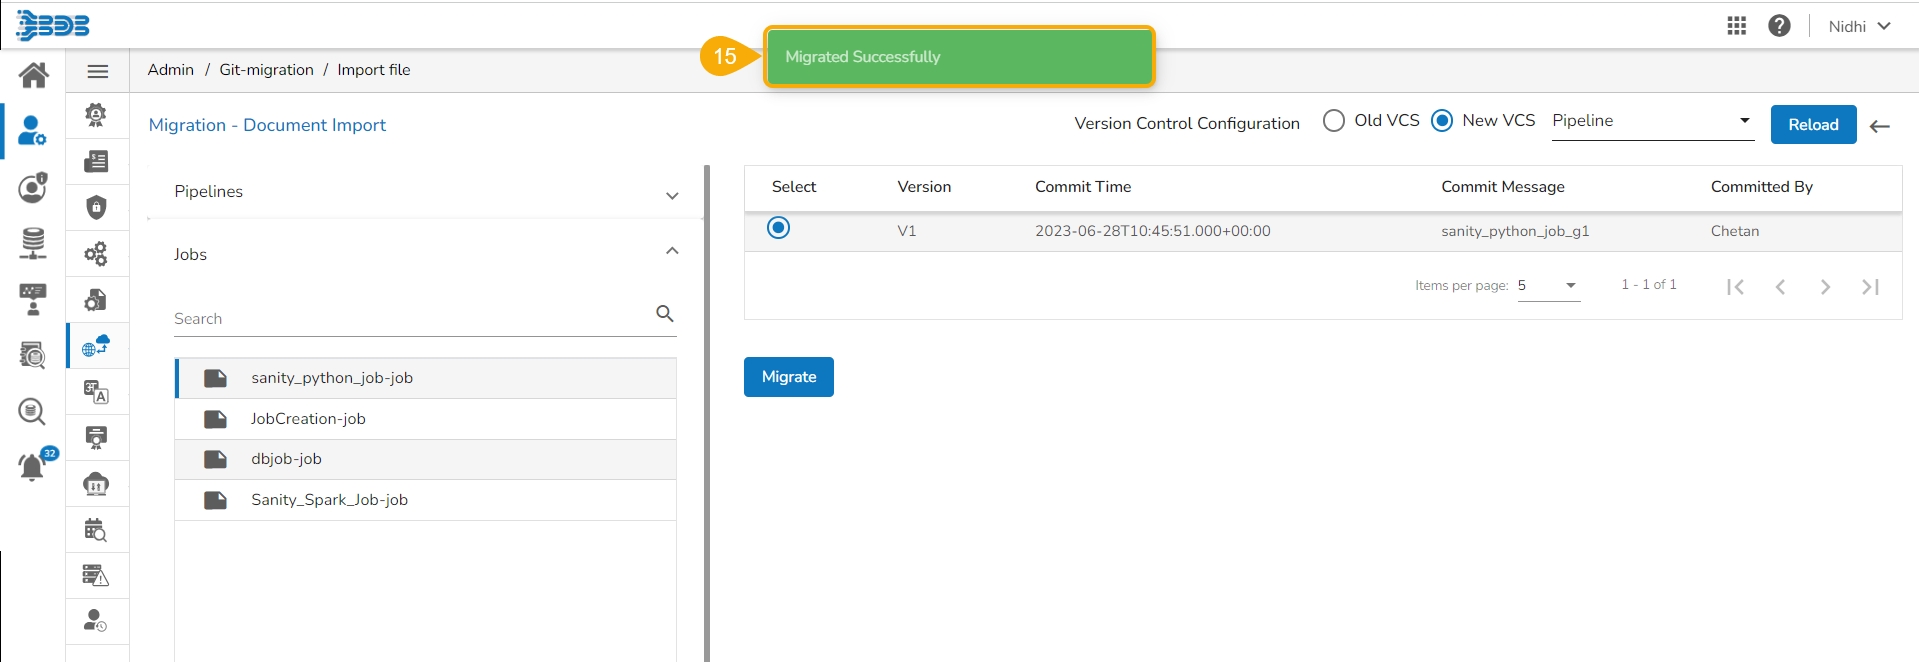
Select the Jobs from the other drop-down menu on the left side of the page.
Search a job name in the Search bar.
A customized list of the imported jobs appears.
Select a job from the displayed list.
Available versions of the selected job appear.
Select a version using the given checkbox.
The Migrate option appears below, click it.
A success message appears to confirm the completion of the migration action.
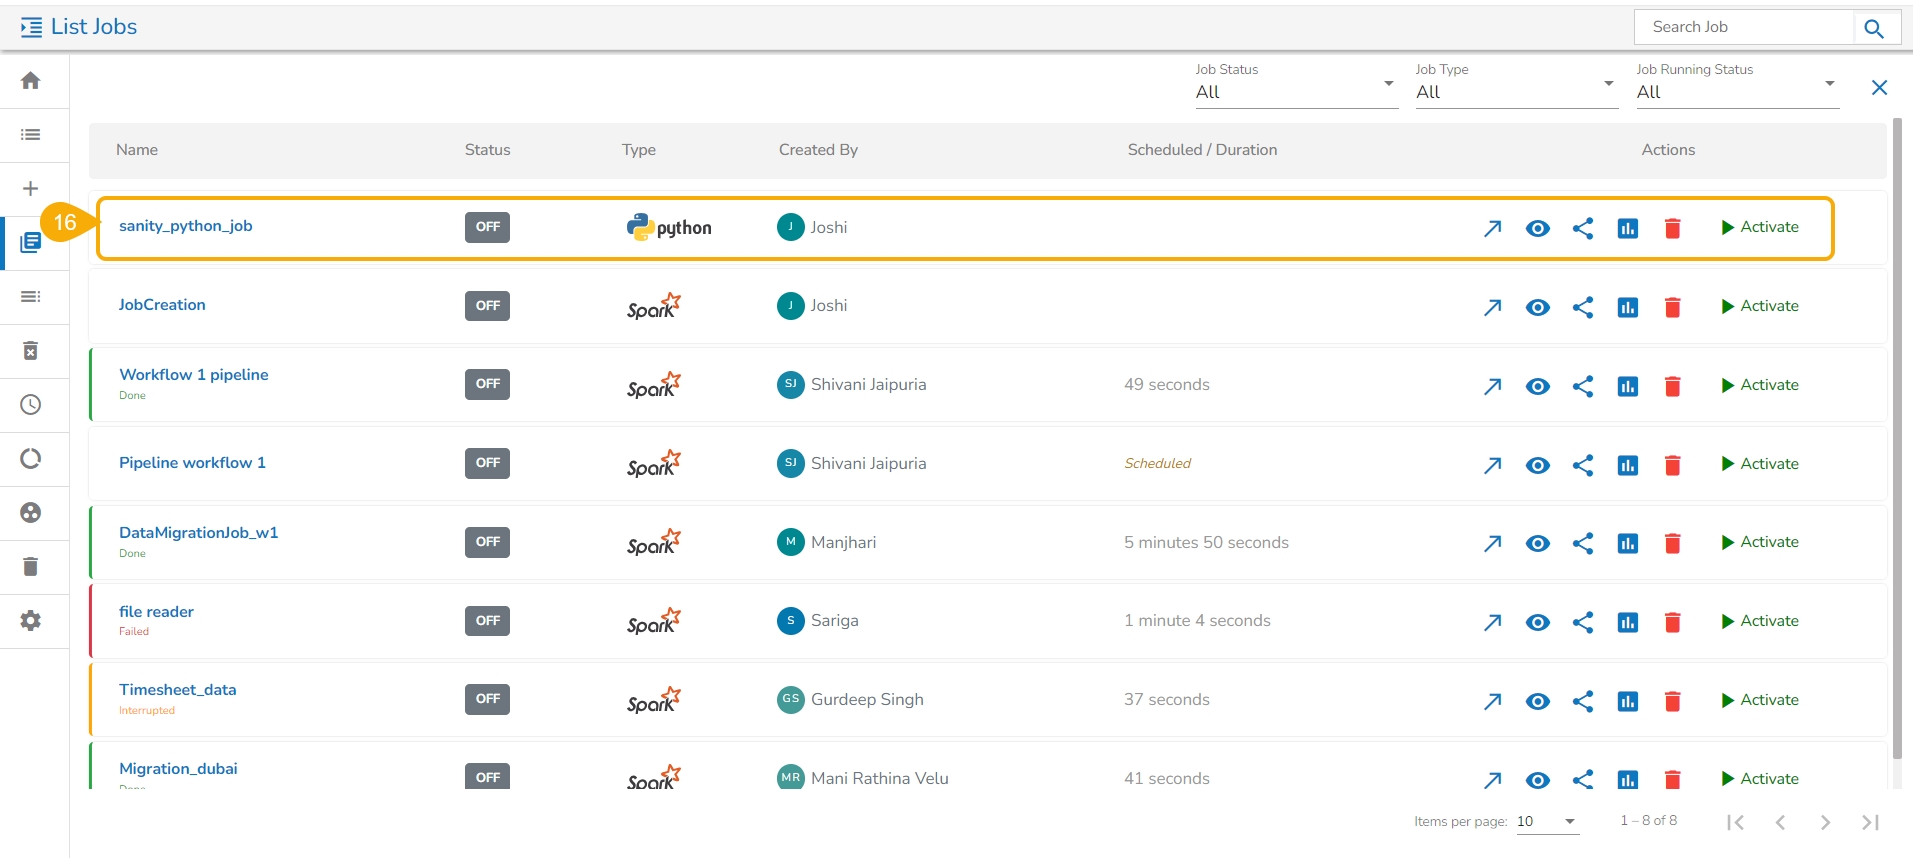
The migrated job can be seen on the List Jobs page under the Data Pipeline module.
The users can import an exported API Service by using this feature.
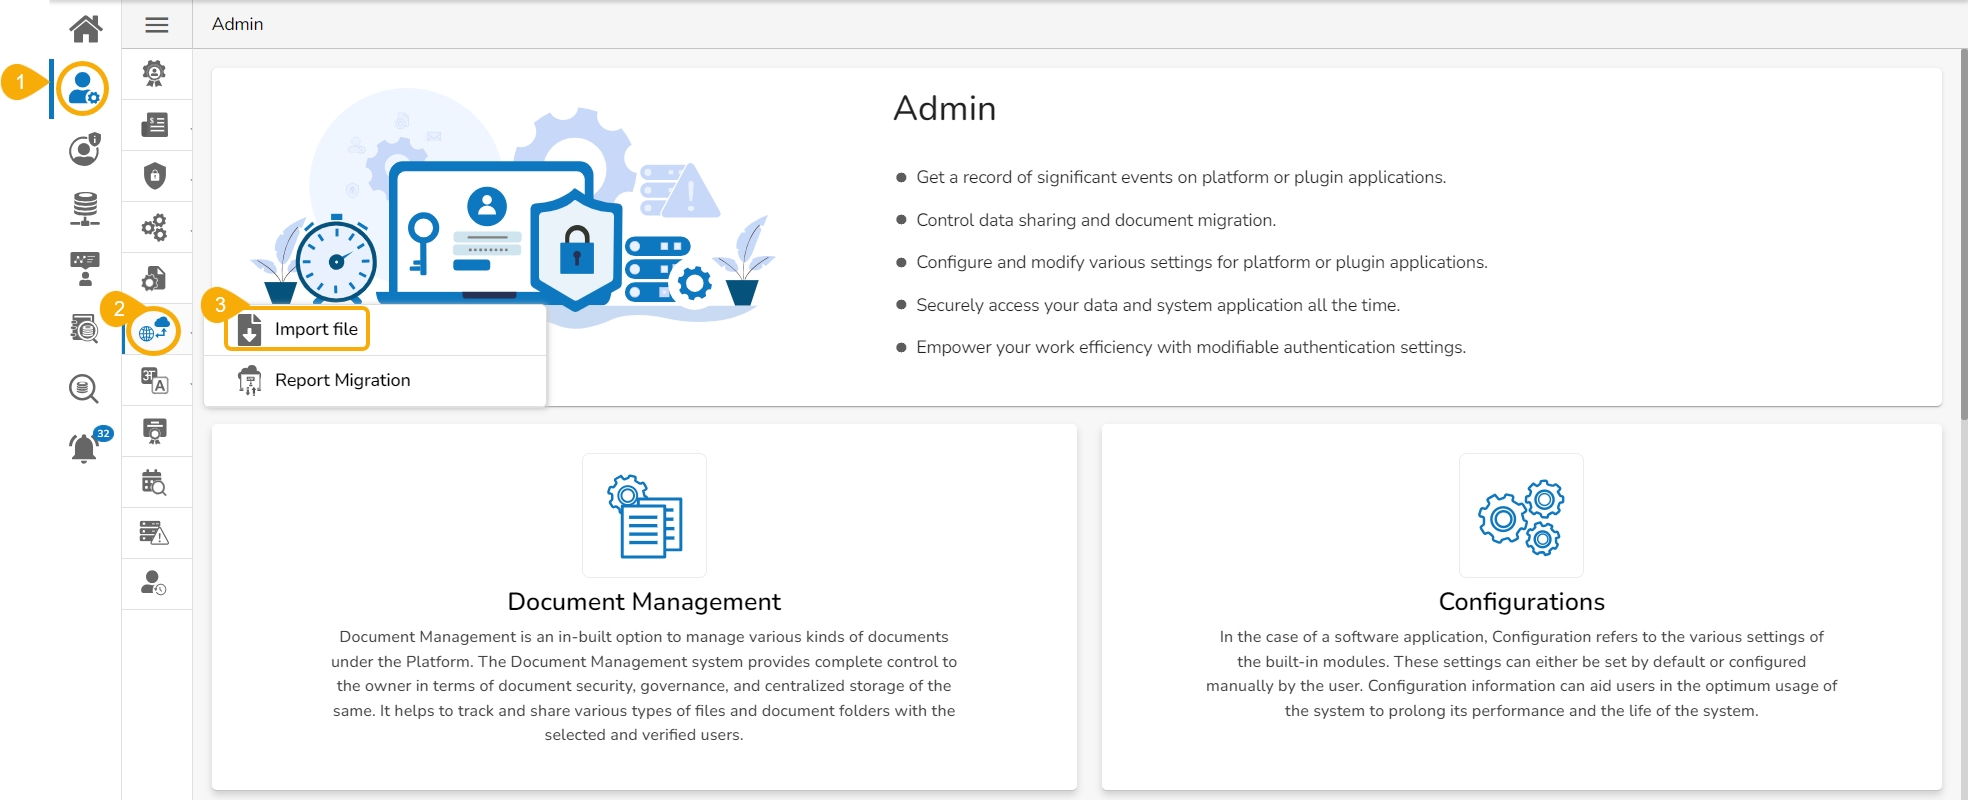
Navigate to the Admin Module.
Click the GIT Migration icon from the side navigation bar.
Click the Import File option that appears.
Click the Import option that appears on the next page.
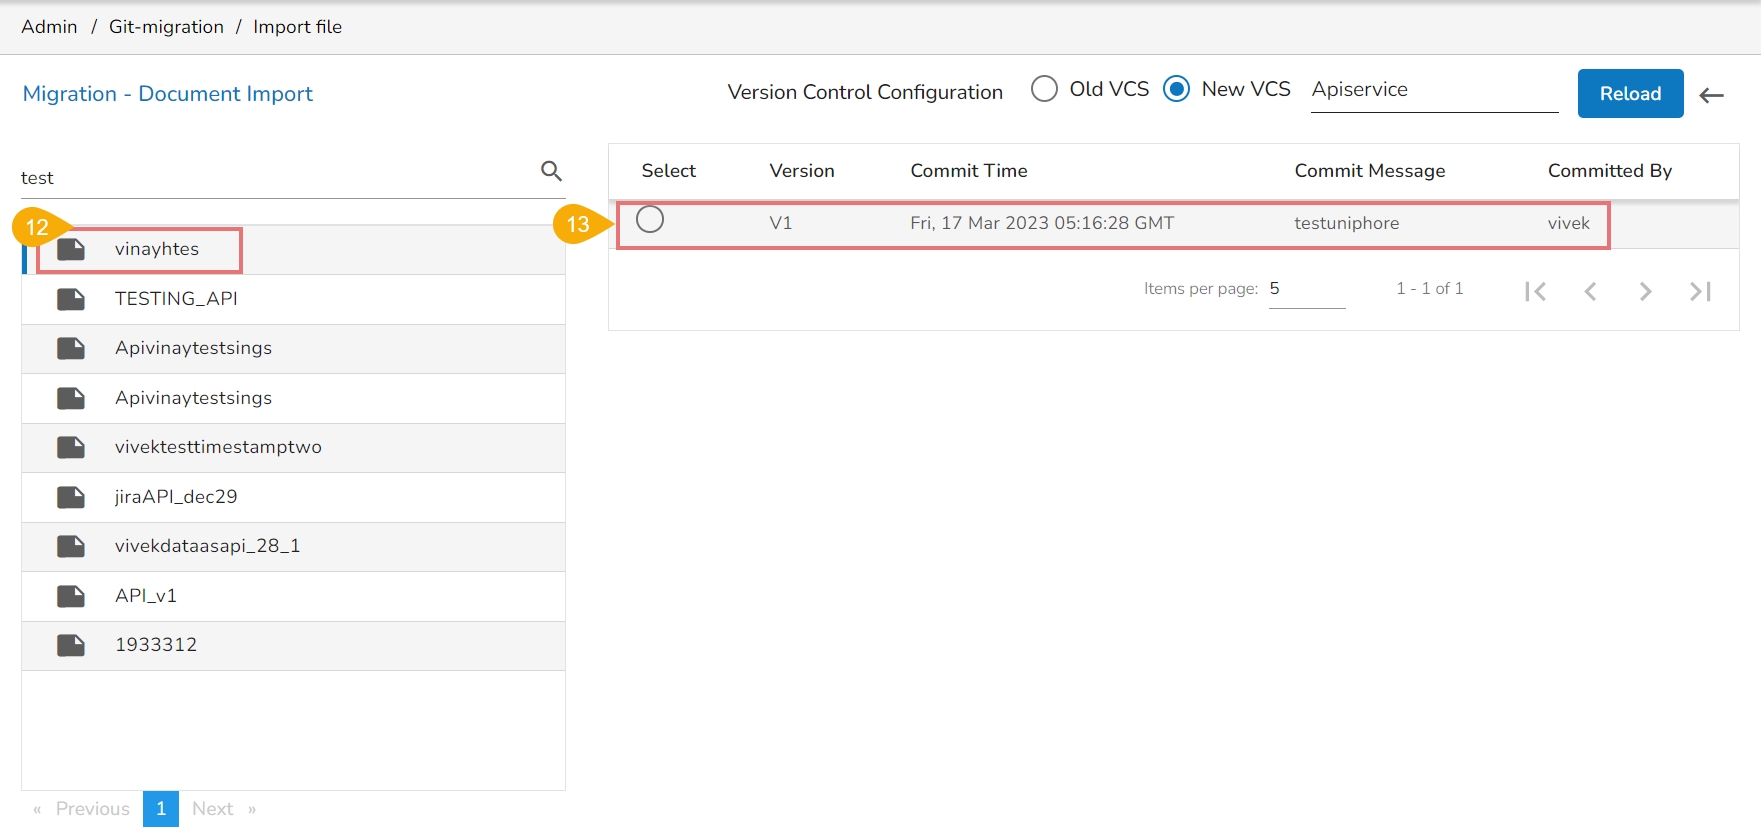
The Migration-Document Import screen appears.
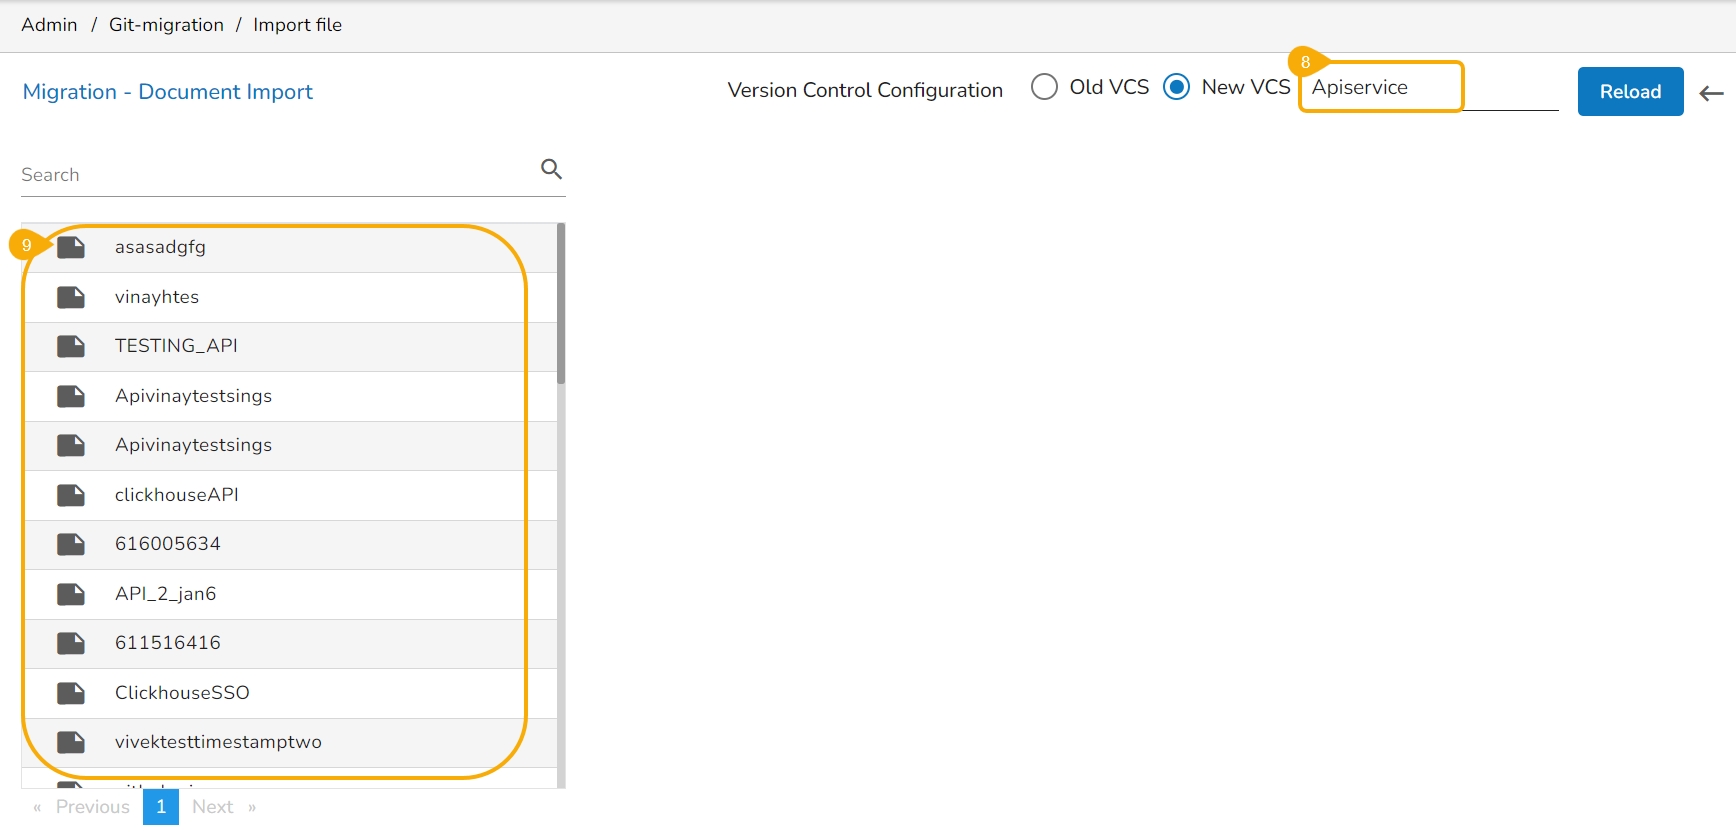
Select the New VCS for the Version Control Configuration.
The Select a Module drop-down menu bar appears at the top-right side of the screen.
Select the API Service module using the Select a Module drop-down menu.
A list of the available Published API Services appears on the left side of the page.
Please Note: Only the Published and exported API Services will be visible in the list.
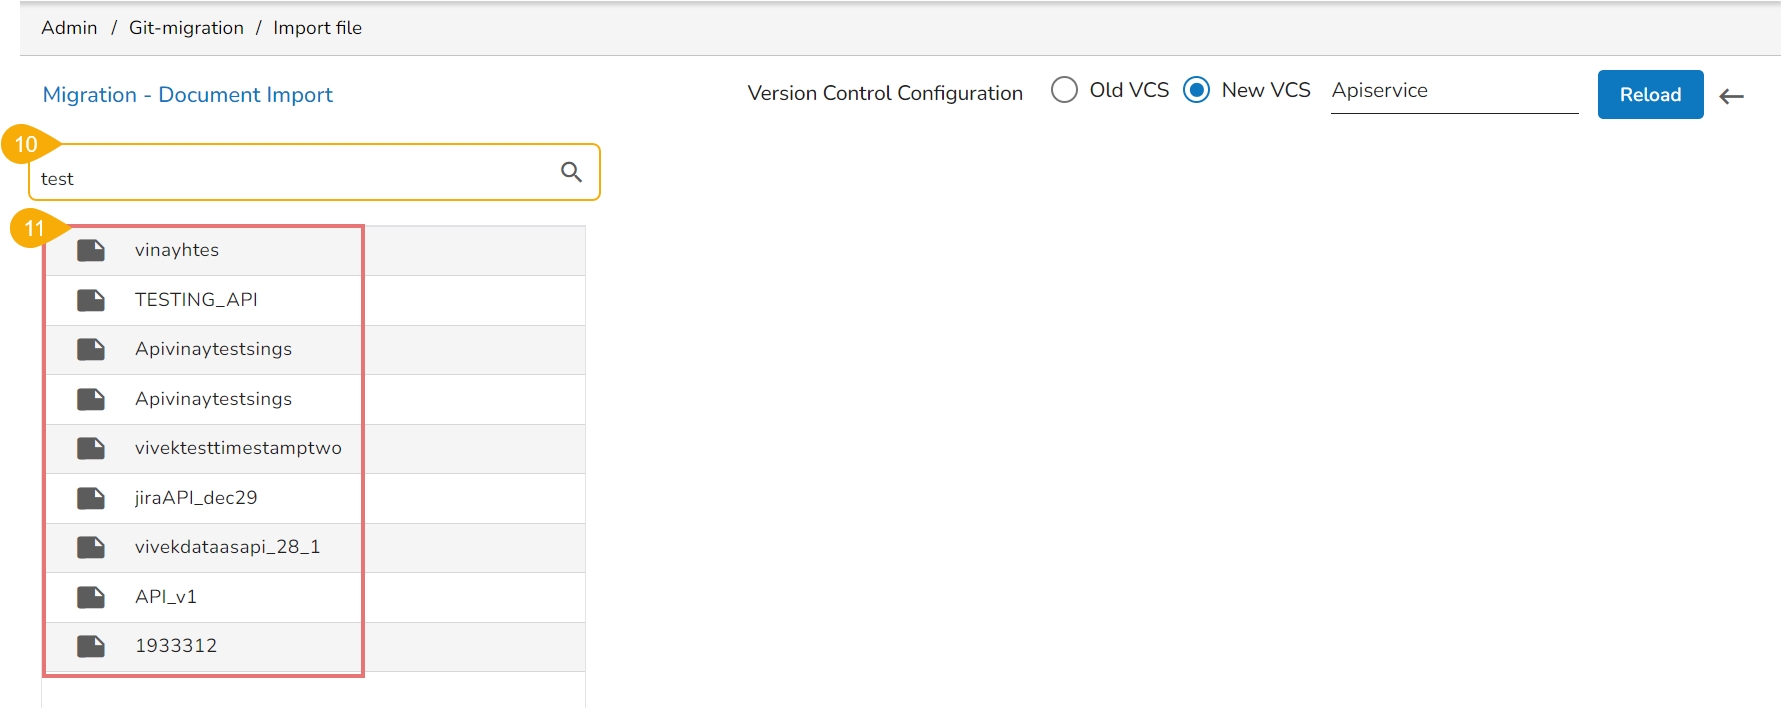
Use the search bar to search for an API Service. (Ex. export)
The customized list appears based on the searched term.
Select an API service and click to open the details.
The various versions (if available in the GIT) of the selected API Service appear.
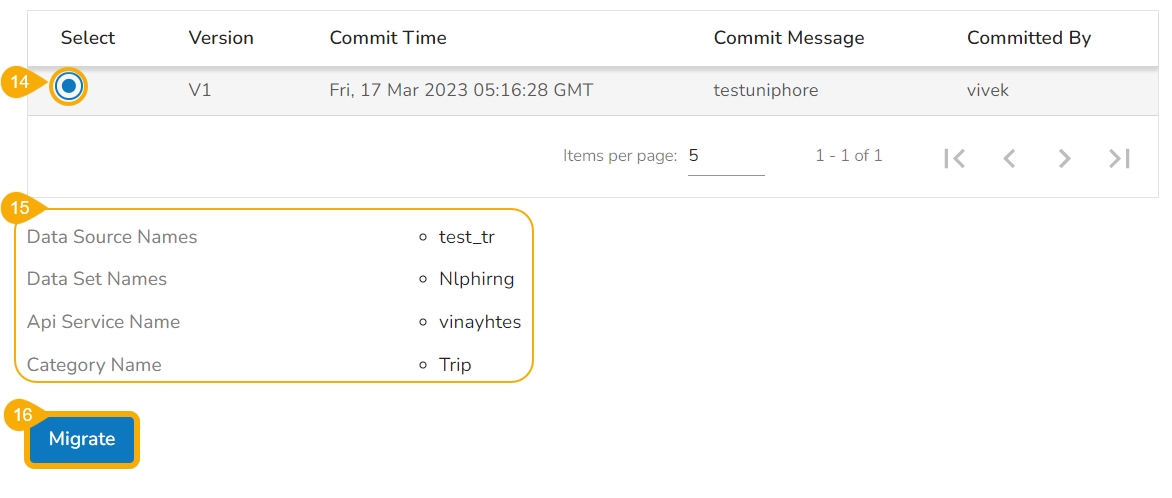
Select a version using the checkbox.
The following information gets displayed:
Data Source Names
Data Set Names
API Service Name
Category Name
Click the Migrate option.
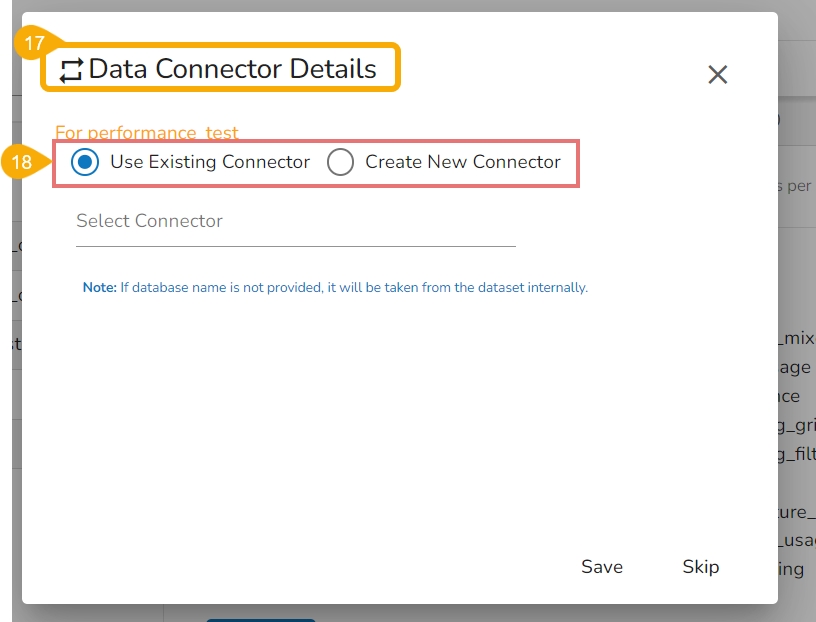
The Data Connector Details dialog box appears to configure a data connector.
The user gets two choices:
Choose the Use an Existing Connector option -> Select a data connector from the drop-down menu -> Click the Save option.
Configure/Create a New Data Connector-> Click the Save option to save the new connector details.
Please Note: The user can choose Skip while importing a version of the concerned API Service. It is mandatory to fill in the details while migrating the API Service for the first time.
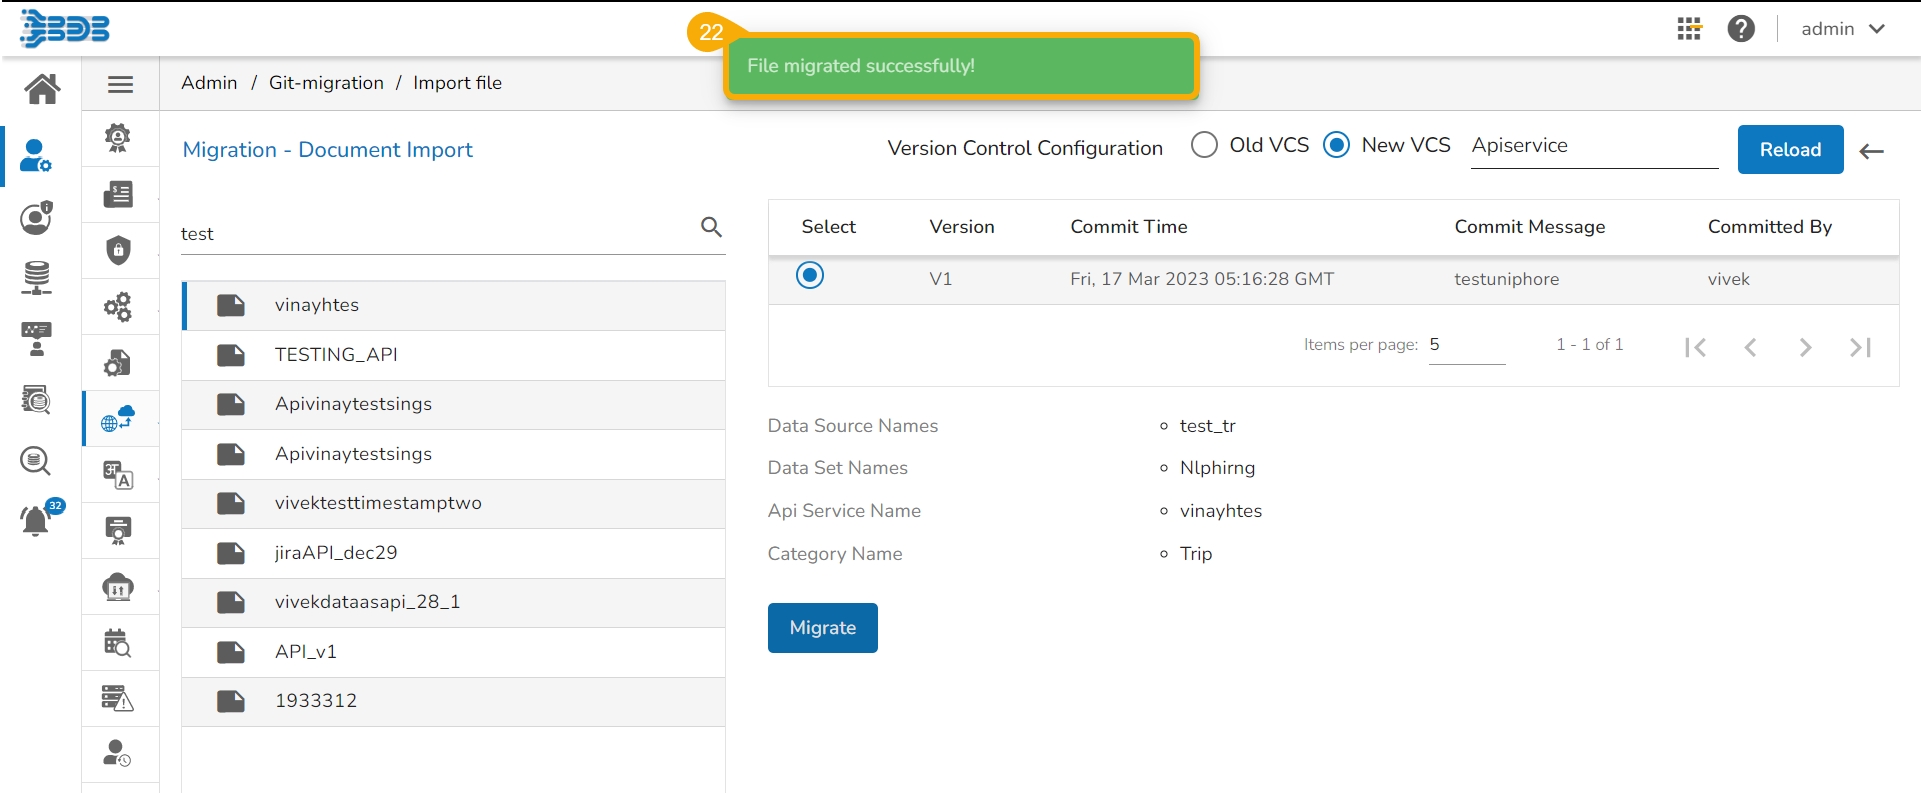
A notification message appears, and the selected API Service gets migrated to the Data Center module.
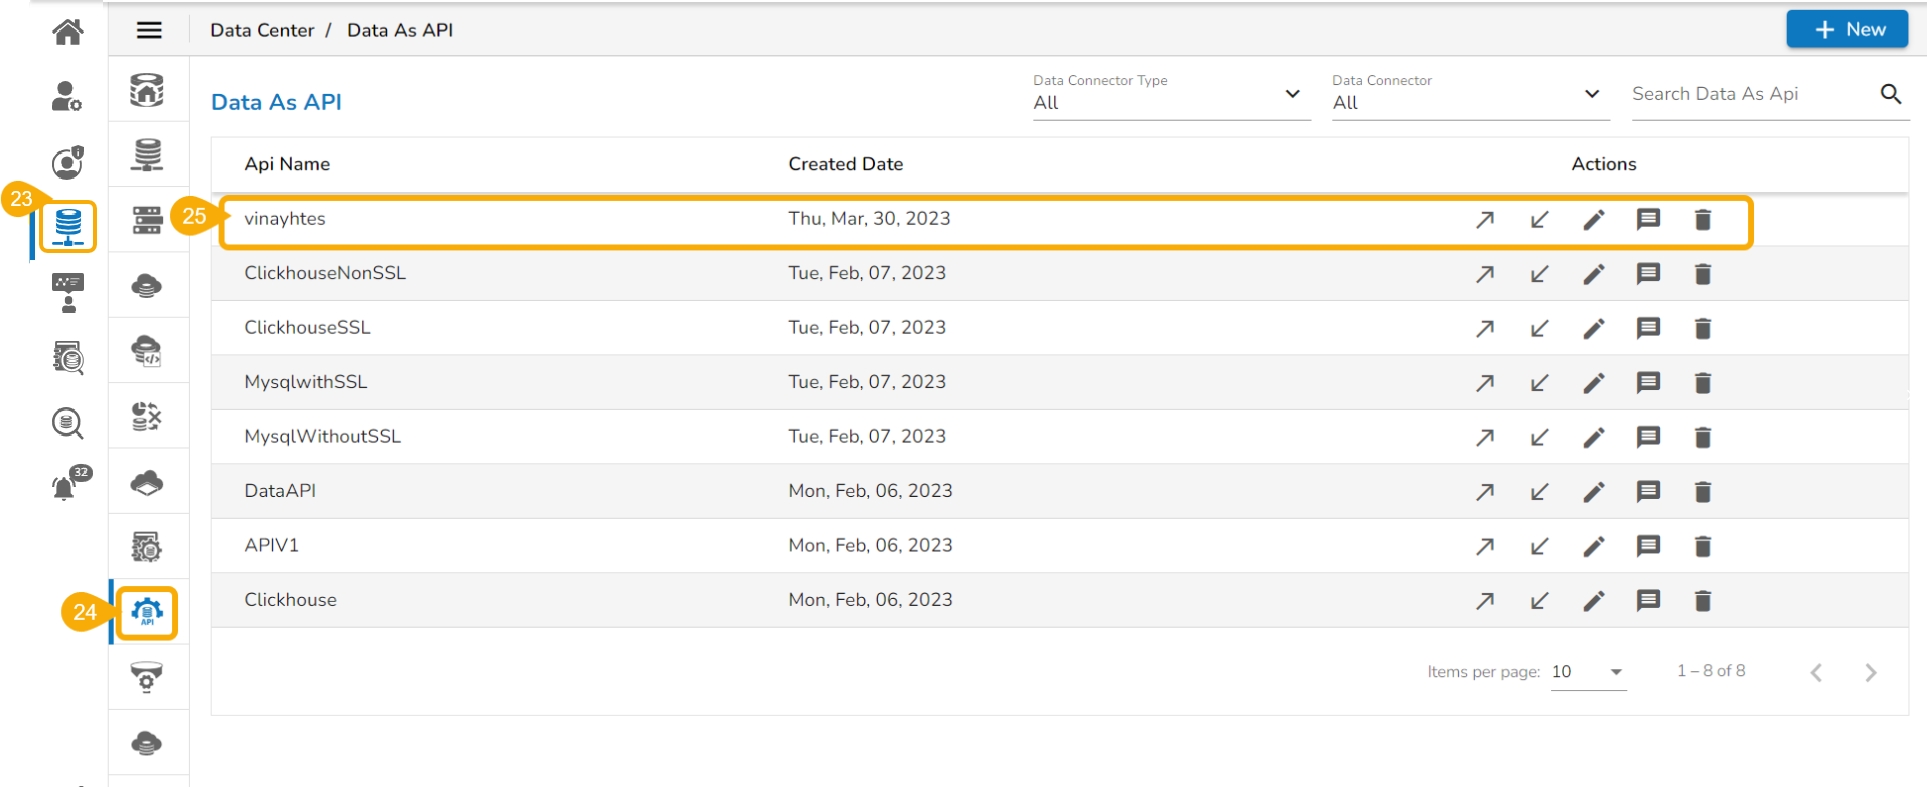
Navigate to the Data Center module.
Open the Data As API list.
The imported API service gets added to the displayed list.
Please Note:
The user can migrate the API service between two users, two spaces, or two servers. The Version control configuration settings should be the same for both users, spaces, and servers where the user attempts to migrate.
The migrated API Service should contain the same category and the Template JSON as its source.

