Loading...
Loading...
Loading...
Loading...
Loading...
This section include steps to create a new Report with Data Preparation.
Loading...
Loading...
This page describes steps on how to create a new report with an existing Datastore.
Check out the walk-through on creating a new report based on an existing Data Store.
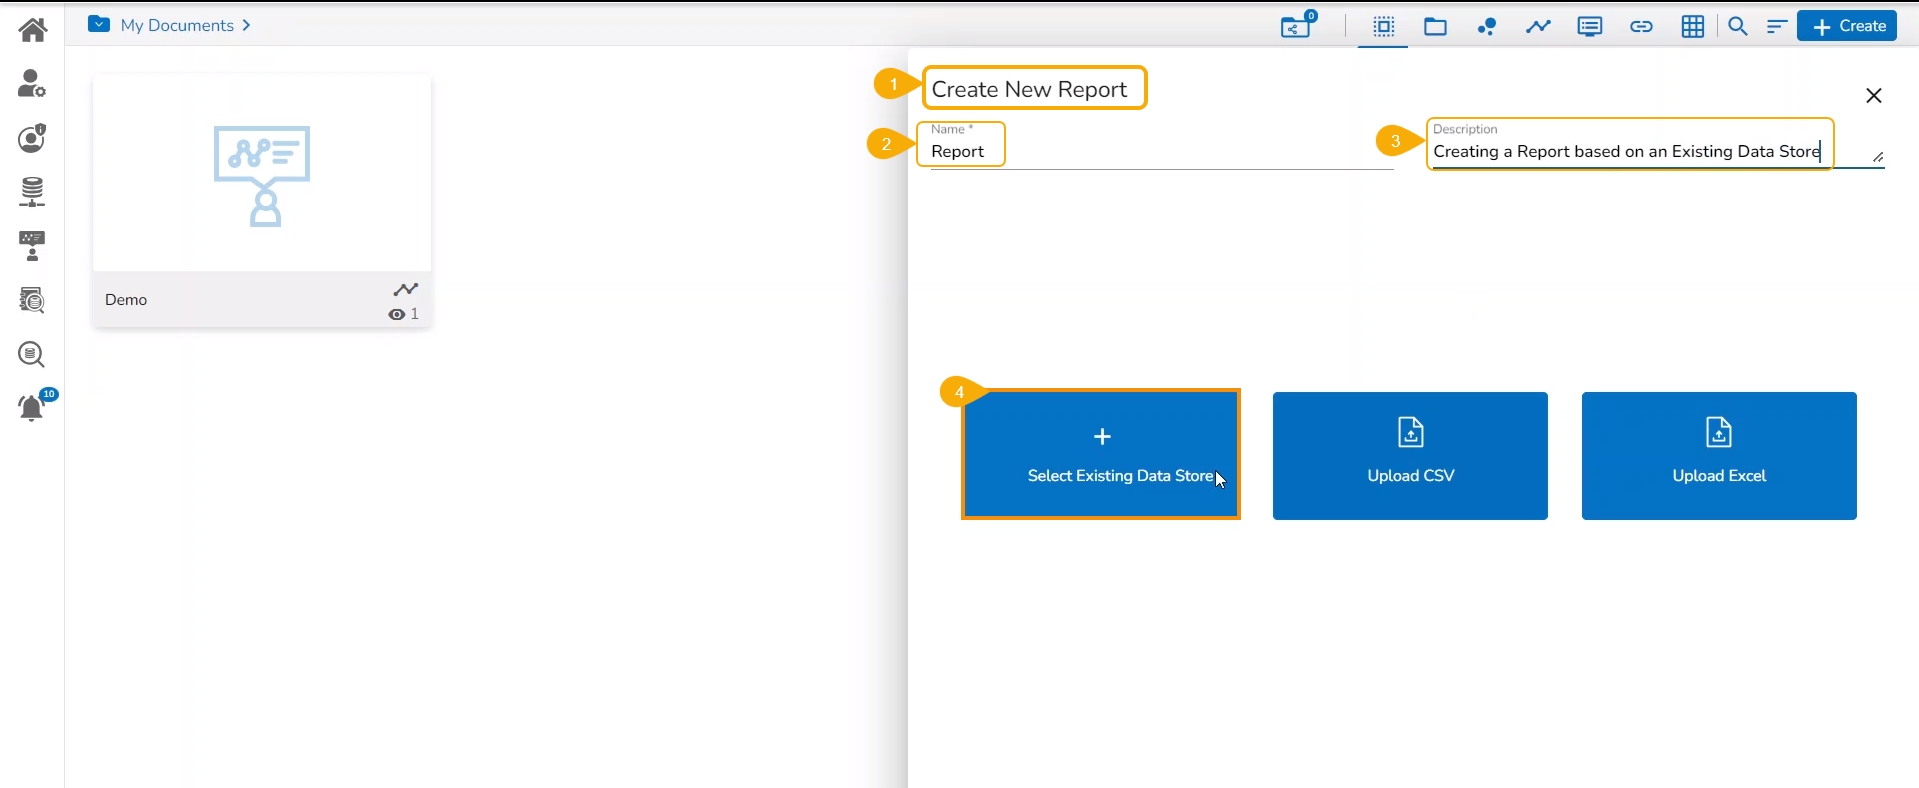
Navigate to the Create Report page after selecting the Report Module or Create New Report option.
Provide the report name.
Describe the Report.
Select the Select Existing Data Store option.
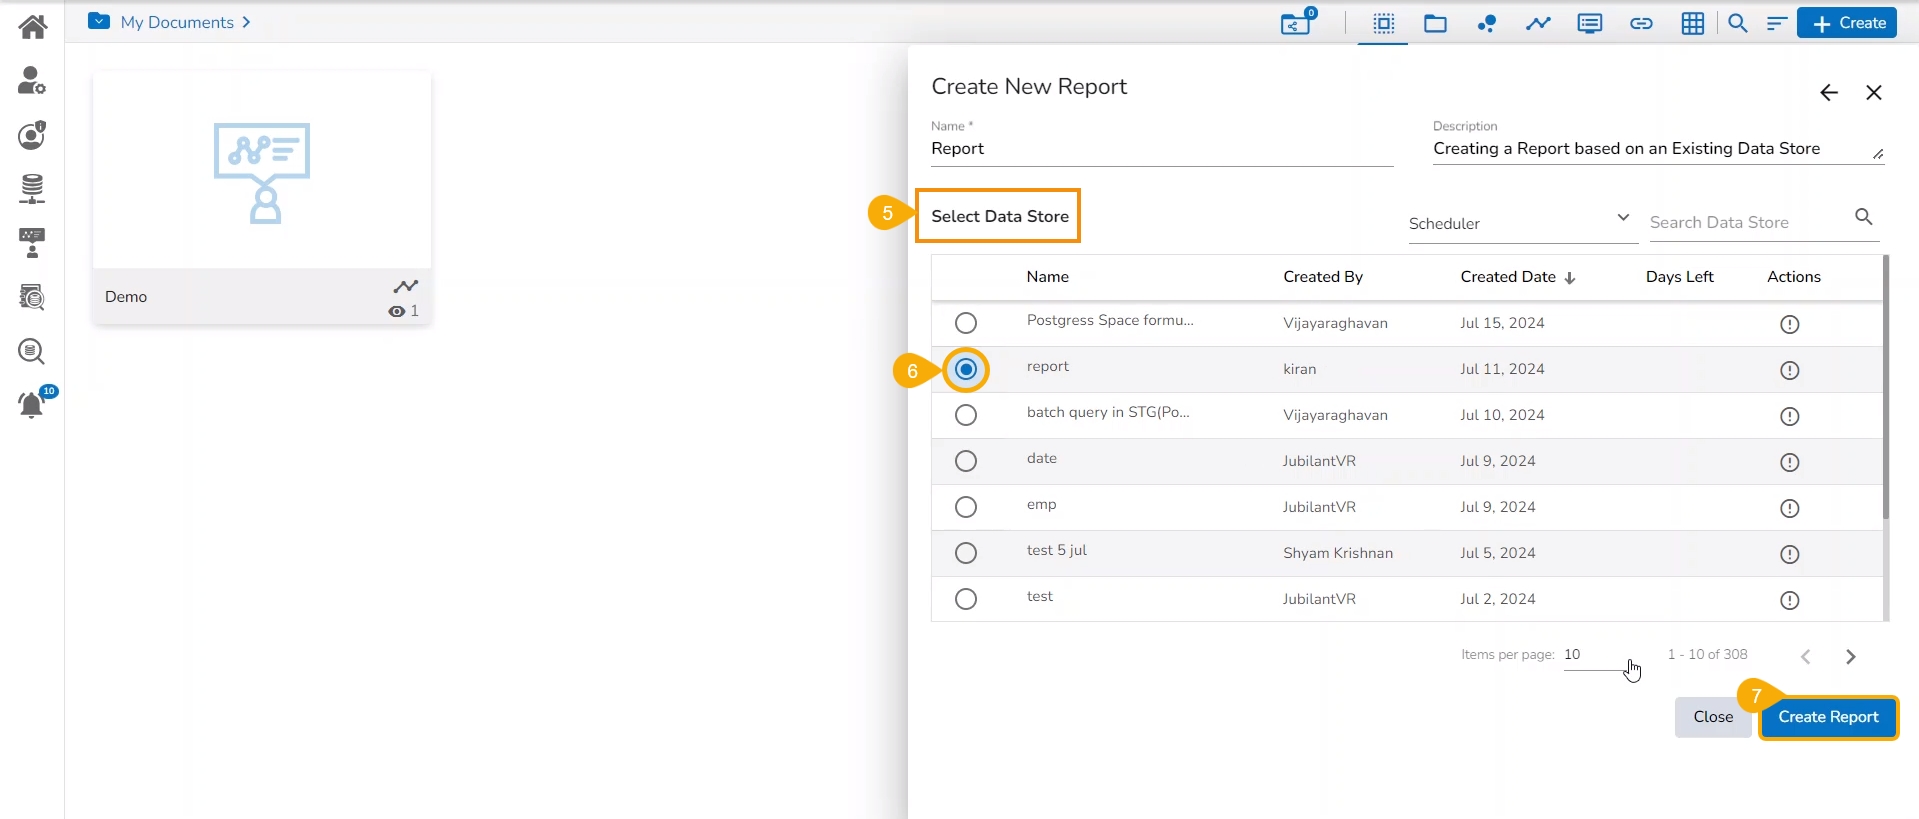
The Select Data Store list appears listing all the existing data stores.
Select a Data Store using the checkbox given next to the Data Store name.
Click the Create Report option.
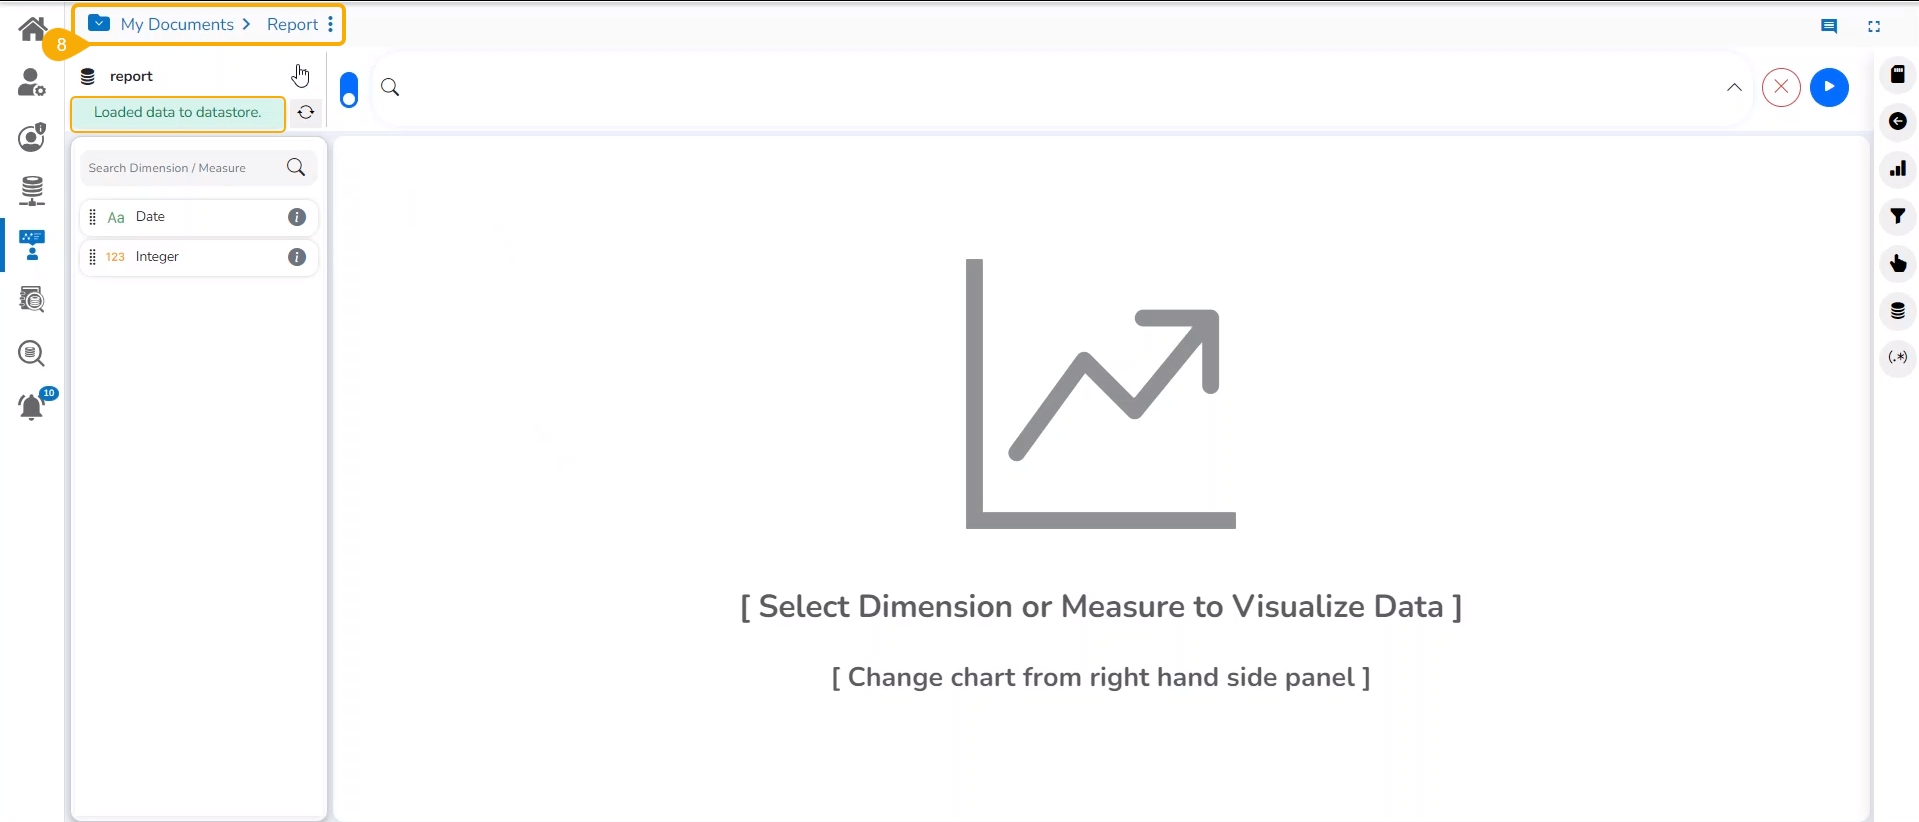
The user gets redirected to the designing canvas to create a View.
Please Note: The user can select a UI for designing a View using the Switch UI icon.
Begin your actual Report creation process with this section. It aims to explain the multiple ways available for a user to create a new report.
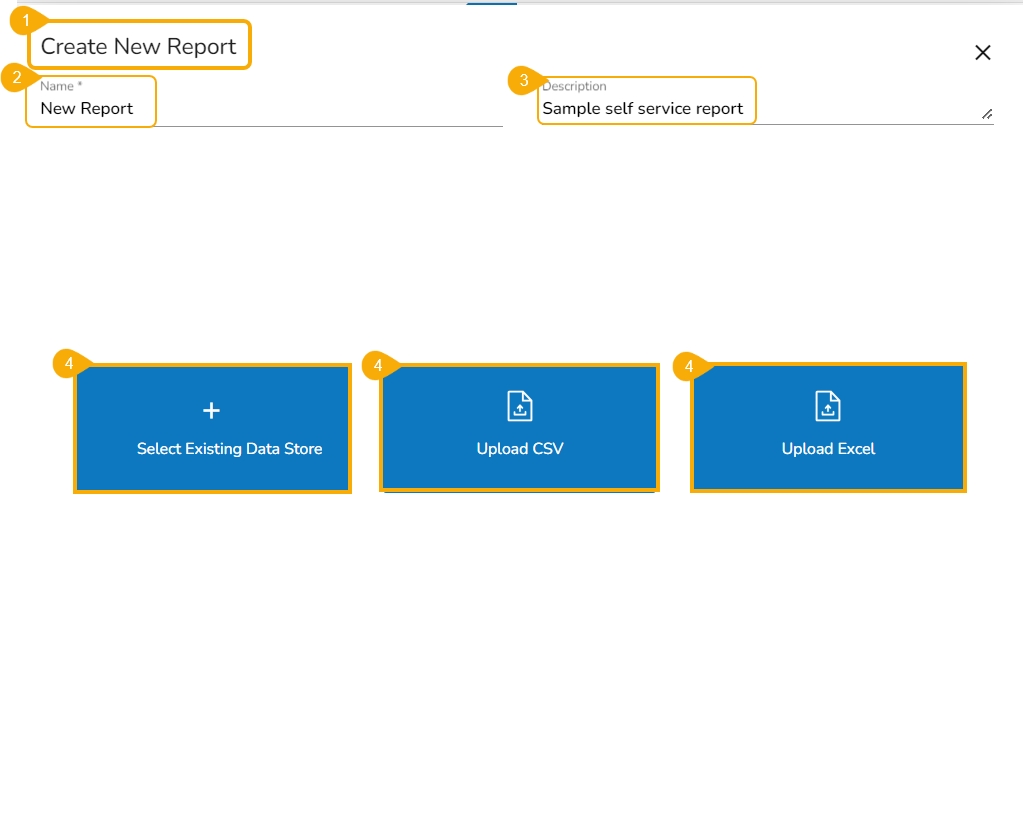
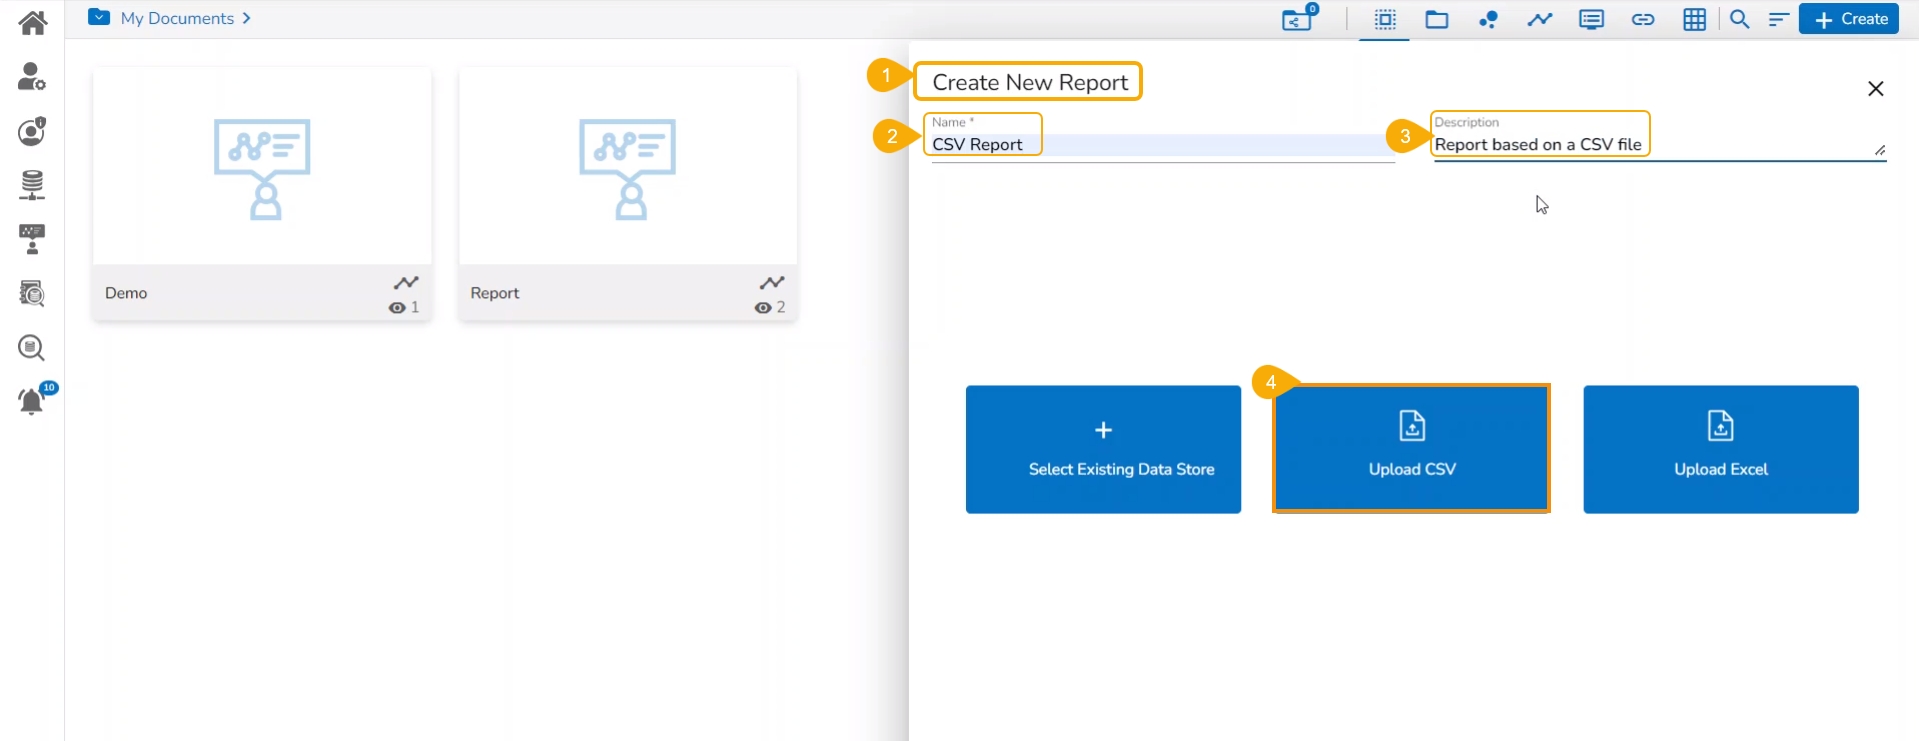
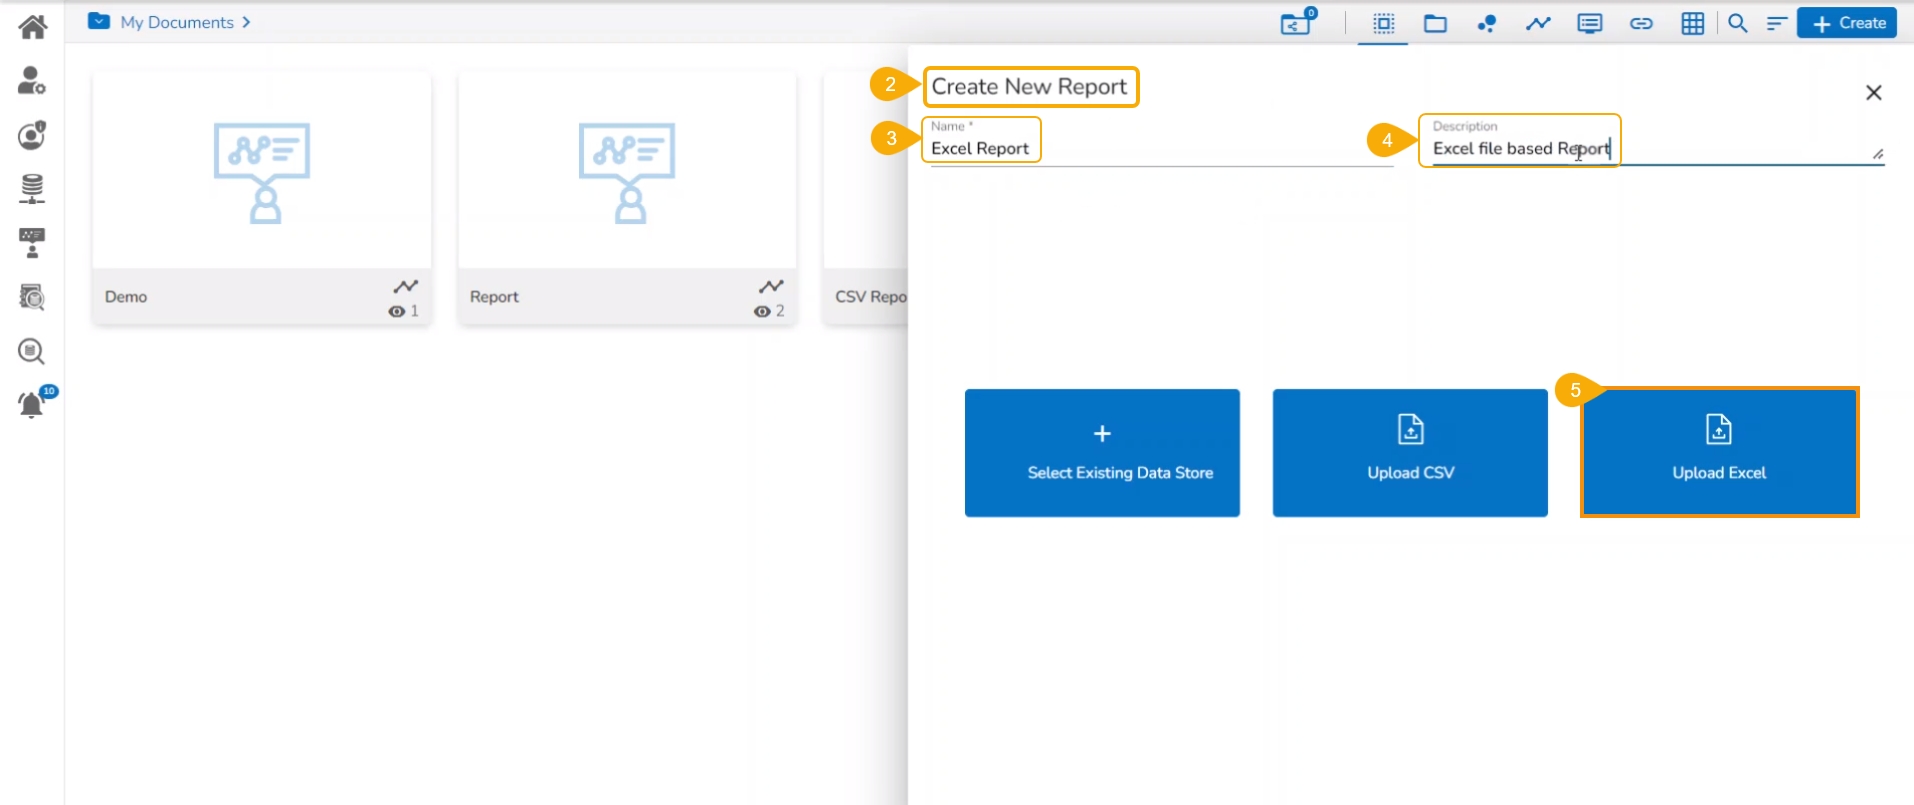
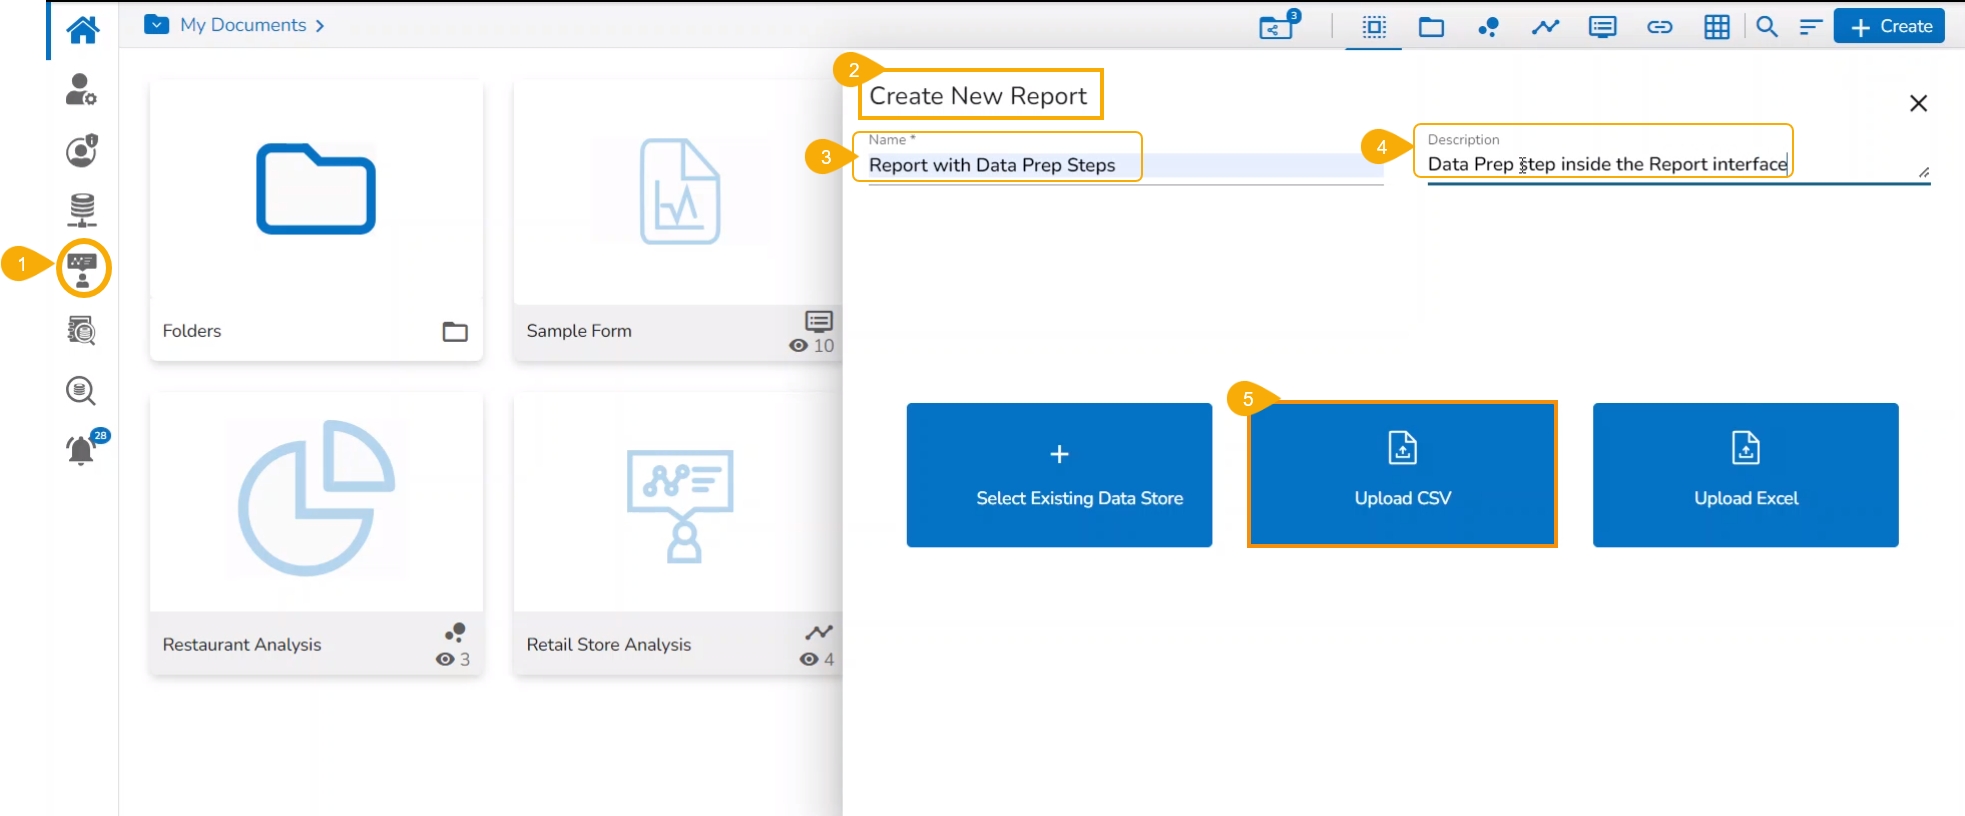
The Create New Report page displays three options to begin with the Report creation.
Please Note: This screen opens to a user who has accessed the Report module using either of the steps shown in the Accessing the Report Module description.
Navigate to the Create New Report page.
Provide a Name for the Report.
Provide a Description of the report.
Select Existing Data Store.
OR
Upload a CSV file.
OR
Upload an Excel file.
Based on the selected option the rest of the information gets displayed to the user.
Please Note: The user can create a new Report based on an uploaded Data Sandbox file. It is possible to save some Data Preparations transforms on this Data Sandbox file and then use it for Data Store creation. Later the user can select this Data Store from the Existing list of Data Store while creating a new Report. This flow contains the following steps:
Upload a Sandbox File/ Use an uploaded Sandbox file.
Use the Data Preparation option to transform the uploaded file data.
Create a Data Store based on the same Sandbox file.
Create a new Report based on the same Data Store created on the clean Sandbox file.
Refer to the Creating a new Report based on a Data Sandbox Data Store with Data Preparations section to understand the flow in detail.
This section explains steps to create and update instance for a Data Store.
Prerequisite: The Data Store Settings must be configured from the Admin module to access the Instance functionality for the Data Store inside a Report.
Check out the walk-through on the instance for an existing datastore under the Personalised category.
The Create Instance option loads the data for the first time from the datastore into Elastic, MongoDB, and ClickHouse server as the configuration is done in the Admin Module for the Datastore Settings.
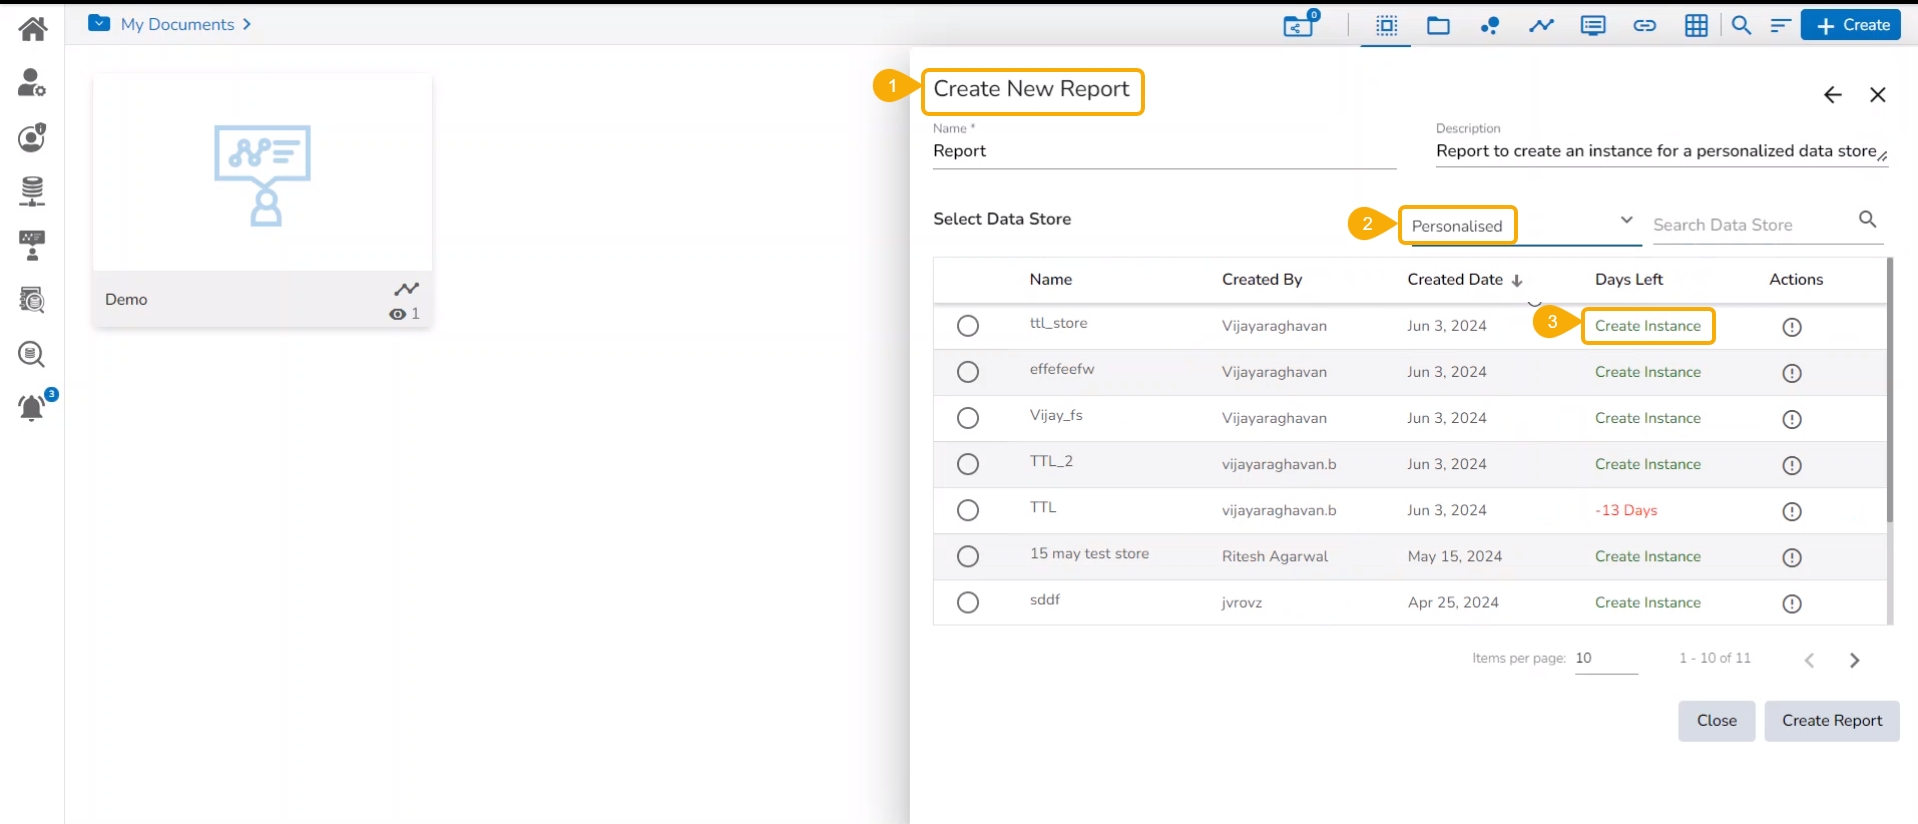
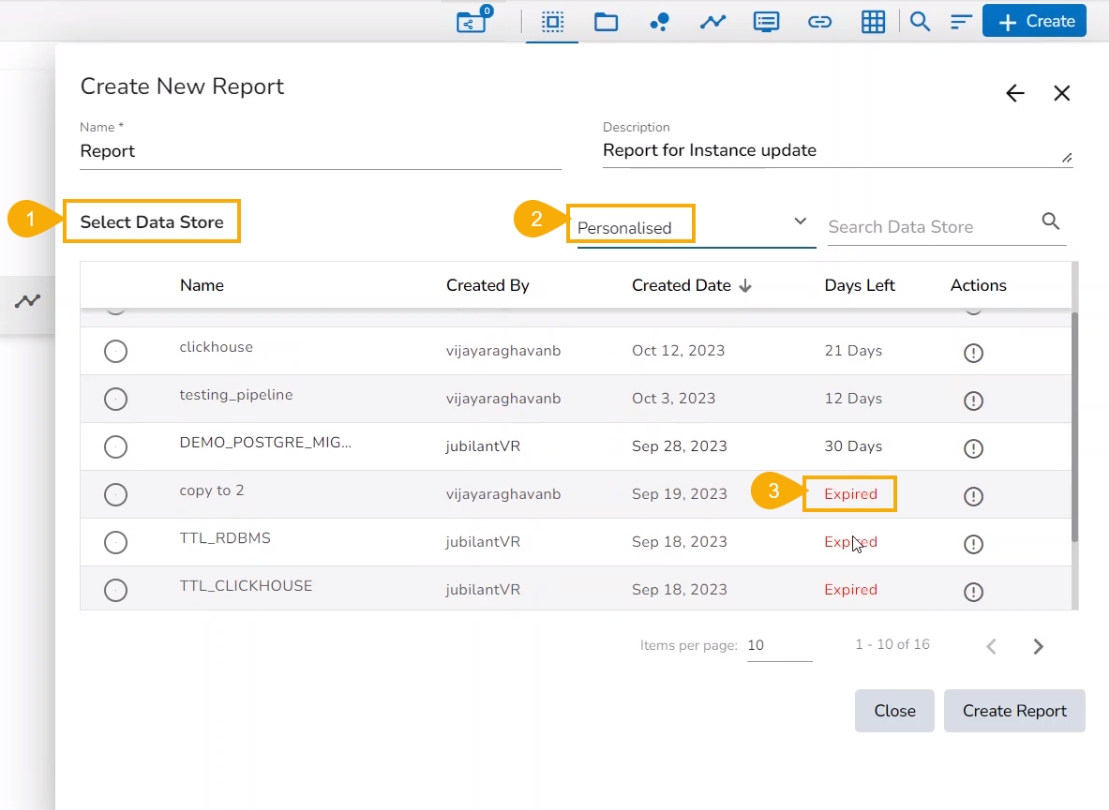
Navigate to the Data Store list inside a Create New Report dialog box.
The Select Data Store page opens listing all the available Data Stores.
Select the Personalized Data Store Category.
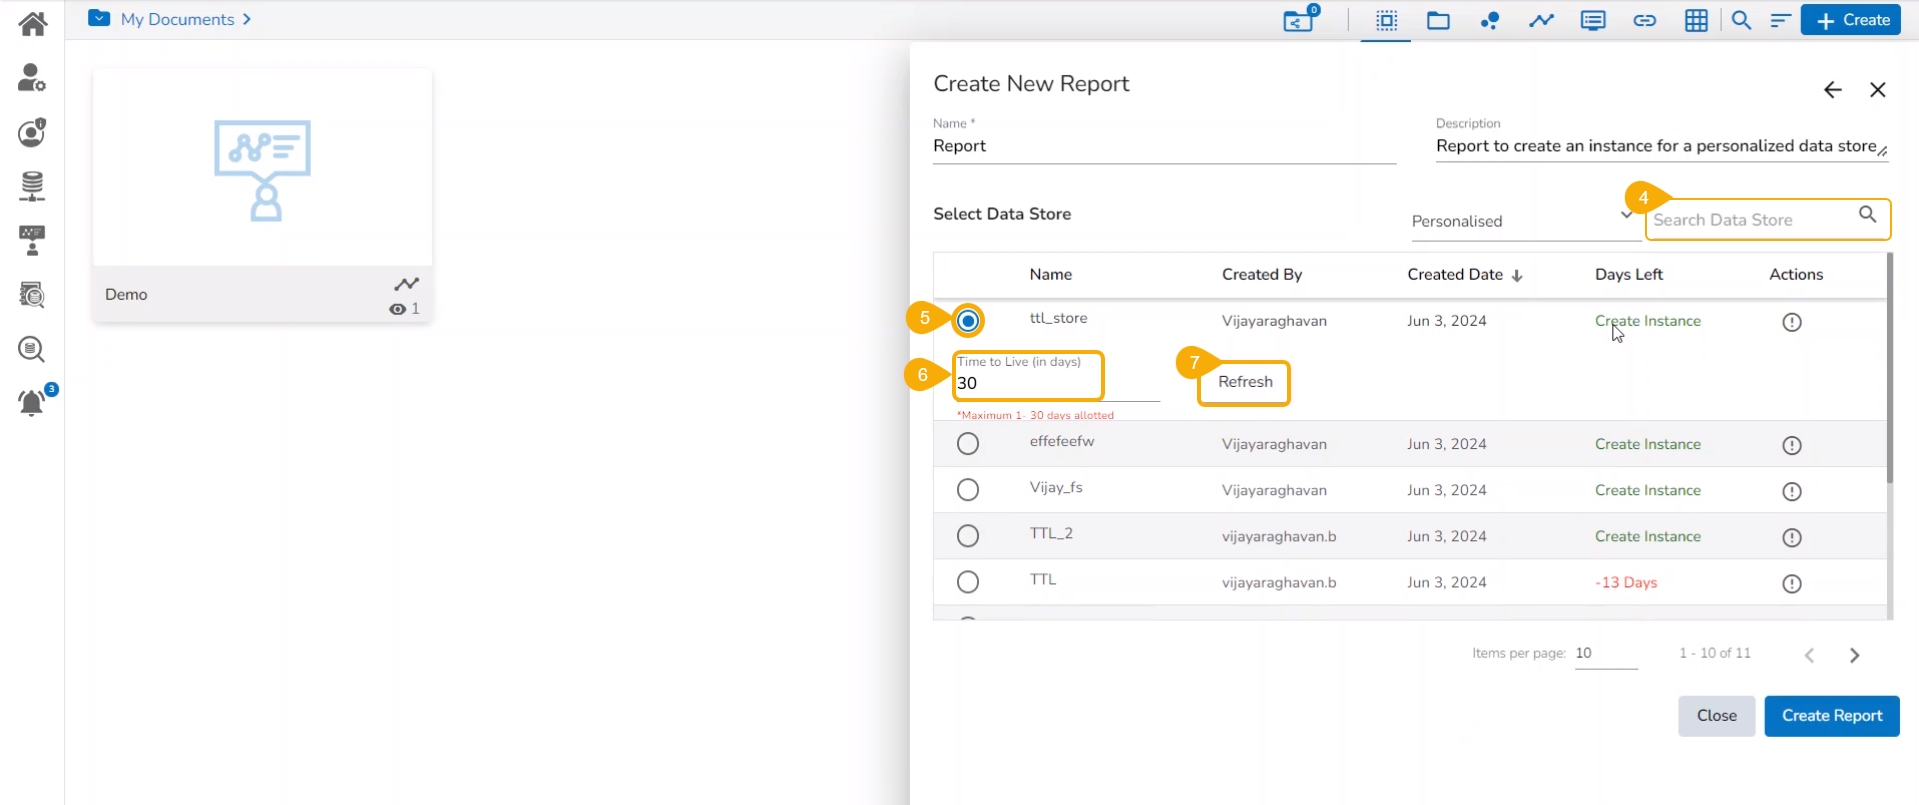
Search for a Data Store in the given search bar.
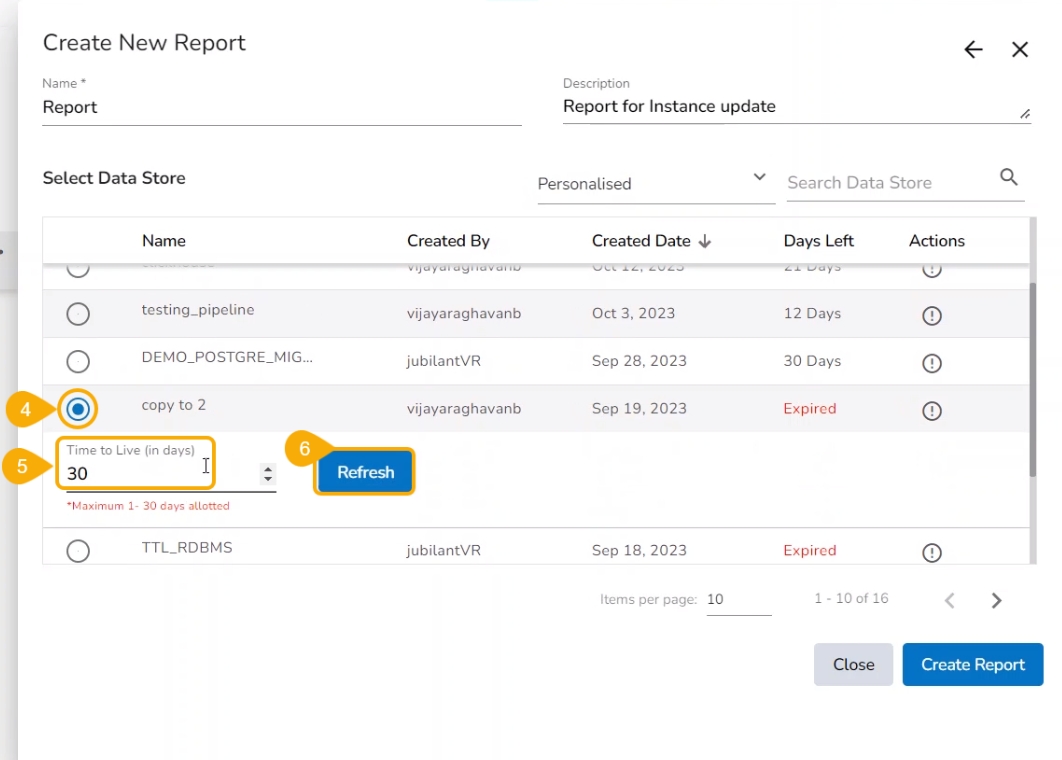
Select a Data Store by using the checkbox.
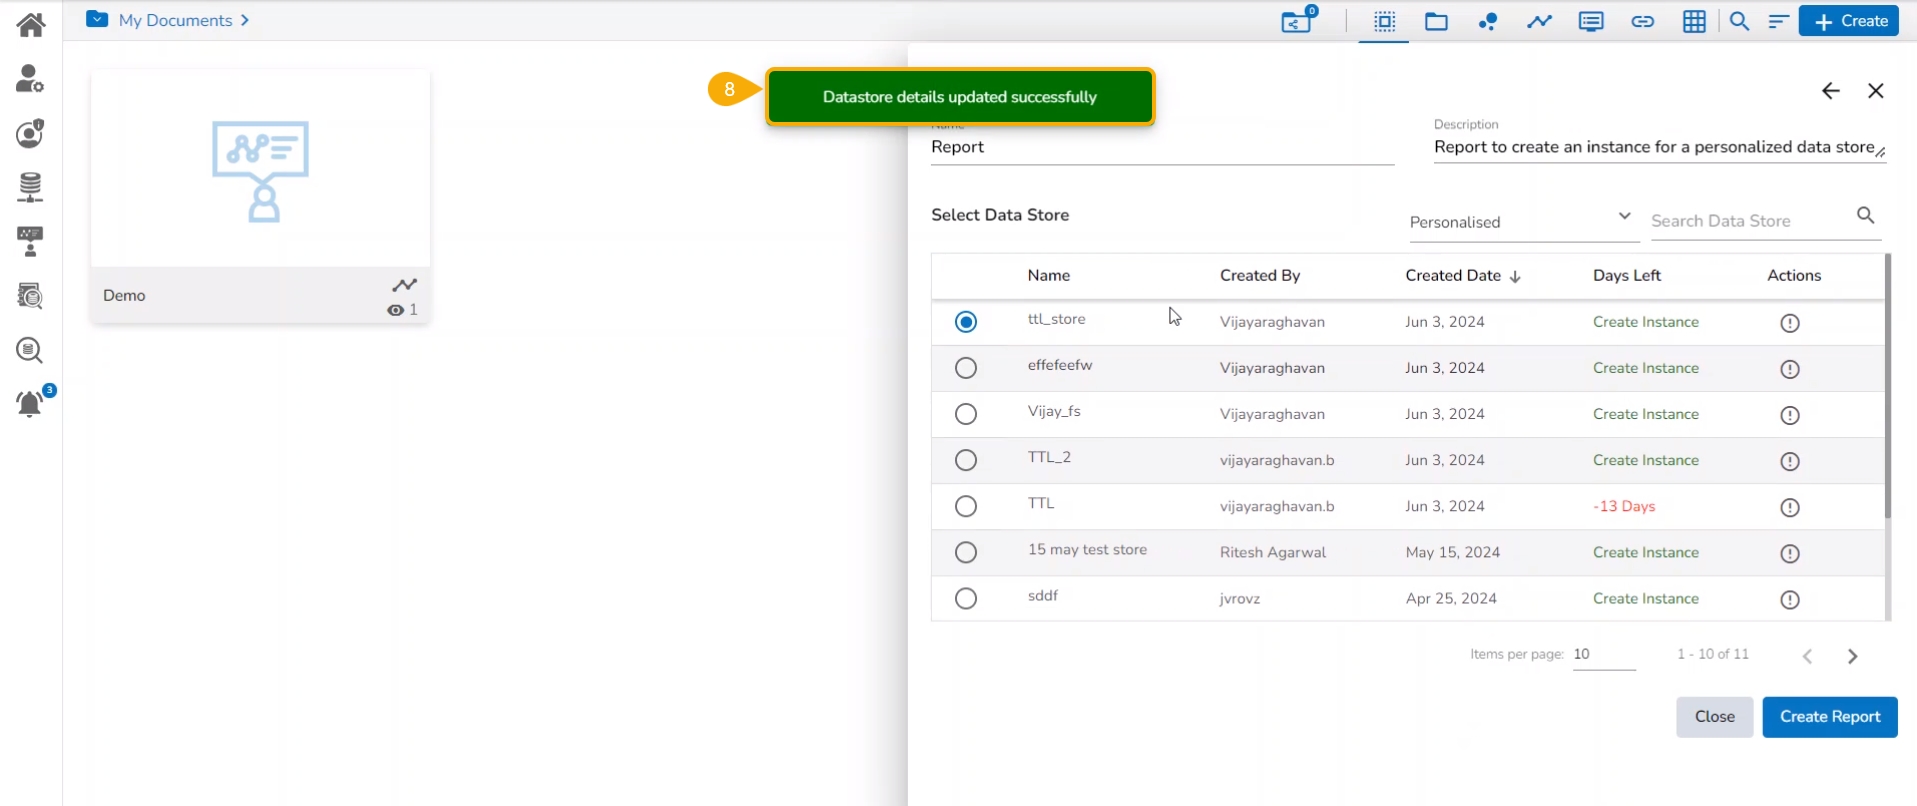
Click the Data Store to open the Time To Live (in days) option. Provide the no. of days for the selected Data Store to create a new instance.
Click the Refresh option.
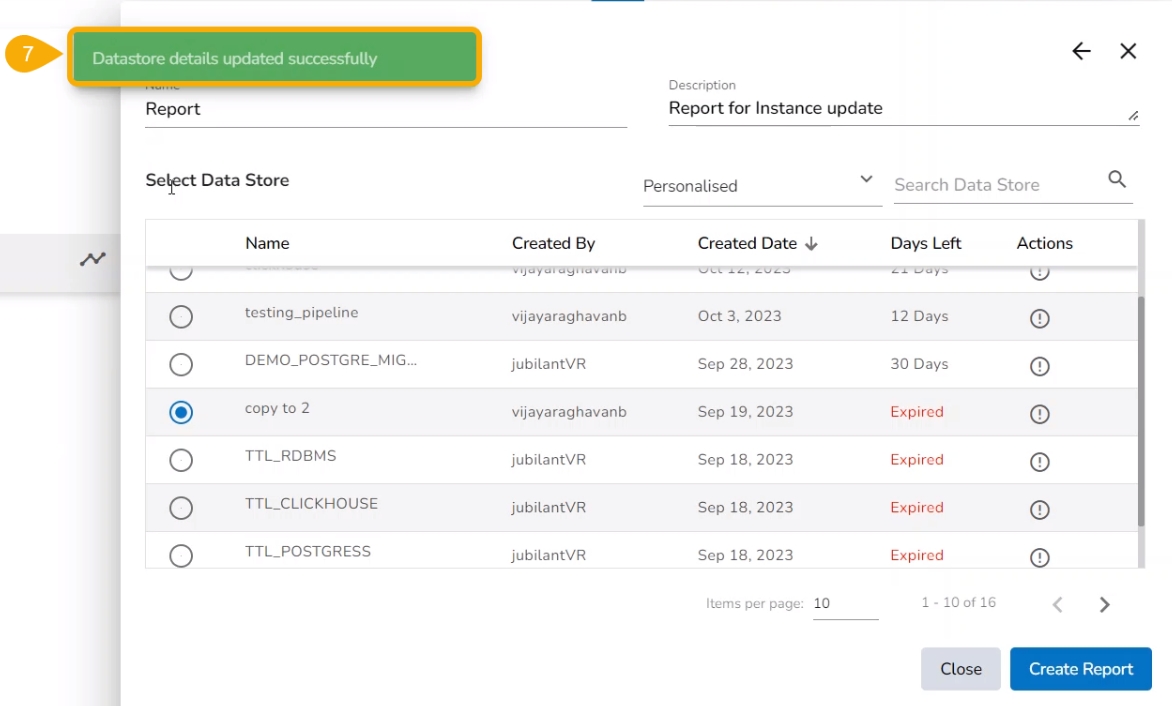
A confirmation message appears to update the Data Store details.
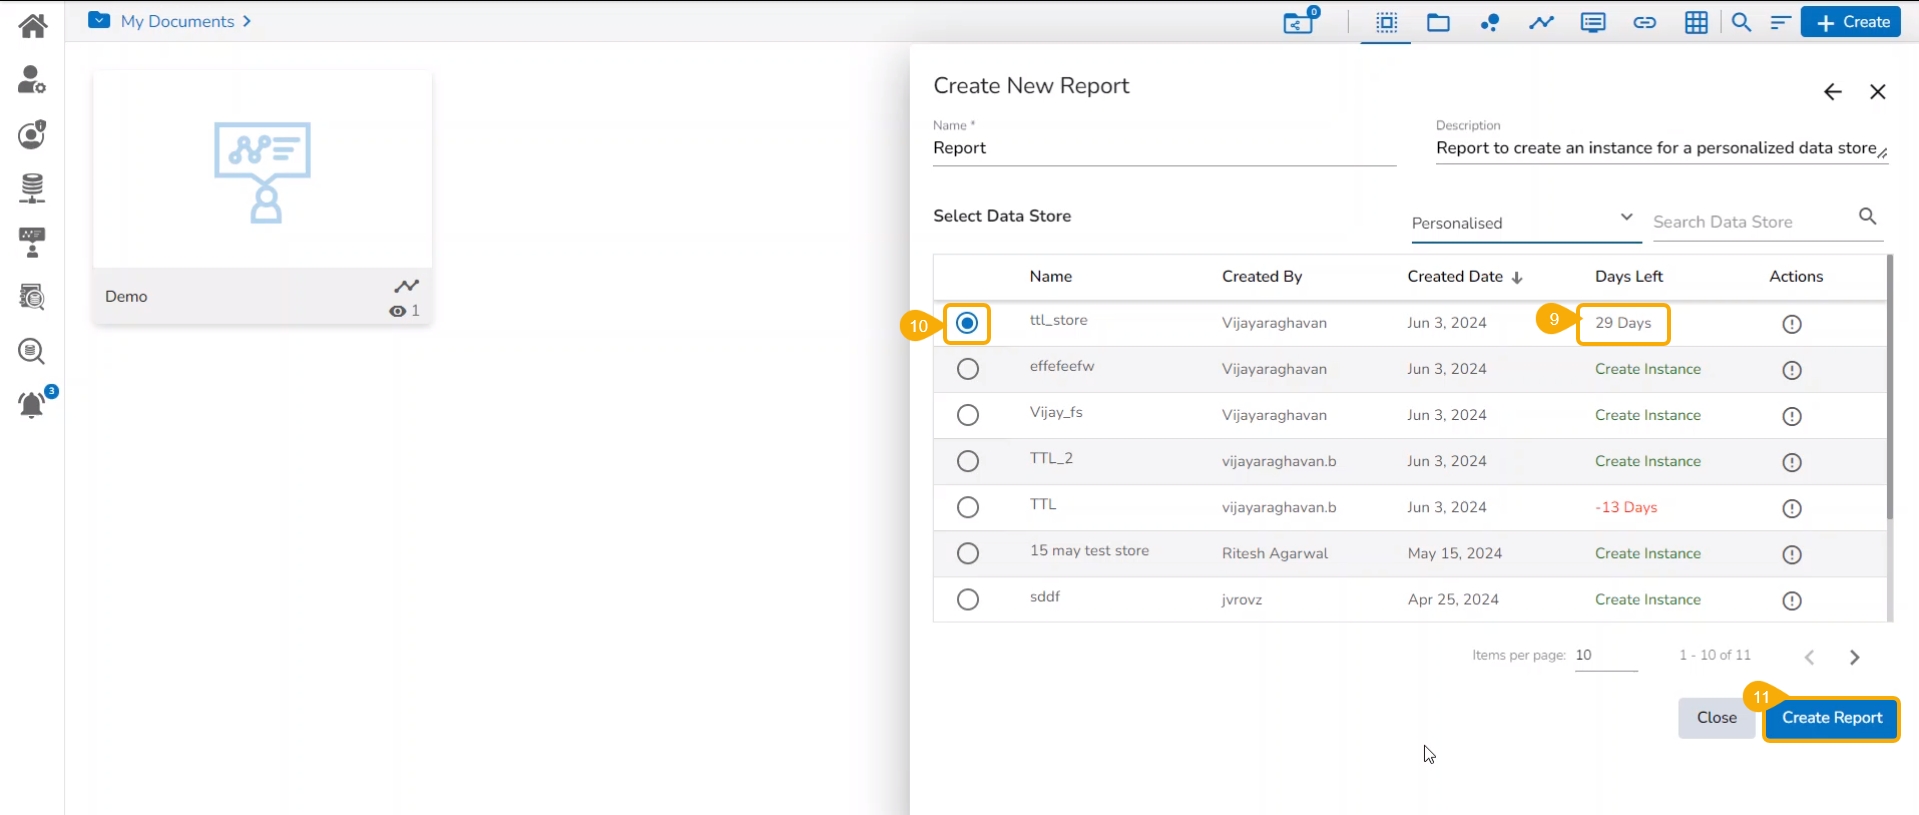
The concerned Data Store starts displaying the Days Left option based on the provided no. of days while setting the TTL.
Select the Data Store by using the check box.
Click the Create Report option to proceed with the View creation.
The permitted Time to Live limit for a Data Store is only 30 days (maximum). If it goes above that, data will not be present in the Report.
Hence, the user can manually update the instance. The Days Left column will highlight such conditions as flashing Expire status in the red color. Click the user to get redirected to update the instance for the selected Data Store so the data will be refreshed again in the ES or MongoDB.
Check out the illustration on updating an instance for an existing datastore.
Navigate to the Create New Report page.
Filter the Data Store list with the Personalised category.
Select a Data Store from the Personalised category that has expired.
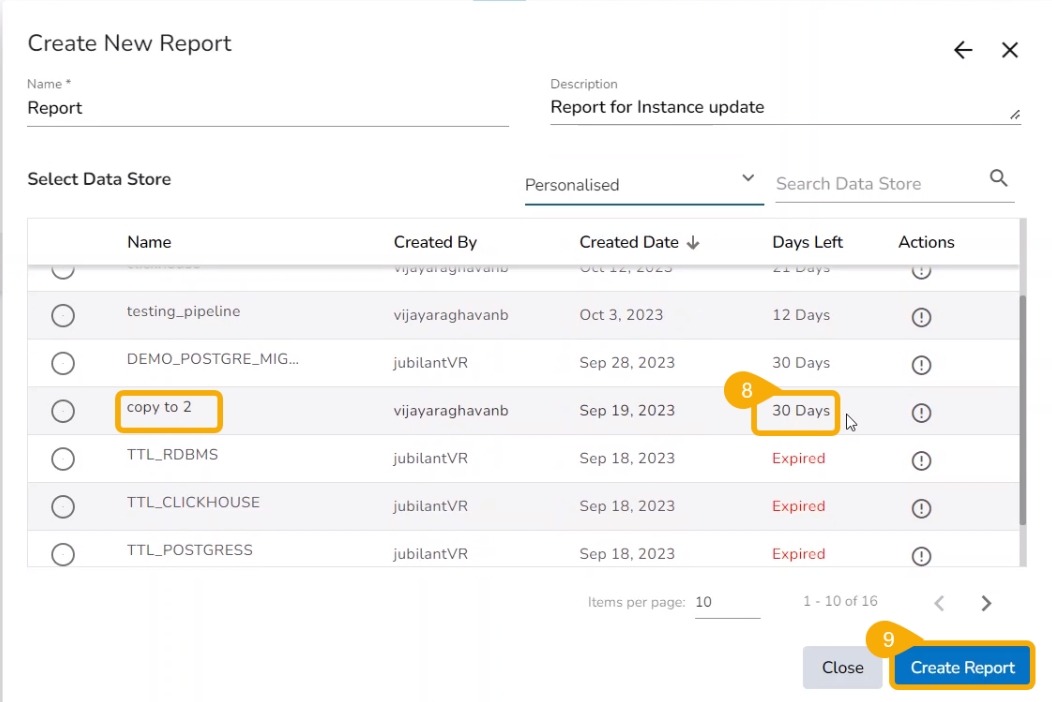
Select the Data Store by using the checkbox provided next to the Data Store.
Click the Datastore to open the Time to Live (TTL) option. Mention no. of days (up to 30 days is allowed for TTL).
Click the Refresh option.
A notification message appears to inform about the successful update of the Data Store.
The Data Store gets refreshed, and the inserted no. of days gets reflected under the Days Left column.
Click the Create Report option to start with the View creation part of the Report.
Please Note: The user can distinguish between Datastores:
Distinguish between instances and scheduler-based data stores.
Distinguish between the Active and Expired instances.
The Expired Data Stores are mentioned with the Expired Status.
This page describes steps on how upload a CSV file to create a New Story. The user can try this functionality themselves by using the sample file.
Check out the given walk-through on how to create a new Report and save a View in it using the Upload File option.
Navigate to the Create New Report page.
Provide a name for the report.
Describe the report.
Click the Upload CSV option.
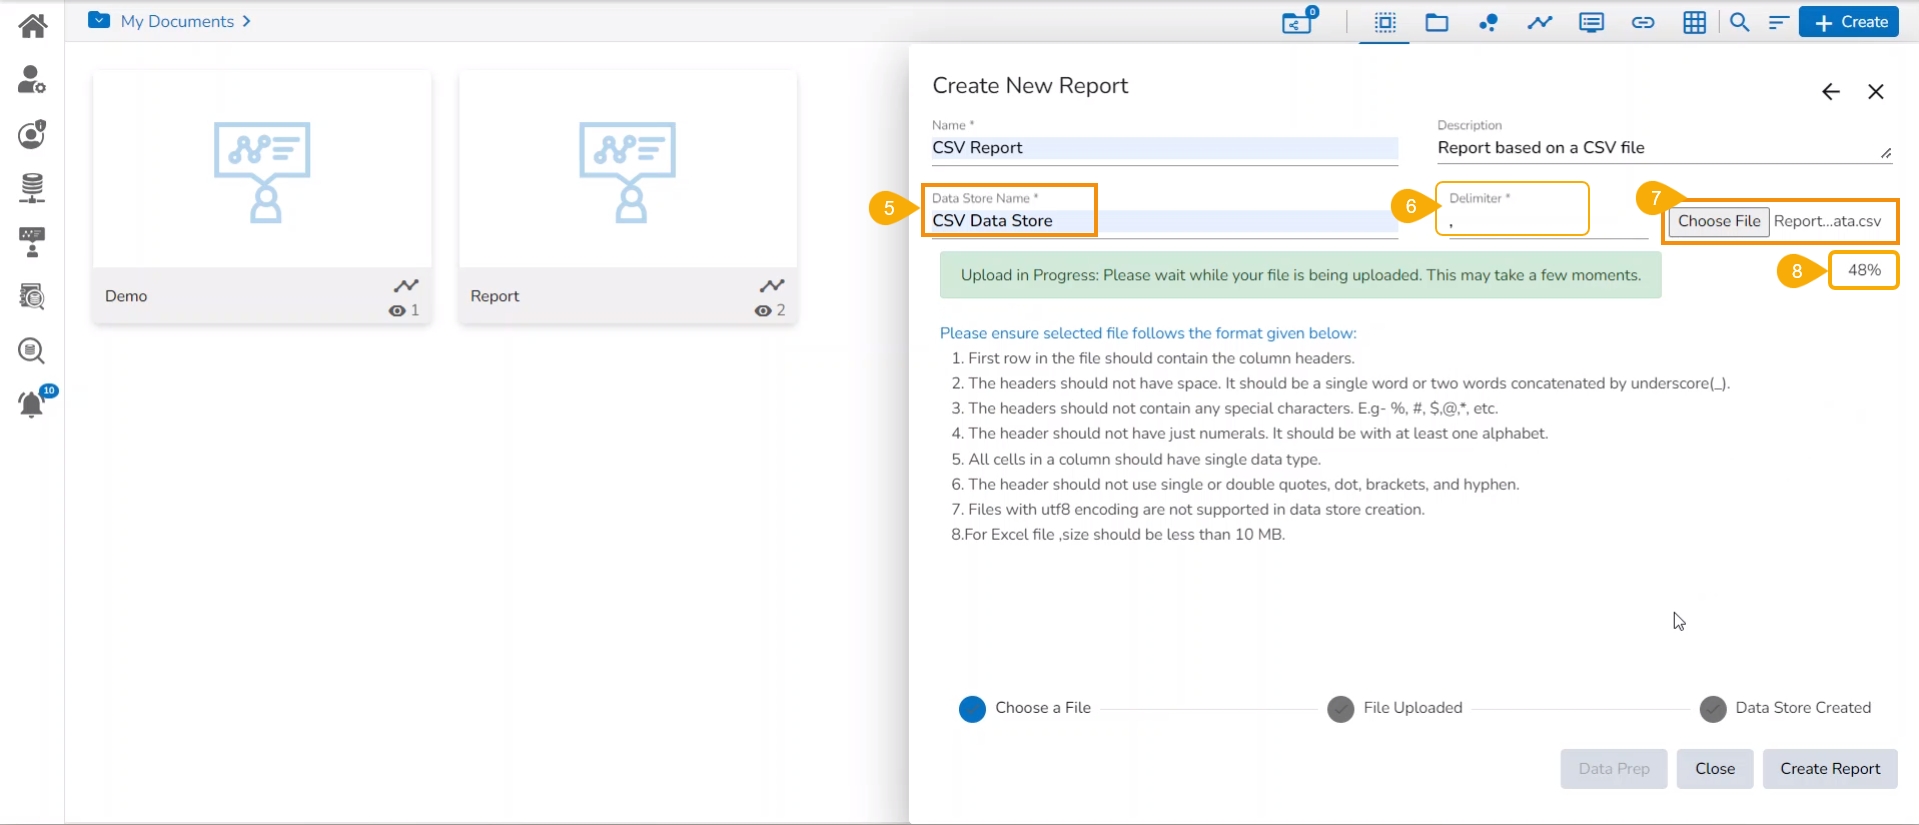
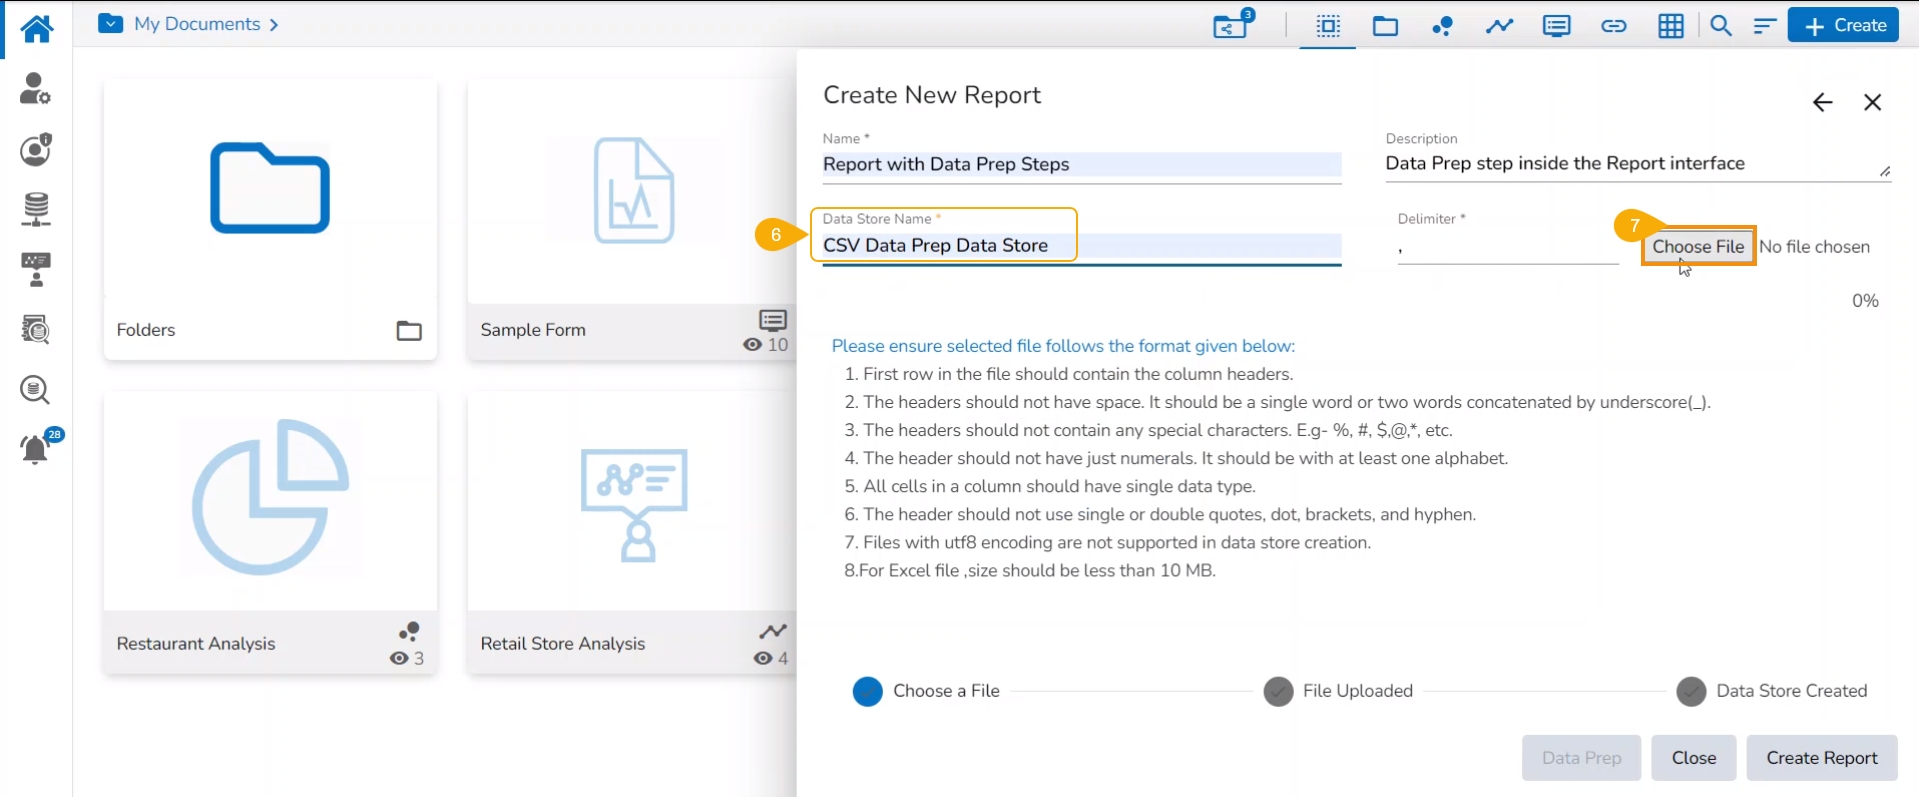
Provide the Data Store Name.
The Delimiter field appears for a CSV file.
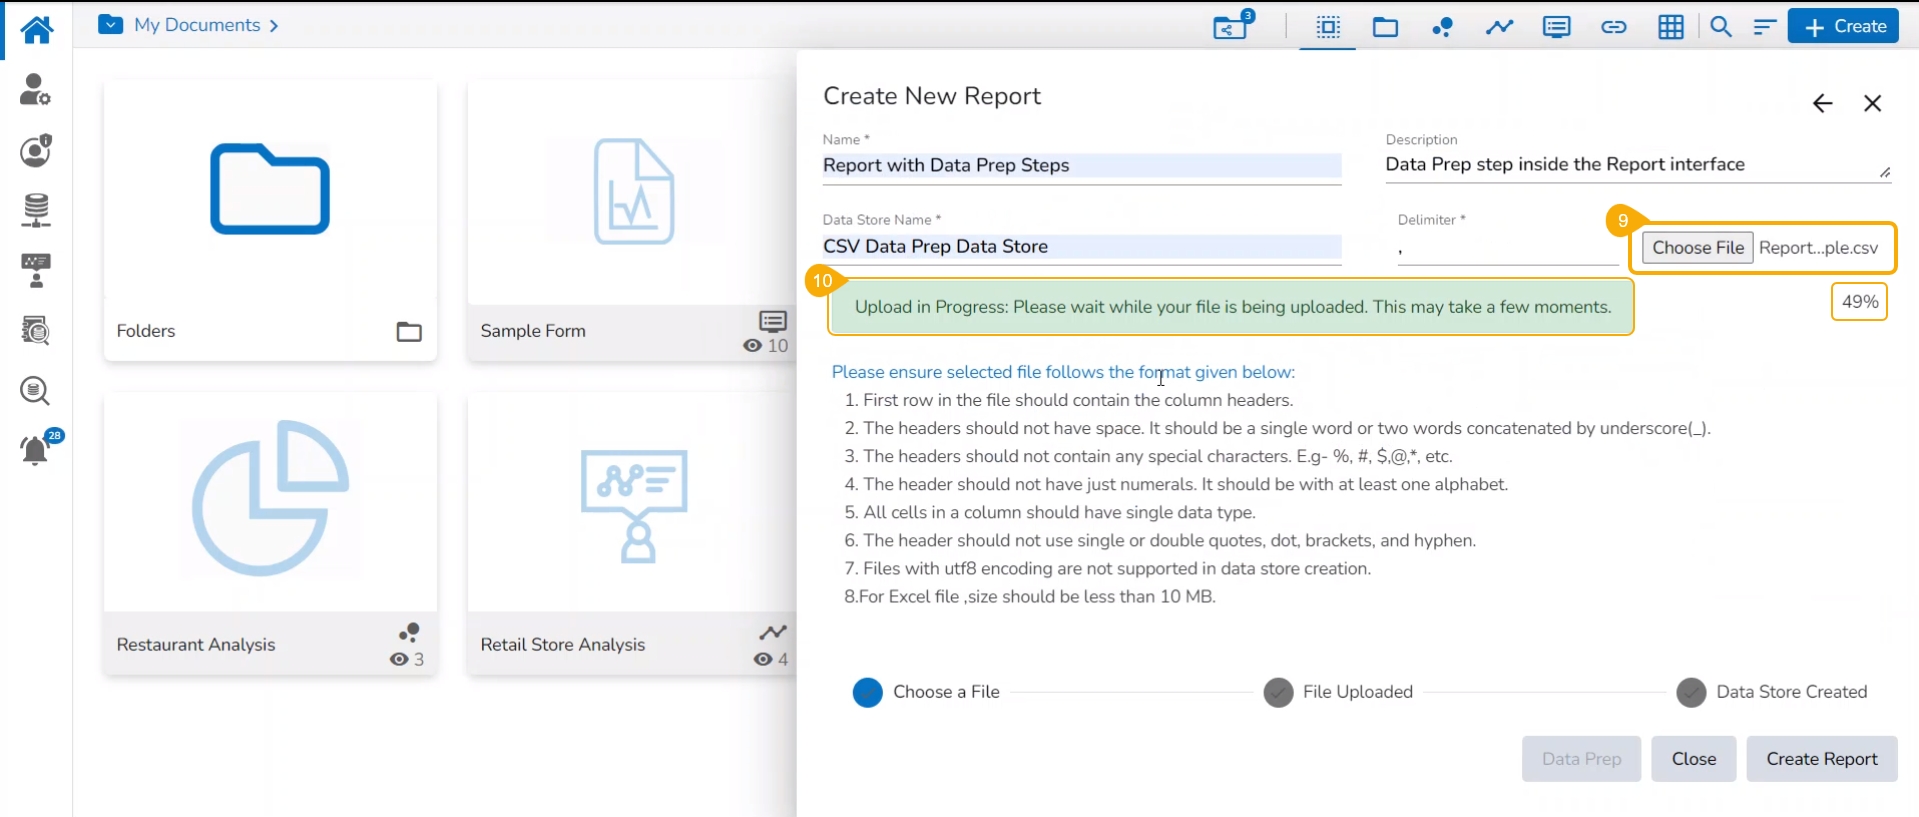
Use the Choose File option to upload a file.
The file upload completion is suggested through the mention of %.
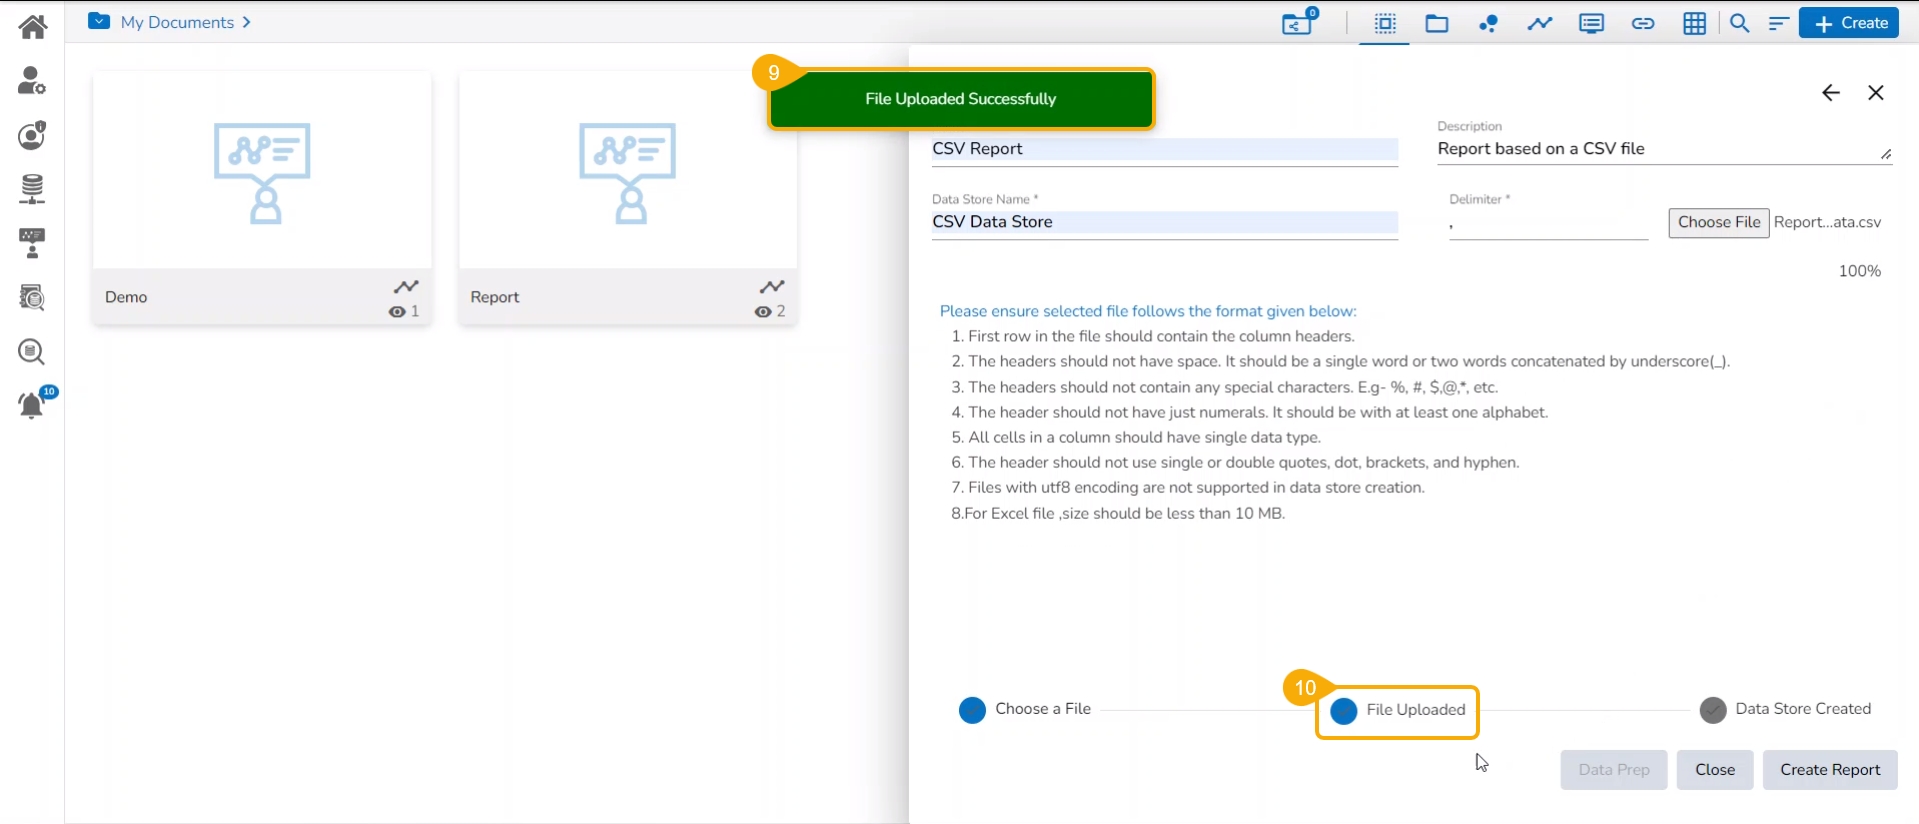
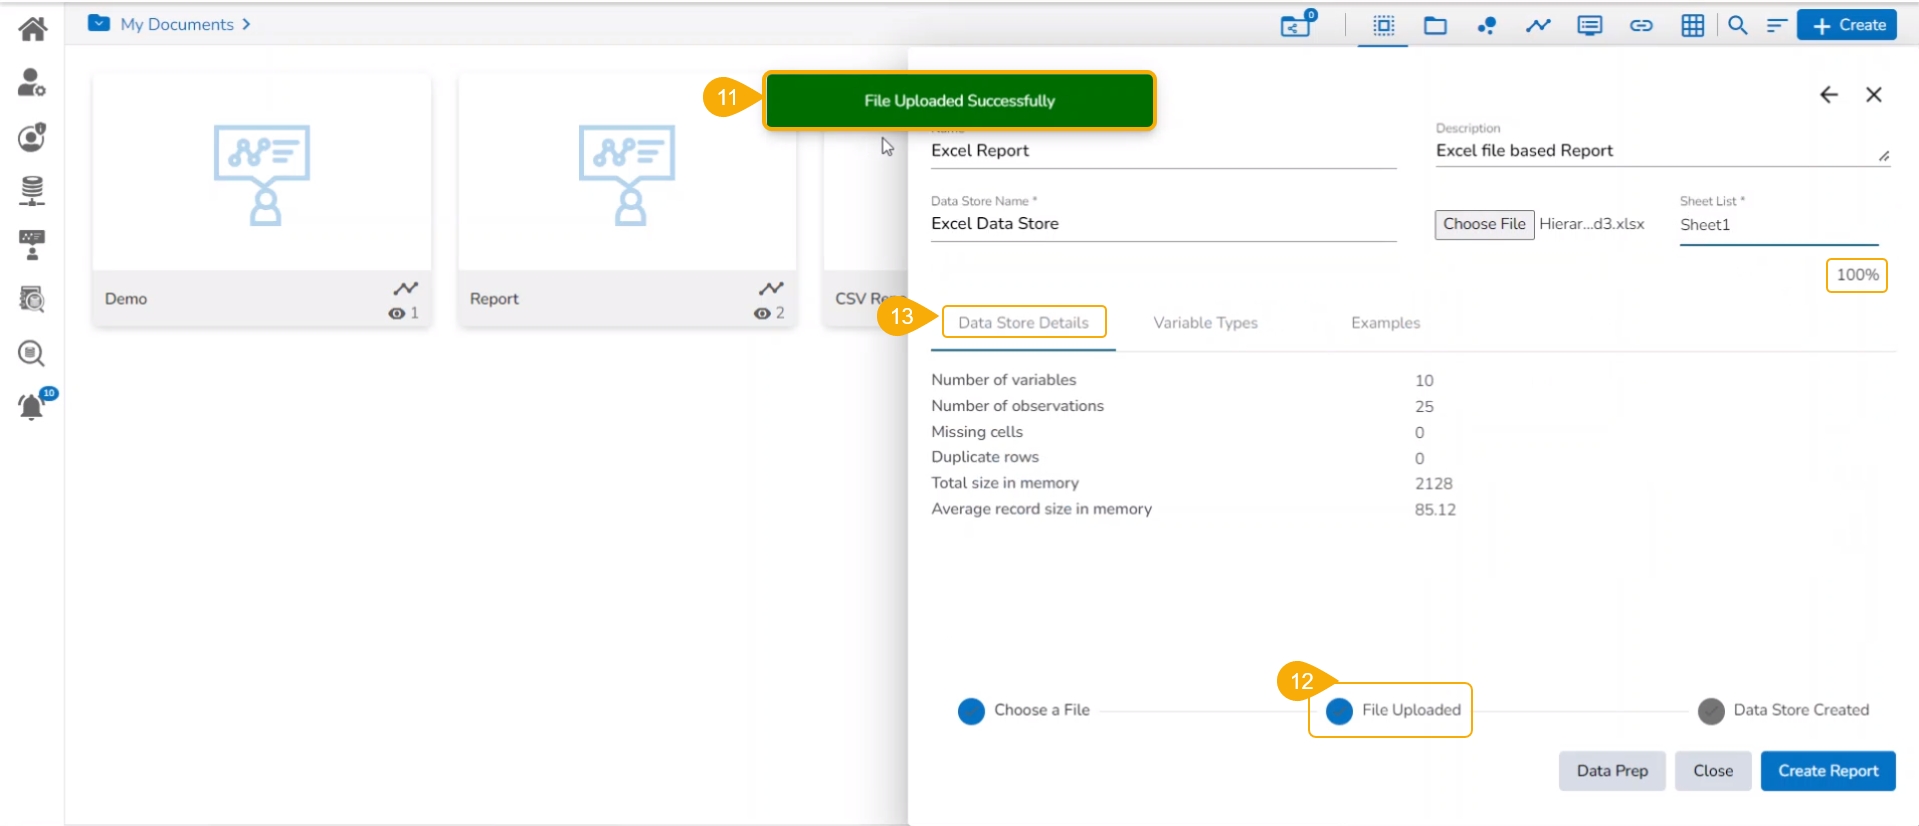
A notification message appears to ensure the status of the upload file action.
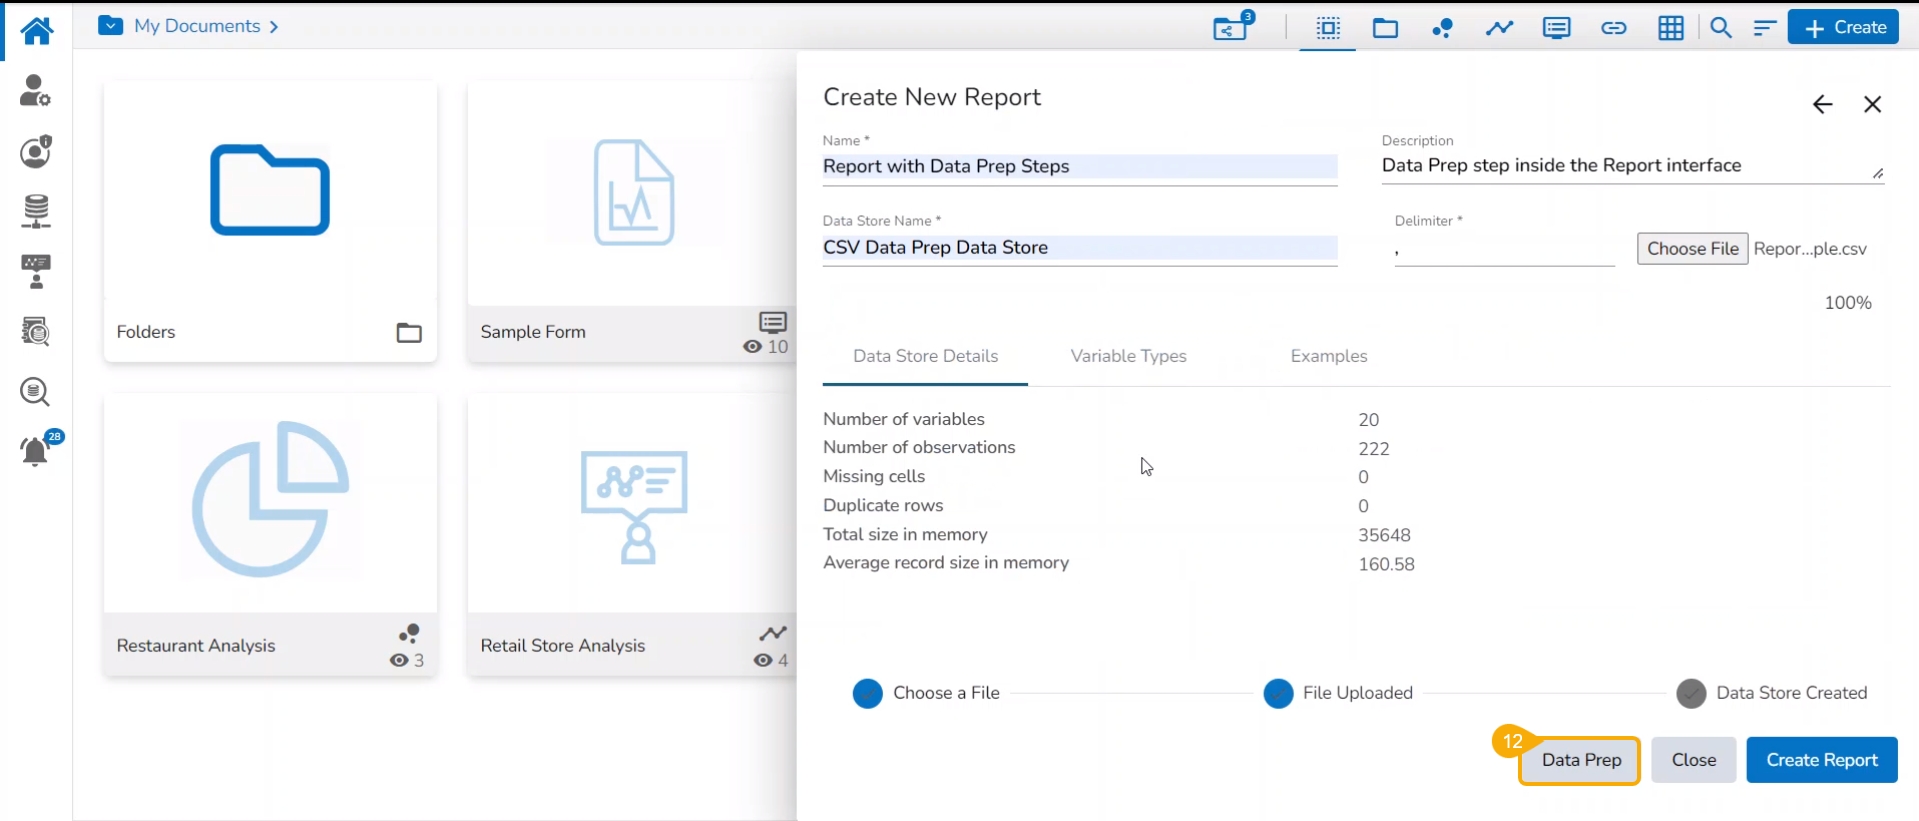
The File Uploaded option gets a blue tick mark after uploading the file.
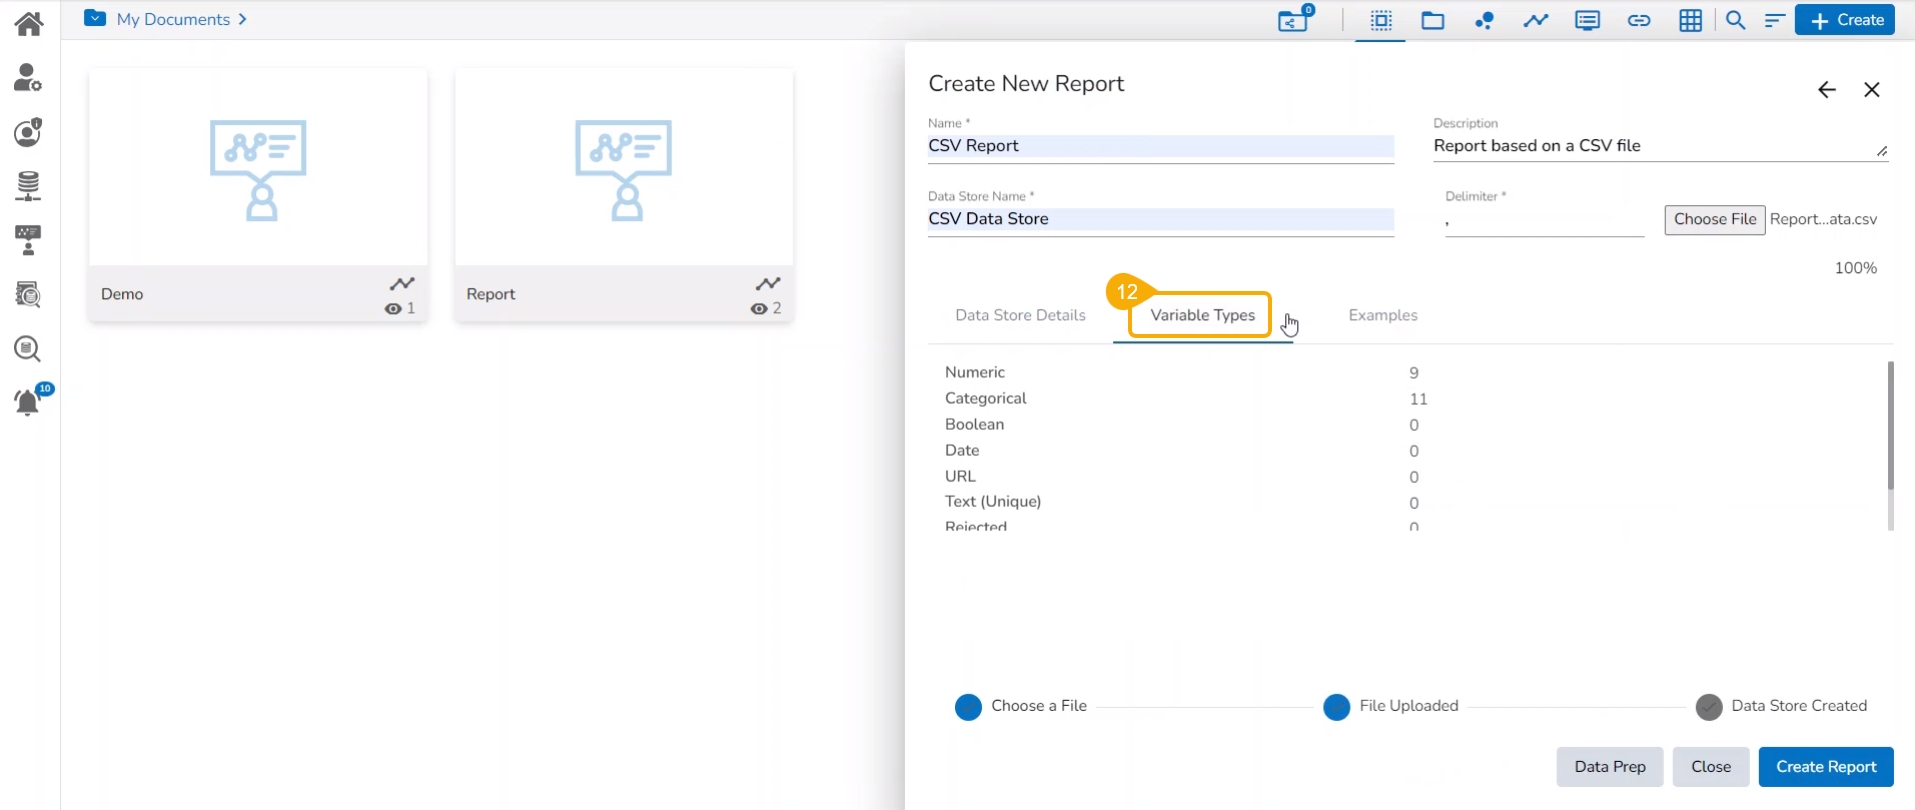
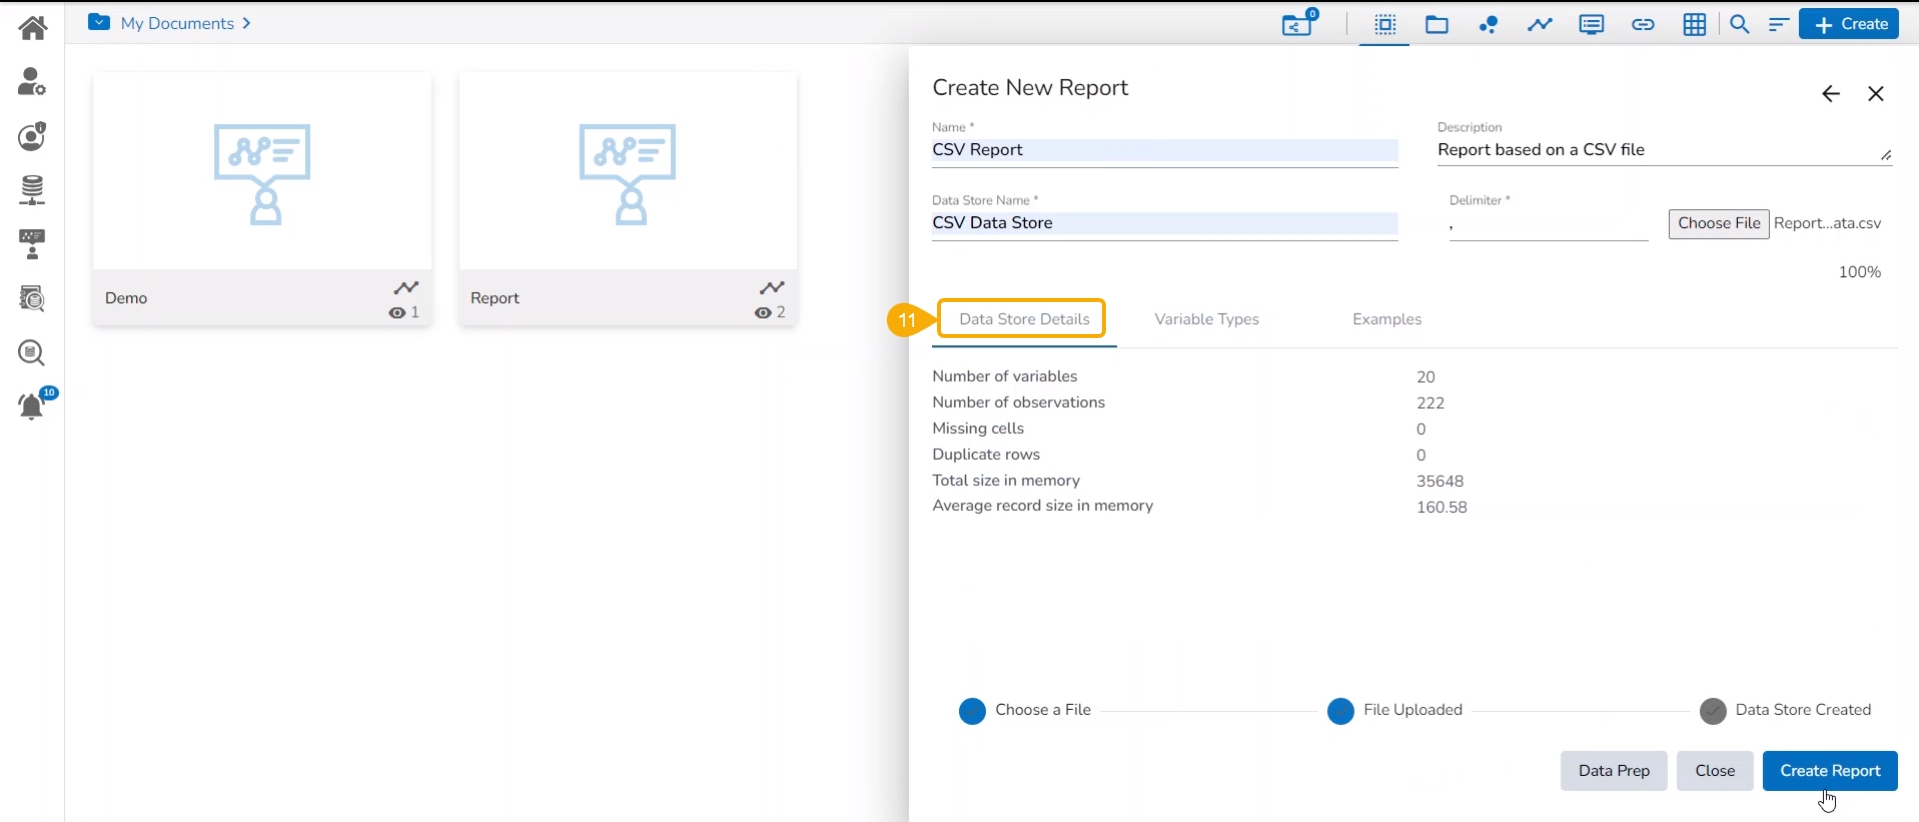
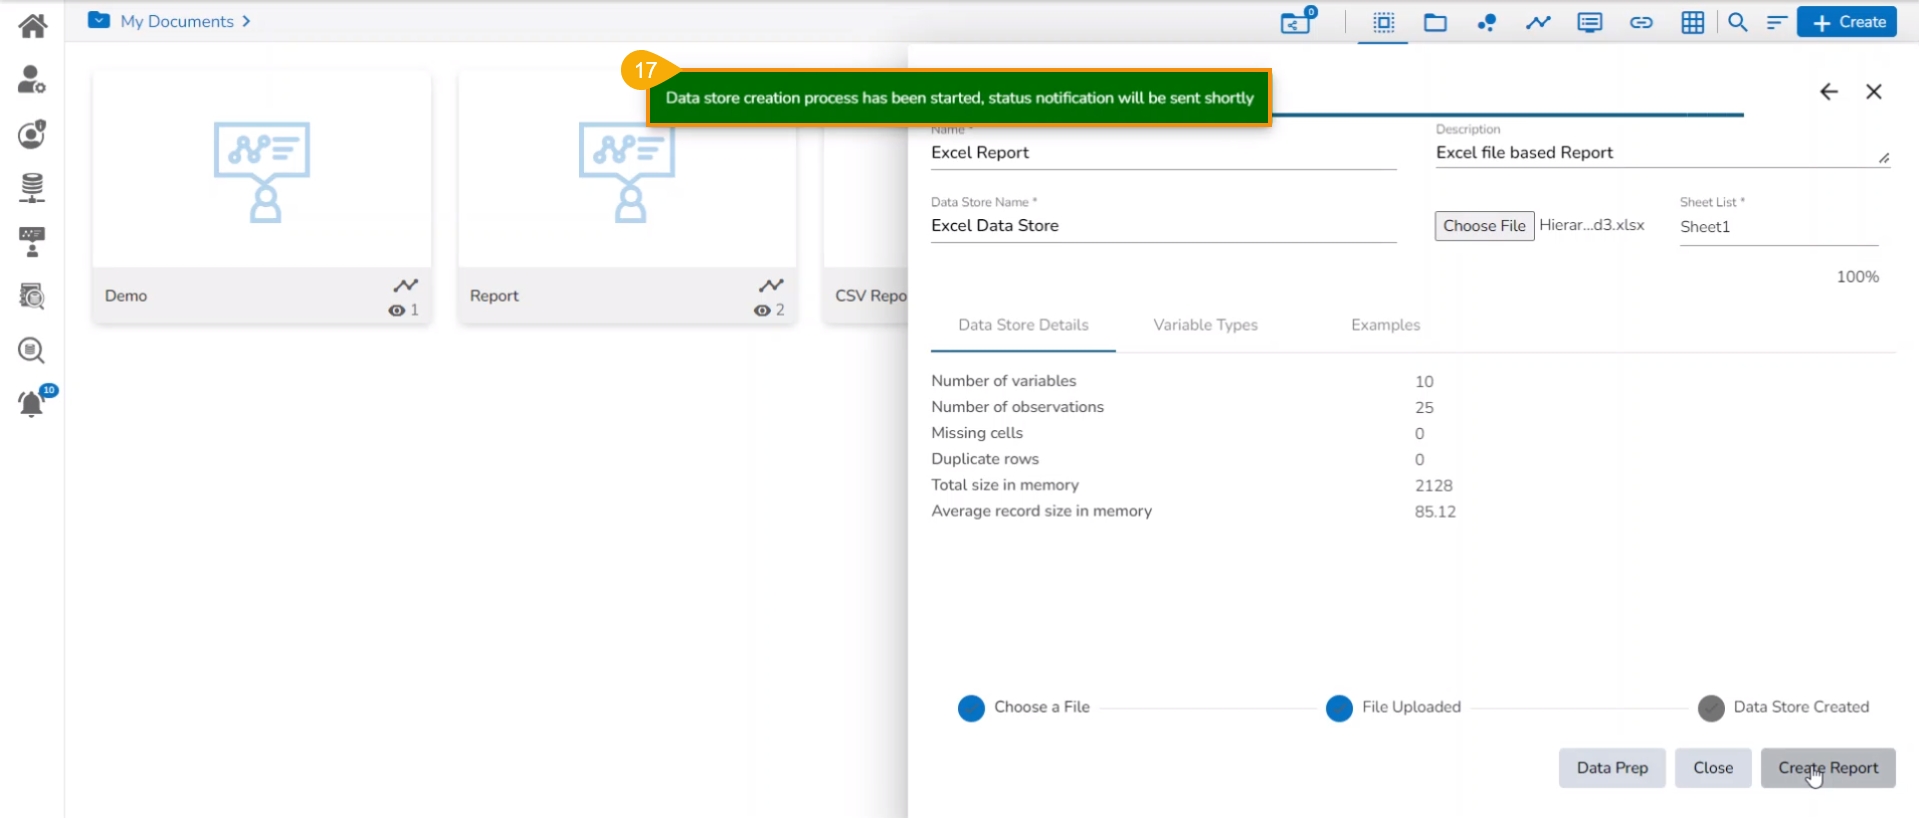
The Data Store Details tab opens by default (as displayed in the image).
Open the Variable Types tab to get the variable types with count.
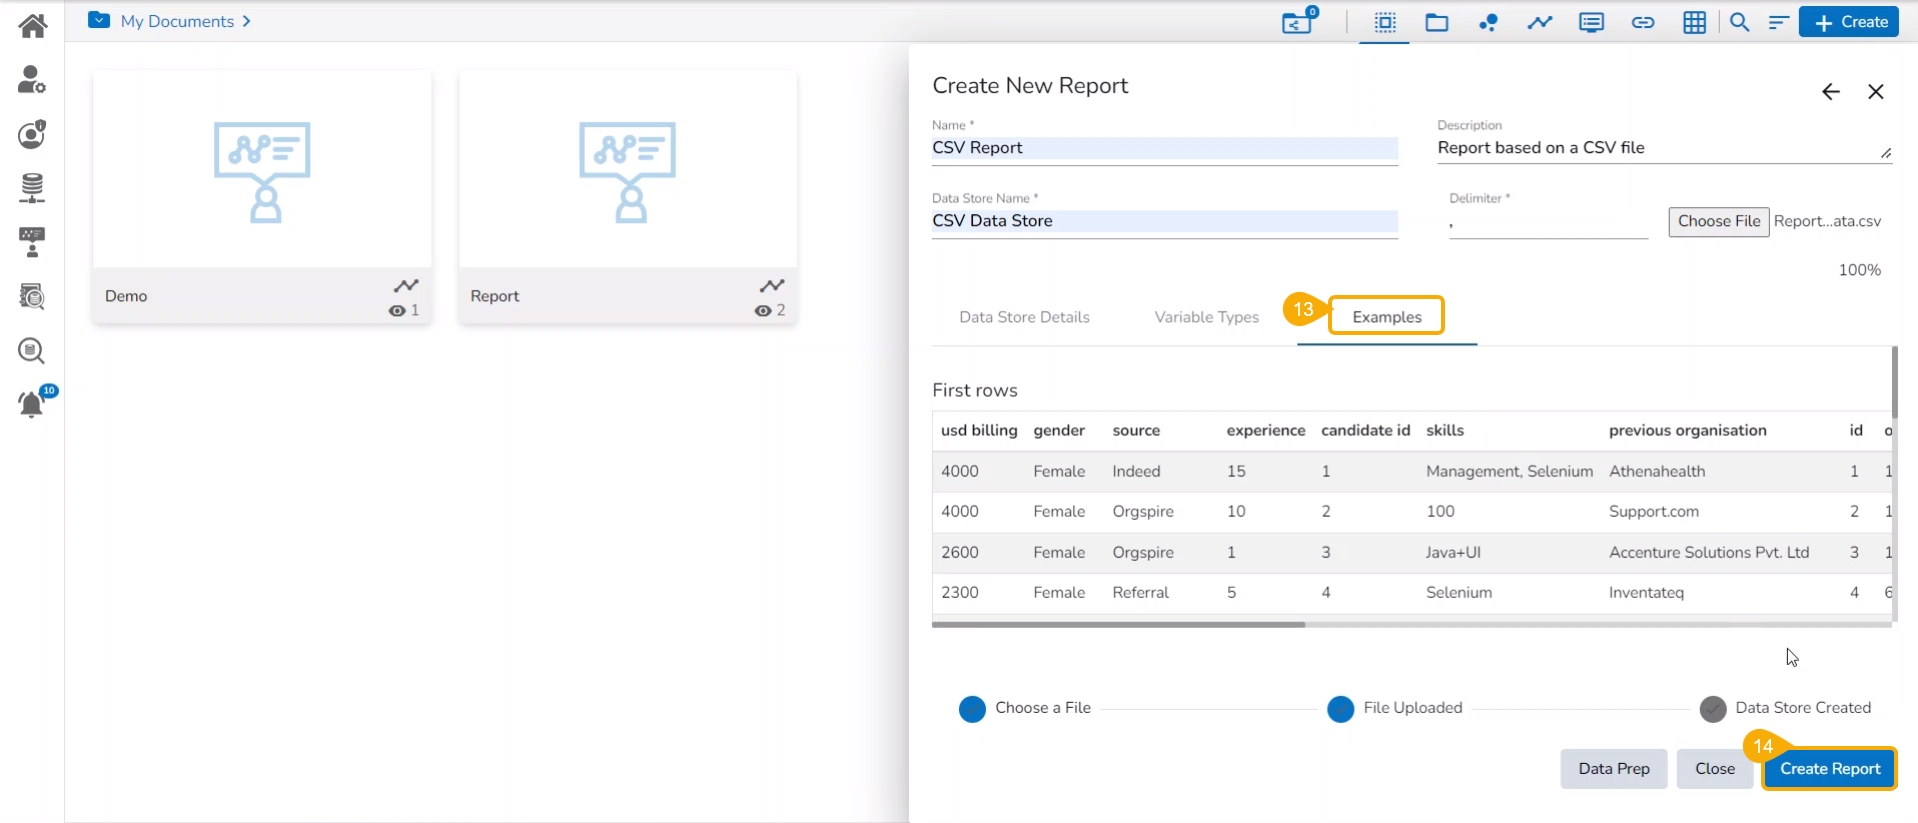
Navigate to the Examples tab to display the sample data from the uploaded file.
Click the Create Report option given below.
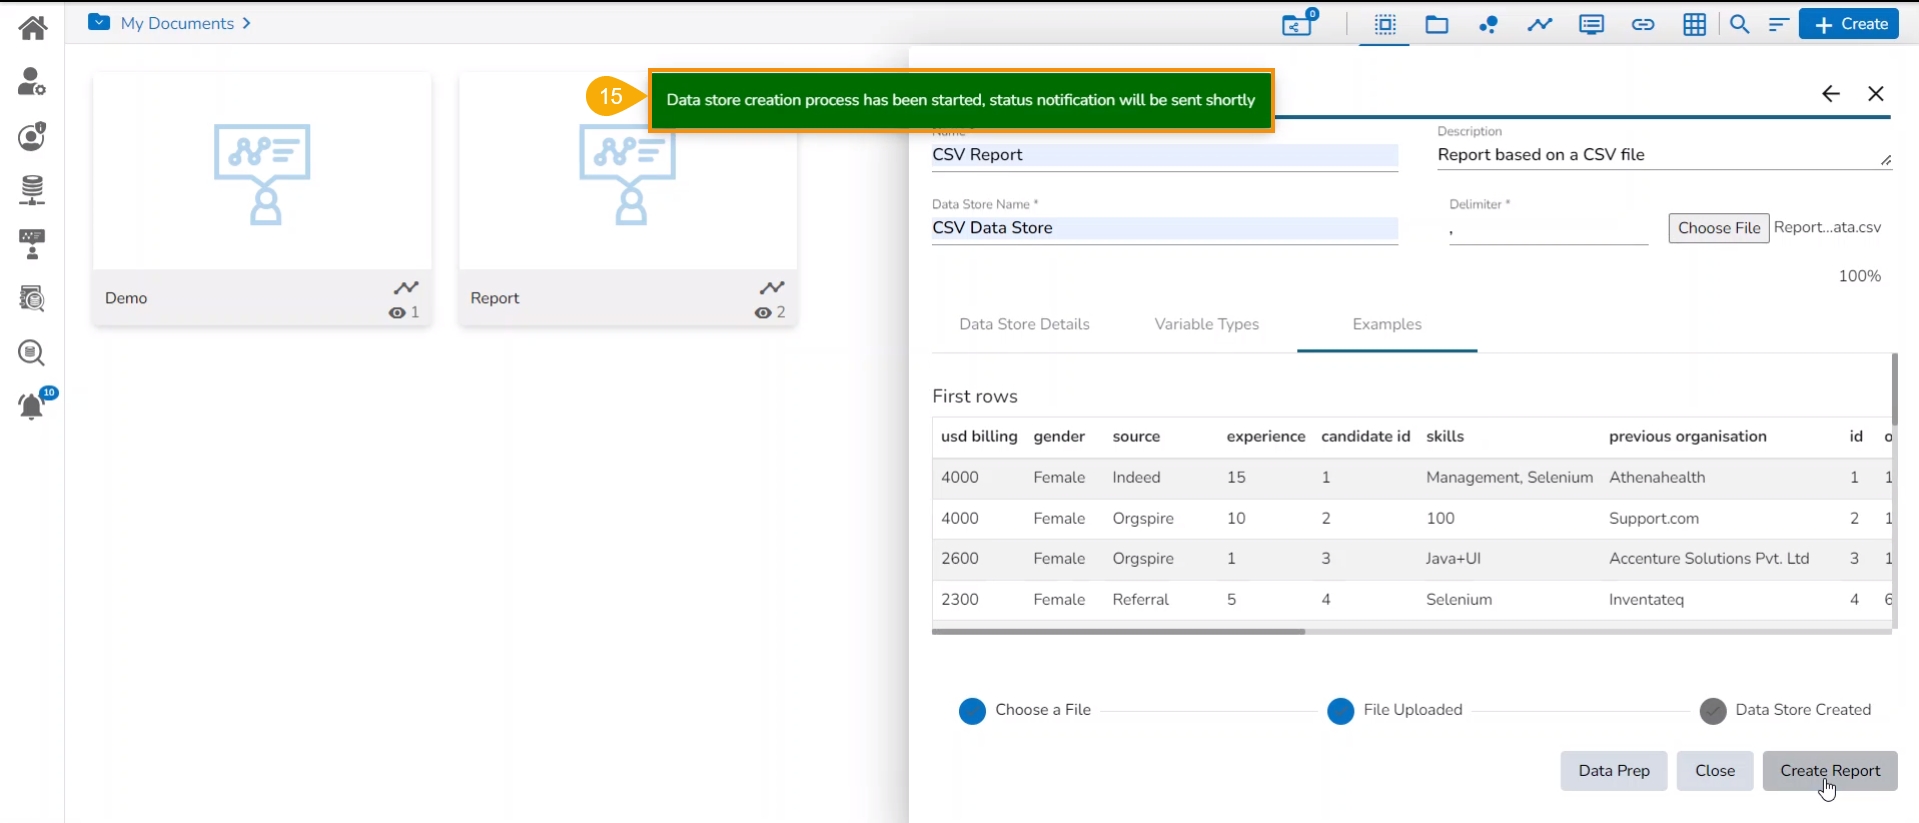
After clicking the Create Report option the Data Store gets created.
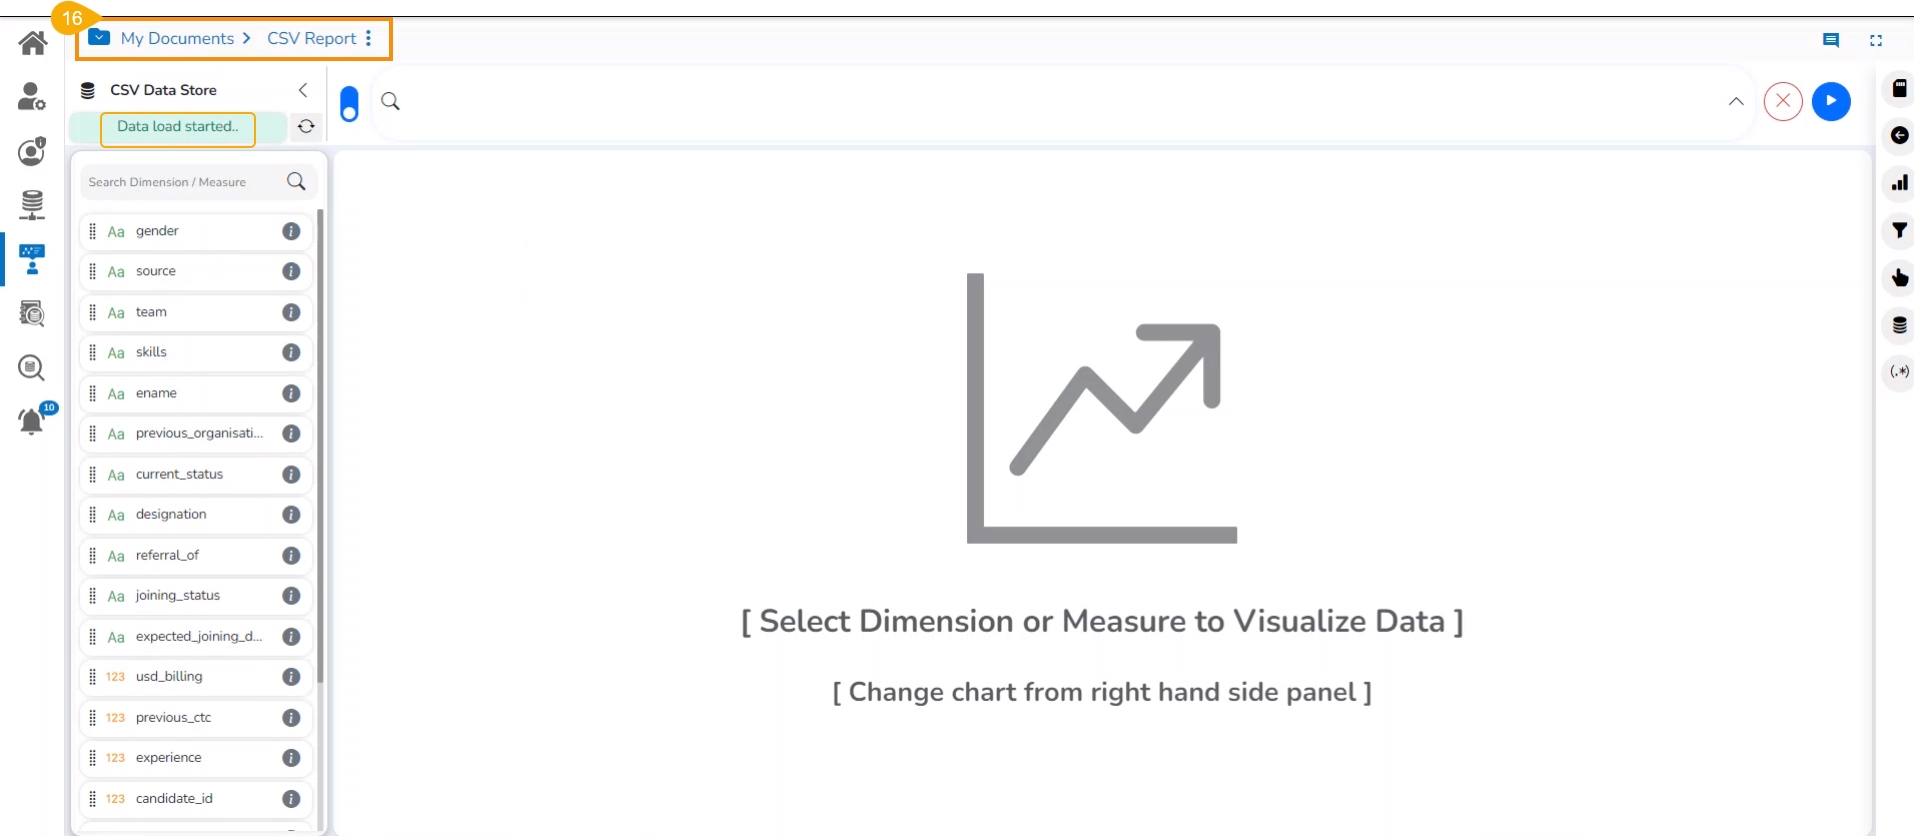
The Report gets created based on the selected Data Store and the user gets redirected to the Design page of the newly created Report.
Please Note: Kindly change the name of the Sample File while using it for your trial each time.
This page describes steps on how upload a CSV file to create a New Story. The user can try this functionality themselves by using the sample file.
Check out the walk-through to create a new Story and save a View using the Upload Excel option.
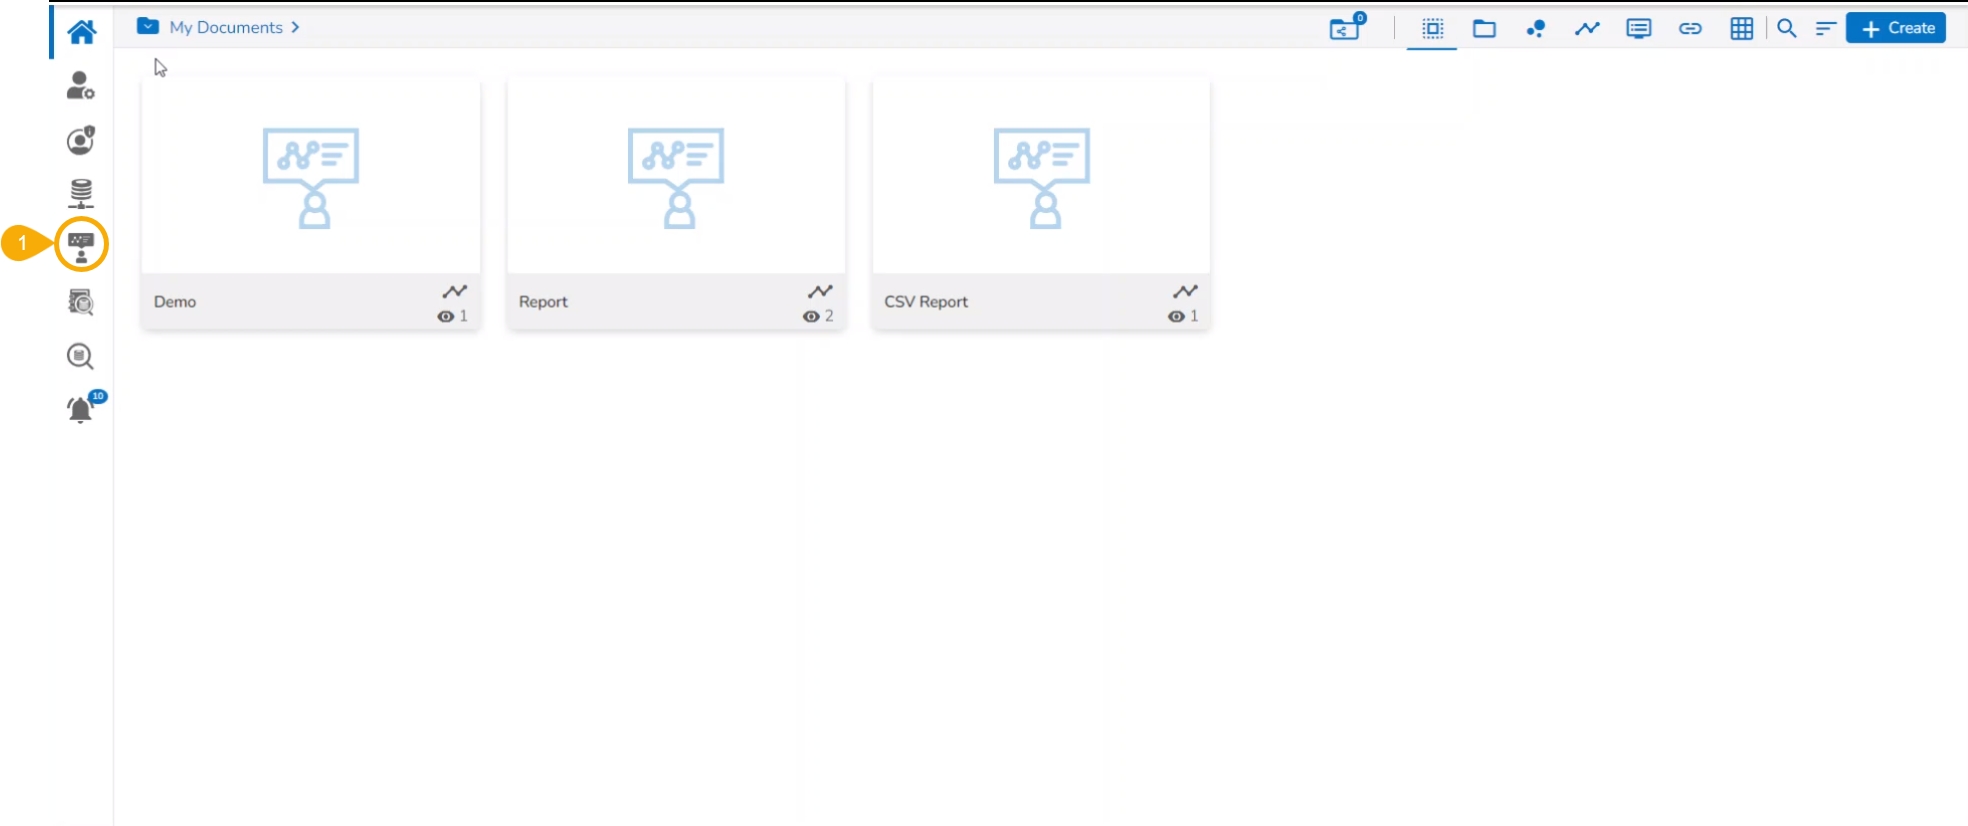
Access and click the Report module icon.
The Create New Report page opens.
Provide a name for the report.
Describe the report.
Click the Upload Excel option.
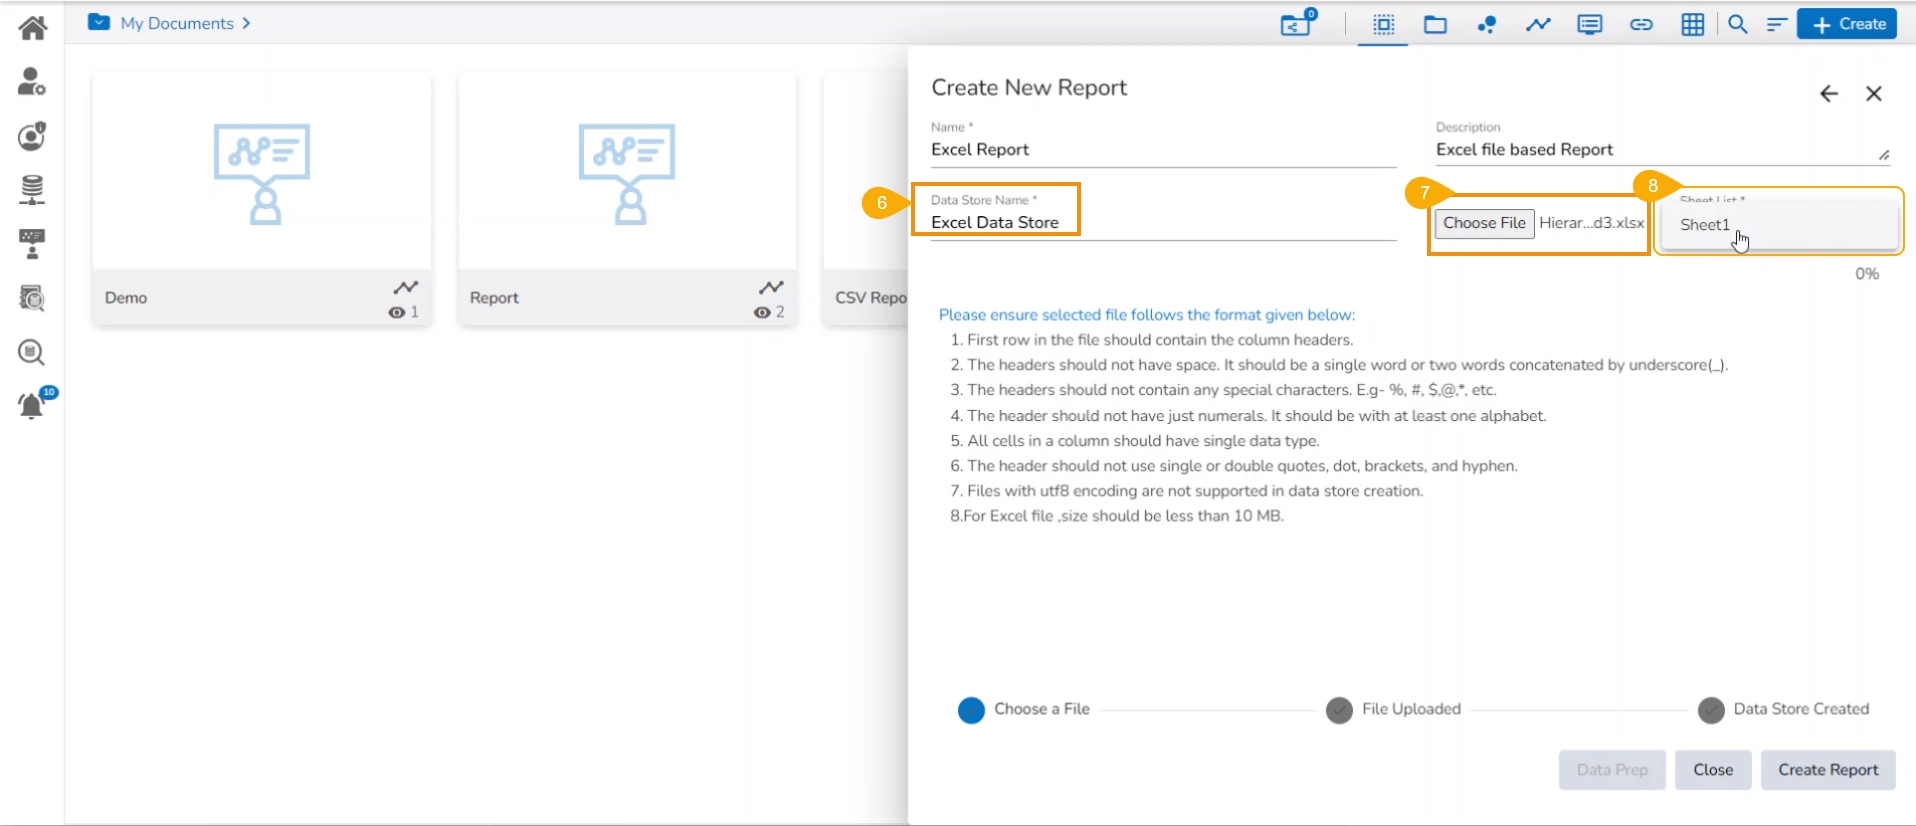
Provide the Data Store Name.
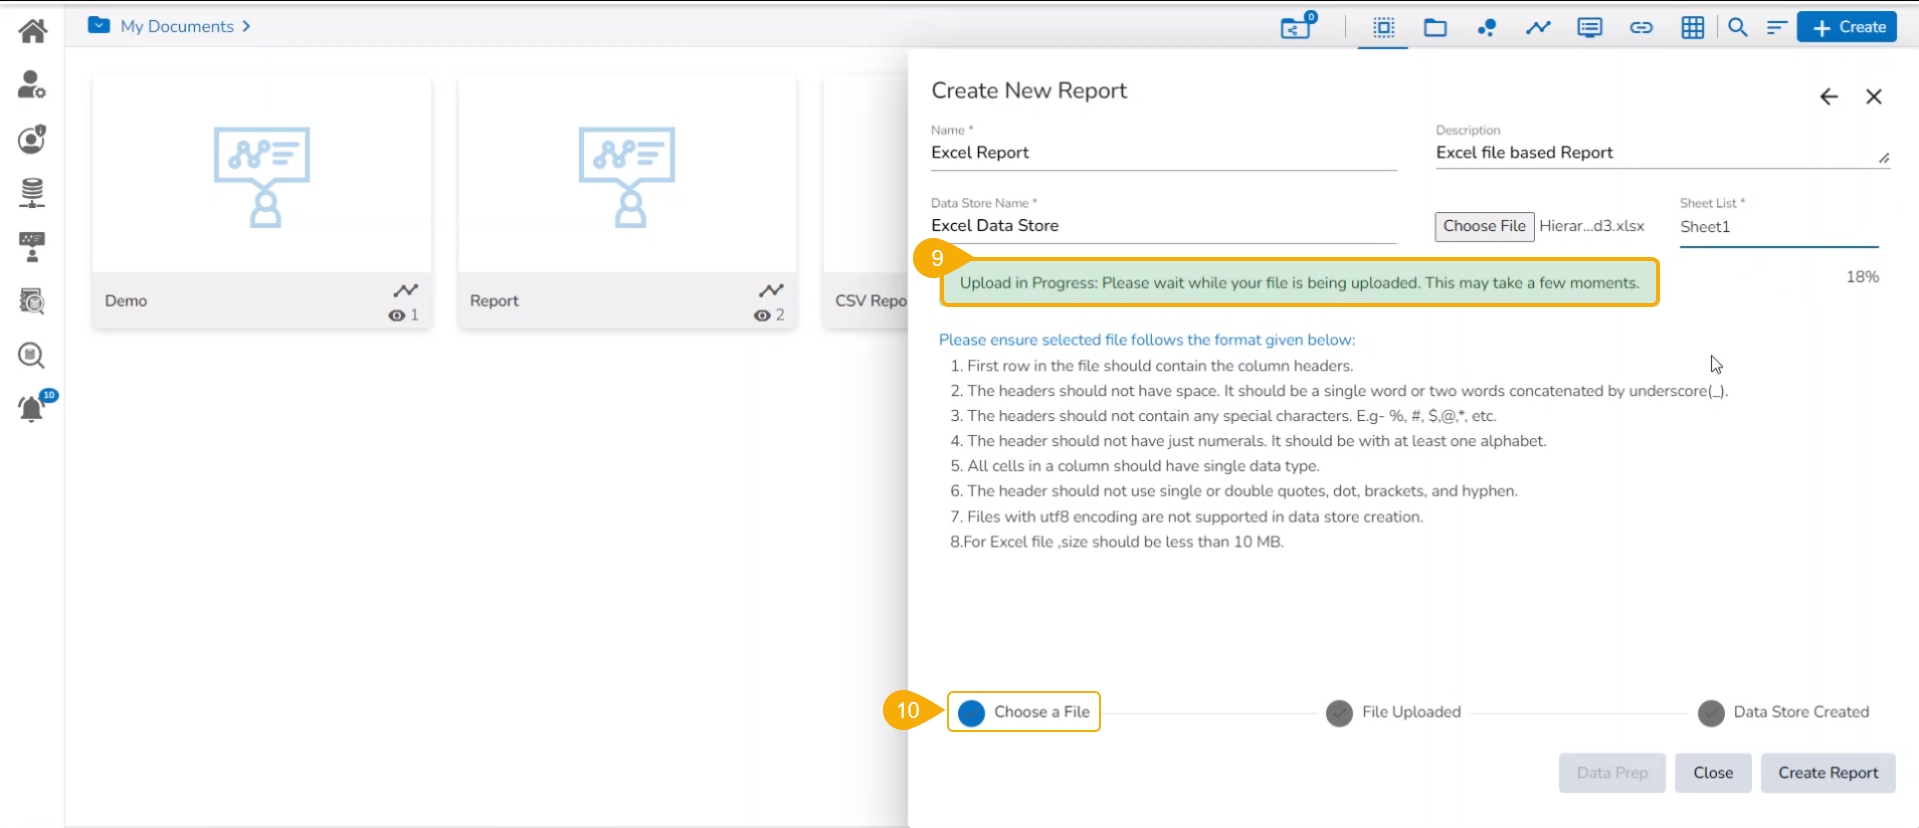
Use the Choose File option to upload a file.
Select a specific Sheet by selecting a Sheet from the drop-down menu.
A notification flashes suggesting the user wait till the file gets uploaded.
The Choose a File option turns blue suggesting the successful upload of the selected file.
A notification message appears to ensure the completion of the file upload action.
The File Uploaded option gets a blue tick mark after the file is uploaded.
The Data Store Details tab opens by default (as displayed in the image).
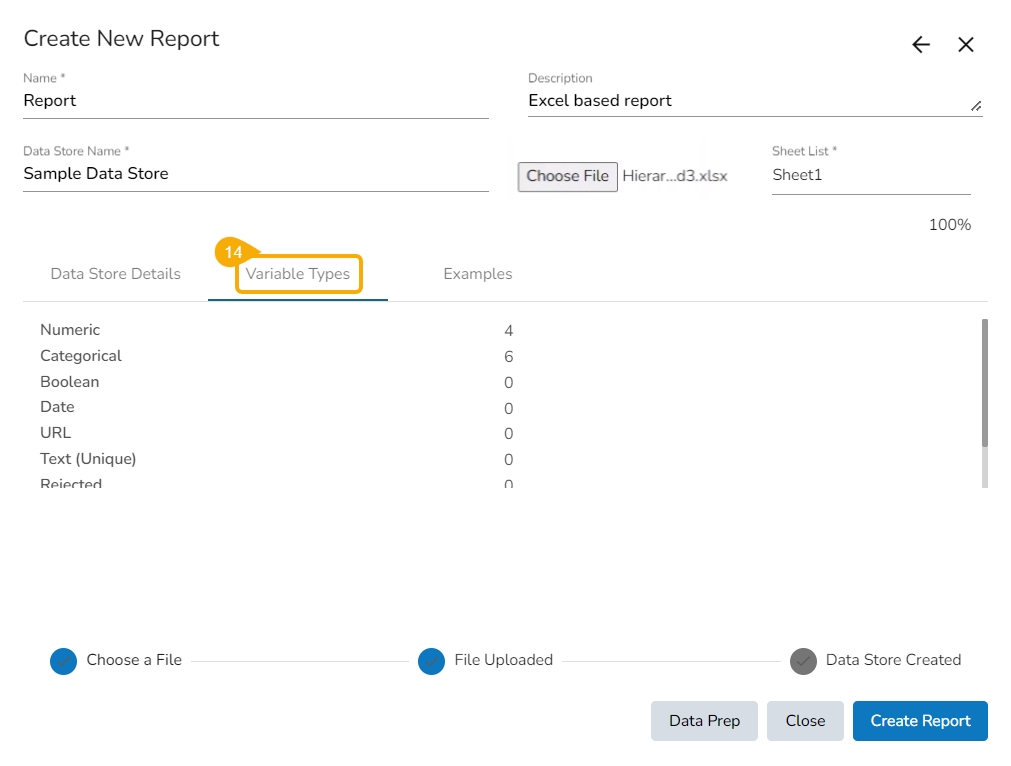
Open the Variable Types tab to get the variable types with count.
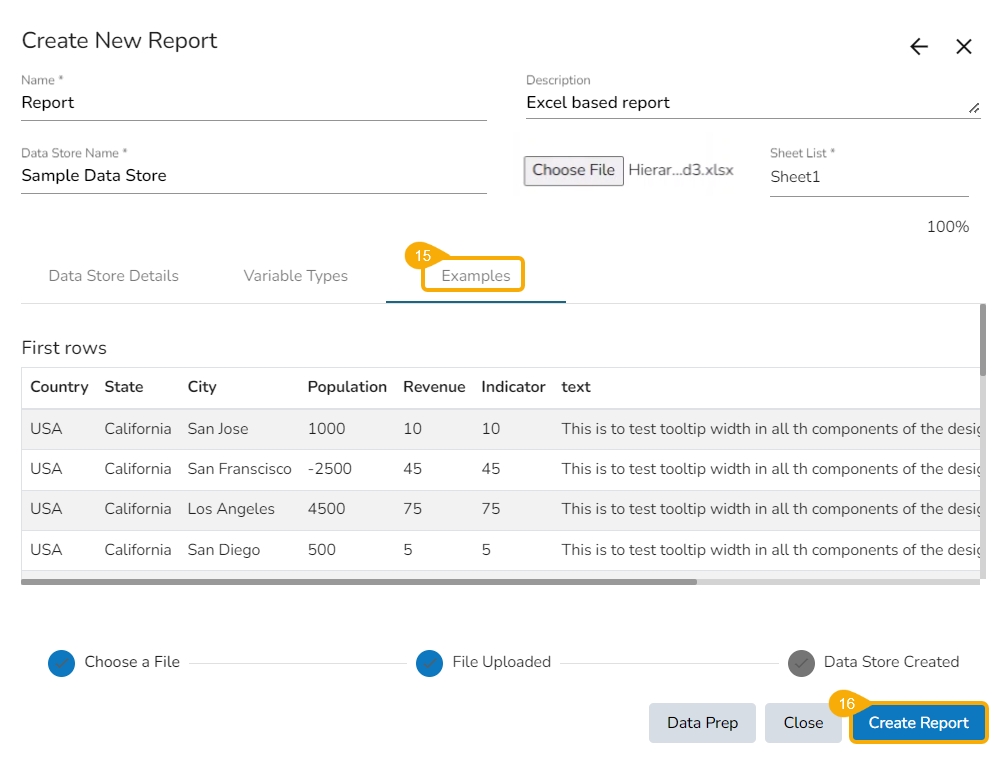
Navigate to the Examples tab to display the sample data from the uploaded file.
Click the Create Story option given below.
A notification message appears to ensure that the Datastore creation has been started.
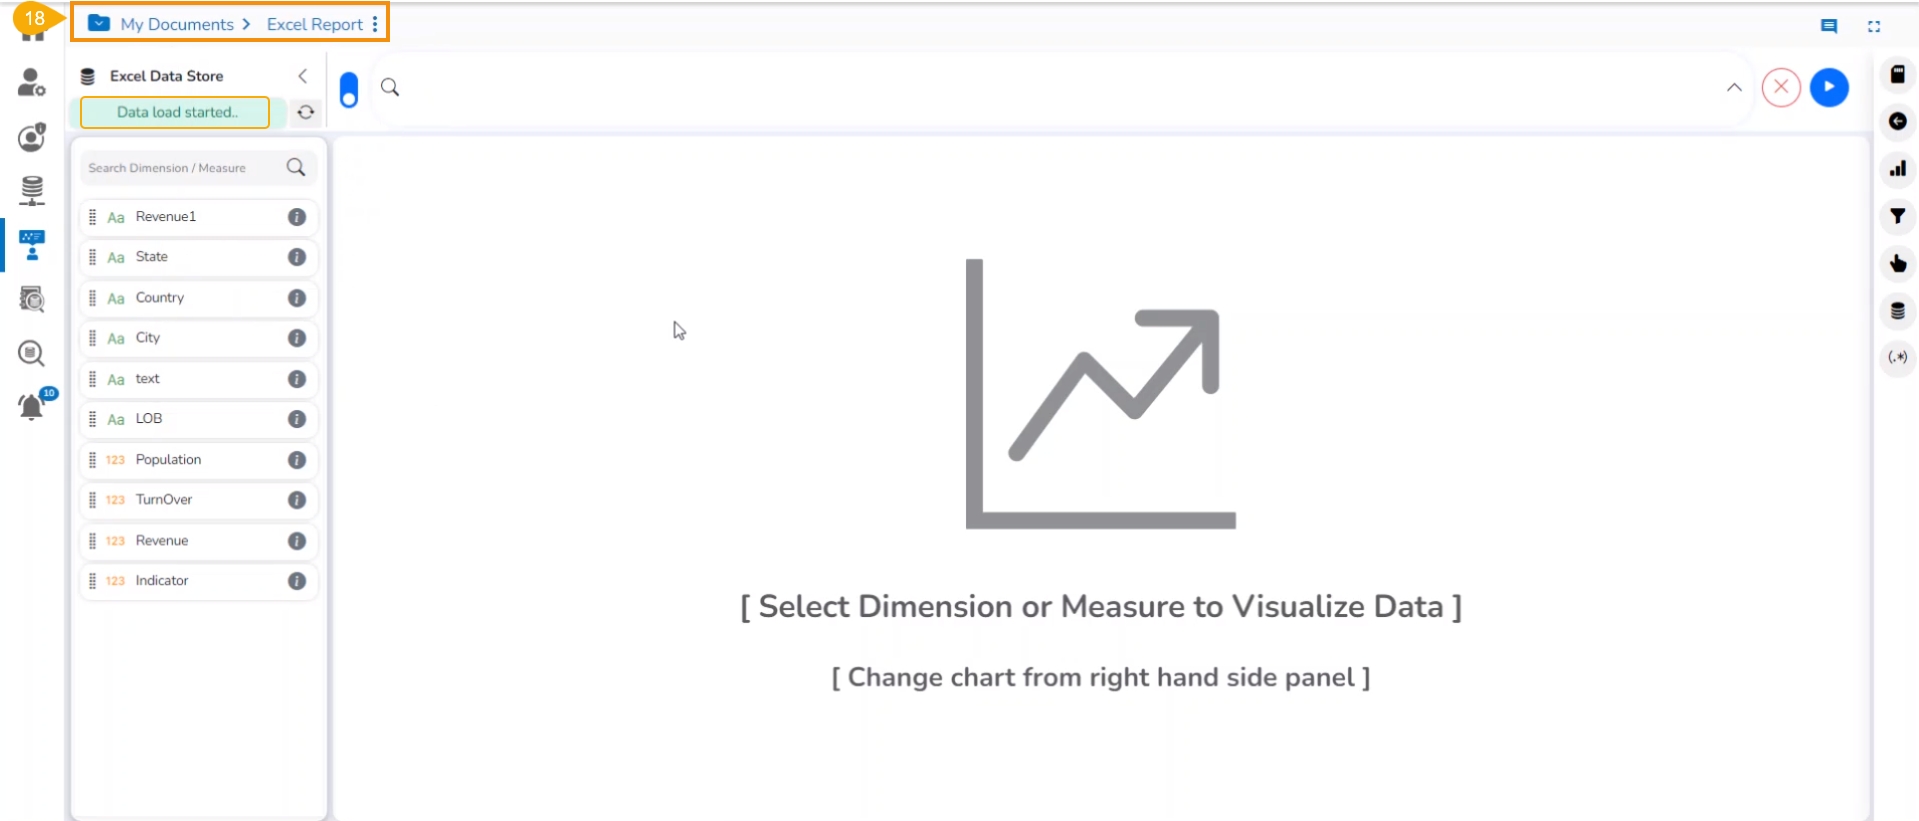
The report gets created based on the selected Data Store and the user gets redirected to the Design page of the newly created Report.
Please Note: Kindly change the name of the Sample File while using it for your trial each time.
Create a new Report by implementing the Data Preparation steps to an uploaded file using the Report UI.
Check out the given walk-through to create a new report on top of an uploaded file that contains Data Preparation steps.
Please follow the below-given steps to create a new report based on an uploaded file containing the Data Preparation Steps:
Click the Report icon or Create a Report option from the Platform homepage.
The Create New Report dialog box opens.
Provide the name of the Report.
Describe the Report.
Click the Upload CSV option to upload a CSV file.
Provide a name for the Datastore.
Click the Choose File option to select and upload a file from the local system.
Please Note: After selecting the Upload CSV file a field to mention the delimiter appears on the Create New Report page.
The selected file's name appears next to the Choose File option.
A notification flashes to inform you that uploading the selected file may take a few moments.
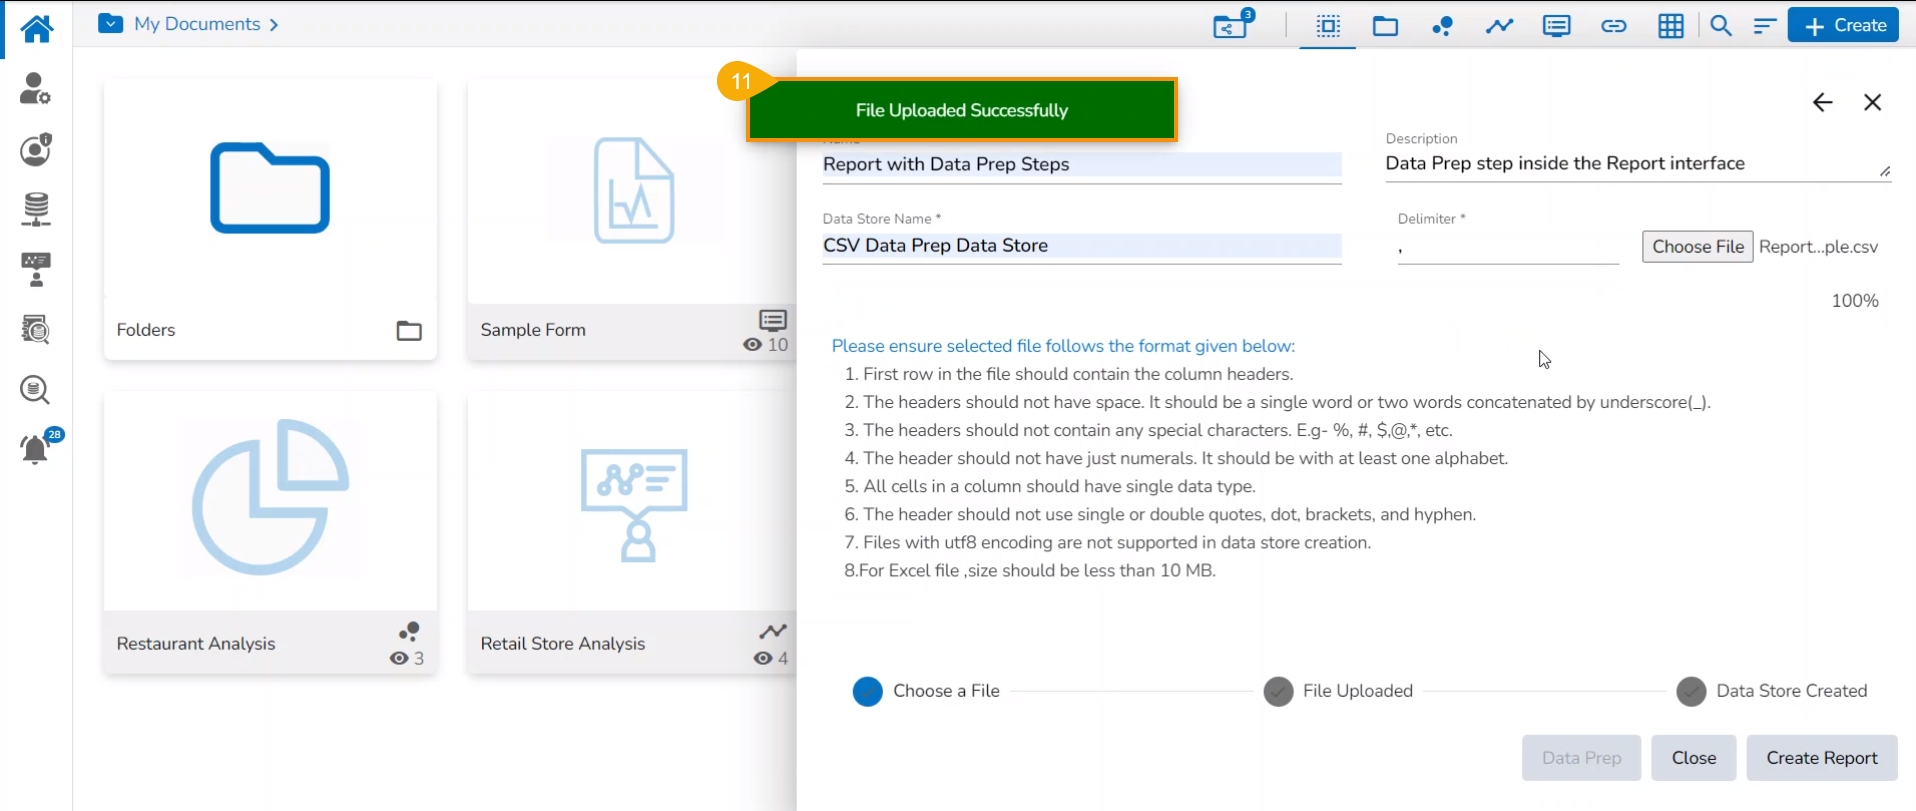
A notification message appears to ensure that the file is successfully uploaded.
Click the Data Prep option provided at the bottom of the page.
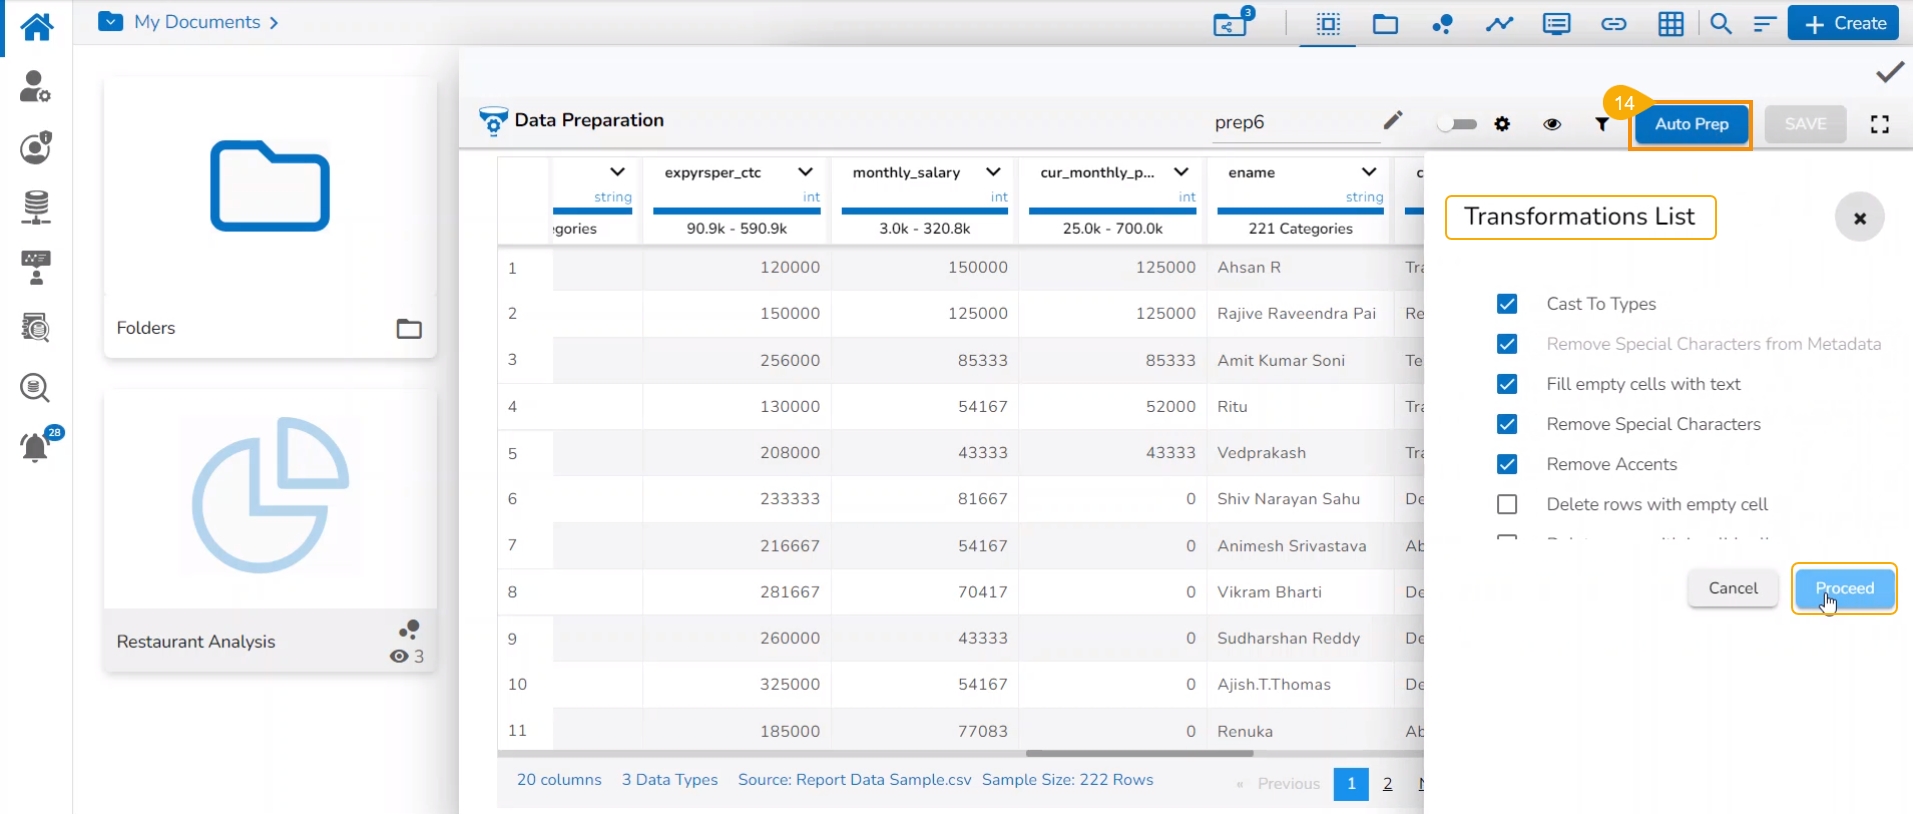
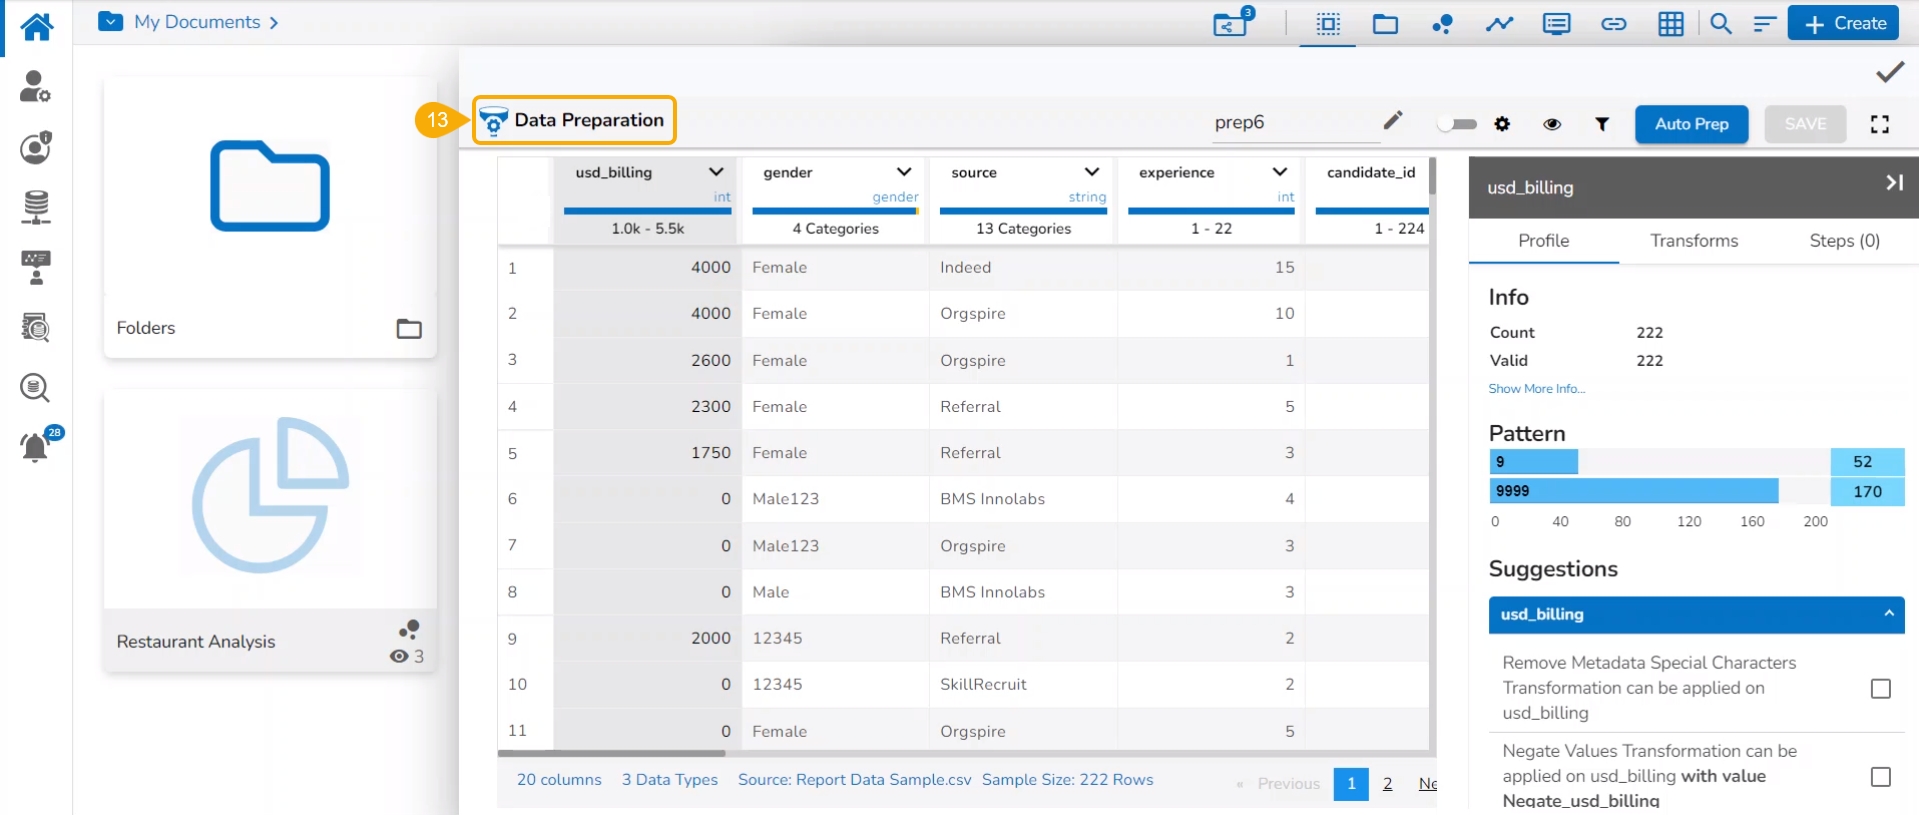
The data of the selected CSV file opens in the Data Grid format under the Data Preparation framework.
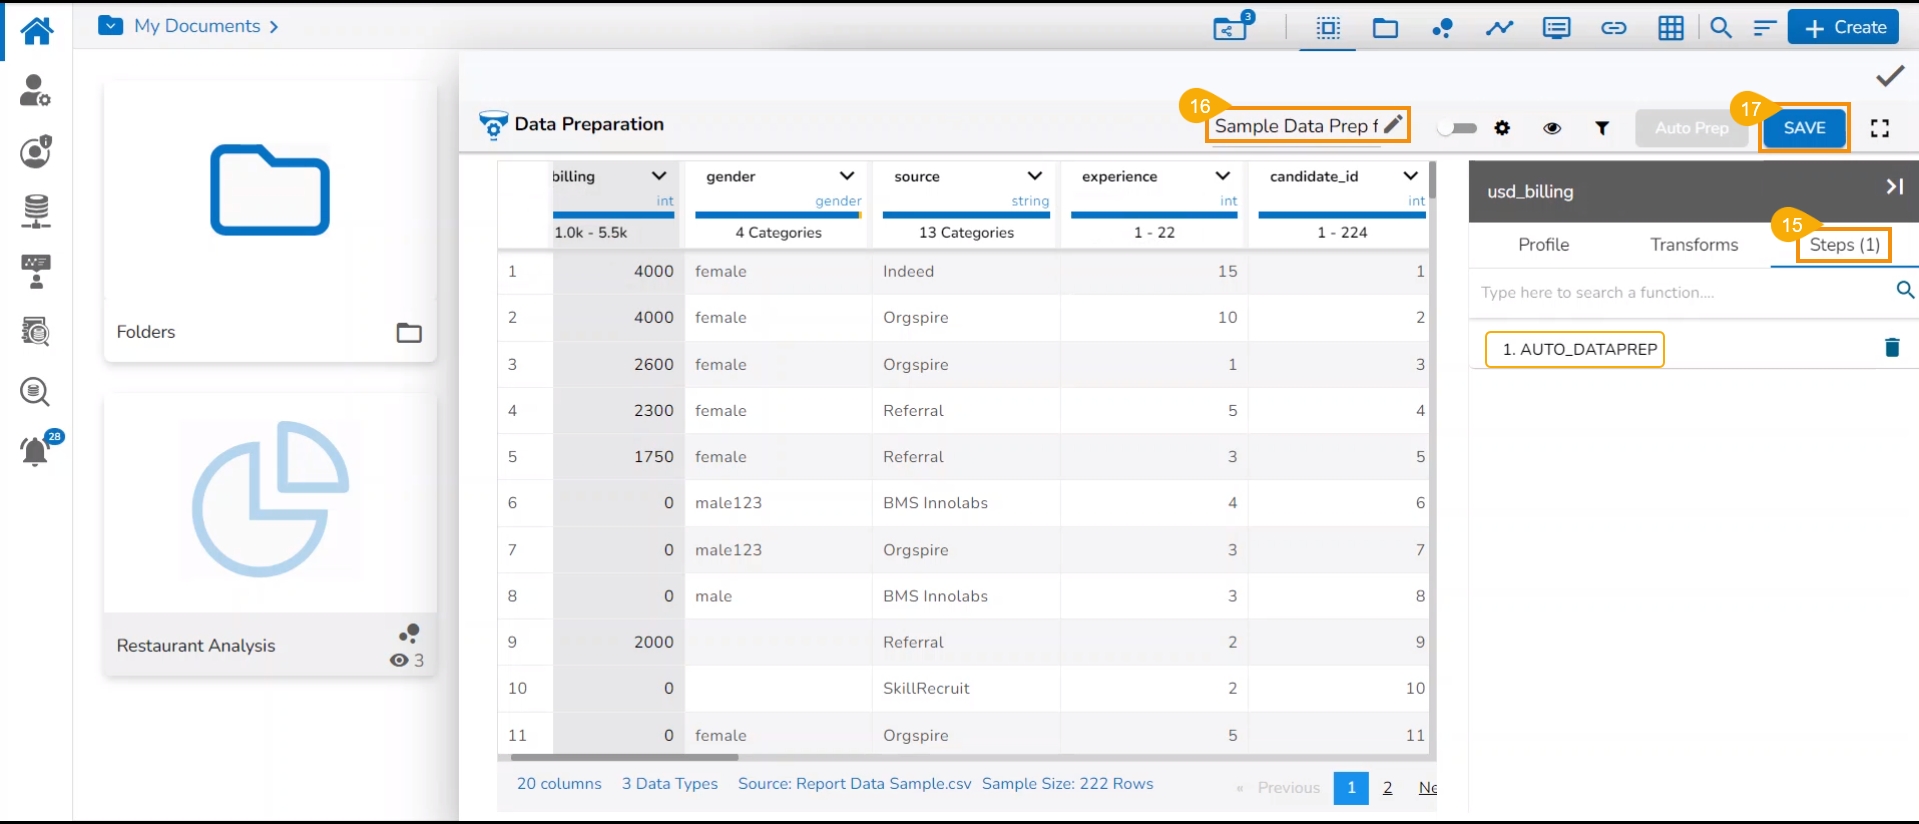
Apply the required Transforms. or Click the Auto Prep option to apply the auto-mated transforms to the selected data (In the below-given image the Auto Prep option has been chosen).
Open the Steps tab to see the applied Data Preparation steps (In this case, all the transforms part of the Auto Prep appear as a single step).
Provide a name for the Data Preparation.
Click the SAVE option.
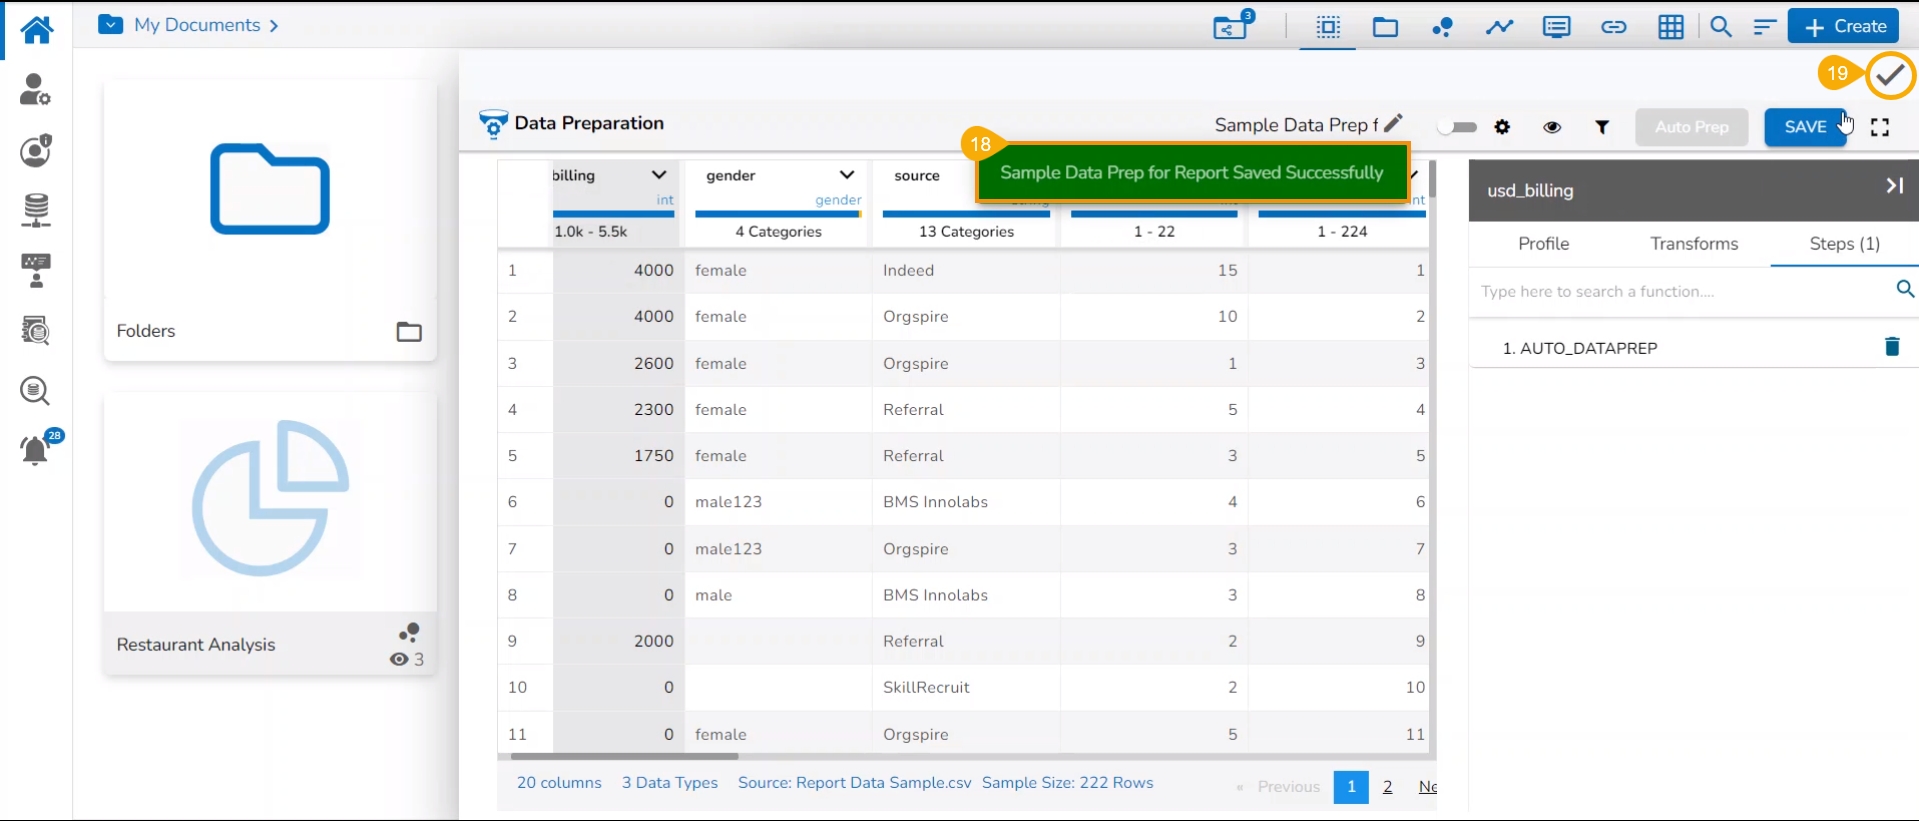
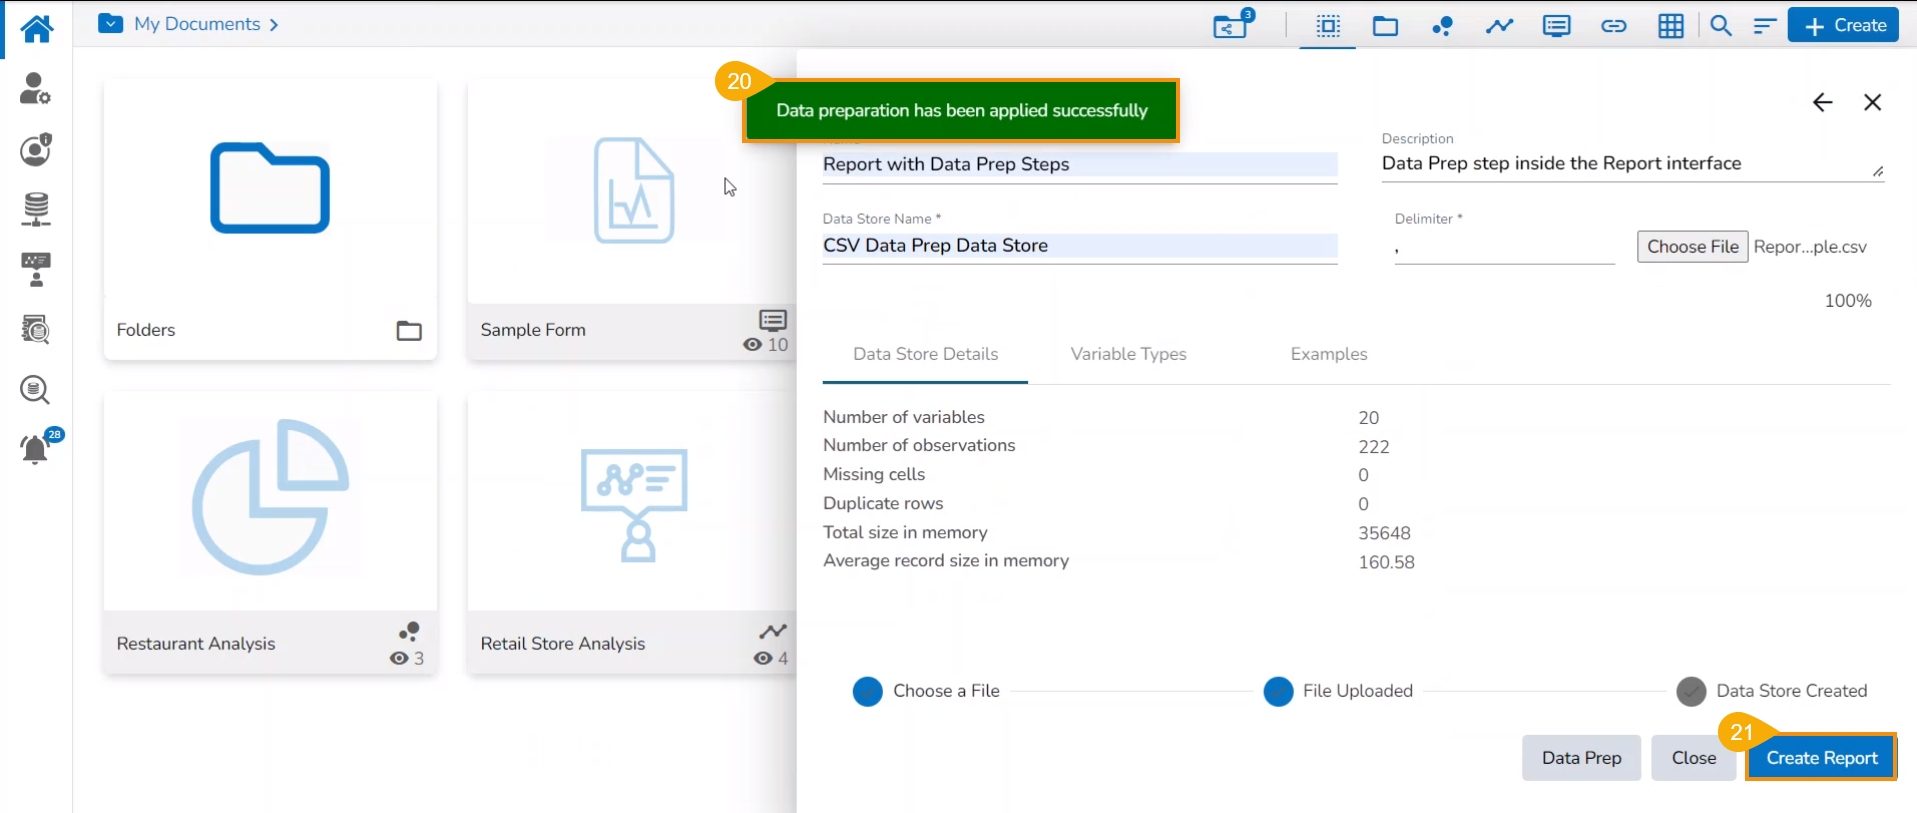
A notification message ensures the user that the Data Preparation has been successfully applied.
Click the Apply and Close icon.
A notification ensures that the selected Data Preparation has been applied.
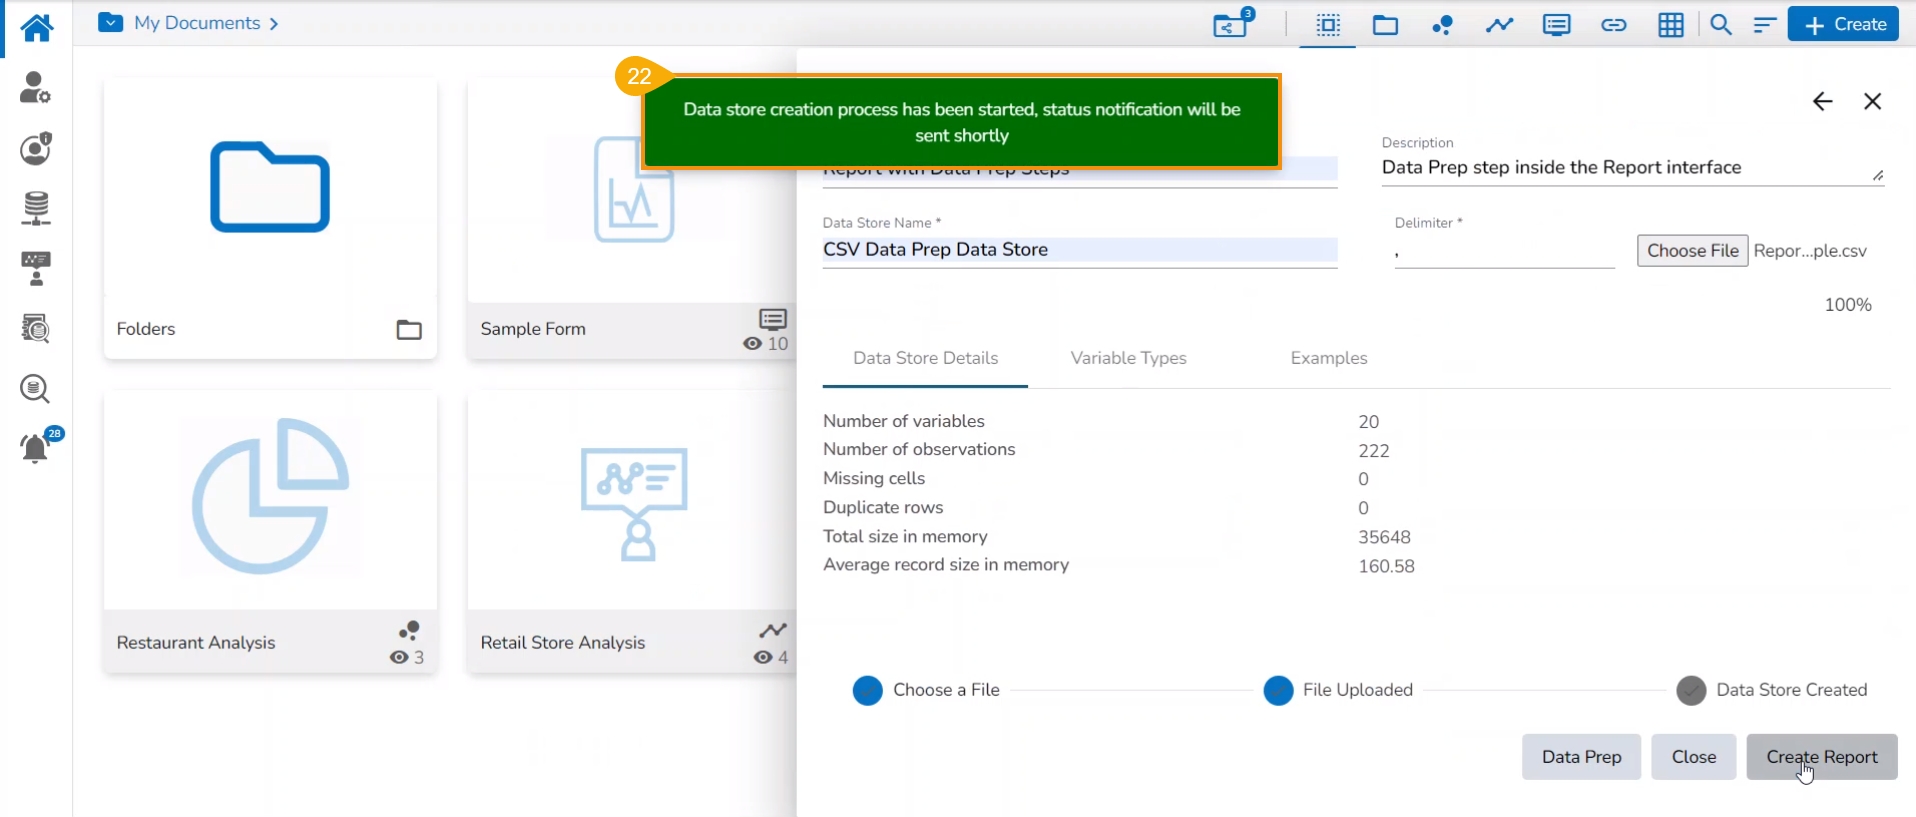
Click the Create Report option.
Another notification message informs the users that the Data Store creation process has been started and a status notification will be sent shortly.
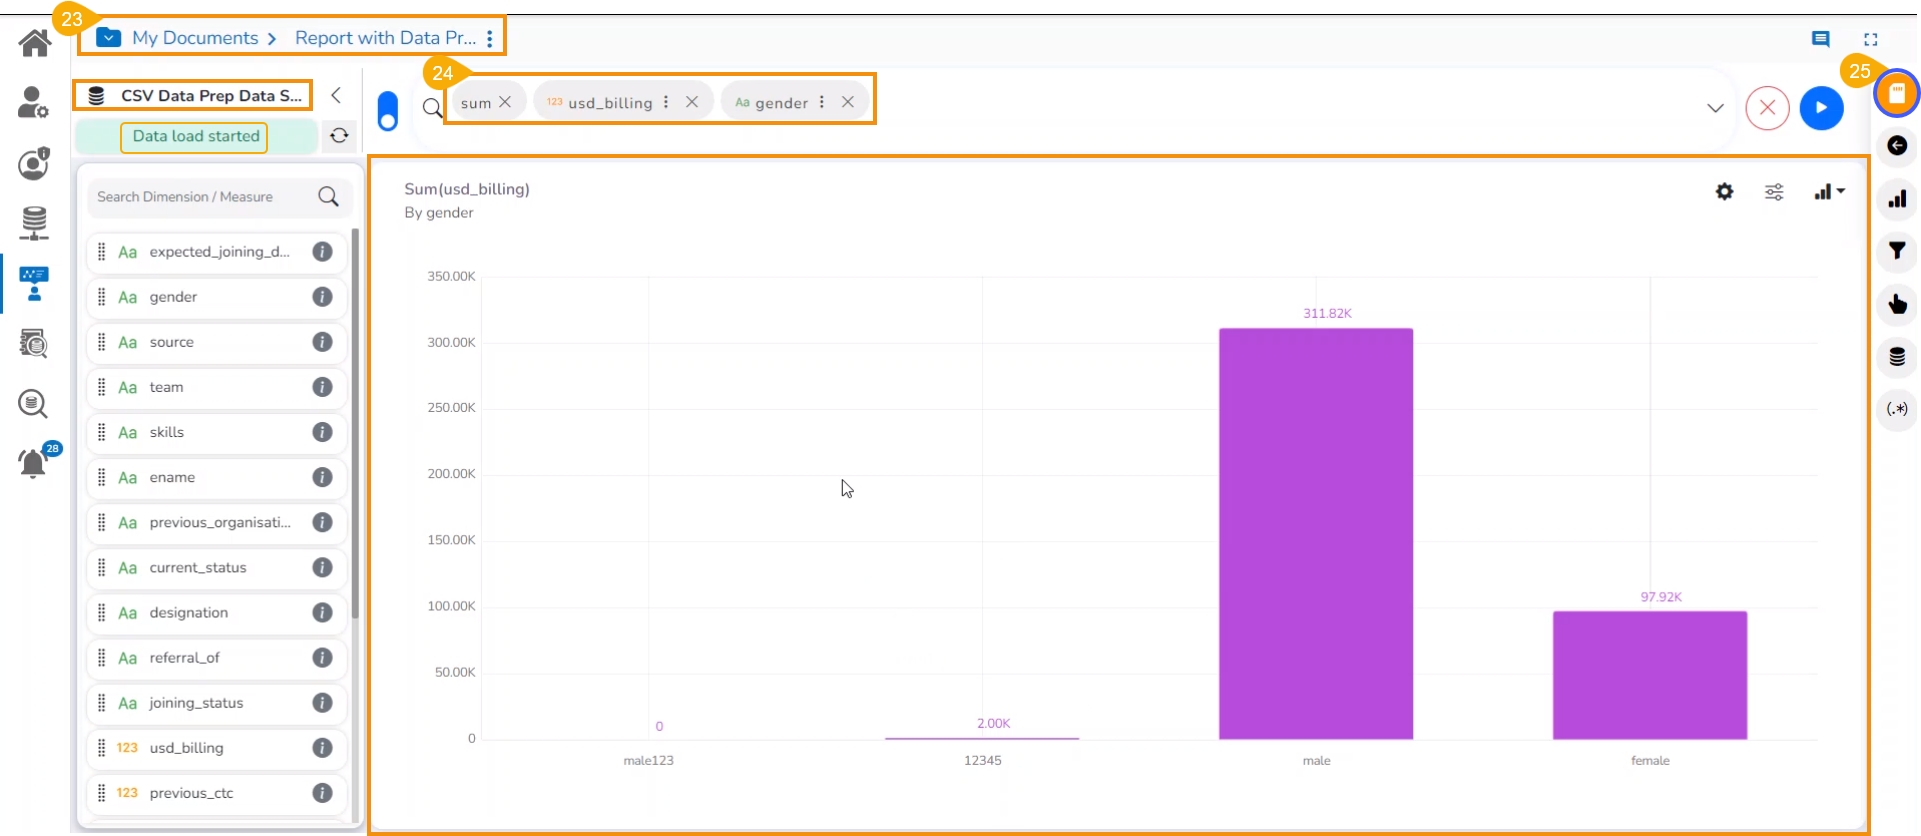
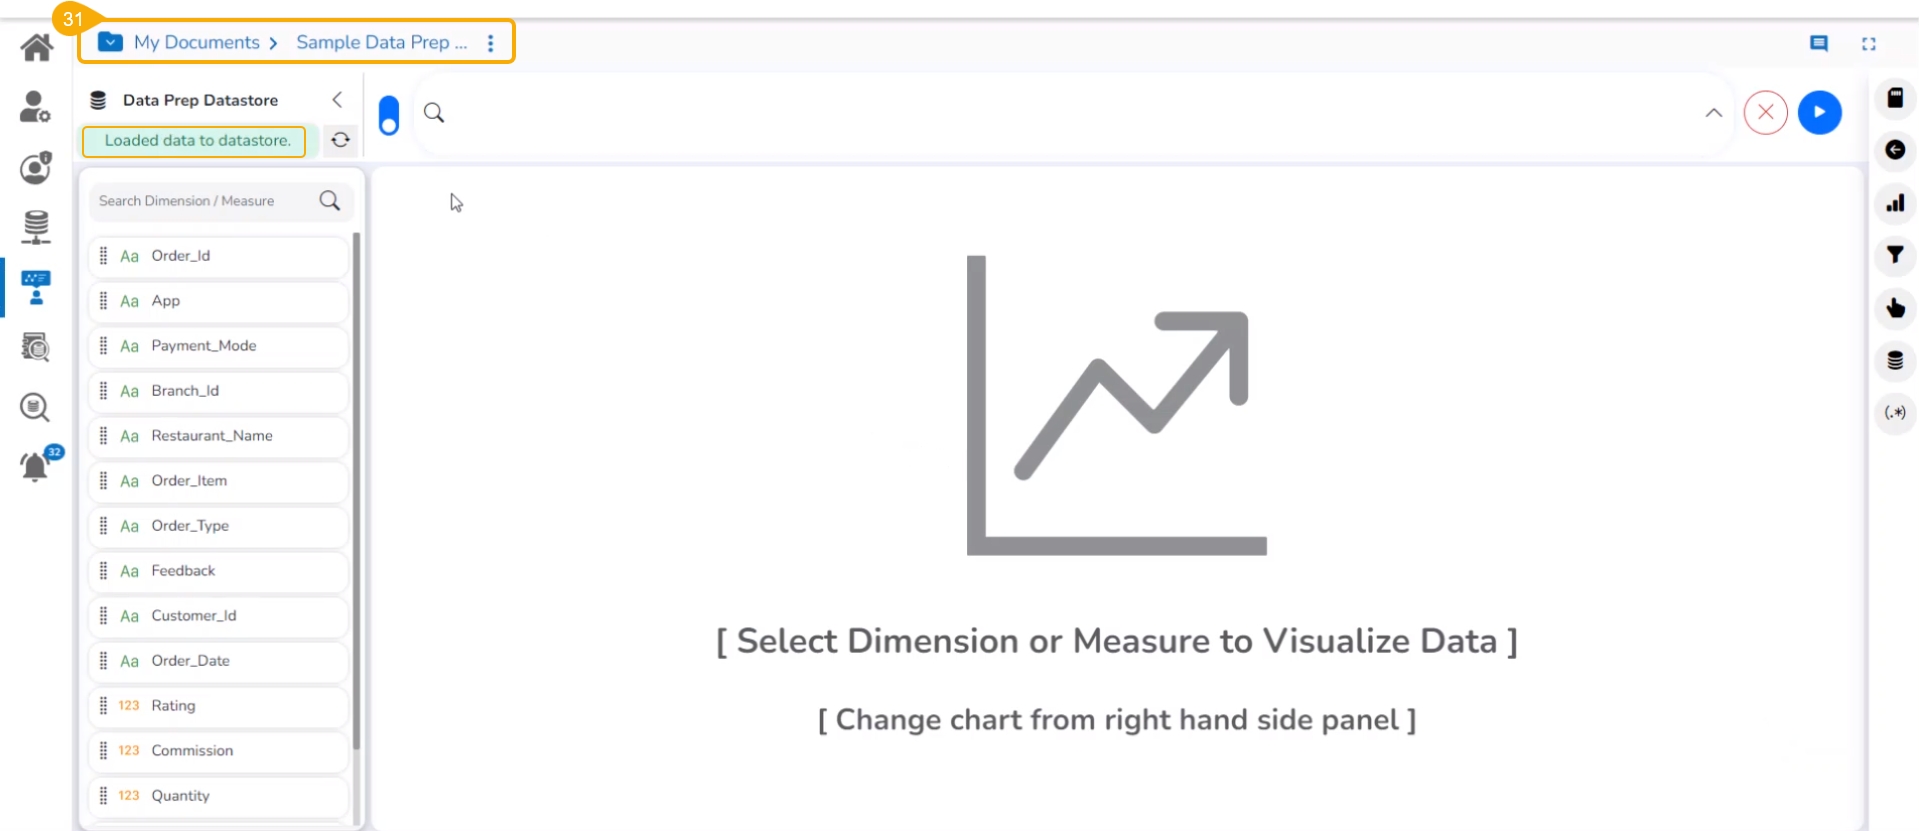
The report gets created under My Documents, and the Design canvas of the report opens by default.
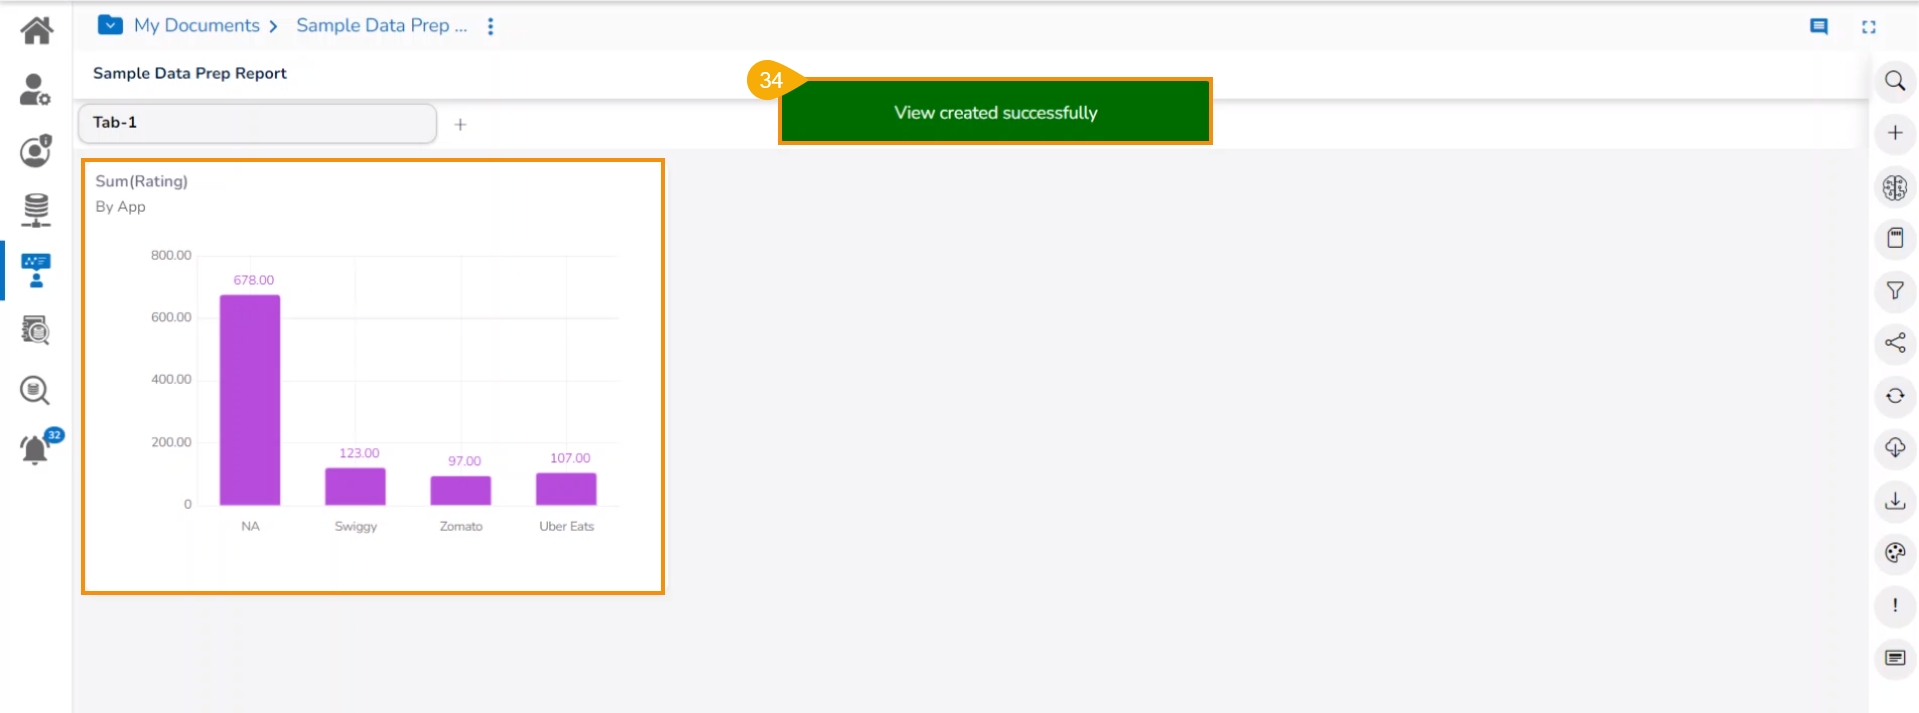
Create a View by drag and drop of the required Dimensions and Measures.
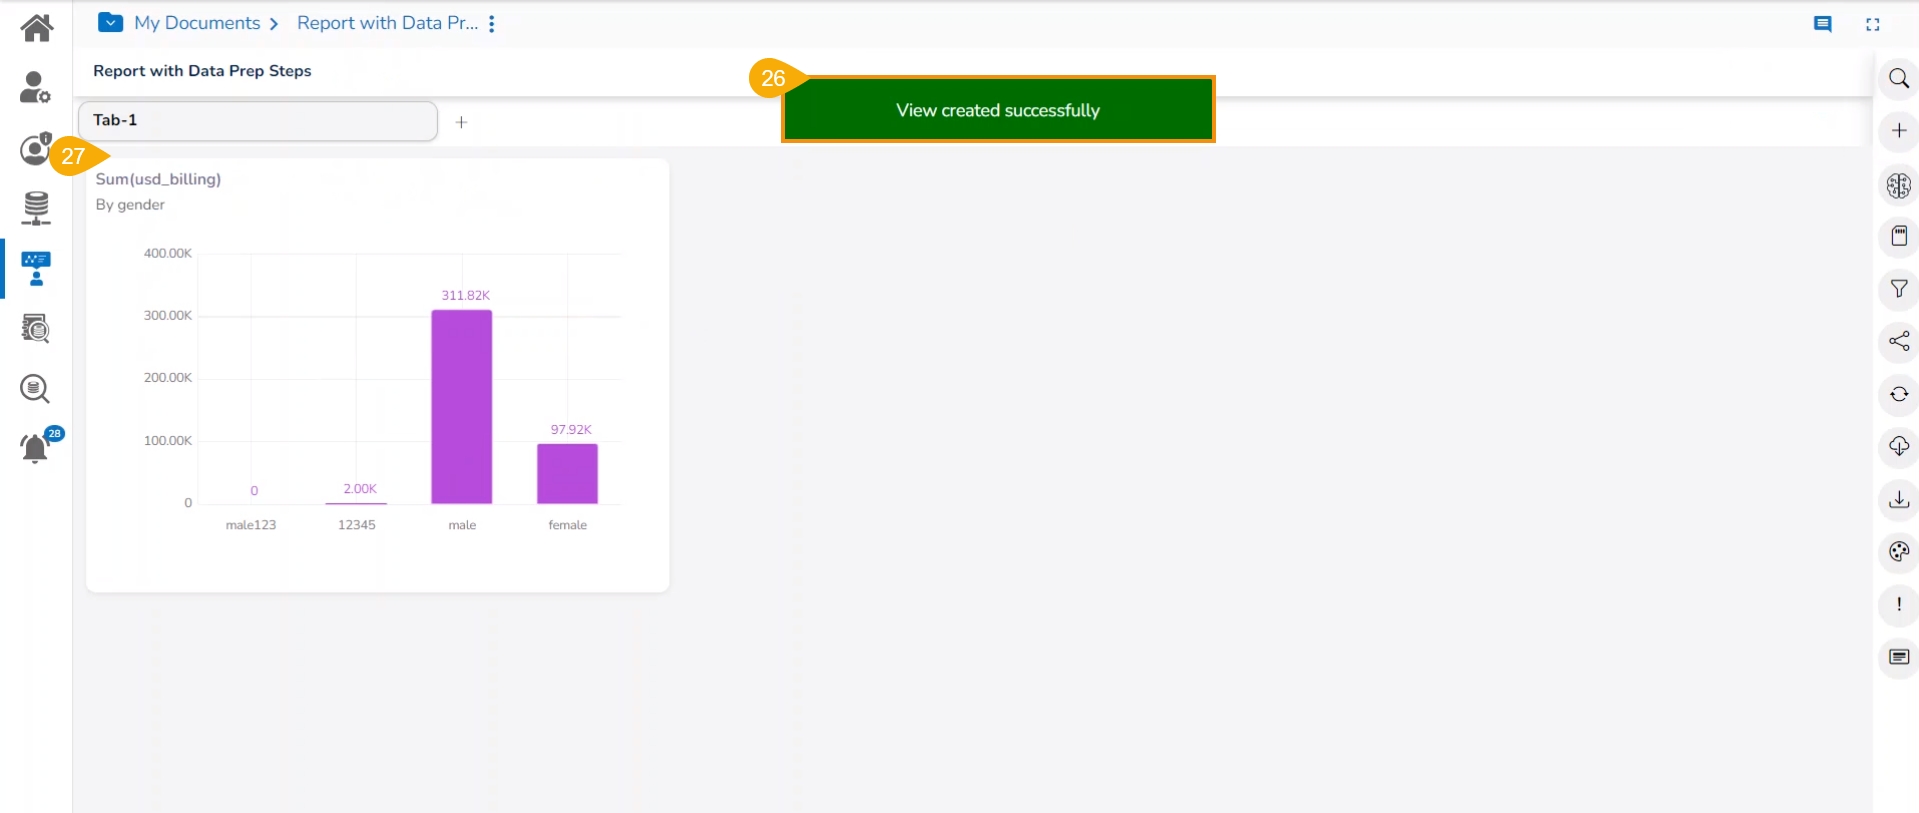
Click the Save option to save the View.
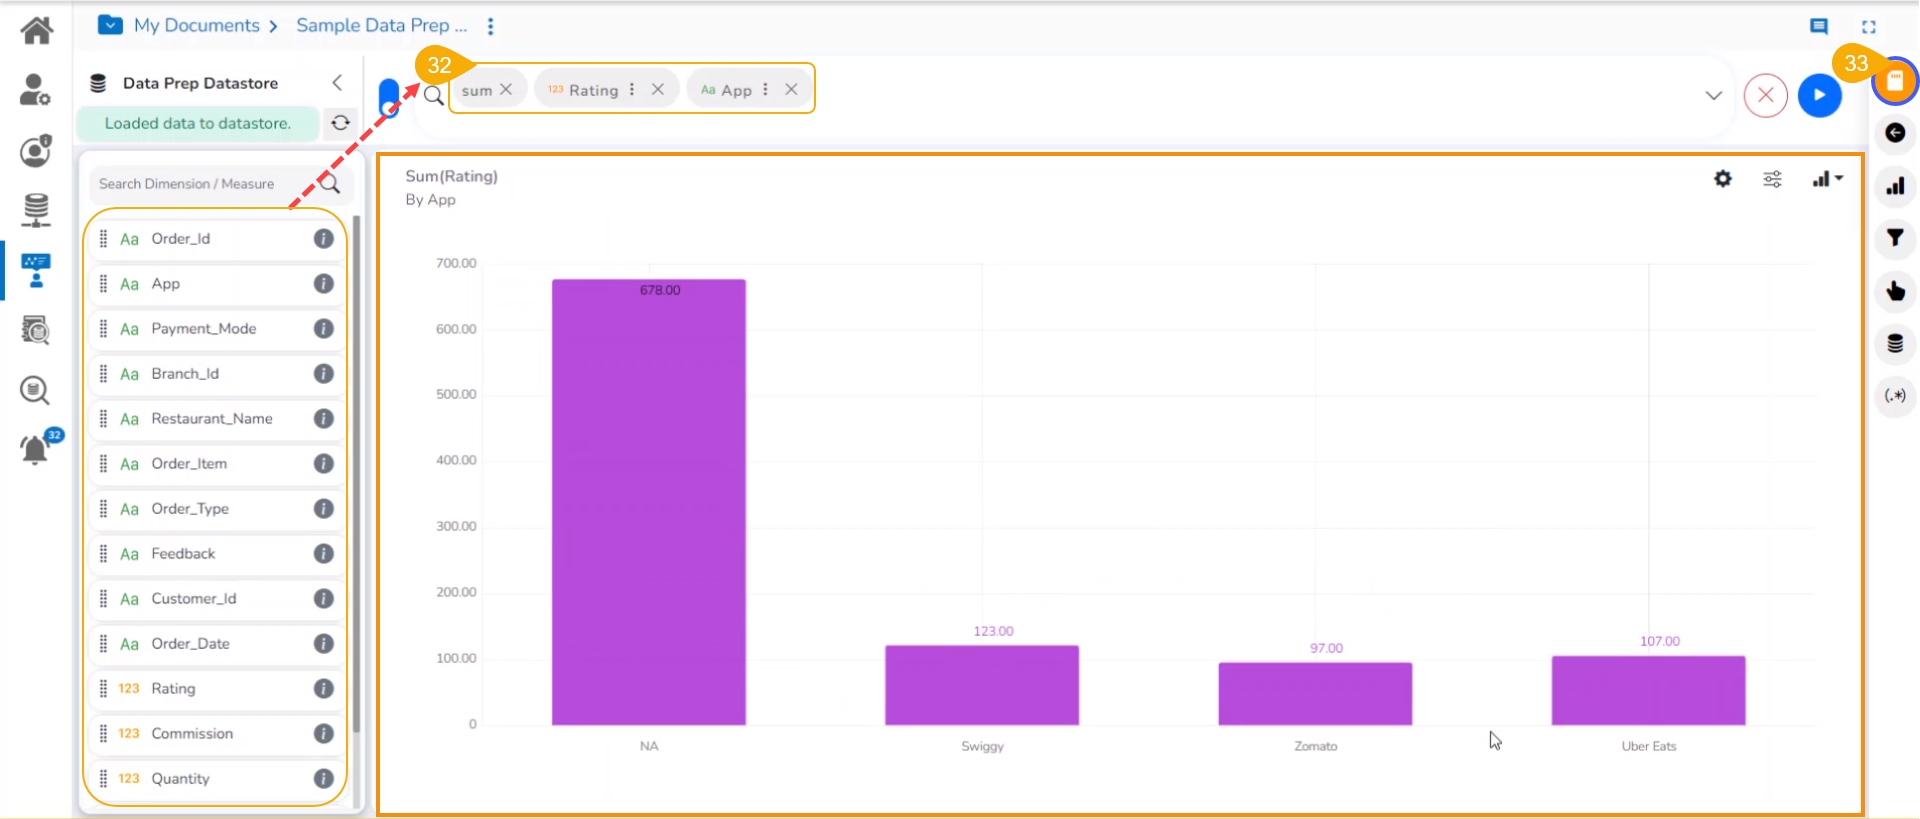
A notification message appears to ensure that the View has been created successfully.
The newly created View gets Saved to the final screen of the Report.
Please Note: The same steps can be applied to an uploaded Excel file to create a Report.

The page explains Report creation based on a Data Store (from the Data Center) that contains Data Preparation steps.
Check out the walk-through on a Report creation workflow with a Data Store that contains saved Data Preparation steps.
Please follow the below-given steps to create a new Report based on a Data Sandbox file with Data Preparation Steps:
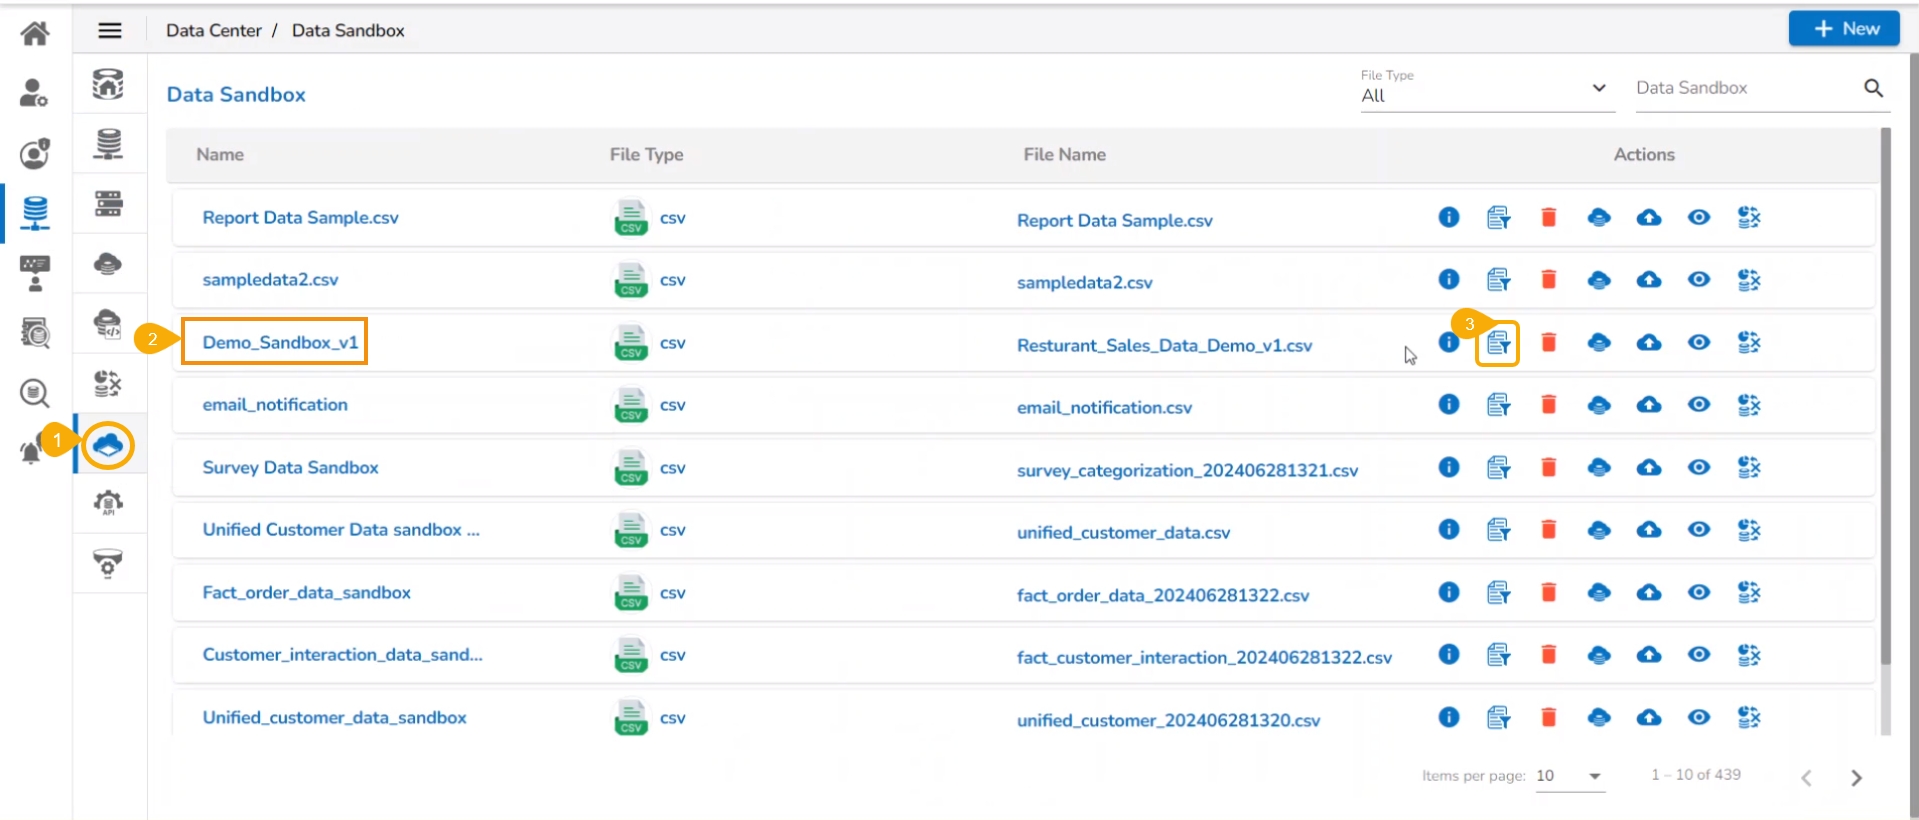
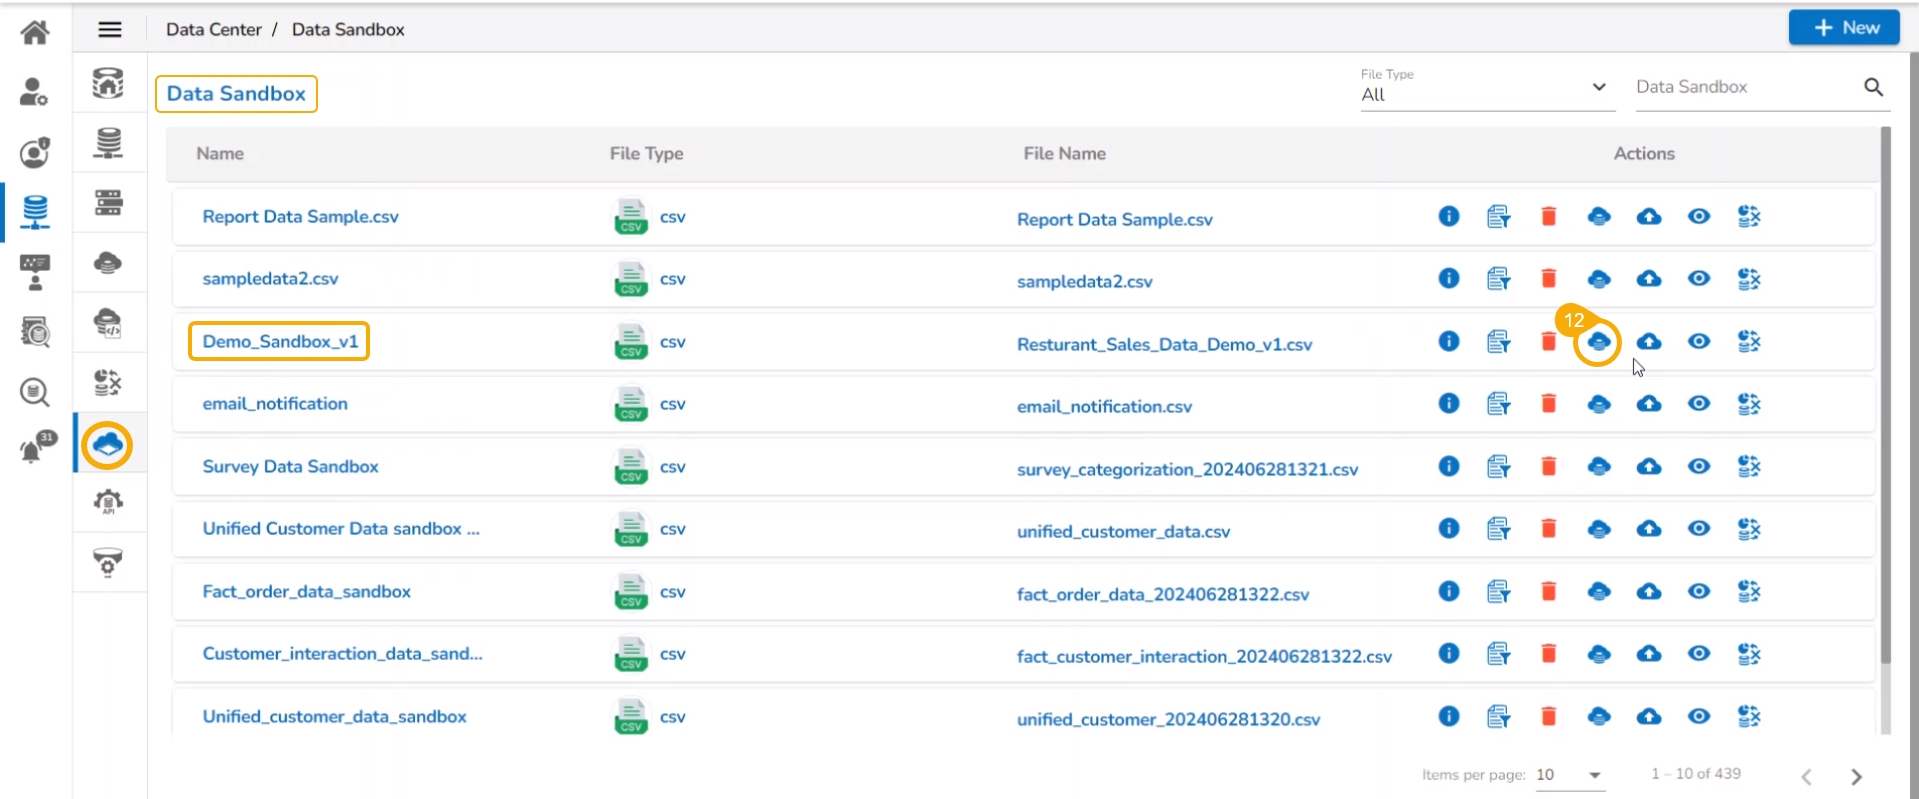
Navigate to the Data Sandbox list from the Data Center module.
Select a Data Sandbox file from the list.
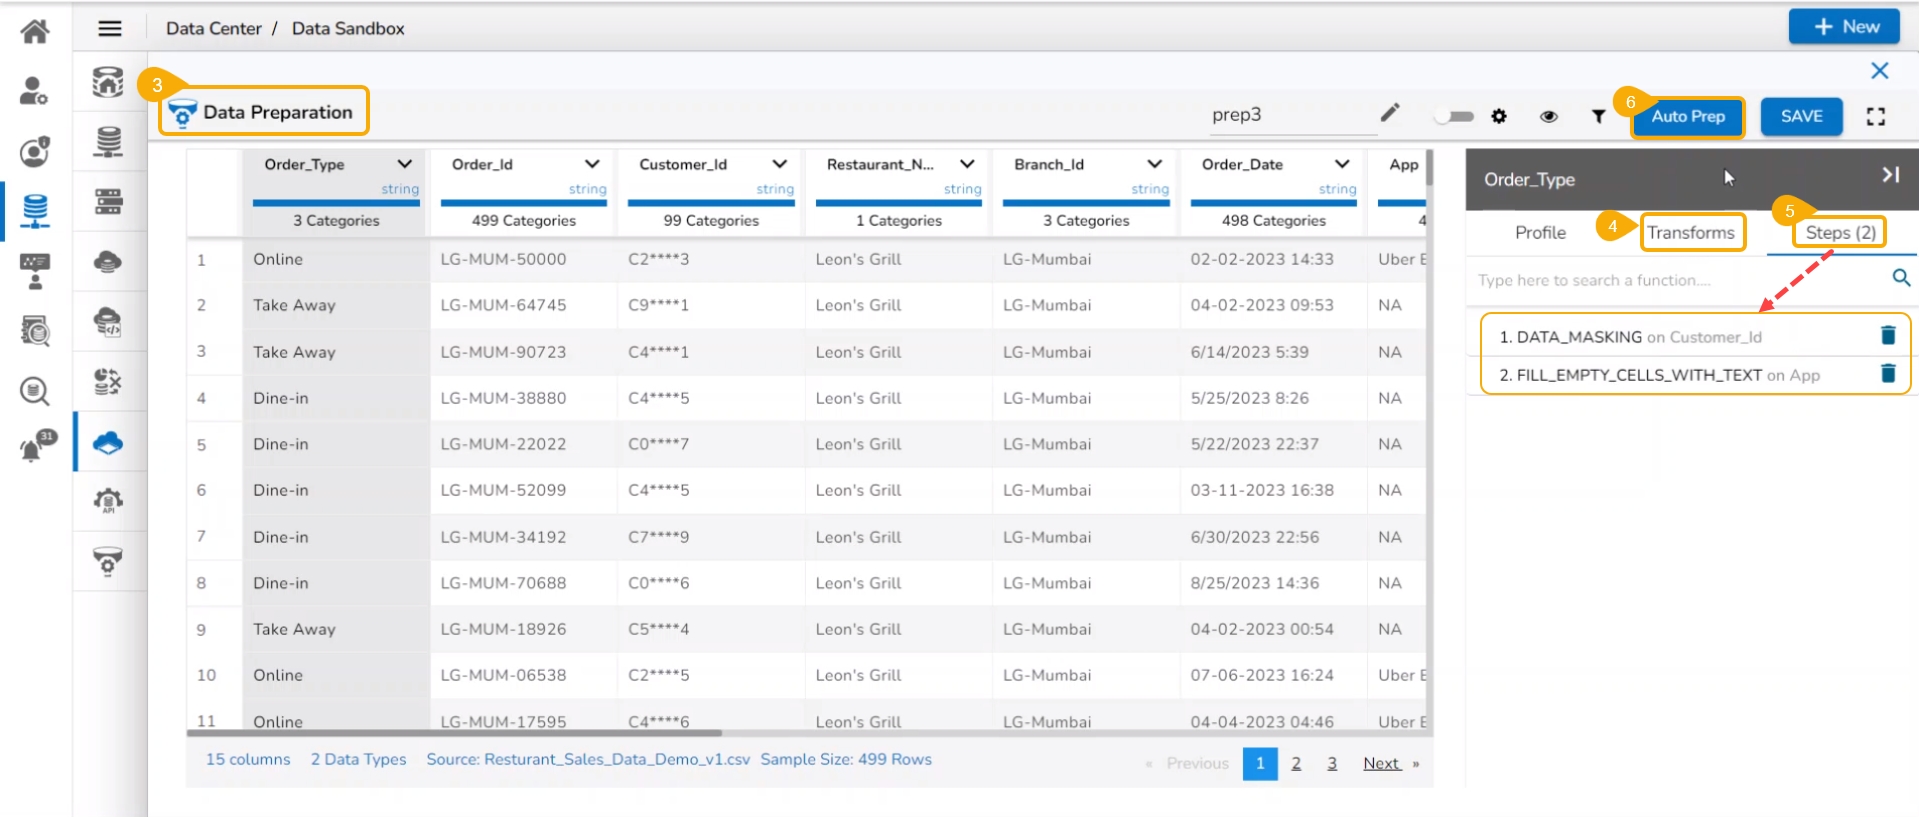
Click the Data Preparation icon to create a Data Preparation and make some transformations.
The user gets redirected to the Data Preparation module.
Apply transformations using the Transforms tab.
The applied transforms will be noted under the Steps tab. You may open it to see the applied transforms.
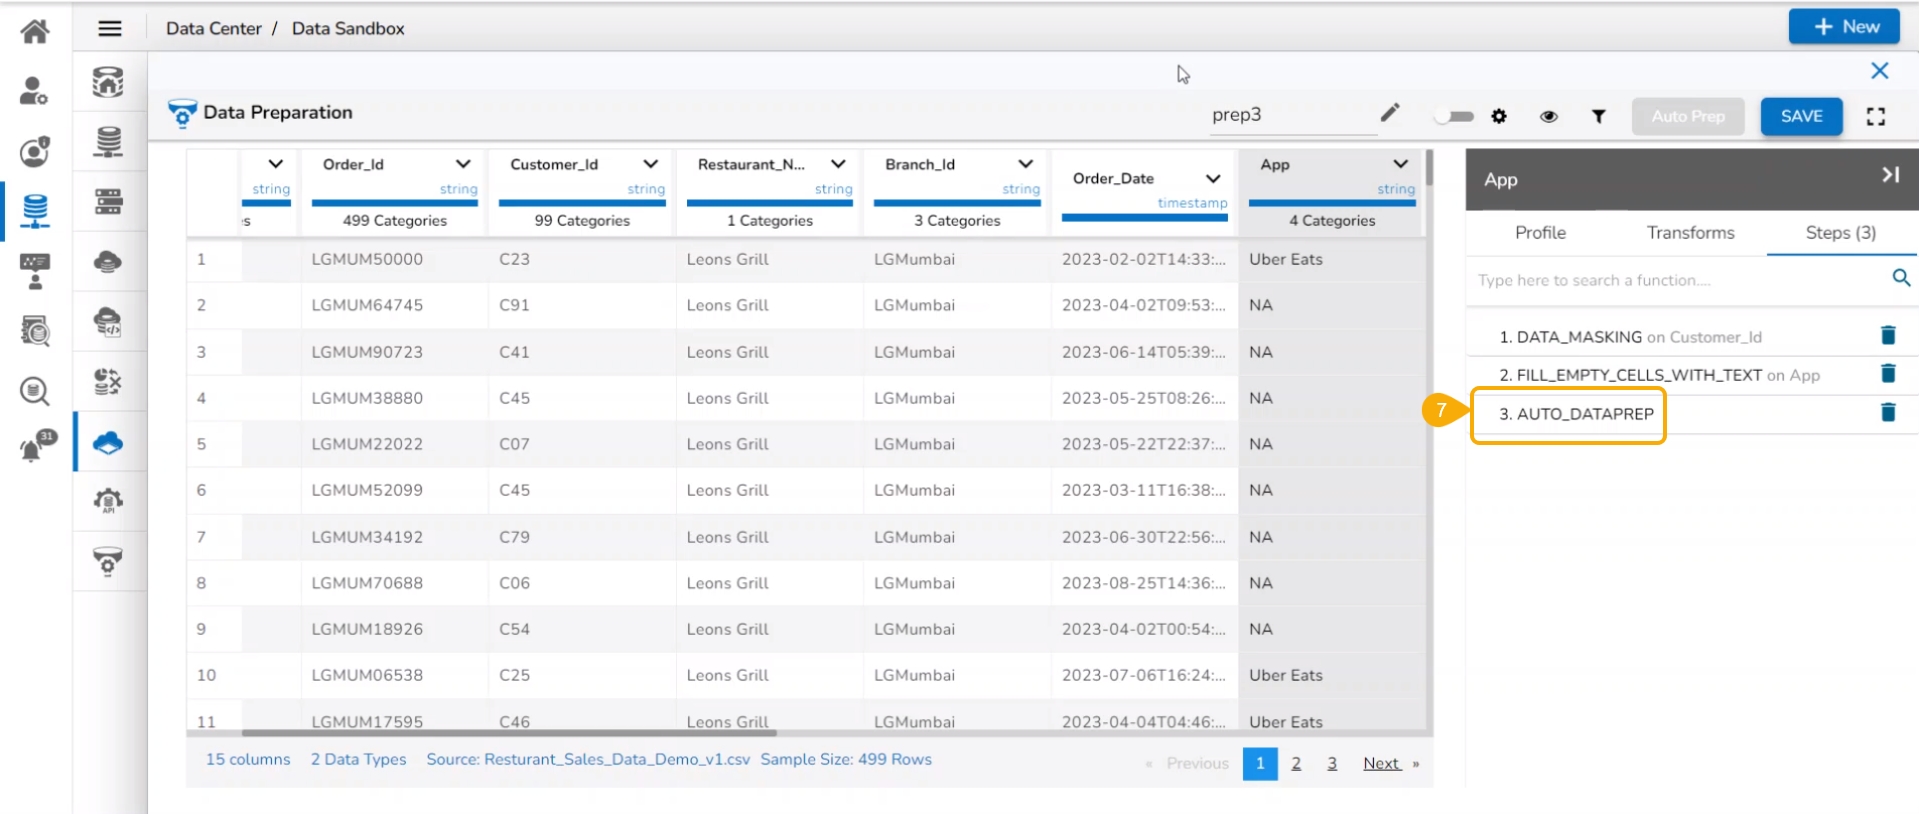
Click the Auto Prep option to apply the Auto Prep functionality.
The Auto Prep is also mentioned under Steps tab after being applied to the selected data.
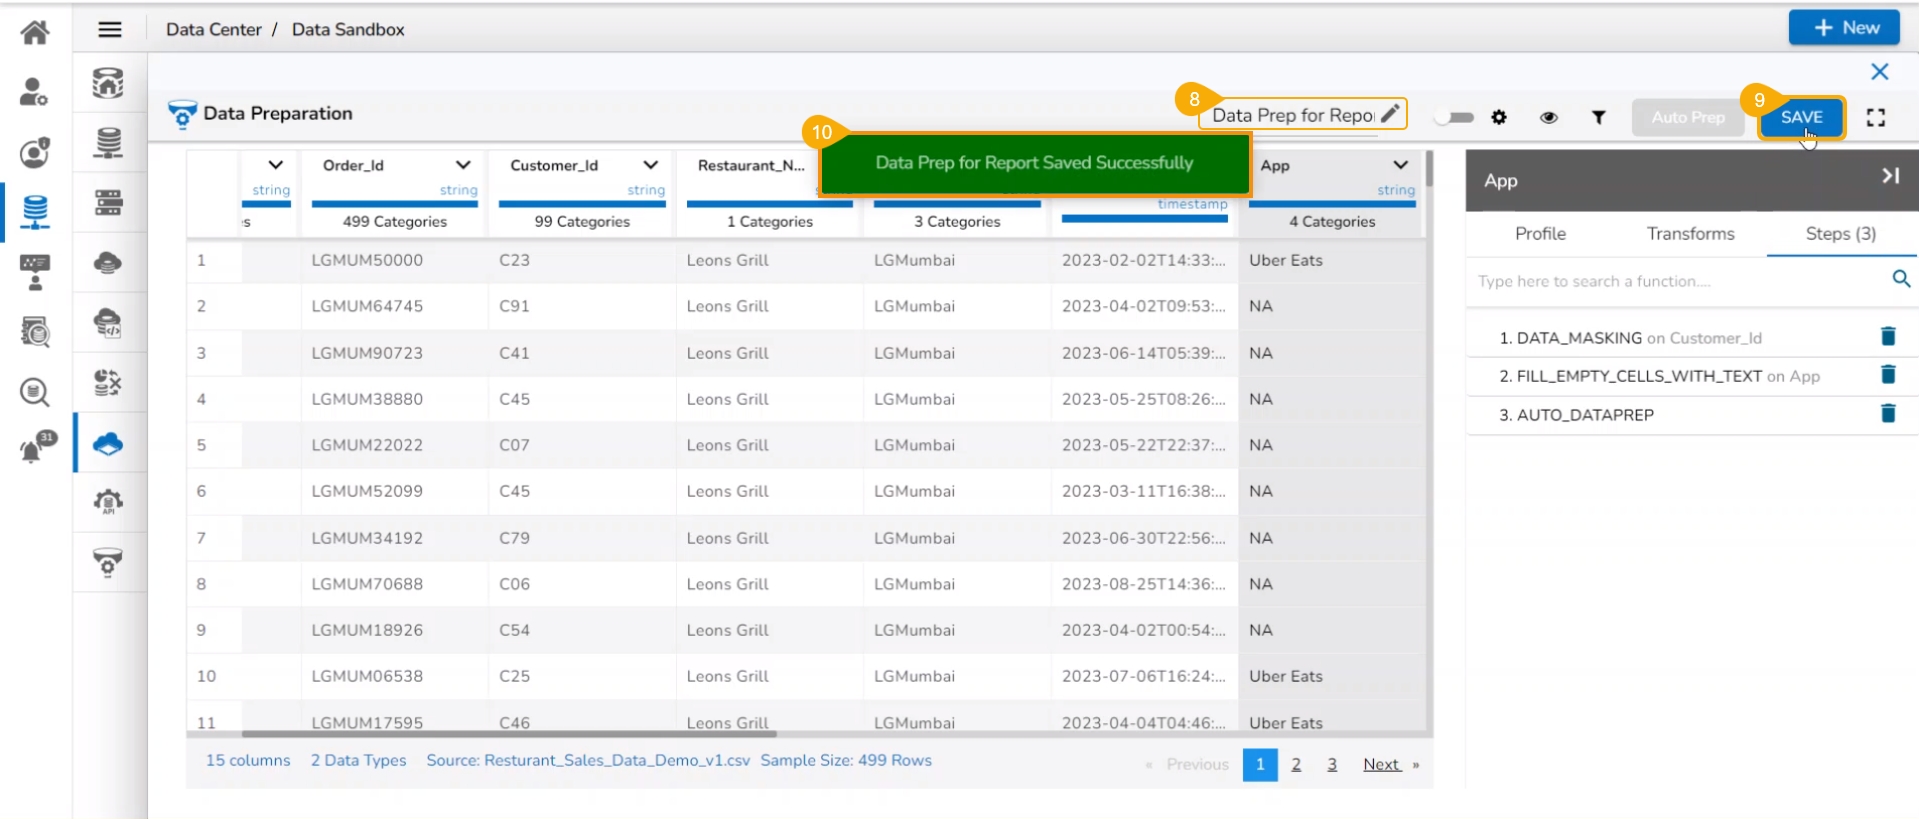
Provide a name to the Data Preparation.
Click the SAVE option.
A notification ensures that the data preparation is saved.
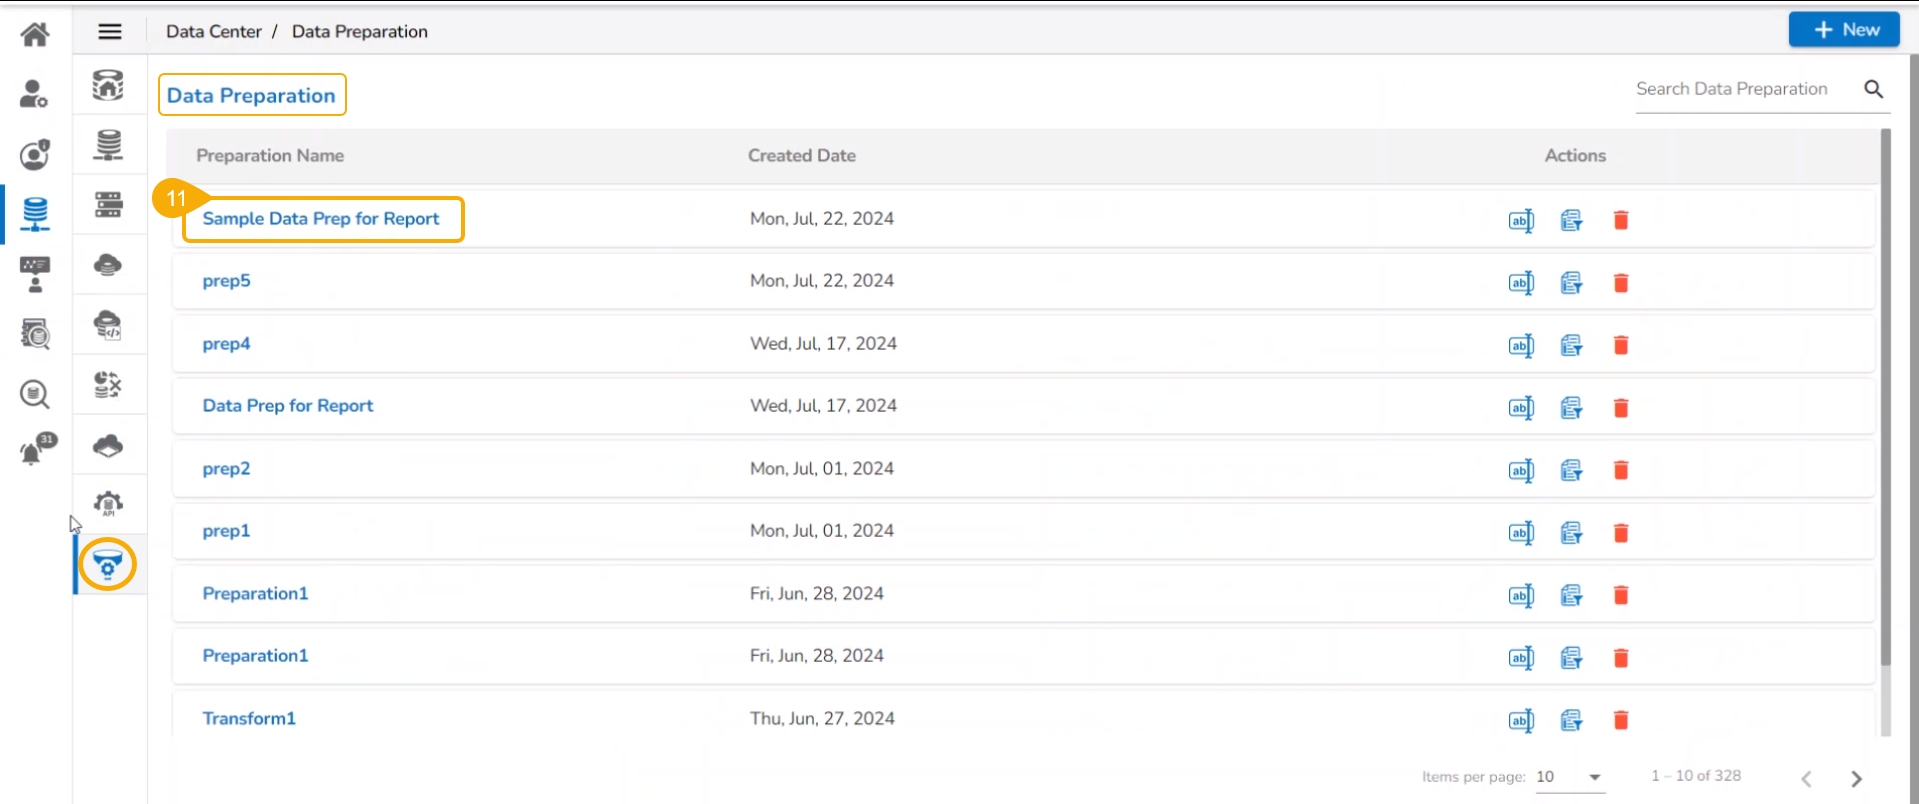
The Data Preparation gets added to the Data Preparation list.
Click the Create Data Store icon for the same Sandbox file from the Sandbox list.
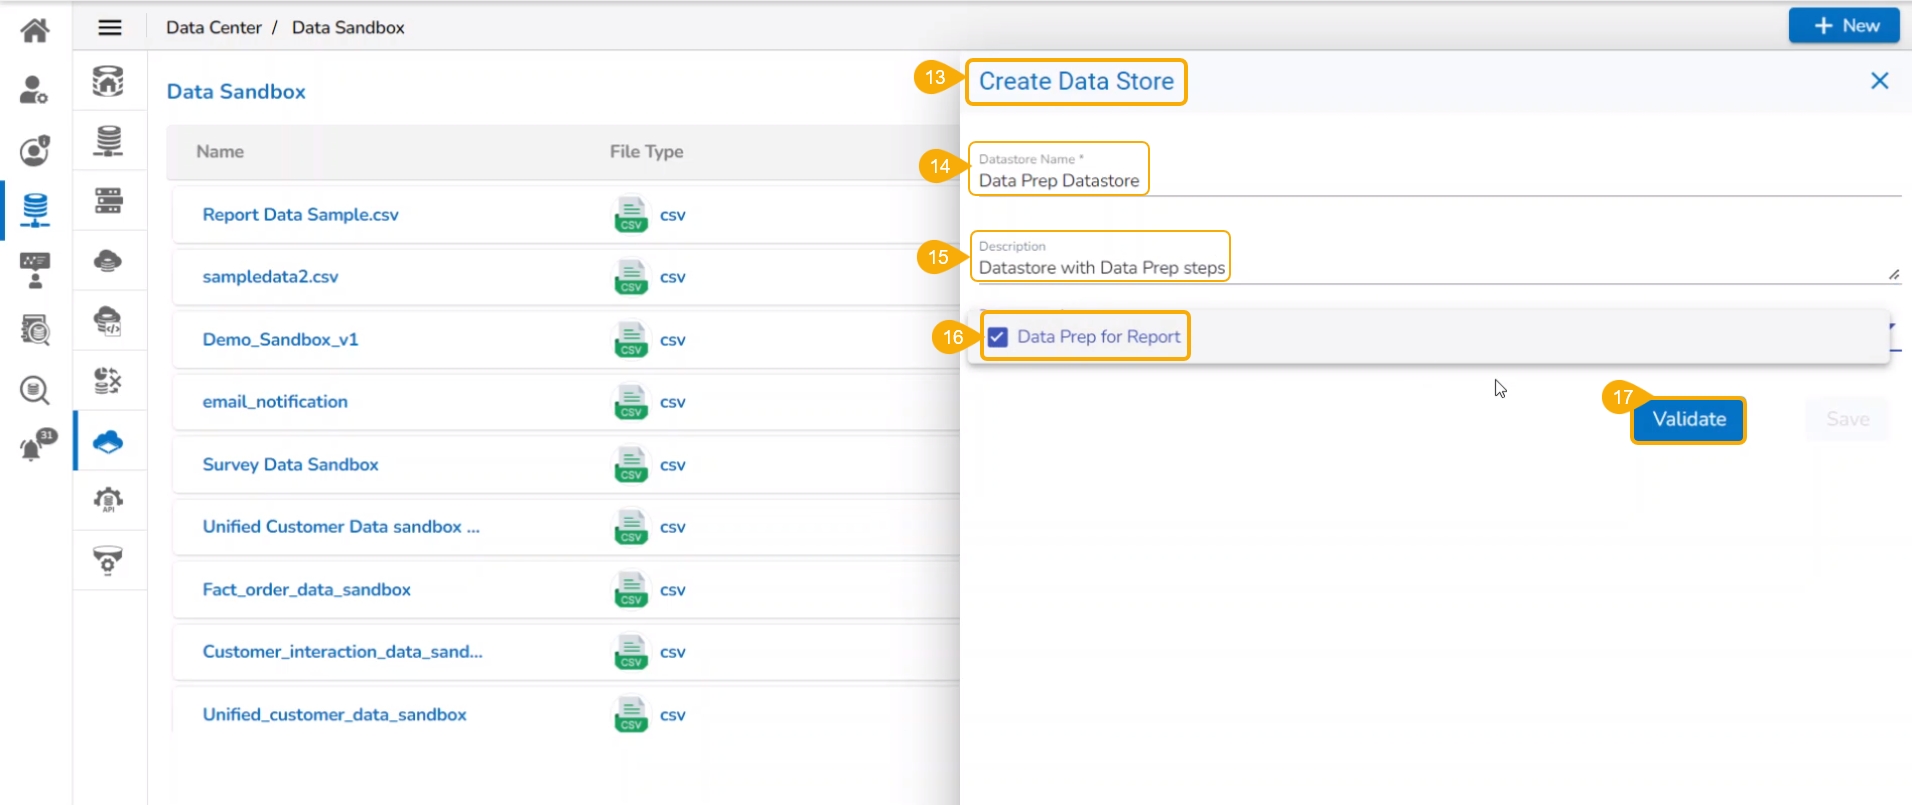
The Create Data Store window appears.
Provide a name for the Data Store.
Describe the Data Store.
Select the available Data Preparation using the drop-down menu.
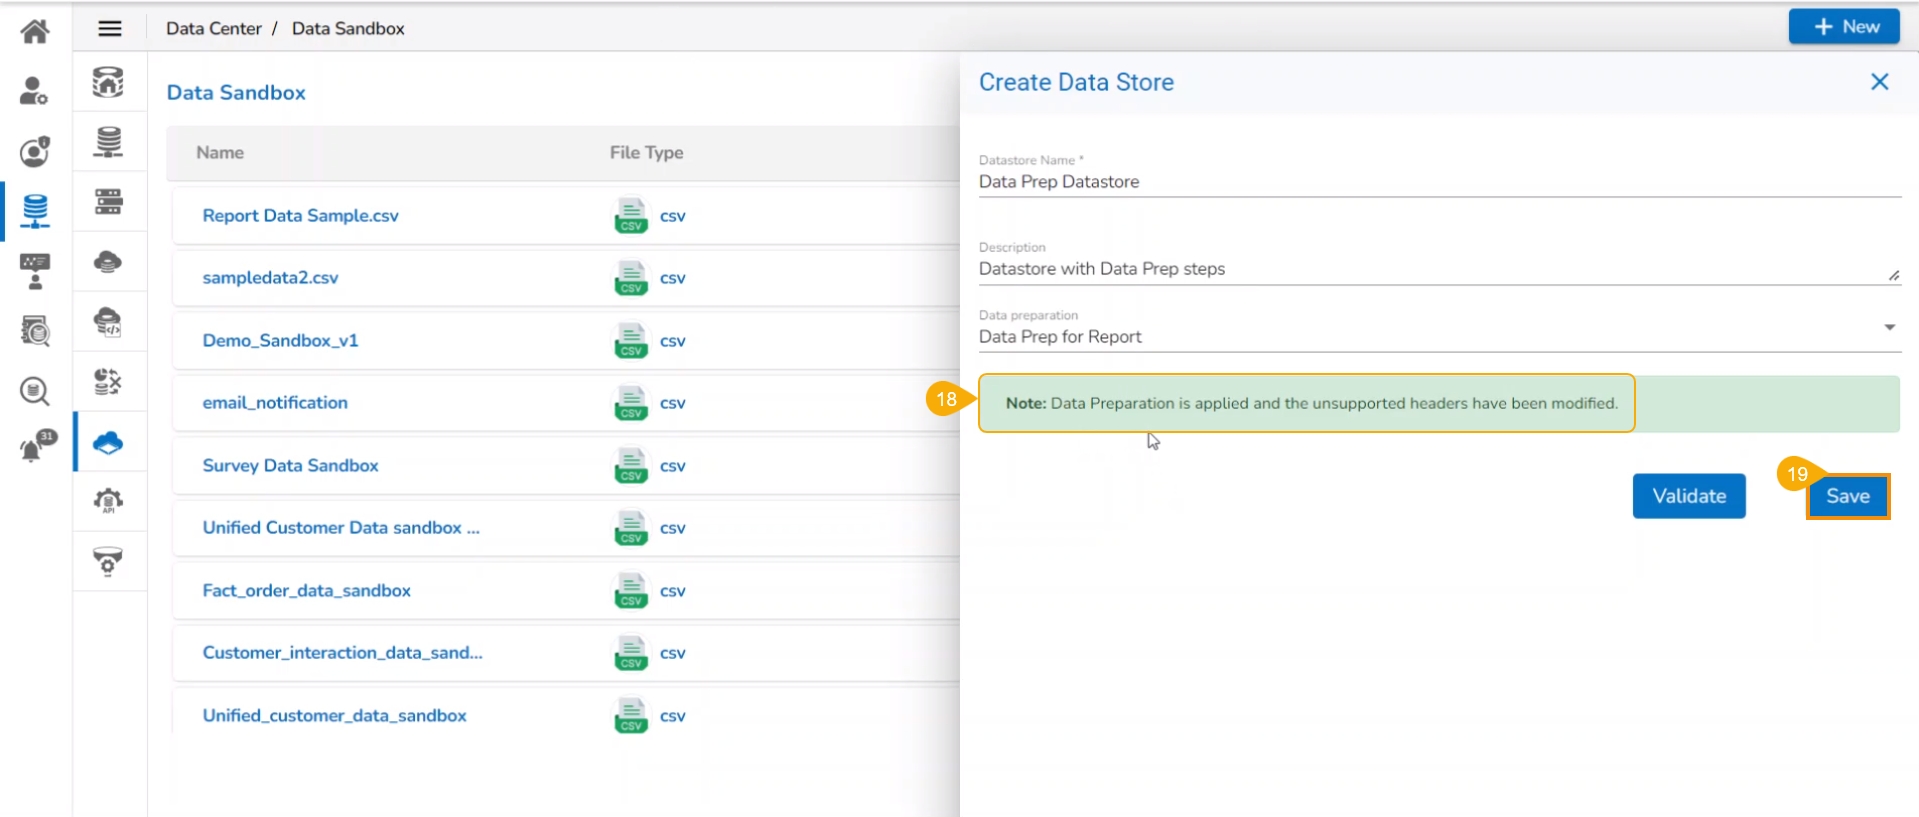
Click the Validate option.
A note gets displayed ensuring that the Data Preparation is applied and unsupported headers are modified.
Click the Save option to finish the Data Store creation.
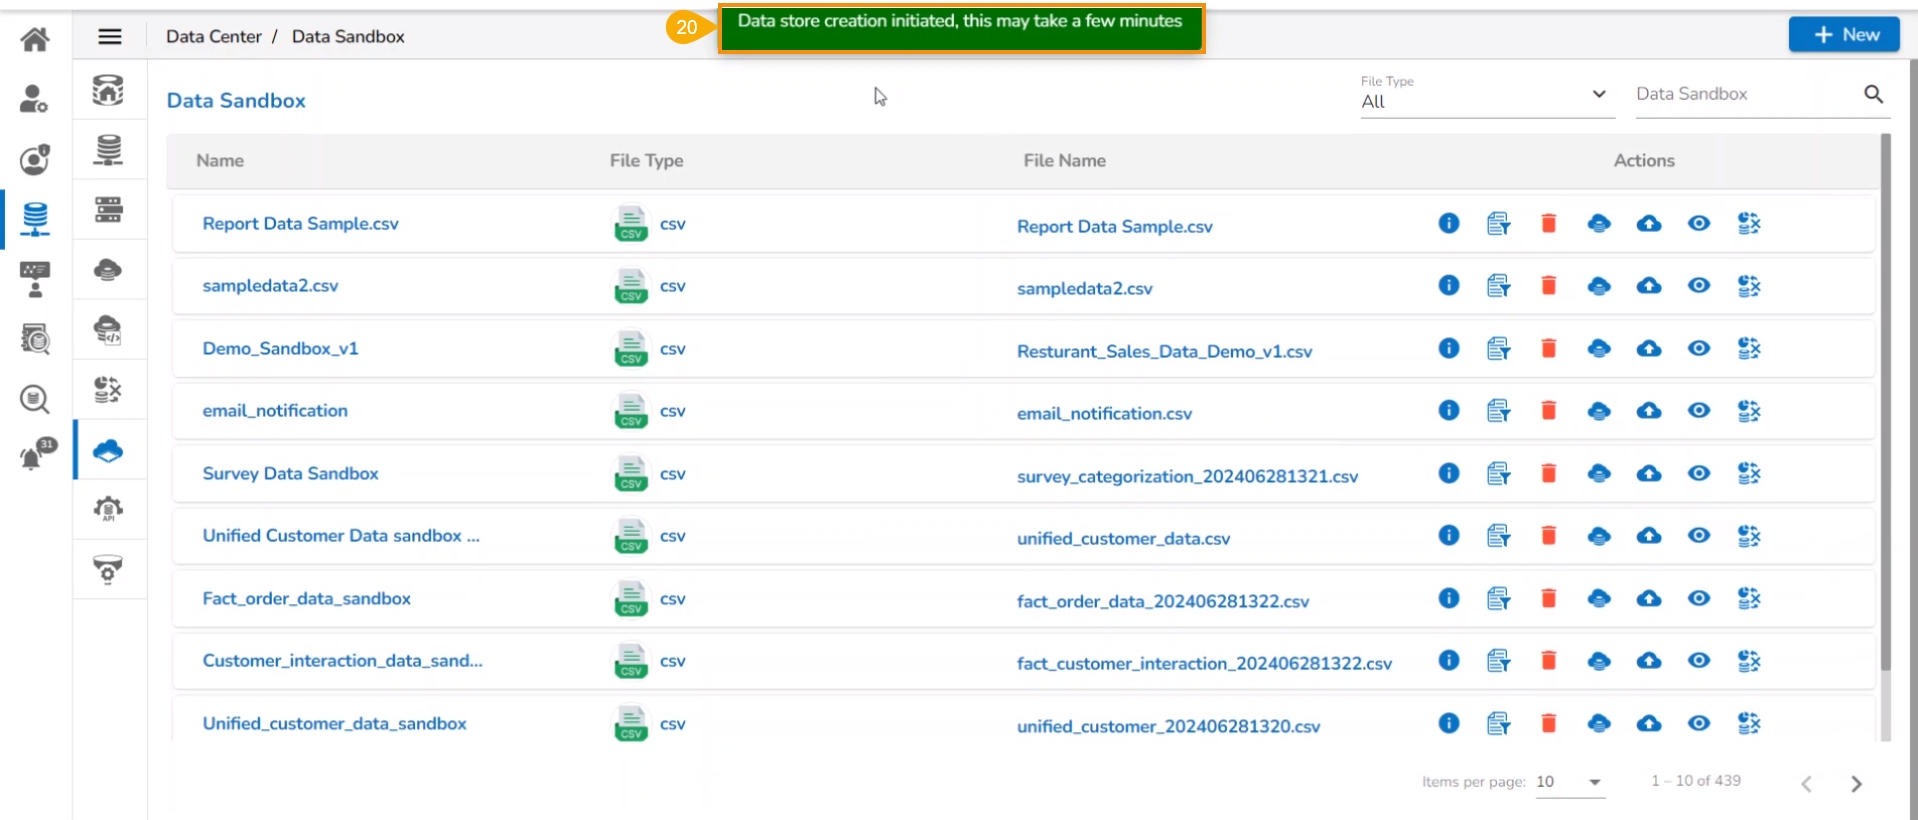
A notification ensures that the Data Store creation has been initiated and may take a few minutes.
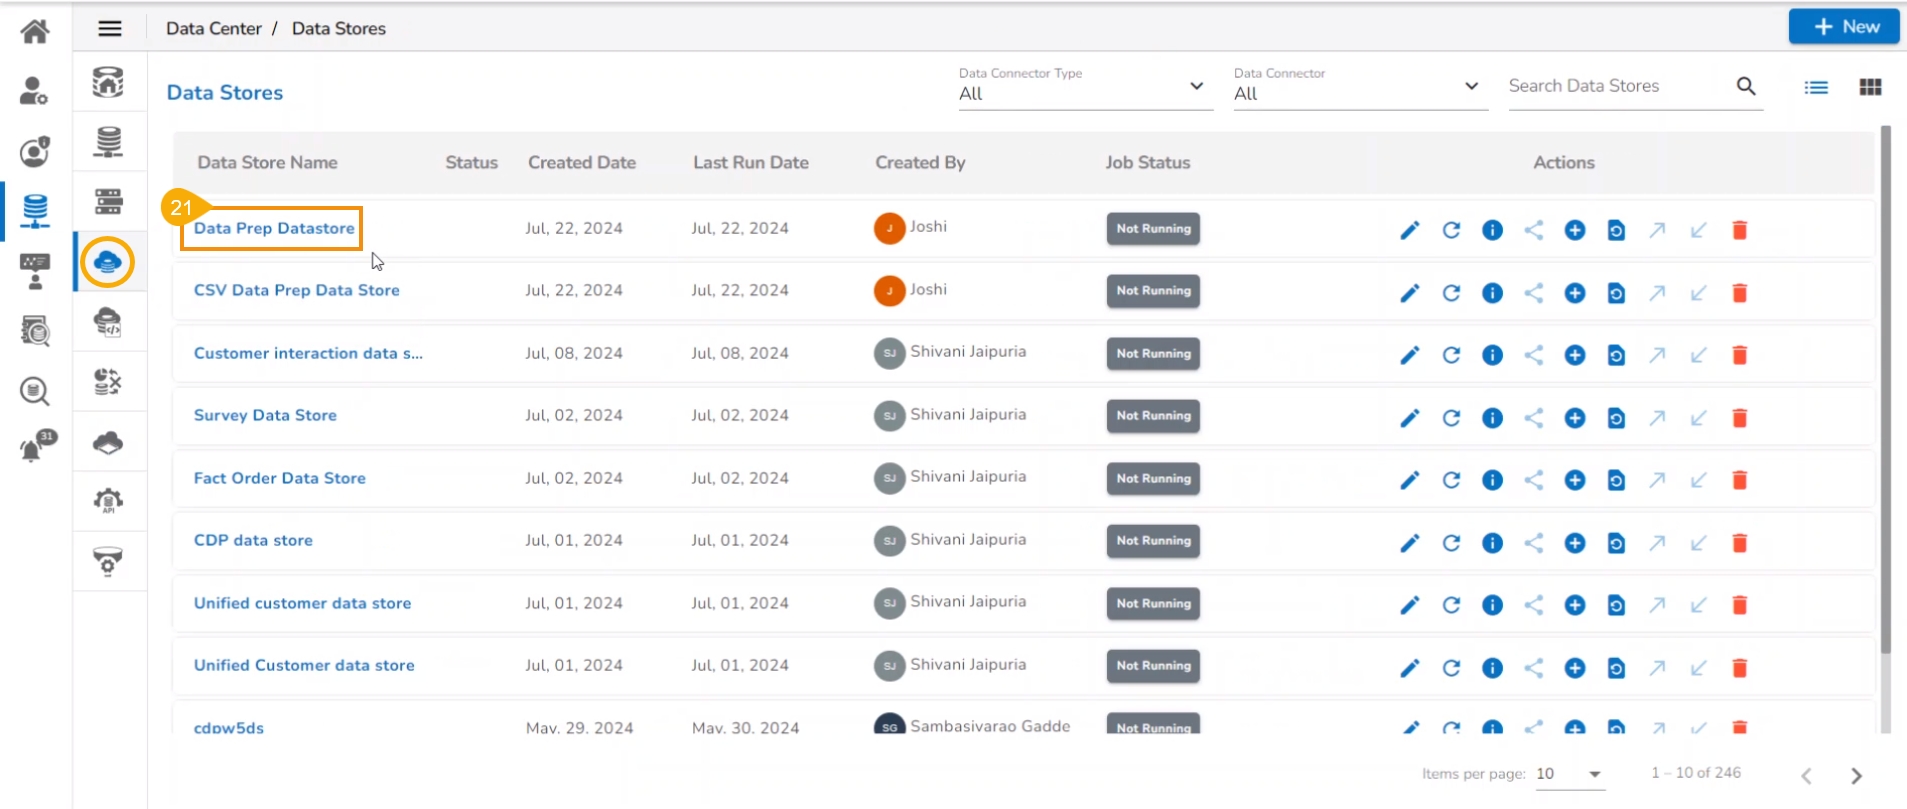
The newly created data store with data preparation steps gets added to the Data Store list.
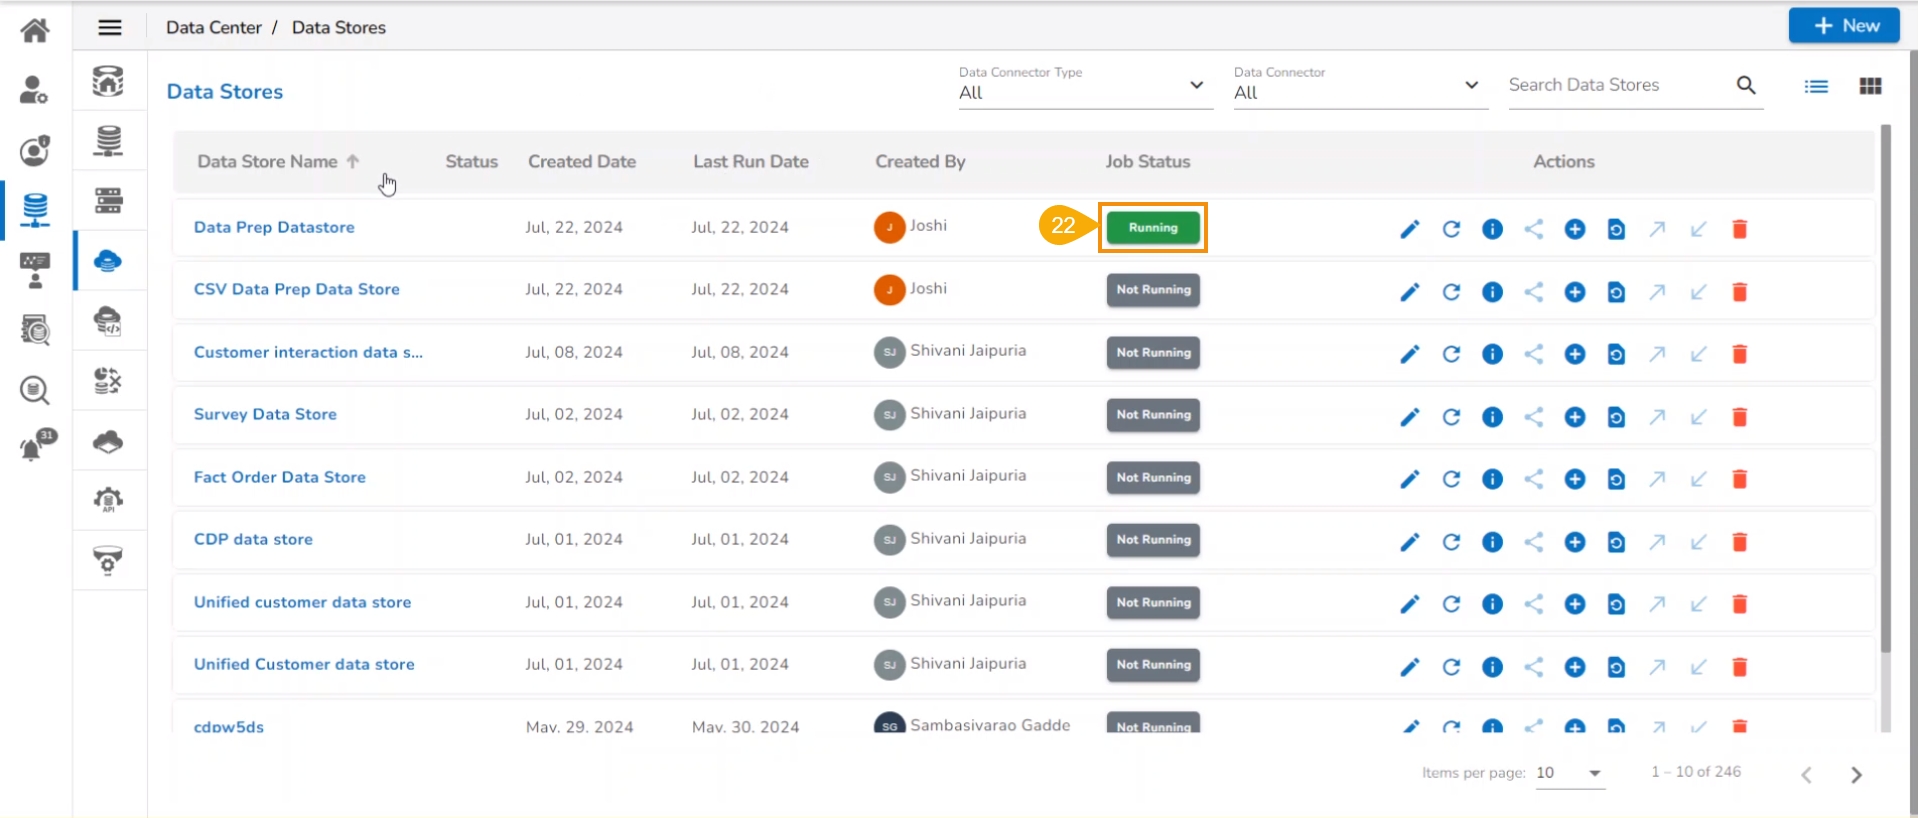
Wait till the Job Status for the newly created Data Store gets displayed as Running.
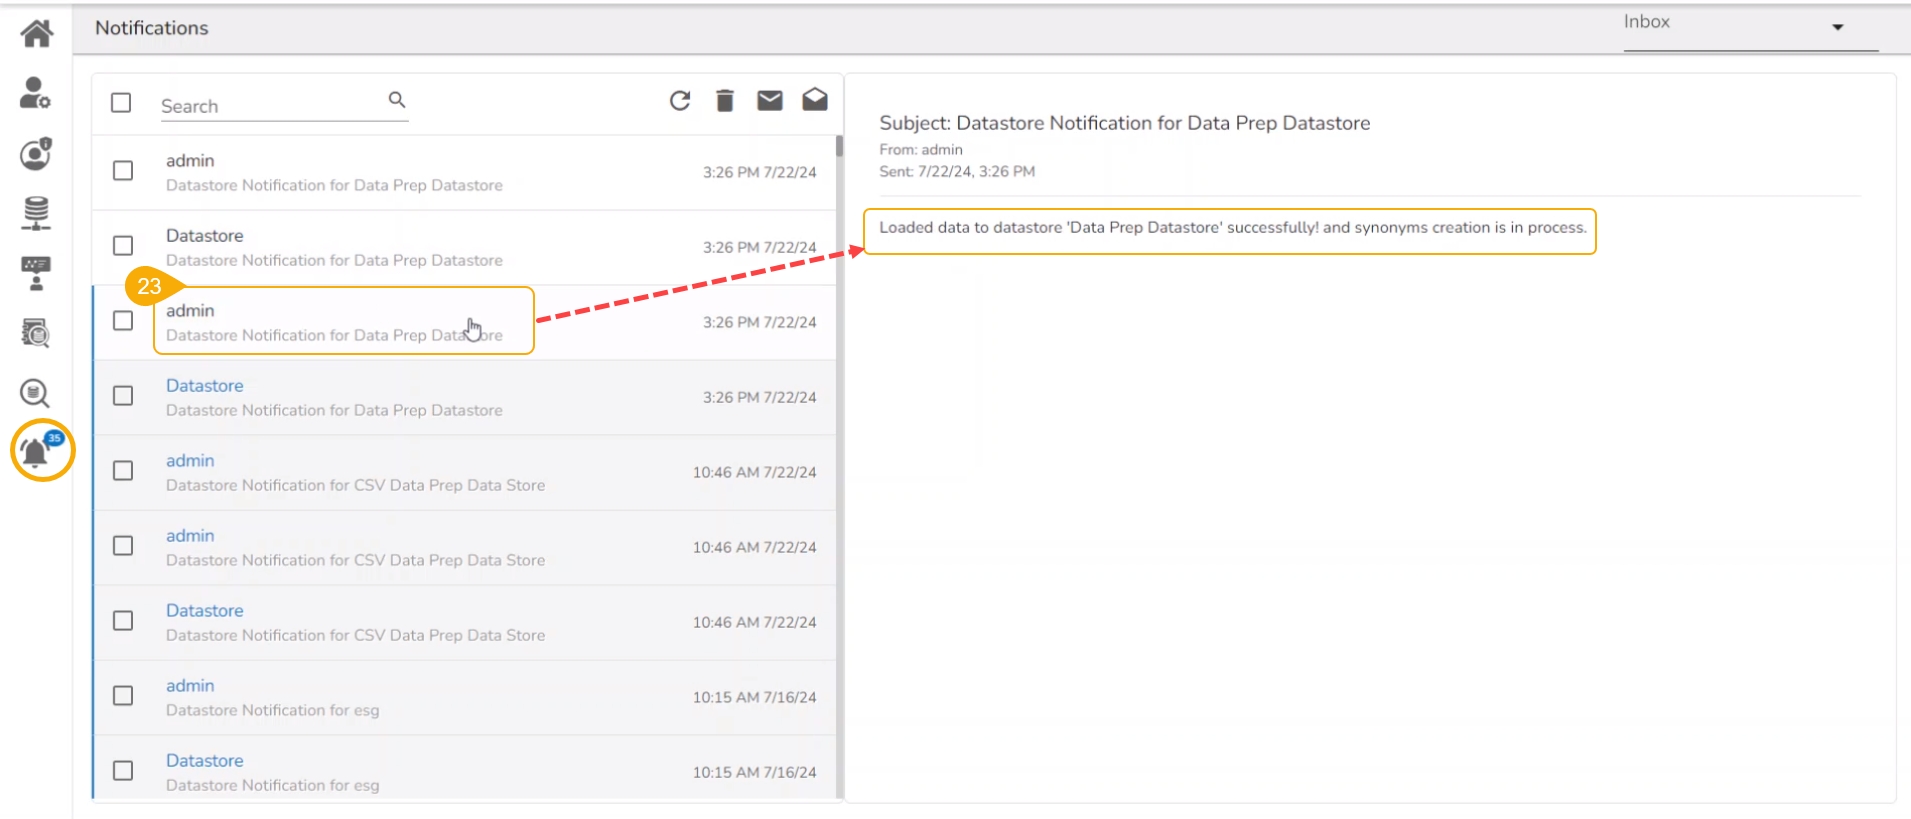
The user may open the Notifications section to check the Data Store update. It would notify that the data is loaded to the newly created Data Store.
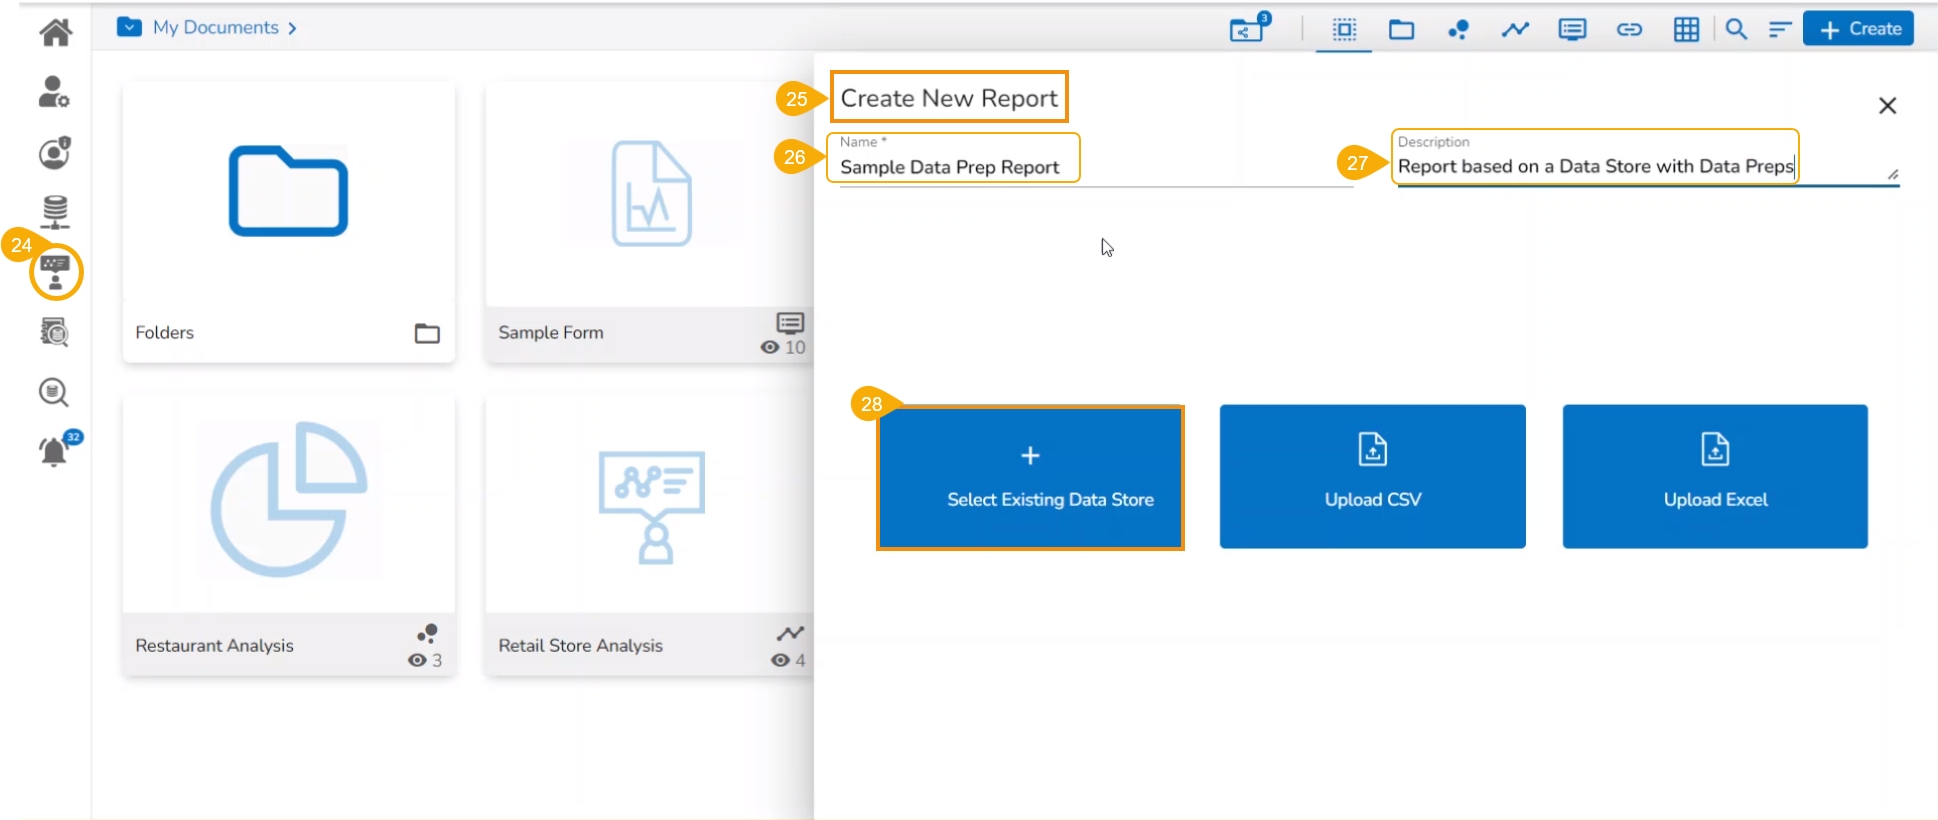
Navigate to the homepage and click the Report icon or Create New Report option to initiate the report creation.
The Create New Report window opens.
Provide a name for the Report.
Describe the report.
Click the Select Existing Data Store option to create the report.
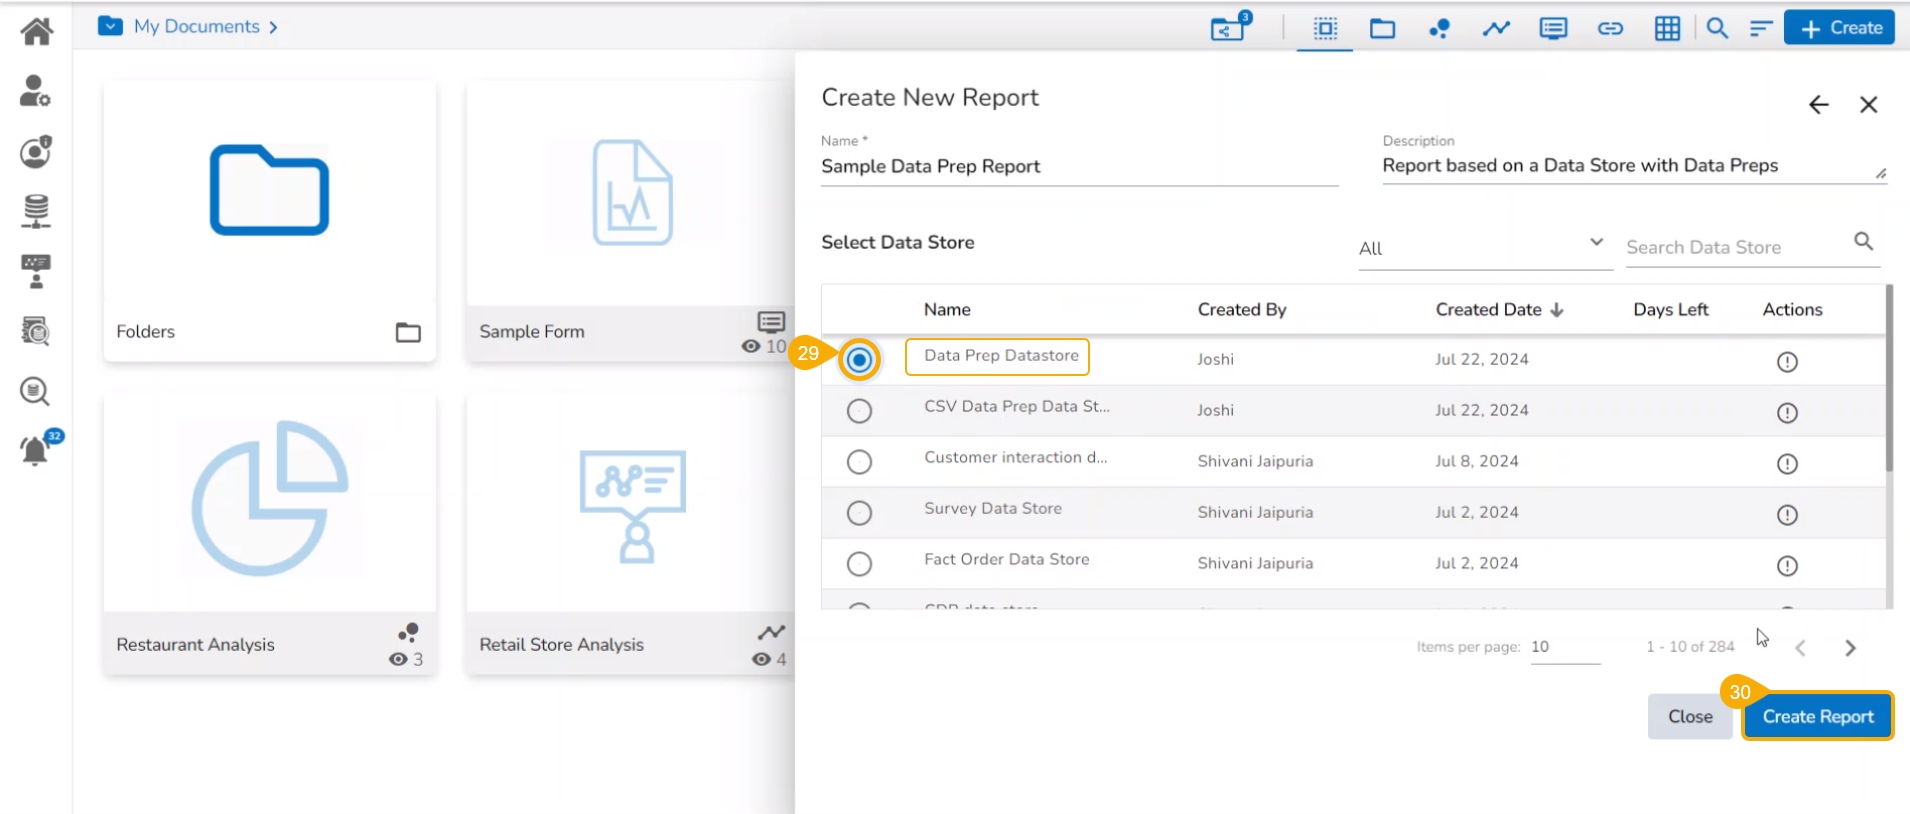
Select the data store earlier created with the Data Preparation steps using the checkbox.
Click the Create Report option.
A new report gets created based on the Datastore and the user gets redirected to the Design page of the report.
Drag and drop dimensions and measures to create a View.
Click the Save icon to save the View.
A notification message appears and the View gets saved to the Report.
