This page explains steps for View Filter based on data Dimensions.
Check out the walk-through to filter a View based on Dimension value.
Steps to Apply Dimension-based View Filter
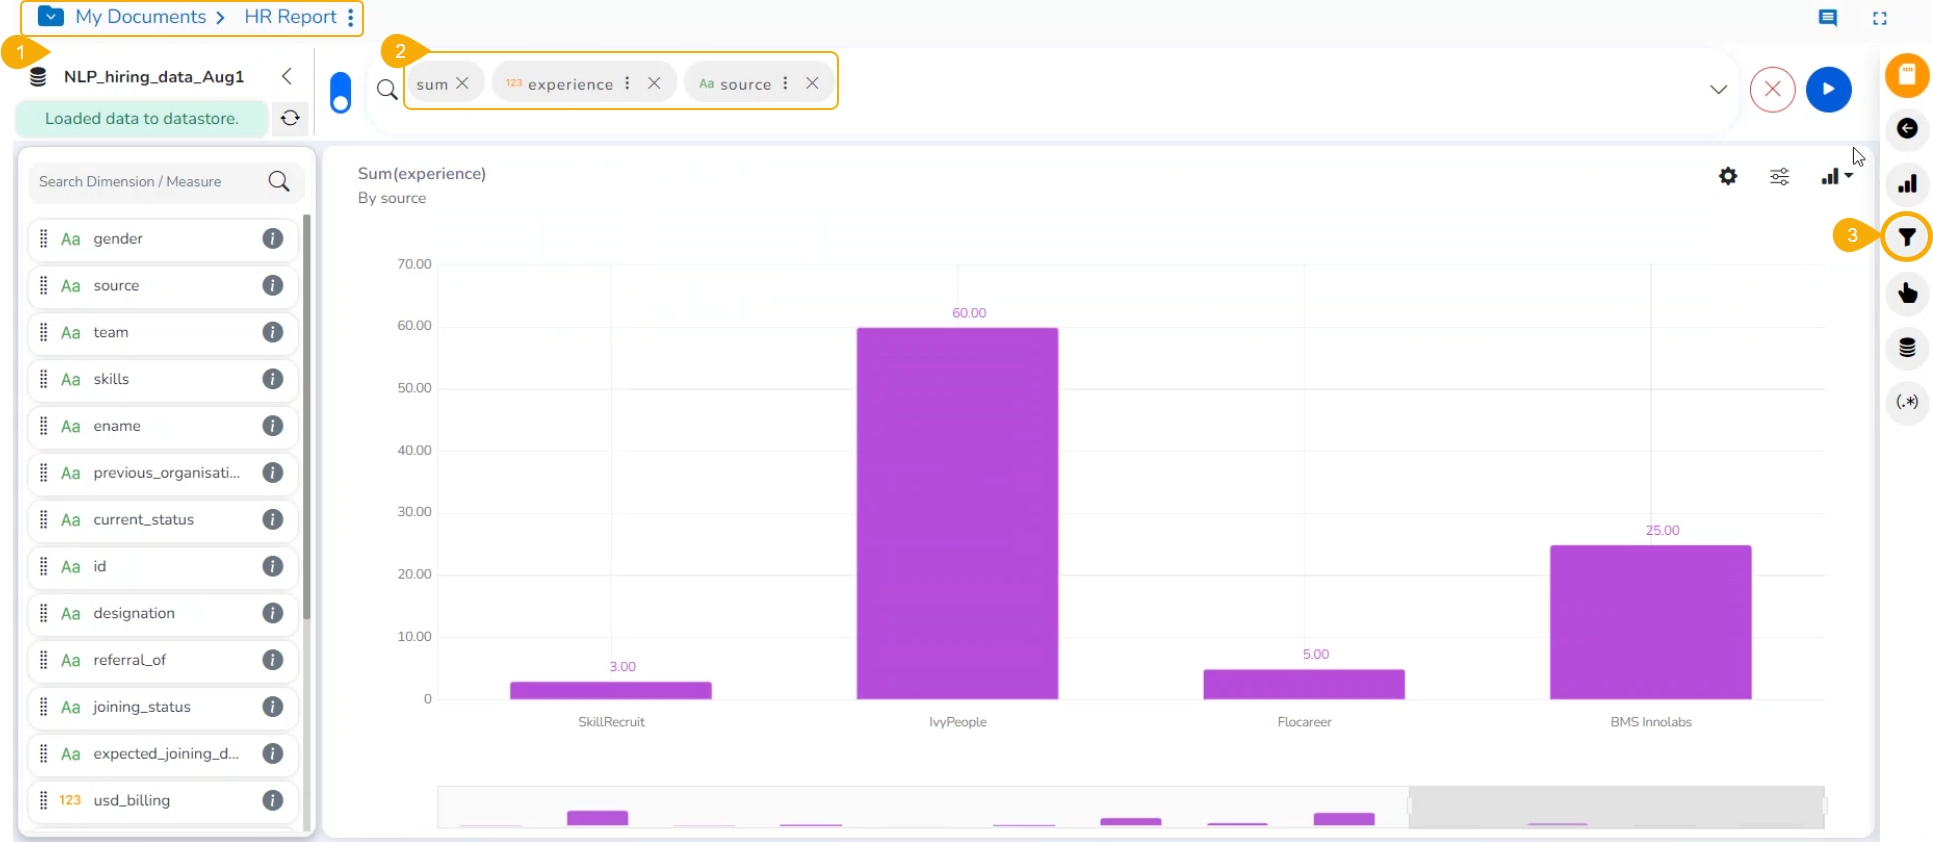
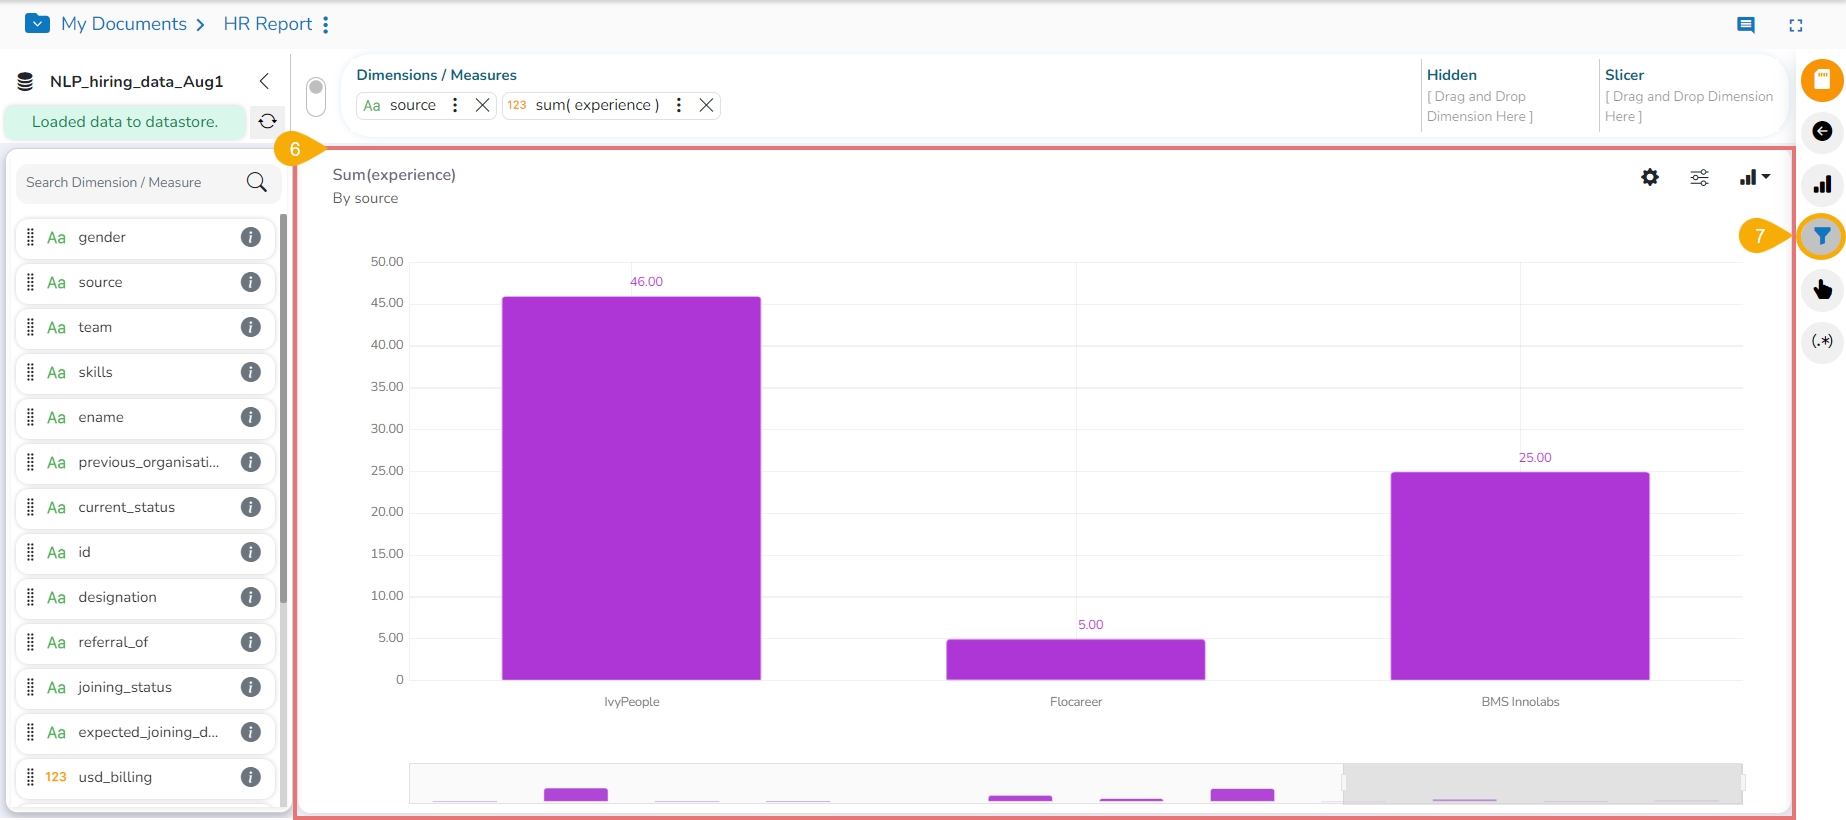
Navigate to the Design workspace.
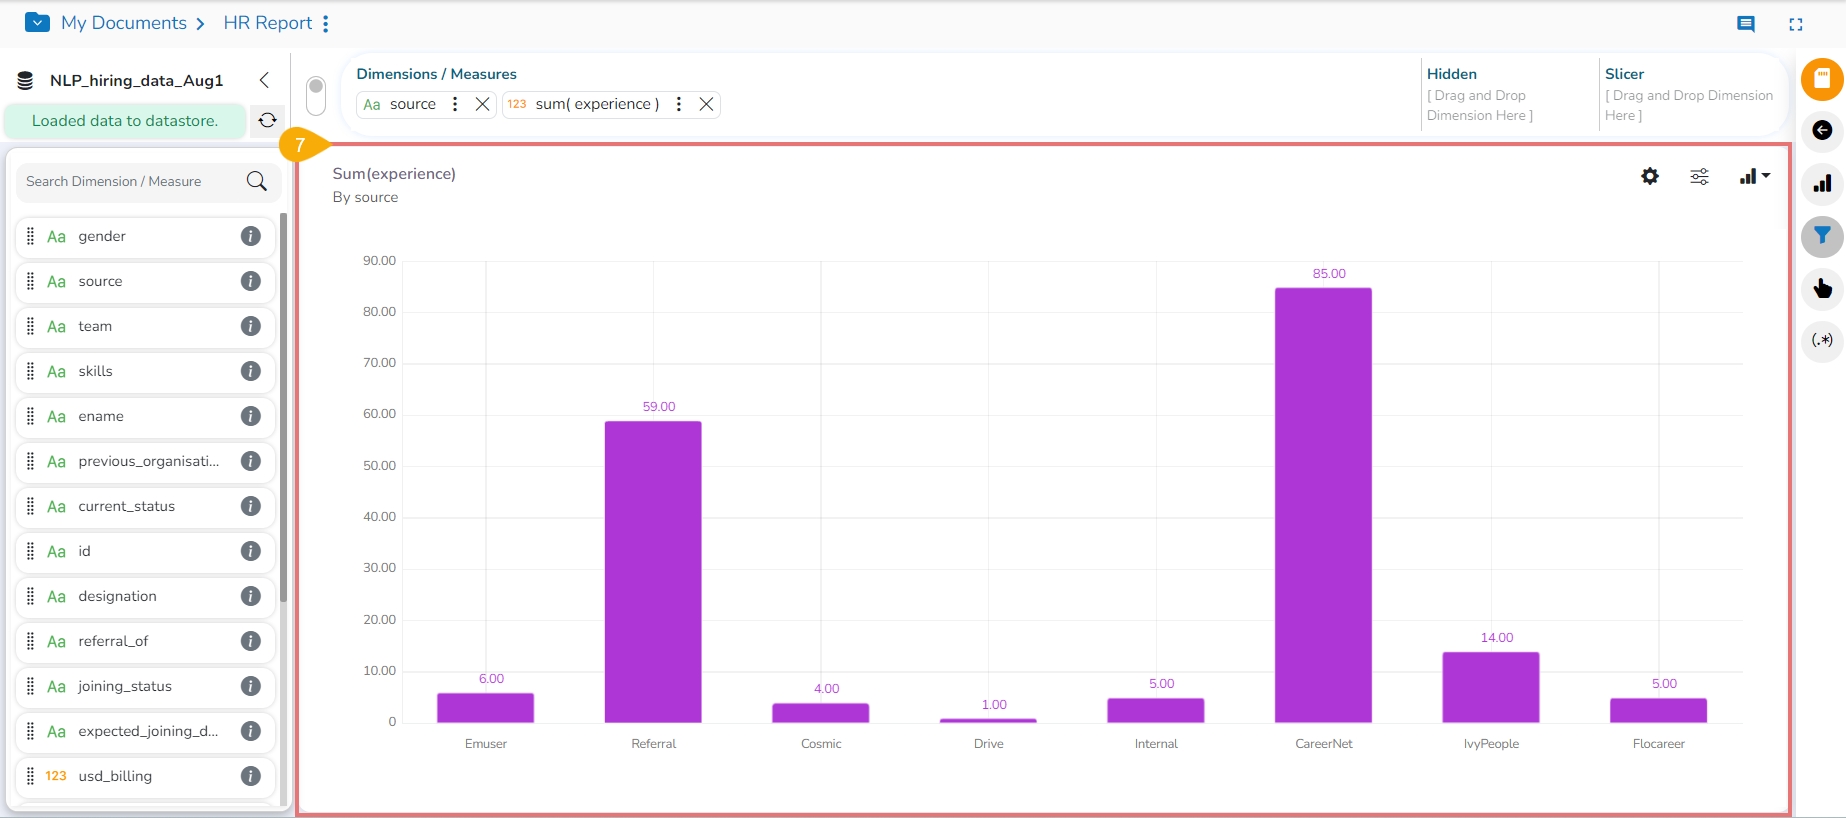
Create a View with the combination of Dimension and Measure.
Click the Filter icon from the Design workspace of a View.
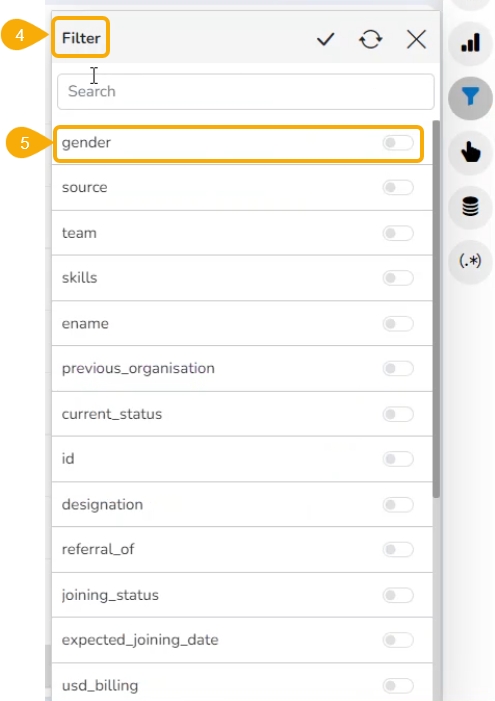
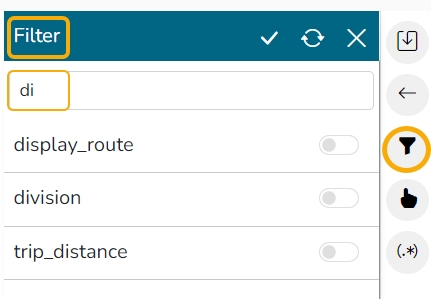
A Filter panel opens with the list of available filter values.
Select a dimension to display a list containing all the sub-dimensions.
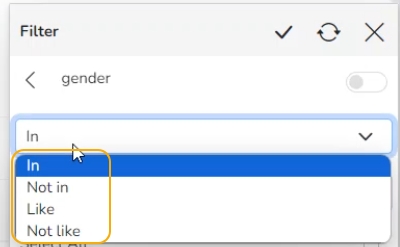
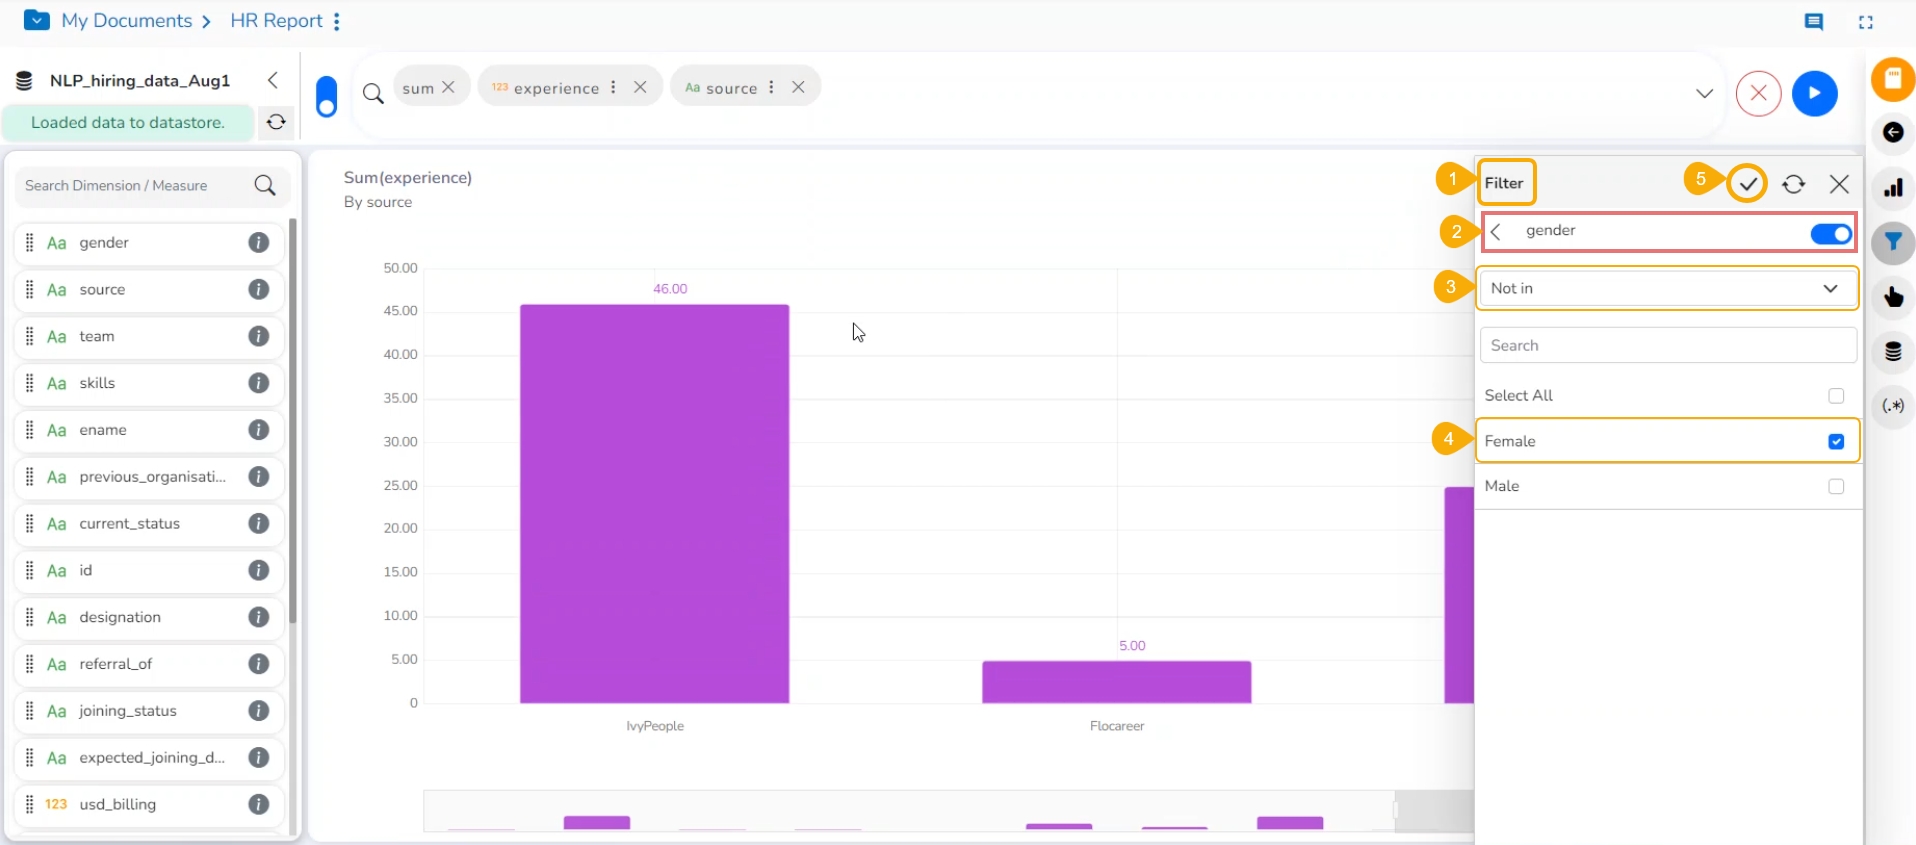
Four(4) types of Filter conditions are available to be applied to a selected dimension: In, Not in, Like, and Not like.
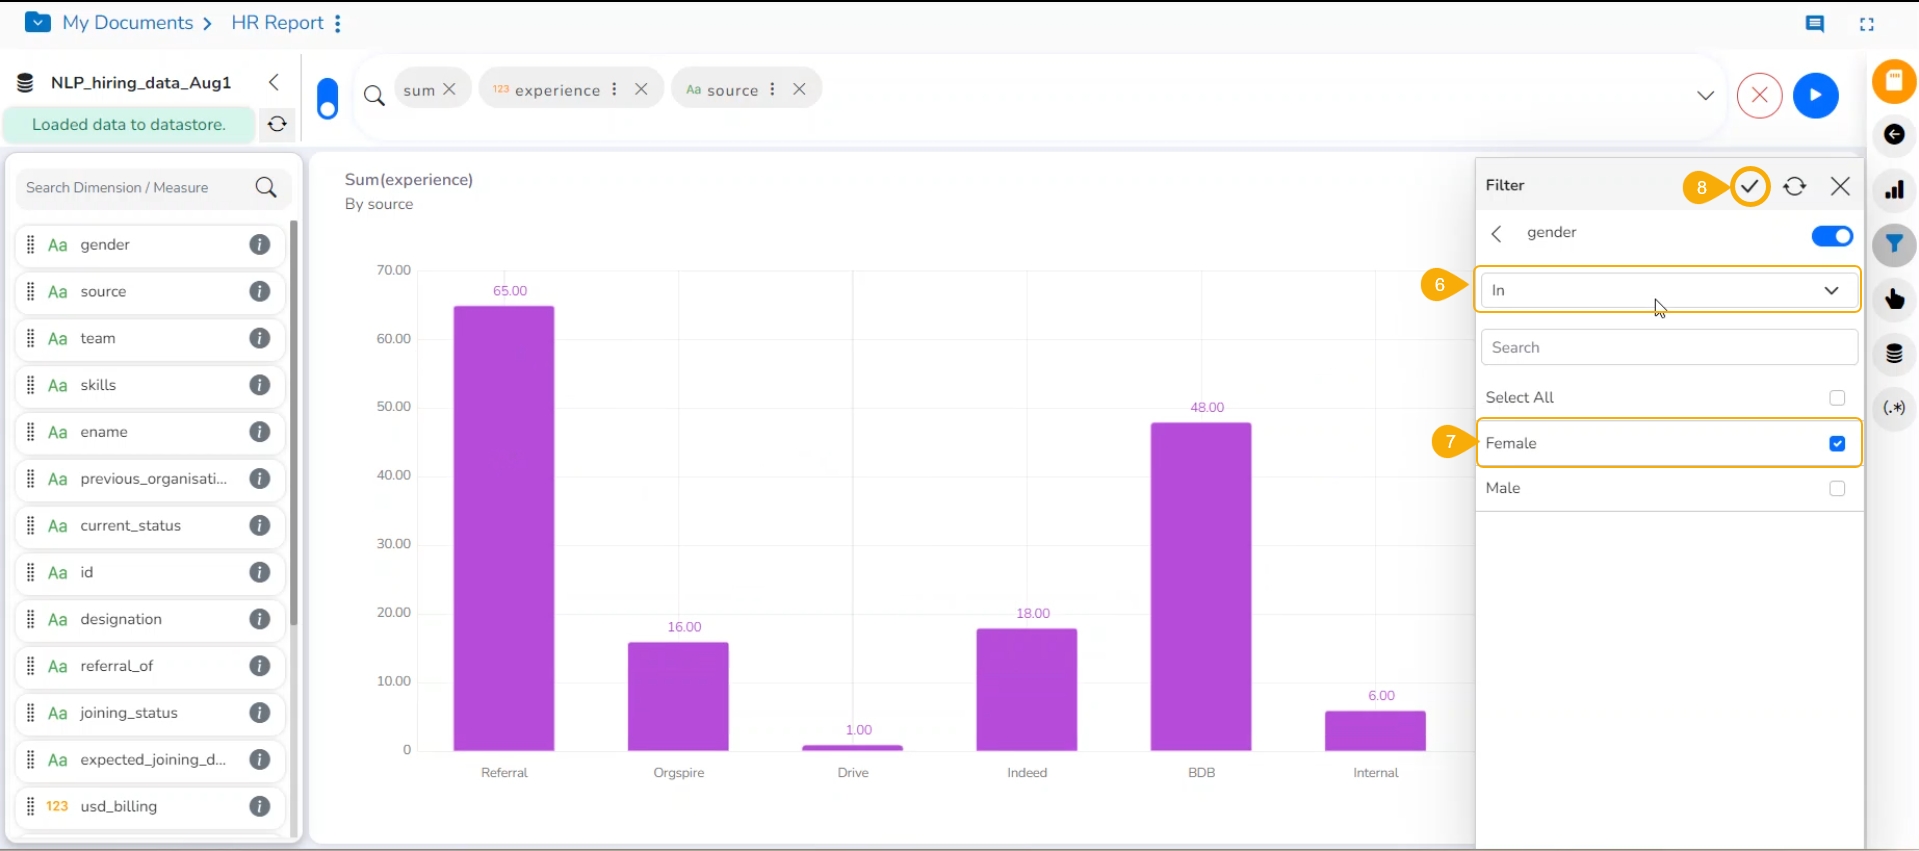
Select the In option as the filter condition from the drop-down menu.
Select sub-dimension(s) by putting checkmarks in the box (the user can select multiple values as sub-dimension).
Click the Apply icon.
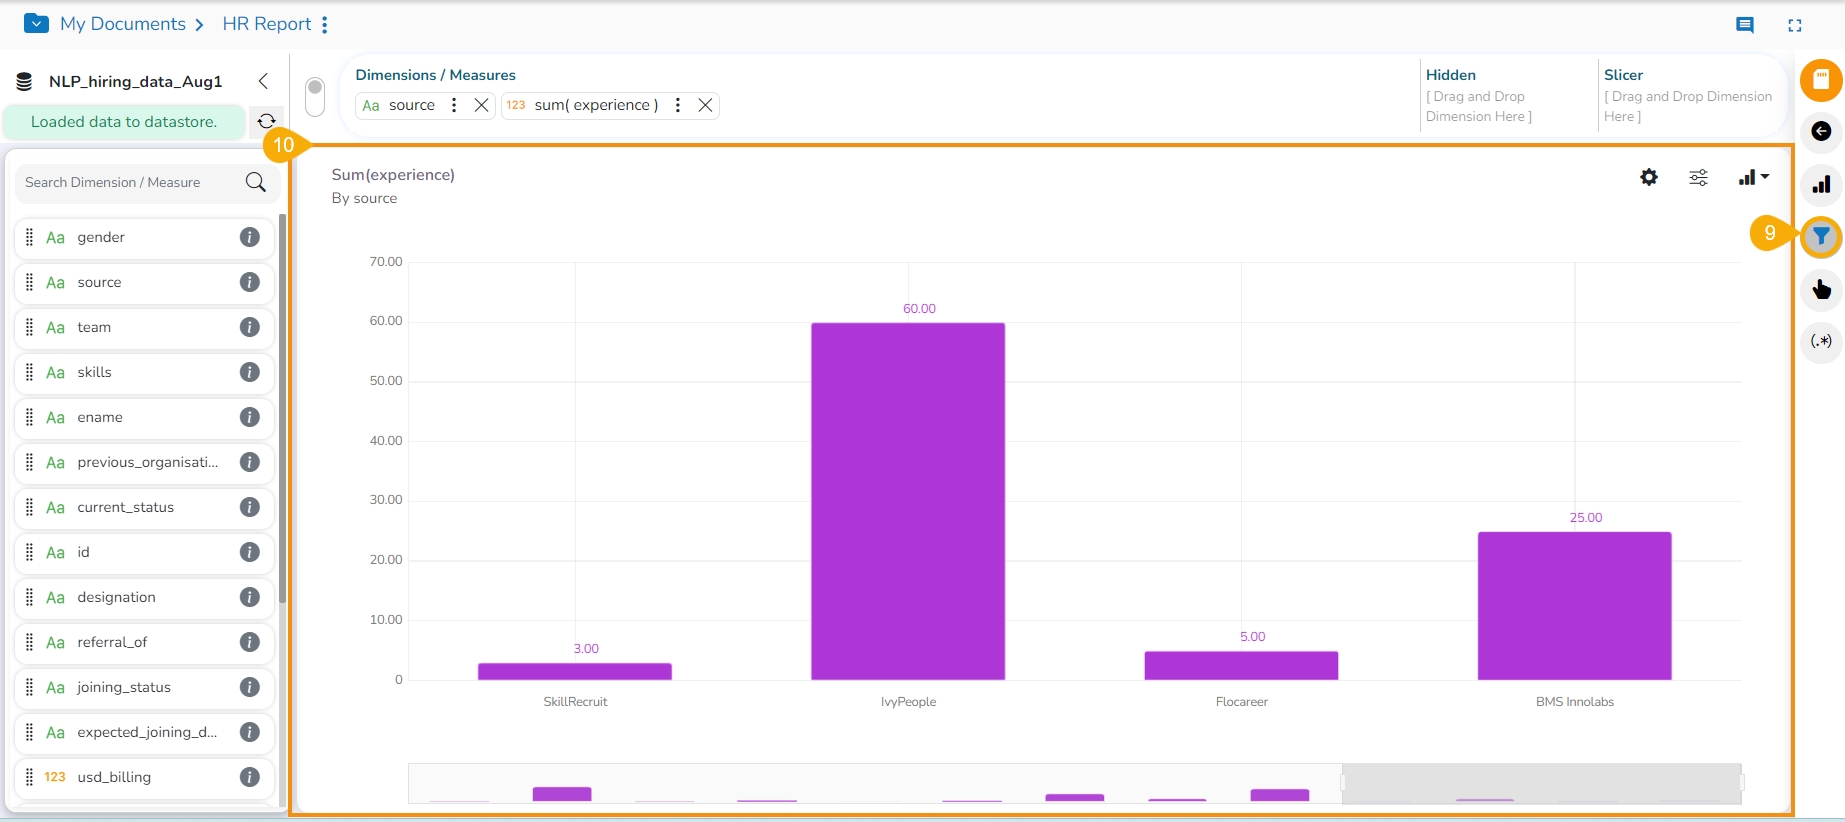
The View Filter icon gets highlighted.
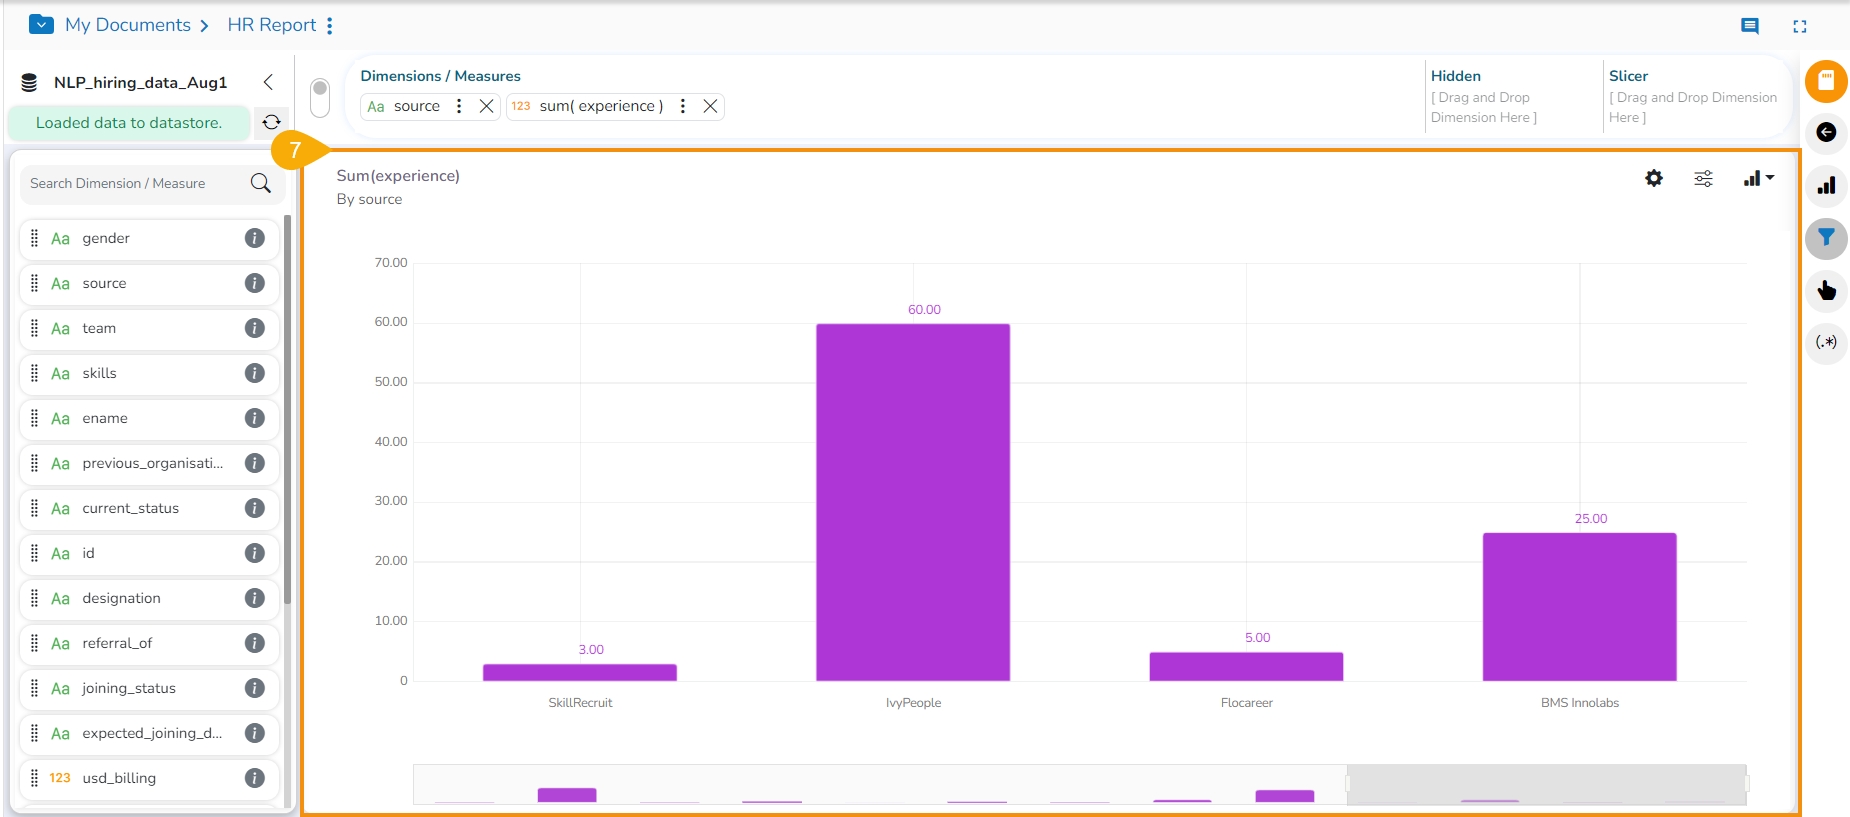
The concerned View gets filtered by the applied filter condition(s).
If the selected filter condition is Not In for the View Filter.
Then, the View gets filtered by the not-selected filter values (In the below-given image, the View gets filtered by the not-selected value of the dimension).
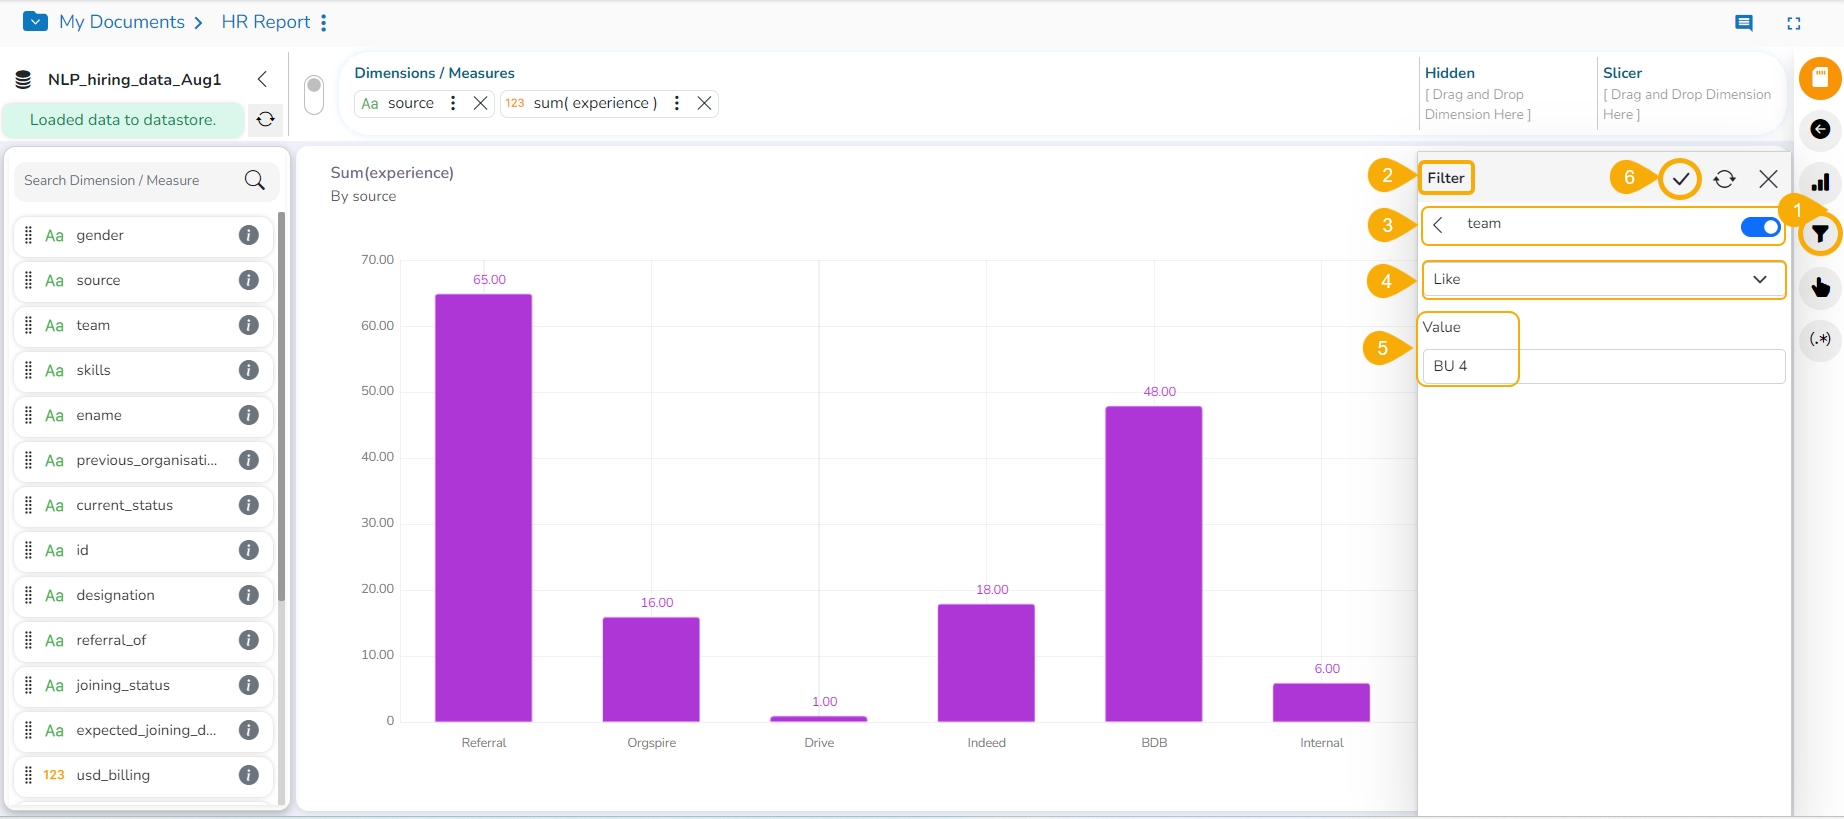
If the selected filter condition is Like for the View Filter, the View gets filtered by the given sub-dimension value.
The View gets filtered by Team BU 4 data.
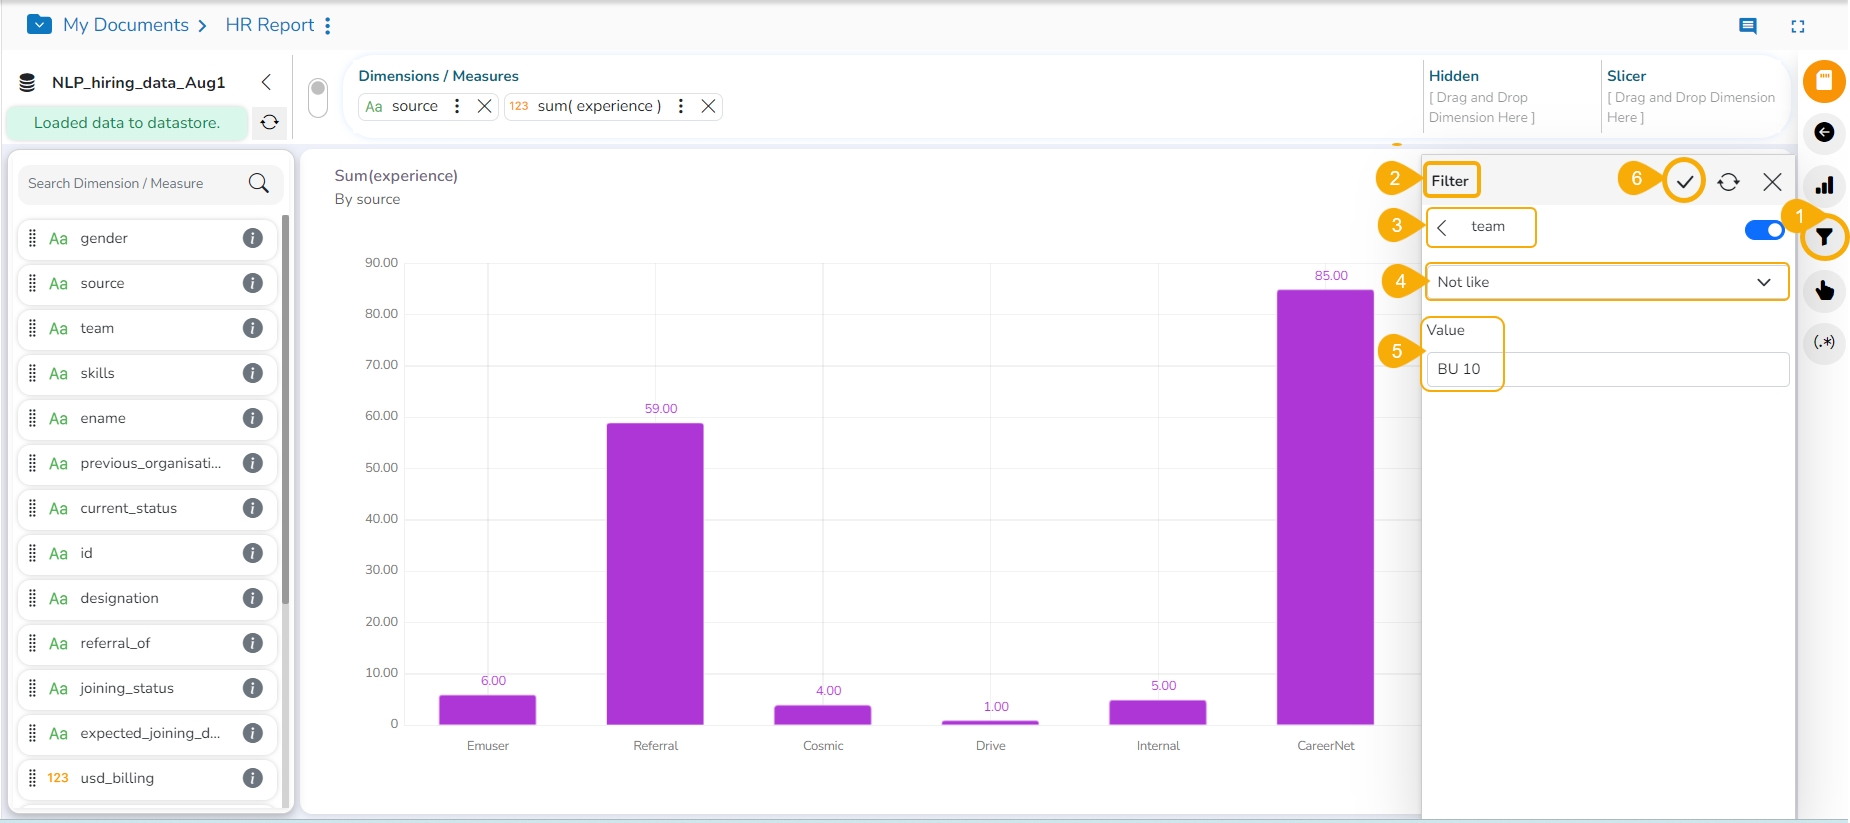
If the selected filter condition is Not like for the View Filter, the view gets filtered by not selecting the given sub-dimension value.
In the image, the View shows the data other than BU 10.
Please Note:
A Search bar has been provided in the View Filter panel to search a specific Dimension/ Measure/ Time value from the available list.
The user needs to click the Apply Filter button while enabling or eliminating the View-specific filter values to reflect the same in the displayed chart.
The Analyse option allows users to insert, modify, or remove a view-specific filter.
The View Filter becomes ineffective when the selected View is inserted into a report, and the Global Filter is applied to it.

