This section explains formula field creation at both record and summary levels.
Please Note: The 'if-else' function does not support other functions in the Formula Expression.
This section provides steps to create a range using the calculated field option.
Check out the walk-through on creating a Range using the Create Formula window.
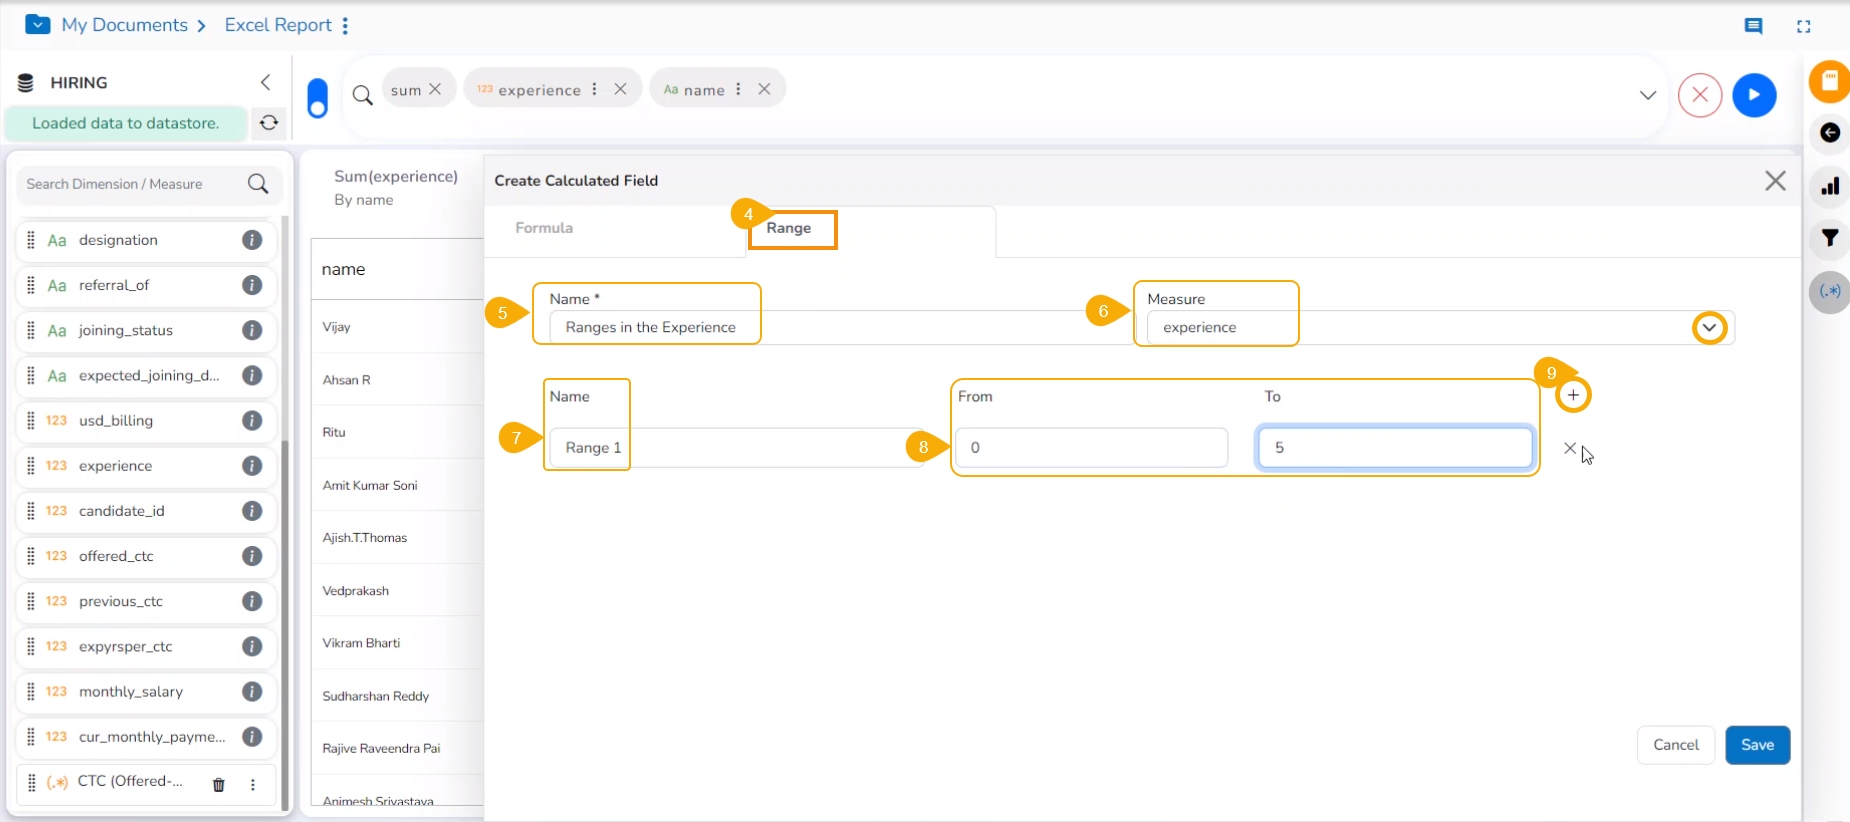
The user can create a new calculated field in the selected data store using the Range tab.
Navigate to the Design Workspace.
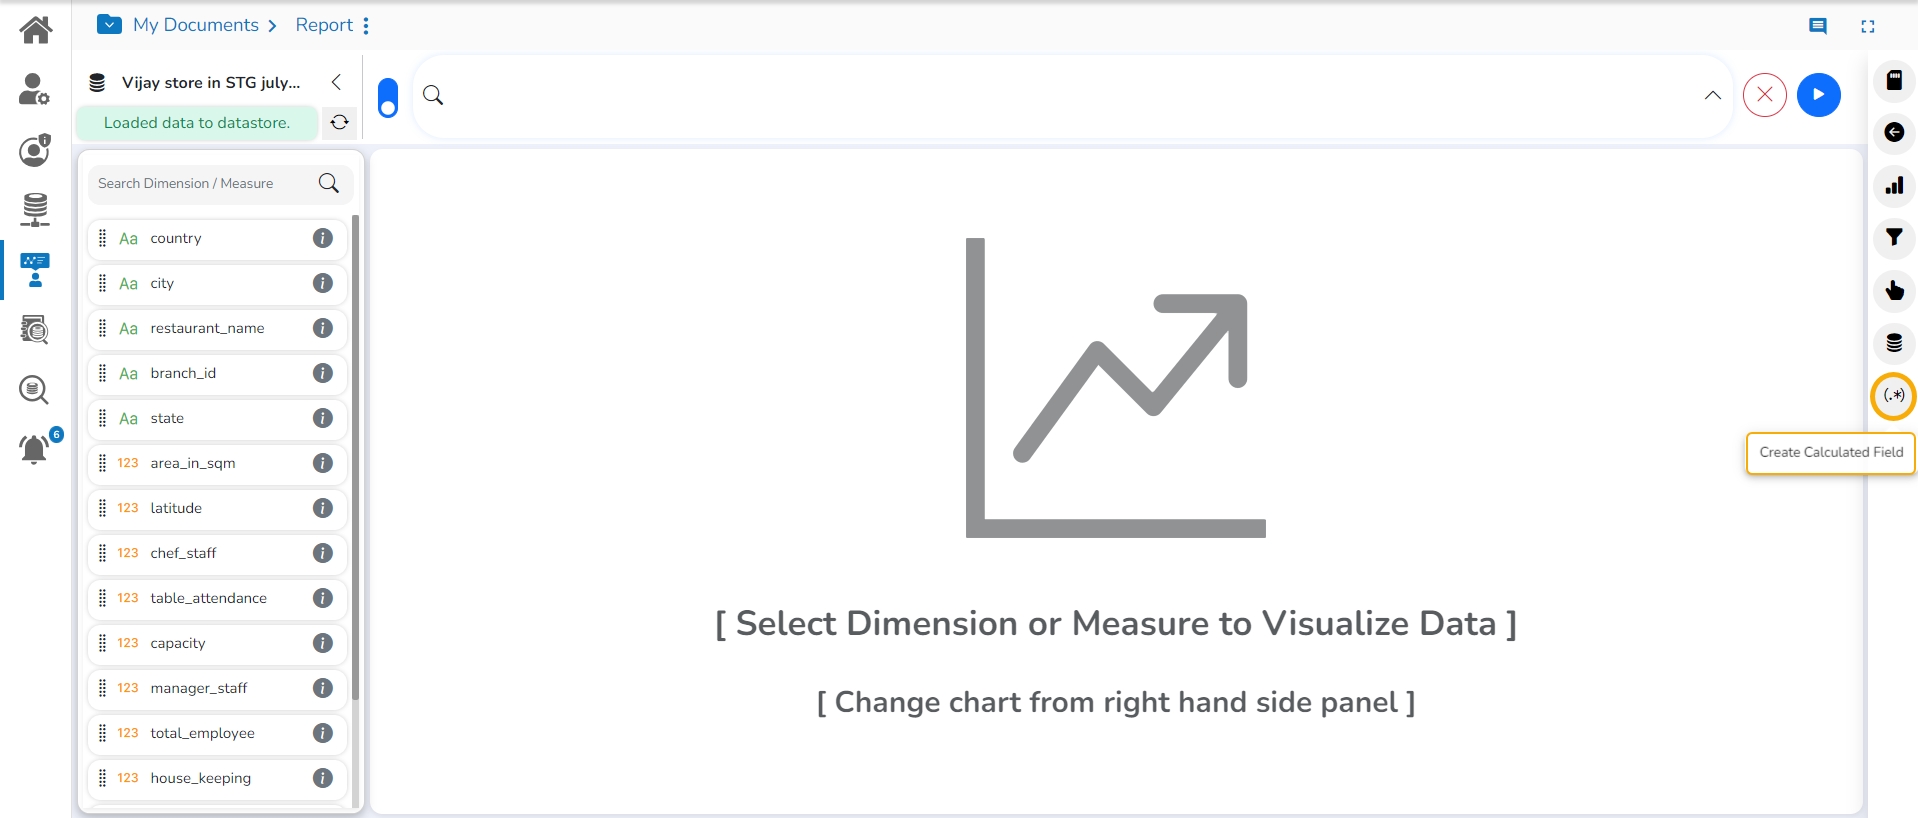
Click the Formula Field Editor icon.
The Create Calculated Field window opens.
Select the Range tab.
Name: Provide a title for the formula field.
Measure: Select a Measure field using the drop-down menu.
Click the ADD ROW option.
Provide the following information to create a range:
Name: Provide a name for the defined range.
From: Set a minimum value to define a specific range.
To: Set a maximum value to define a range.
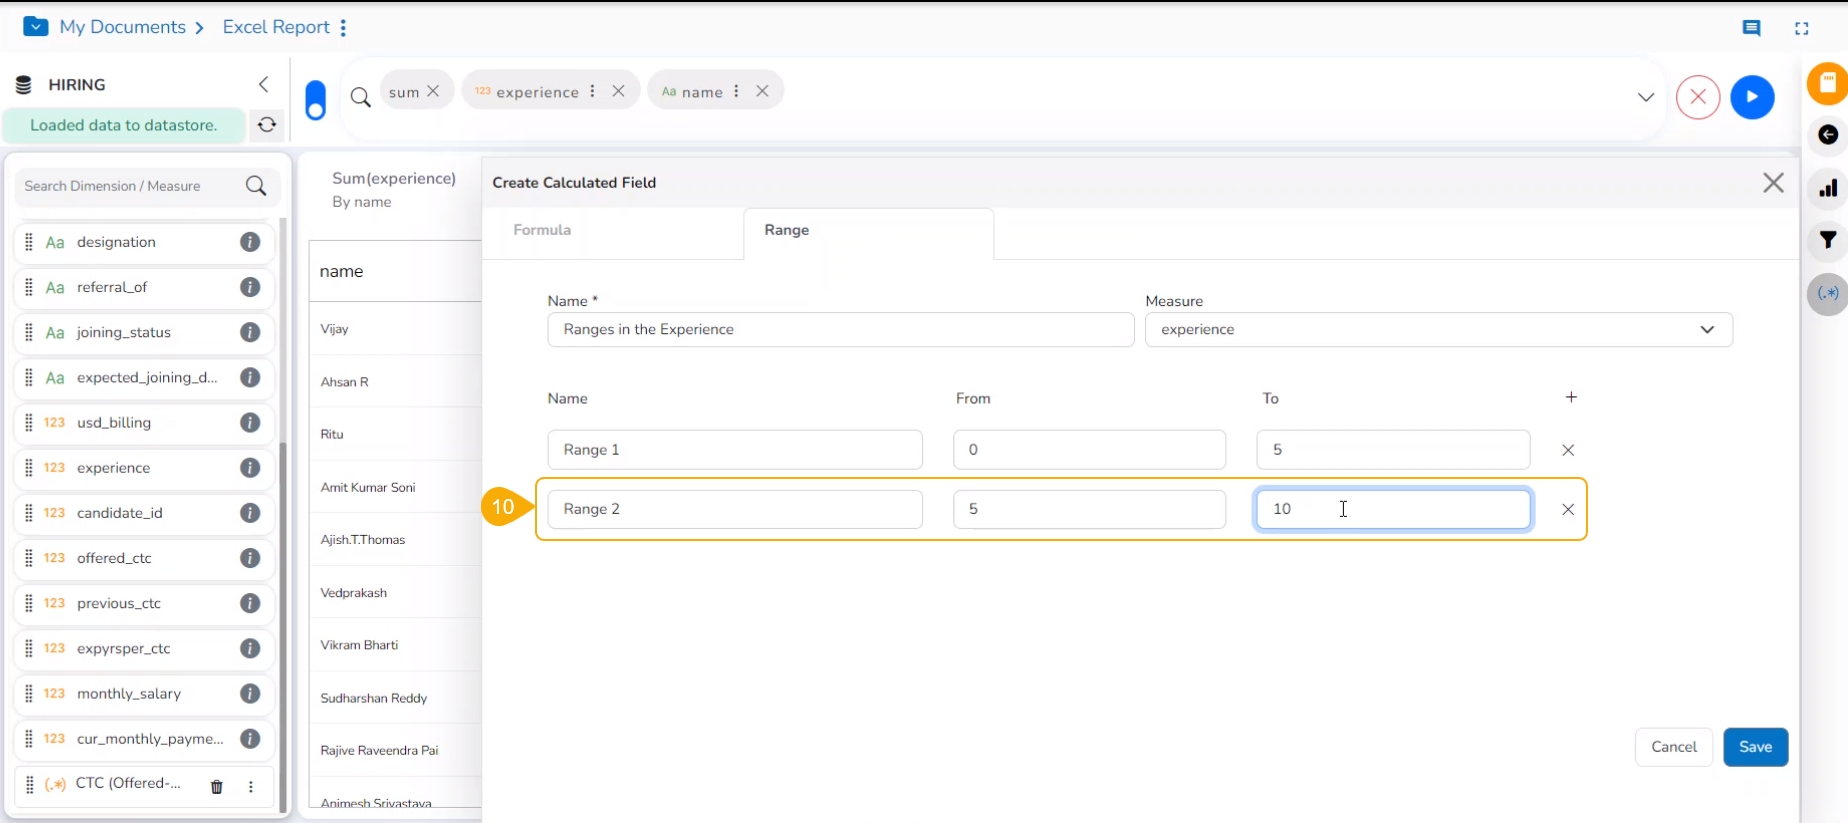
Click the Add icon.
A new field gets added to create a new Range.
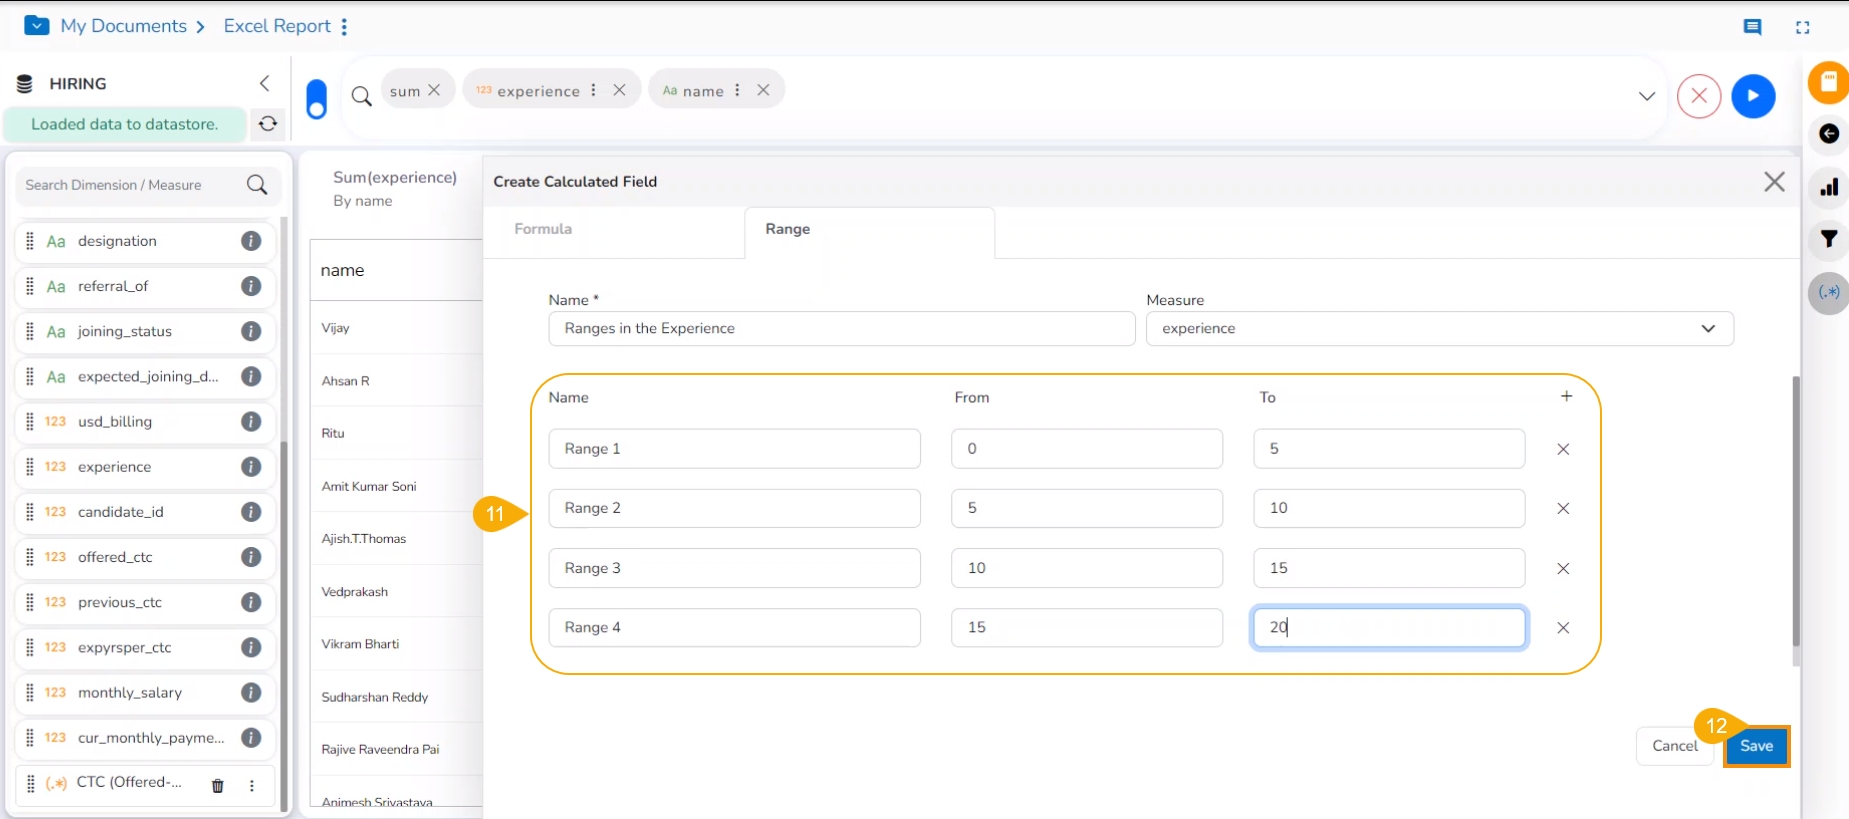
You may insert multiple ranges and define them.
Click the Save option.
A new calculated field gets added to the selected Data Store.
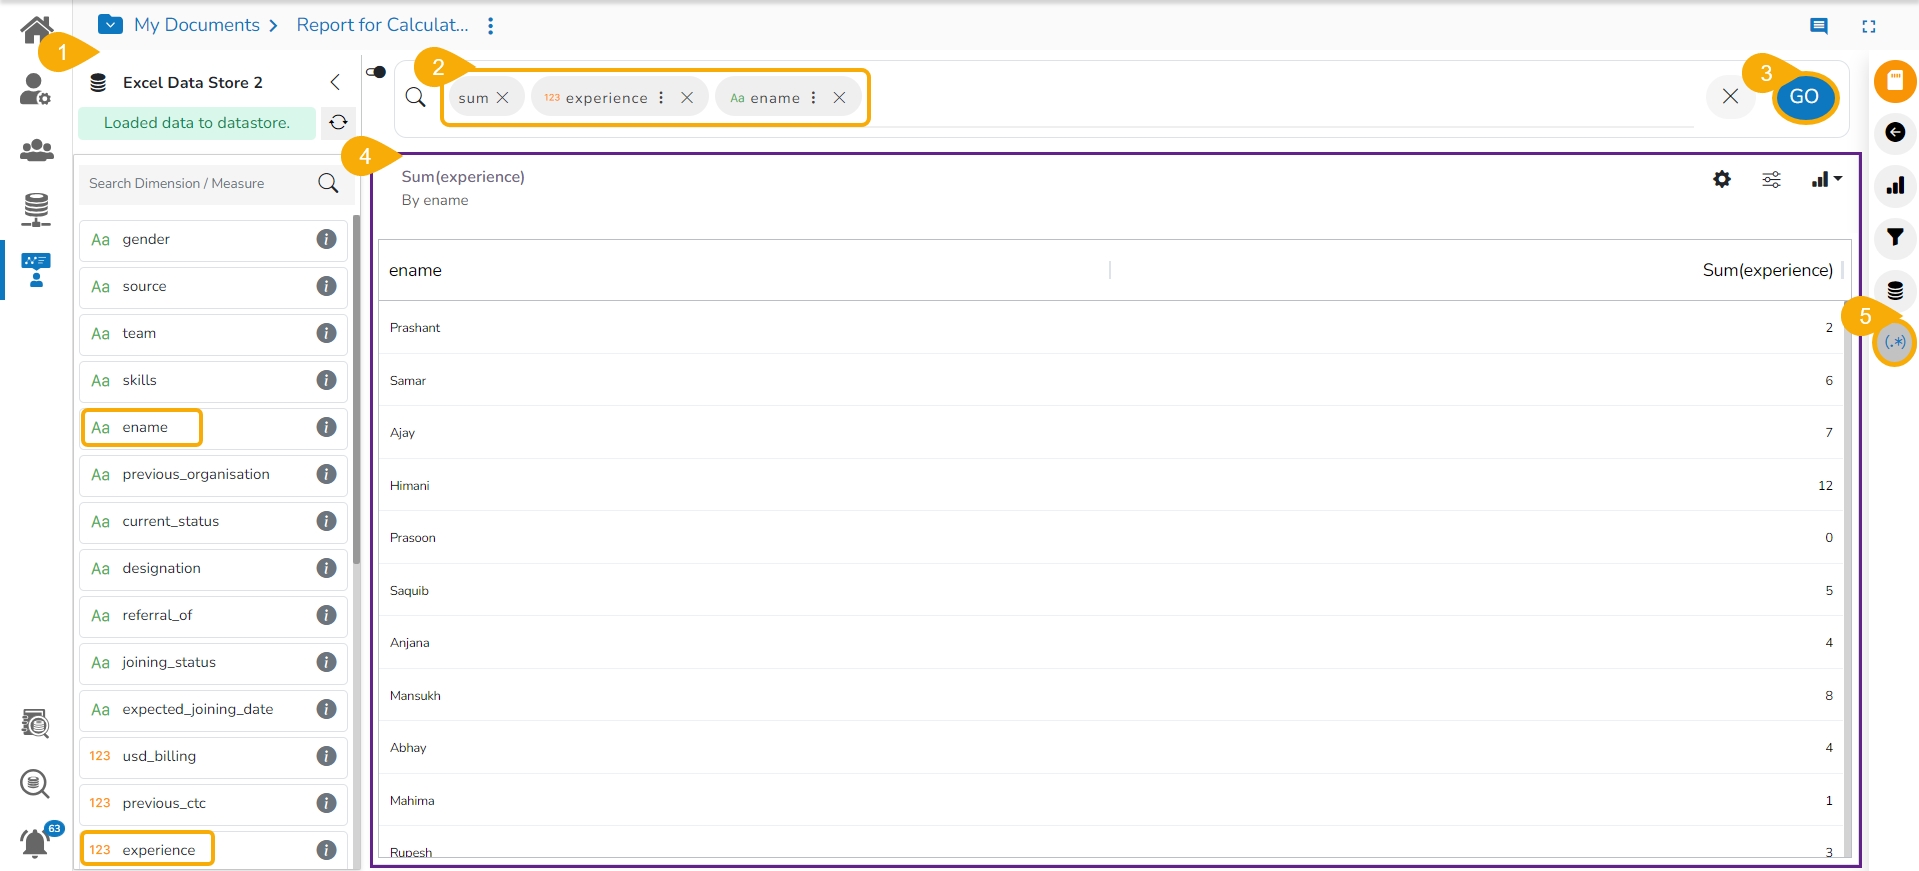
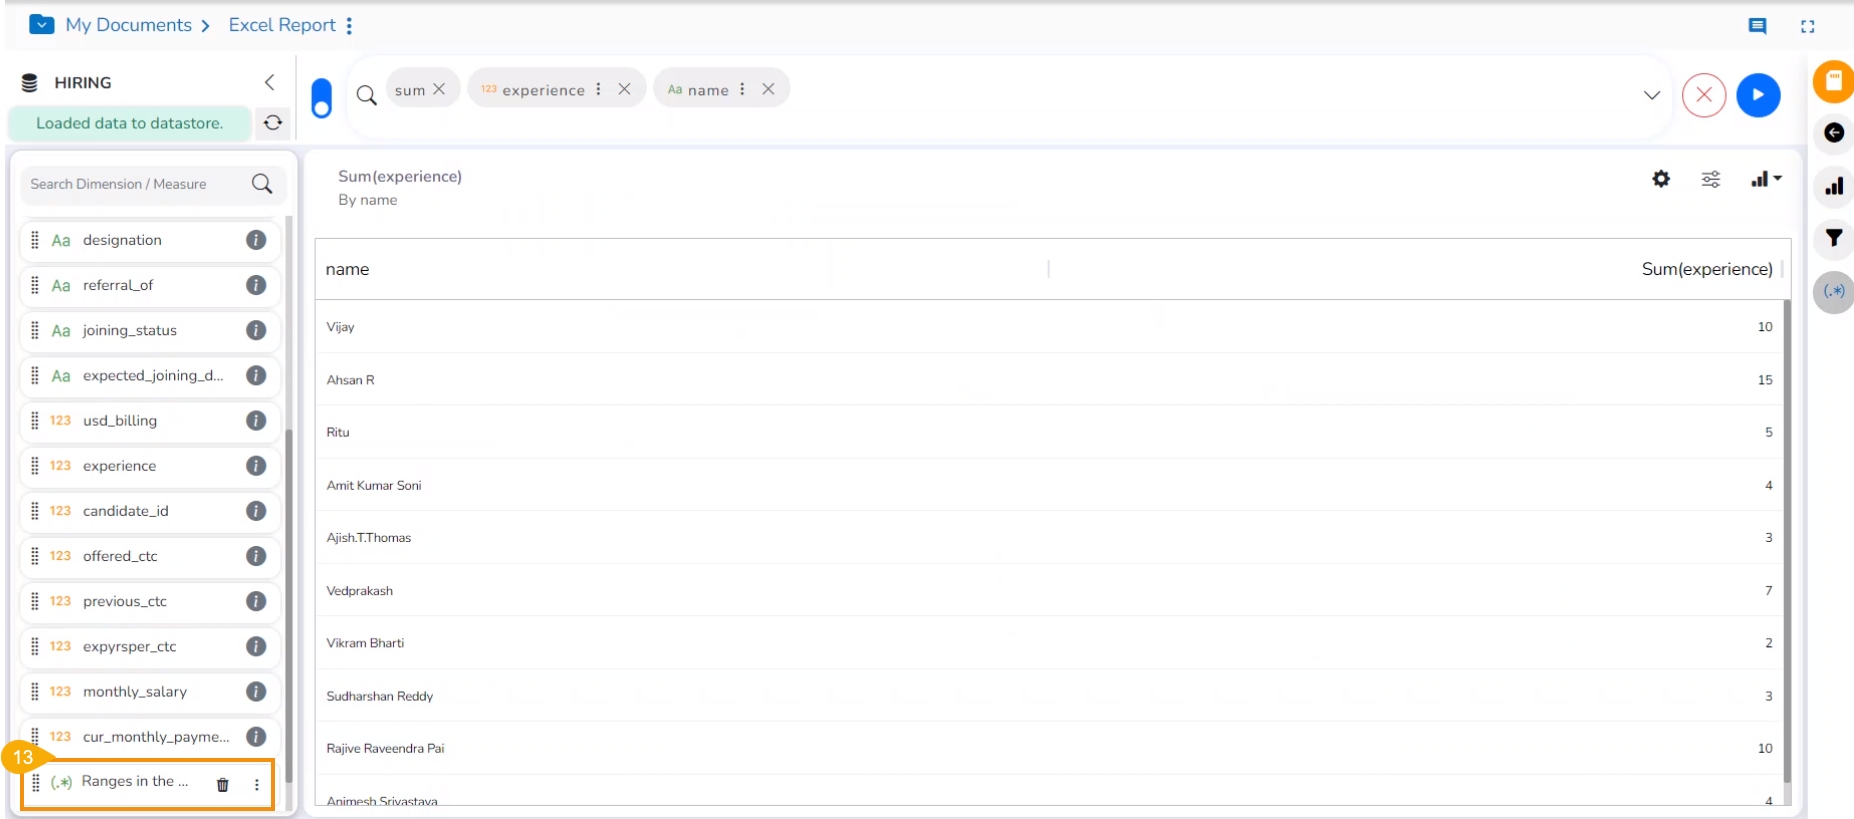
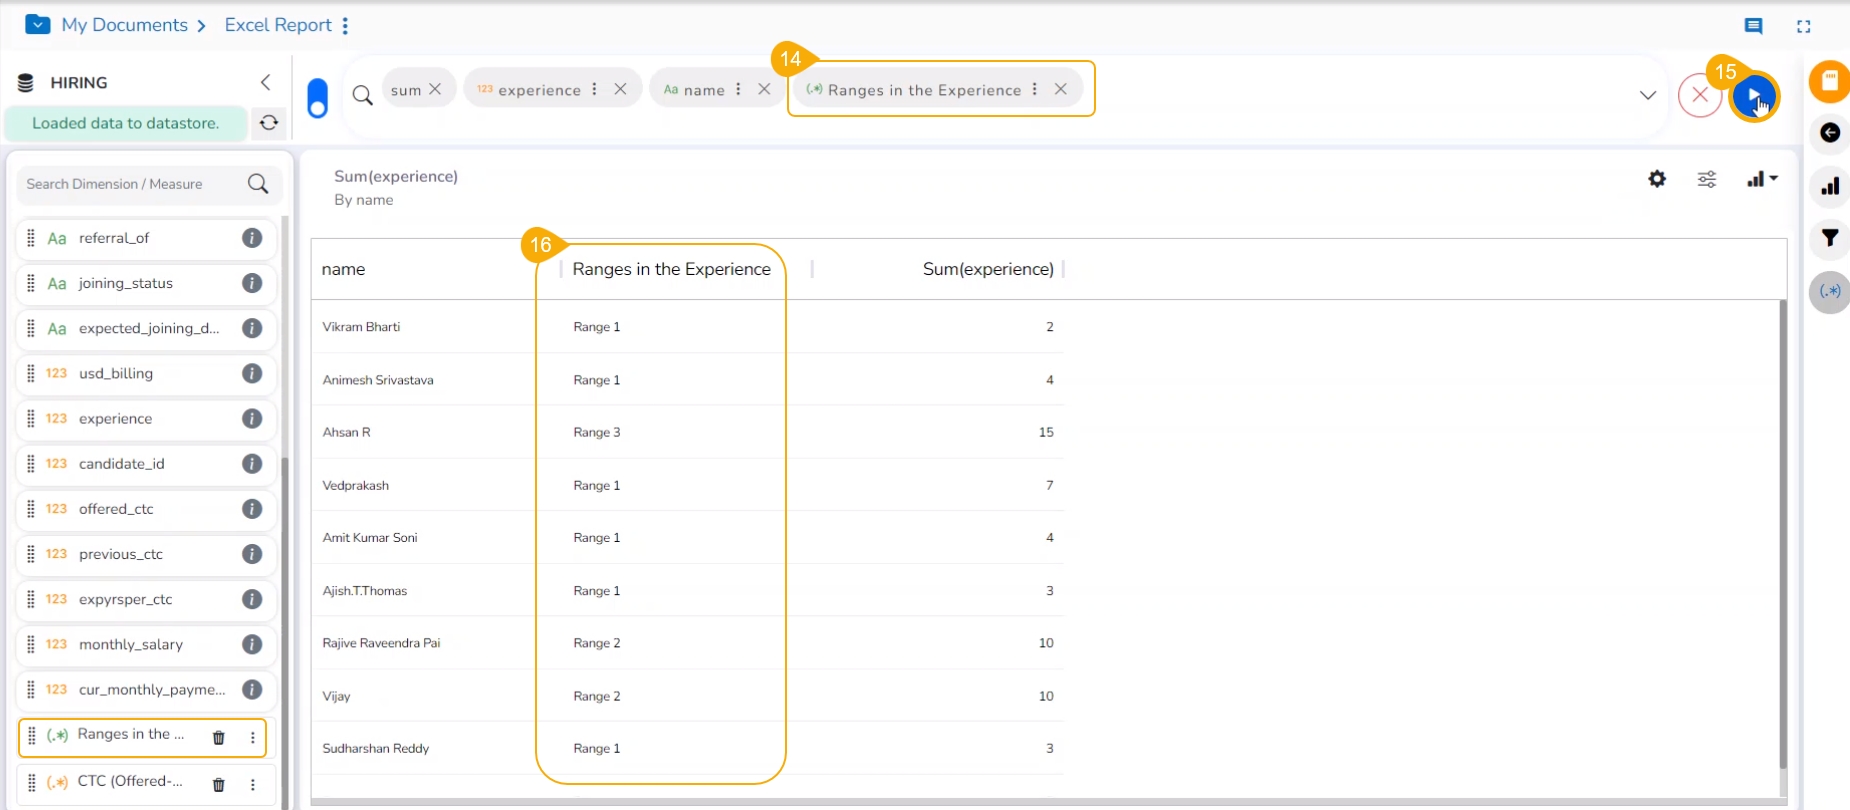
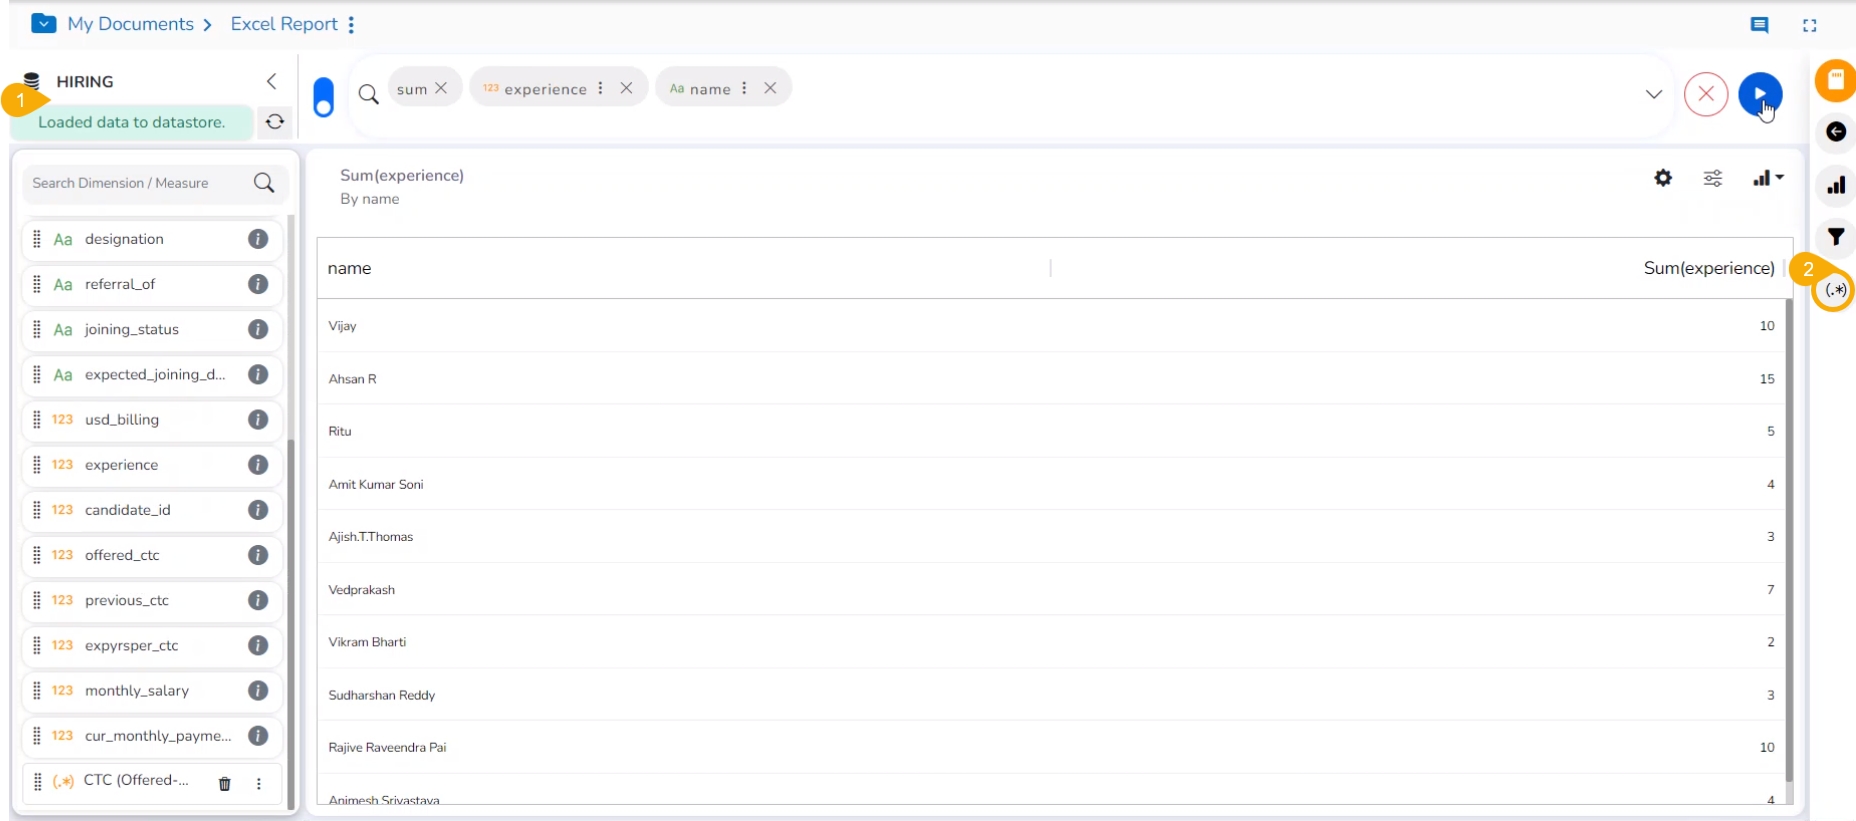
Select the newly created calculated field and add it to the top menu bar.
Click the GO option.
The calculated field will display the range based on the experience value.
Please Note:
The Range option will not be listed for the space where the MongoDB server is configured in the Admin Settings. The Range functionality is available only if the Elastic Search configuration is done from the Admin Settings.
The Calculated Field with various ranges gets added a Dimension by default.
This section describes Summary Level Formula field.
Check out the illustration on creating a Formula Field at the Summary level.
The user can also create a formula field choosing the Summary Level as a level option from the Formula field editor window.
Navigate to the Design page of the report.
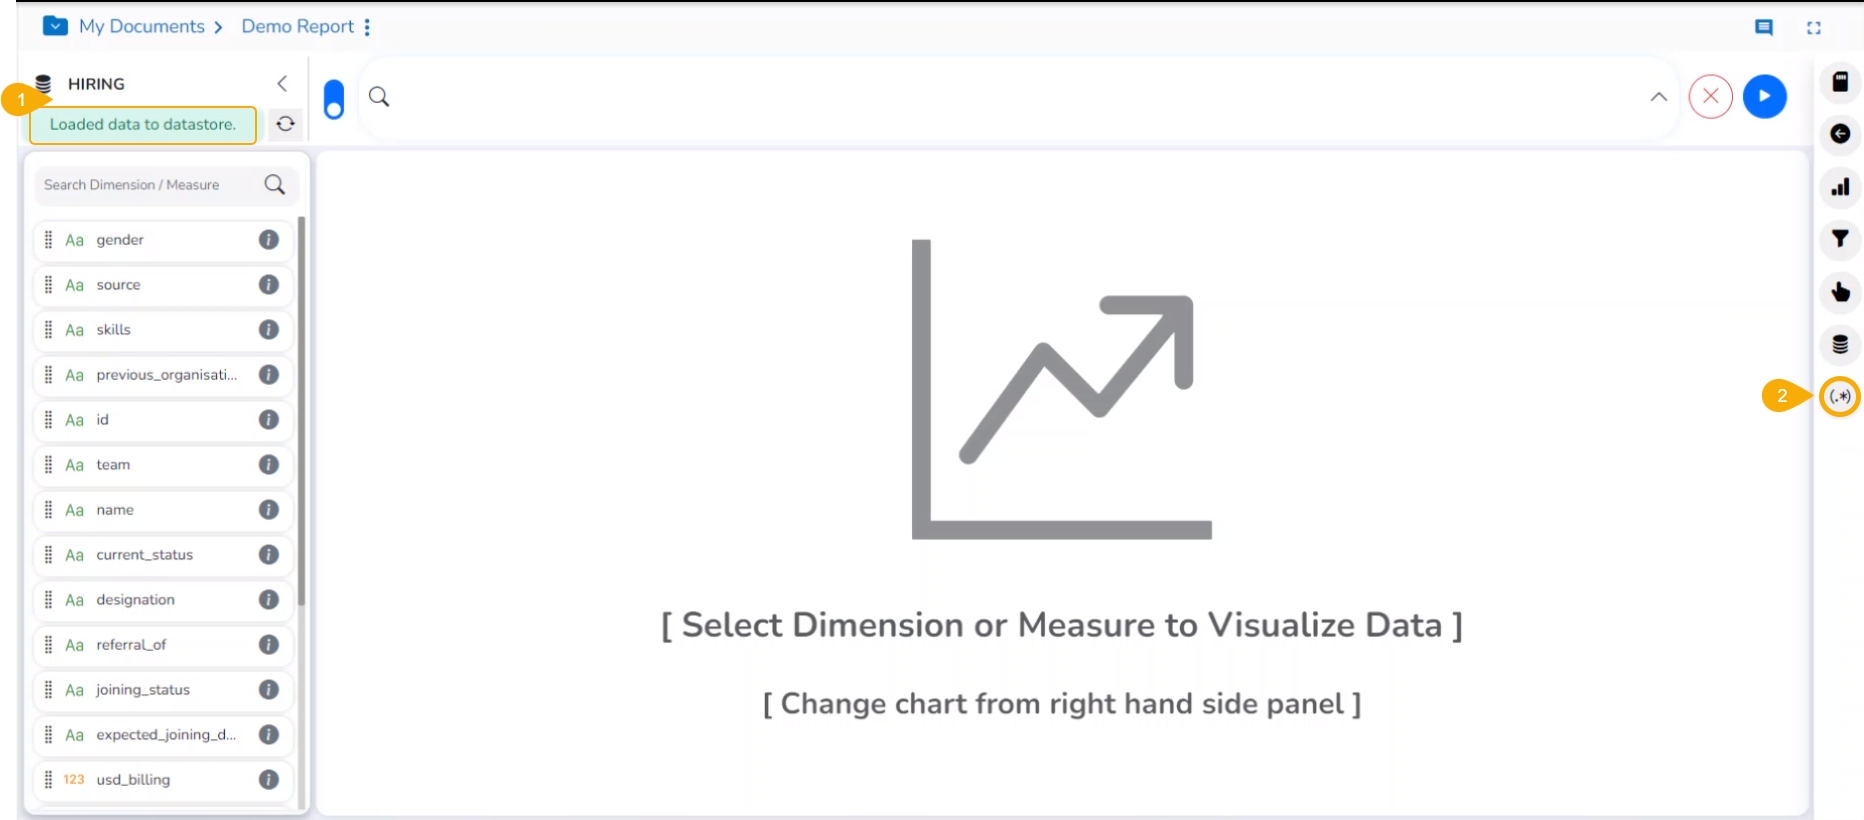
Click the Create Calculated Field icon.
The Create Calculated Field window appears.
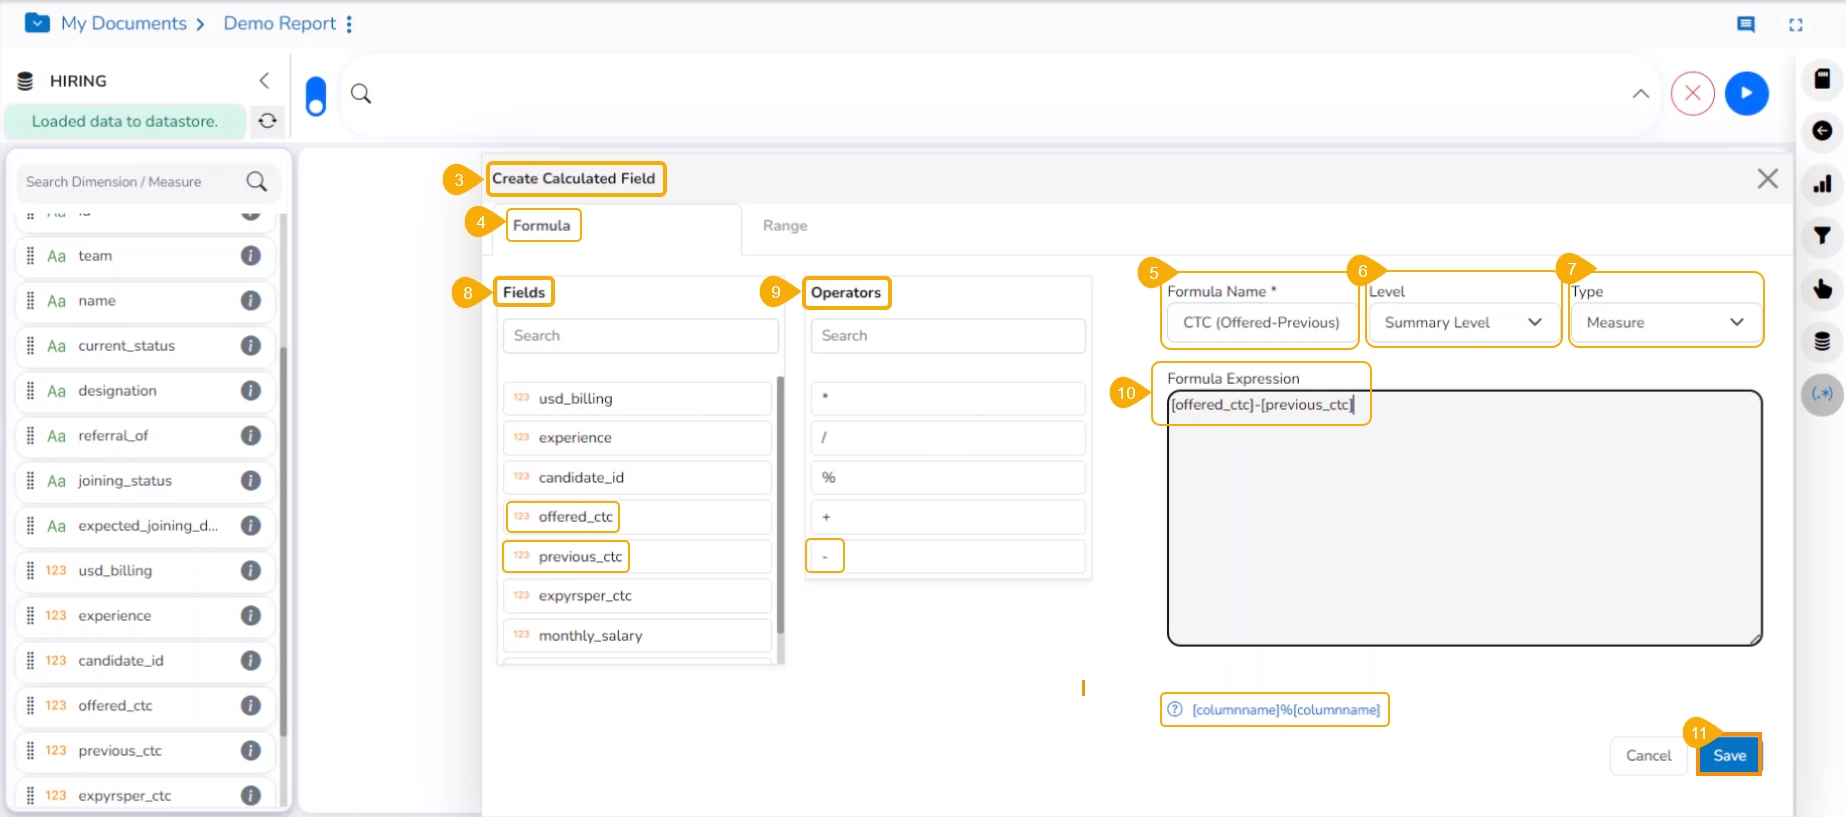
Navigate to the Formula tab (It is the default tab).
Give a name to the new field.
Choose Summary Level from the Level drop-down menu.
Select a Save as option (It allows only Measure as the Save As option).
Select fields using the Fields tab.
Select an Operator from the Operators column.
Enter a Formula Expression using the Fields and Operators.
Click the Save option.
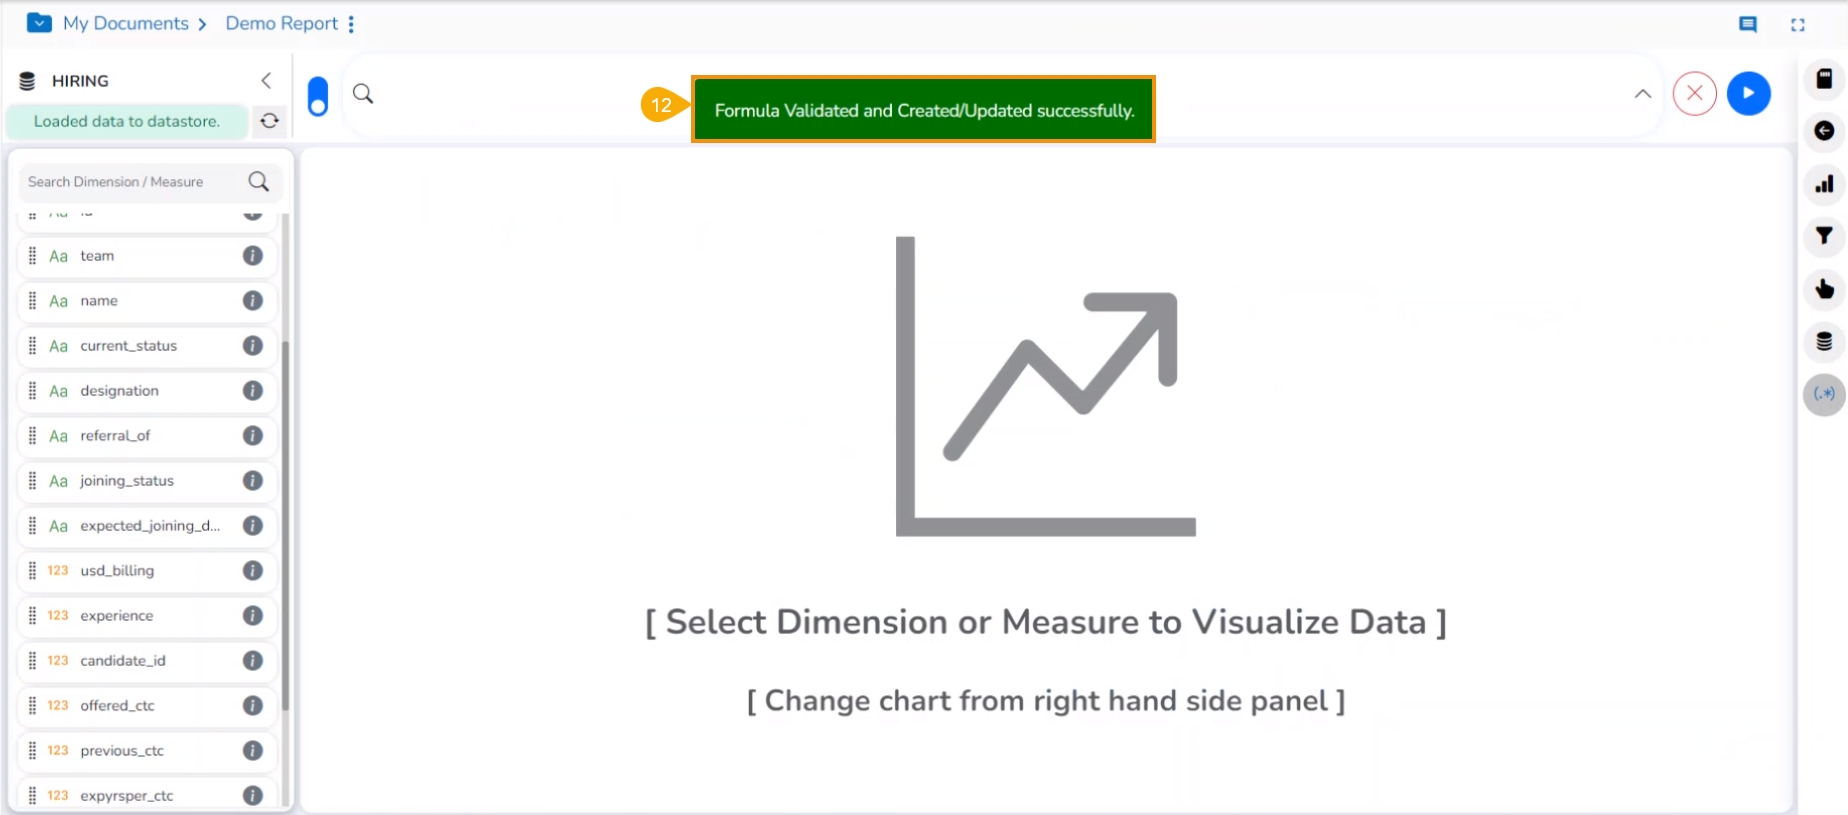
A notification message ensures that the Formula field is created.
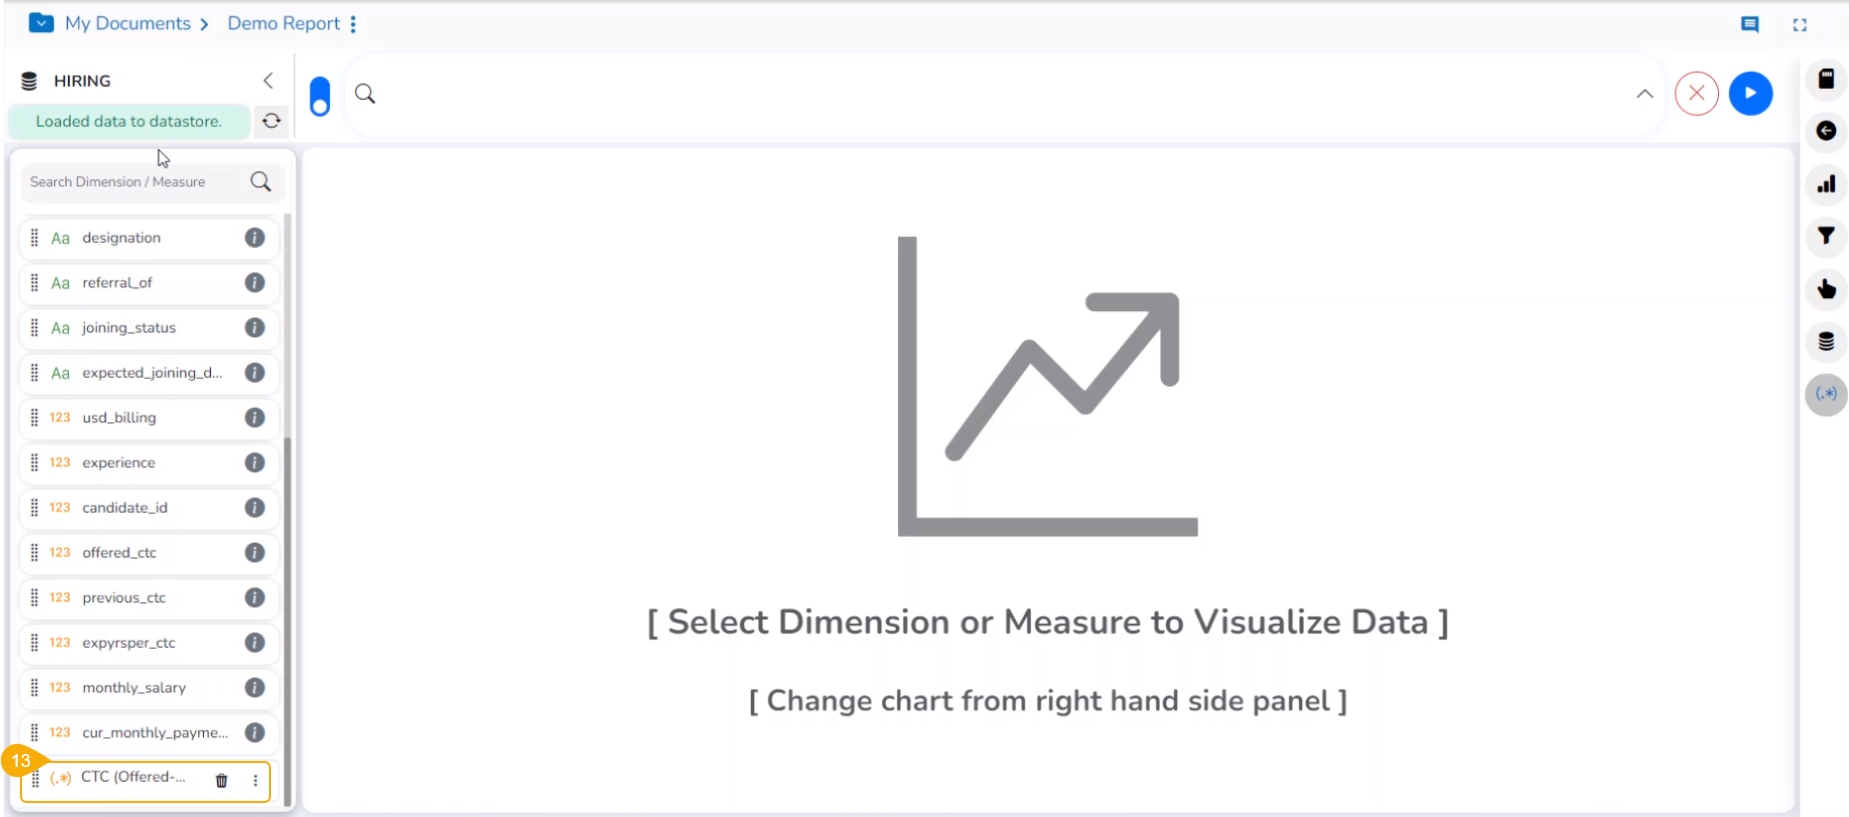
A new Formula Field gets created and added to the list of dimensions and measures.
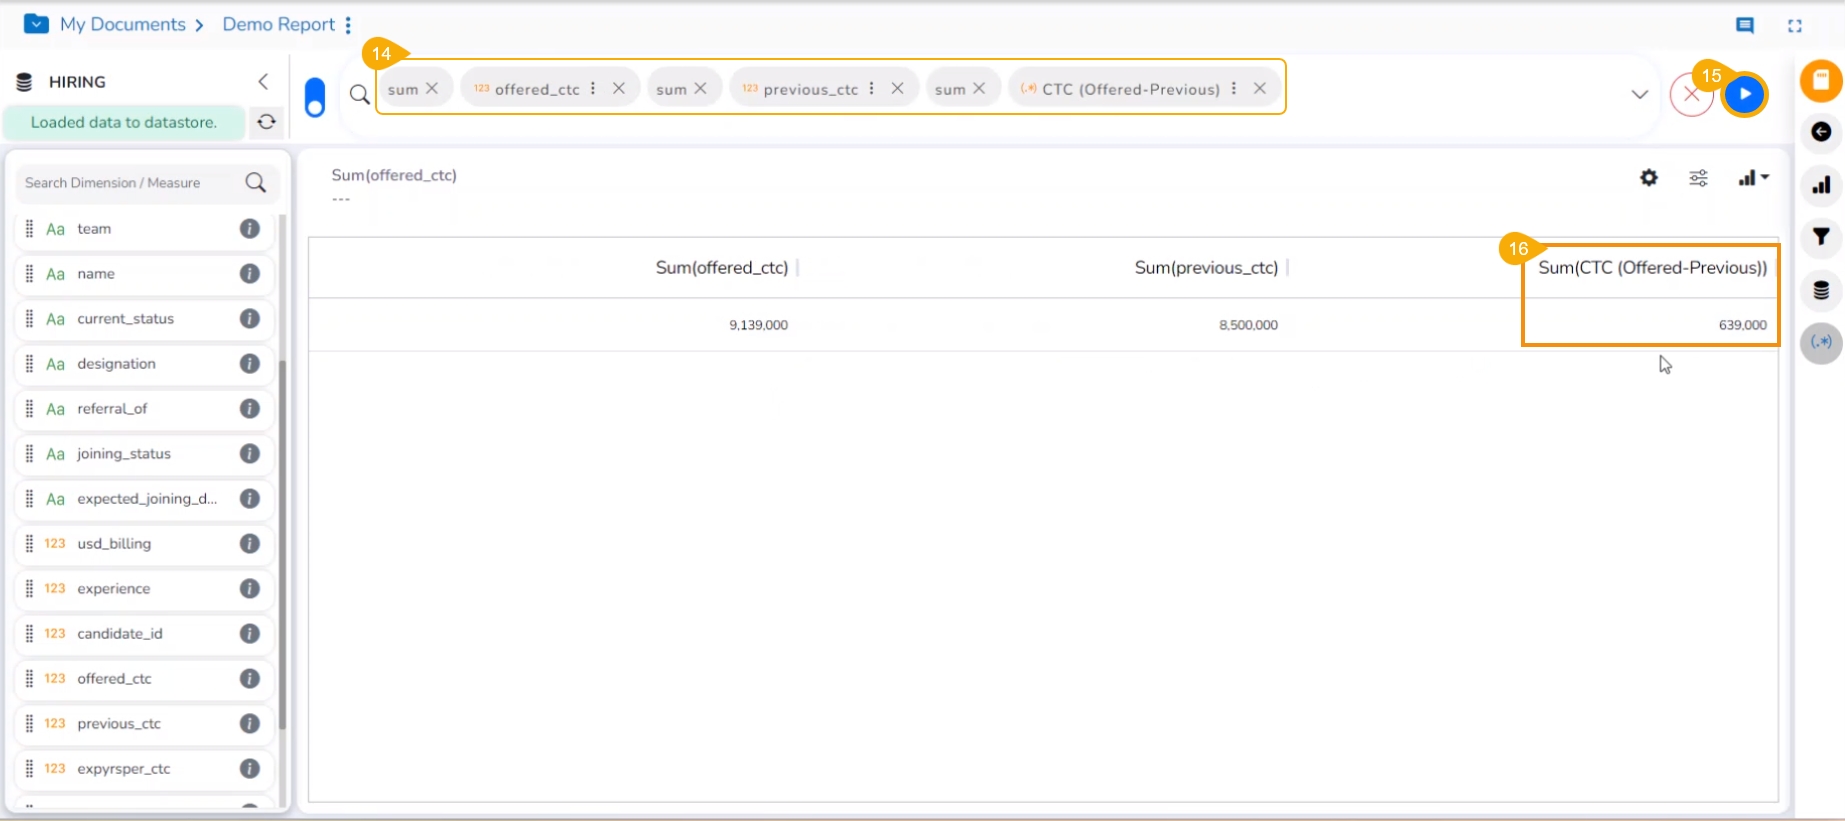
Add the newly created Formula Field to the top bar together with the earlier existing columns taken to create the new column.
Click the GO option.
The Formula Field data gets displayed in the current View for the users to validate the Formula.
Please Note:
The Summary level Formula Field only gets saved as a Measure. It can't be saved as a Dimension to the Data Store.
Summary Level will not be listed for the space where the MongoDB server is configured in the Admin Settings.
The user can create and add a calculated field in the selected Data Store by using this functionality. This function offers options to create either a Formula or add Range in the selected Data Store.
The users can access the Create Calculated Field icon from the right-hand side of the Design page.
This page describes Record Level Formula field as Dimension and Measure in a Report.
Please Note: The user can set the database settings using the Data Store Settings option provided under the Configuration part of the Administration module.
Check out the given walk-through on creating a formula field at the record level.
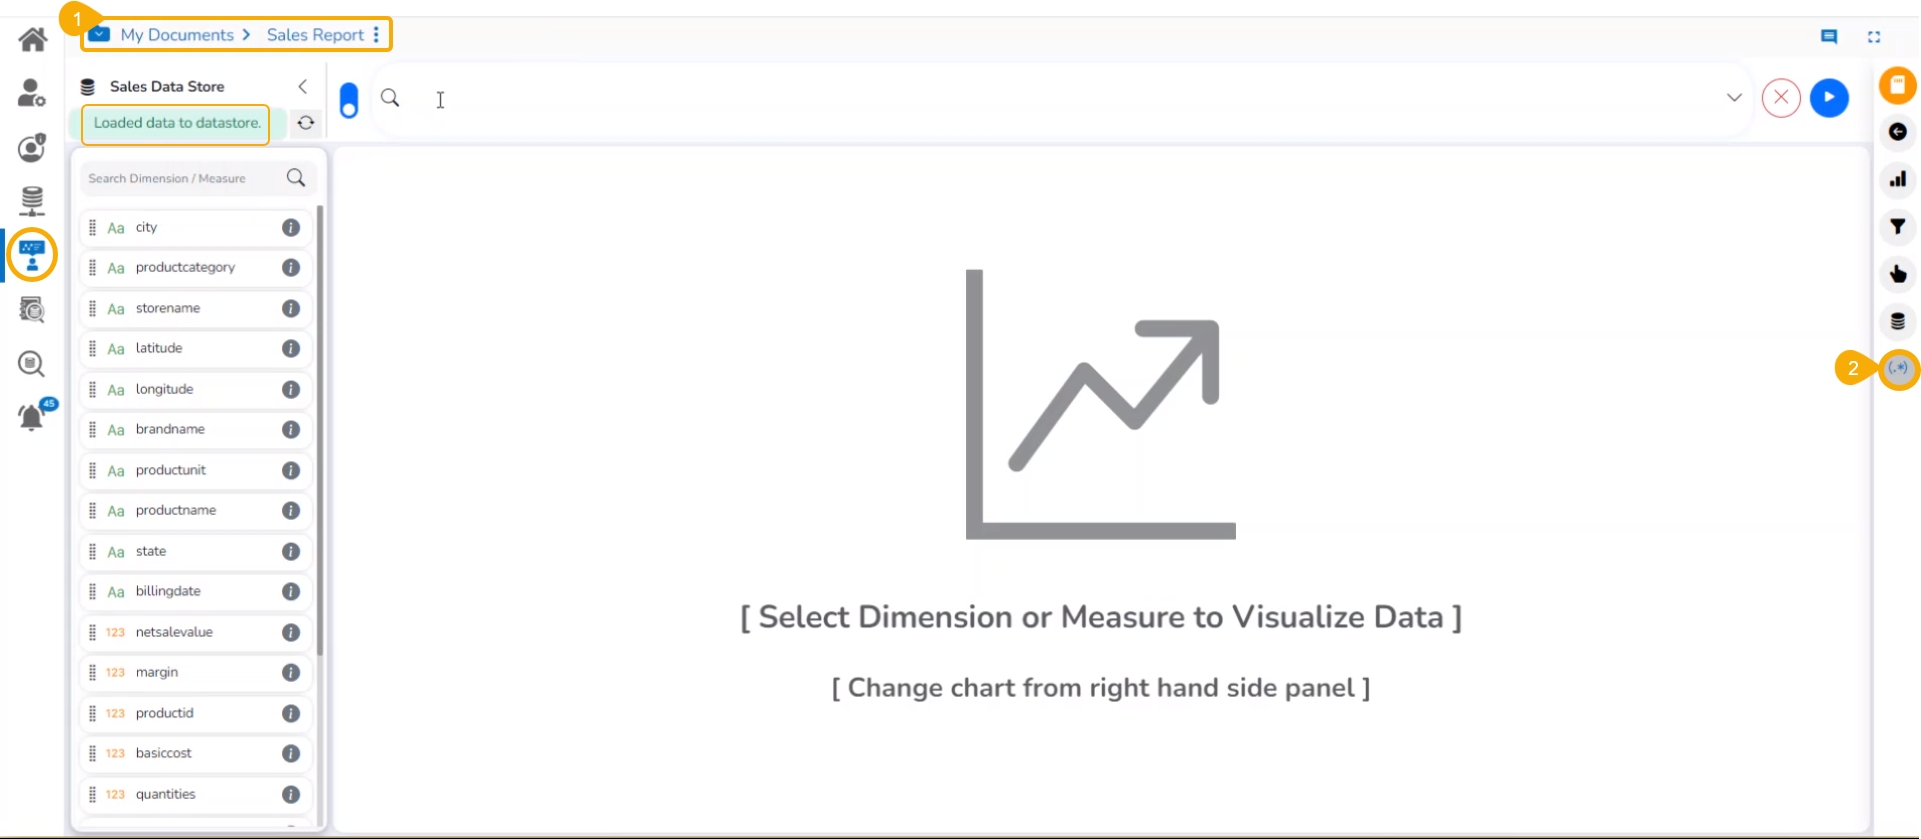
Navigate to the Design tab after selecting a Data Store to design a new view.
Click the Create Calculated field icon.
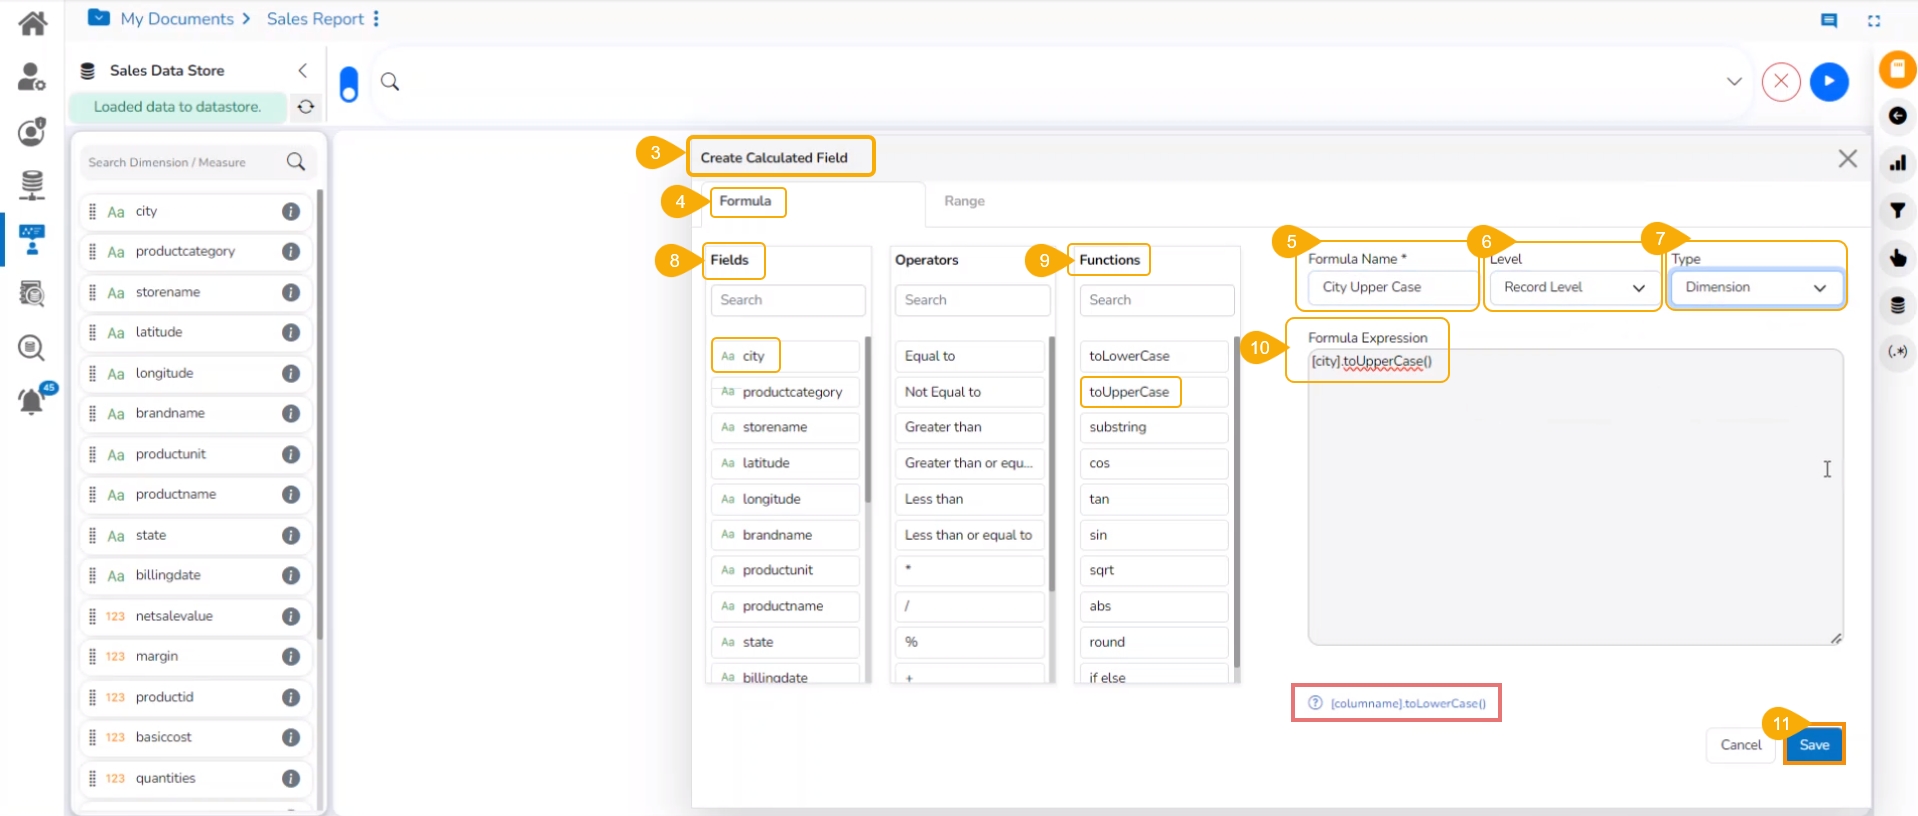
The user gets redirected to the Create Calculated Field window.
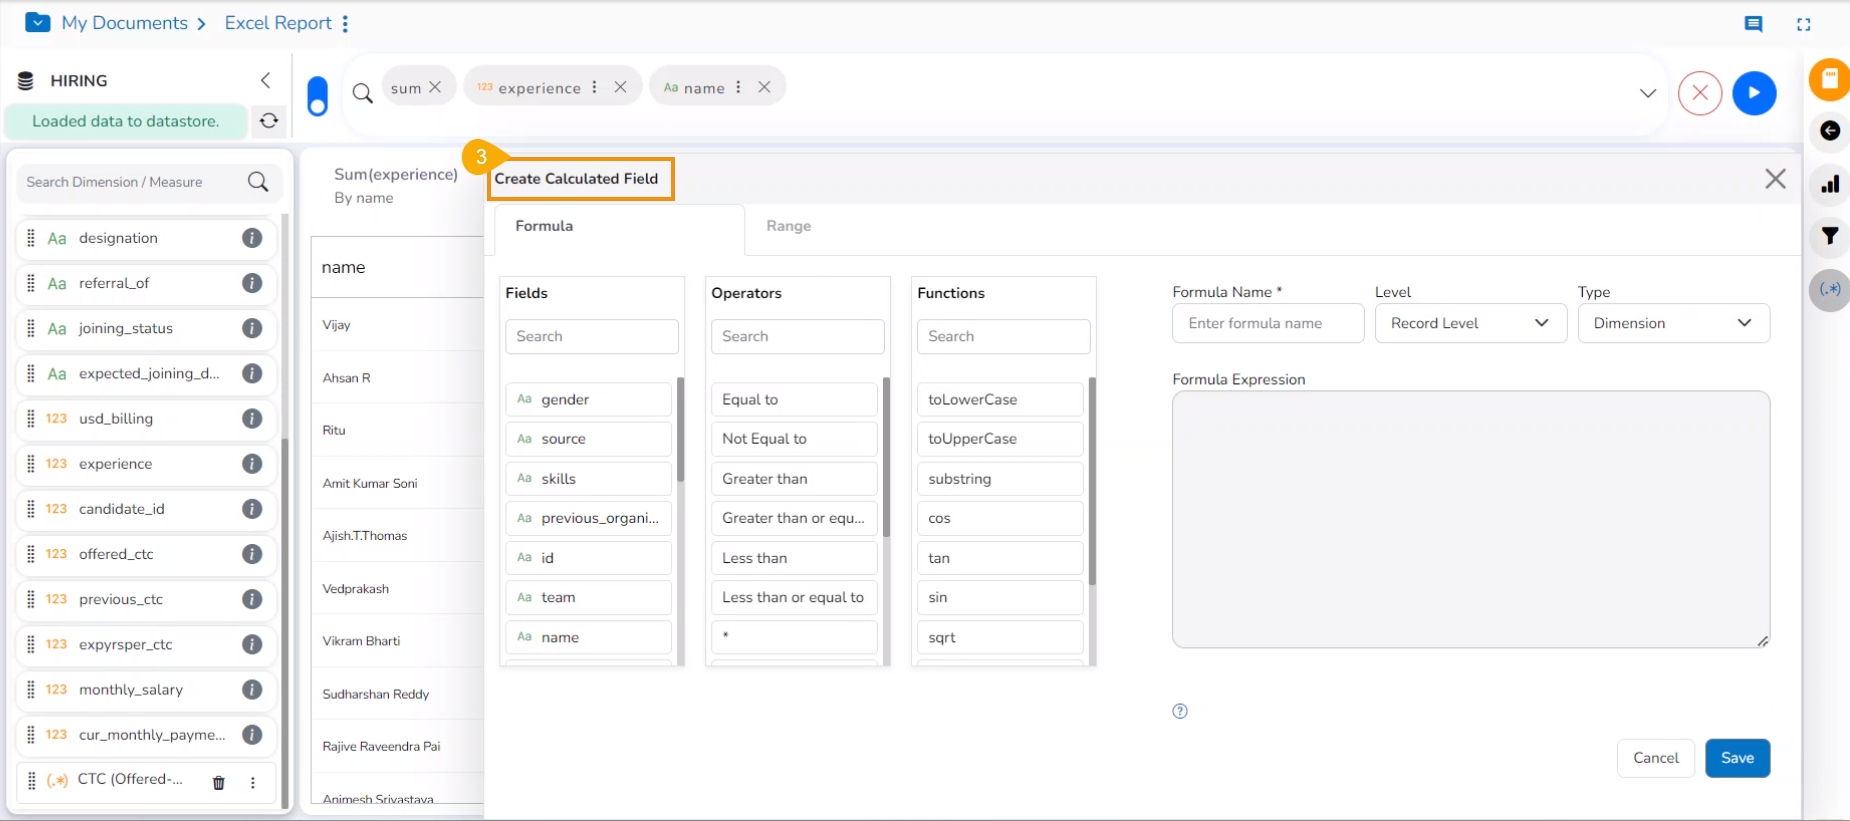
Please navigate to the FORMULA tab (It opens by default).
Formula Name: Give a title to the formula field.
Level: The user can create the calculated field at two levels.
Record Level
Summary Level
Type: Select an option from the drop-down menu to decide the kind of the Formula Field.
Dimension
Measure
Fields: All fields from the selected Data Store list are in this window. The users can select the required fields by tapping on them.
Functions: All the available functions are listed in this window. The users can select the required functions to apply them to the chosen field.
Formula Expression: Based on the selected combination of Fields with Operators or Functions the Formula Expression is entered in this space.
Click the Save option to save the formula field or calculated field.
Please Note: The users can select the required operator to add and complete the formula for a Measure column.
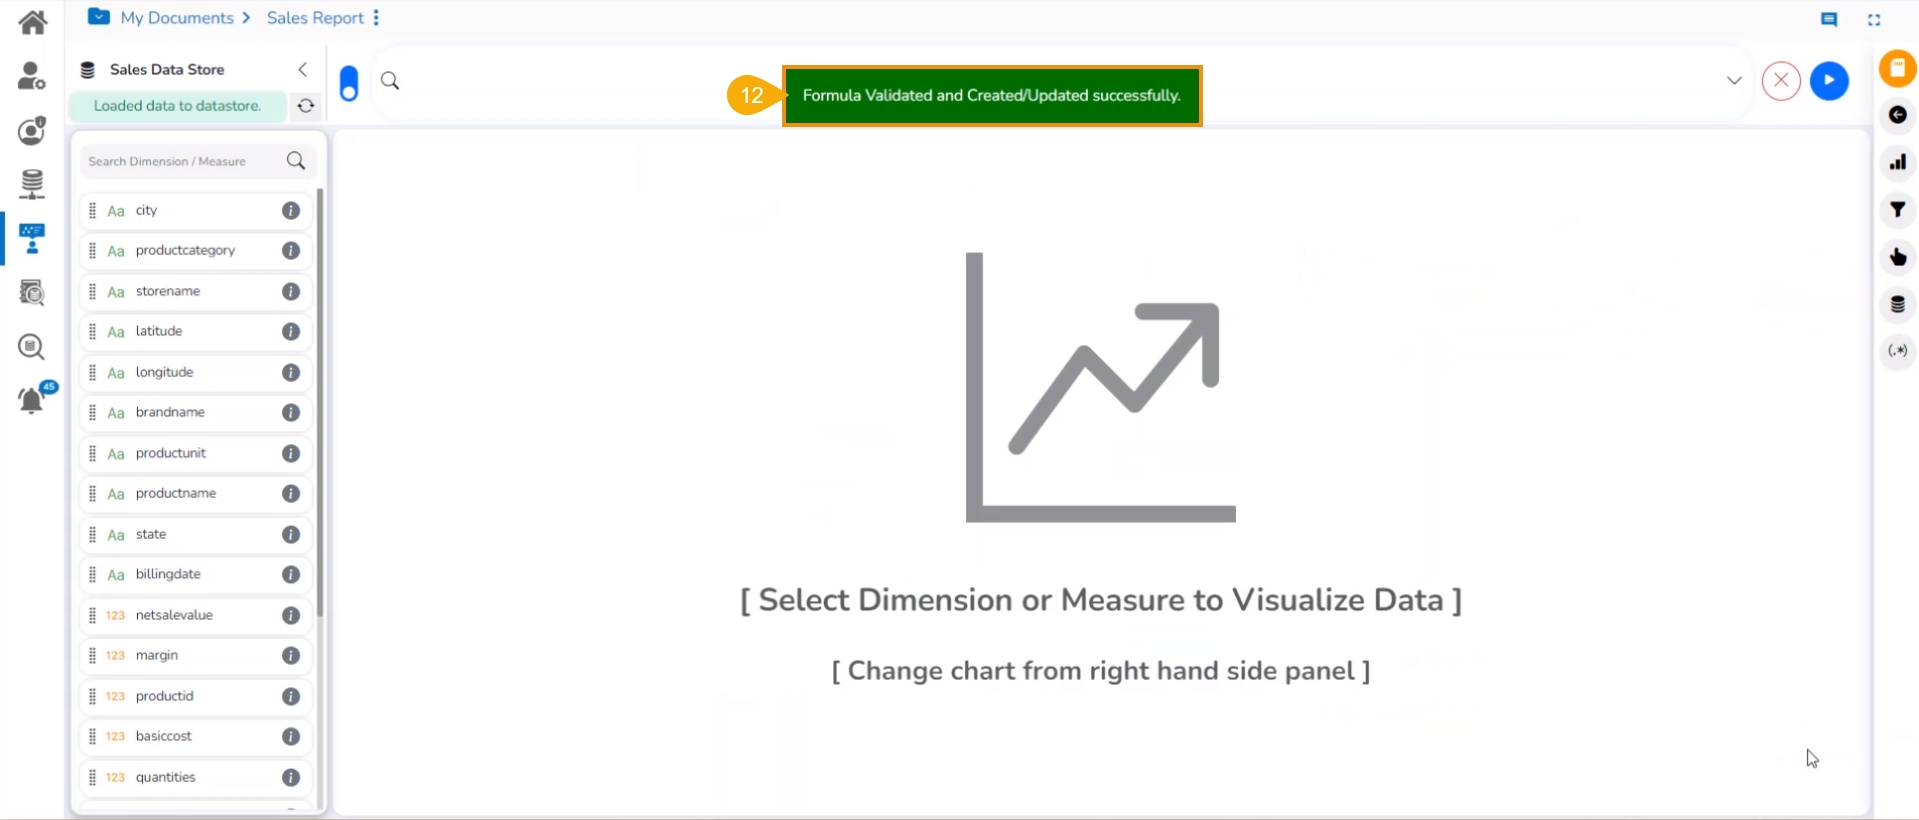
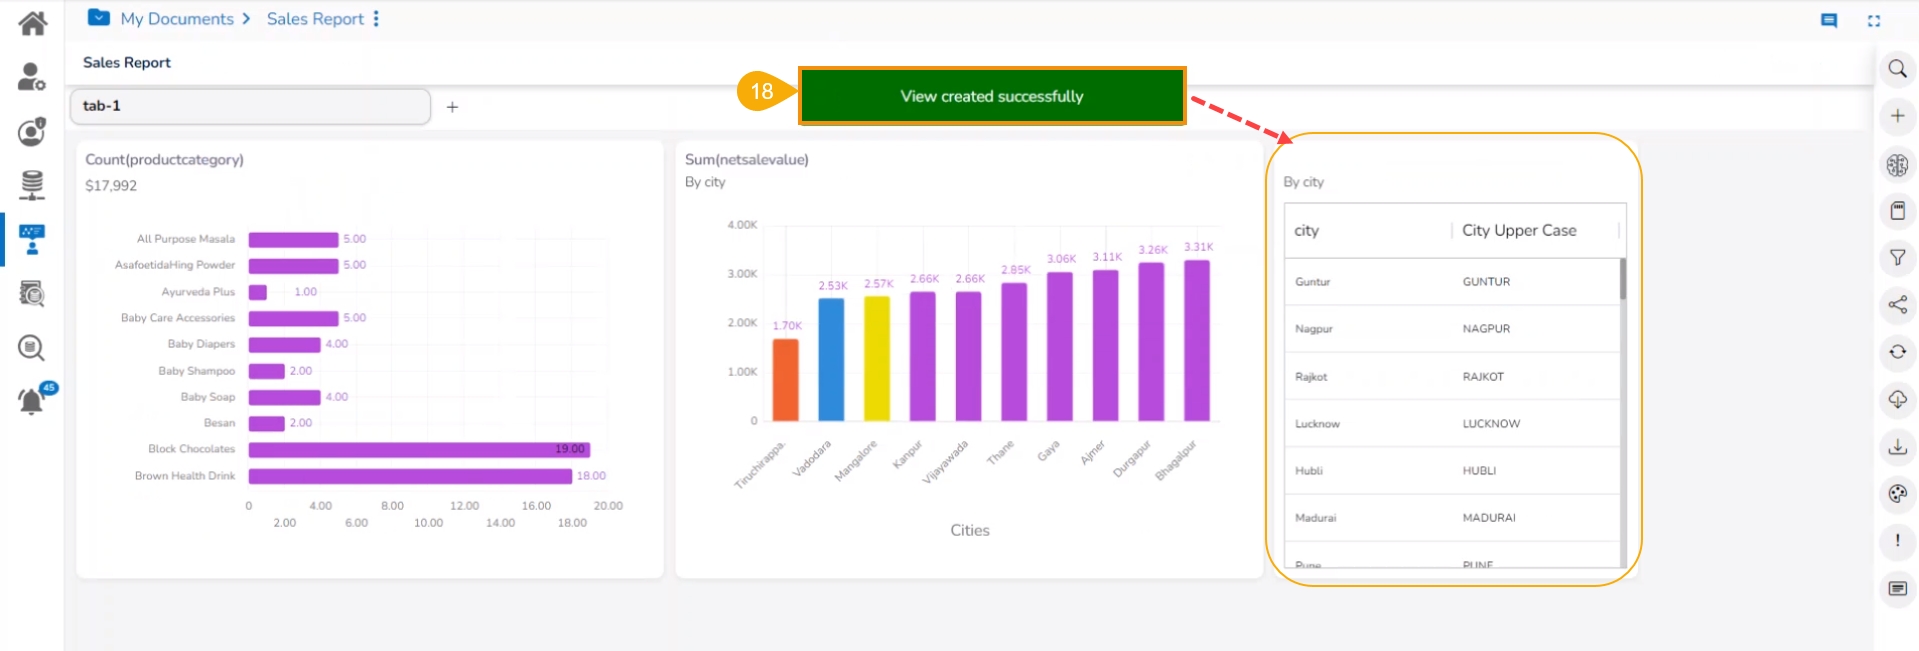
A notification message appears to ensure that the Formula Field gets created.
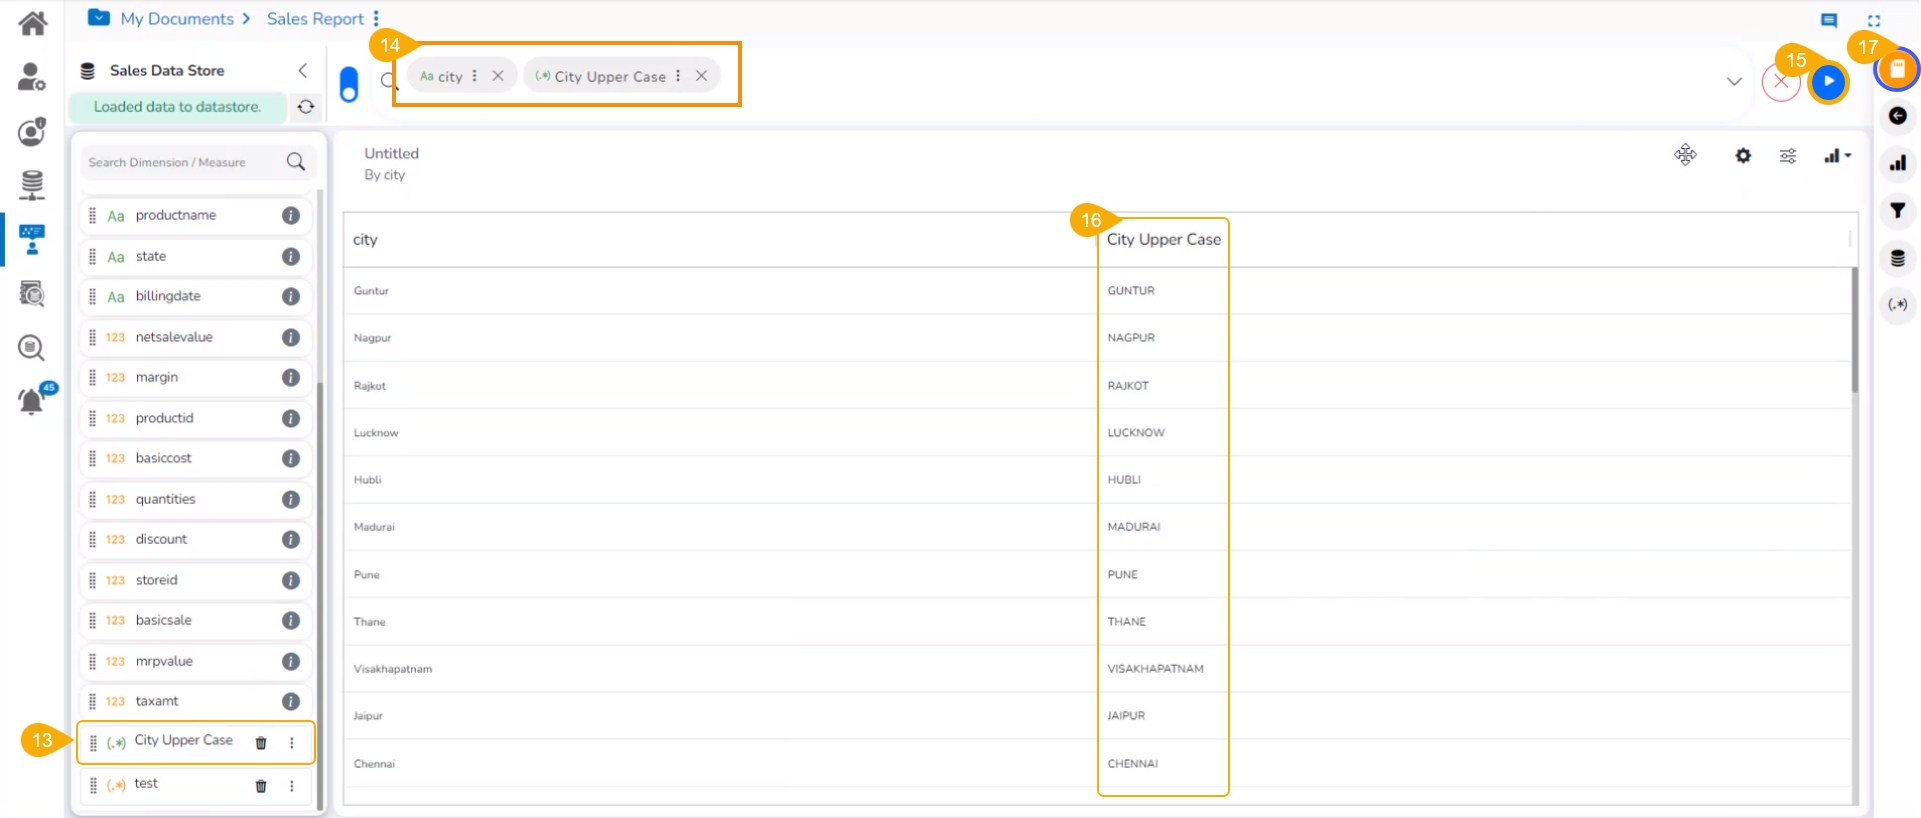
The newly created formula field gets added to the selected Data Store.
Select the formula column name to get it in the top panel.
Click the GO option.
The column data is displayed in the Upper case.
Click the Save View icon to save the View to the Report.
A notification appears and the user gets redirected to the final screen of the Report with the View added to it.
Please Note:
The Formula Fields created with the Record Level option can be saved as either Dimension or Measure. Based on the selected option for the Type, the displayed Fields may vary in the right-side panel.
Double click on the Functions or Operators from the Formula Field Editor where the MongoDB server is configured in the Admin Settings as it generates one expression. The tan function does not support the MongoDB server.

