It is the default user role for all the new users until they are added to any user groups with required permissions to use platform modules.
Check out the walk-through on how a Viewer role gets created.
All new users created via the Security module are added to a default (viewer) role. The default user role restricts all new users from accessing any Platform modules until they are added to some user group.
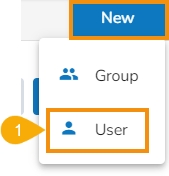
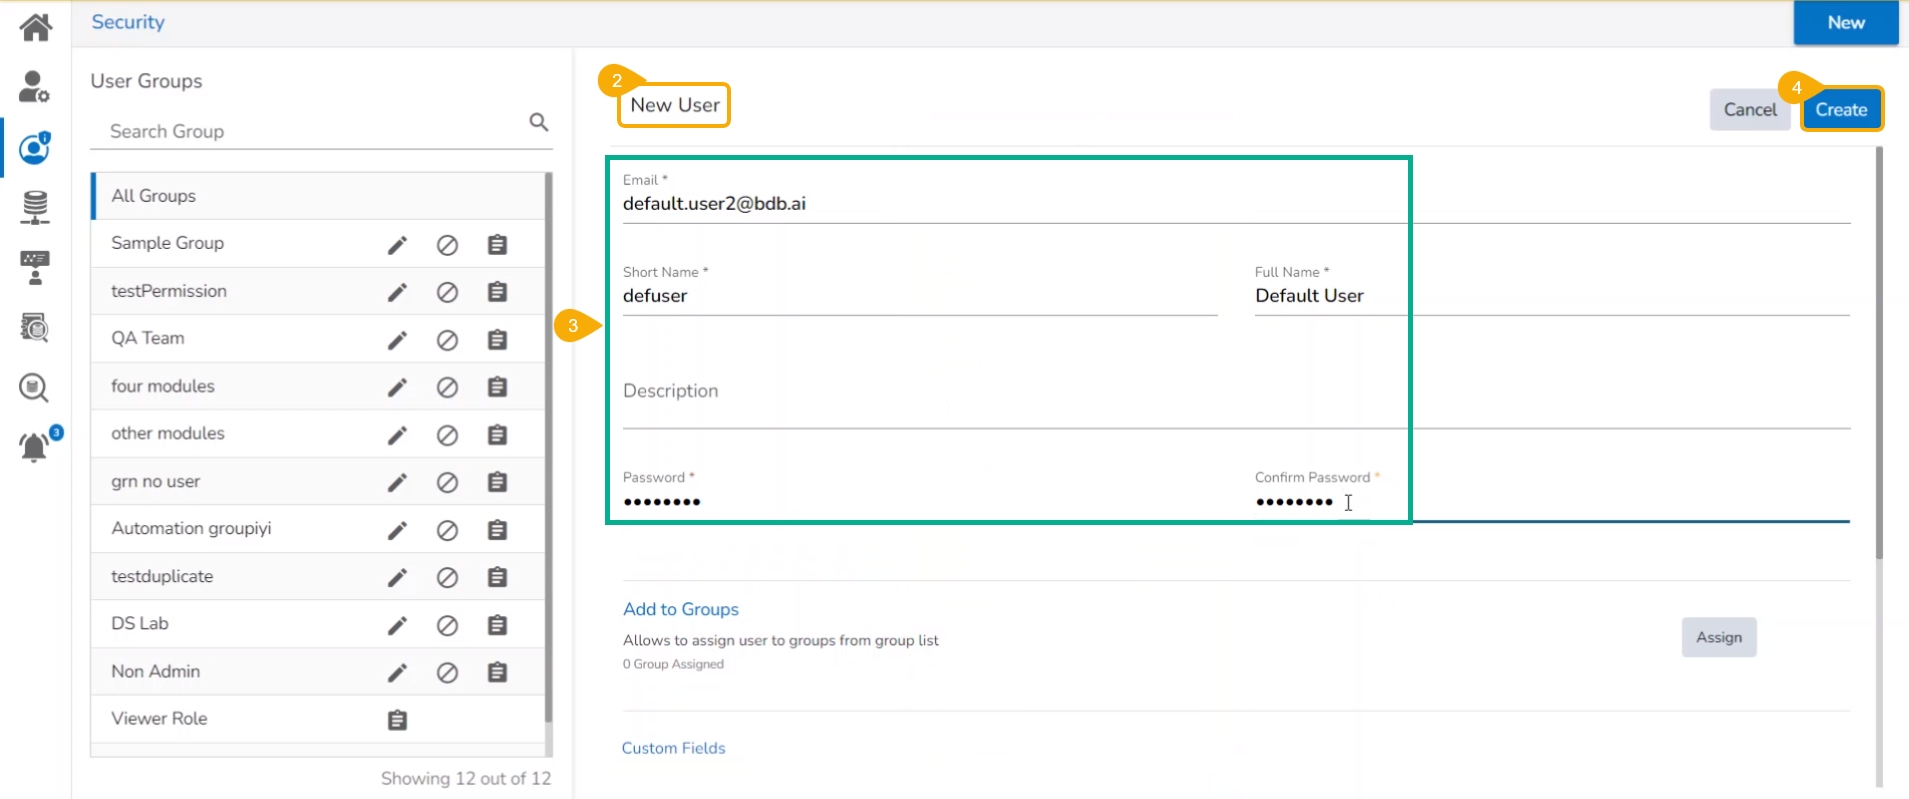
Select the User option from the New Context menu.
Access the New User page opens.
Provide the required information to create a new user.
Click the Create option.
Please Note:
Skip the Add to Group part for this user.
Provide the Custom Fields details for the new user (If only marked as mandatory).
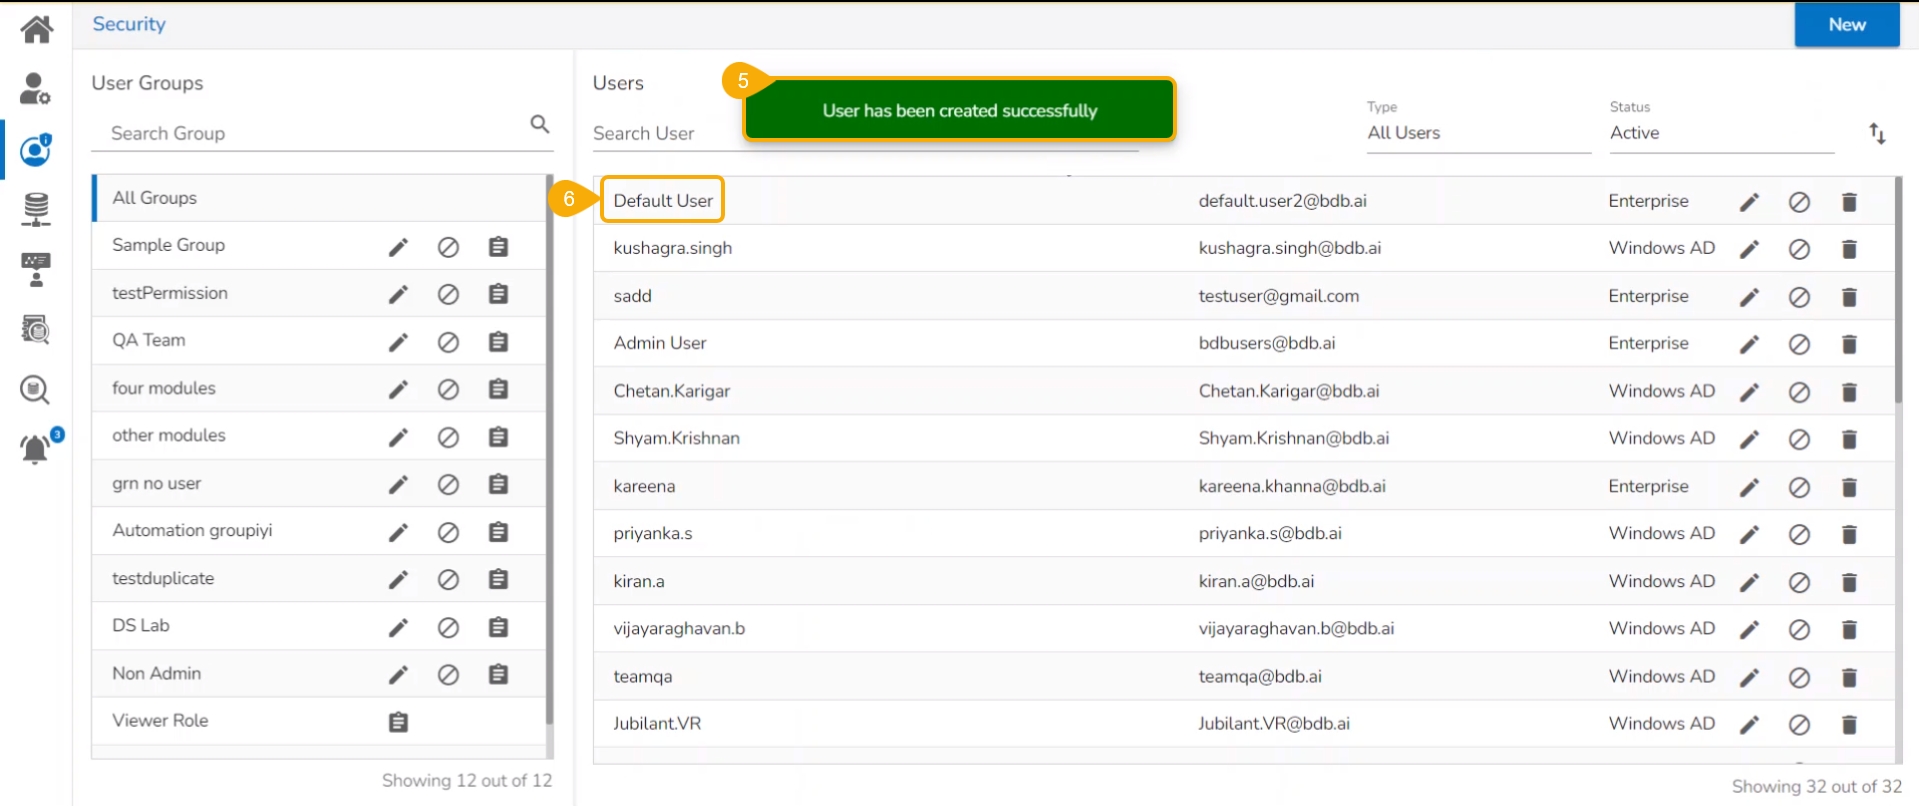
A confirmation message appears.
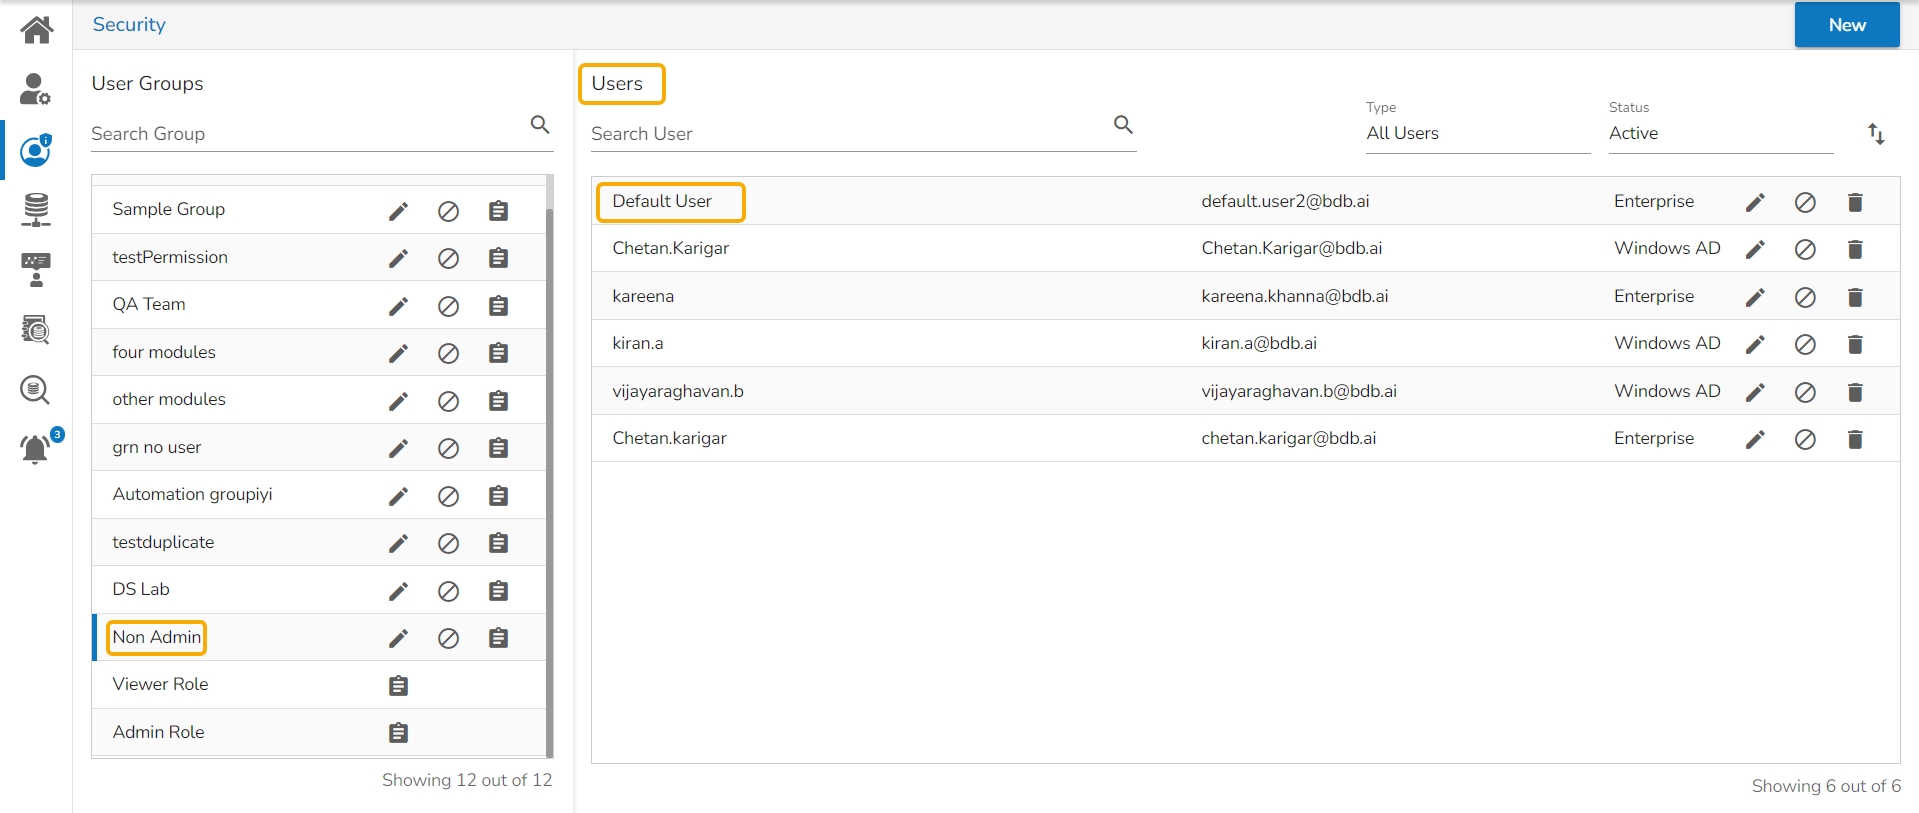
The user gets created and added to the list of users (By default the newly created user will appear at the top of the list).
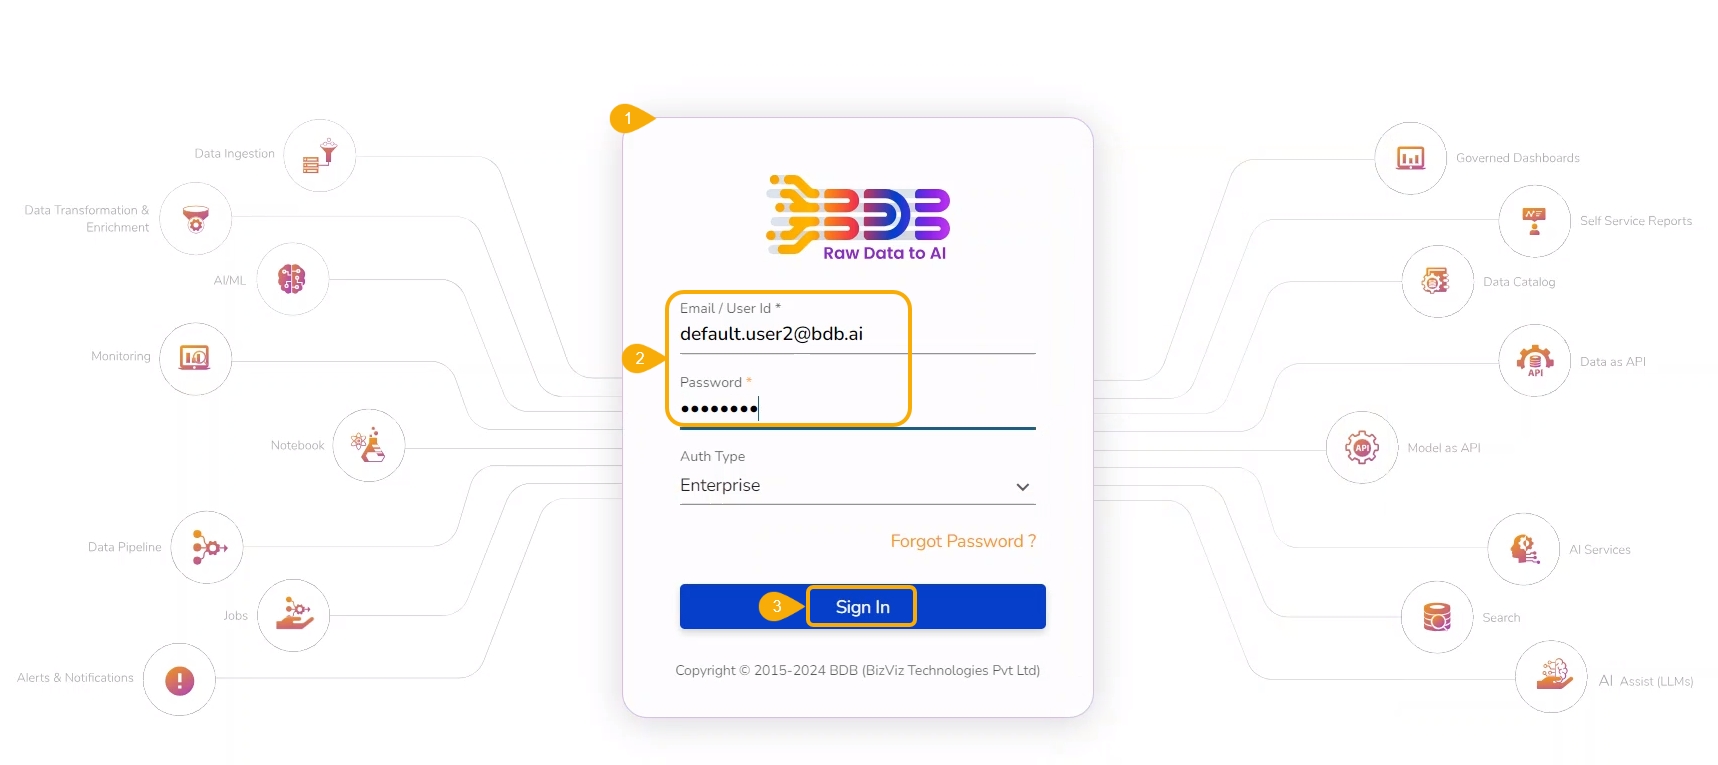
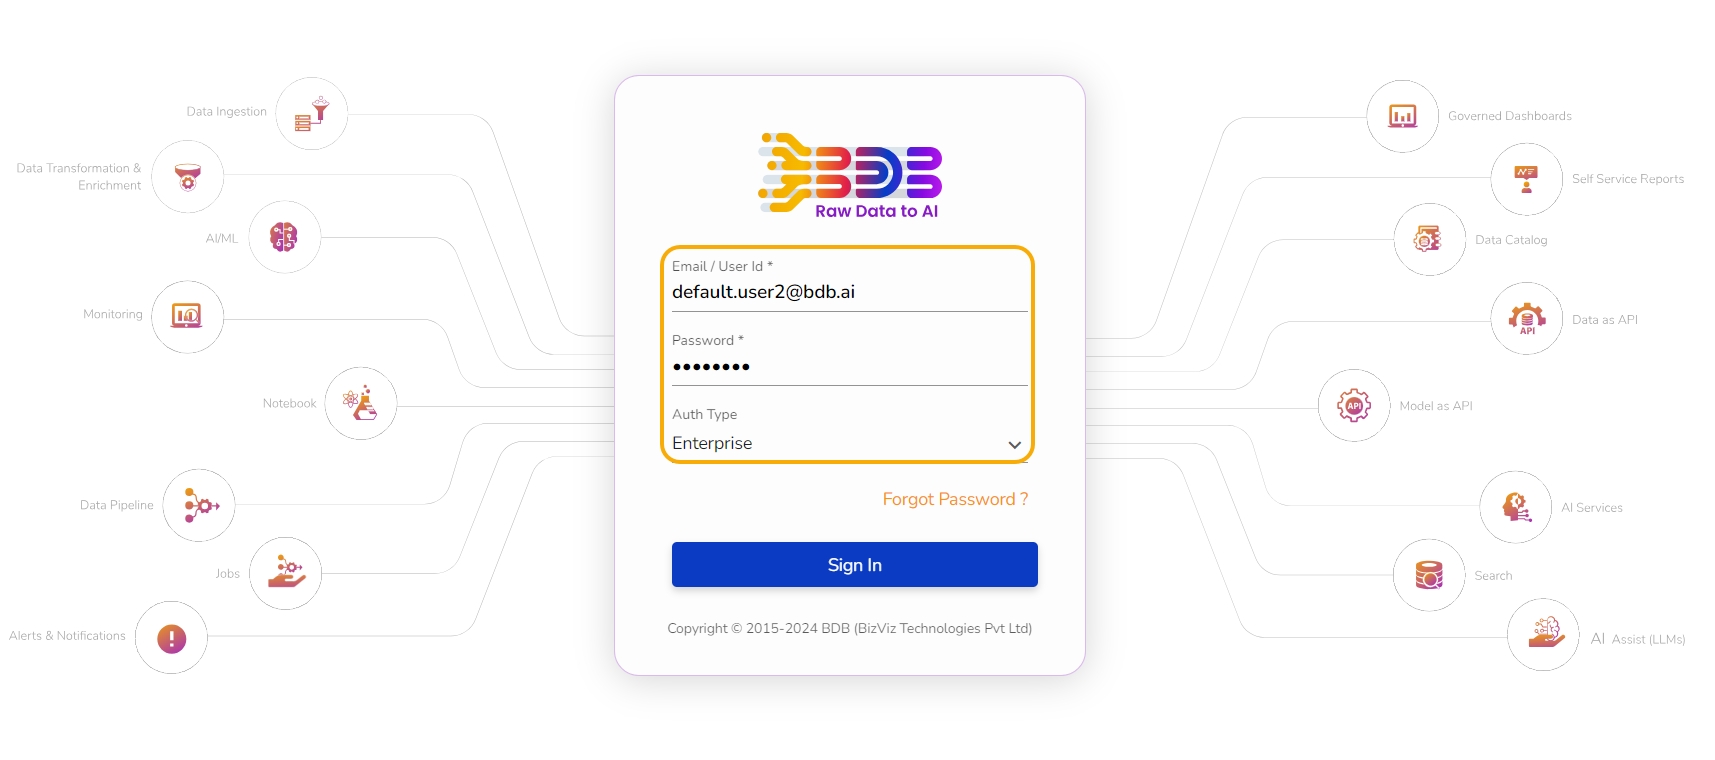
Navigate to the Sign In page of the BDB platform.
Use the new user’s credentials to access the Platform.
Click the Sign In option.
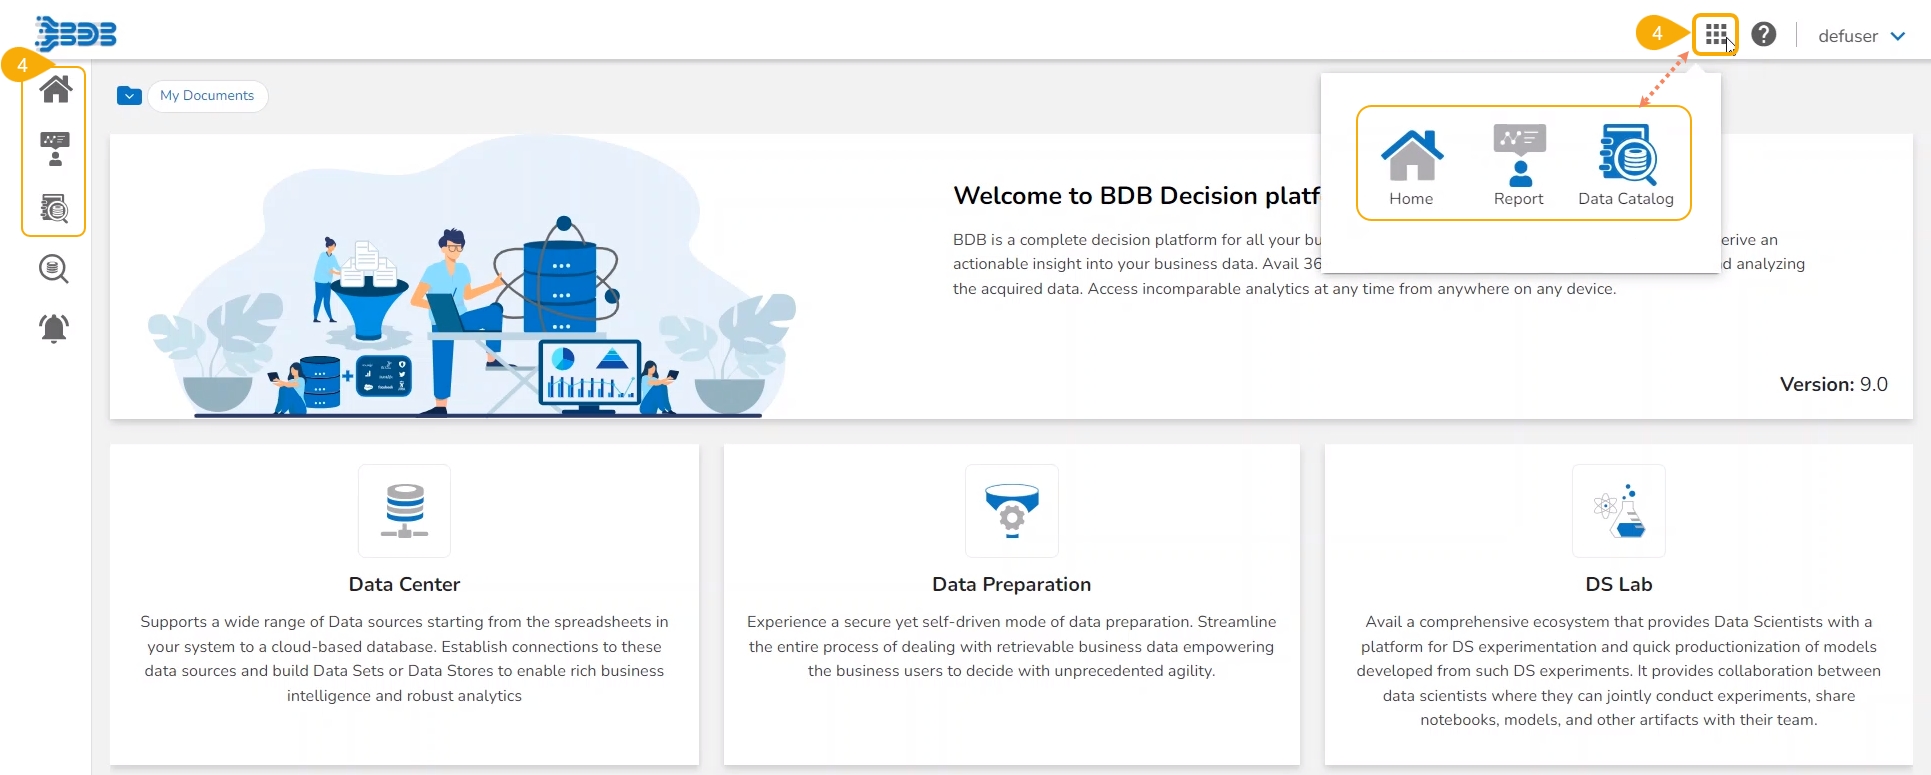
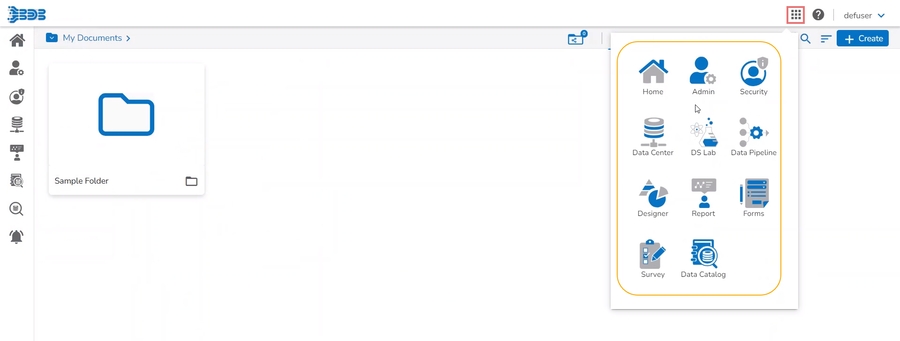
Once you Sign in to the platform homepage open the Apps menu.
As you can see the newly created user who is not part of any user groups does not have access permissions for the platform modules other than view permission for the Home, Report, and Data Catalog modules.
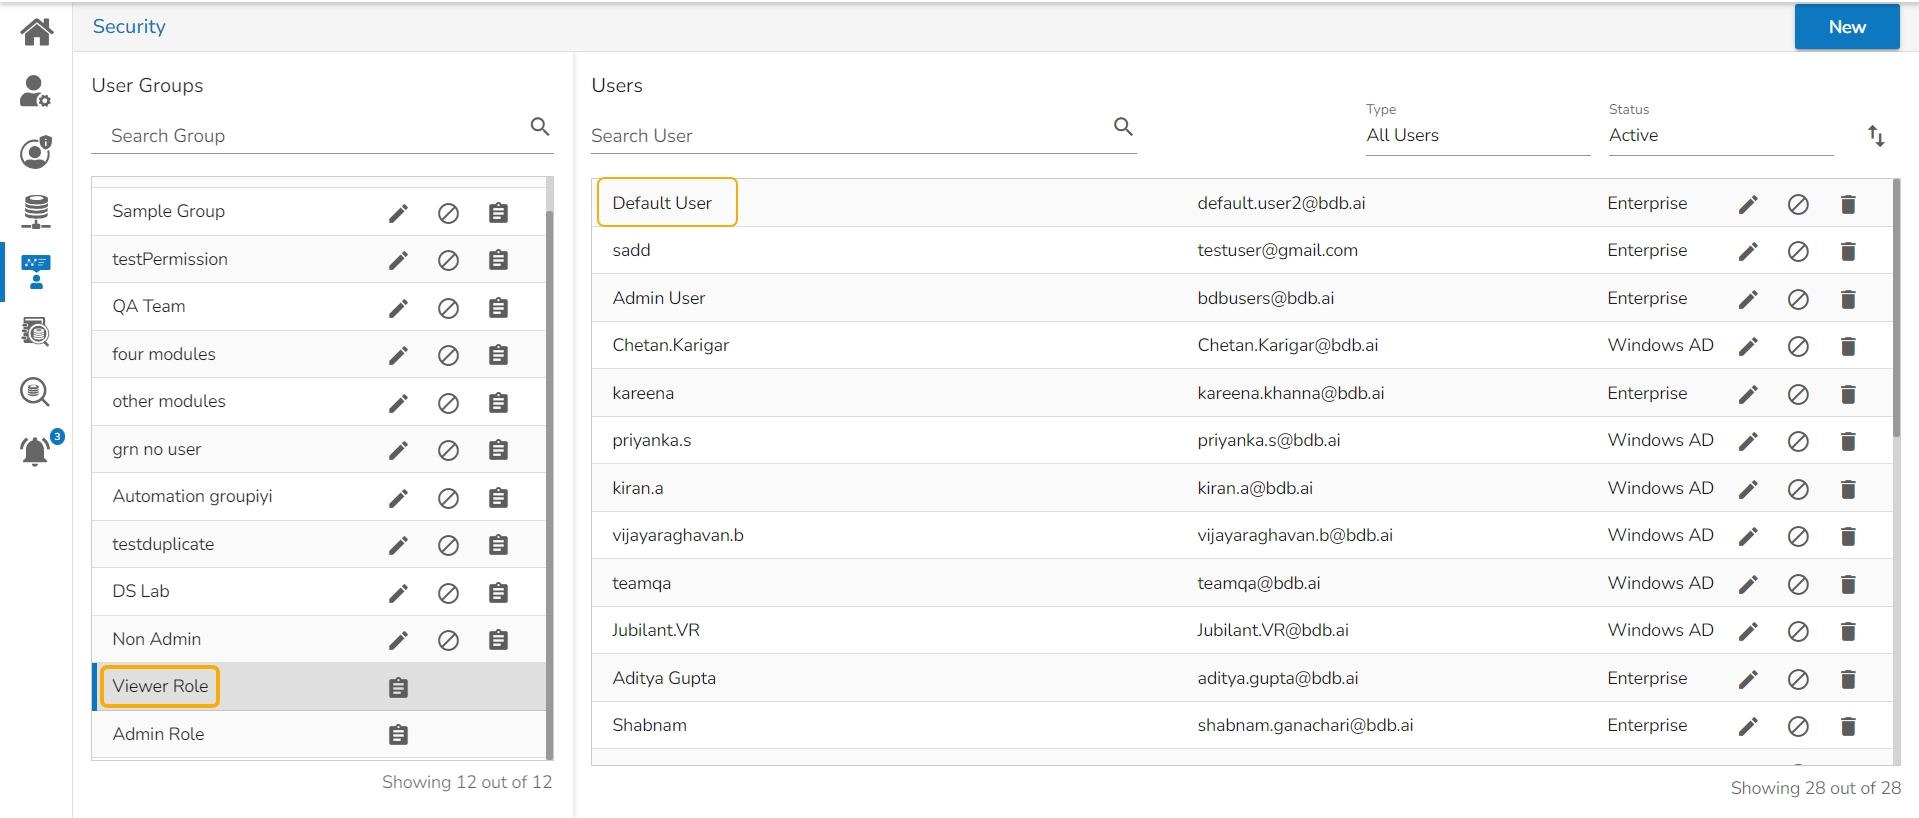
The newly created user who does not belong to any group is added to the default user group entitled Viewer Role under the User Groups.
Please Note:
The user in the Viewer Role/ Default User Role can have only view permission for the documents shared with him. They can't see any credited options for the shared documents.
All the newly created users will get a notification message "Documents are not available in this folder" until they have some shared documents accessible to them.
How to assign Admin Role to platform user.
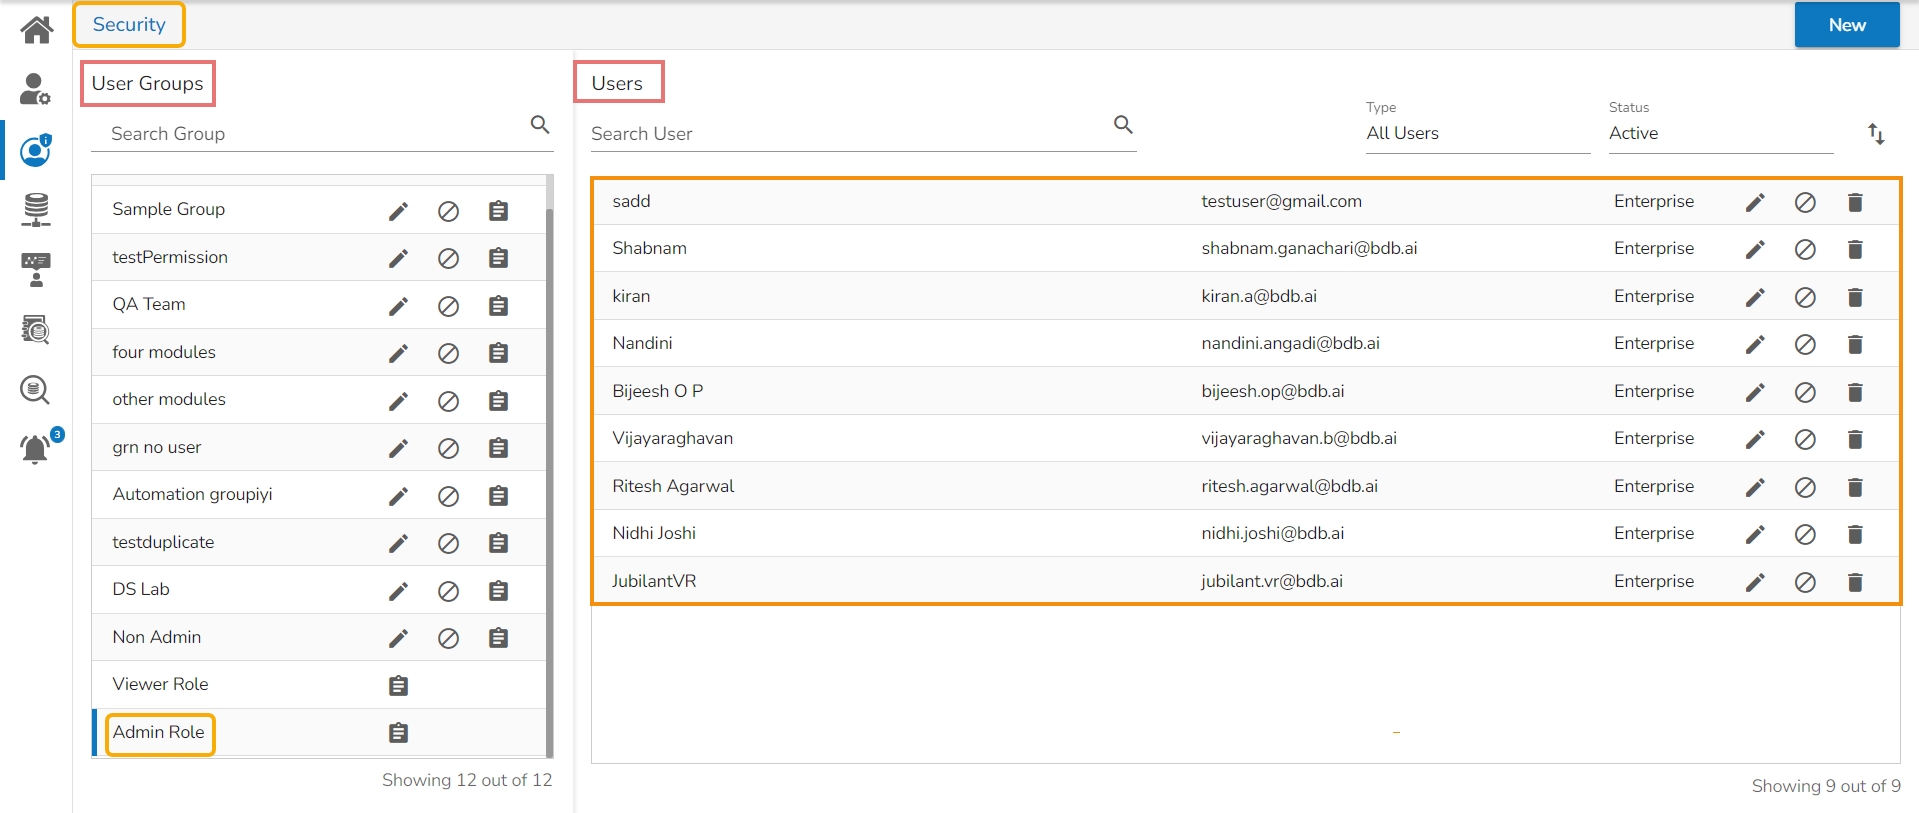
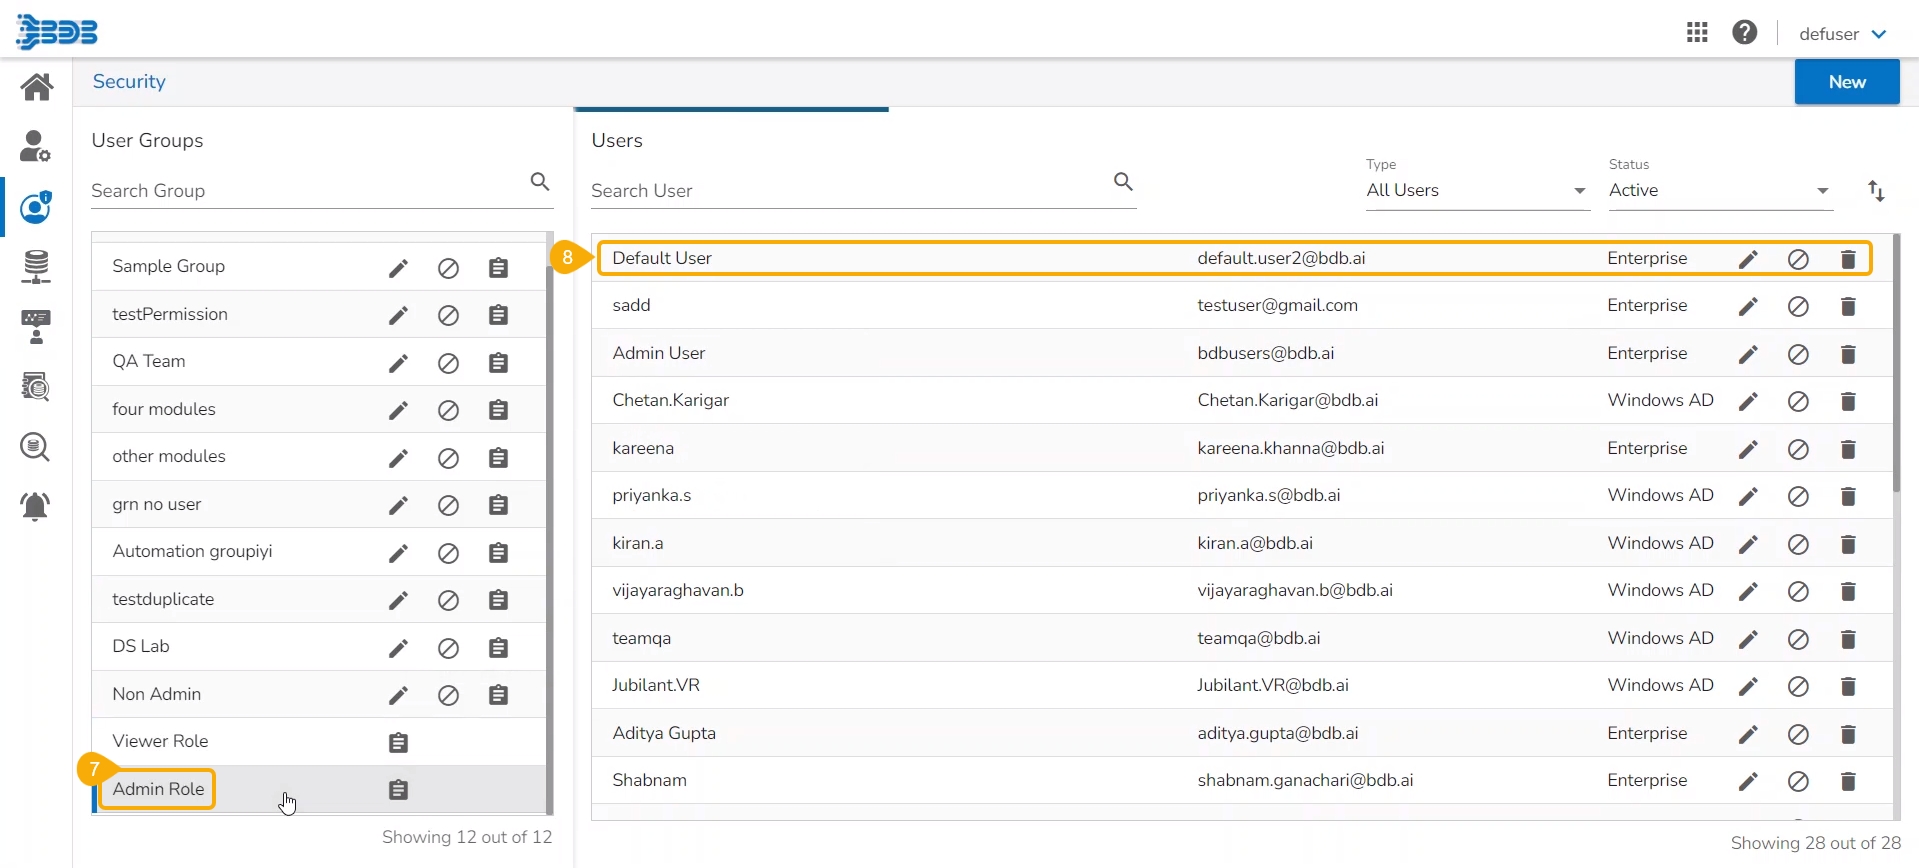
There is a default user group, Admin Role under the User Management module.
Navigate to the Security page.
Search for the Admin Role group or scroll down the User Groups list.
The Admin Role group appears at the bottom of the User Groups list.
All the users added to the Admin Role will be listed while selecting the Admin Role user group.
Please Note: Any user added to the Admin Role group gets Admin Role access to the Platform.
Check out the given walk-through to understand the steps for adding a user to the Admin Role.
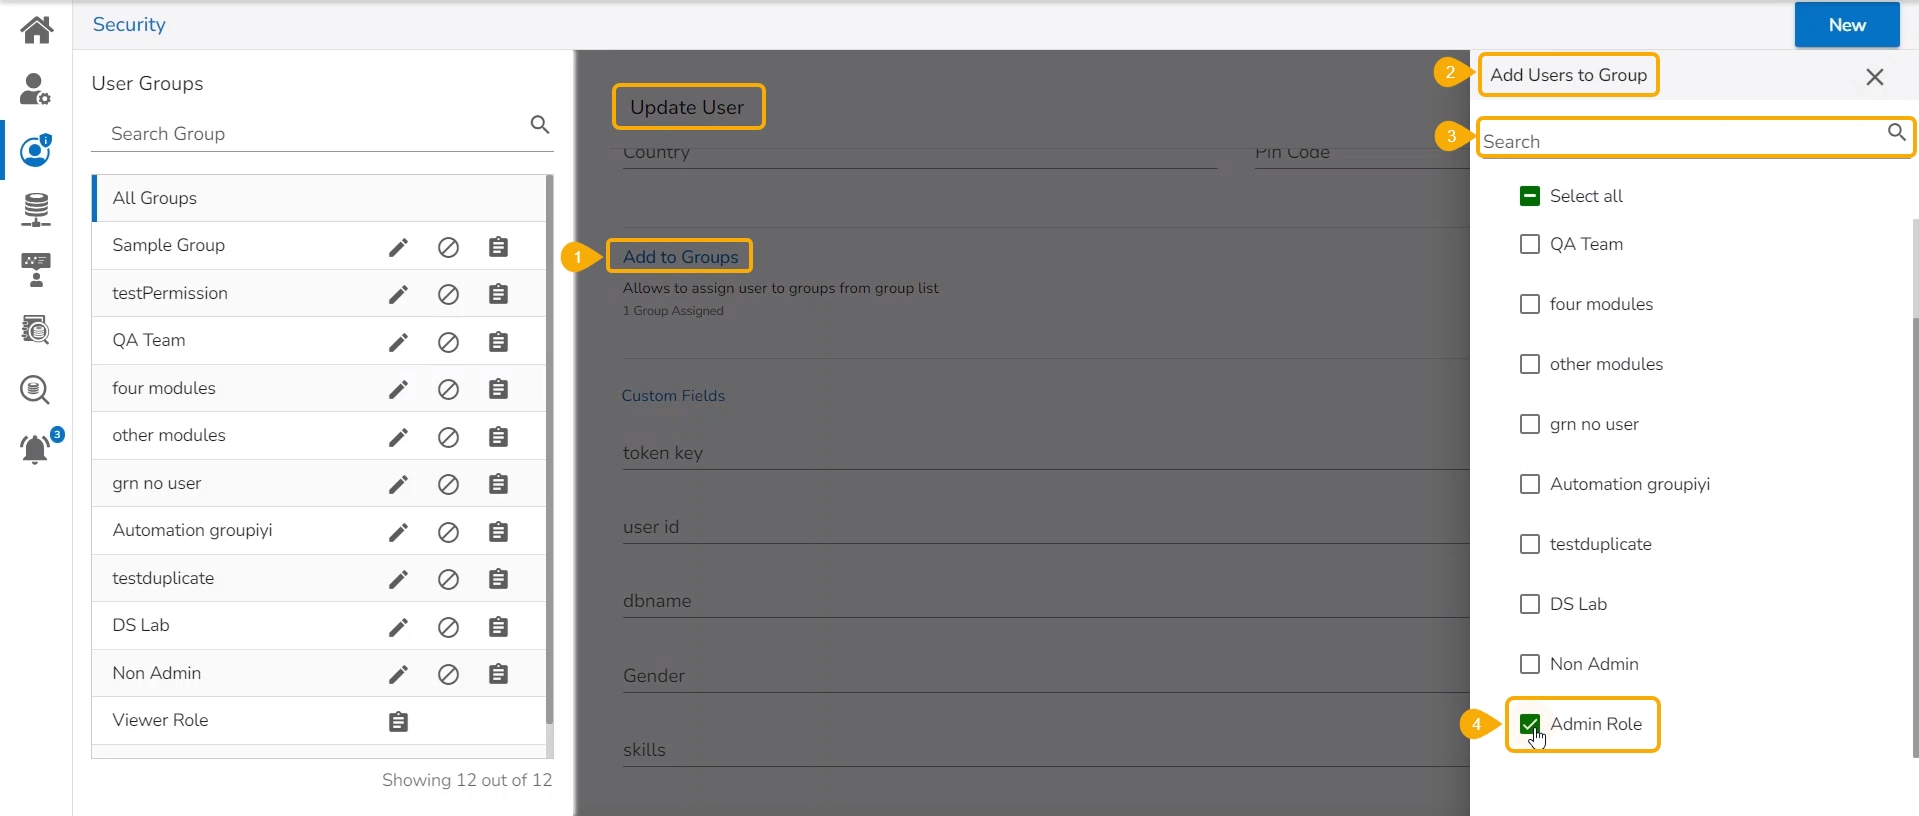
Select the Add Users to Group option for a new user or an existing user.
The Add Users to Group panel opens on the right-hand side.
Search for the Admin Role group.
Select the Admin Role group by using a checkmark in the given box.
Click the Save option.
Please Note: In case of a New User, it will be Create option instead of Save.
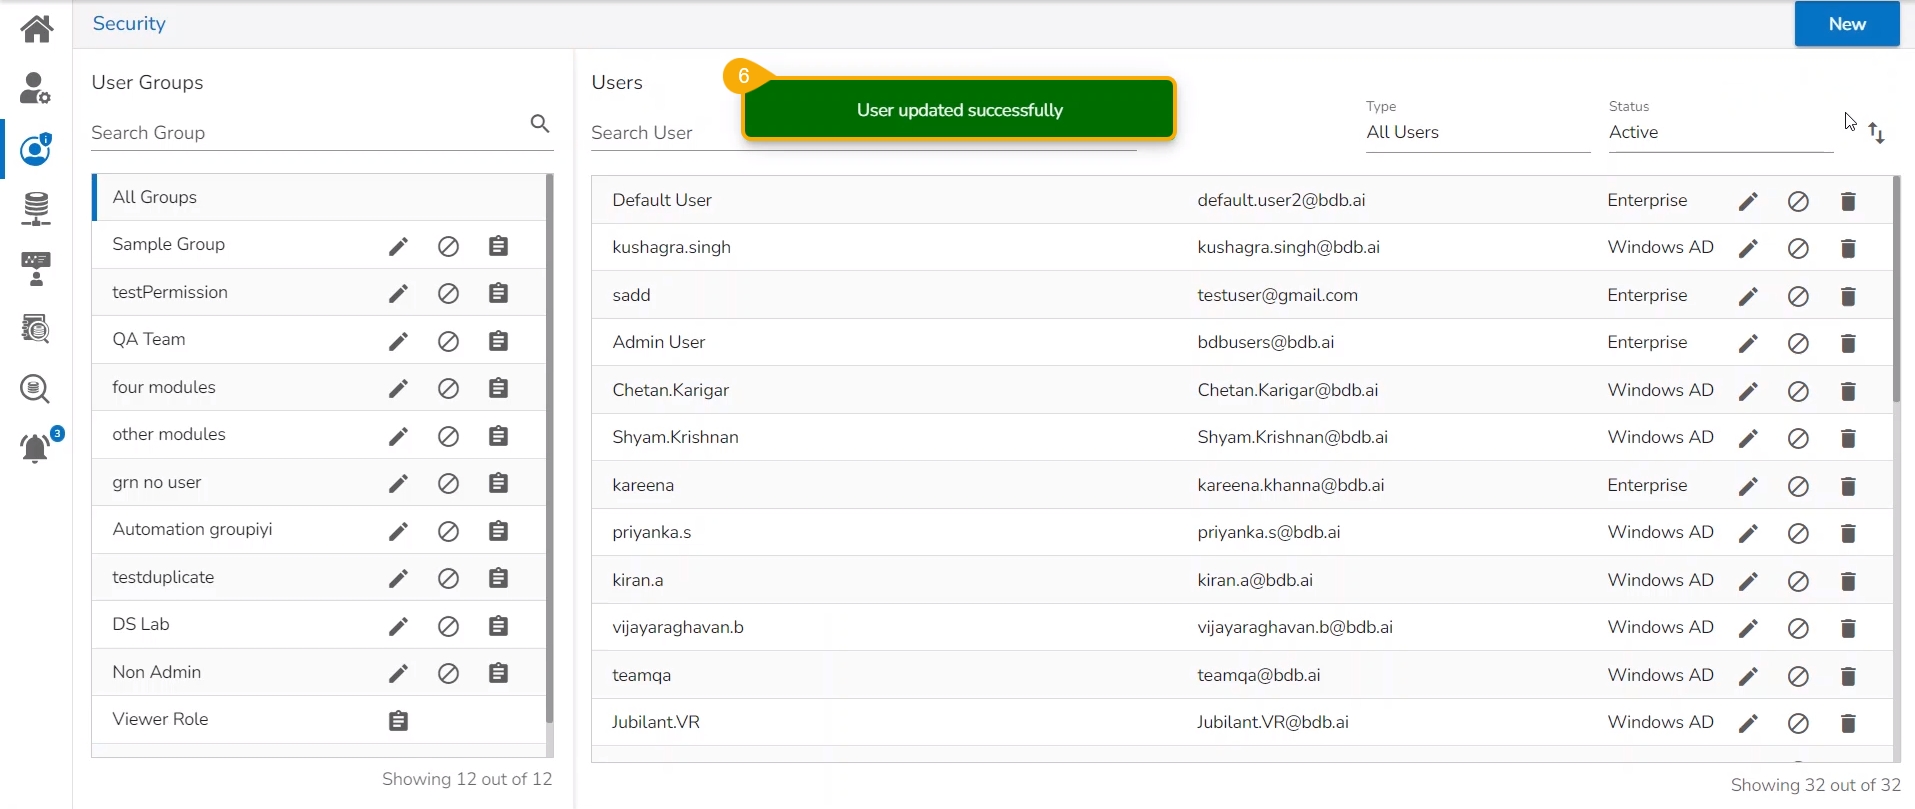
A new user gets created or the selected existing user gets updated (In both scenarios the user will be notified by a confirmation message).
Please Note: The notification message will come for a new user and updating a ser as shown below
Create a New User - The user has been created successfully.
Updating a User - The user updated successfully.
Open the Admin Role group from the User Groups list.
The newly created user or the selected existing user appears as a part of the Admin Role group.
Please Note:
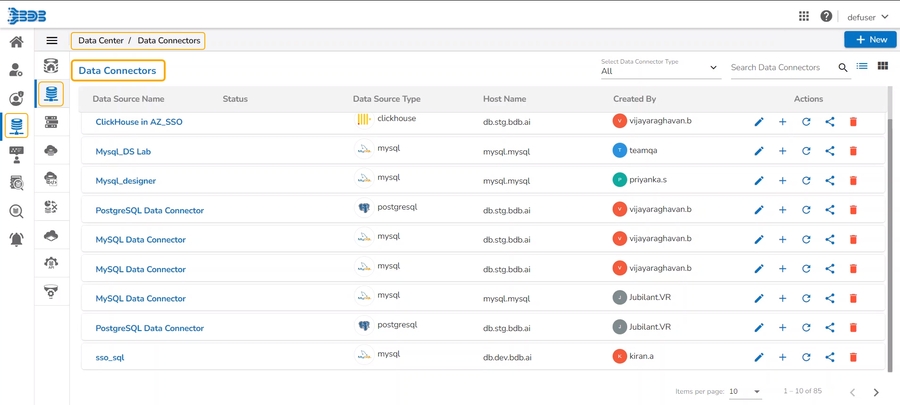
The user who is a part of the Admin Role gets permission to access all the stuff created by other users. E.g., The Data Connectors created by other users are also accessible to this admin user.
The Admin Role user also gets permission to access and use all the available Platform modules under the Apps menu.
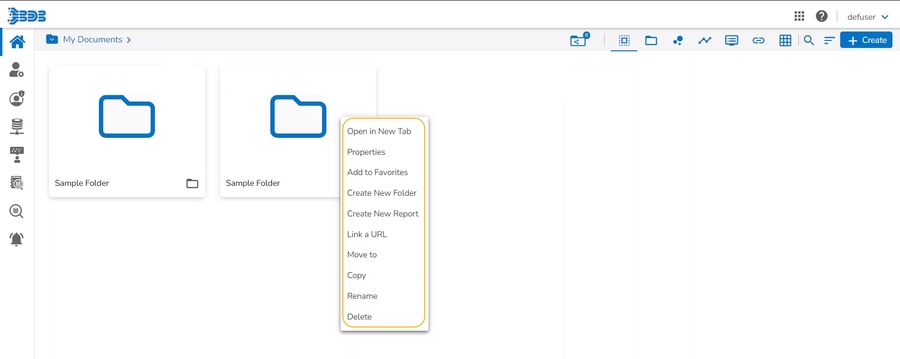
The Admin Role user gets access to all the credited documentation options for a folder and a file.
There can be three types of role for a platform user based on the access permissions provided to them.
The section focuses on user-defined roles of the platform users.
Check out the walk-through on how to assign customized roles to users.
The user allocated to any group other than the Admin Role with limited credited permissions gets the non-admin user role category. The non-admin users may have customized access to platform modules based on the rights given by their administrator.
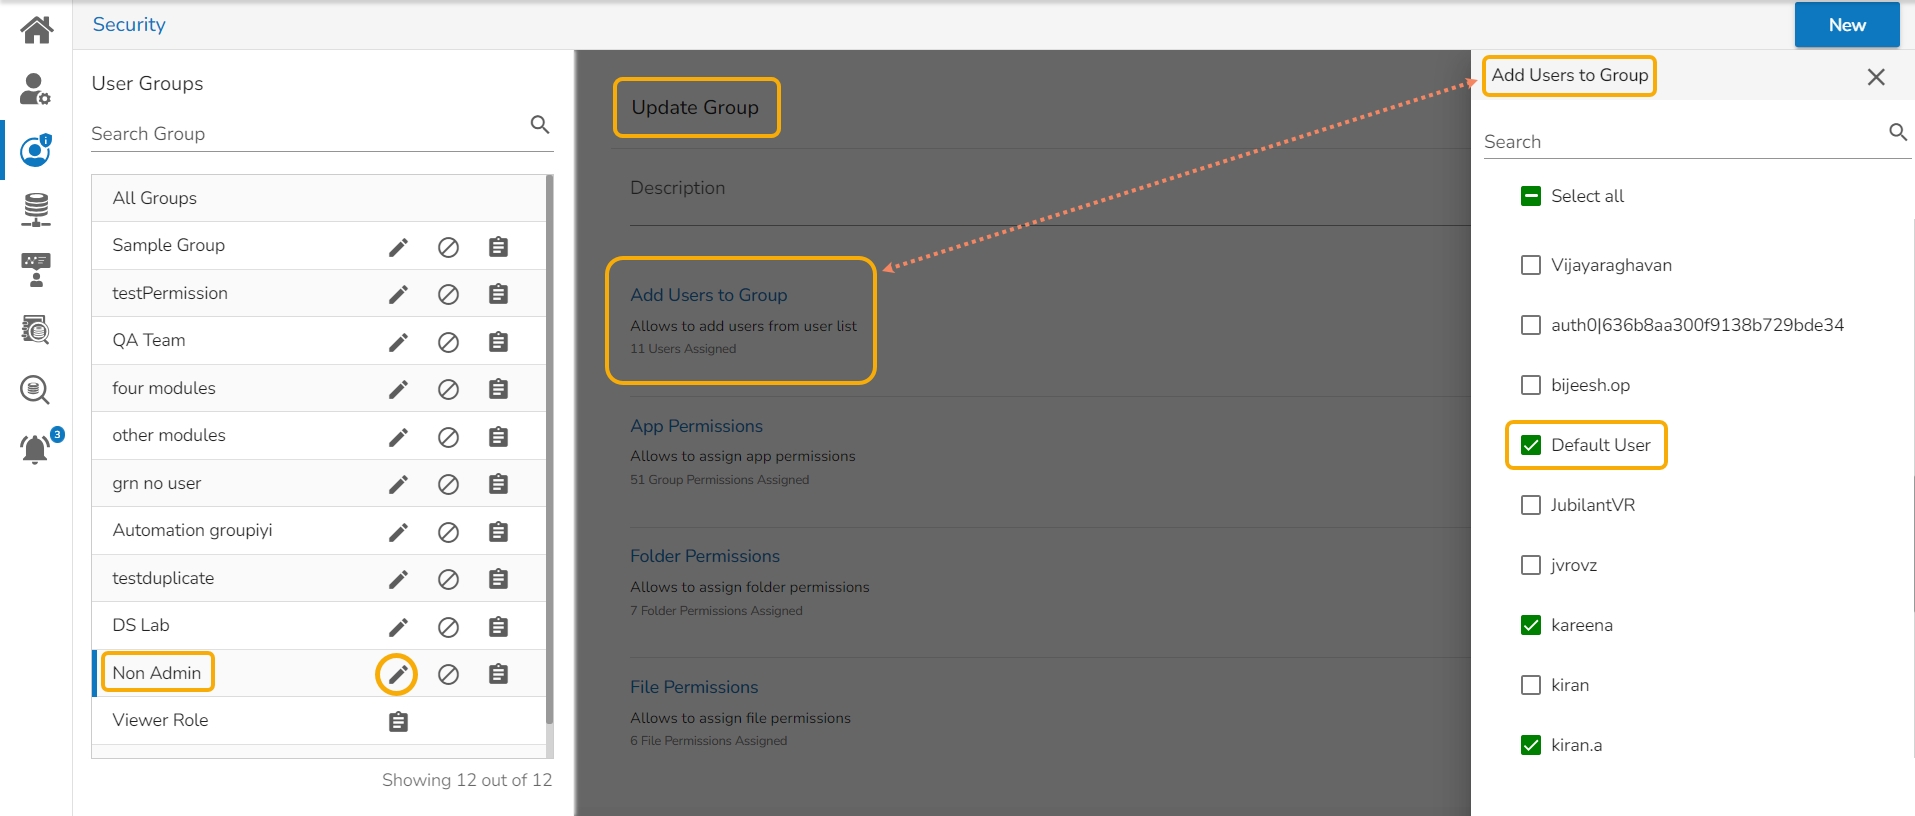
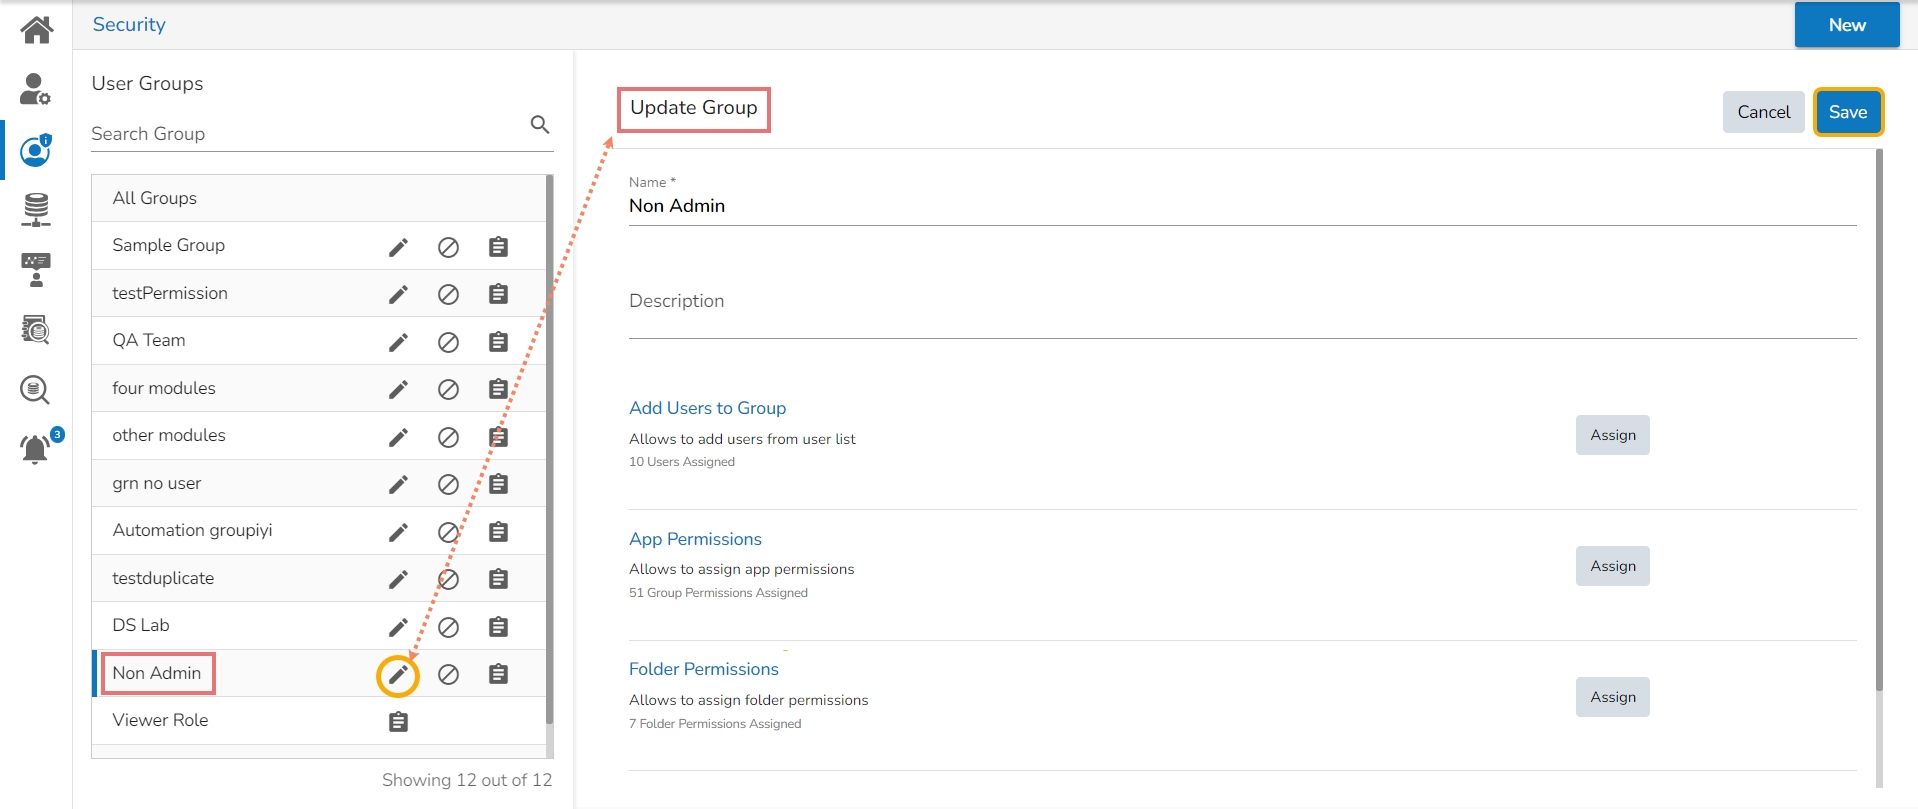
Select a non-admin user group from the User Groups list (E.g., Non-Admin Group).
Open the Add Users to Group panel and add a specific user/ users to that group.
OR
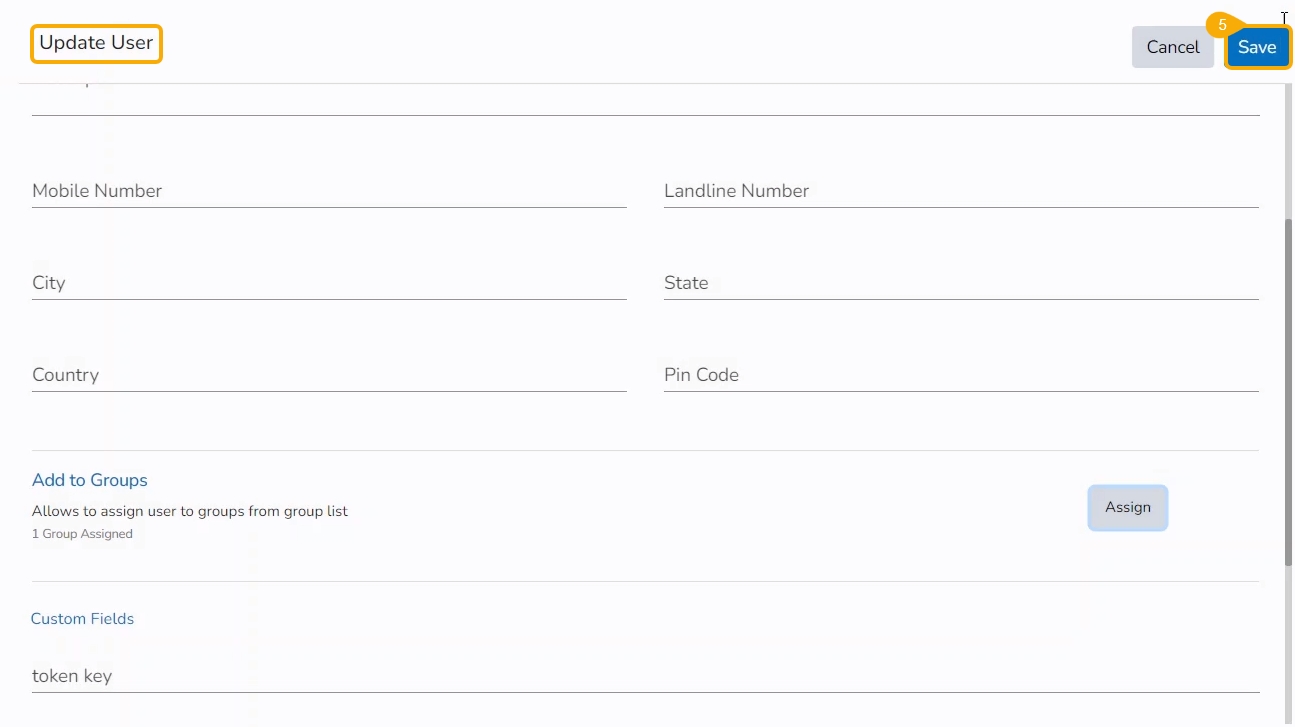
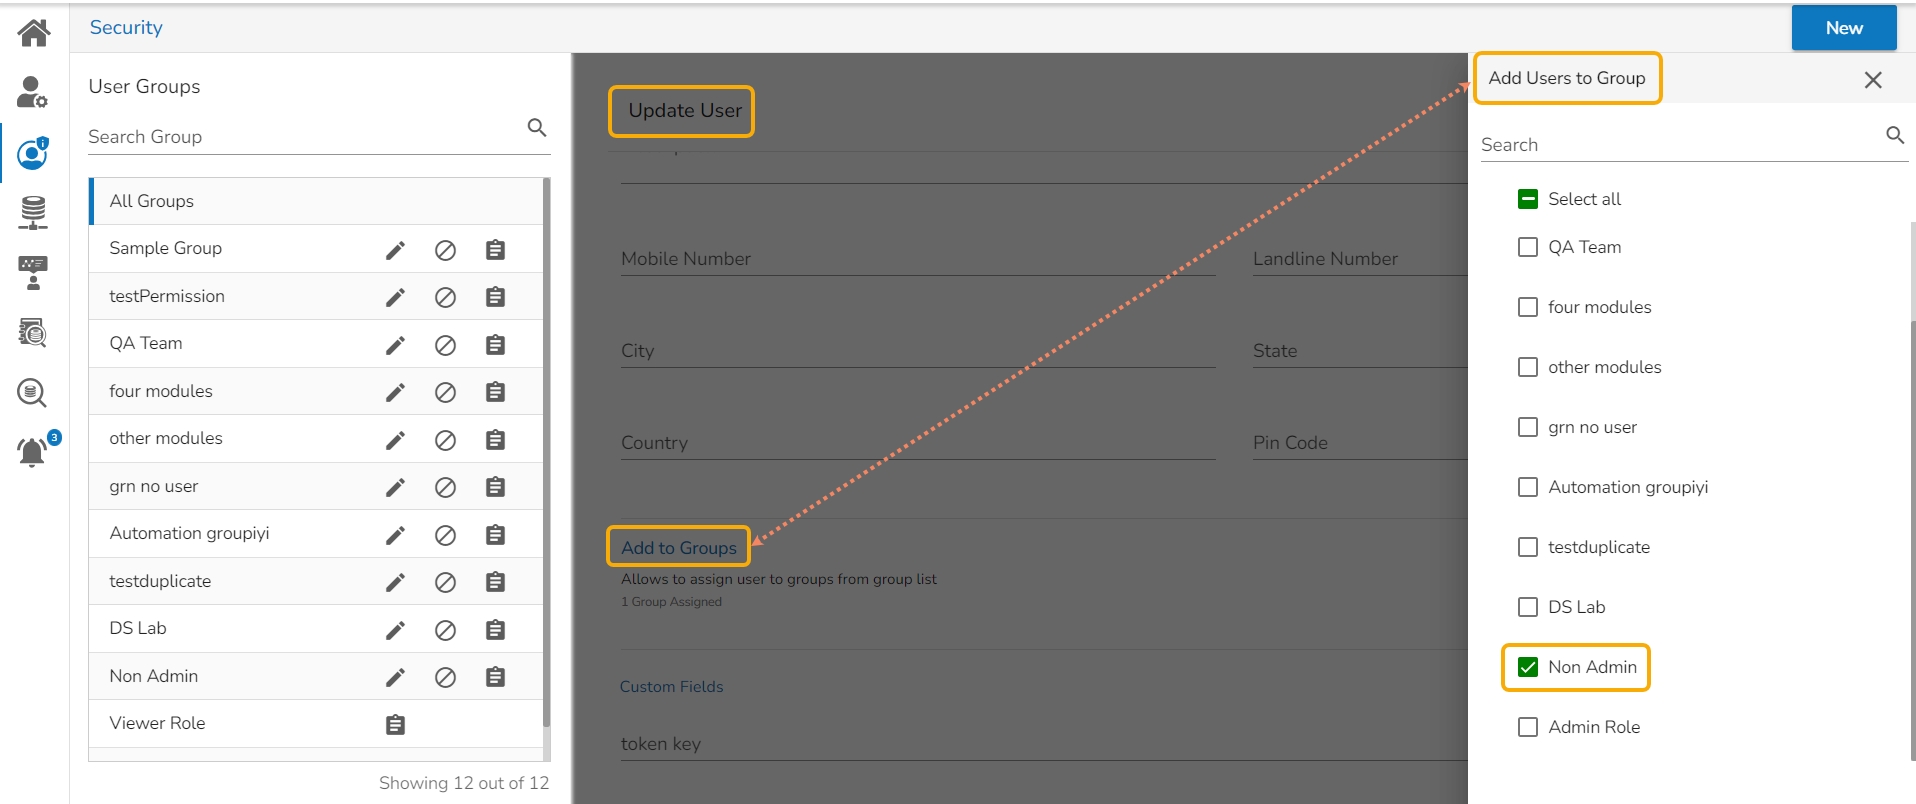
A user can be assigned a non-admin group using the Assign Group to User option while completing the user creation/ updation process.
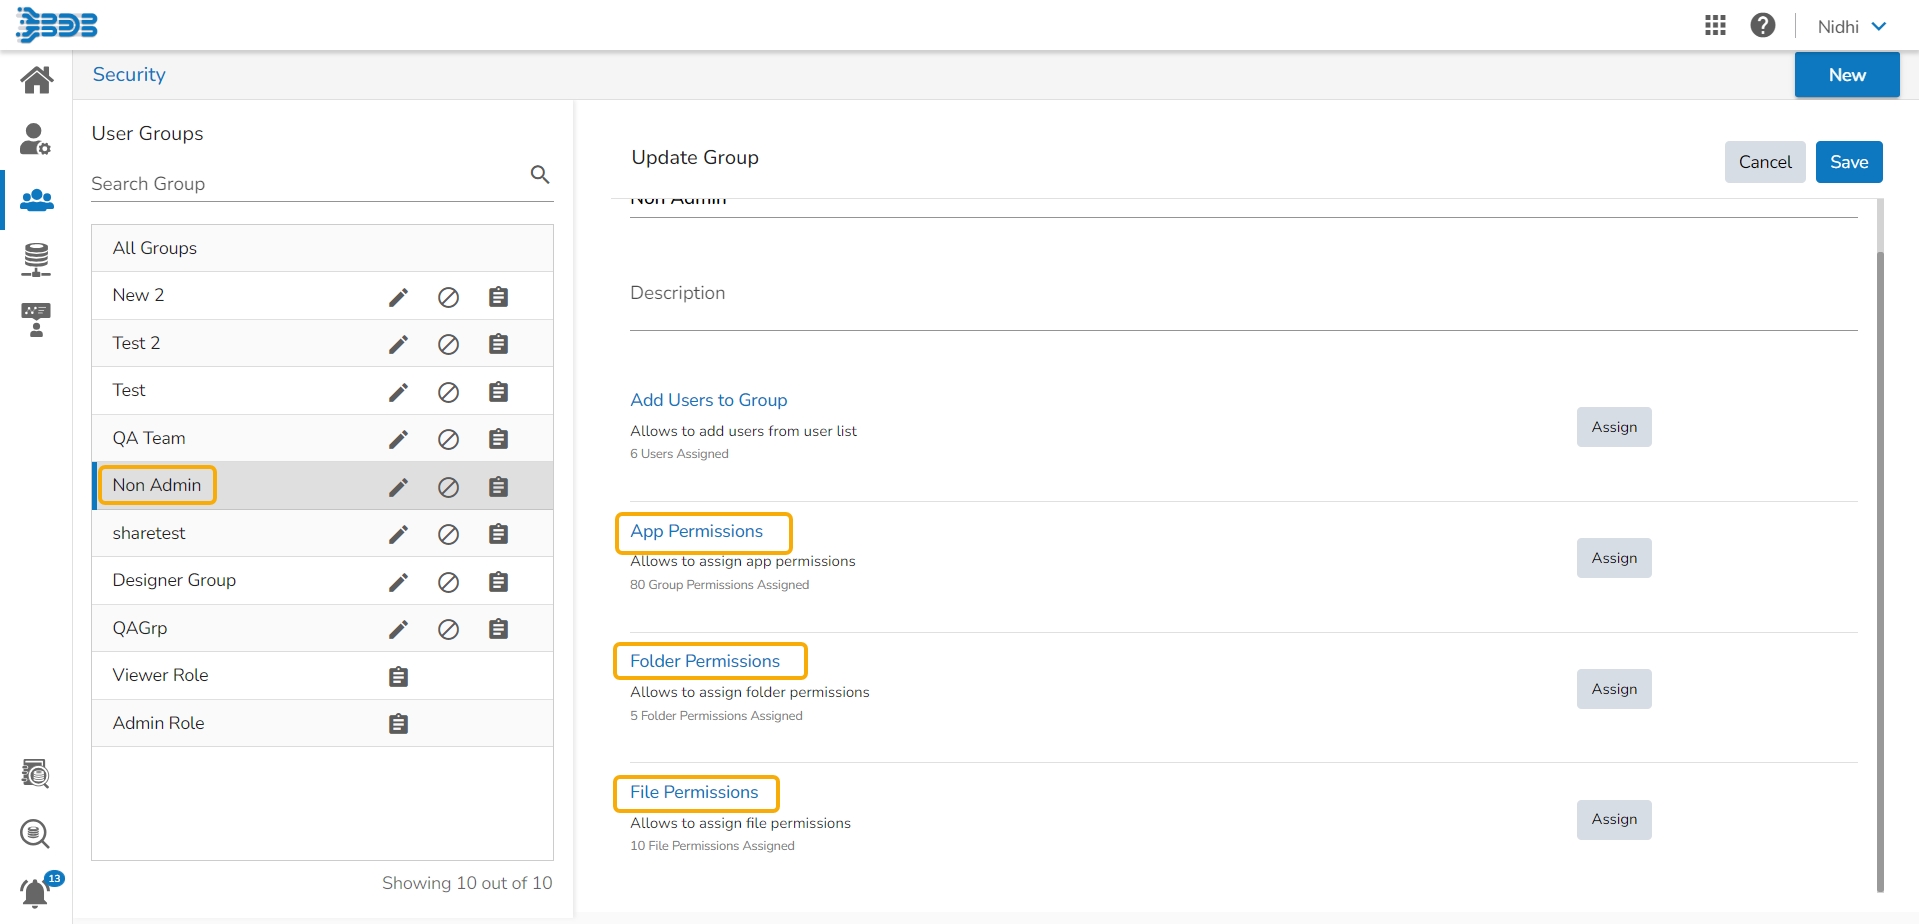
You can check out various access permissions provided to the user group or customize the given permissions such as for App, Folder, and File to the selected group.
Let us take an example to understand how a non-admin user interacts with the BDB platform displaying the details for a Non-admin user group:
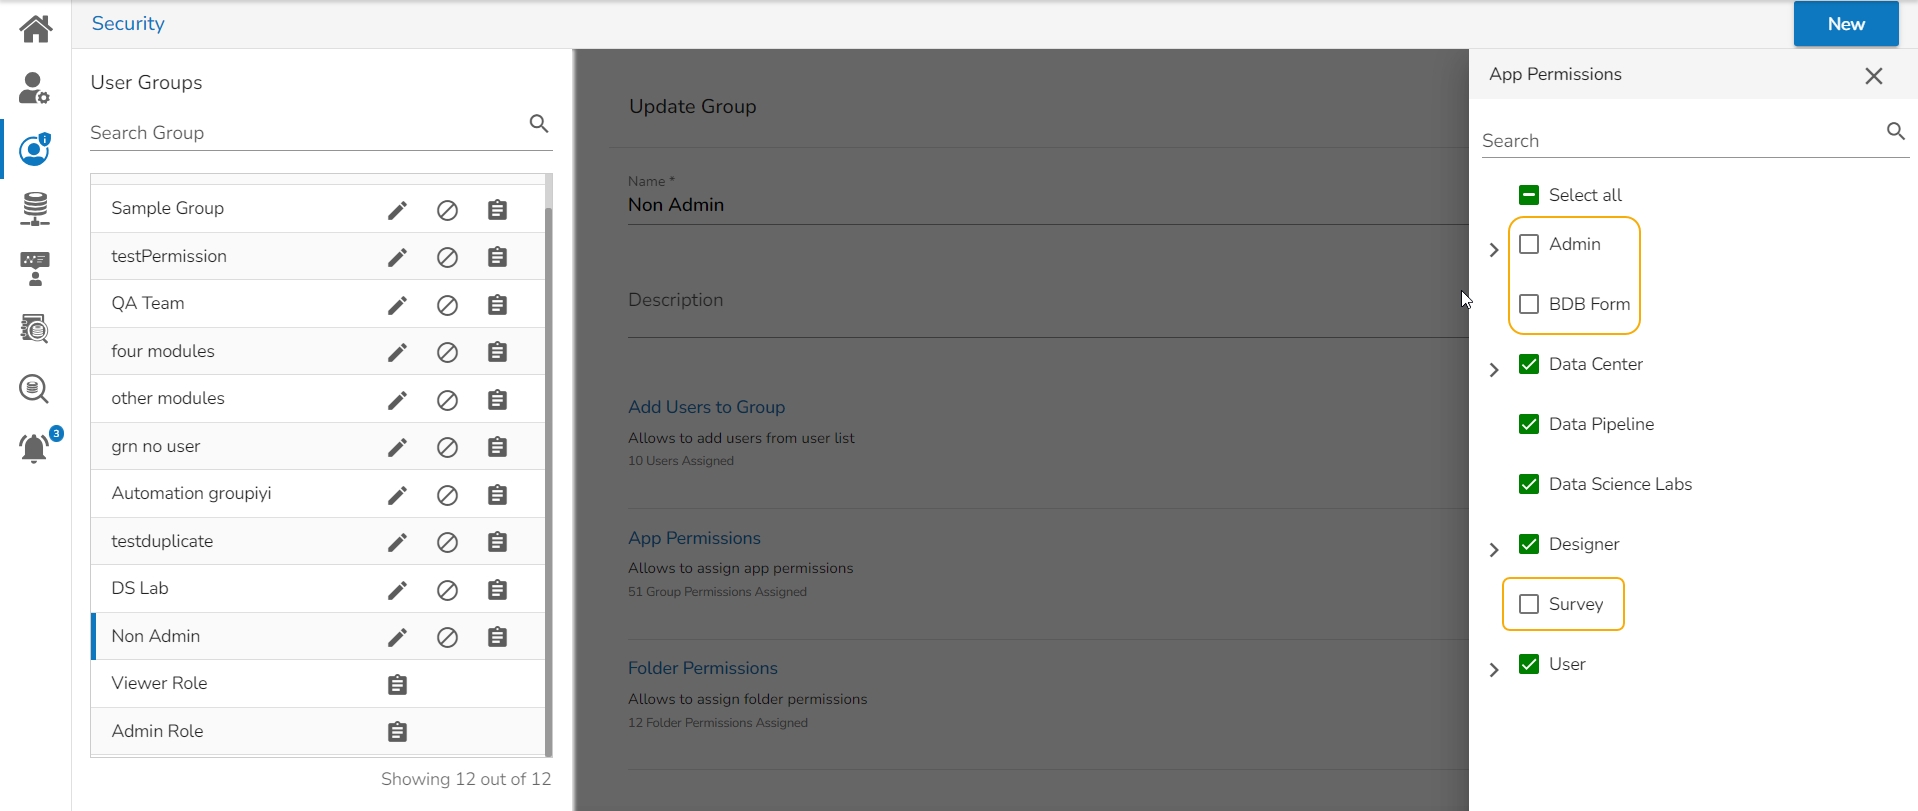
App Permissions: The selected user group does not have permission(s) to access the Admin, Form, and Survey modules.
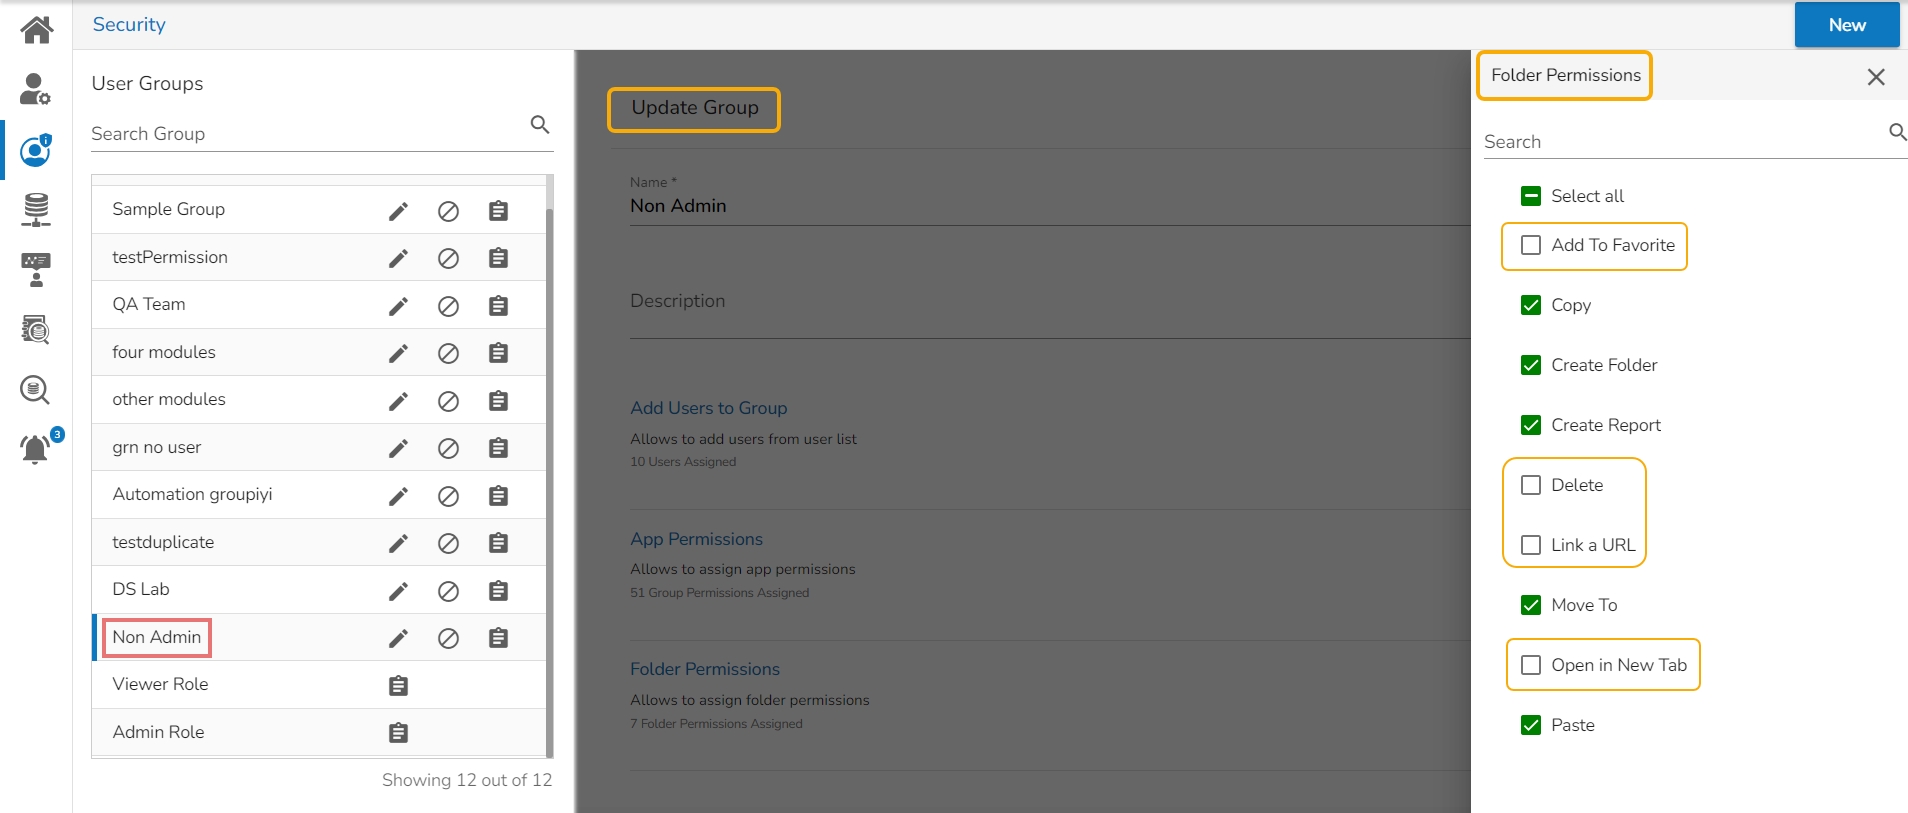
Folder Permissions: The selected user group does not have permission(s) to Add To Favorite, Delete, Link a URL, and Open in a New Tab for a Folder.
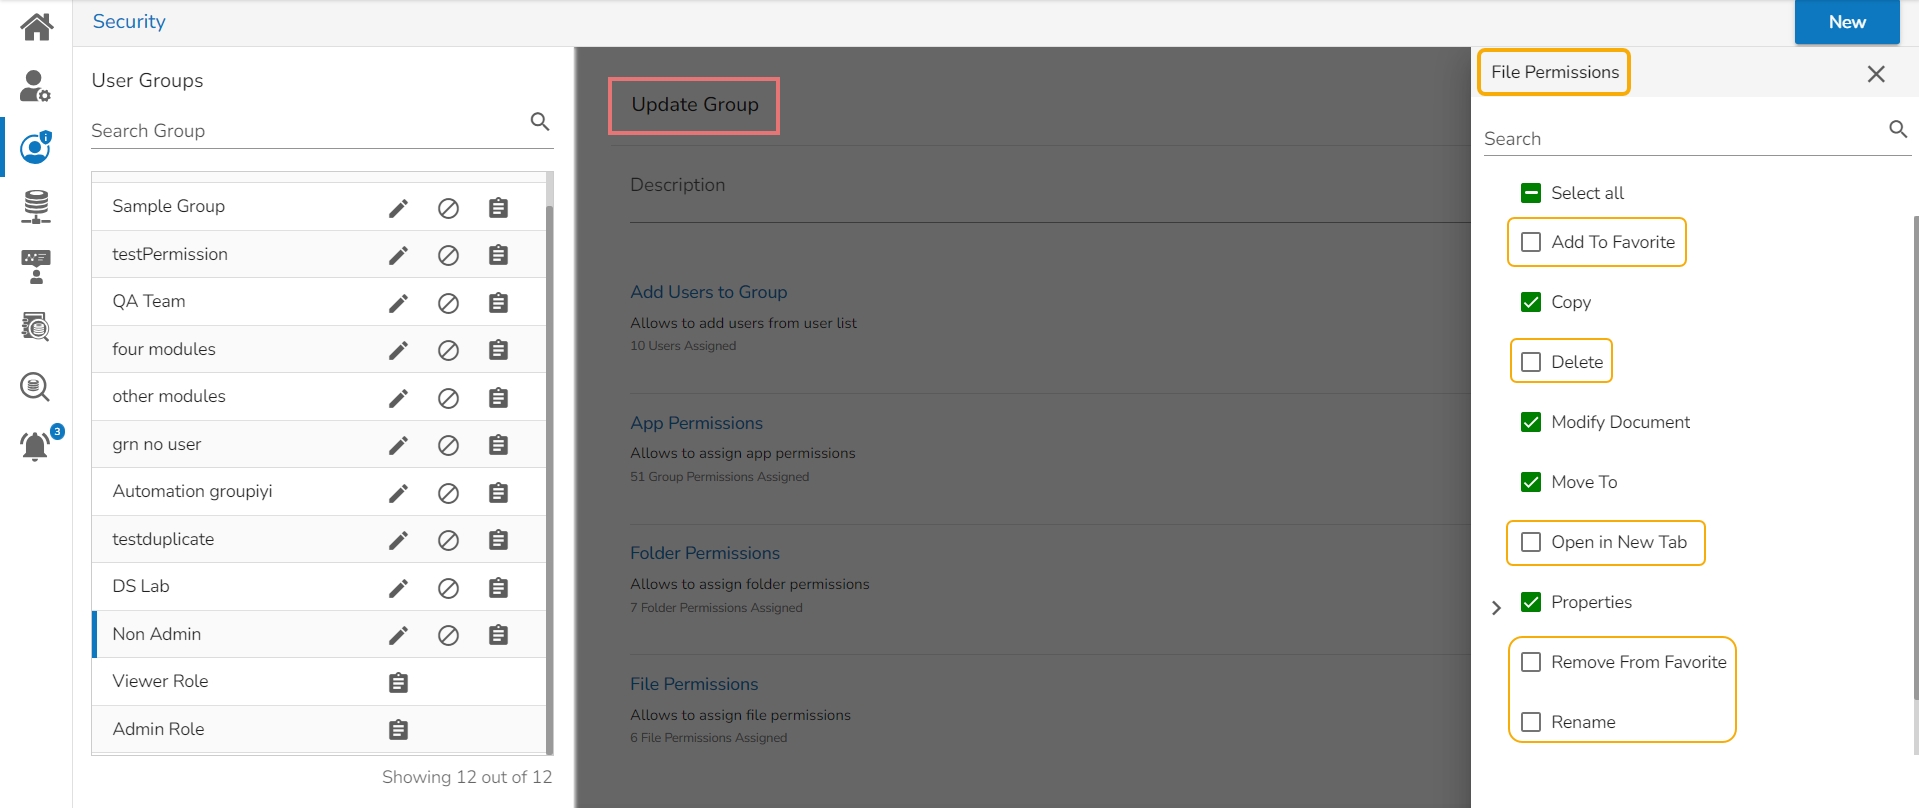
File Permissions: The selected user group does not have File Permissions to Add To Favorite, Delete, Open in a New Tab, or Rename a file document.
Save the User Group updates.
A confirmation message appears to inform that the group updates are saved.
The user(s) gets added to the selected non-admin user group.
Login to the Platform using a non-admin user's credentials.
Open the Apps menu. You will find only the permitted modules accessible to the user.
Please Note: The Home, Report, and Data Catalog modules are also allowed for a Viewer Role user.
Try to access the attributive options by clicking on the Options icon on the My Documents page. You can see that the user gets only limited (permitted) options. E.g., Only the Create Folder and Link a URL options are visible in the following image.
Please Note: The non-admin role users will have customized or restricted permissions for apps, folders, and files based on the permissions assigned to their user group.

