Loading...
Loading...
Loading...
Loading...
Loading...
Loading...
Loading...
Loading...
Loading...
Loading...
Loading...
Loading...
Loading...
Loading...
This section describes steps to create new user.
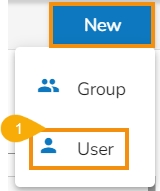
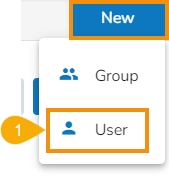
Select the User option from the New Context menu.
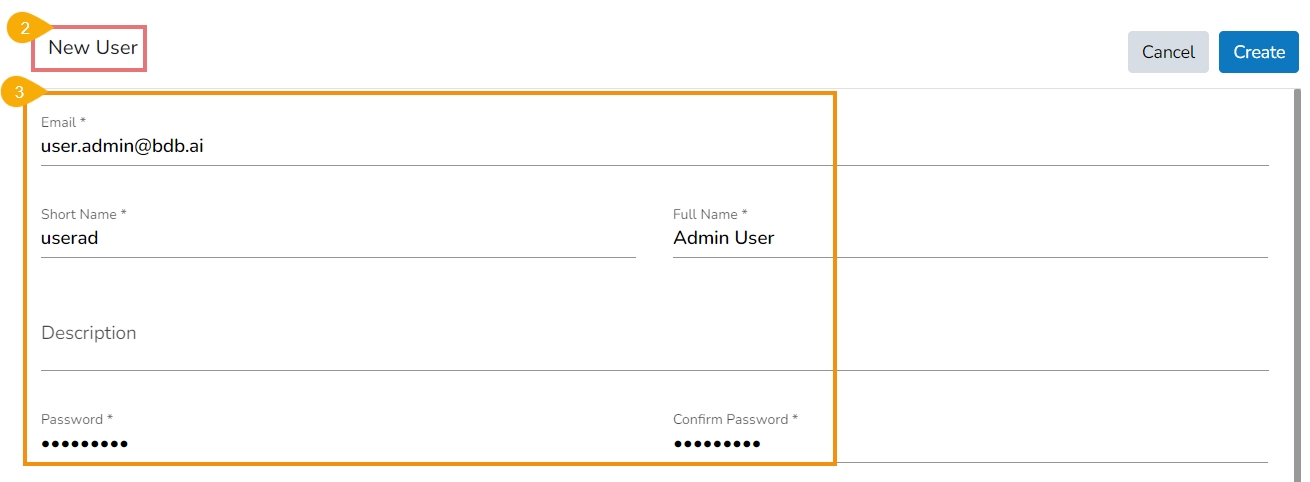
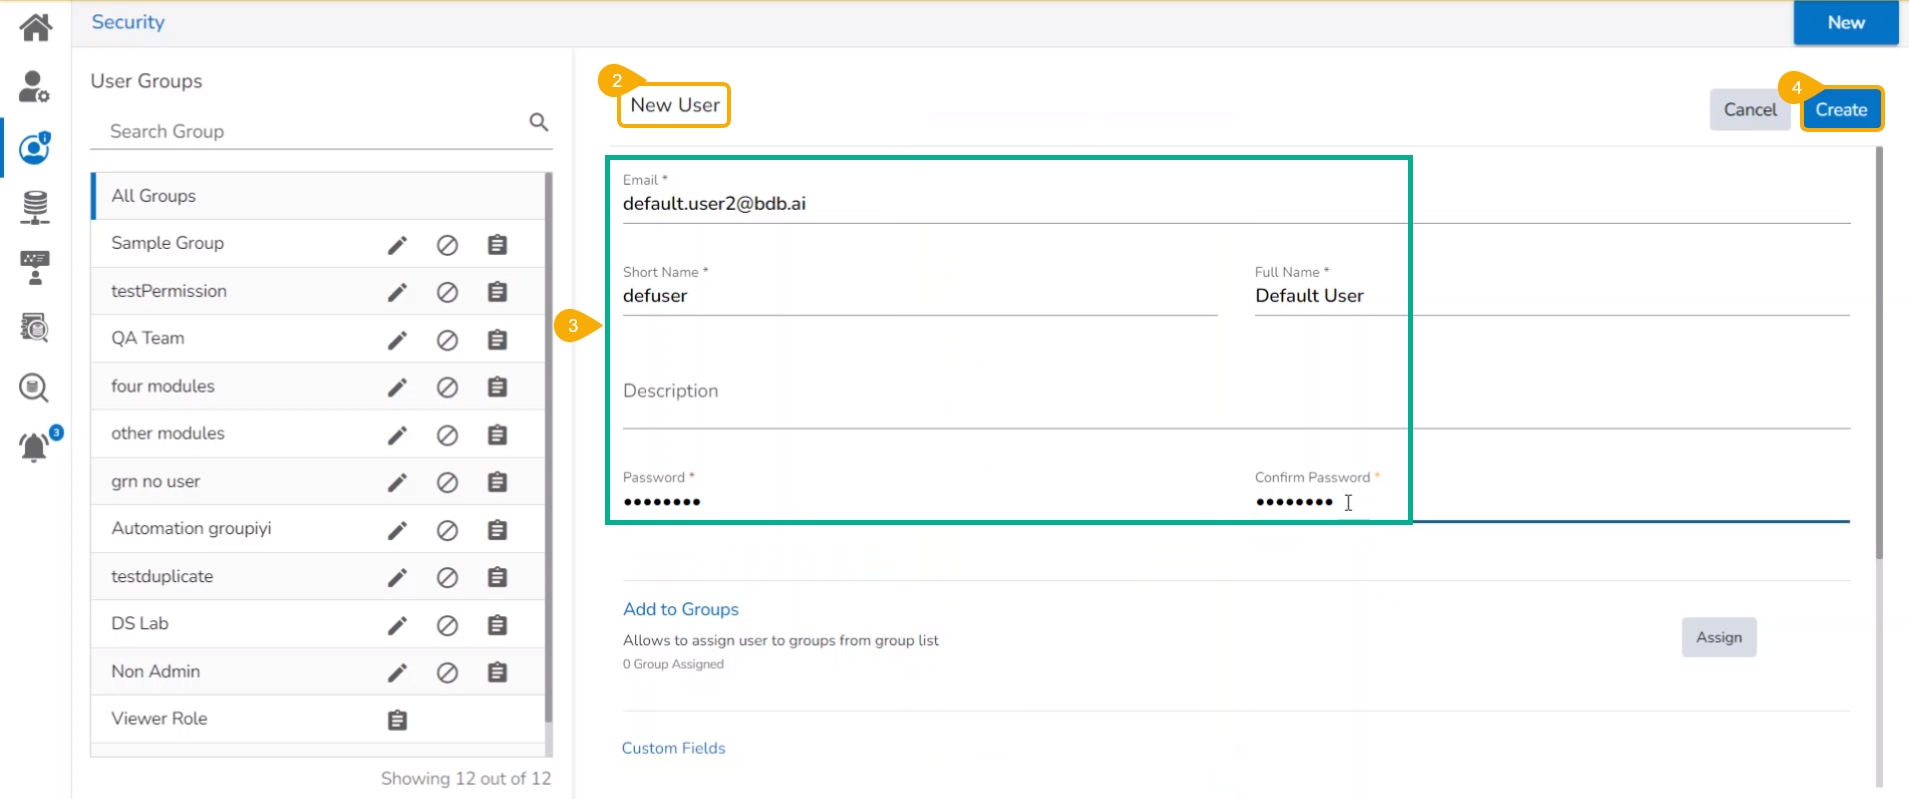
The New User form opens.
Fill in the following information to create a new User:
Email: Provide an email address to be registered for the user.
Short Name: Short name of the user.
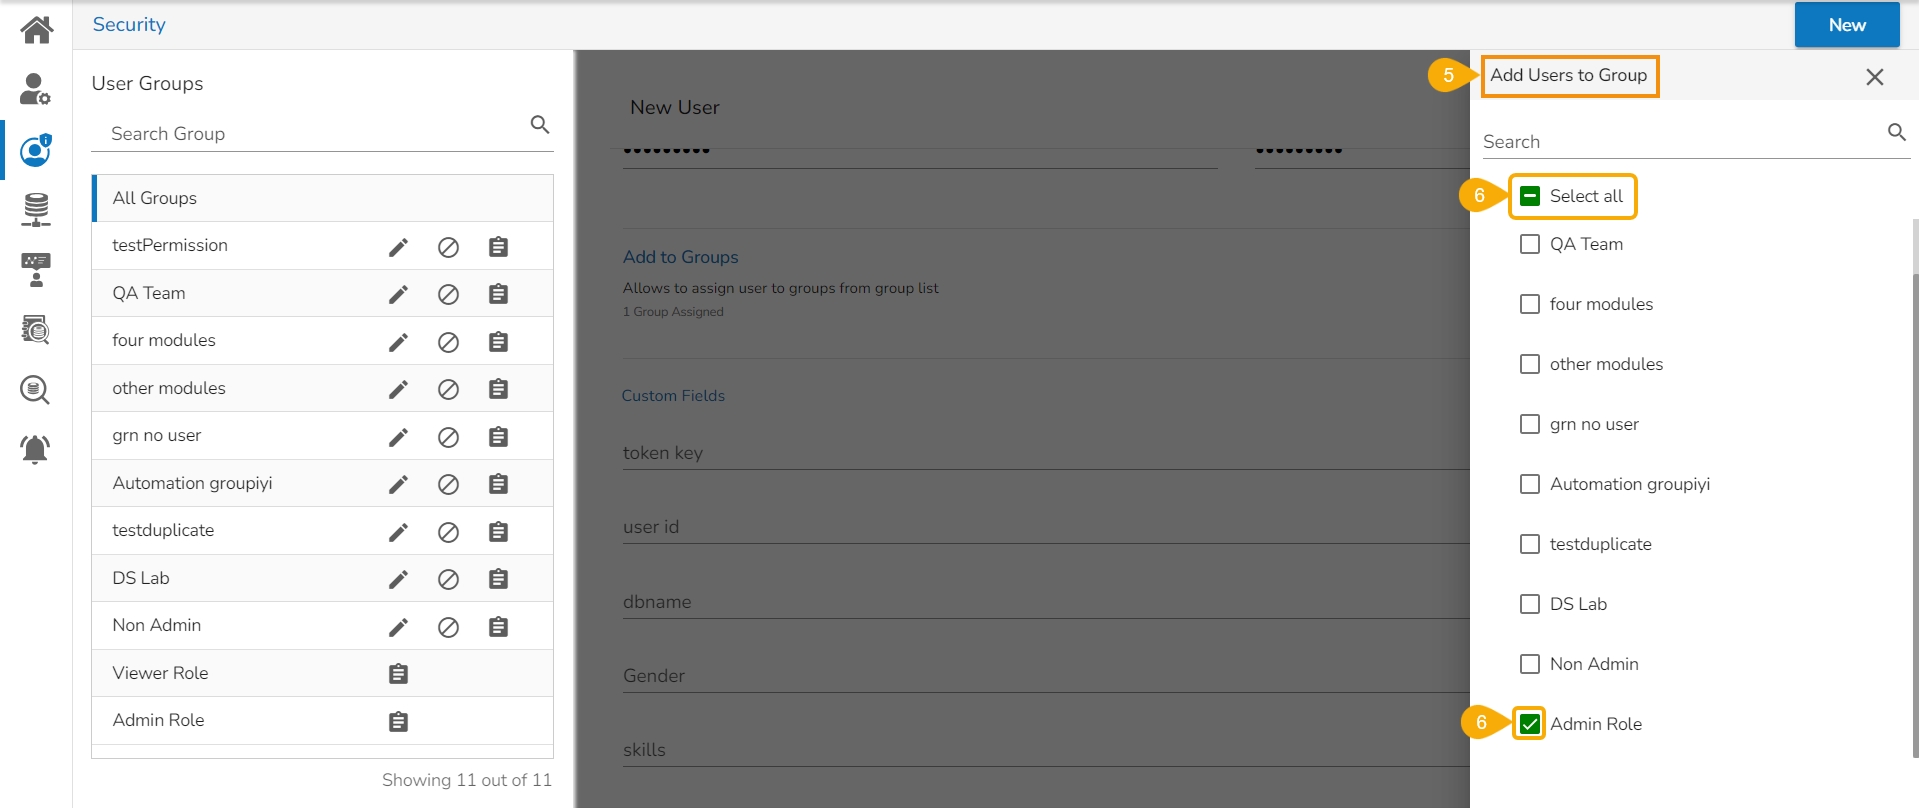
Click the Assign option to add the new User to Group(s).
The Add Users to Group window opens, listing all the groups.
Either choose the Select all option or select the specific group(s) using the checkmarks.
The selected group(s) will be assigned, and the number of the selected groups will mentioned.
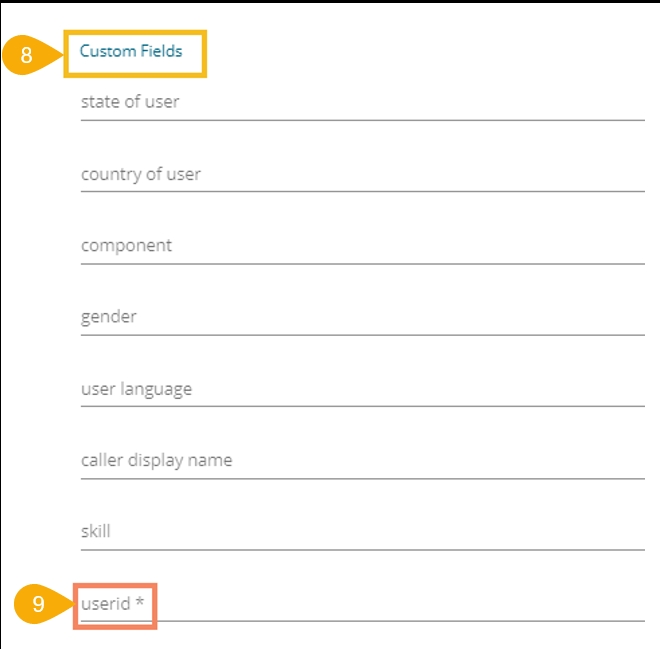
Pre-configured custom fields are displayed under the Custom Fields heading in this form.
The users can provide the required details using the custom fields if marked as mandatory (A user gets group-specific custom fields).
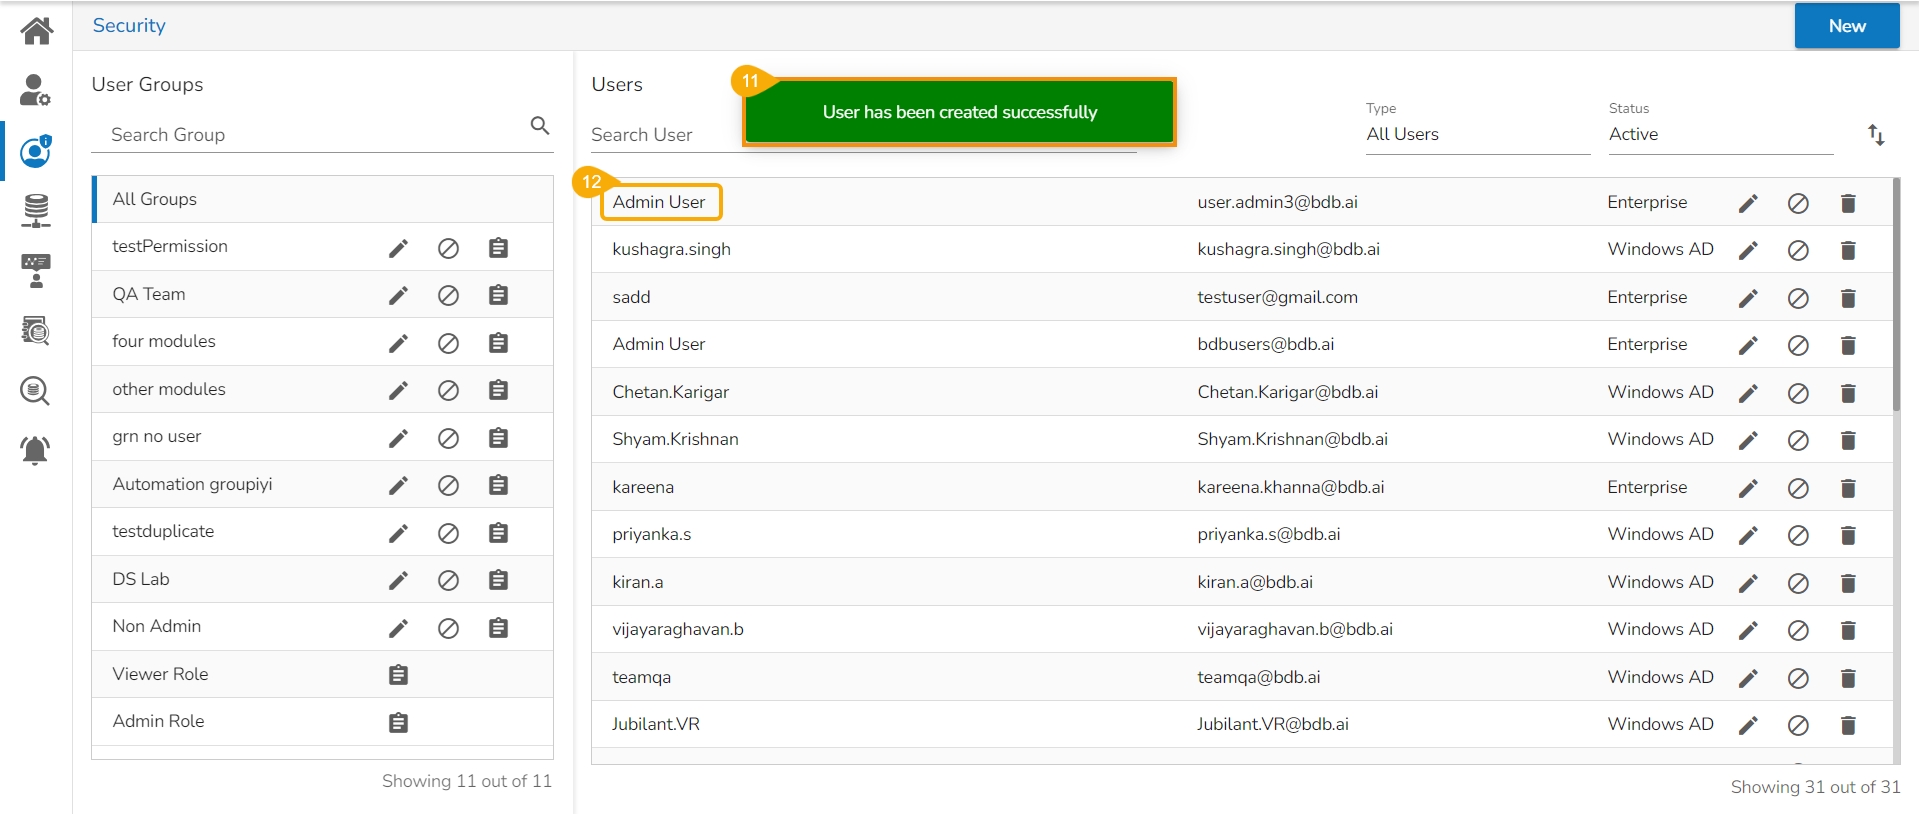
Click the Create option.
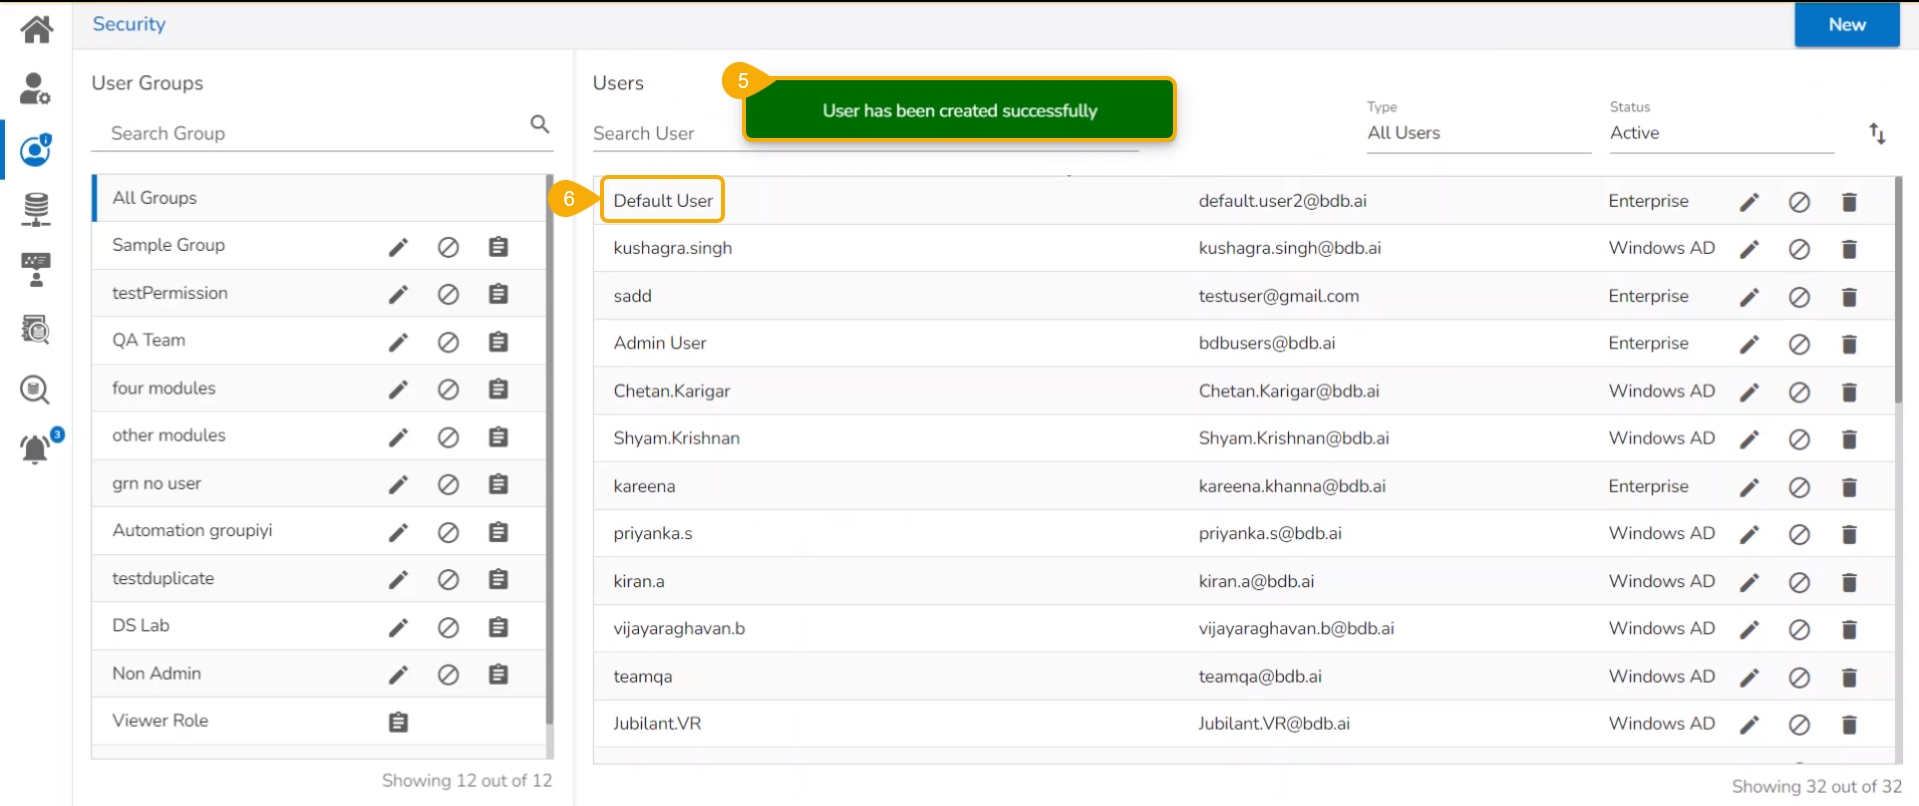
A confirmation message appears.
The newly created user gets added to the user list.
Description: Describe the user (optional).
Password: Set password for the new user.
Confirm Password: Confirm the above password.
A single user can be a part of multiple groups, and the user can get collective permissions from all the groups to access different platform modules.
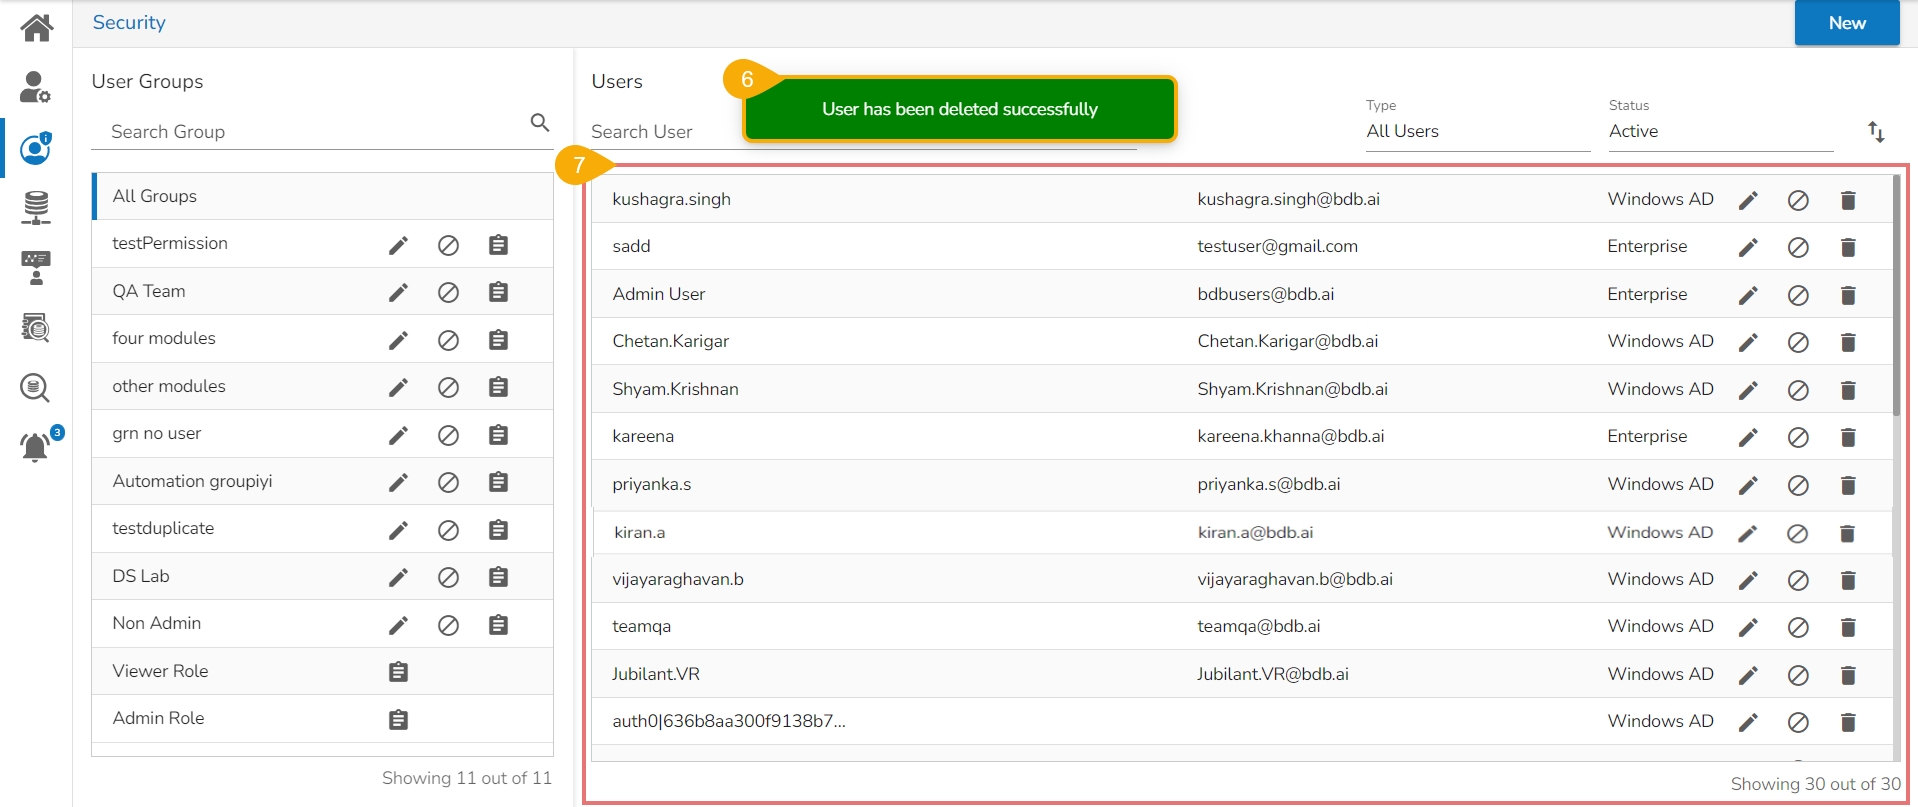
This option helps to remove a user from the user list.
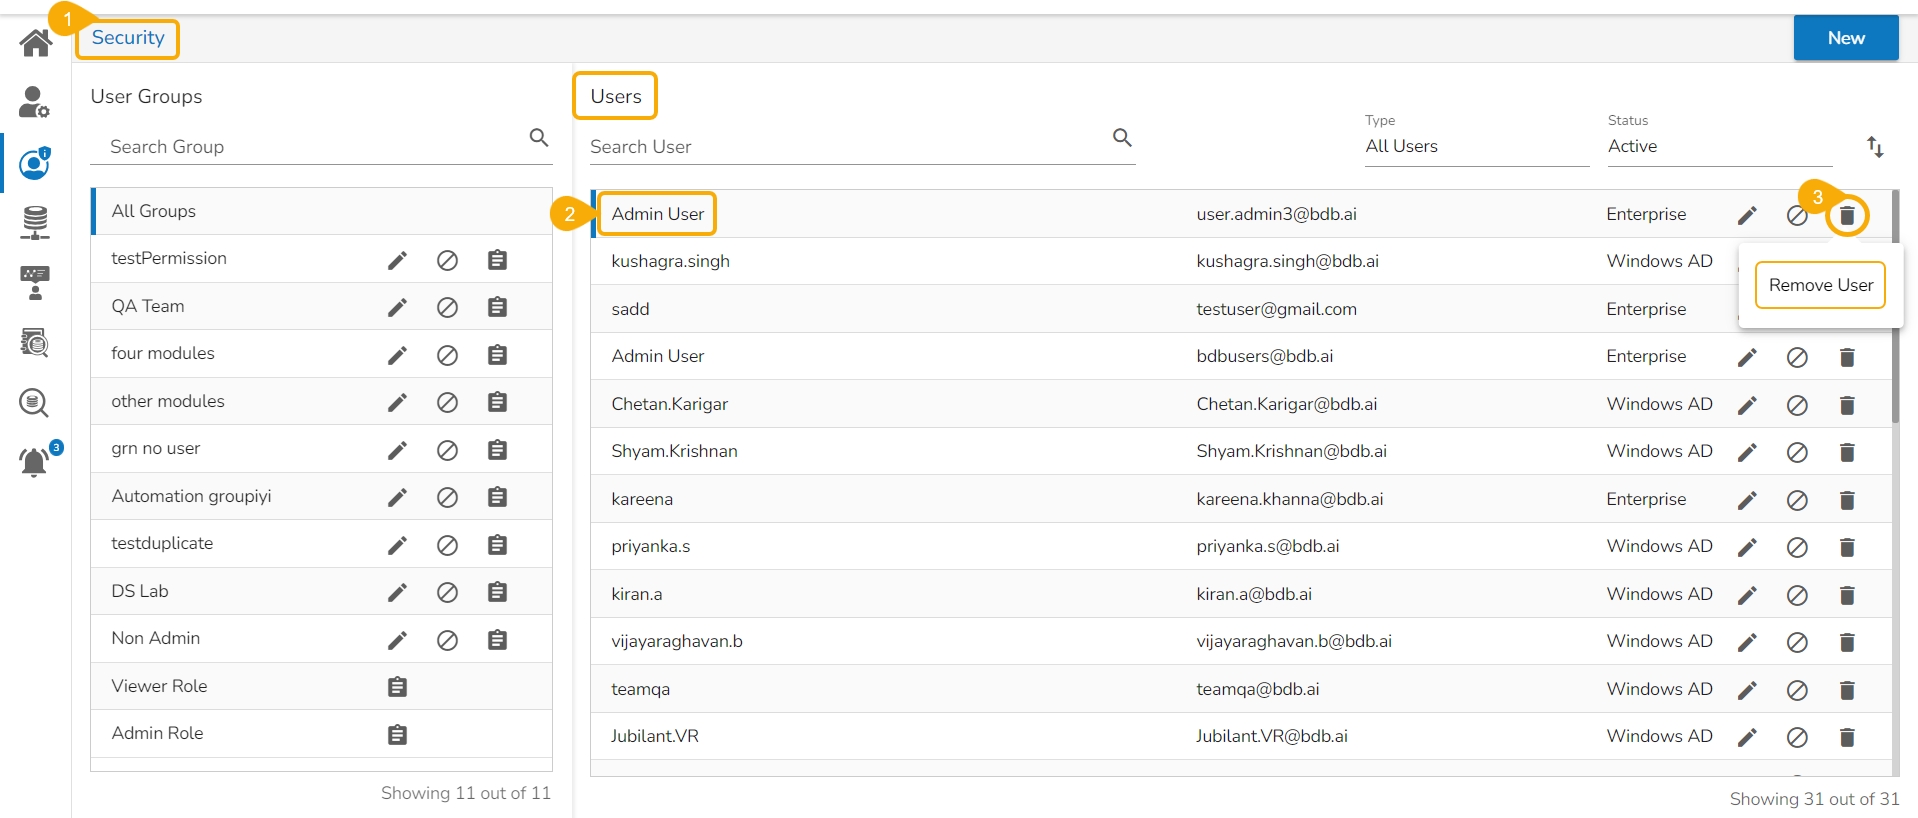
Navigate to the Security page.
Select a user from the Users list.
Click the Remove User icon for the selected user.
The Remove User dialog box appears to confirm the deletion.
Click the Yes option.
A notification message appears.
The selected user gets removed from the Users list.
This functionality is available only for the Enterprise users.
Open the Security page.
Navigate to the Users list.
User the Search Bar to search for a specific user.
Select the Enterprise option using the Type filter.
Select the Active option for the Status filter.
Select a user from the Users list.
Click the Reset Password icon.
A notification message ensures the password reset link has been sent to the registered mail.
The user will receive the Reset Password link on the registered email from the support team. Click the Reset Password link.
The user will be redirected to the Reset Password page.
Provide a new password.
Confirm the new password.
Click the Continue option
The password will be reset for the selected user account.


This feature helps the administrator to identify the various types of platform users and enable an expired user account.
Navigate to the User Security page.
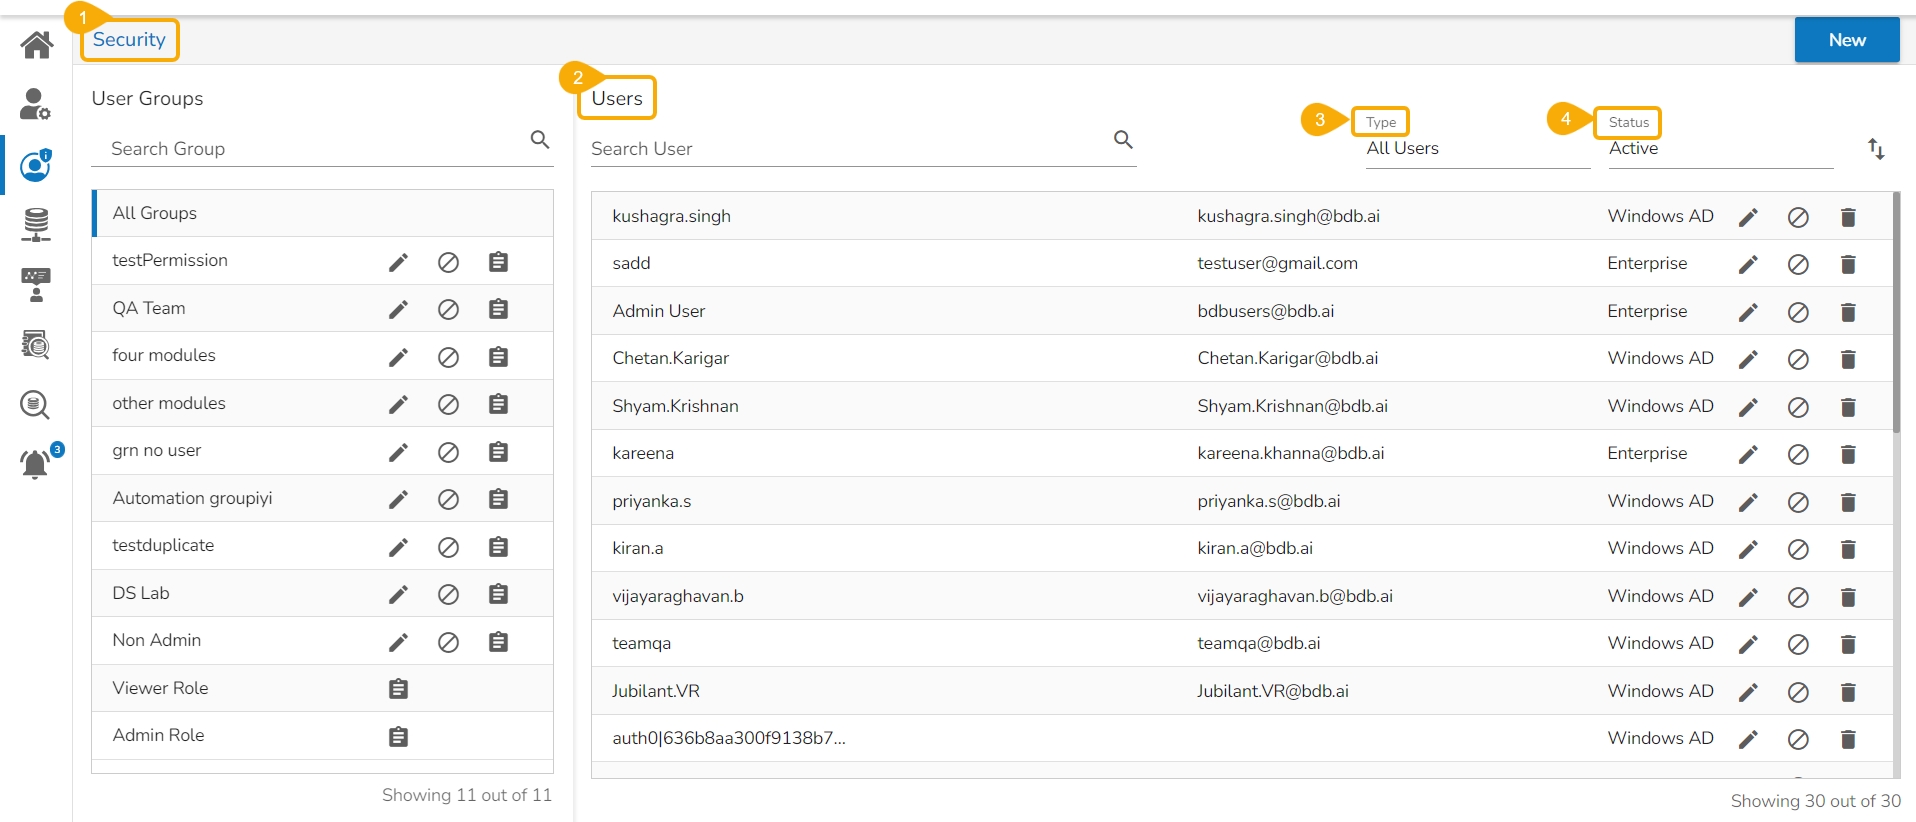
You can see two drop-down menus.
Type: It contains the following authentication types as drop-down options.
Enterprise
Window AD
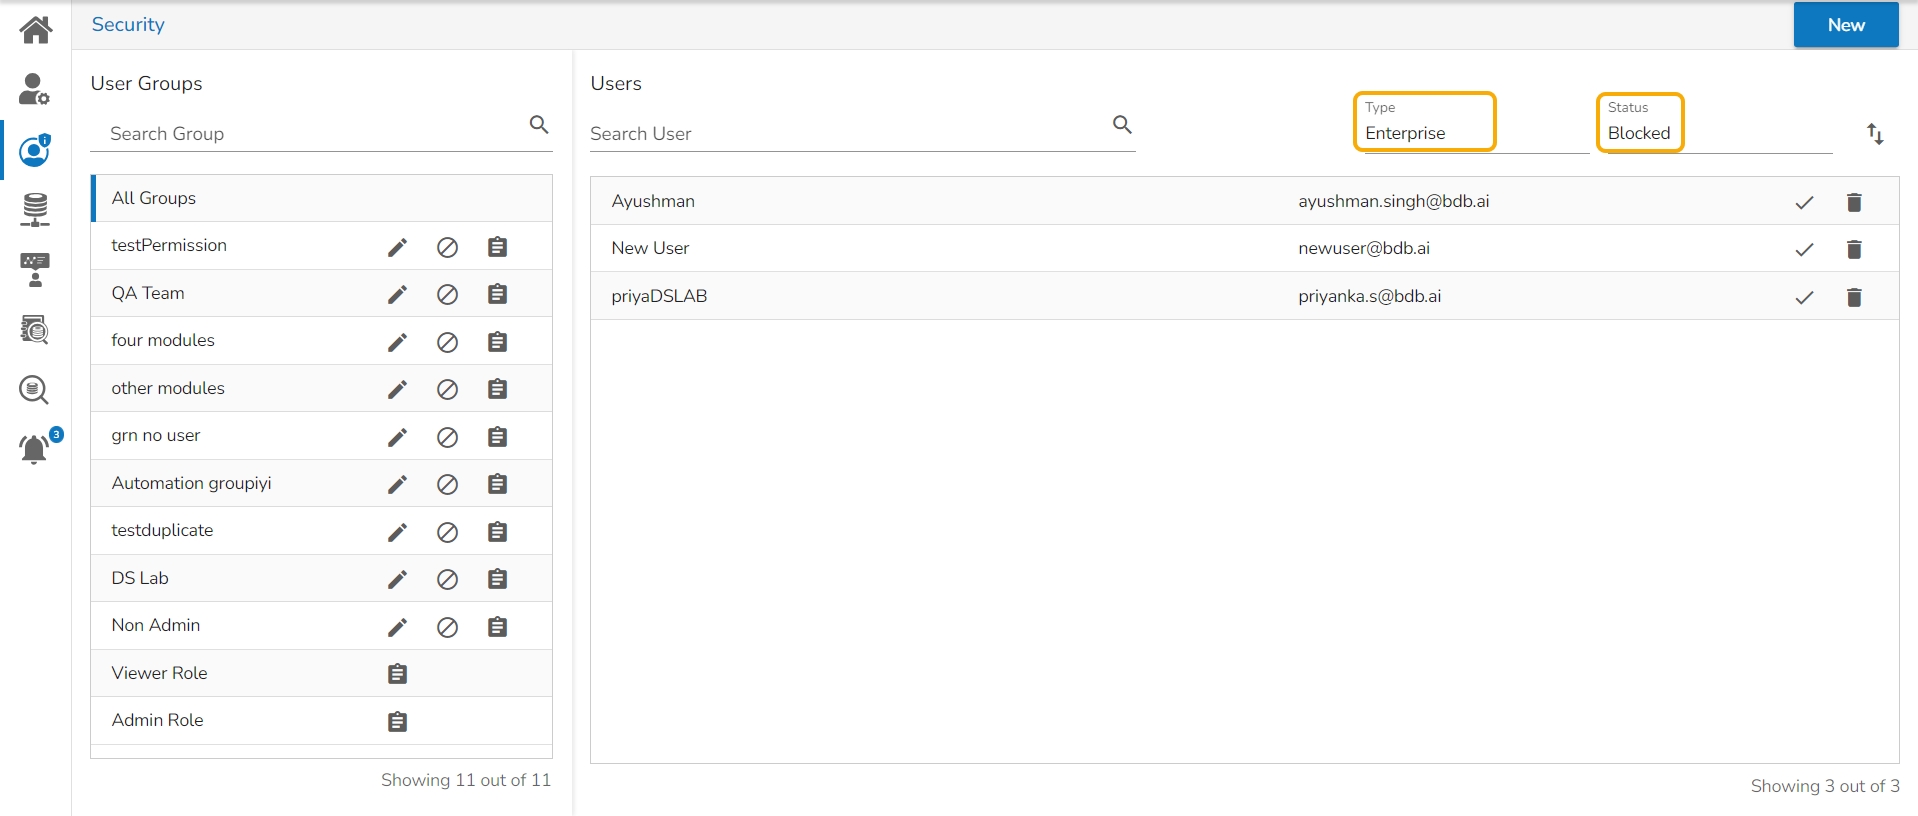
You can select any combination of the filter values mentioned above to display filtered/customized lists of users. E.g., The given image displays a filtered user list with all the Enterprise users with Blocked Status.

AWS Cognito
Status: It includes the following user status as drop-down options
Active
Blocked
Expired
Deleted

This section describes steps to create a new user group.
Click the New option given on the Security page.
Select the Group option from the context menu.
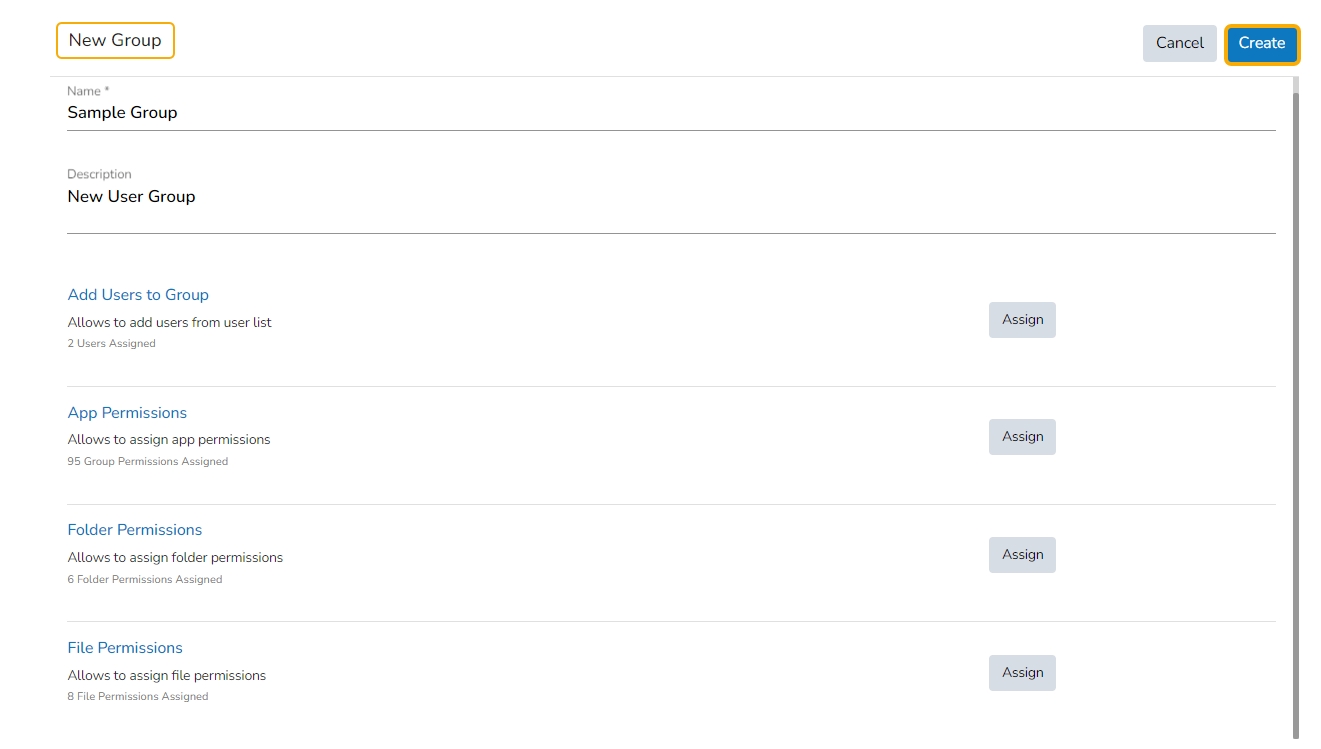
The New Group window opens asking for information about a new group.
Provide the following information to create a new User Group:
Group Name: Enter a name for the user group (The group name should not exceed 20 words).
Description: Describe the user group (optional) (The description should not exceed 150 words).
Click the Assign option to add the existing users to the newly created group.
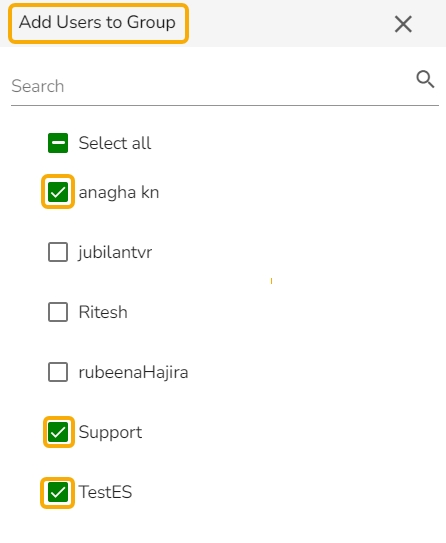
The Add Users to Group window opens with a list of all the existing users in that space.
Select User(s) by using a checkmark in the box from the displayed list of users.
Click the Assign option to add various app permissions to the newly created group.
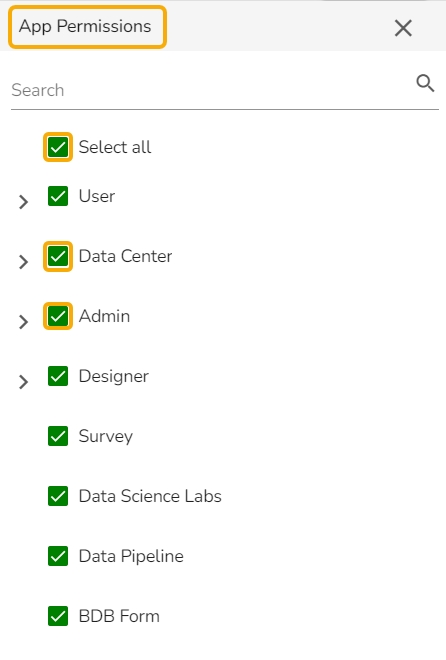
The App Permissions window opens with the list of the available apps to select the App Permissions.
Either choose the Select all option to add all the permissions or manually Assign various plugin/app rights by manually selecting the specific plugin options to the newly created User Group via the App Permissions menu list.
Click the Assign option provided next to the Folder Permission option.
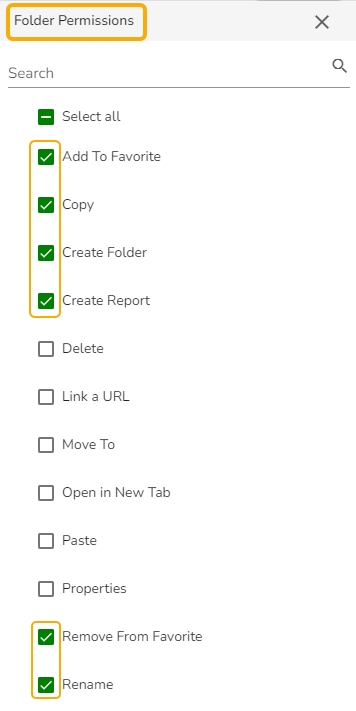
The Folder Permissions window opens with the list of the Folder Permissions to be selected for the group.
Click the Assign option provided for the File Permissions.
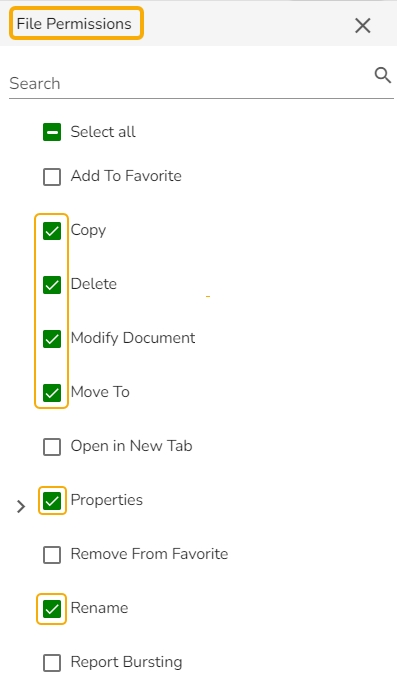
The File Permissions window opens with the list of the File Permissions to be selected for the group.
After adding users and allowing the required Permissions to the new group, click the Create option for the new User Group.
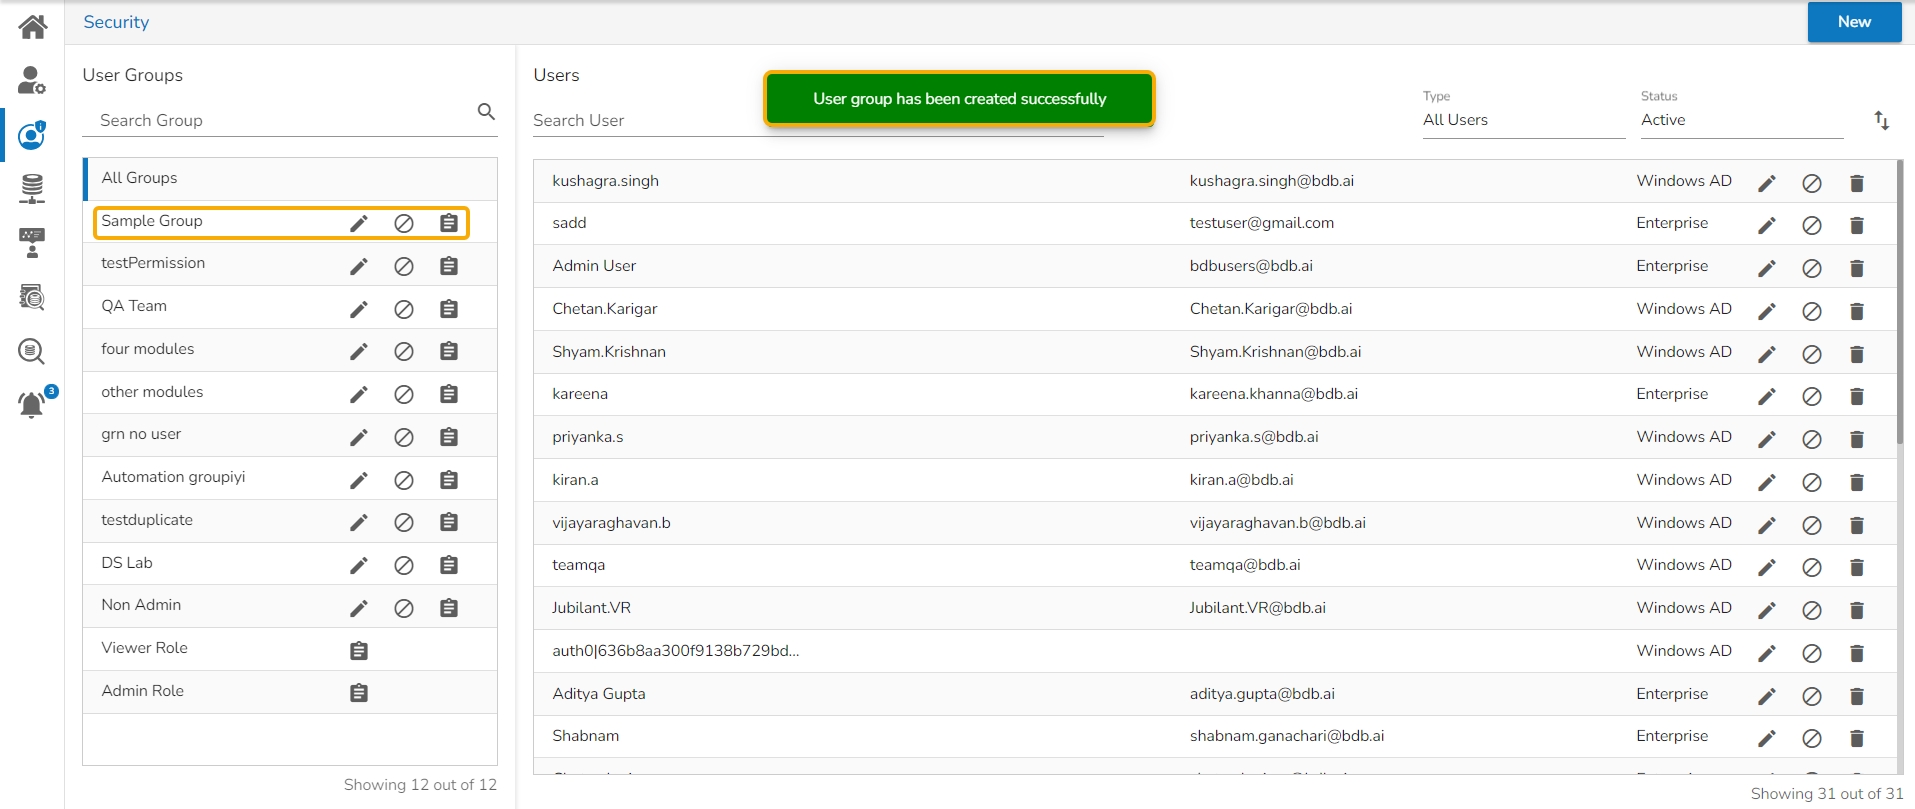
A confirmation message appears.
The newly created group will be listed under the All Group list (as shown below):
How to assign Admin Role to platform user.
There is a default user group, Admin Role under the User Management module.
Navigate to the Security page.
Search for the Admin Role group or scroll down the User Groups list.
The Admin Role group appears at the bottom of the User Groups list.
All the users added to the Admin Role will be listed while selecting the Admin Role user group.
Check out the given walk-through to understand the steps for adding a user to the Admin Role.
Select the Add Users to Group option for a new user or an existing user.
The Add Users to Group panel opens on the right-hand side.
Search for the Admin Role group.
Click the Save option.
A new user gets created or the selected existing user gets updated (In both scenarios the user will be notified by a confirmation message).
Open the Admin Role group from the User Groups list.
The newly created user or the selected existing user appears as a part of the Admin Role group.
The section focuses on user-defined roles of the platform users.
Check out the walk-through on how to assign customized roles to users.
The user allocated to any group other than the Admin Role with limited credited permissions gets the non-admin user role category. The non-admin users may have customized access to platform modules based on the rights given by their administrator.
Select a non-admin user group from the User Groups list (E.g., Non-Admin Group).
Open the Add Users to Group panel and add a specific user/ users to that group.
OR
A user can be assigned a non-admin group using the Assign Group to User option while completing the user creation/ updation process.
You can check out various access permissions provided to the user group or customize the given permissions such as for App, Folder, and File to the selected group.
Let us take an example to understand how a non-admin user interacts with the BDB platform displaying the details for a Non-admin user group:
App Permissions: The selected user group does not have permission(s) to access the Admin, Form, and Survey modules.
Folder Permissions: The selected user group does not have permission(s) to Add To Favorite, Delete, Link a URL, and Open in a New Tab for a Folder.
File Permissions: The selected user group does not have File Permissions to Add To Favorite, Delete, Open in a New Tab, or Rename a file document.
Save the User Group updates.
A confirmation message appears to inform that the group updates are saved.
The user(s) gets added to the selected non-admin user group.
Login to the Platform using a non-admin user's credentials.
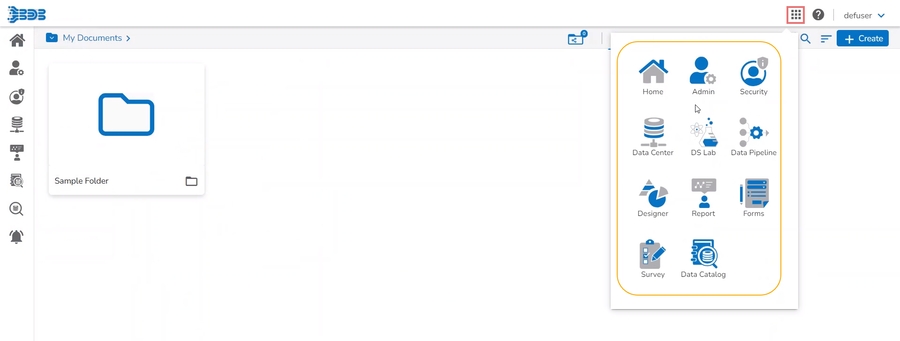
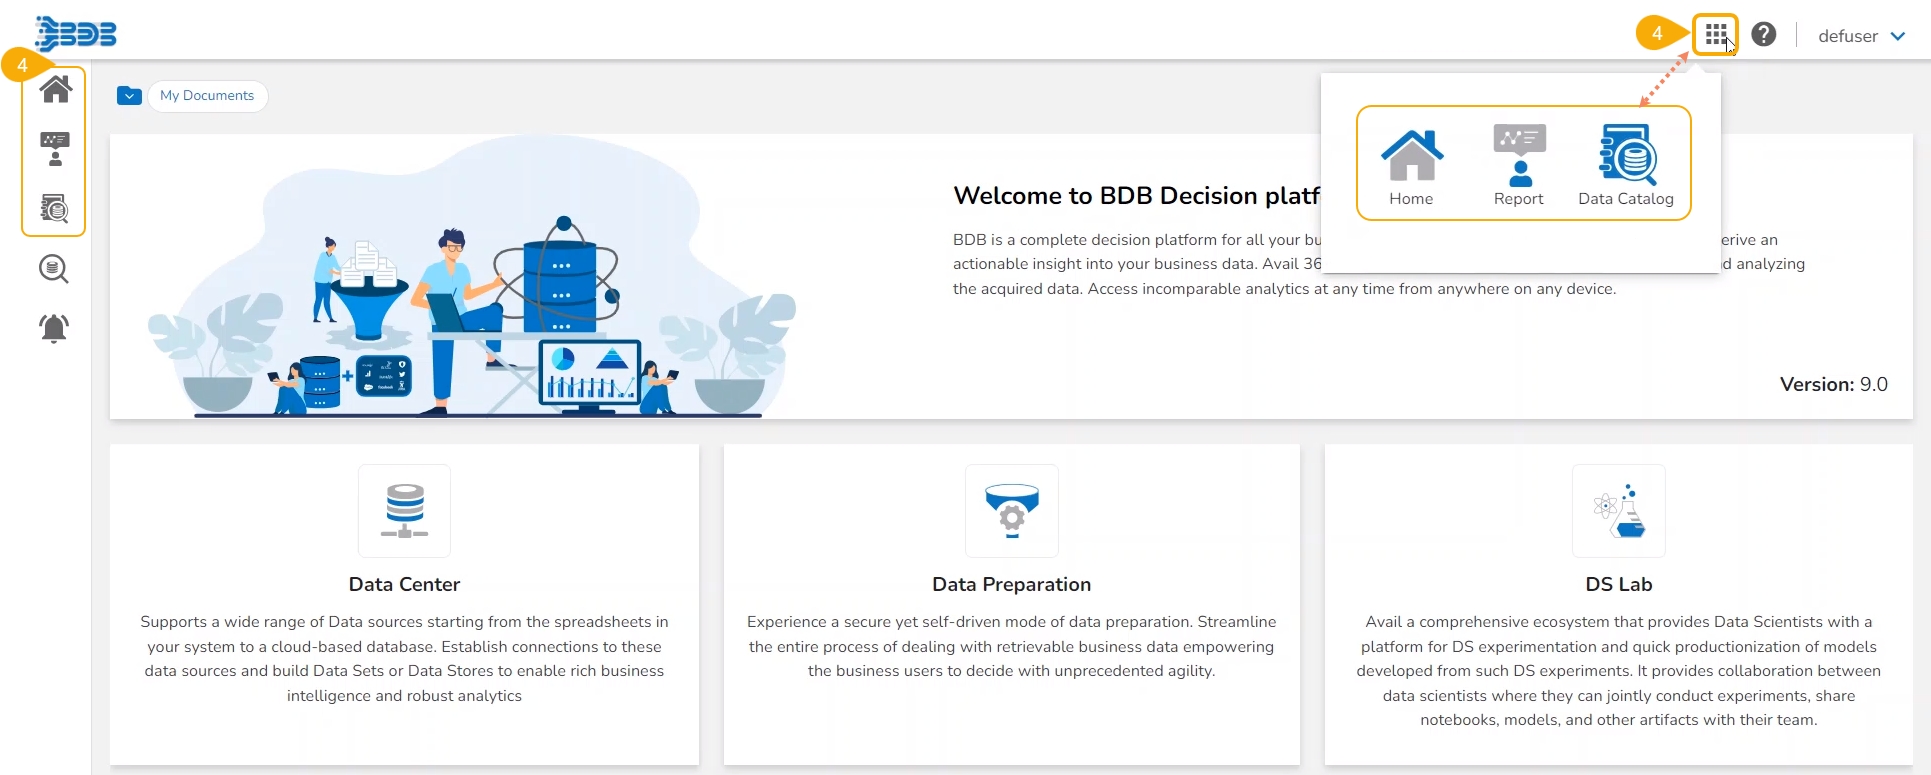
Open the Apps menu. You will find only the permitted modules accessible to the user.
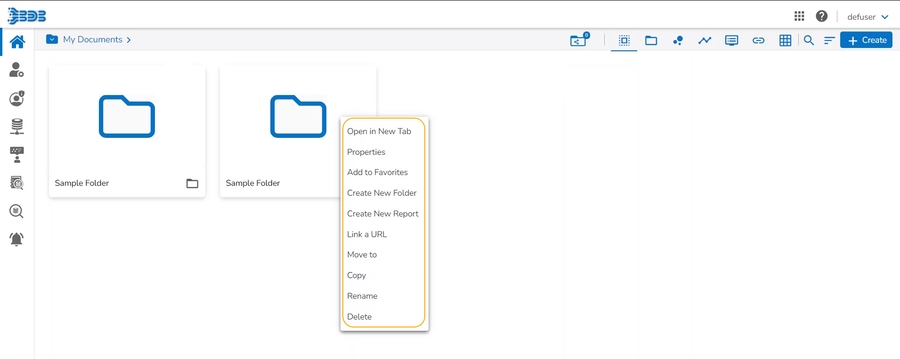
Try to access the attributive options by clicking on the Options icon on the My Documents page. You can see that the user gets only limited (permitted) options. E.g., Only the Create Folder and Link a URL options are visible in the following image.
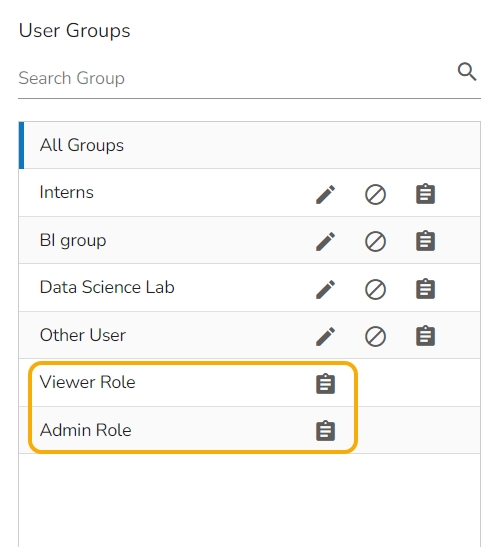
The default user groups do not have the Edit and Block icons –E.g., Viewer Role and Admin Role.
Select the Admin Role group by using a checkmark in the given box.
The Admin Role user also gets permission to access and use all the available Platform modules under the Apps menu.
The Admin Role user gets access to all the credited documentation options for a folder and a file.


It is the default user role for all the new users until they are added to any user groups with required permissions to use platform modules.
Check out the walk-through on how a Viewer role gets created.
All new users created via the Security module are added to a default (viewer) role. The default user role restricts all new users from accessing any Platform modules until they are added to some user group.
Select the User option from the New Context menu.
Access the New User page opens.
Provide the required information to create a new user.
Click the Create option.
A confirmation message appears.
The user gets created and added to the list of users (By default the newly created user will appear at the top of the list).
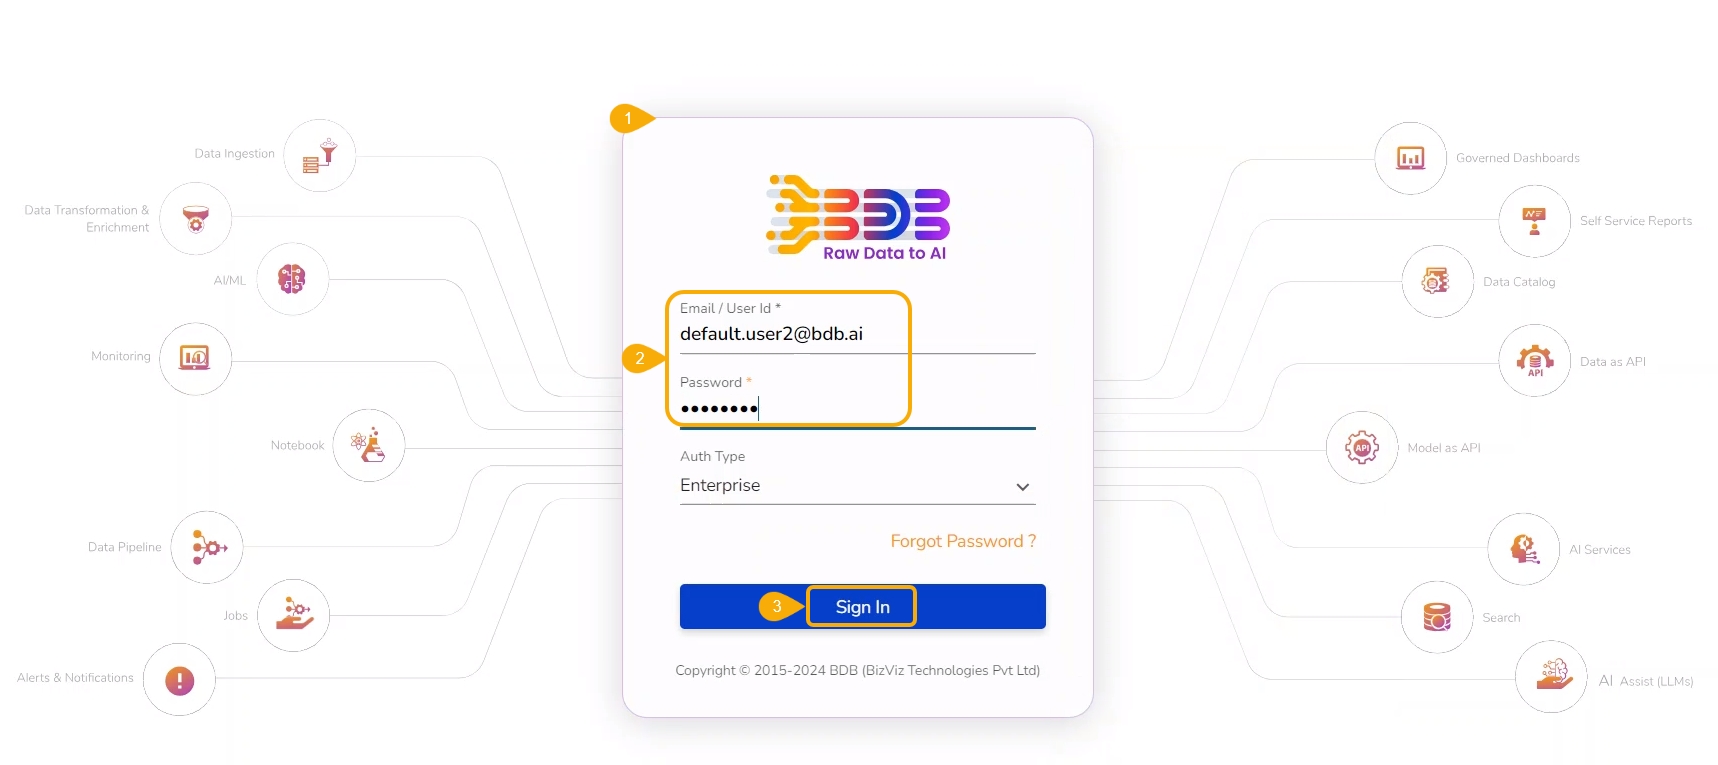
Navigate to the Sign In page of the BDB platform.
Use the new user’s credentials to access the Platform.
Click the Sign In option.
Once you Sign in to the platform homepage open the Apps menu.
As you can see the newly created user who is not part of any user groups does not have access permissions for the platform modules other than view permission for the Home, Report, and Data Catalog modules.
The newly created user who does not belong to any group is added to the default user group entitled Viewer Role under the User Groups.



This option helps to restrict data access for all the users of the selected user group by applying custom field.
Pre-requisites:
The user must be able to access the dataset or data store to which the data access restriction is applied.
The necessary must be configured to the selected user group.
There should be permission to access the Security module.
Check out the illustration on assigning the custom fields to a group to restrict data access.
Open the Security module.
Navigate to the User Groups menu.
Search the specific user group using the search bar.
The All Groups list will be customized displaying the Searched user groups.
All the users from the selected group will be displayed on the right side. For example, the logged-in user belongs to the selected Admin role users.
Click the Data Center icon from the same admin user.
Open the Data sets list.
Select a dataset from the list.
Click the View/ Edit icon for the data set.
The Data Set update page opens.
Click the Validate option to execute the query.
A notification message ensures the query is executed and the table has been updated.
The data result will be displayed under the Preview Result option.
Open the Security module.
Navigate to the User Groups section.
Use the search bar to search for a specific group.
The All Groups get customized.
Click the Assign Custom Fields icon for the selected non-admin group.
Assign the Custom Feidls to the group users page that appears.
Use the Select Custom Fields option to get the Custom Fields drop-down.
Select a custom field from the drop-down.
Click the User Lookup option to get the user lookup drop-down.
Select a user from the displayed drop-down.
Click the Save option.
A notification message ensures that the group custom fields have been udpated.
Sign- into a user account from that non-admin group.
Click the Data Center icon.
Open the Data Sets list.
Select a Data set from the list.
Click the View/Edit icon.
The Data Set update page opens.
Click the Validate option.
A notification message ensures the query is executed and the table is updated.
The restricted data appears under the Preview Result section.
Sign in using the admin user credentials of the platform.
Click the Data Center icon.
Navigate to the Data Stores list page.
Select a Data Store from the displayed list.
The Update page opens for the selected Data Store.
The Getting Data tab opens by default.
Click the Next option (until the Data Restrictions tab opens).
The Data Restriction tab opens.
Select a Custom Field using the Dimension drop-down menu (The Custom Field must be configured as Dimension using the Data Type Definition tab of Data Store creation).
Provide the same for the User Property.
Click the
Navigate to the Schedule Data Refresh tab.
Click the Finish option.
A notification message ensures that the Data Store has been updated.
Click the Report icon.
The Create New Report window opens.
Provide a Name for the Report.
Click the Select Existing Data Store option.
The Select Data Store list appears. Select a Data Store using the checkbox.
Click the Create Report option.
The Design page for the newly created report opens.
Drag and drop or select the required Dimension (the same chosen for a Custom Field name).
Click the Play icon.
The View will be displayed displaying the data.
Open the Security module.
Navigate to the User Groups section.
Use the Search bar to search for a specific user.
Select a user group from the list.
The Assign the Custom Fields to Group users section opens.
Select a custom field from the Select Custom Fields drop-down menu.
Since the selected option to configure the selected Custom Field is a User Lookup. Choose one user from the drop-down.
Click the
The Select Users section opens.
Use the Search bar to search for specific users.
Use the checkmarks to select users. Use the Select All option to select all the users.
The selected users' numbers will be mentioned under the Users heading.
Click the Save option.
A notification message appears.
Navigate to the Users section.
Select a user with whom the Custom Fields are shared.
Click the Edit icon for the selected user.
The Update User page for the selected user.
Go to the Custom Fields section of the user.
The same custom field will be displayed under the Name custom field.
Click the Save
A notification message appears ensuring the successful update of the user.
Sign in to the platform using the same user account that has been updated with the Custom field value.
Open the Data Center module.
Navigate to the Data Store update page for the same data store that contains the custom field value.
Navigate to the Data Restrictions tab.
Select the same (the configured custom field from the Security module) custom field from the Dimension drop-down menu.
Provide the same title as User Property.
Click the
Navigate to the Schedule Data Refresh to schedule the data refresh for the current data store.
Click the Finish option.
A notification message ensures the successful update of the data store.
Click the Report icon to create a new report.
The Create New Report page opens.
Provide a title to the report.
Select the Select Existing Data Store option to create the report.
The Select Data Store list opens displaying all the existing data stores.
Select a data store using the checkbox.
Click the Create Report option.
A new report is created based on the selected data store and with the given name.
Drag the configured Custom Field as a Dimension under the header menu and drag another measure to create a View.
Click the Play icon.
The View will display restricted data based on the configured custom field.


Select a user group from the list.
Click the Save option.
All the users part of the selected user group will be displayed on the right side.
Click the Edit icon.
Click the Assign Custom Field icon.




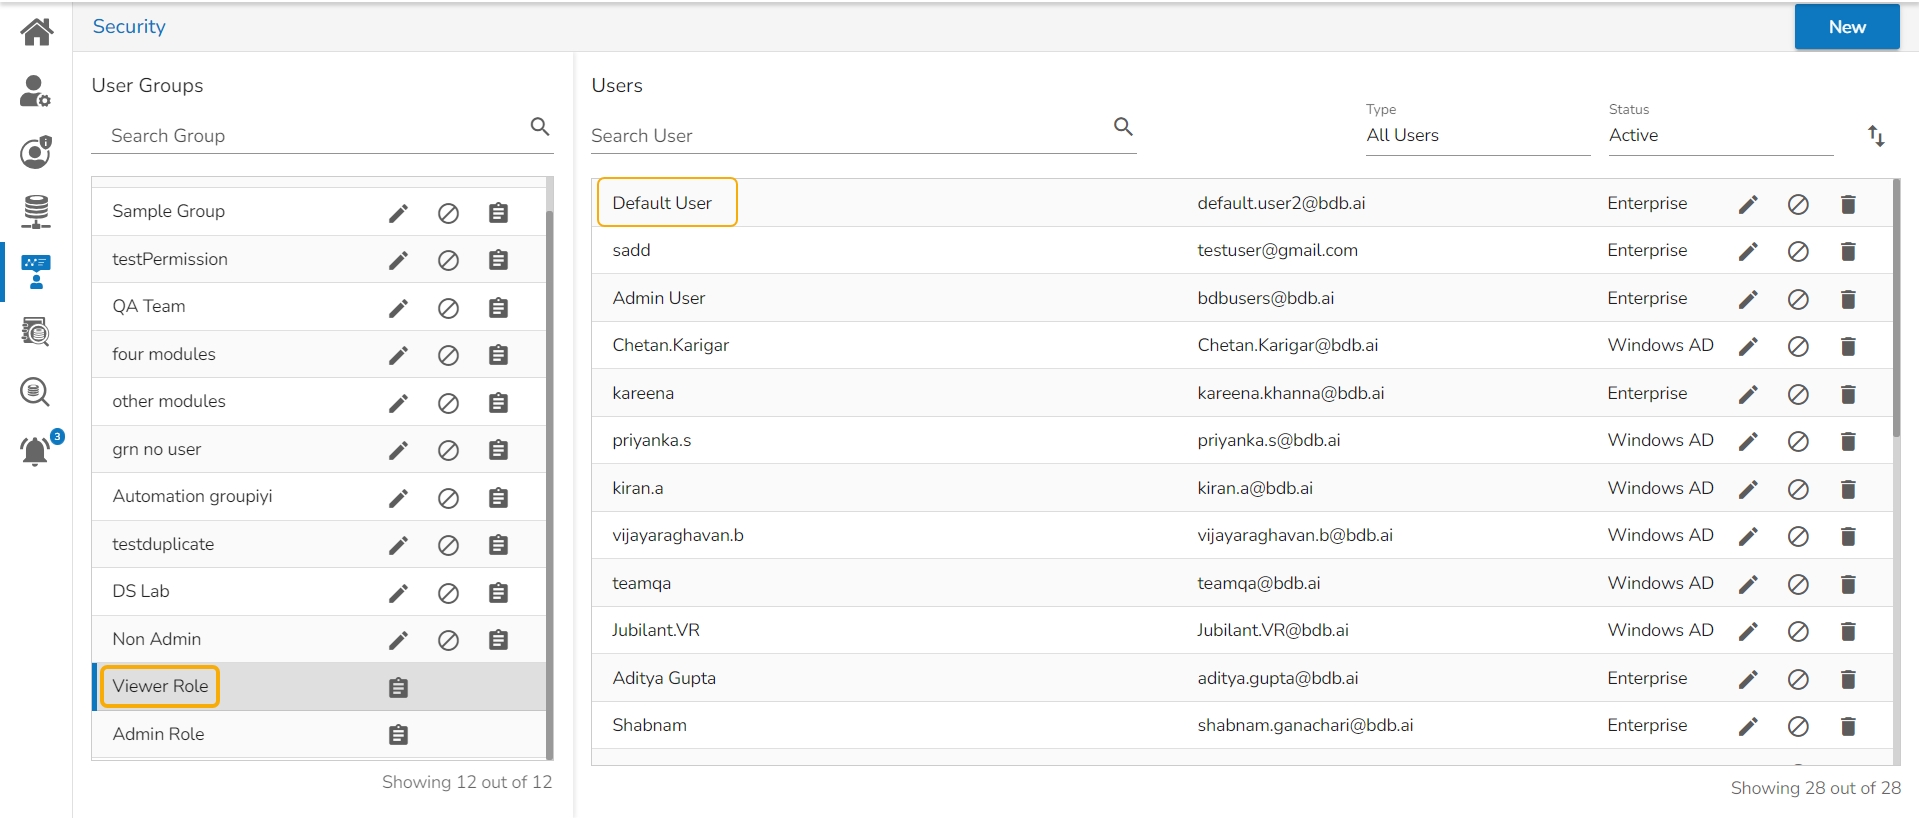


There can be three types of role for a platform user based on the access permissions provided to them.


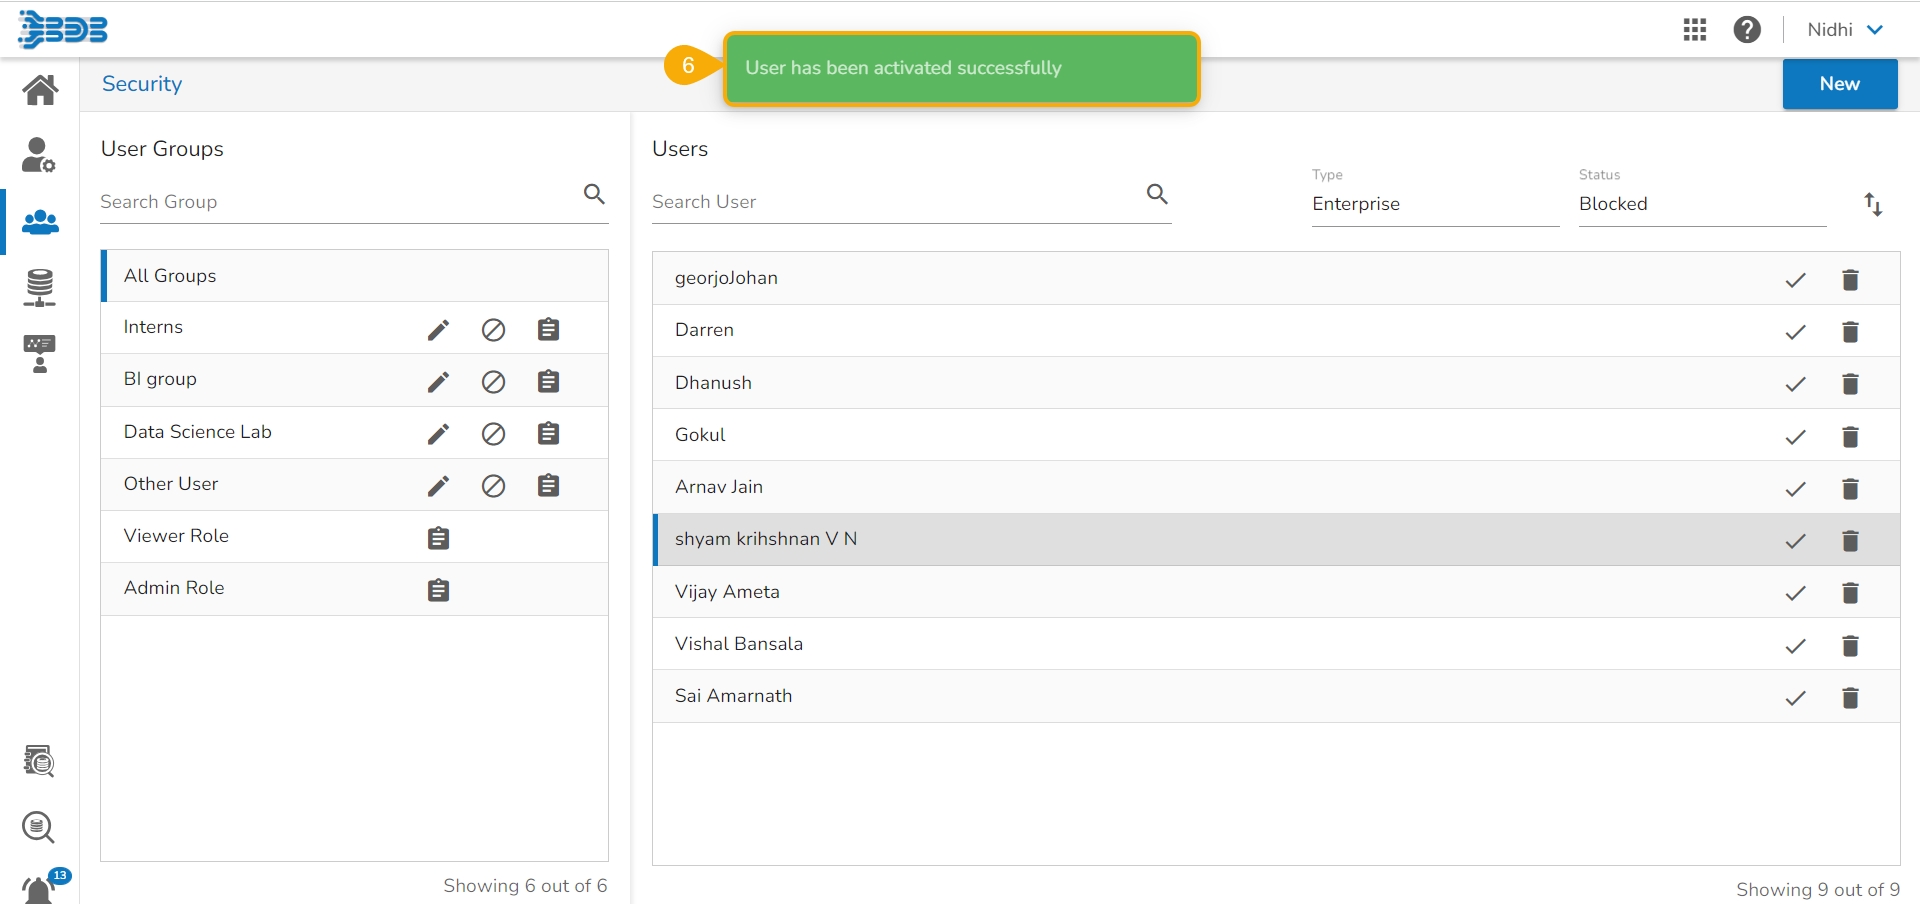
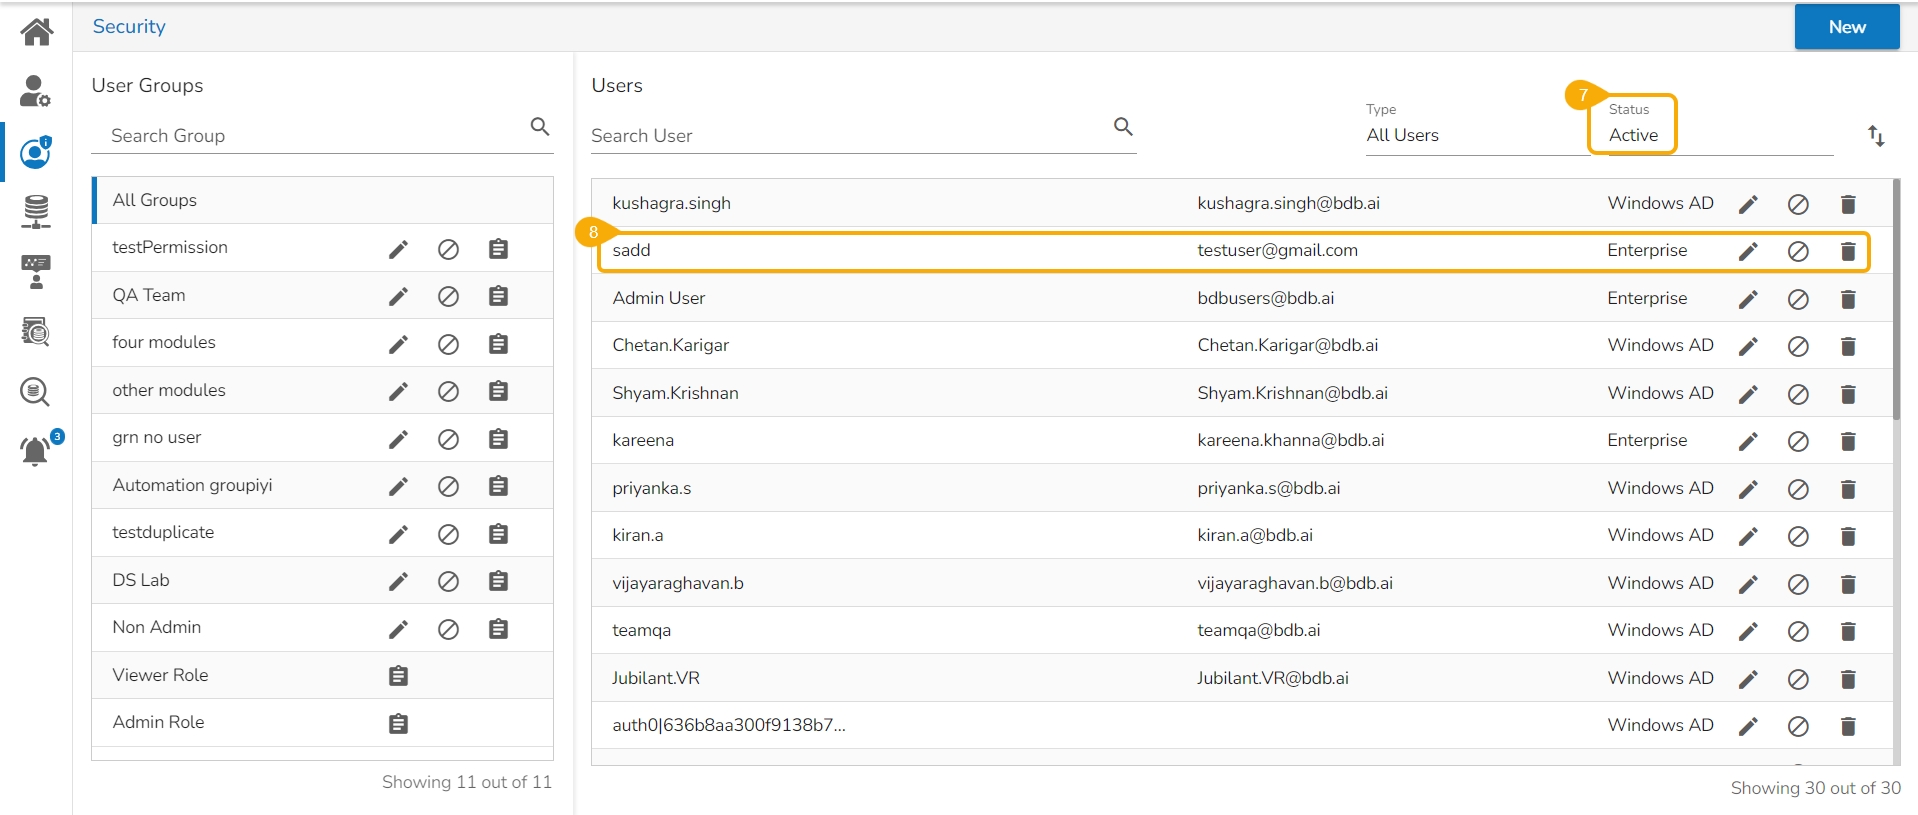
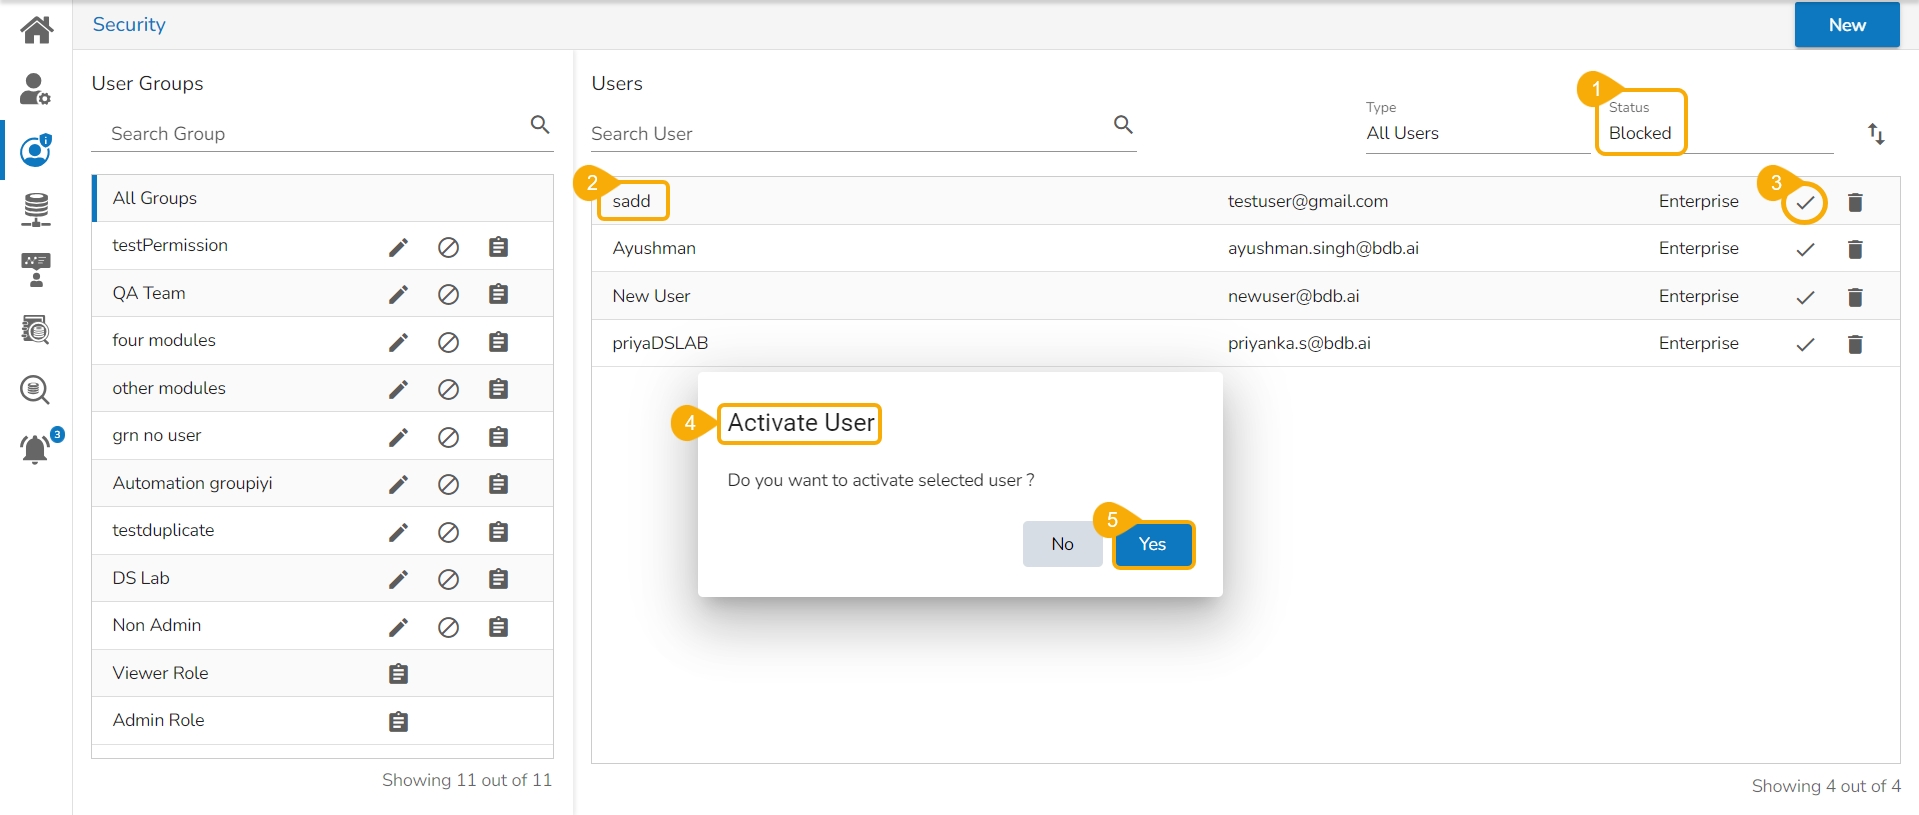
This section explains the steps to Activate a user from the Blocked or Expired Users lists.
Select Blocked as the status option to generate the users list with blocked users.
Select a user from the list of all blocked users list.
Click the Activate User icon to activate a specific user.
The Activate User dialog box appears to confirm the action.
Click the Yes option.
A notification message appears and the selected user gets activated.
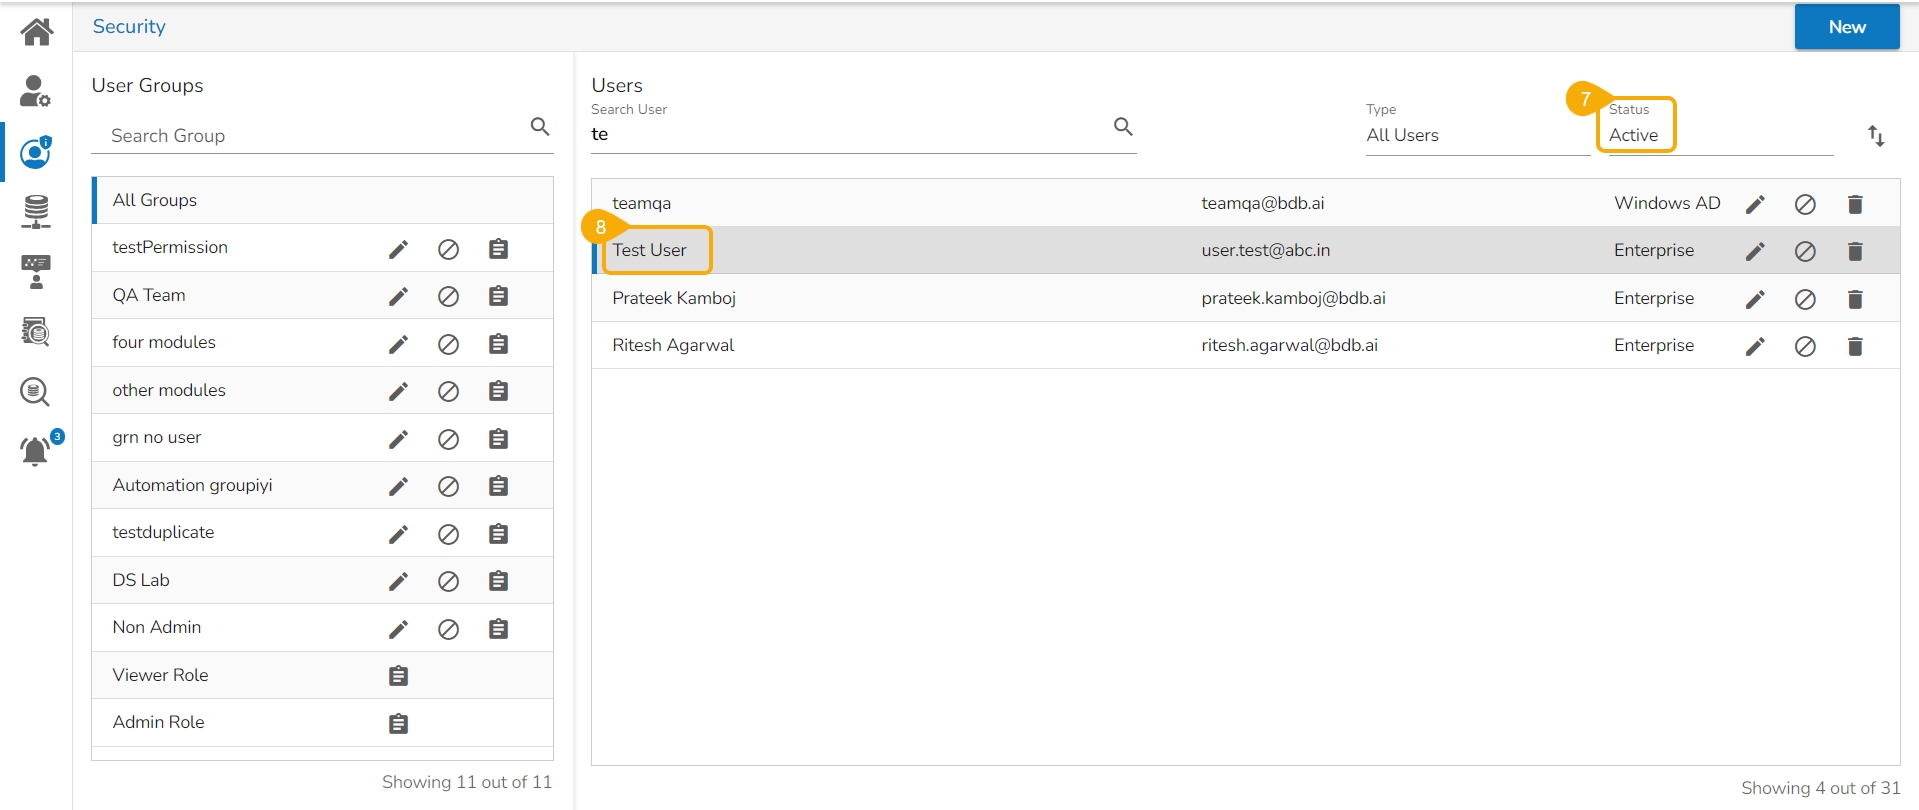
Navigate to the Active user page by selecting the Status option.
The newly activated user gets listed here.
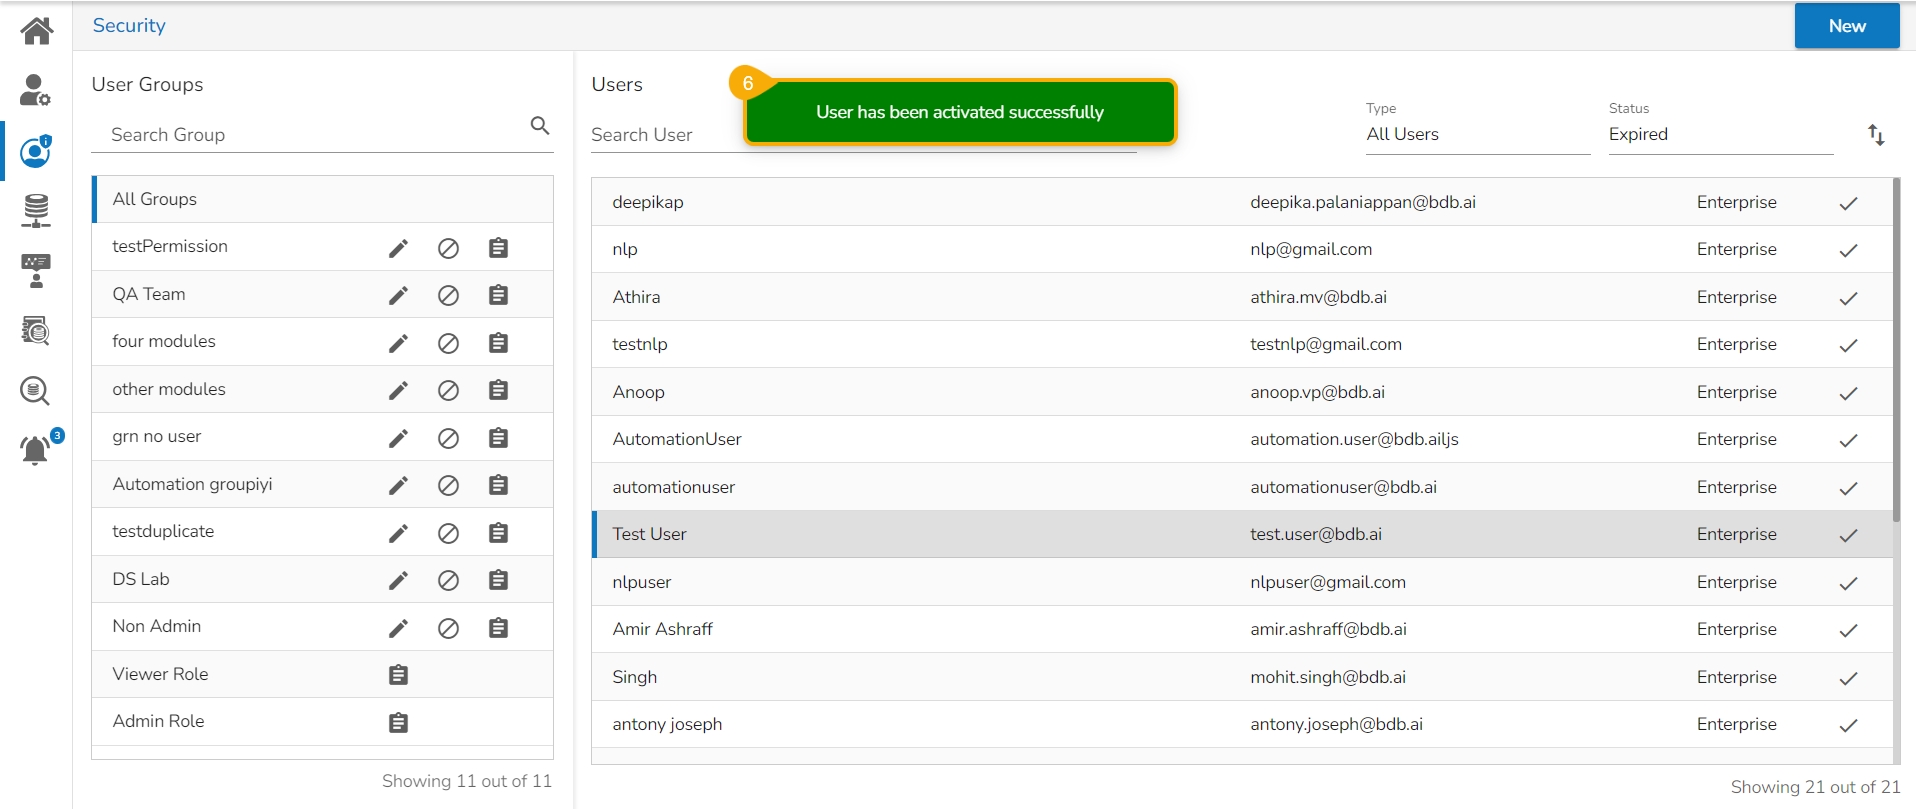
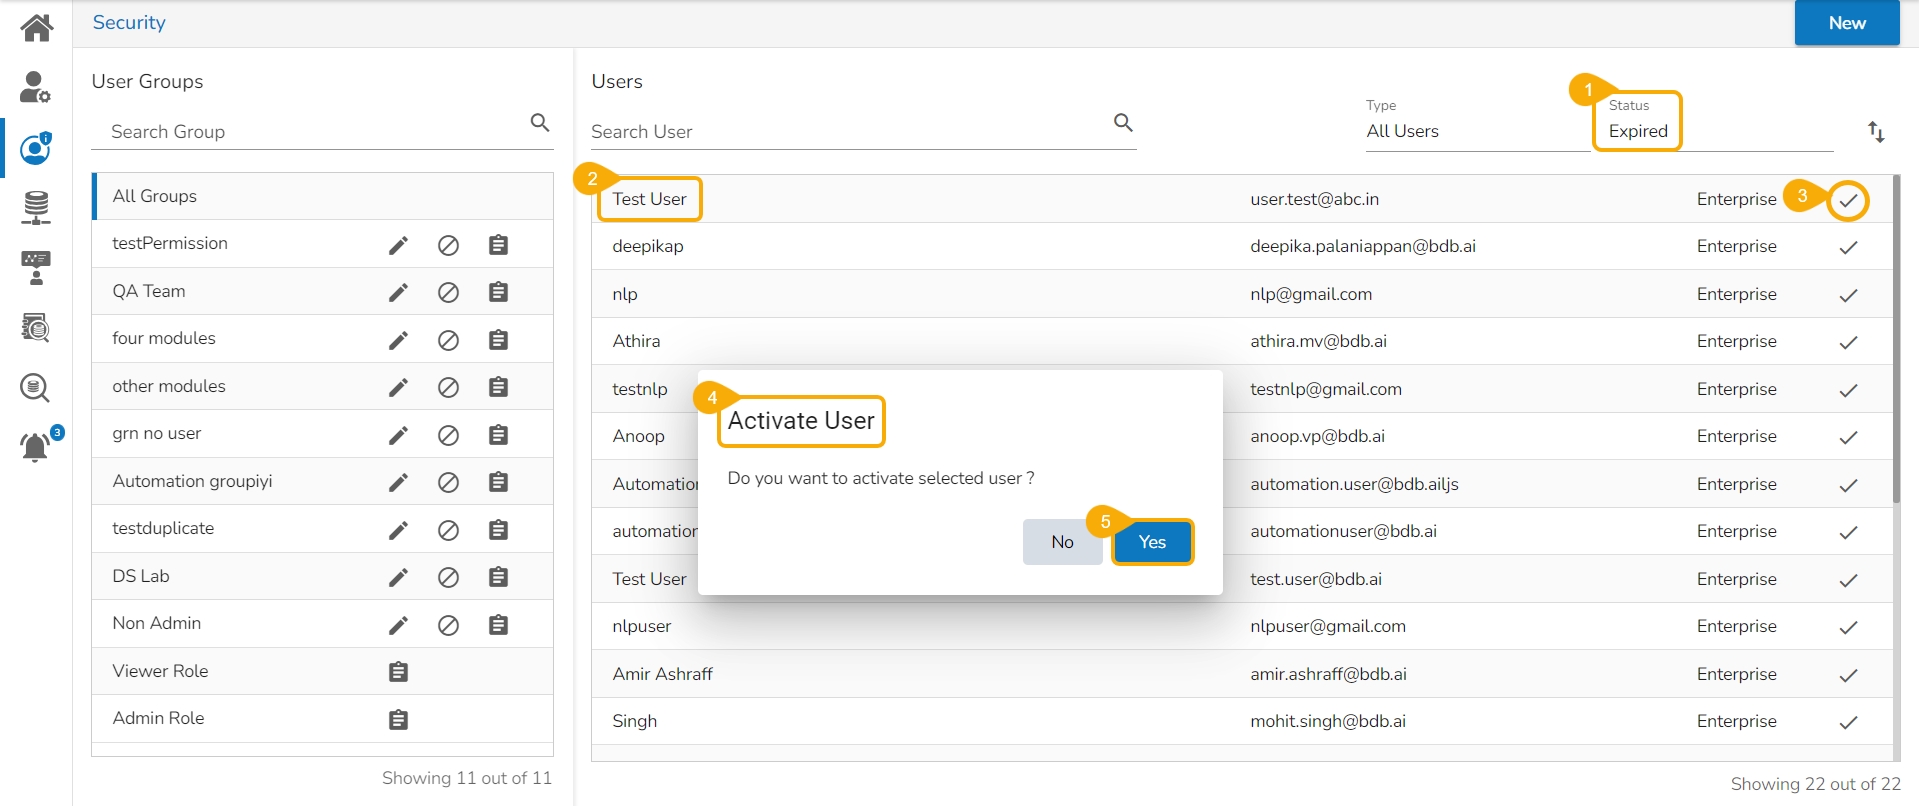
Select Expired as the status option.
Select a user from the list of all expired user accounts/ groups that appear.
Click the Activate User icon to activate a specific user.
The
A notification message appears.
Navigate to the Active user page by selecting the Status option.
The newly activated user gets listed here.
Click the Yes option.
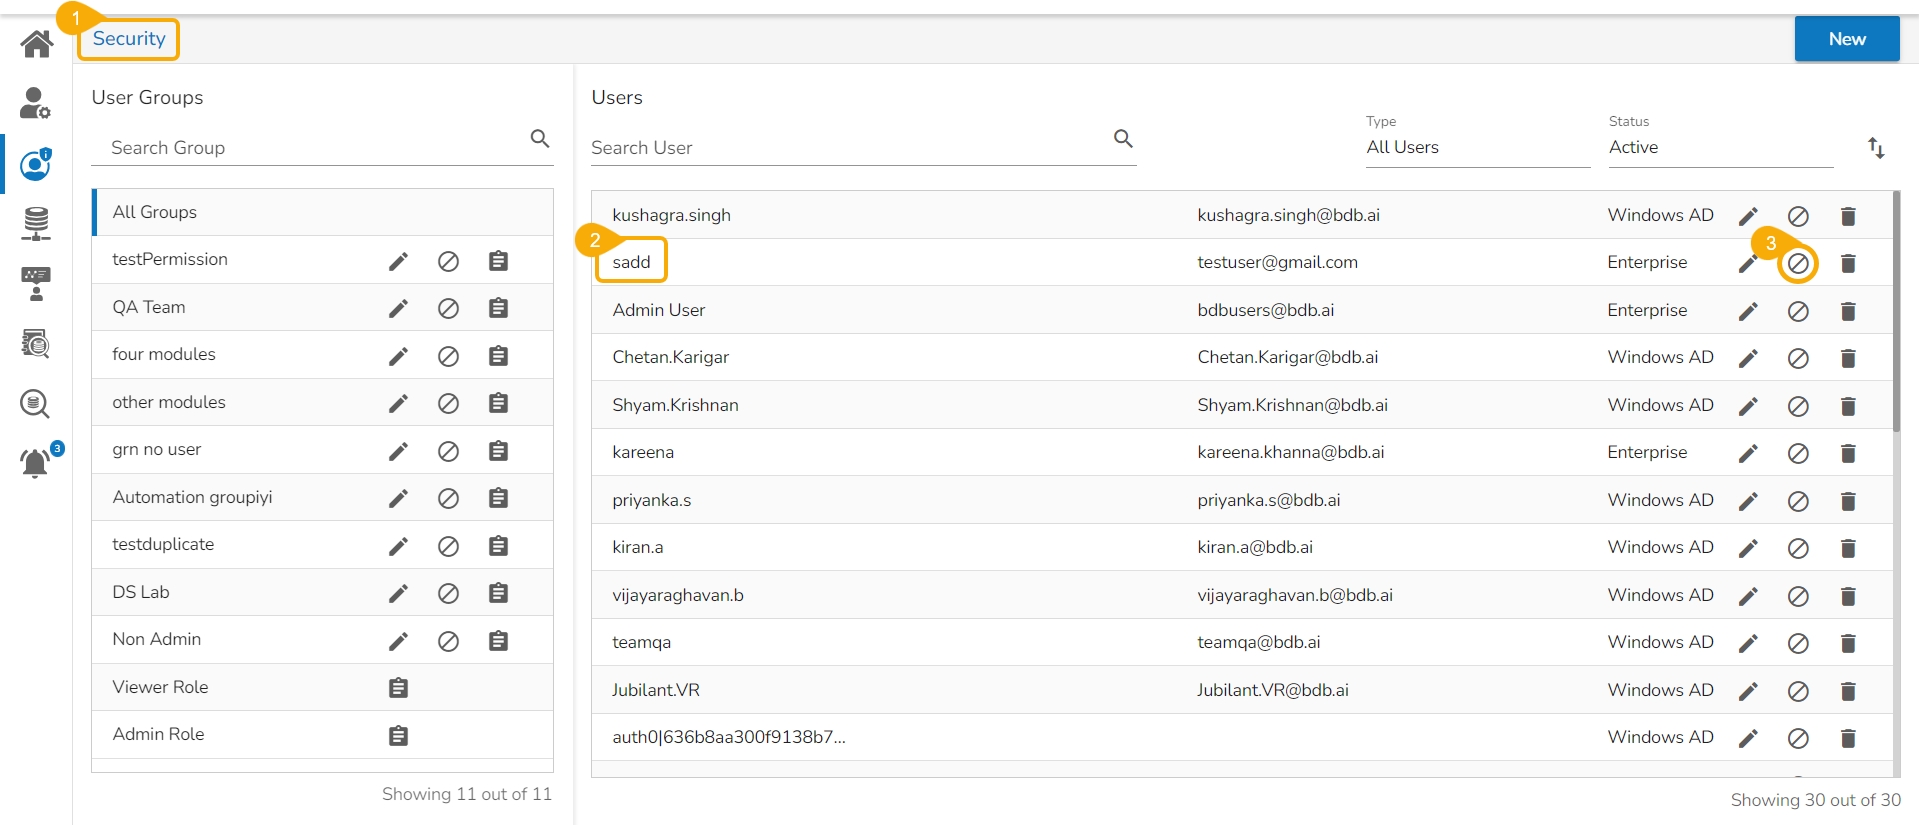
Navigate to the Security page.
Select a user from the Users list. (By default, the Users list displays All Users type listing Active users)
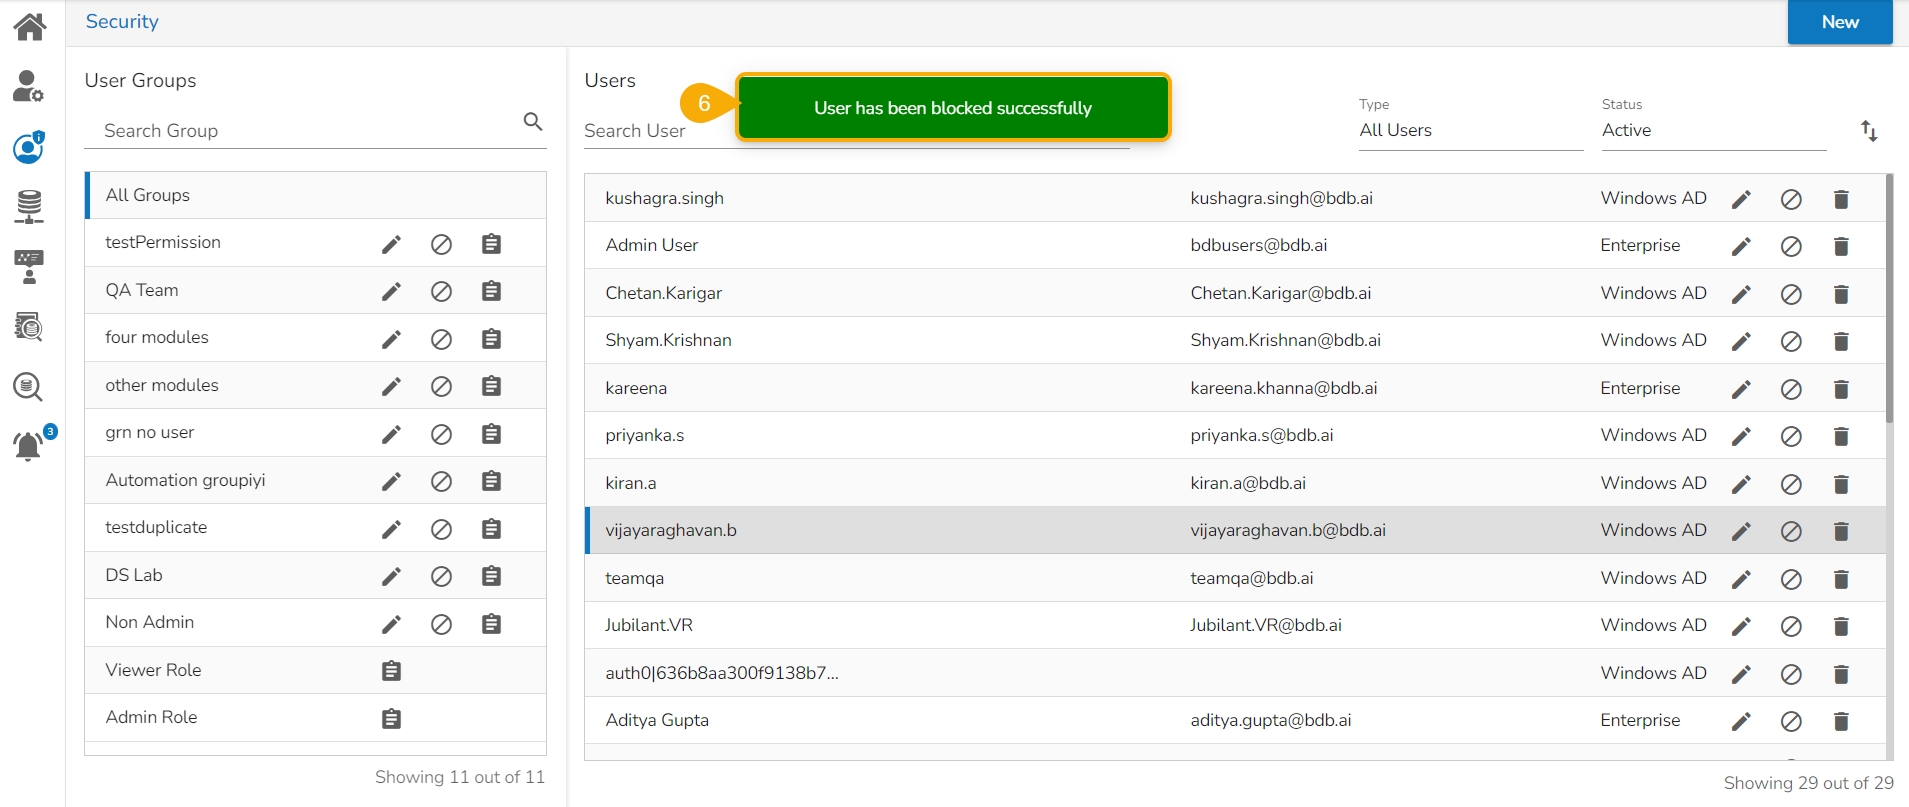
Click the Block User icon for the selected user.
The Block User dialog box appears to confirm the deletion.
Click the Yes option.
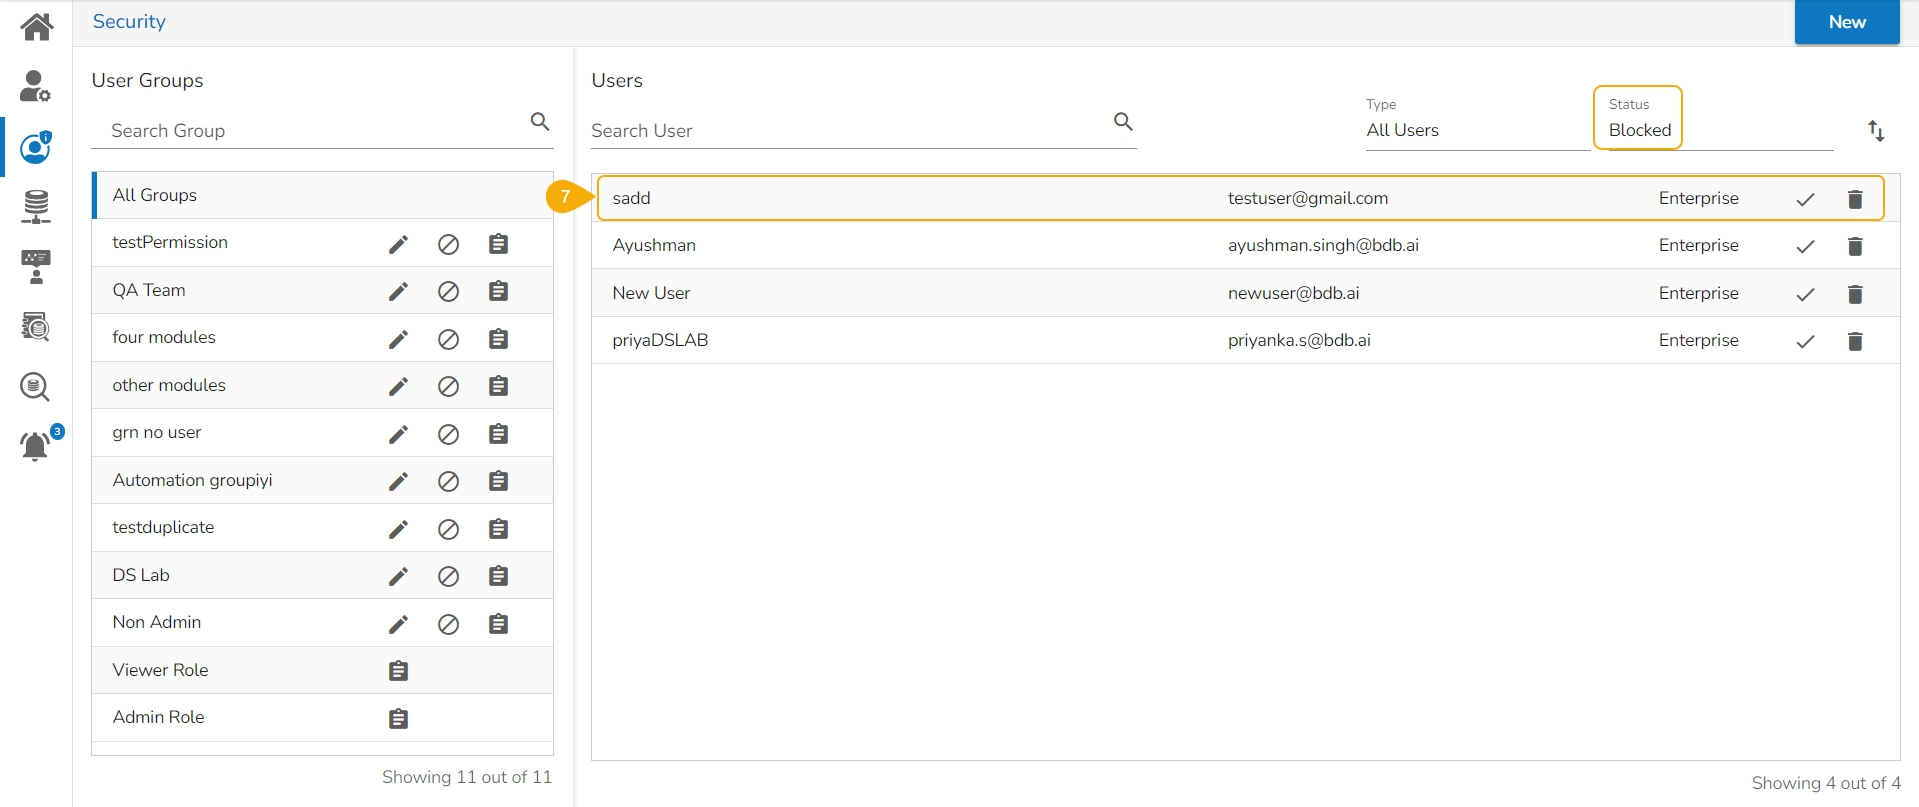
A notification message appears, and the selected user gets removed from the Active Users list.
The selected user gets added to the Blocked Users list.

Platform admin can restrict the data access for the non-admin users using the Custom Fields.
Pre-requisites:
The user must be able to access the dataset or data store to which the data access restriction is applied.
The necessary must be configured to the user account.
Check out the illustration on restricting data access of a Dataset for a user.
Navigate to the Data Center module using an Admin user account.
Click the Data Sets icon.
The Data Sets list page opens.
Select a dataset from the list.
Click the View/ Edit icon for the selected Data Set.
The Data Set update page opens for the selected data set.
Click the Validate option.
A notification message appears and the table gets updated.
The data preview is displayed under the Preview Result section.
Click the Security module icon.
The Users list opens under the Security module.
Select a user from the list.
Click the Edit icon.
The Update User page opens.
Navigate to the Custom Fields section and configure the mandatory custom field.
Specify the required custom field value using the user look-up option.
Click the Save option.
Sign in to a non-admin user platform account.
Click the Data Center icon.
Navigate to the Data Sets list page.
Select the same data set that was selected under the Admin user.
Click the Edit icon for the selected data set.
A notification message appears and the table gets updated.
Click the Validate option.
The restricted data preview appears under the Preview Result section.
Check out the illustration on restricting data access of a Data Store for a user.
Navigate to the Data Center module using an Admin user account.
Click the Data Stores icon.
The Data Stores list opens.
Select a data store from the displayed list.
Click the Edit icon for the selected data store.
The Data Store update page opens displaying the Getting Data tab for the selected data store.
Open the Data Restrictions tab.
Select a dimension using the Dimension drop-down menu.
Configure the User Property. Use the same as the selected Dimension.
Click the Next option.
Navigate to the Schedule Data Refresh tab to finish the Data Store update.
A notification message ensures that the Data Store has been updated successfully.
Navigate to the platform Homepage.
Click the Report icon to start a new report. OR Open an existing report from the platform homepage.
Navigate to the Design page of the report.
Create a view using dimension and measure. The created View displays data for all the names.
Open the Security module.
The Users section lists all the existing users.
Use the Search bar to search for a specific user from the list.
Select a user from the list.
The Update User page appears for the selected user.
Provide a user name using the Custom Fields fields. E.g., Anagha is mentioned in the given image for the Name custom field.
Click the Save option.
Sign in to a non-admin user account.
Click the Data Center icon.
Navigate to the Data Stores list page.
Select the data store where you want to restrict data.
Click the Edit icon for the selected data store.
Navigate to the Data Restrictions tab for the selected Data Store.
Select a Dimension using the drop-down menu.
Configure the User Property for the selected dimension. It should be the same as the chosen dimension.
Click the Next option to move to the next tab. The user will be redirected to the Schedule Refresh tab to finish the data store update process.
Click the Report icon to create a new report (You may use an existing report and select the recently updated data store to create a view). Click the Select Existing Data Store option to create the report based on the updated data store.
Select the same data store where you have configured the Data Restrictions tab.
Click the Create Report option.
The Design page appears for the report. Select Dimension and Measure to create a View.
A View appears with the limited data. E.g., only Angha's data will be listed for this user since it was configured for the same user using the Custom Fields for the user.
Click the Edit icon for the selected user.


You can create users/ user groups and assign various app permissions using this page.
Pre-requisite: The Security module will be visible under the Apps menu and in the left side menu panel only for those users who are created either containing the Admin role or have permission to access the Security module.
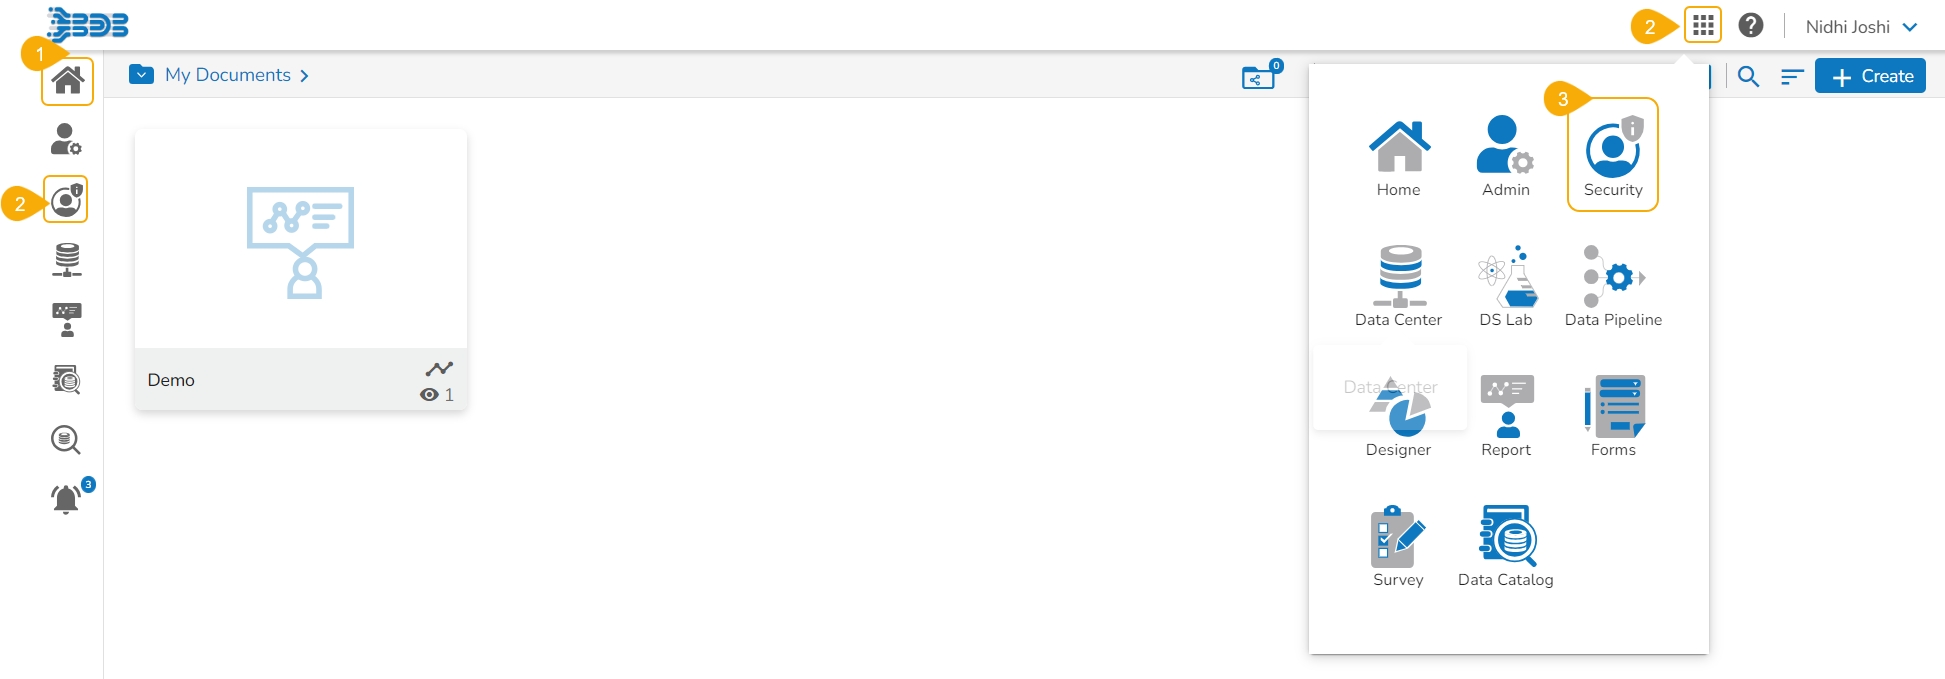
Check out the walk-through on how to access the Security page.
Select the Security module icon from the Apps menu.
OR
Select the Security module icon from the left-side panel of the Platform Homepage.
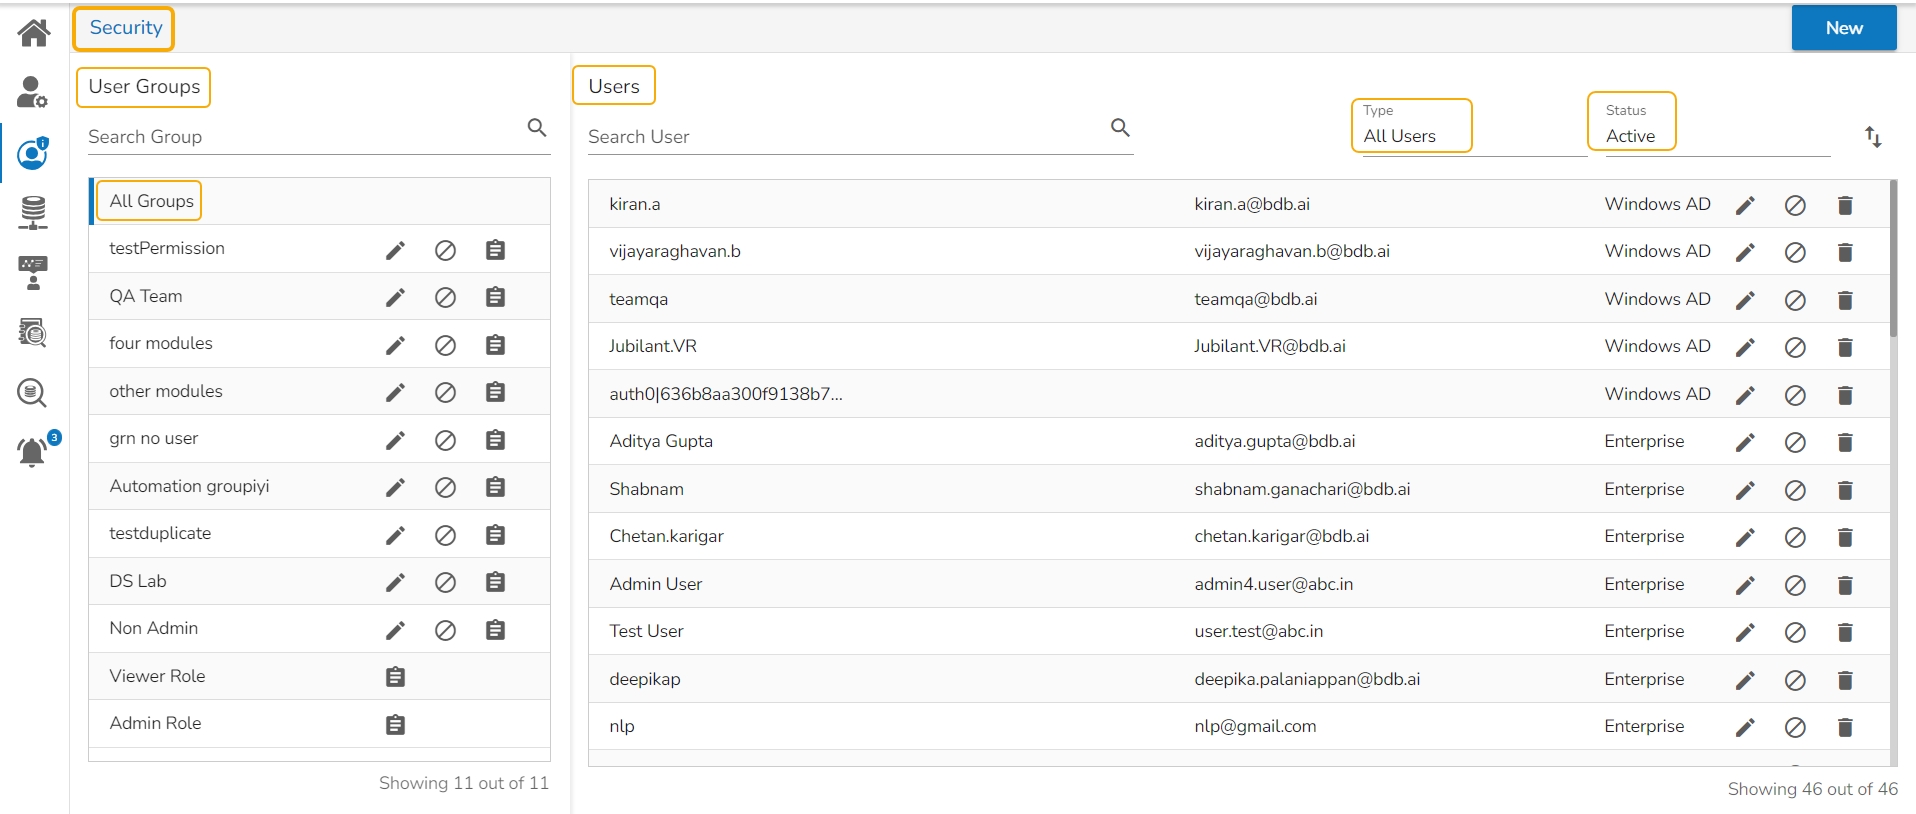
The Security page opens.
You can see a list of created User Groups on the left side of the screen whereas the right side displays the list of Users who are part of any selected group.
By default, the landing page displays All Groups selected from the User Groups list and
The user can create a new Group or User by clicking the New menu option.

