This option helps to restrict data access for all the users of the selected user group by applying custom field.
Pre-requisites:
The user must be able to access the dataset or data store to which the data access restriction is applied.
The necessary must be configured to the selected user group.
There should be permission to access the Security module.
Check out the illustration on assigning the custom fields to a group to restrict data access.
Open the Security module.
Navigate to the User Groups menu.
Search the specific user group using the search bar.
The All Groups list will be customized displaying the Searched user groups.
Select a user group from the list.
All the users from the selected group will be displayed on the right side. For example, the logged-in user belongs to the selected Admin role users.
Please Note: the Admin users will have unrestricted data access.
Click the Data Center icon from the same admin user.
Open the Data sets list.
Select a dataset from the list.
Click the View/ Edit icon for the data set.
The Data Set update page opens.
Click the Validate option to execute the query.
A notification message ensures the query is executed and the table has been updated.
The data result will be displayed under the Preview Result option.
Click the Save option.
Open the Security module.
Navigate to the User Groups section.
Use the search bar to search for a specific group.
The All Groups get customized.
All the users part of the selected user group will be displayed on the right side.
Click the Assign Custom Fields icon for the selected non-admin group.
Assign the Custom Feidls to the group users page that appears.
Use the Select Custom Fields option to get the Custom Fields drop-down.
Select a custom field from the drop-down.
Click the User Lookup option to get the user lookup drop-down.
Select a user from the displayed drop-down.
Click the Save option.
A notification message ensures that the group custom fields have been udpated.
Sign- into a user account from that non-admin group.
Click the Data Center icon.
Open the Data Sets list.
Select a Data set from the list.
Click the View/Edit icon.
The Data Set update page opens.
Click the Validate option.
A notification message ensures the query is executed and the table is updated.
The restricted data appears under the Preview Result section.
Please Note: Creating a dashboard with restricted data access involves implementing both data-level security and user-role access management. The restricted data will then be displayed based on the level of access granted to the user.
Sign in using the admin user credentials of the platform.
Click the Data Center icon.
Navigate to the Data Stores list page.
Select a Data Store from the displayed list.
Click the Edit icon.
The Update page opens for the selected Data Store.
The Getting Data tab opens by default.
Click the Next option (until the Data Restrictions tab opens).
The Data Restriction tab opens.
Select a Custom Field using the Dimension drop-down menu (The Custom Field must be configured as Dimension using the Data Type Definition tab of Data Store creation).
Provide the same for the User Property.
Click the Next option.
Navigate to the Schedule Data Refresh tab.
Click the Finish option.
A notification message ensures that the Data Store has been updated.
Click the Report icon.
The Create New Report window opens.
Provide a Name for the Report.
Click the Select Existing Data Store option.
The Select Data Store list appears. Select a Data Store using the checkbox.
Click the Create Report option.
The Design page for the newly created report opens.
Drag and drop or select the required Dimension (the same chosen for a Custom Field name).
Click the Play icon.
The View will be displayed displaying the data.
Please Note: The View will display unrestricted data since the user is an admin user and no data restriction is implemented.
Open the Security module.
Navigate to the User Groups section.
Use the Search bar to search for a specific user.
Select a user group from the list.
Click the Assign Custom Field icon.
The Assign the Custom Fields to Group users section opens.
Select a custom field from the Select Custom Fields drop-down menu.
Since the selected option to configure the selected Custom Field is a User Lookup. Choose one user from the drop-down.
Click the Assign option to select the users from the selected user group.
The Select Users section opens.
Use the Search bar to search for specific users.
Use the checkmarks to select users. Use the Select All option to select all the users.
The selected users' numbers will be mentioned under the Users heading.
Click the Save option.
A notification message appears.
Navigate to the Users section.
Select a user with whom the Custom Fields are shared.
Click the Edit icon for the selected user.
The Update User page for the selected user.
Go to the Custom Fields section of the user.
The same custom field will be displayed under the Name custom field.
Click the Save option to update the user settings.
A notification message appears ensuring the successful update of the user.
Sign in to the platform using the same user account that has been updated with the Custom field value.
Open the Data Center module.
Navigate to the Data Store update page for the same data store that contains the custom field value.
Navigate to the Data Restrictions tab.
Select the same (the configured custom field from the Security module) custom field from the Dimension drop-down menu.
Provide the same title as User Property.
Click the Next option.
Navigate to the Schedule Data Refresh to schedule the data refresh for the current data store.
Click the Finish option.
A notification message ensures the successful update of the data store.
Click the Report icon to create a new report.
The Create New Report page opens.
Provide a title to the report.
Select the Select Existing Data Store option to create the report.
The Select Data Store list opens displaying all the existing data stores.
Select a data store using the checkbox.
Click the Create Report option.
A new report is created based on the selected data store and with the given name.
Drag the configured Custom Field as a Dimension under the header menu and drag another measure to create a View.
Click the Play icon.
The View will display restricted data based on the configured custom field.
This section describes steps to create a new user group.
Click the New option given on the Security page.
Select the Group option from the context menu.
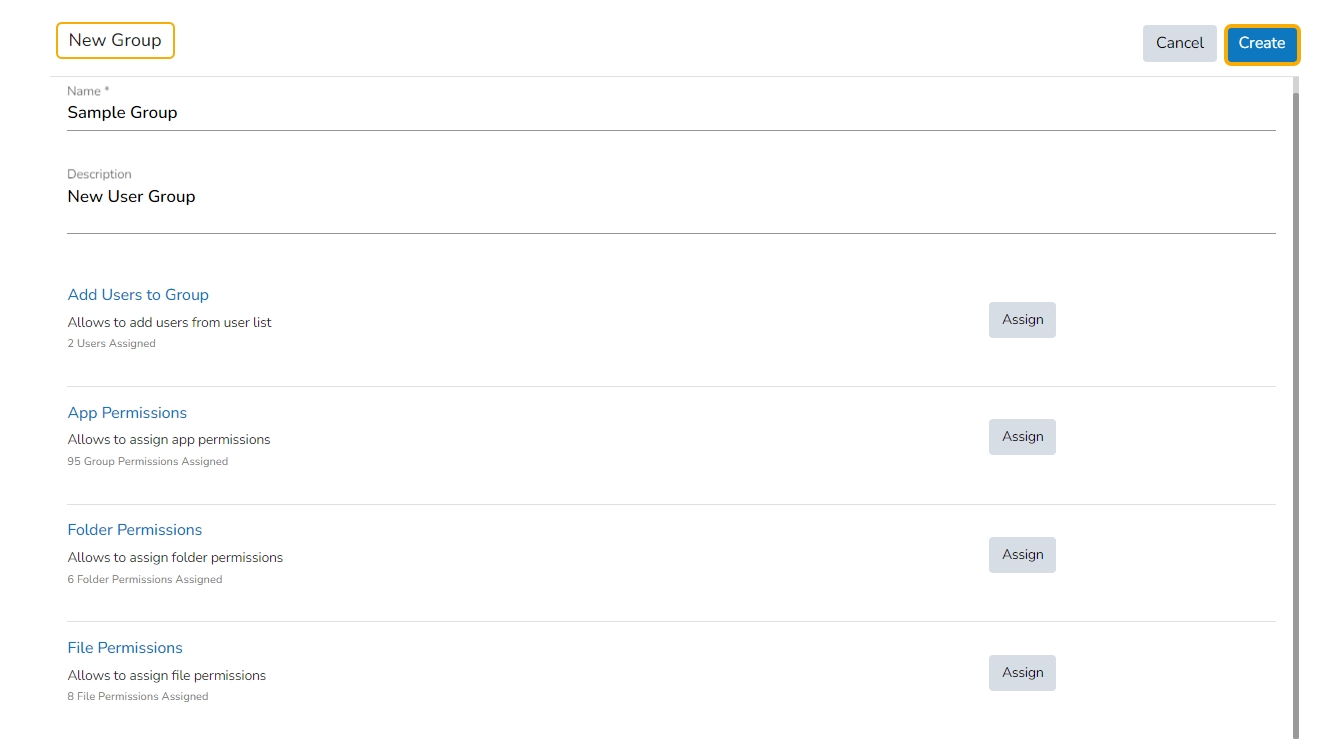
The New Group window opens asking for information about a new group.
Provide the following information to create a new User Group:
Group Name: Enter a name for the user group (The group name should not exceed 20 words).
Description: Describe the user group (optional) (The description should not exceed 150 words).
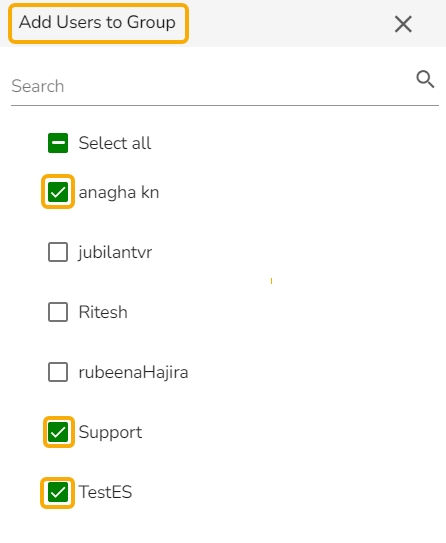
Click the Assign option to add the existing users to the newly created group.
The Add Users to Group window opens with a list of all the existing users in that space.
Select User(s) by using a checkmark in the box from the displayed list of users.
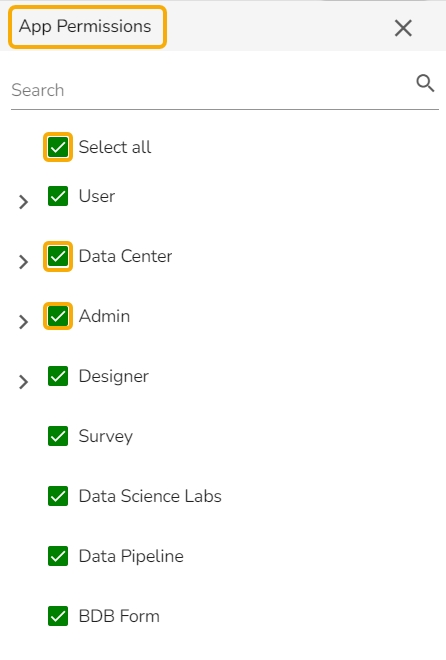
Click the Assign option to add various app permissions to the newly created group.
The App Permissions window opens with the list of the available apps to select the App Permissions.
Either choose the Select all option to add all the permissions or manually Assign various plugin/app rights by manually selecting the specific plugin options to the newly created User Group via the App Permissions menu list.
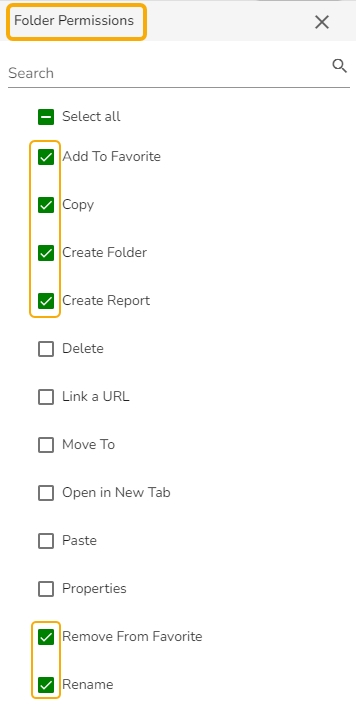
Click the Assign option provided next to the Folder Permission option.
The Folder Permissions window opens with the list of the Folder Permissions to be selected for the group.
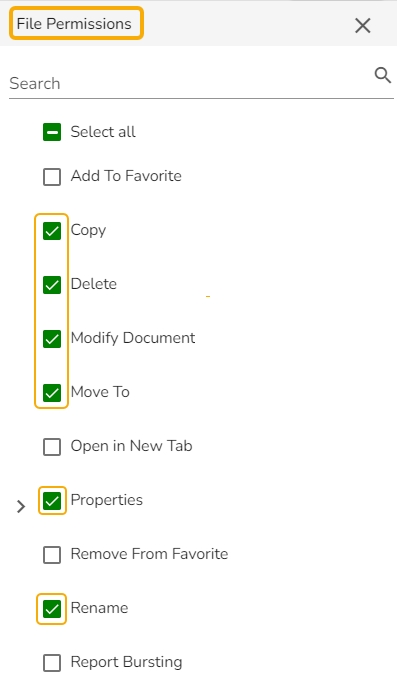
Click the Assign option provided for the File Permissions.
The File Permissions window opens with the list of the File Permissions to be selected for the group.
After adding users and allowing the required Permissions to the new group, click the Create option for the new User Group.
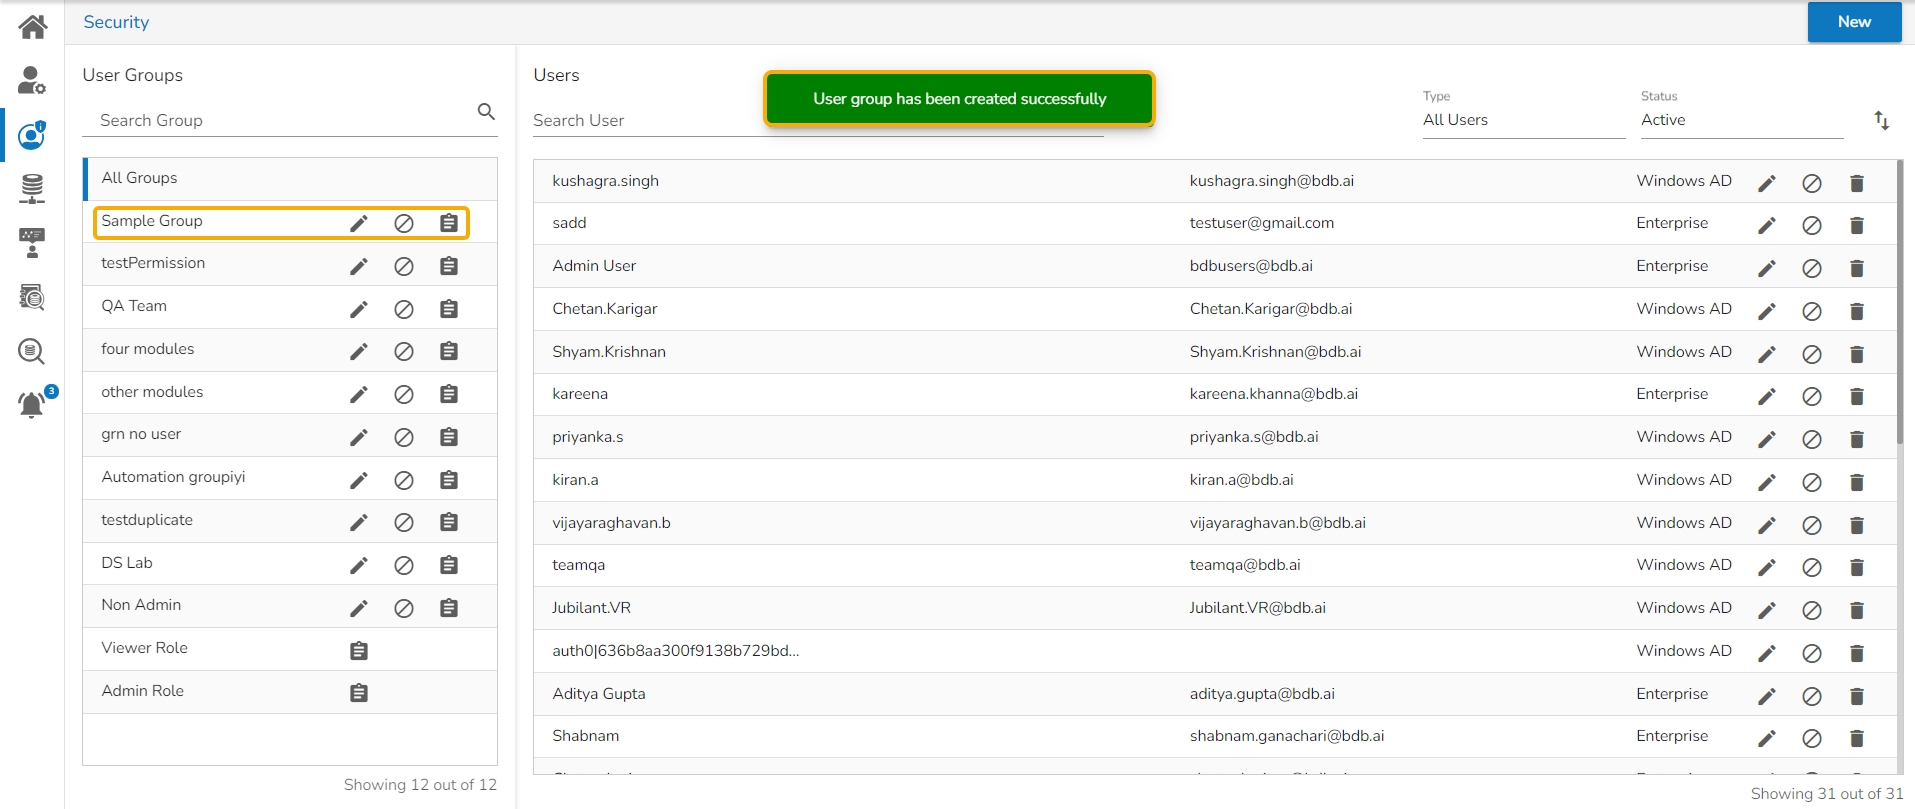
A confirmation message appears.
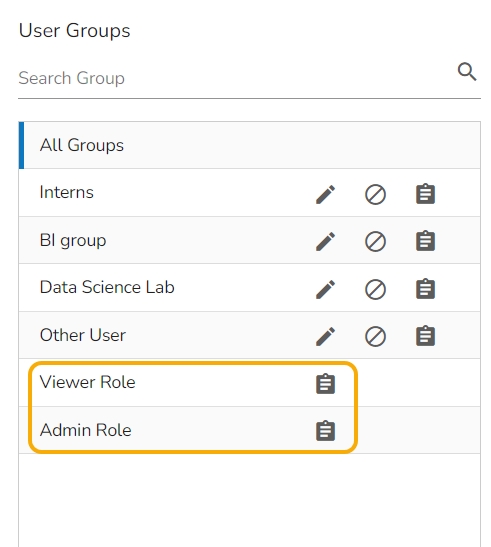
The newly created group will be listed under the All Group list (as shown below):
Please Note:
You will get a common Save option to save all the provided permission settings.
Use a checkmark in the given box for the Select all option to select all the existing users.
The default user groups do not have the Edit and Block icons –E.g., Viewer Role and Admin Role.


