Loading...
Loading...
Loading...
Loading...
Loading...
Check out the illustration on sharing a workspace.
Open the Manage option.
Navigate to the Workspaces section.
Select a Workspace from the list.
Click the Share Workspace icon.
The Manage Access window opens.
Select permissions using the Grant Permissions.
The Users, User Groups, and Exclude Users tabs will be displayed. Choose users or user groups tabs to share the workspace.
Search specific users or user groups using the Search bar.
Select a user or user group using checkboxes.
Click the Share option.
A notification message appears.
Re-open the Manage Access window.
The selected user/ user group gets listed under the Granted Permissions section.
Check out the illustration on revoking privileges for a shared workspace.
Open the Manage Access window for a shared Workspace.
Navigate to the Granted Permissions section.
Select a user/ user group from the Granted Permissions section.
Click the Revoke icon.
The Revoke dialog box opens.
Click the Yes option to revoke the permission.
A notification message appears and the privileges get revoked.
Check out the illustration on excluding users from a user group to access the privileges for a shared workspace.
Open the Manage Access window for a Workspace.
Select permissions using the given checkboxes for the Grant Permissions.
The Users, User Groups, and Exclude Users tabs display. Select the User Groups tab to share a workspace.
Search a specific user/ user group using the Search bar.
Select a user group by using a checkbox.
Navigate to the Exclude Users tab.
Select users using the checkboxes.
Click the Share option.
A notification message appears.
Re-open the Manage Access window.
The excluded user(s) will be listed under the Excluded Users section.
Please Note: An excluded user can be included to access the privileges for a shared Workspace by using the Include User icon.


This section describes steps to delete an existing Workspace and restoring the deleted workspace.
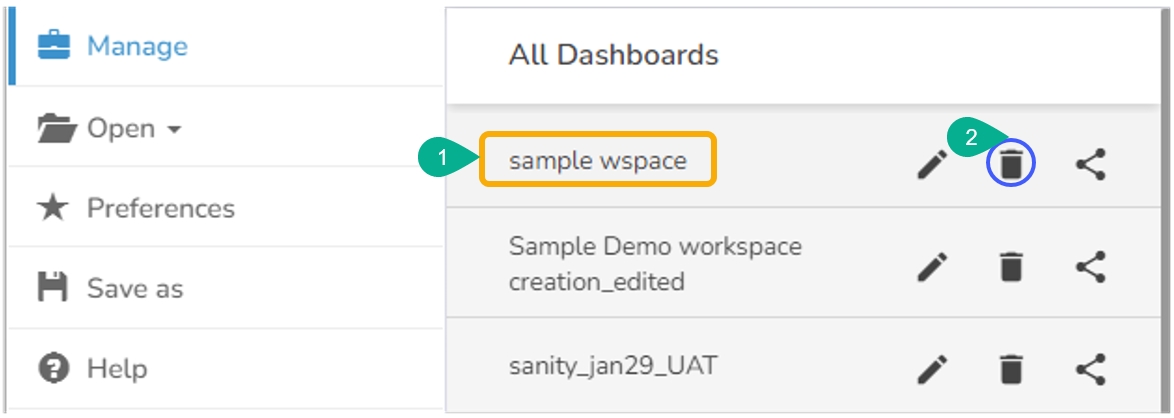
Select a workspace from the Workspaces list.
Click the Remove icon.
The Remove dialog window appears to confirm the deletion.
Click the Remove option.
The selected workspace gets removed from the list.
The removed workspace gets added to the Trash Workspace.
Click the Manage option.
Navigate to the Trash workspace created under the list of all the workspaces.
Select a deleted workspace that you want to restore and click the Restore icon.
Please Note:
Removing a workspace causes the default removal of all the dashboards saved under it into the Trash workspace.
Click the Reload Workspaces icon provided next to the Workspaces list to load all the workspaces again.
Click the Restore icon from the Trash workspace to restore deleted workspaces.
Click the Remove Permanently icon from the Trash workspace to delete a workspace or dashboard permanently.
A Workspace is a placeholder where users can save multiple dashboards.
Workspace once created under the Designer module works as a placeholder for multiple dashboards. If you compare a dashboard with a document/file, then the Workspace created to store them is like a folder. The creation of a new Workspace and understanding the various credited options to an available Workspace under the Designer module are aimed to be explained through an illustration. Check out the given walk-through on the complete flow of Workspace creation.
Workspace once created under the Designer module works as a placeholder for multiple dashboards. If you compare a dashboard with a document/file, then the Workspace created to store them is like a folder. The creation of a new Workspace and understanding the various credited options to an available Workspace under the Designer module are aimed to be explained through an illustration.
Check out the illustration to understand the Workspace creation and apply various actions to a created Workspace.
This section explains the steps on how to create a new Workspace in the Designer module.
Navigate to the Dashboard Designer homepage.
Click New or click the Add option.
Click Workspace from the context menu.
A dialog box appears.
Workspace Name: Enter a title for the Workspace in the given field.
Click the Save option.
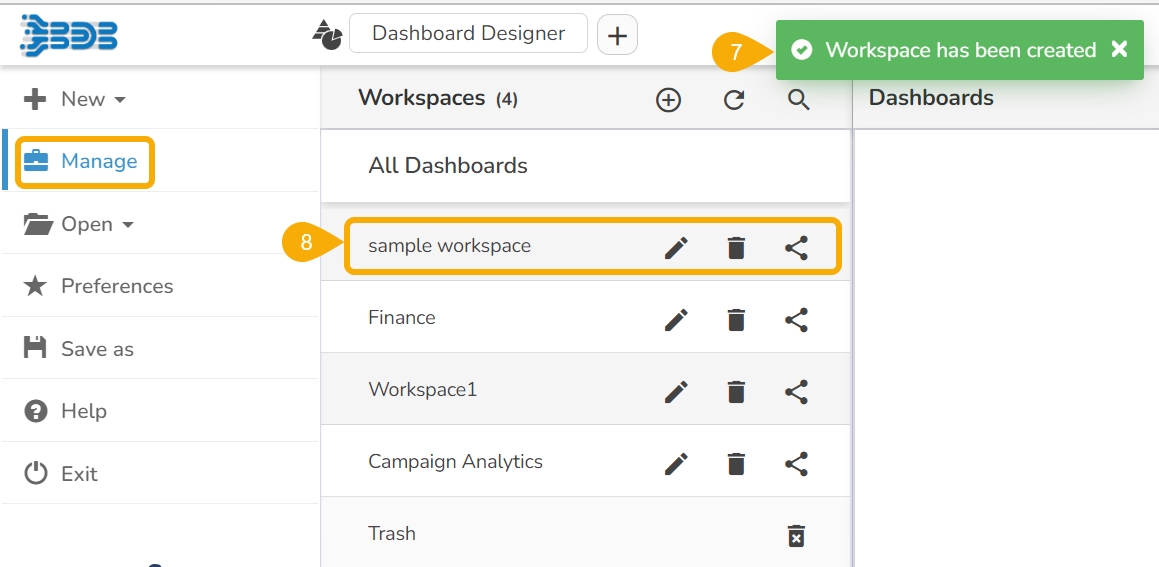
A confirmation message appears to inform the creation of a new Workspace.
The newly created workspace gets saved under the list of the existing Workspaces (The list of the Workspaces can be seen under the Manage option).

Select a workspace from the Workspaces list.
Click the Rename icon.
The Rename window appears to assure the action.
Provide a new name for the dashboard.
Click the Rename to save the new name.
A message appears to assure the success of the renaming action.
The selected workspace gets saved with the new name.


