Save and load models with transform script, register them or publish them as an API through DS Lab module.
Check out a walk-through on how to use the Transform script inside Notebook.
You can write or upload a script containing the transform function to a Notebook and save a model based on it. You can also register the model as an API service. This entire process is completed in the below-given steps:
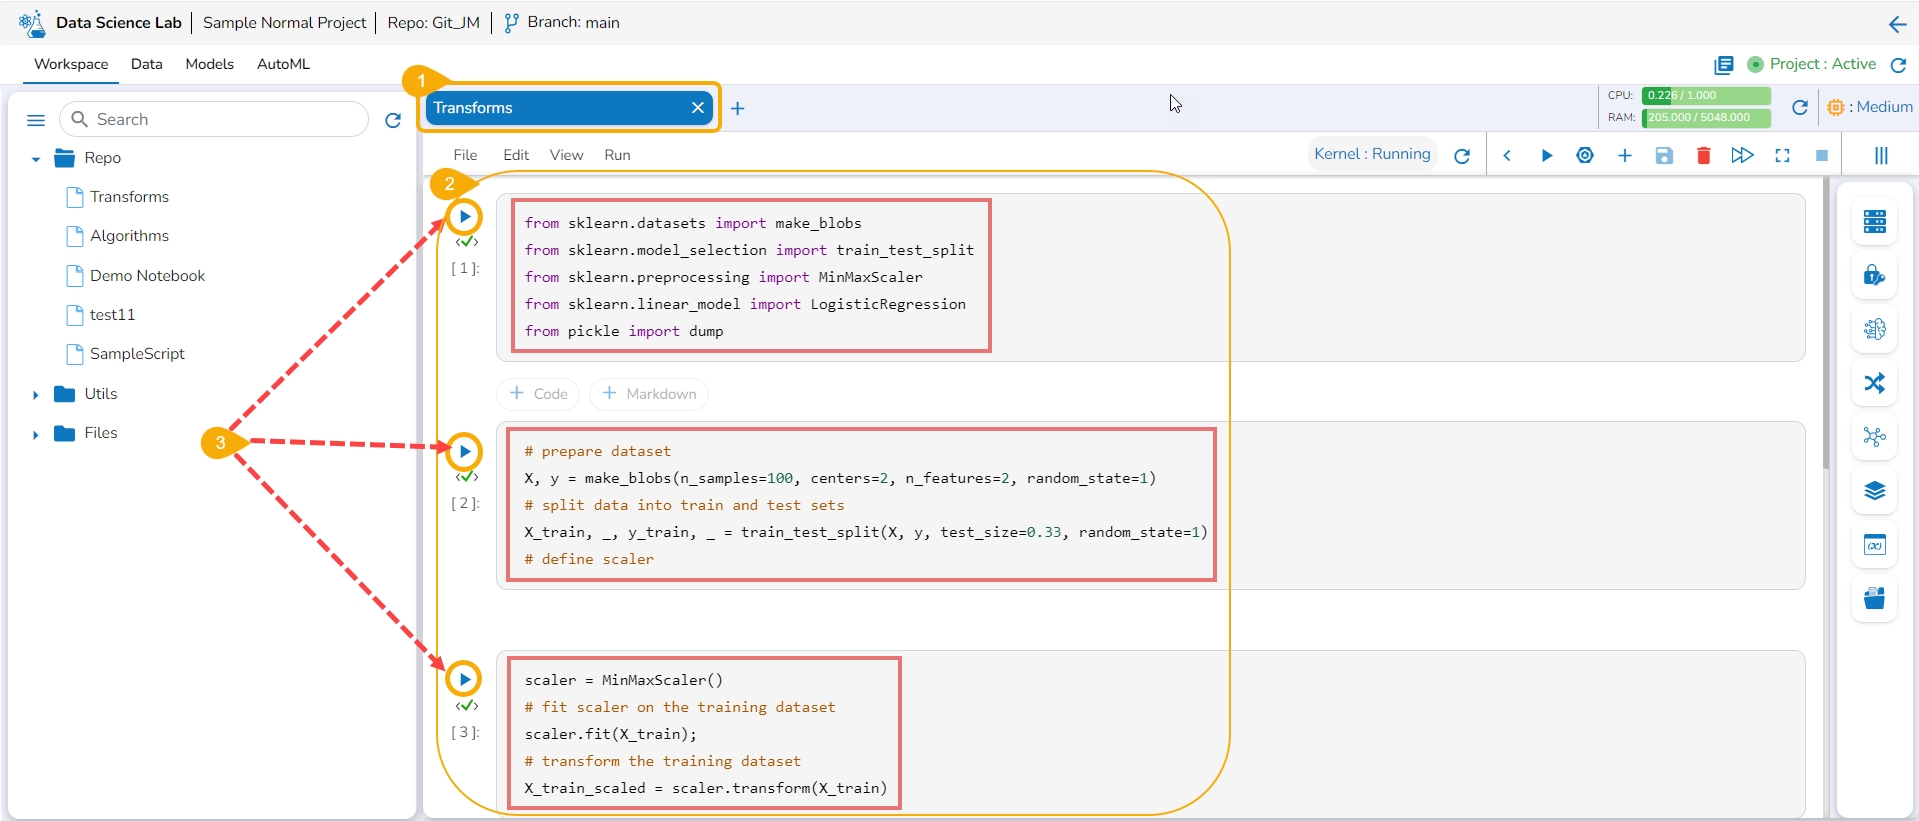
Navigate to a Notebook.
Add a Code cell. Write or provide a transform script to the cell (In this case, it has been supplied in three cells).
Run the cell(s) (In this case, run all the three cells).
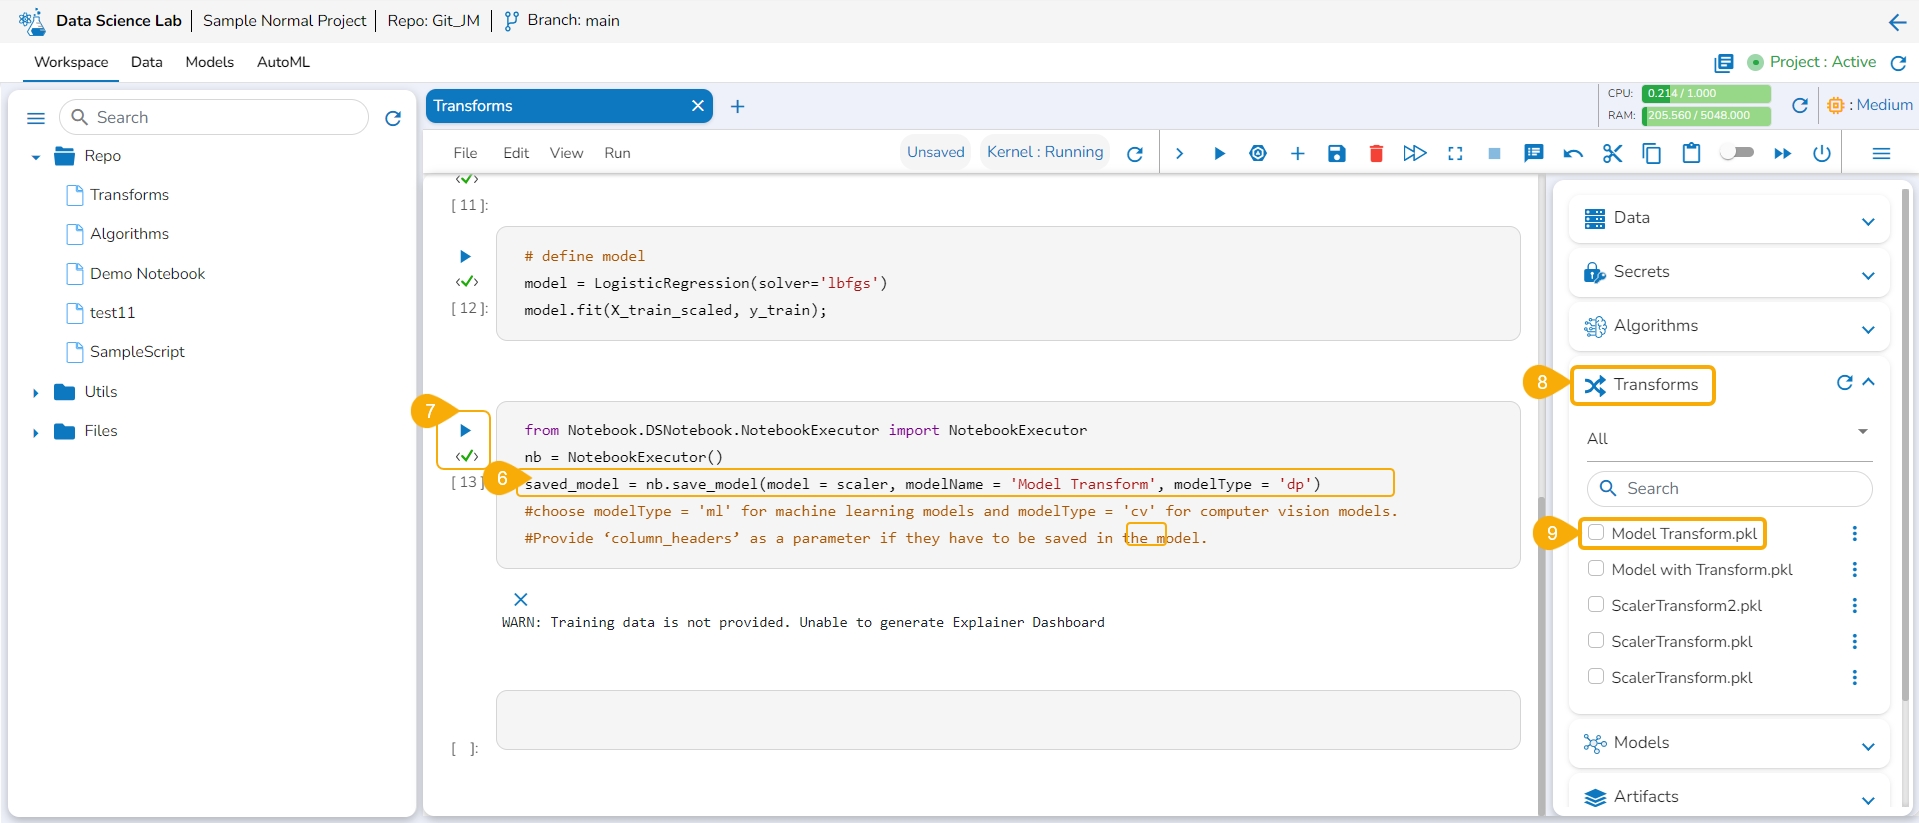
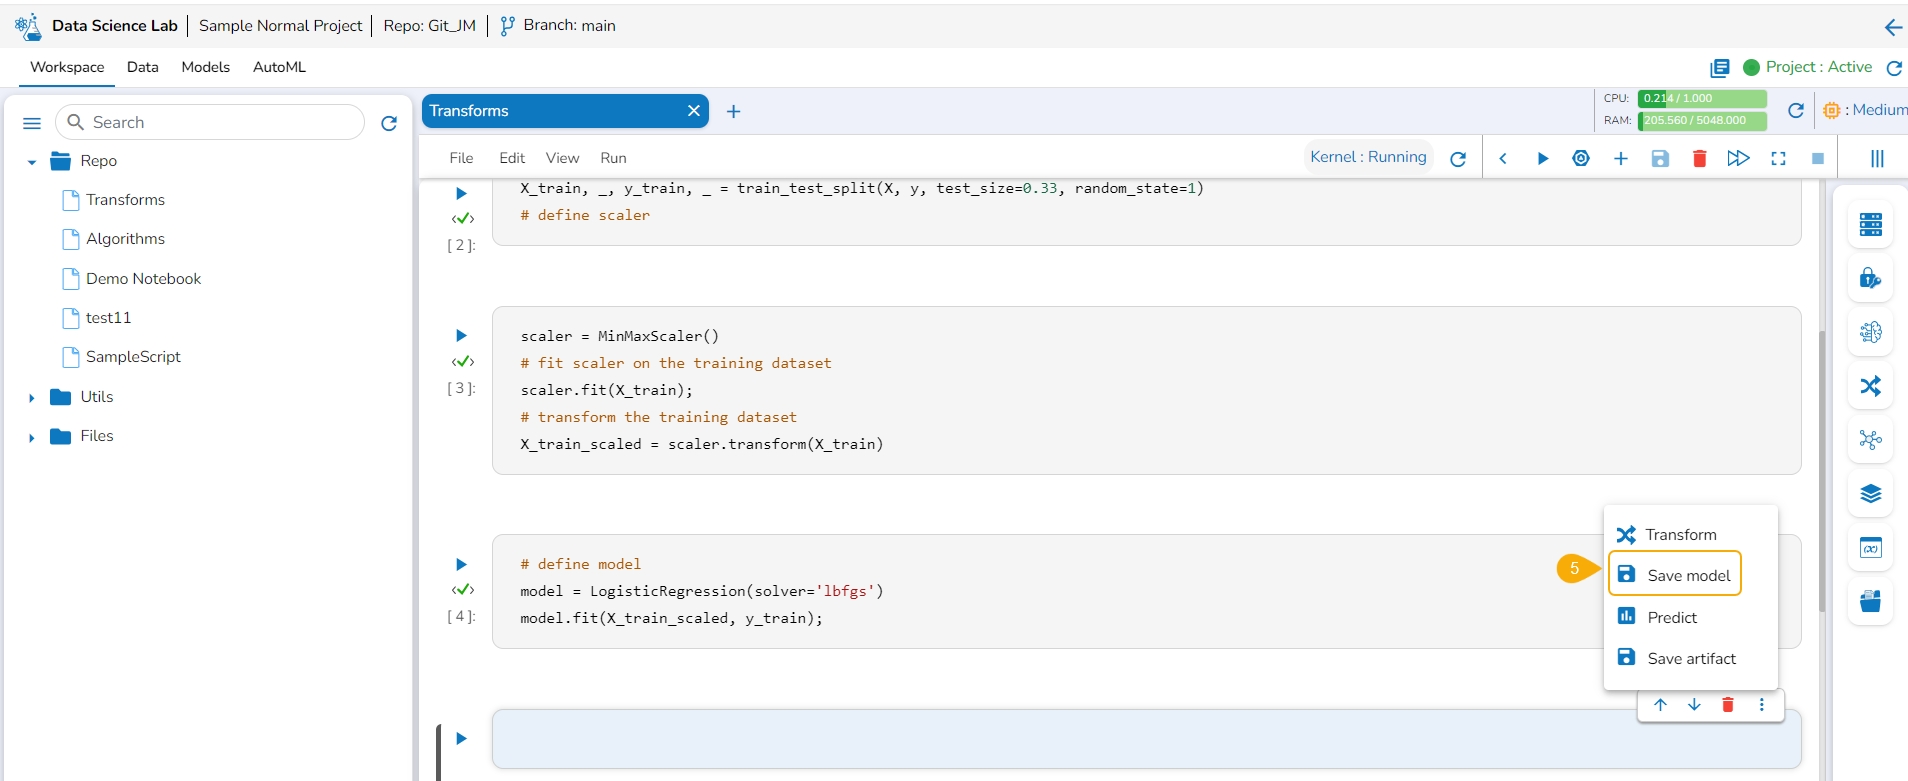
Add a new code cell and define the model.
Add another cell and click the Save Model option for the newly added code cell.
Specify the model name and type in the auto-generated script in the next code cell.
Run the cell.
Open the Transforms tab.
The model gets saved under the Transforms tab.
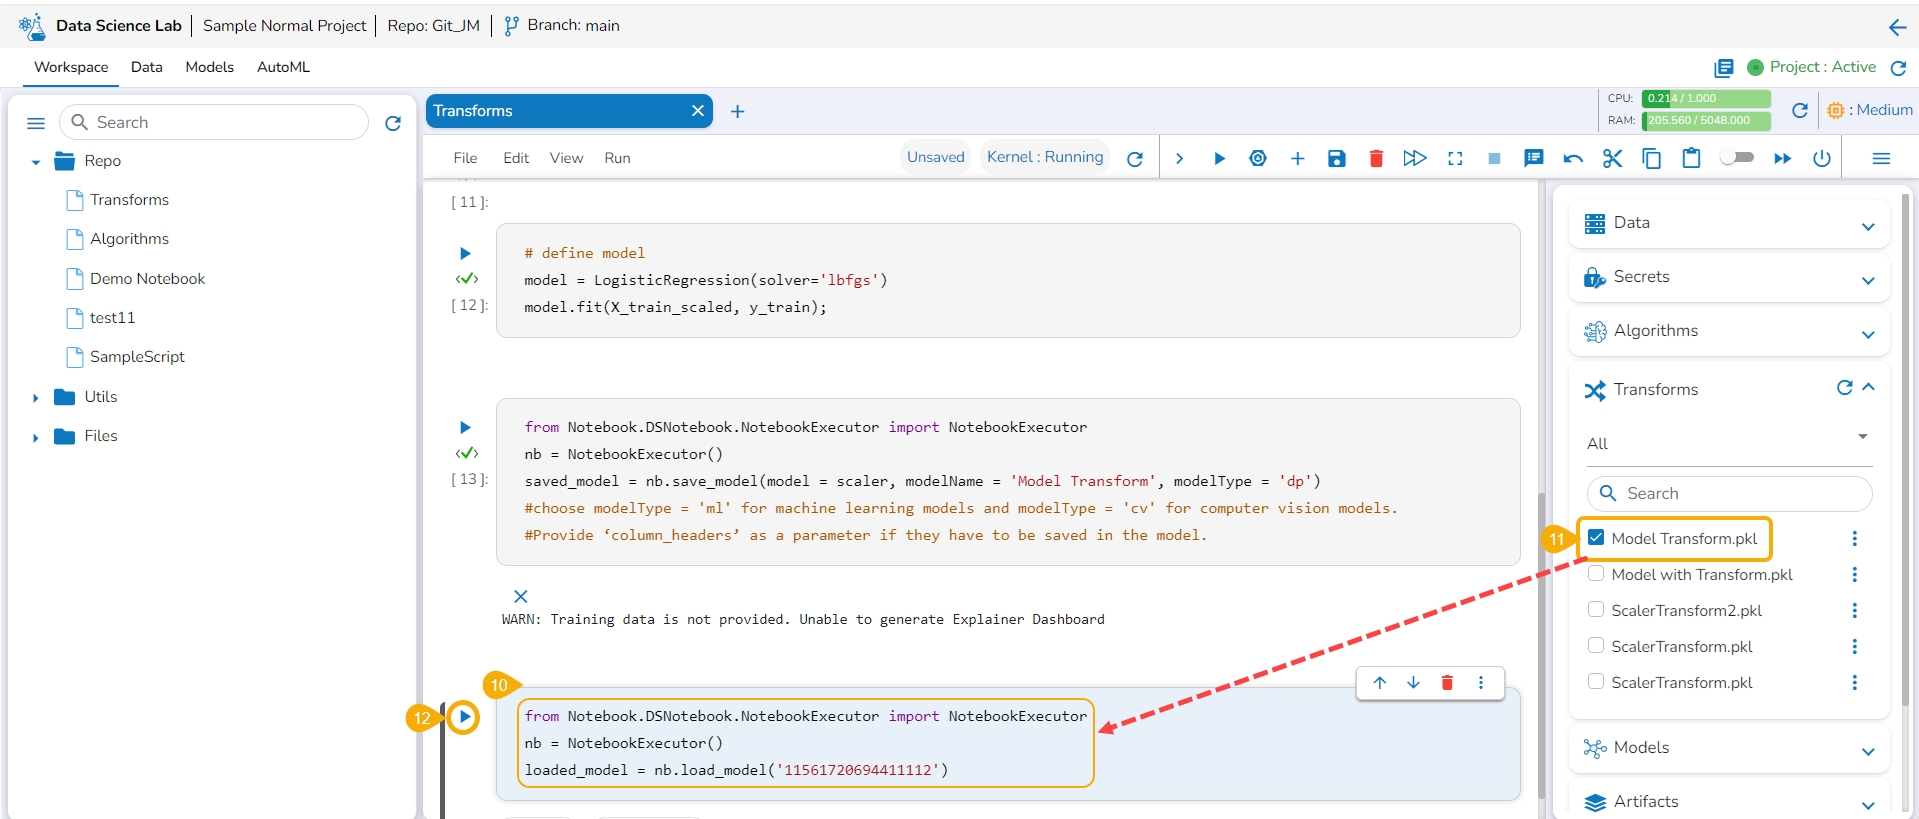
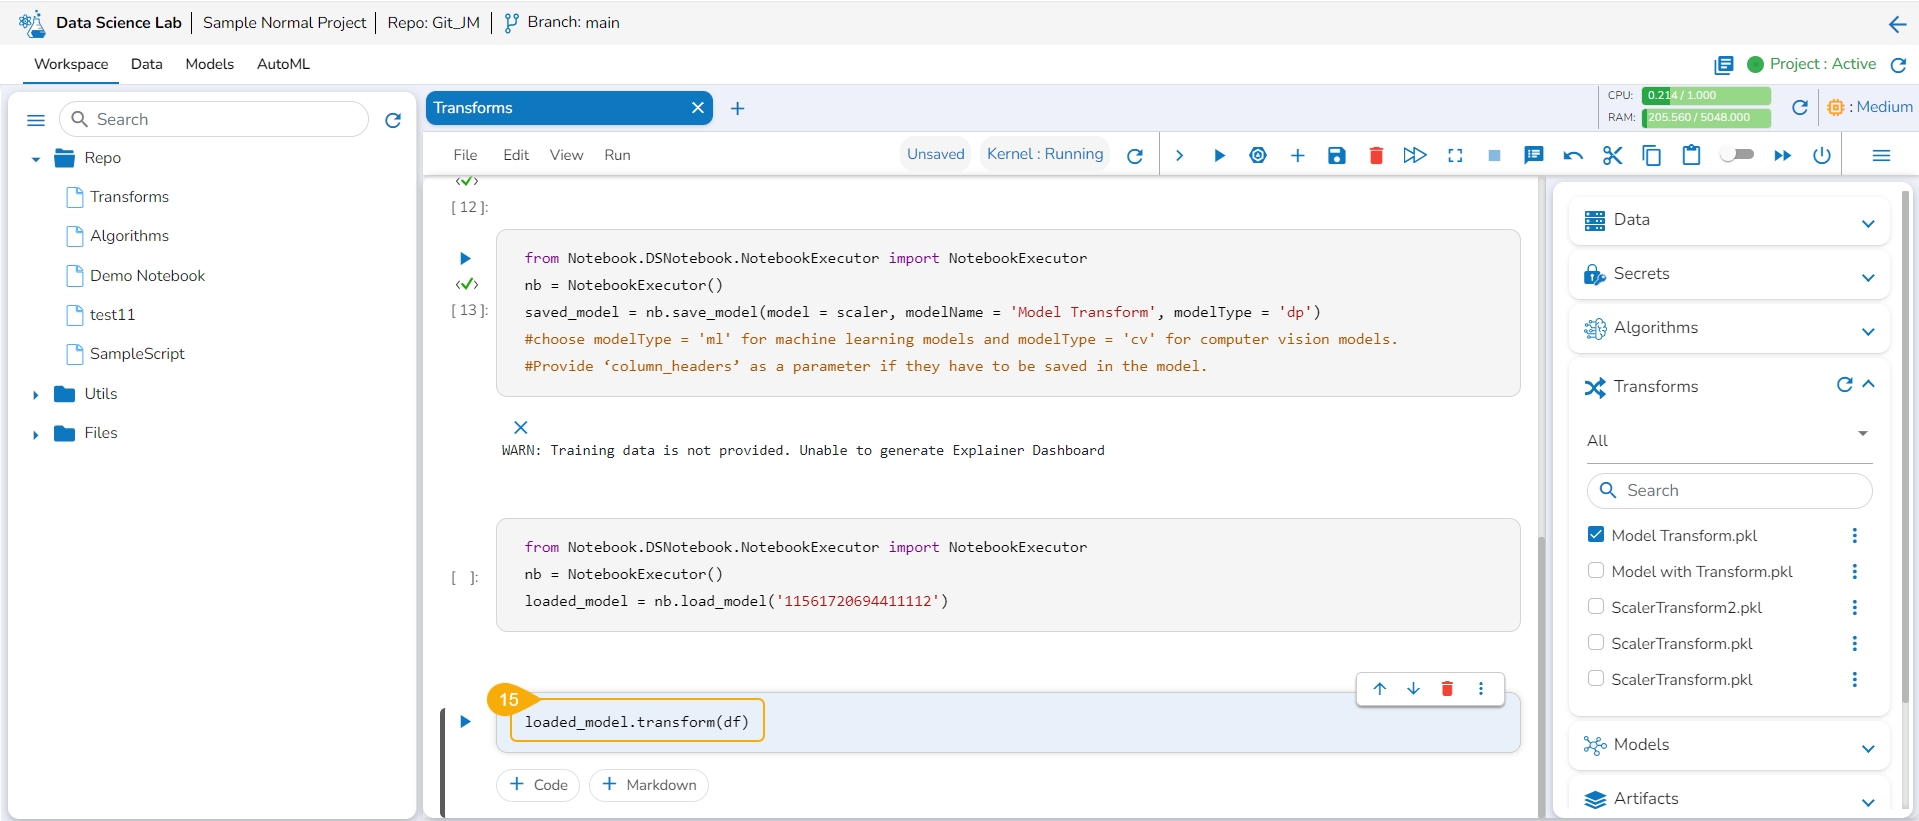
Add a new code cell.
Load the transform model by using the checkbox.
Run that cell.
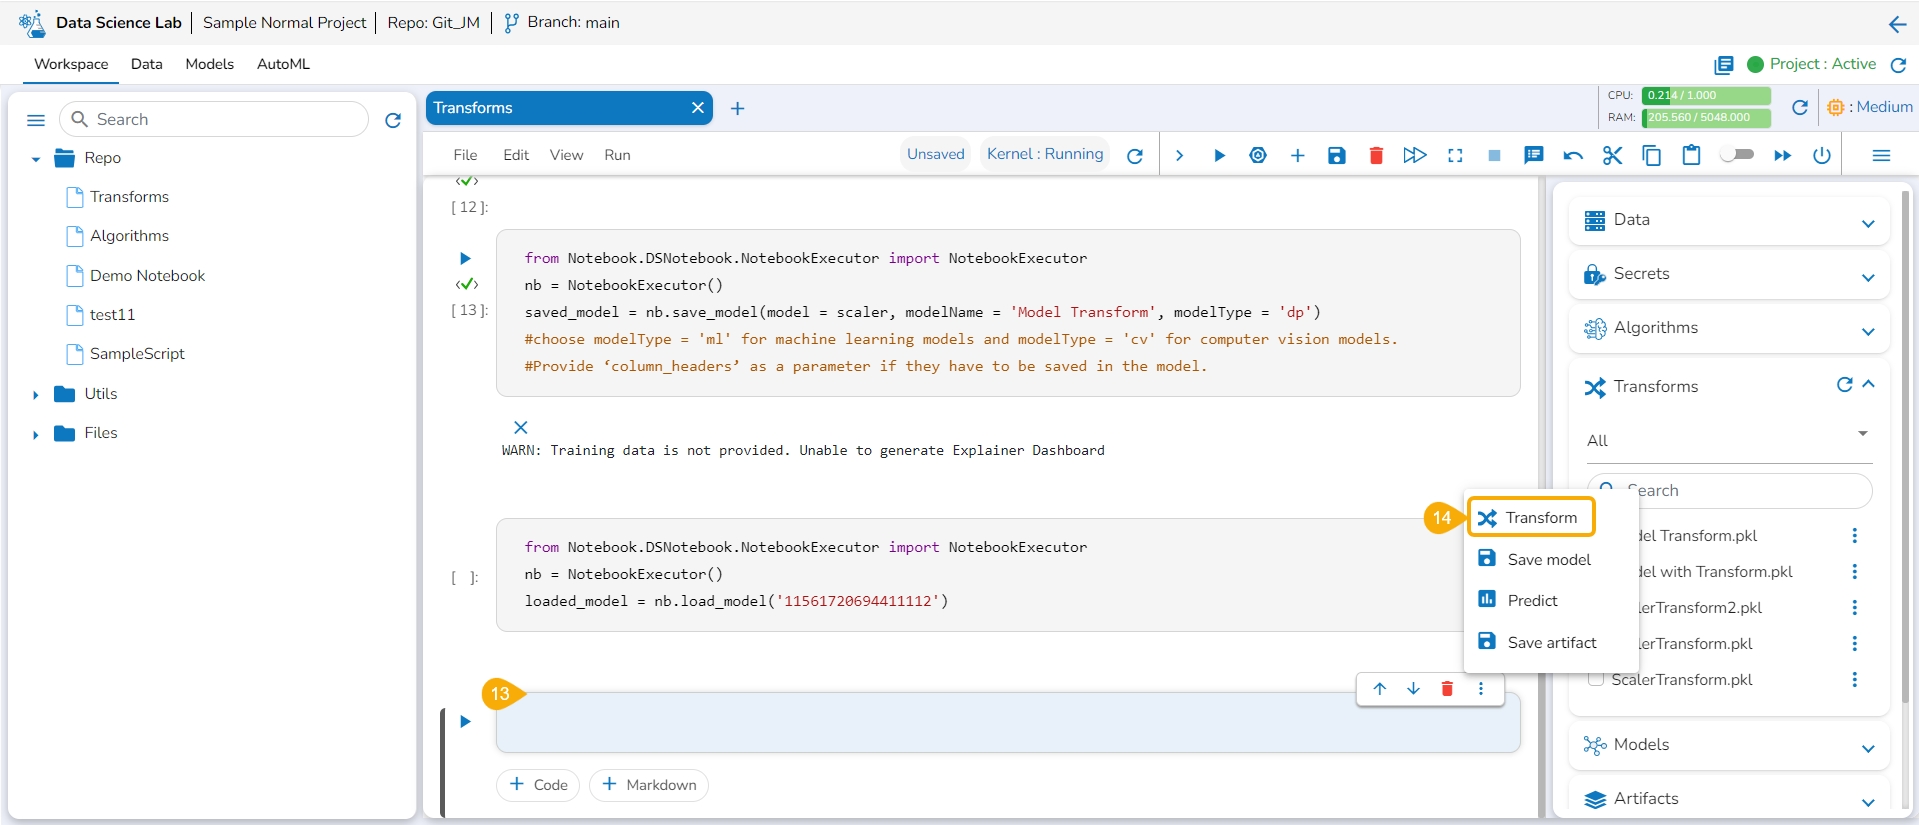
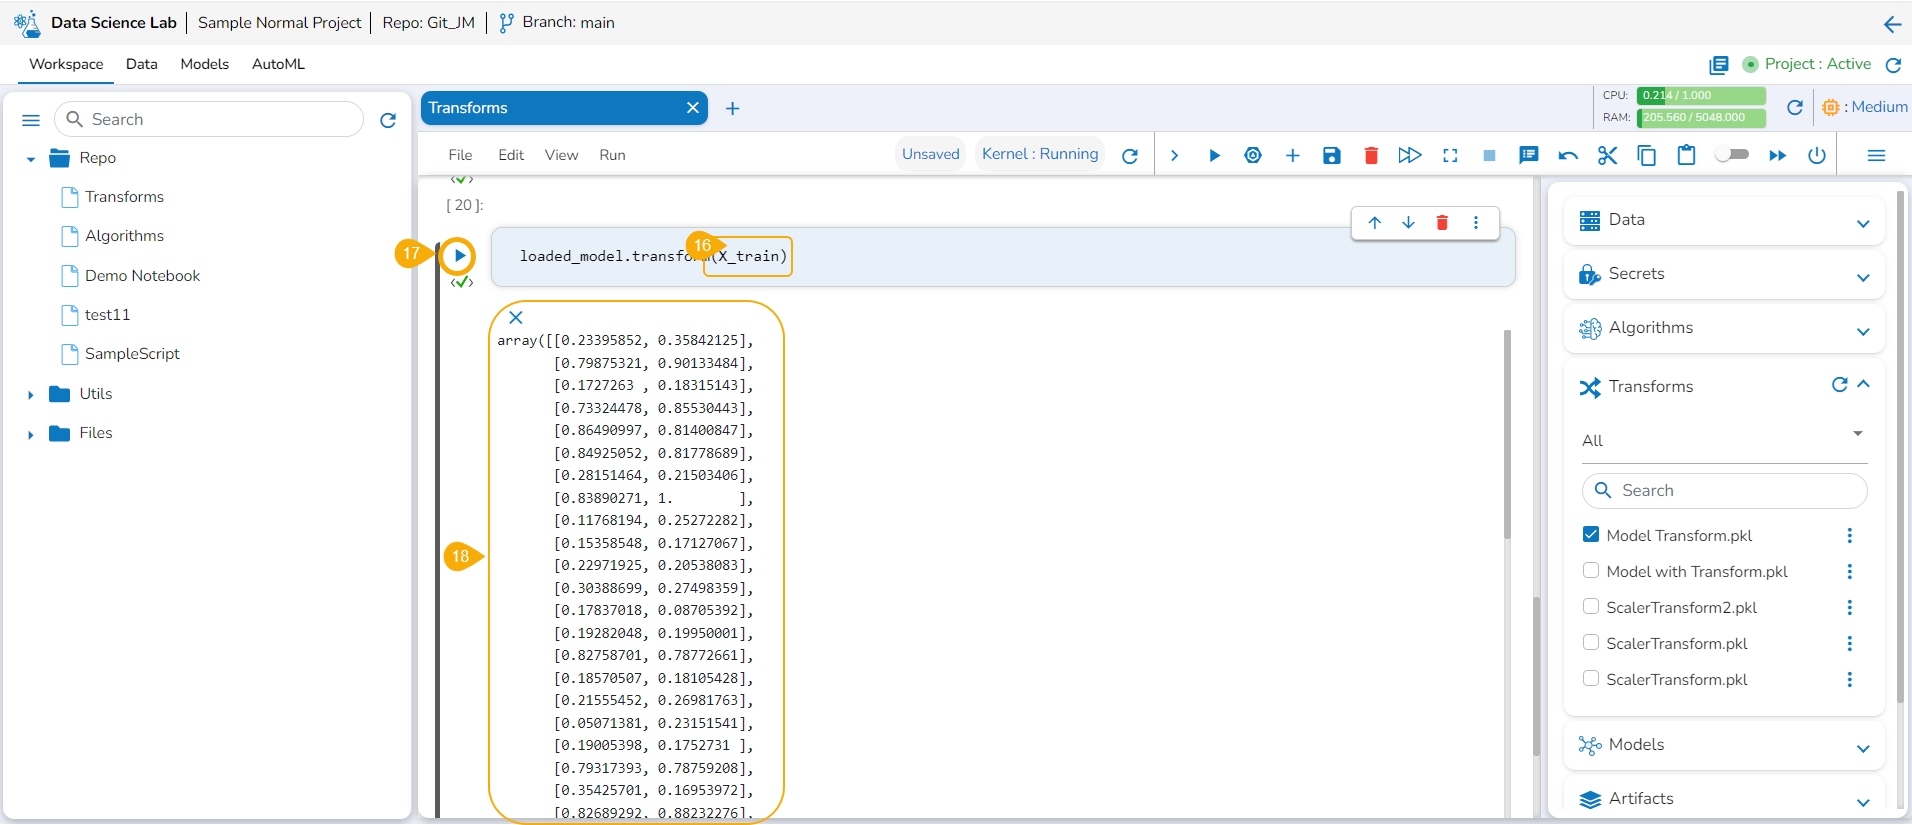
Insert a new code cell.
Click the Transforms option for the code cell.
The auto-generated script appears.
Specify the train data.
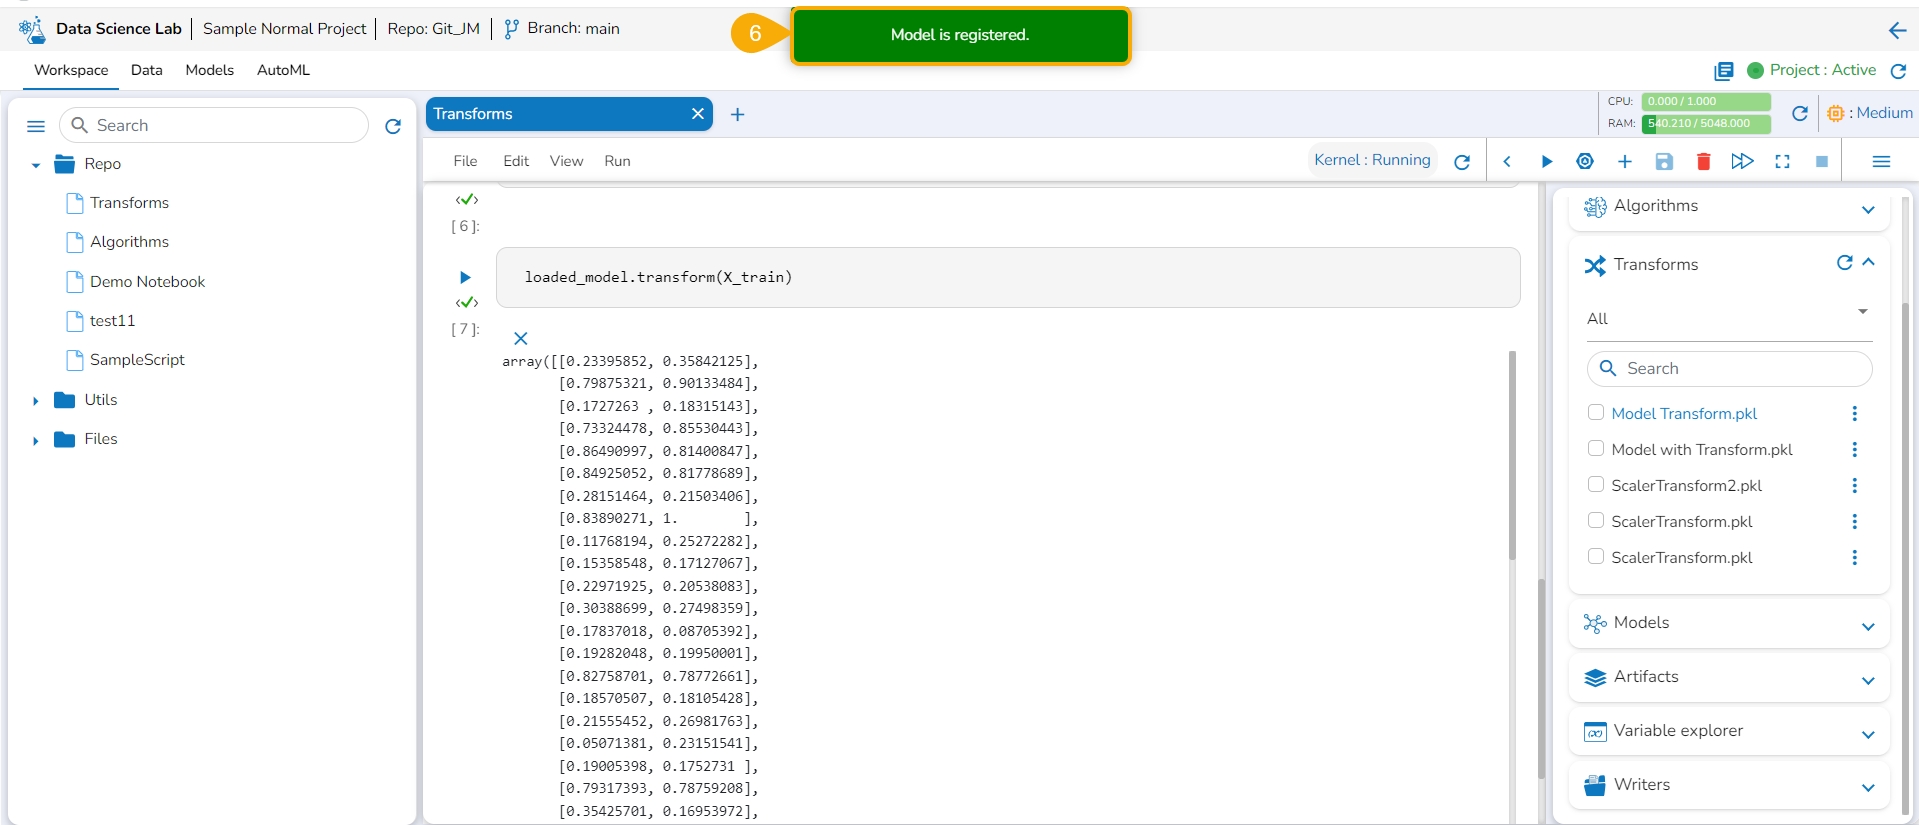
Run the code cell.
It will display the transformed data below.
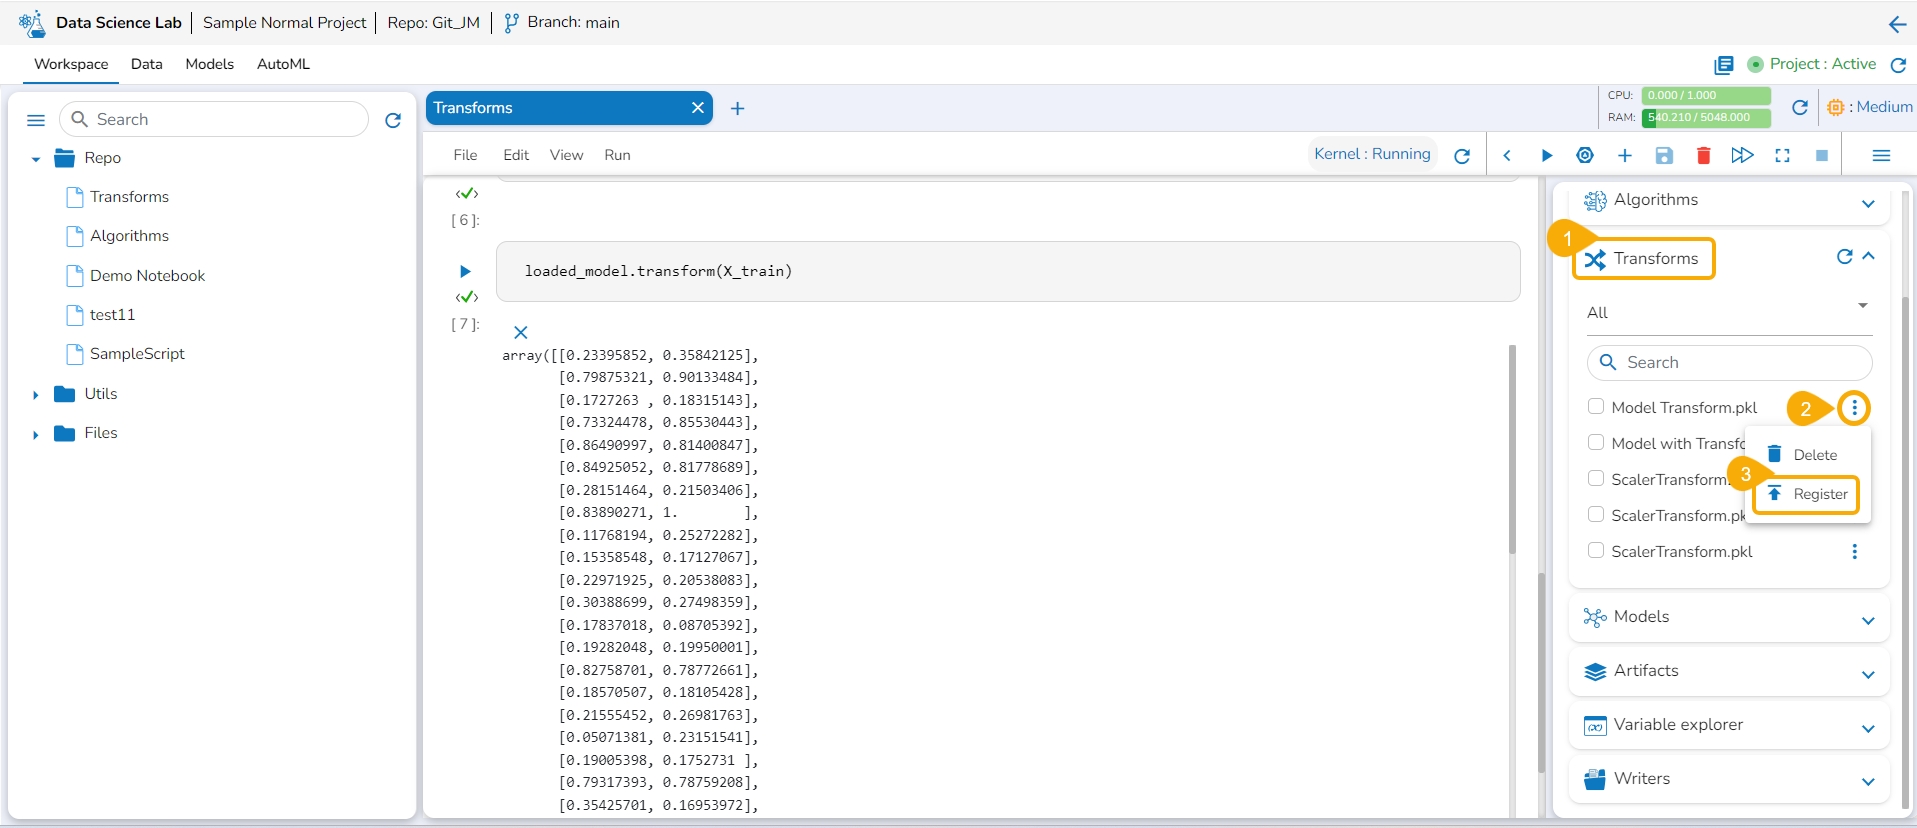
Open the Transforms tab inside a Notebook.
Click the ellipsis icon for the saved transform.
Select the Register option for a listed transform.
The Register Model dialog box opens to confirm the action.
Click the Yes option.
A confirmation message appears to inform the completion of the action.
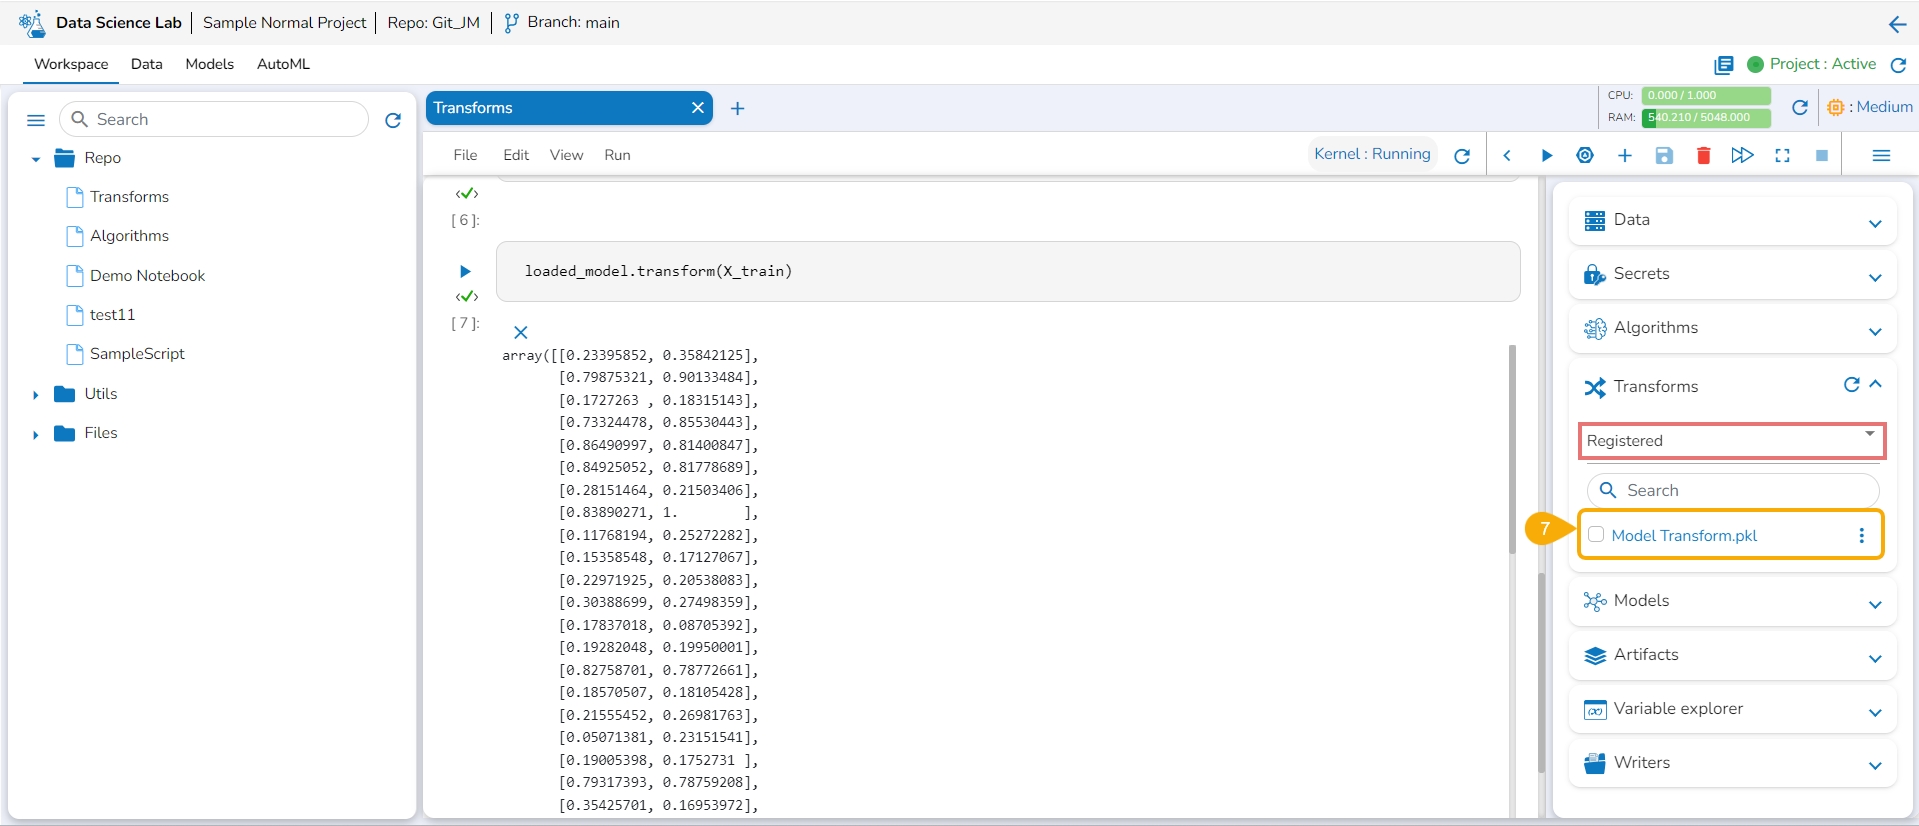
The model gets registered and listed under the Registered list of the models.
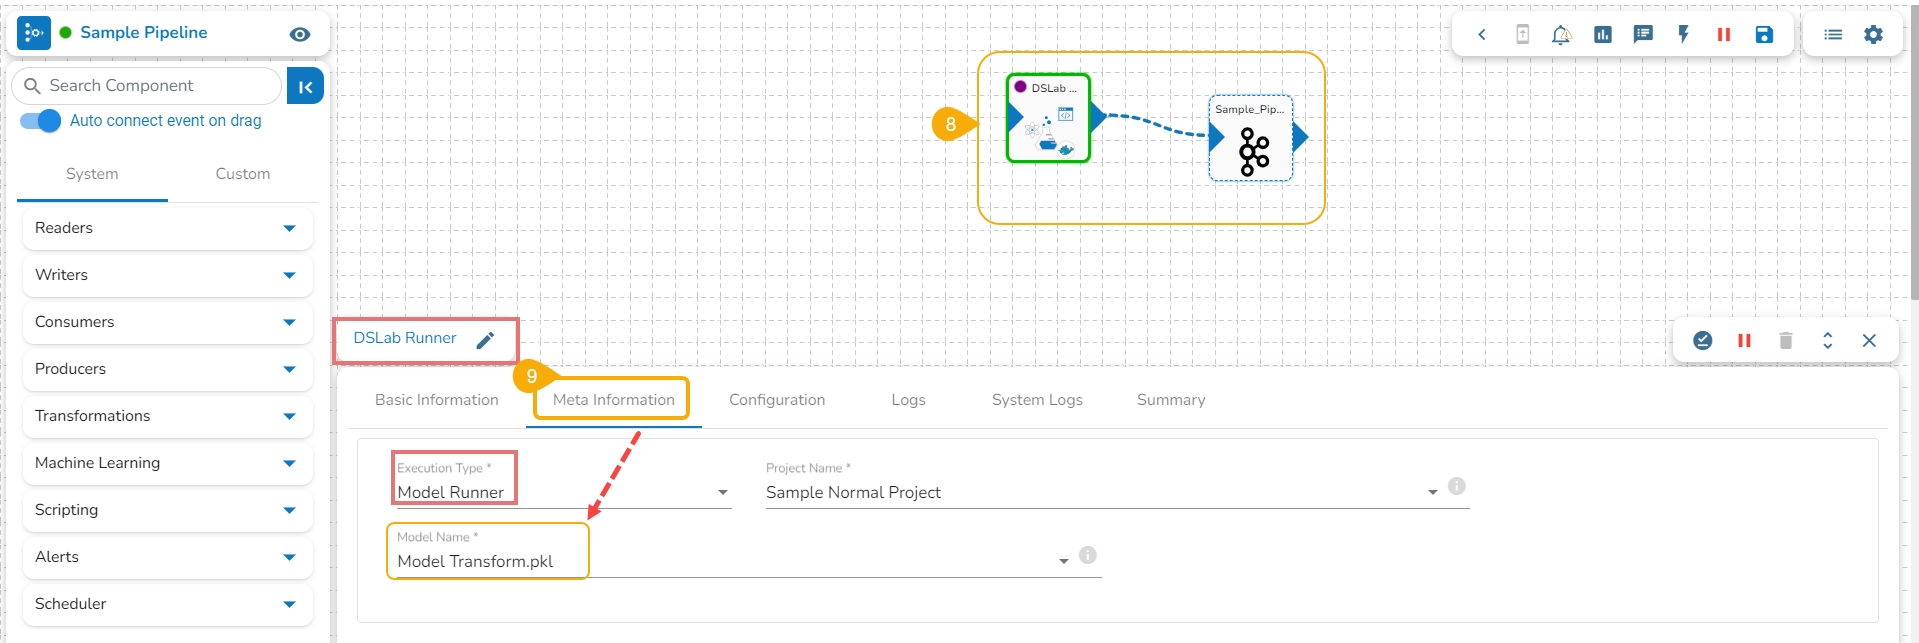
Open a pipeline workflow with a DS Lab model runner component.
The registered model gets listed under the Meta Information tab of the DS Lab model runner component inside the Data Pipeline module.
The steps to publish a model as an API that contains transform remain the same as described for a Data Science Model. Refer to the Register a Model as an API Service page.

