The Model tab includes various models created, saved, or imported using the Data Science Lab module. It broadly list Data Science Models, Imported Models, and Auto ML models.
Loading...
Loading...
Loading...
Loading...
Loading...
Loading...
Loading...
Loading...
This page explains how a model explainer can be generated through a job.
The user can generate an explainer dashboard for a specific model using this functionality.
Check out the illustration on Explainer as a Job.
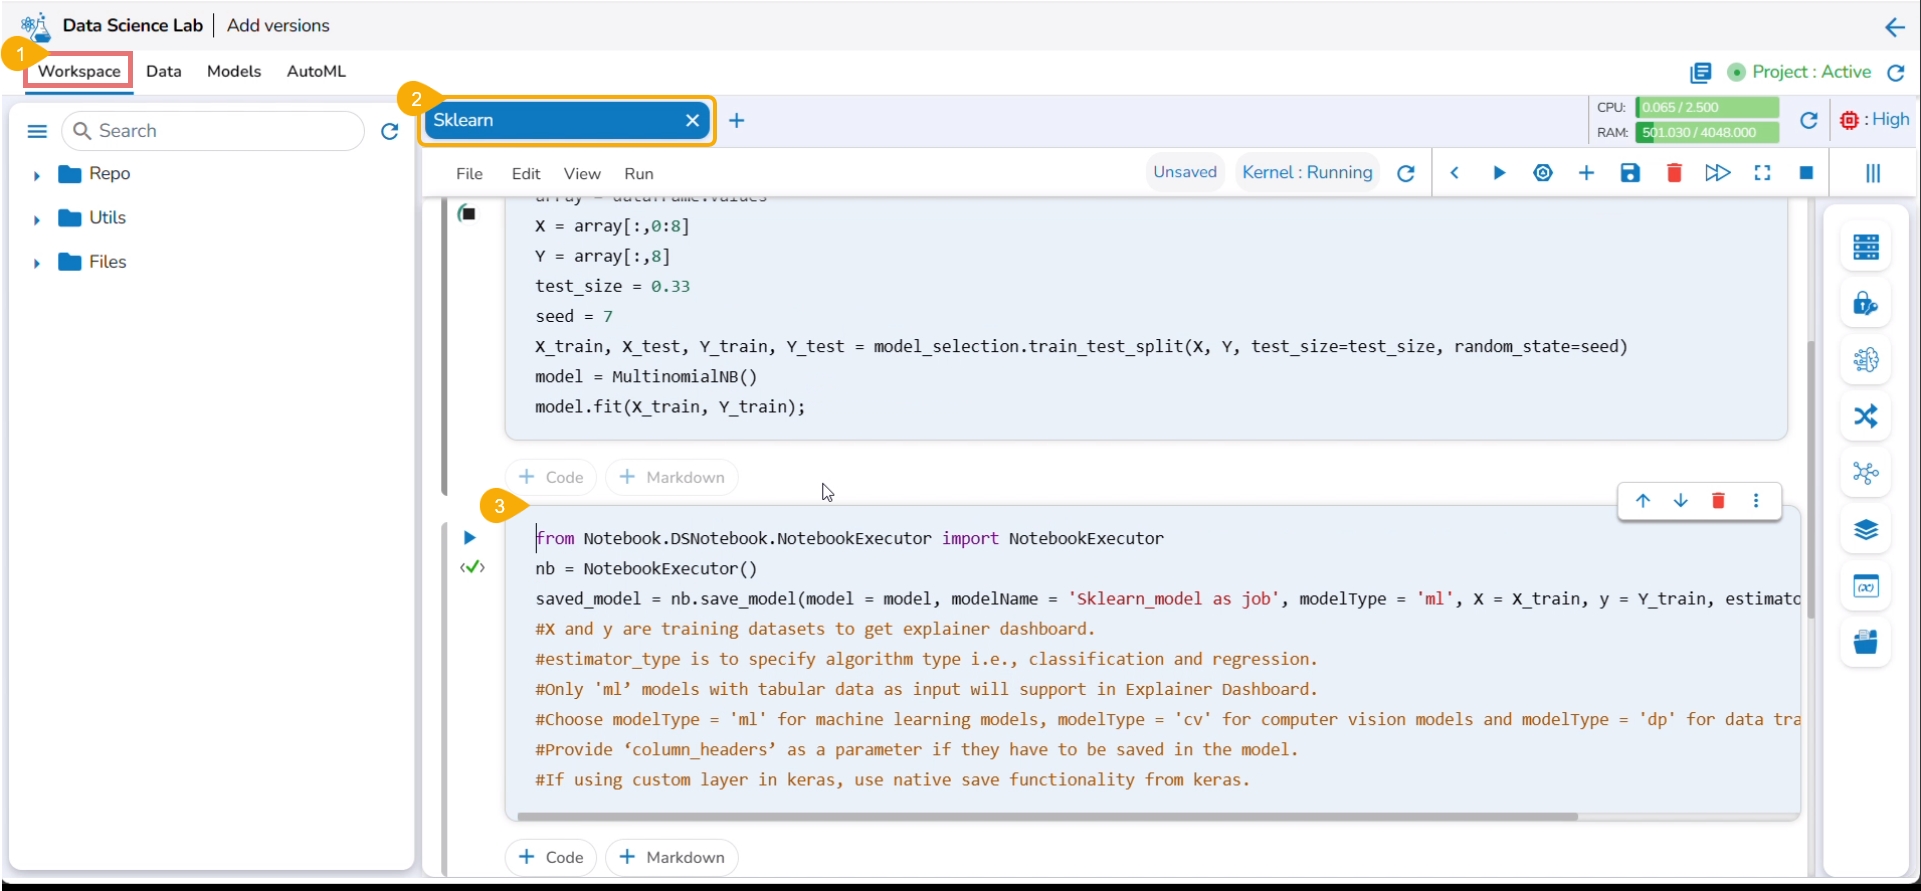
Navigate to the Workspace tab.
Open a Data Science Notebook (.ipynb file) that contains a model.
Navigate to the code cell containing the model script.
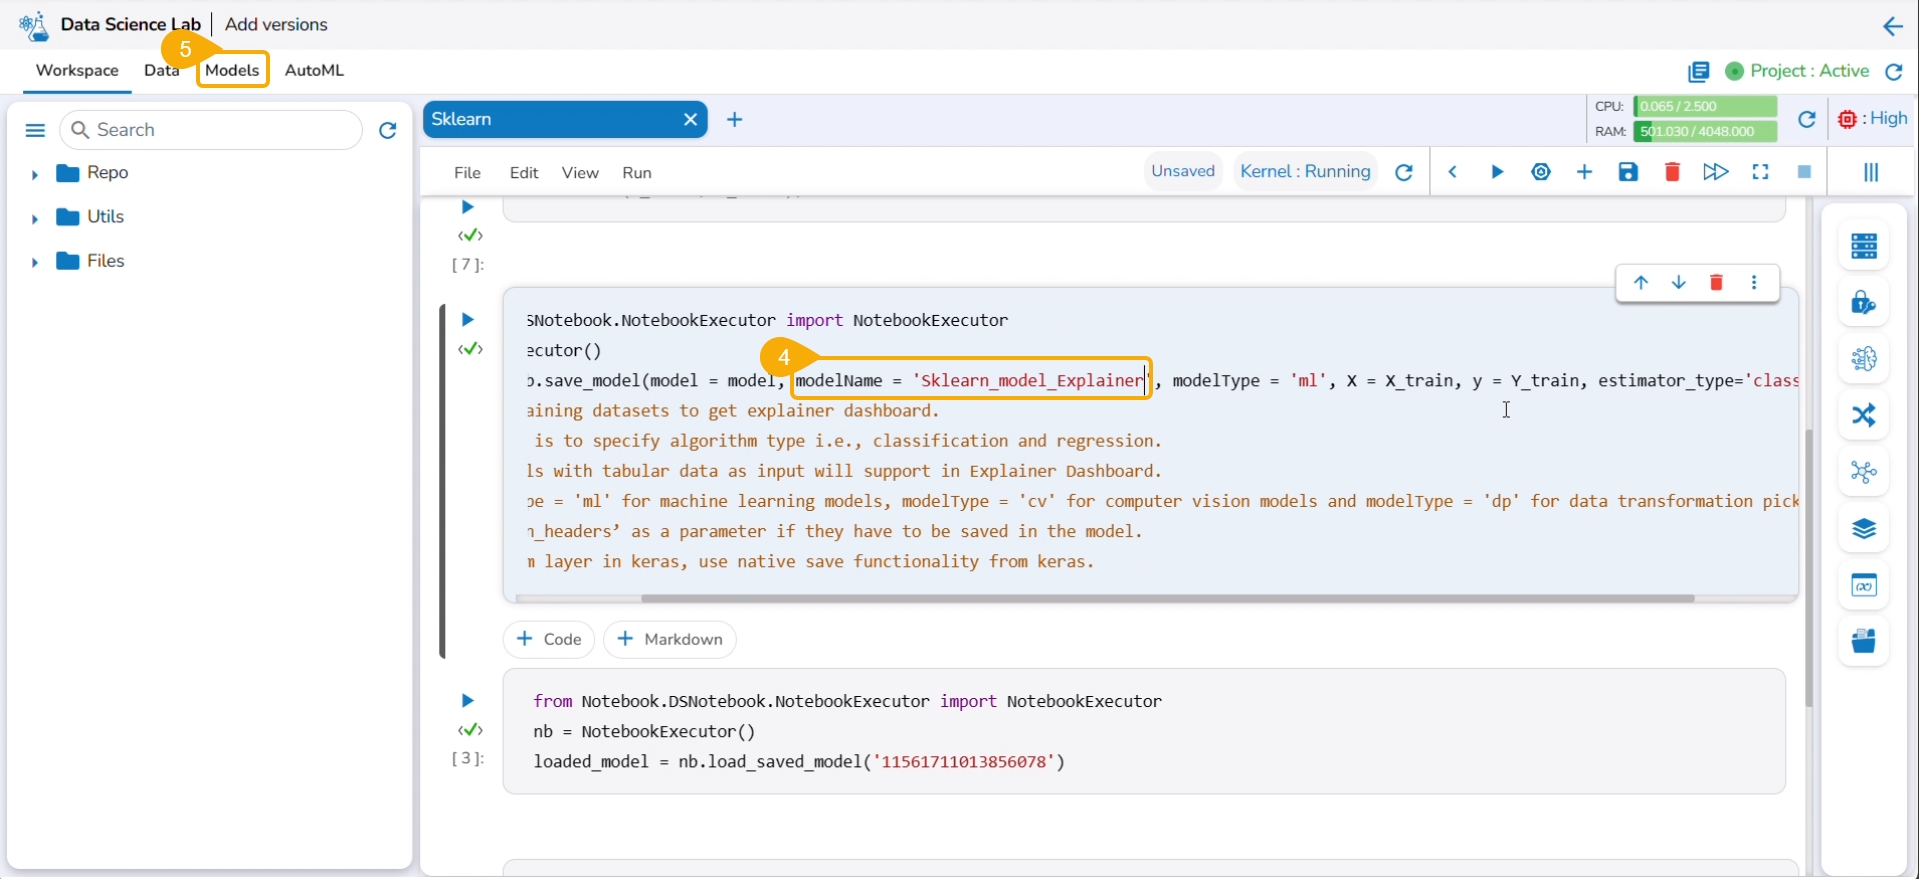
Check out the Model name. You may modify it if needed.
Click the Models tab.
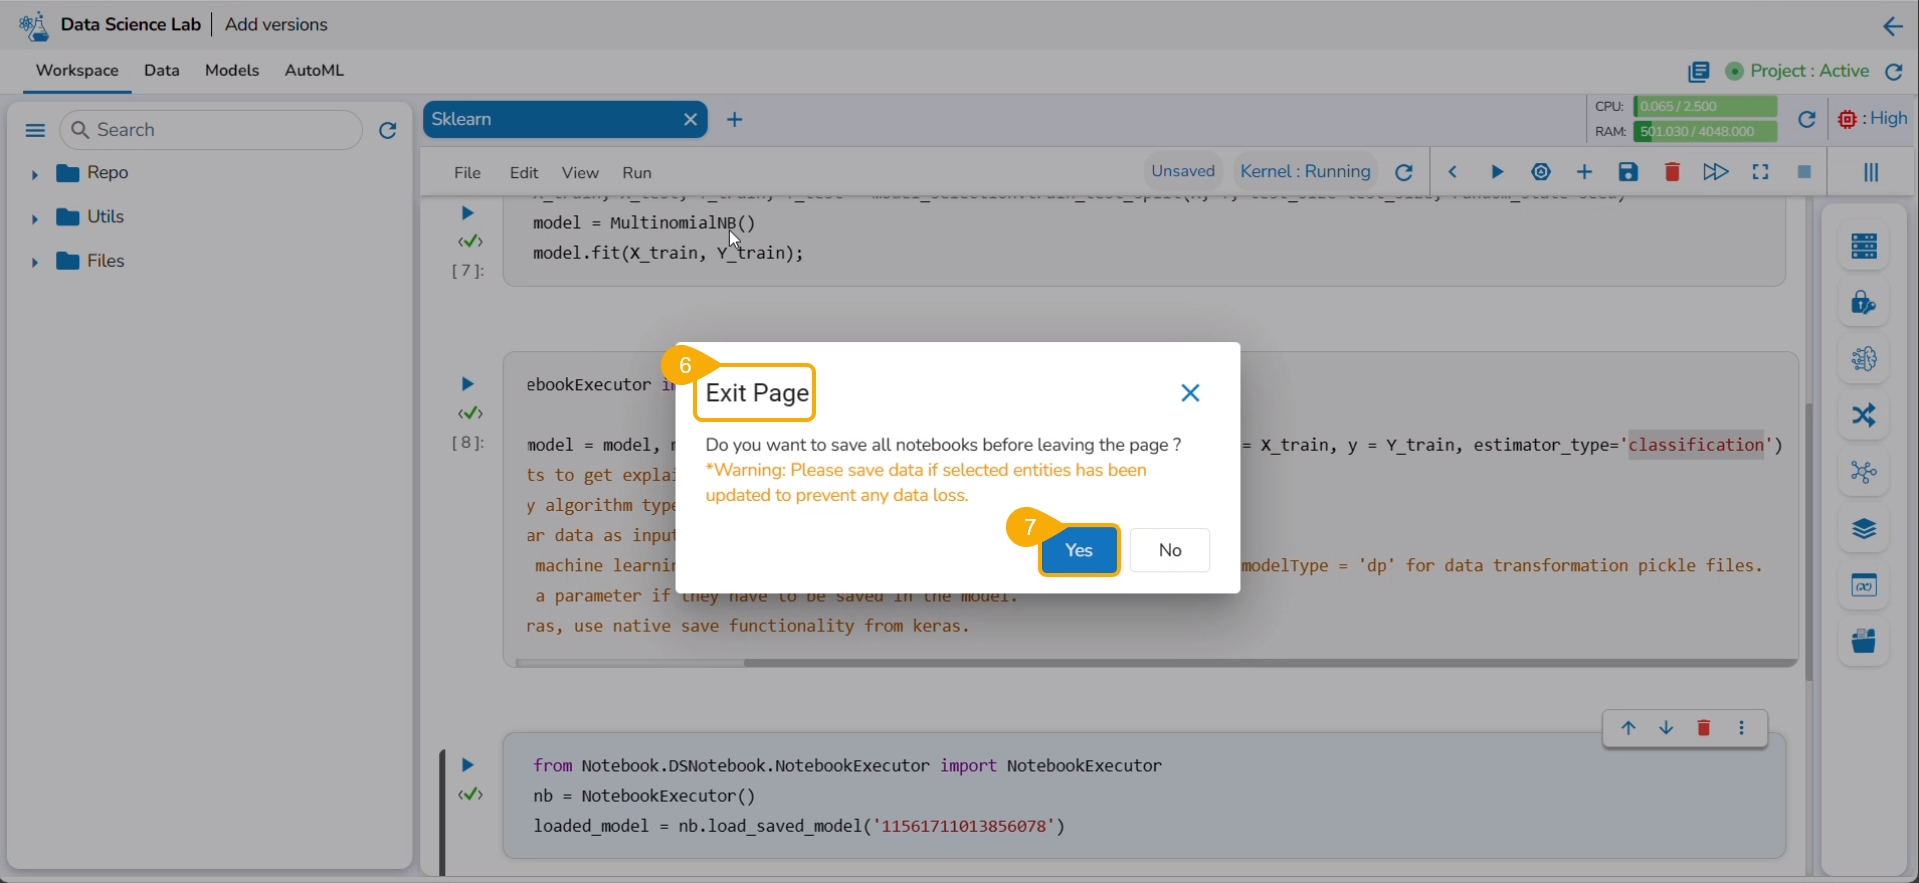
The Exit Page dialog box opens to save the notebook before redirecting the user to the Models tab.
Click the Yes option.
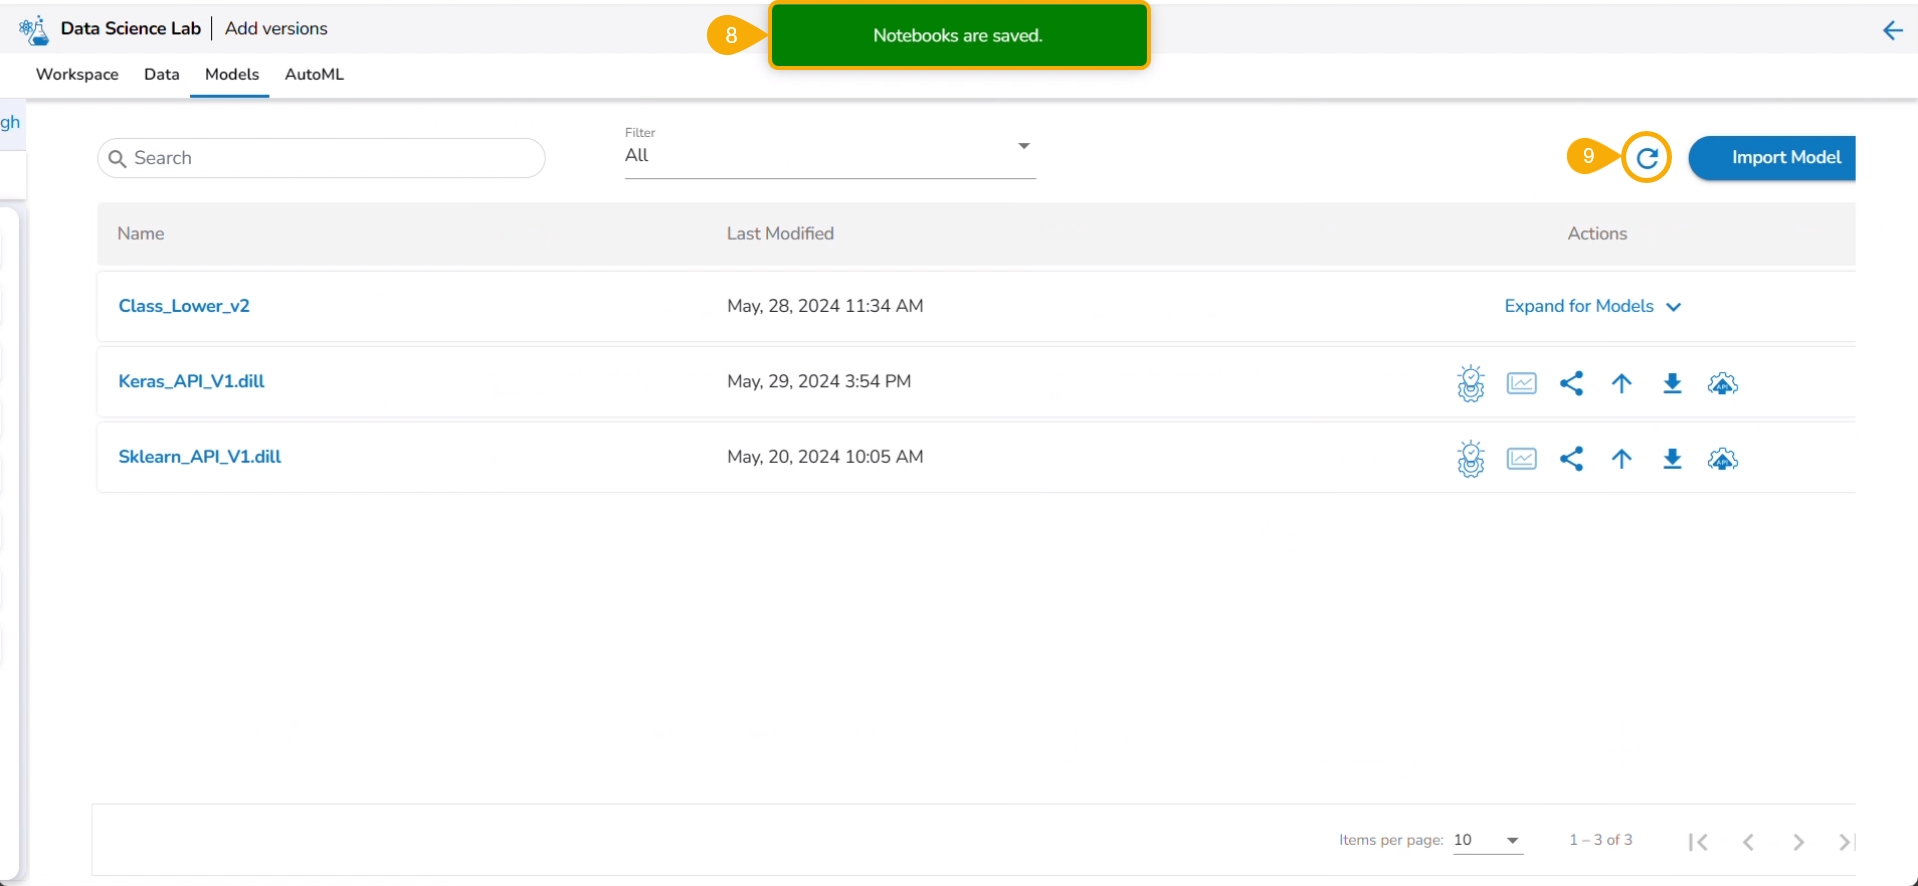
A notification message ensures that the concerned Notebook is saved. The user gets redirected to the Models tab.
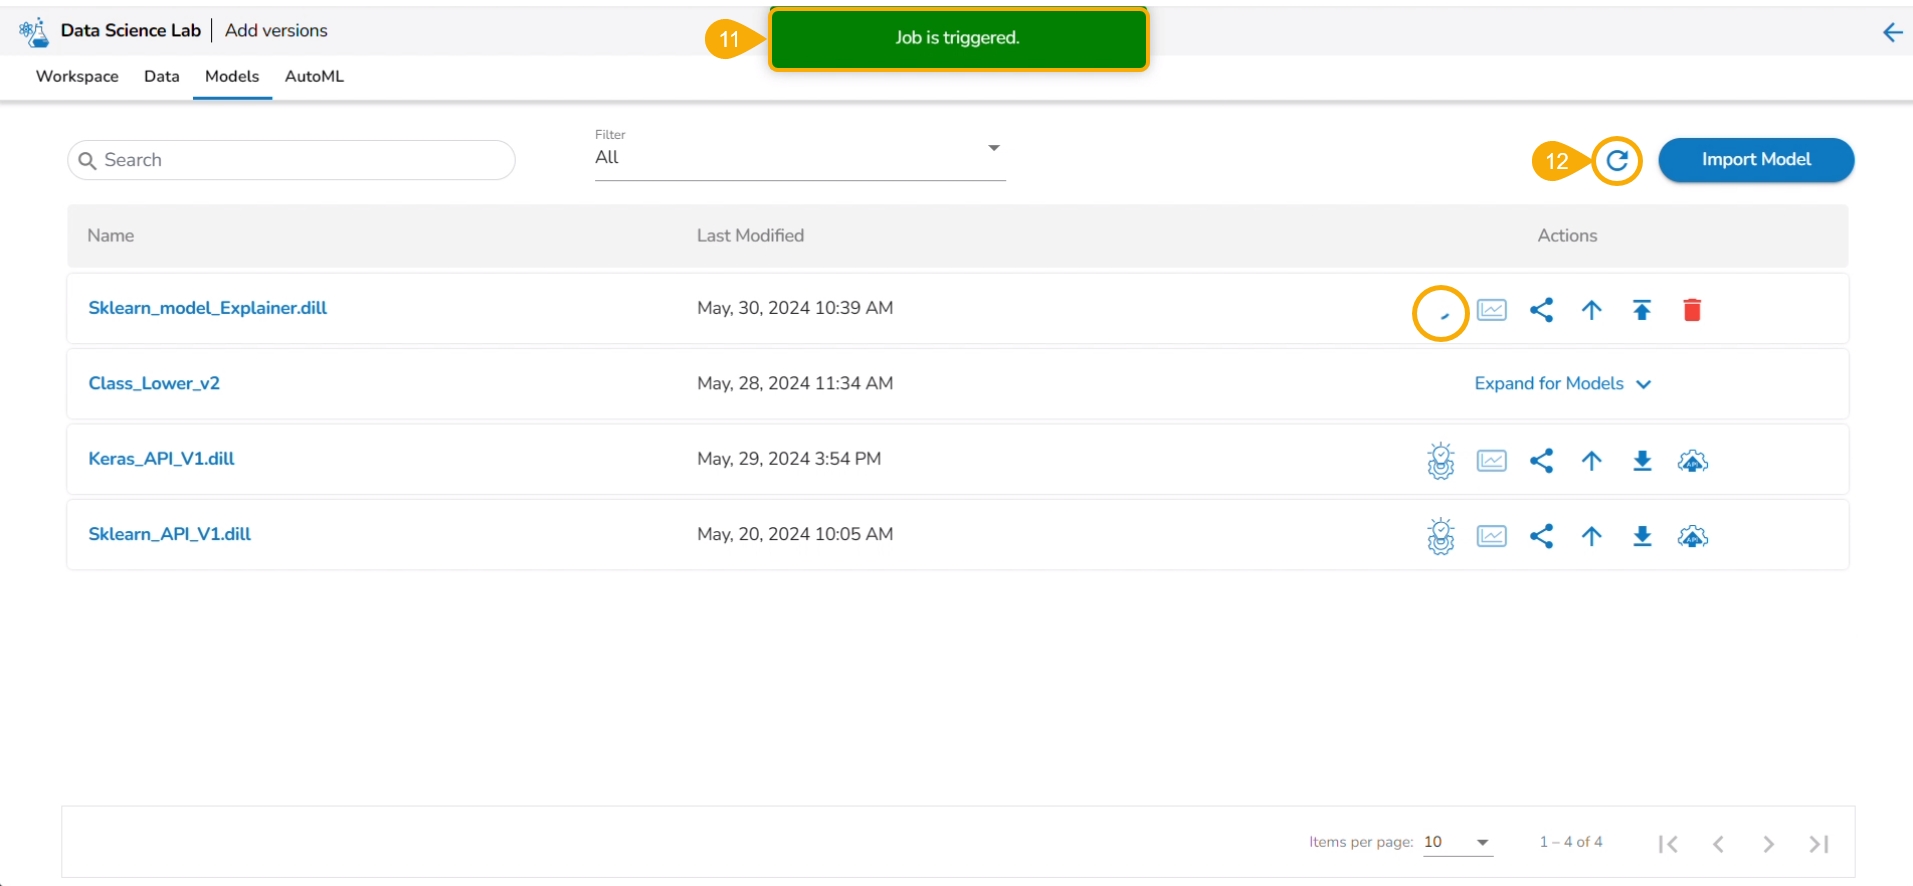
Click the Refresh icon to refresh the displayed model list.
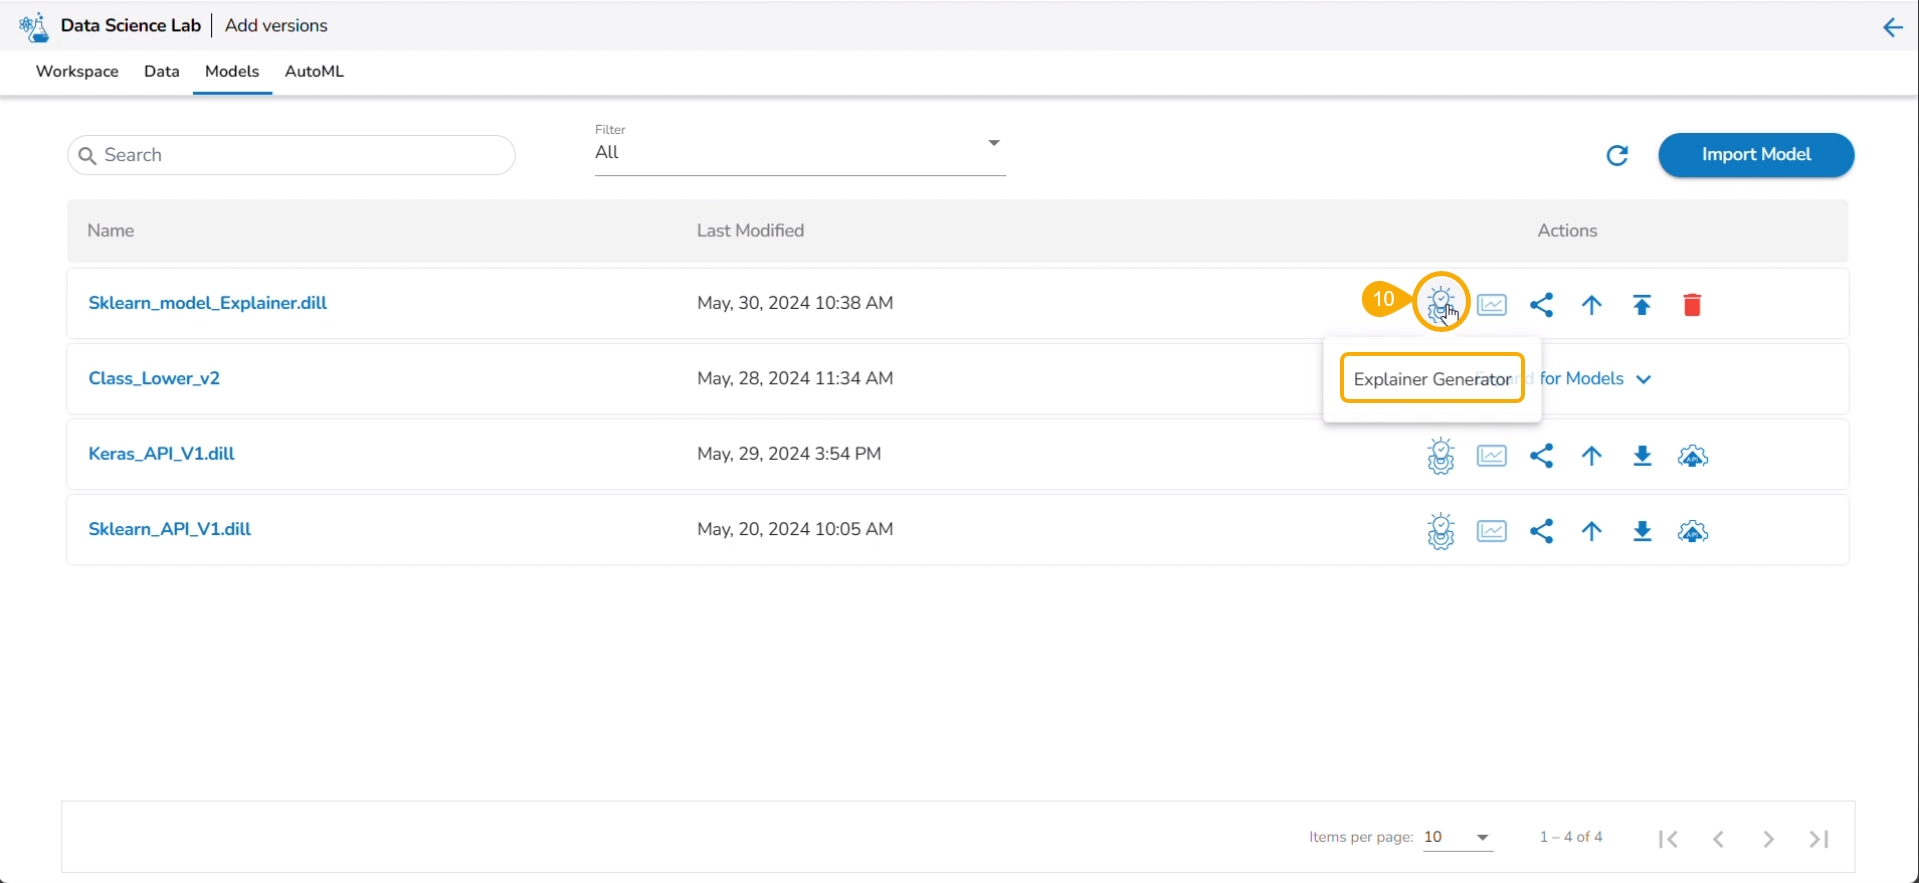
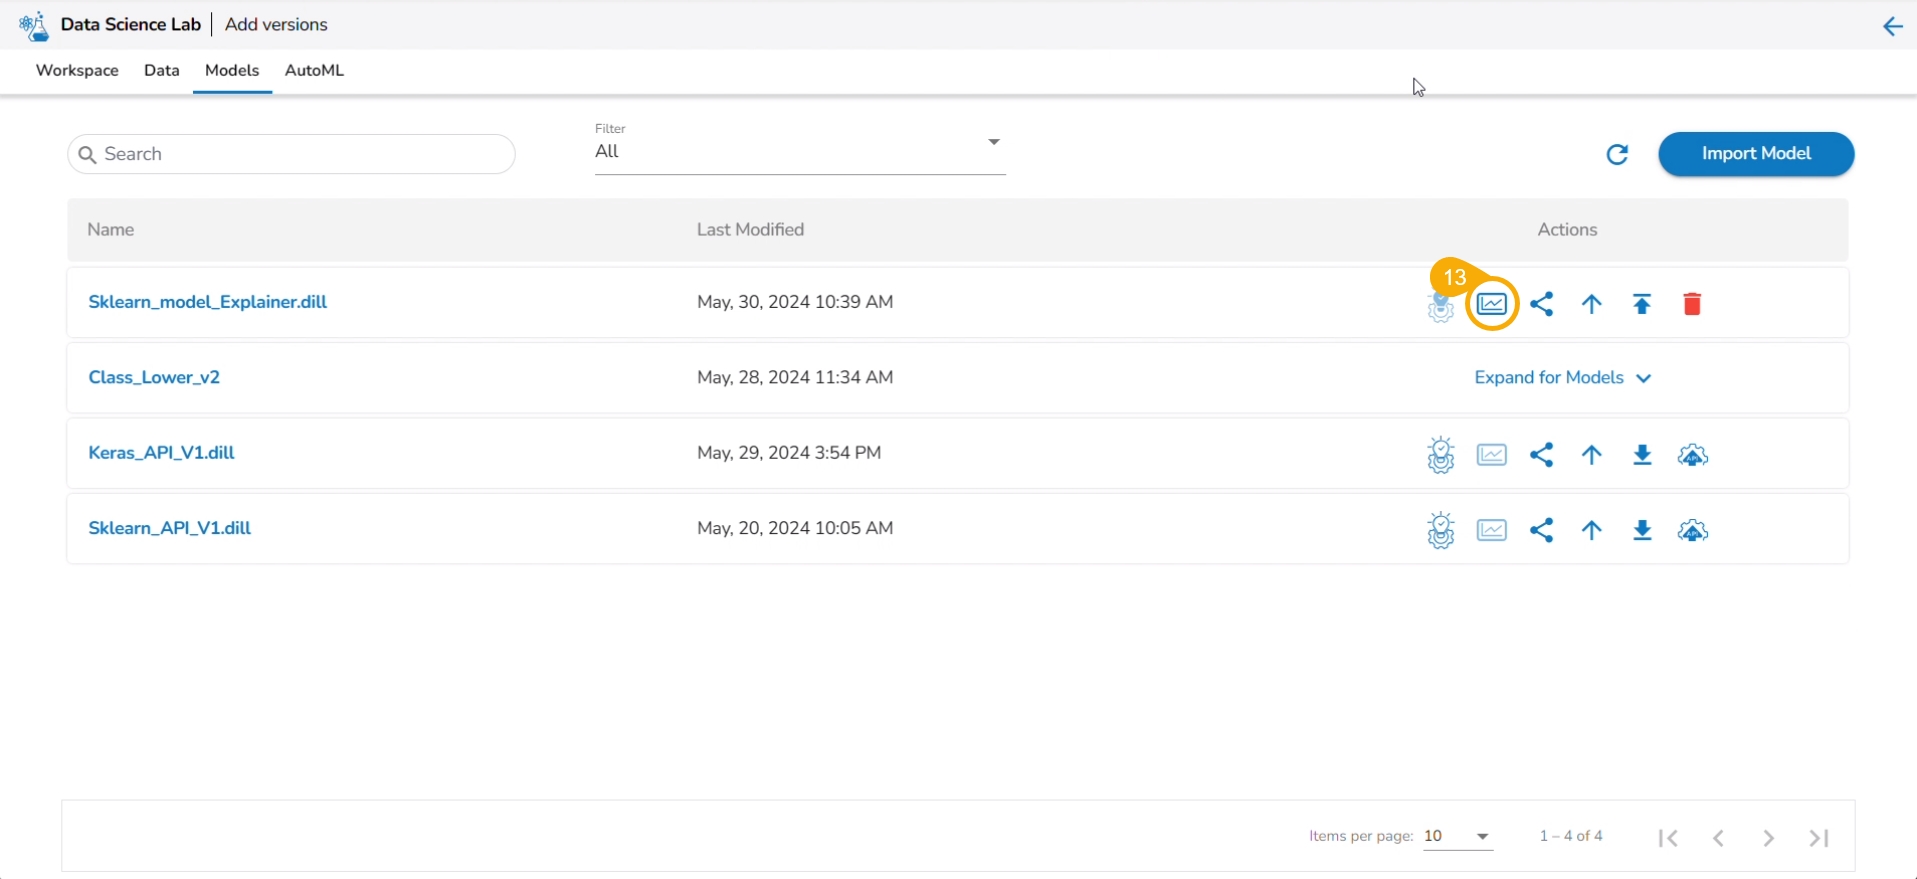
The model will be listed at the top of the list. Click the Explainer Creator icon.
A notification ensures that a job is triggered.
Click the Refresh icon.
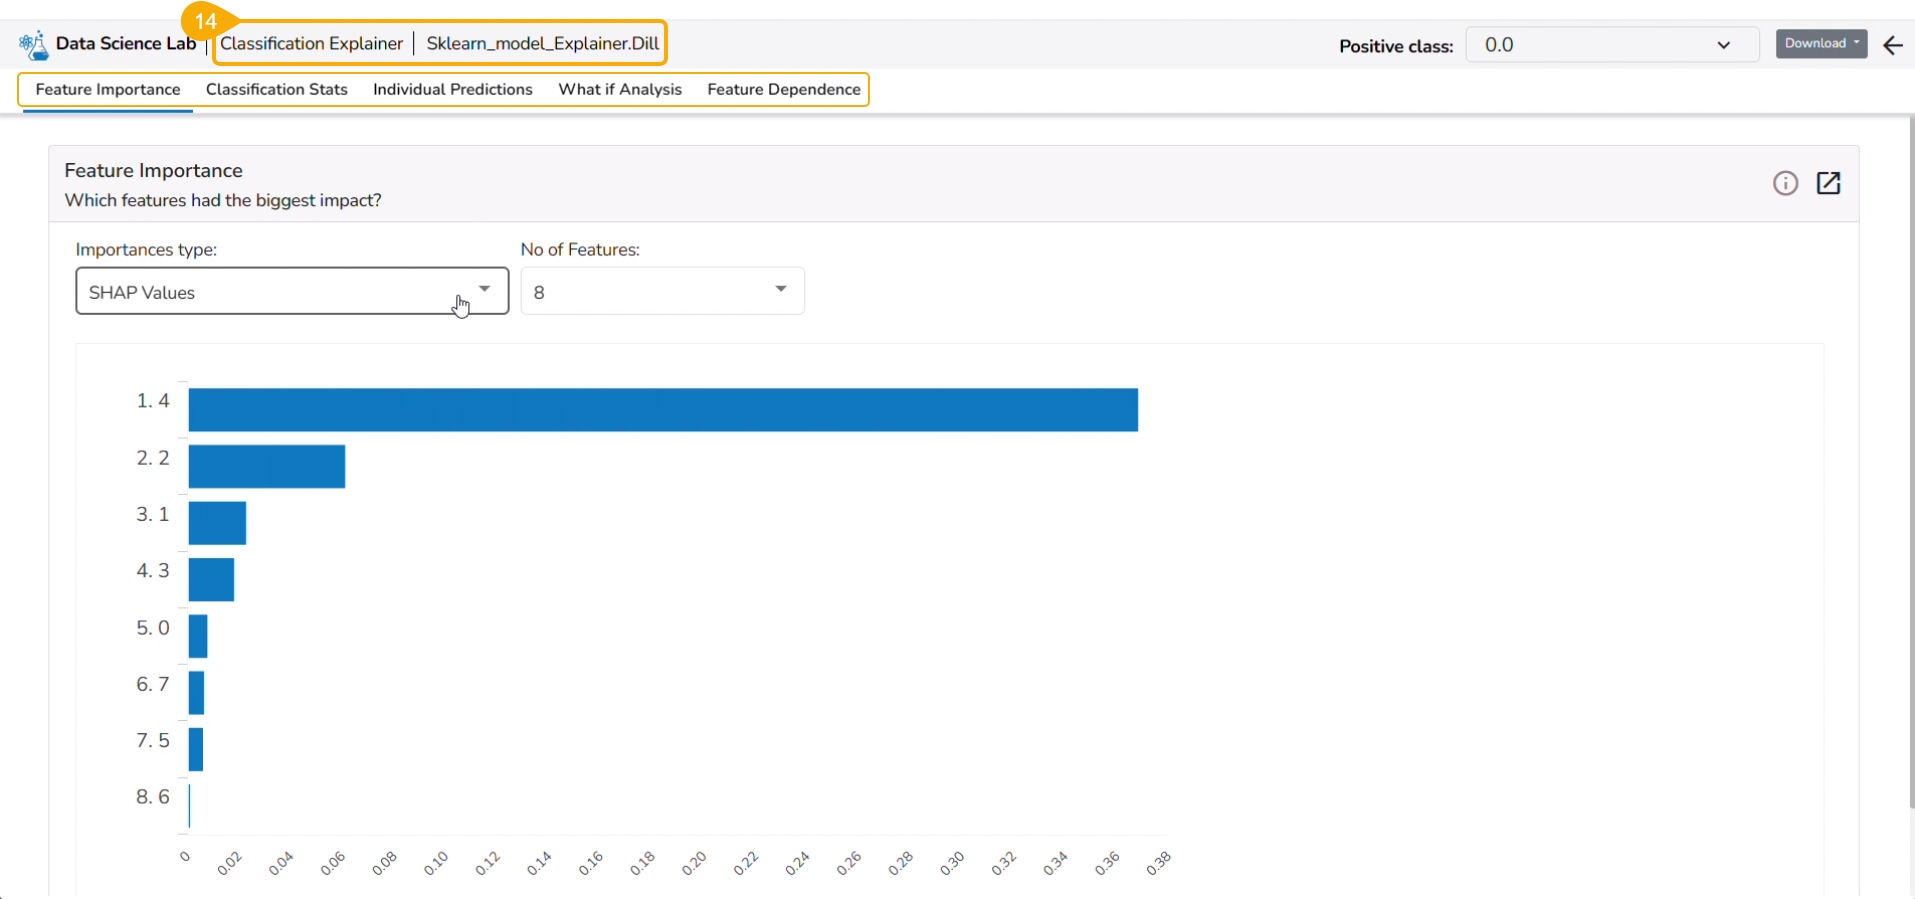
The Explainer icon is enabled for the model. Click the Explainer icon.
The Explainer dashboard for the model opens.
The share option for a model facilitates the user to share it with other users and user groups. It also helps the user to exclude the privileges of a previously shared model.
Check out the following video for guidance on the Share model functionality.
Navigate to the Models tab where your saved models are listed.
Find the Model you want to share and select it.
Click the Share icon for that model from the Actions column.
The Manage Access page opens for the selected model.
Select permissions using the Grant Permissions checkboxes.
Navigate to the Users or User tab to select user(s) or user group(s).
Use the search function to locate a specific user or user group you want to share the Model with.
Select a user or user group using the checkbox.
Click the Save option.
A notification message appears ensuring that it has been shared.
The selected user/ user group will be listed under the Granted Permissions section.
Log in to the user account where the Model has been shared.
Navigate to the Projects page within the DS Lab module.
The Project where the source model was created will be listed.
Click the View icon to open the shared Project.
Open the Model tab for the project.
Locate the Shared Model, which will be marked as shared, in the Model list.
Please Note: A targeted share user cannot re-share or delete a shared model regardless of the permission level (View/ Edit/Execute).
Check out the illustration on using the Exclude Users functionality.
Check out the illustration for including an excluded user to access a shared model.
Navigate to the Manage Access window for a shared model.
The Excluded Users section will list the excluded users from accessing that model.
Select a user from the list.
Click the Include User icon.
The Include User dialog box opens.
Click the Yes option.
A notification message appears ensuring that the selected user is included.
The user gets removed from the Excluded Users section.
Check out the illustration on revoking privileges for a user.
Navigate to the Manage Access window for a shared model.
The Granted Permissions section will list the shared user(s)/ user group(s).
Select a user/ user group from the list.
Click the Revoke icon.
The Revoke Privileges dialog box opens.
Click the Yes option.
A notification message ensures that shared model privileges are revoked for the selected user/user group. The user/ user group will be removed from the Granted Permissions section.
Please Note: The same set of steps can be followed to revoke privileges for a user group.
To register a model implies pushing the model into the Pipeline environment where it can be used for inferencing when Production data is read.
Please Note: The currently supported model types are: Sklearn (ML & CV), Keras (ML & CV), and PyTorch (ML).
Check out the walk-through to Register a Data Science model to the Data Pipeline (from the Model tab).
The user can export a saved DSL model to the Data Pipeline module from the Models tab.
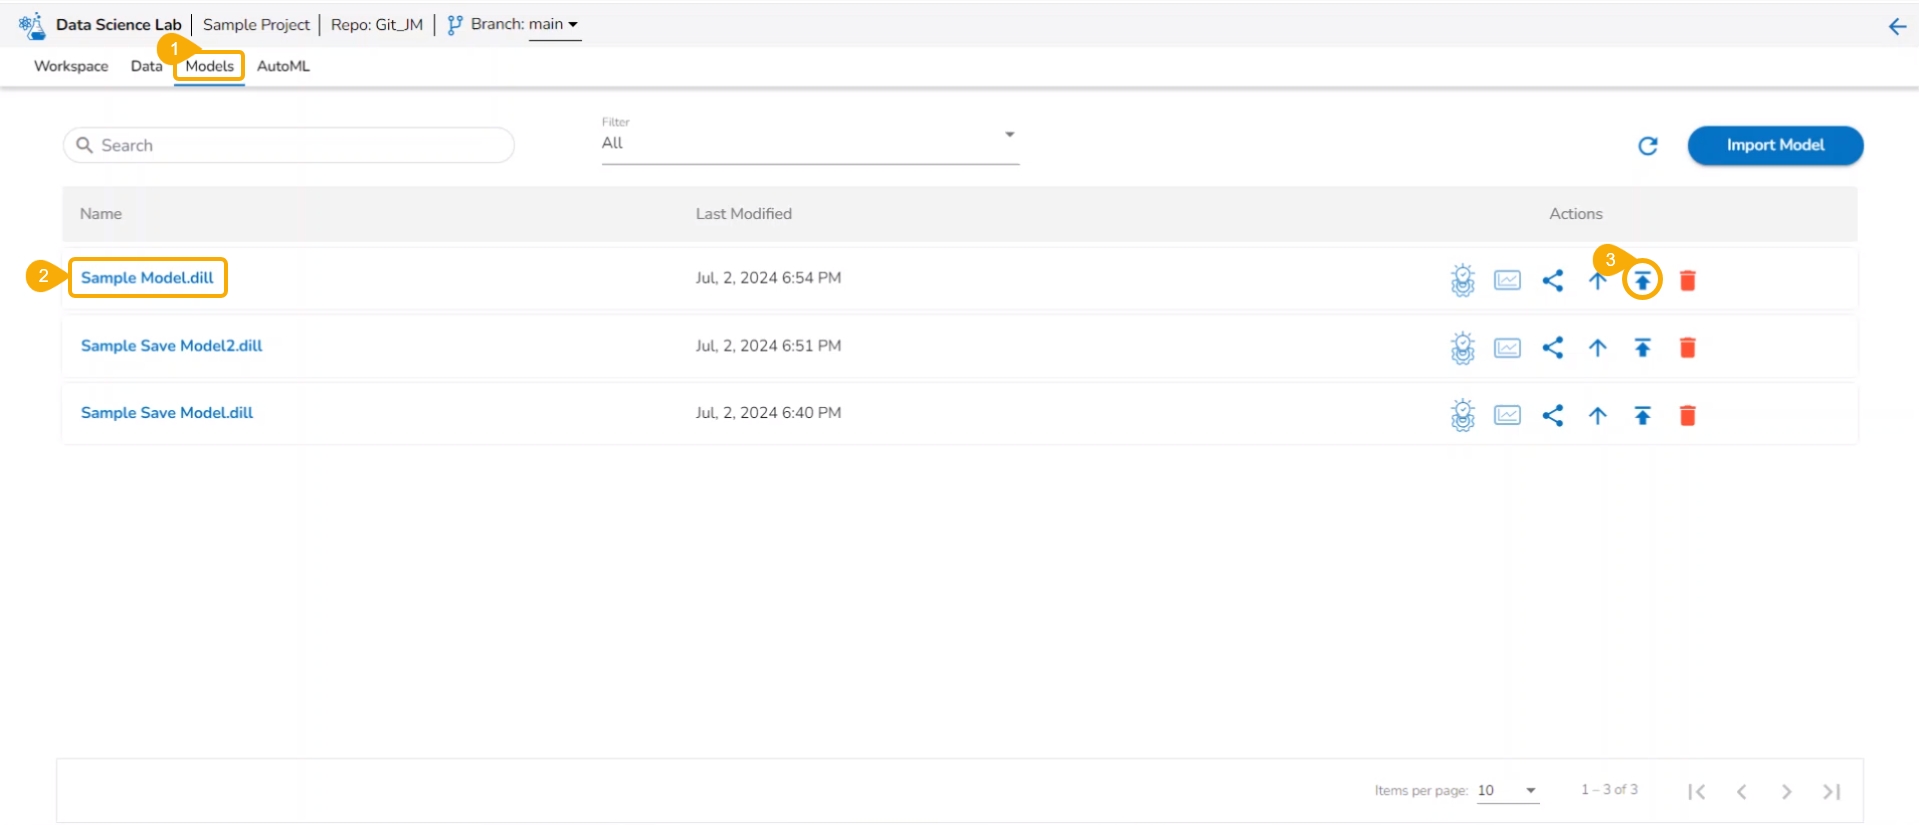
Navigate to the Models tab.
Select a model (unregistered model) from the list.
Click the Register icon for the model.
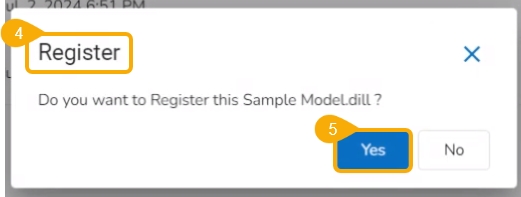
The Register dialog box appears to confirm the action.
Click the Yes option.
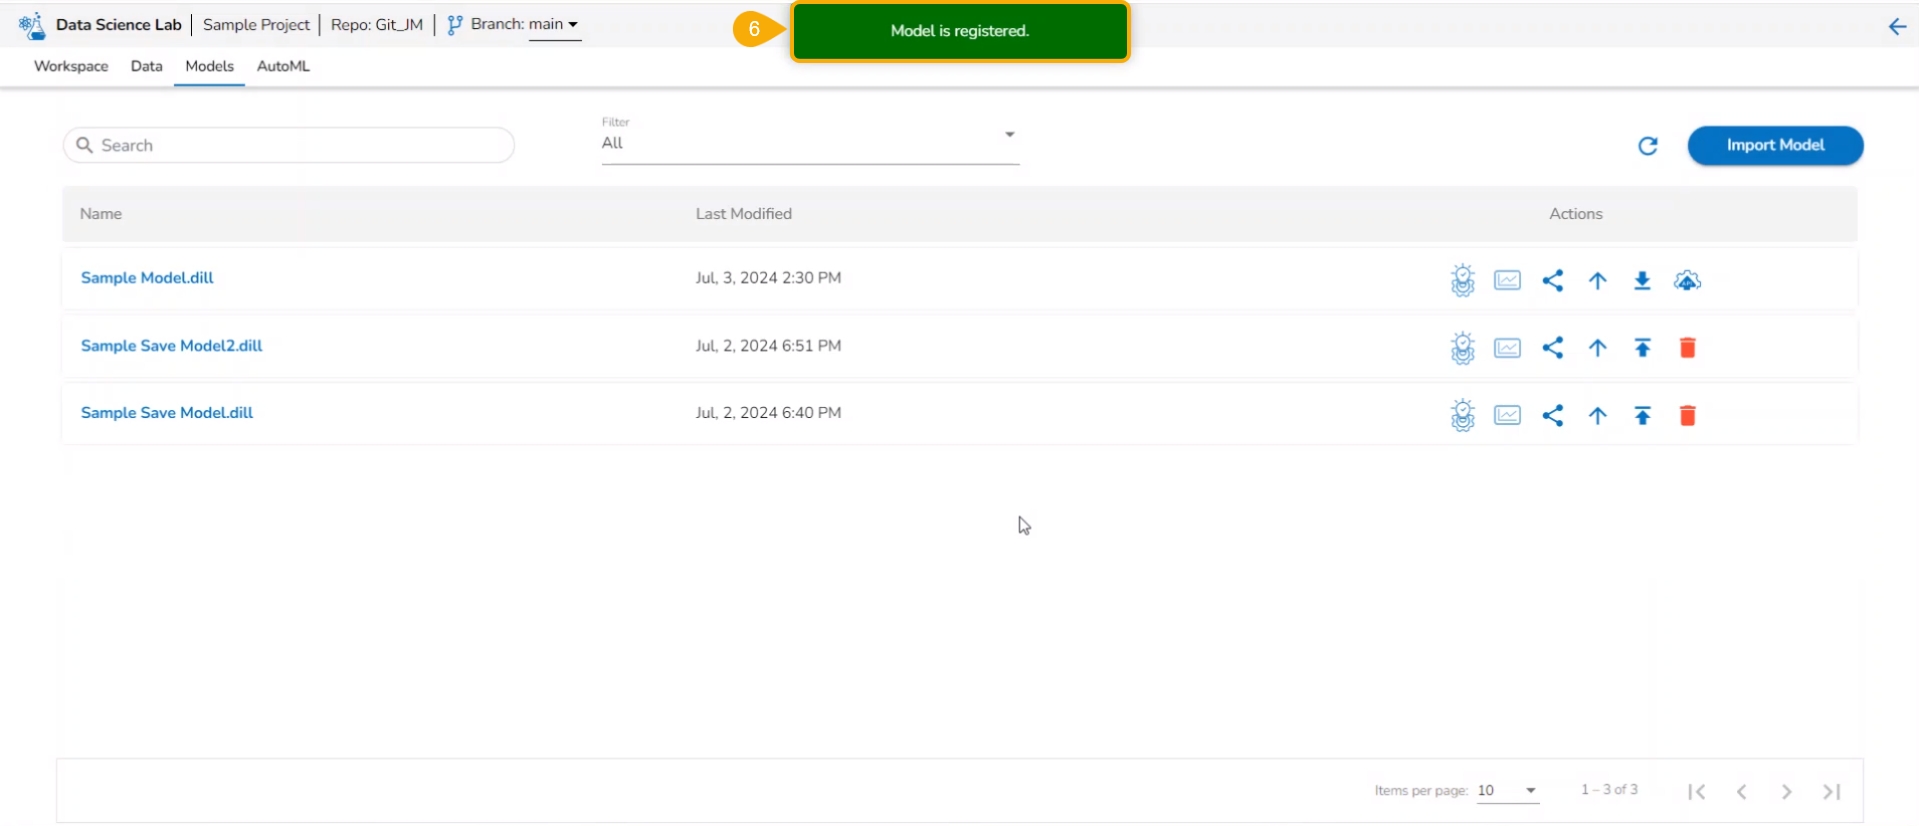
A notification message appears to inform the same.
Please Note: The registered model gets published to the Data Pipeline (it is moved to the Registered list of the models).
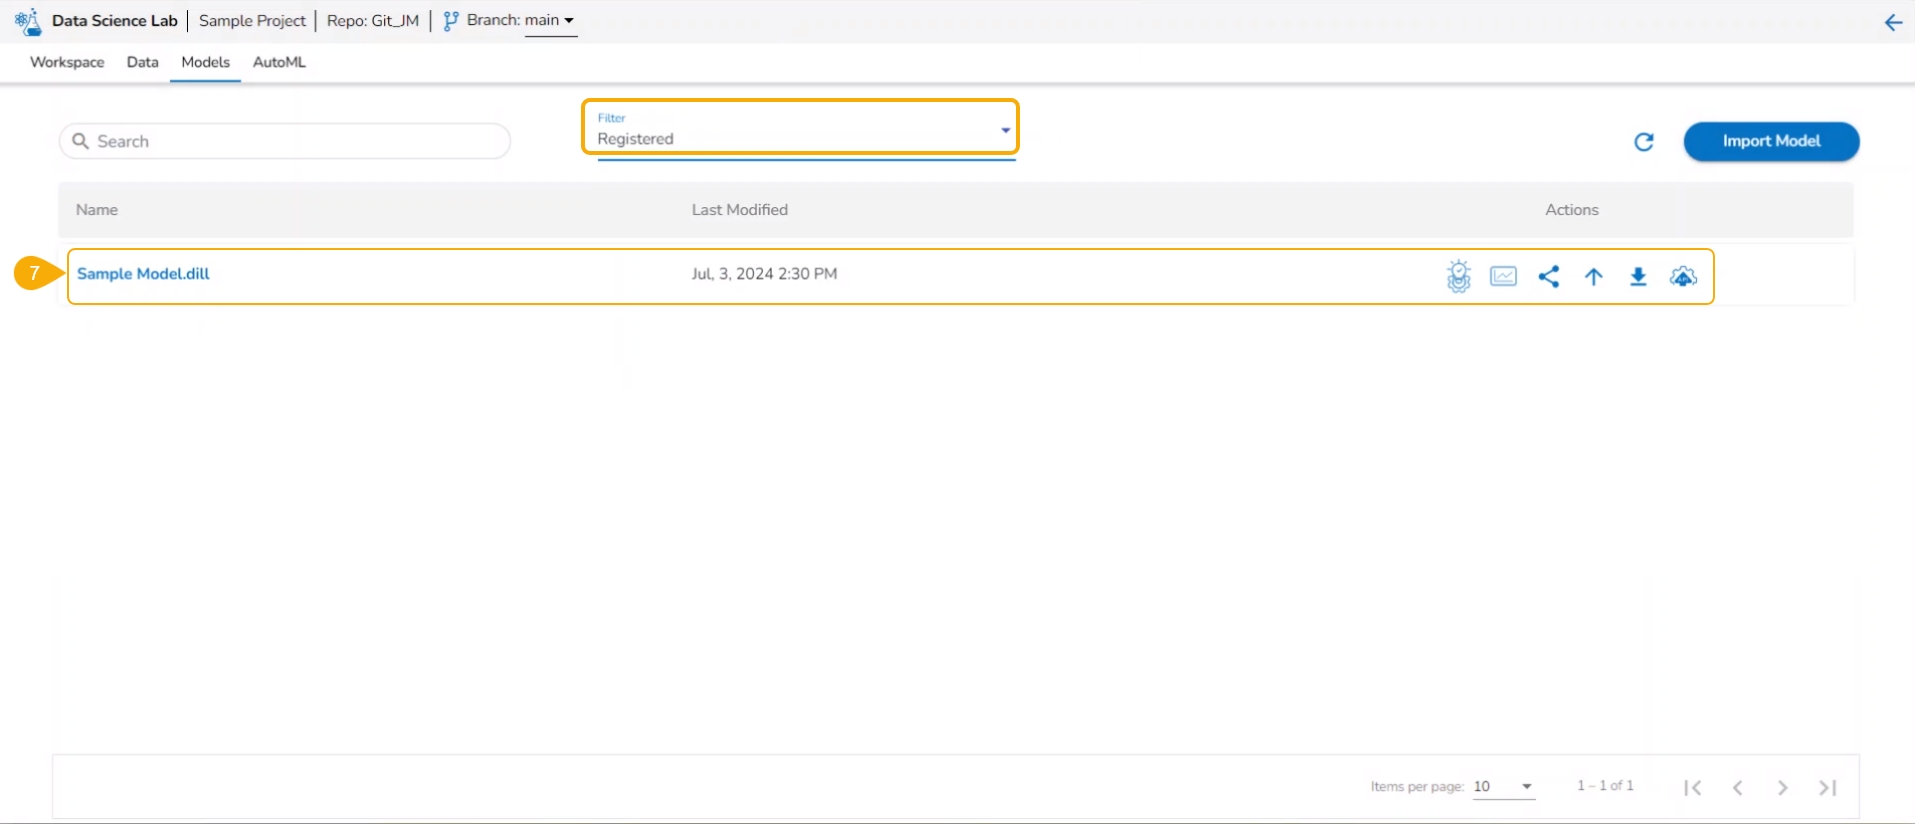
The model gets listed under the Registered model list.
Please Note:
The Register option is also available under the Models section inside a Data Science Notebook.
The Registered Models can be accessed within the DS Lab Model Runner component of the Data Pipeline module.
External models can be imported into the Data Science Lab and experimented inside the Notebooks using the Import Model functionality.
Please Note:
The External models can be registered to the Data Pipeline module and inferred using the Data Science Lab script runner.
Only the Native prediction functionality will work for the External models.
Check out the illustration on importing a model.
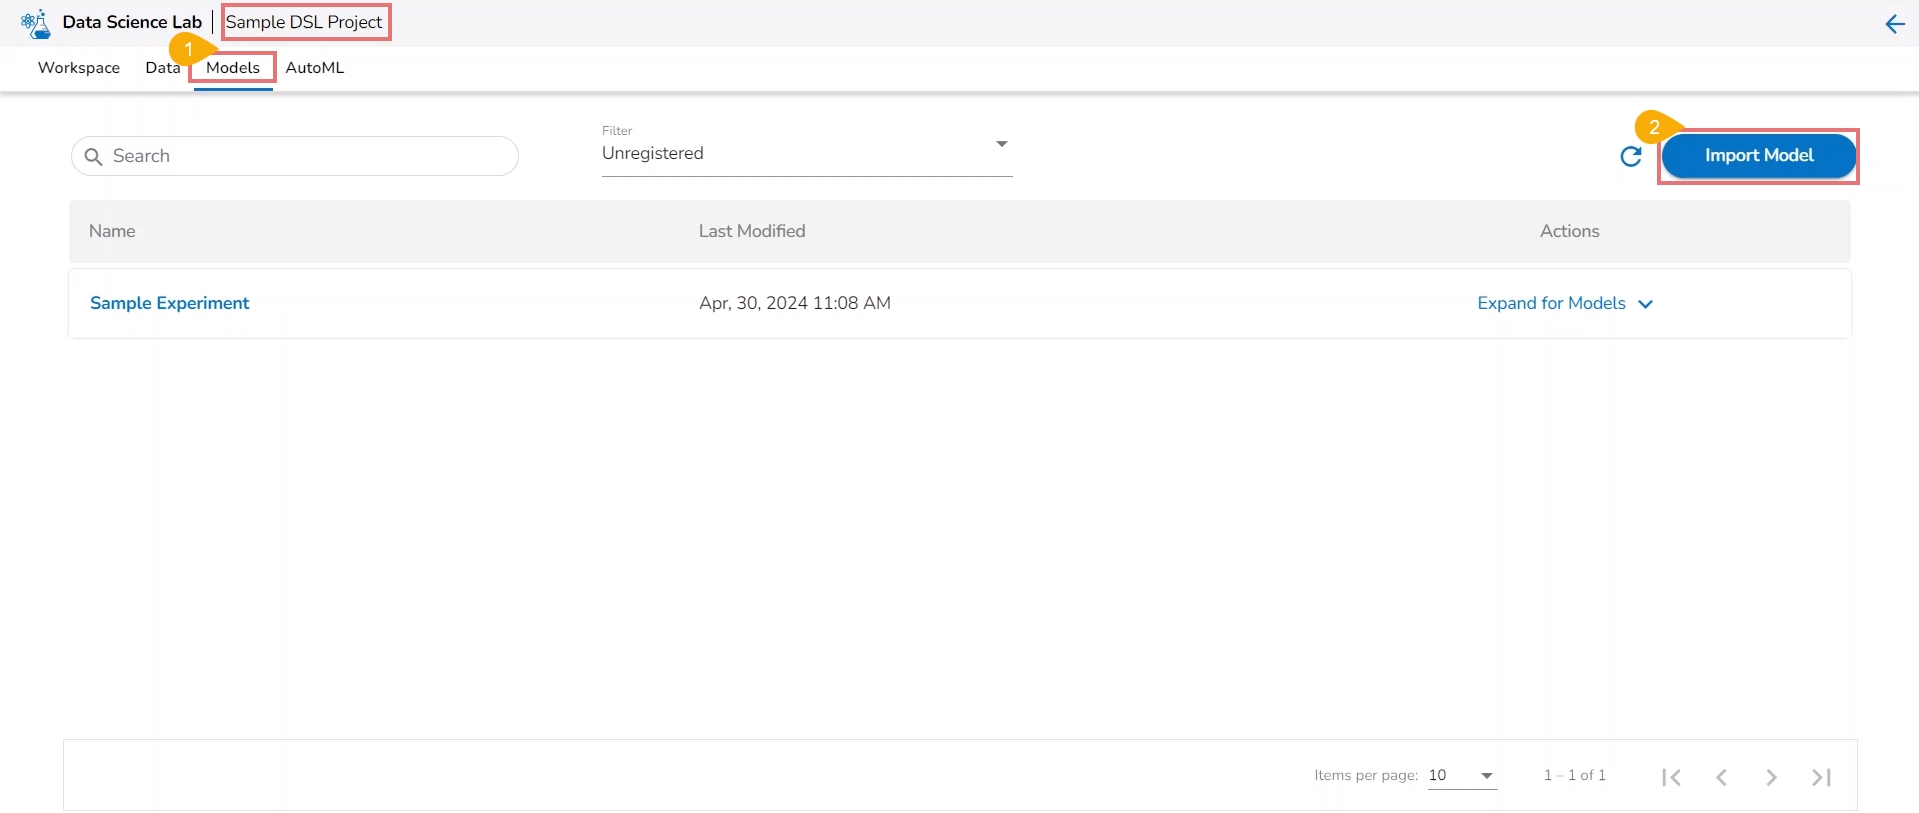
Navigate to the Model tab for a Data Science Project.
Click the Import Model option.
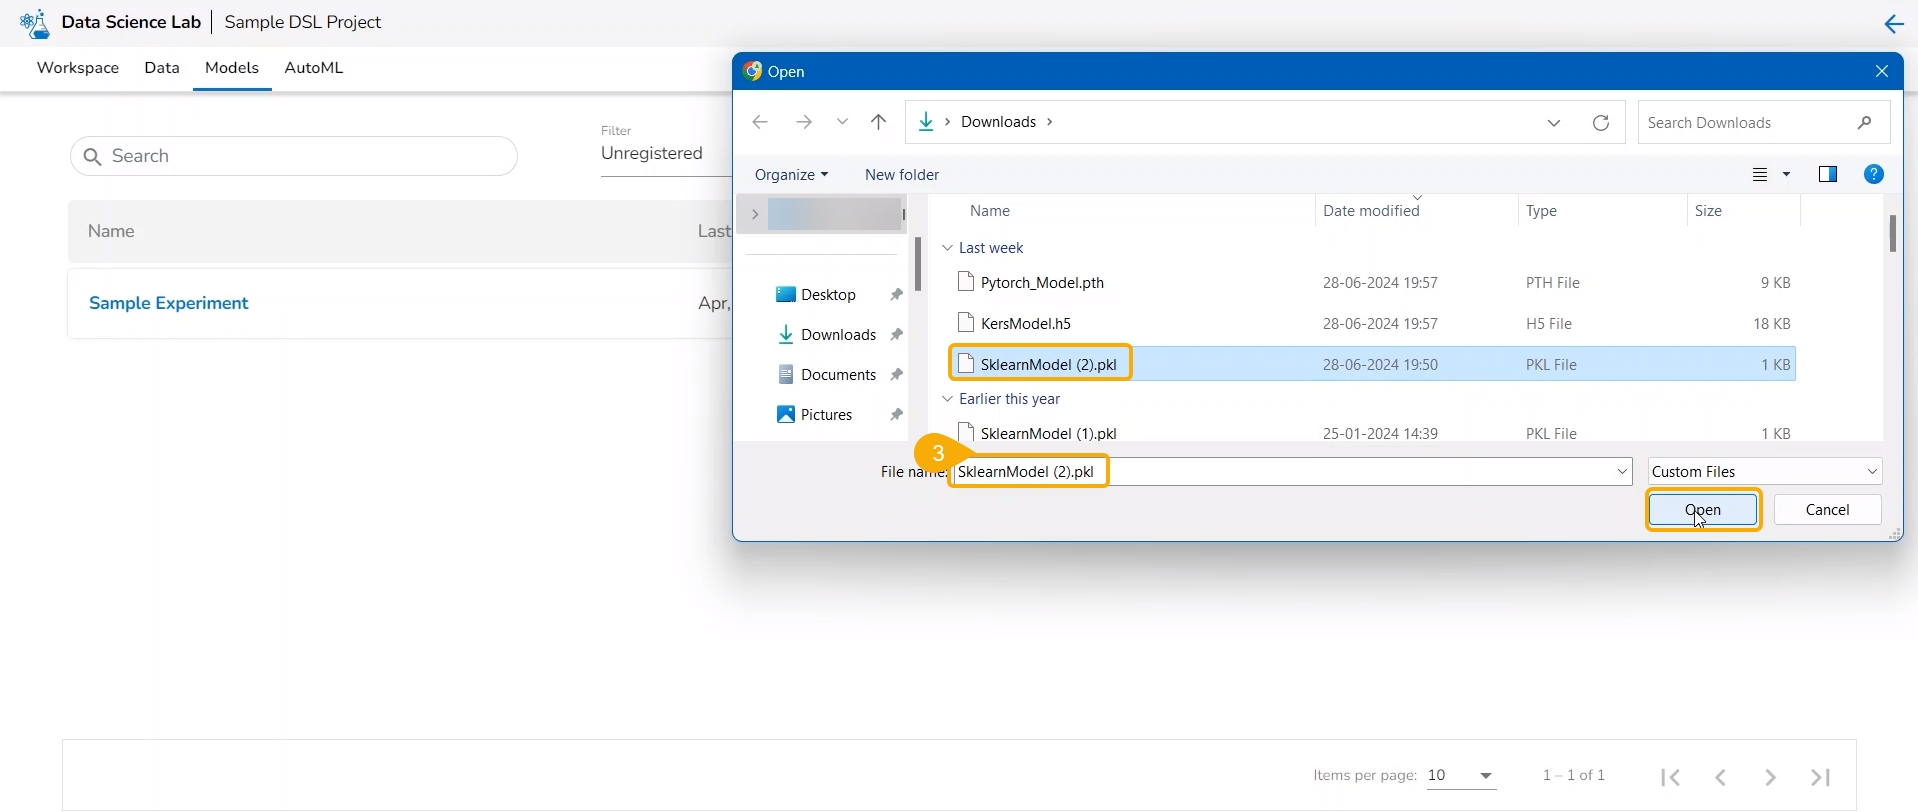
The user gets redirected to upload the model file. Select and upload the file.
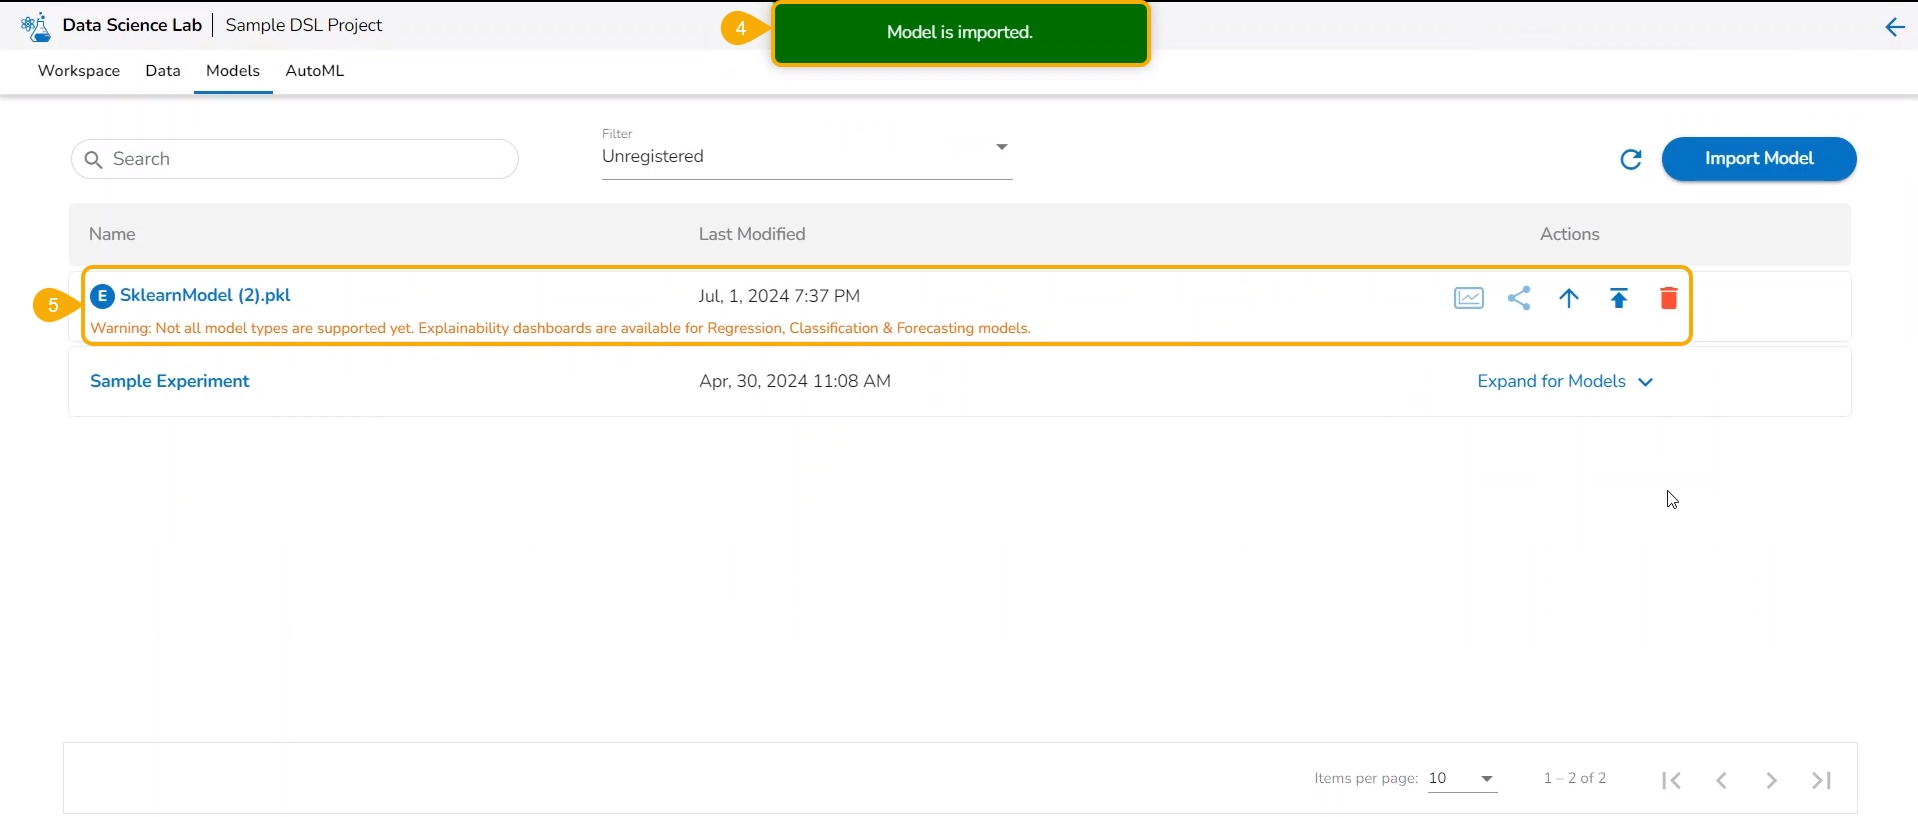
A notification message appears.
The imported model gets added to the model list.
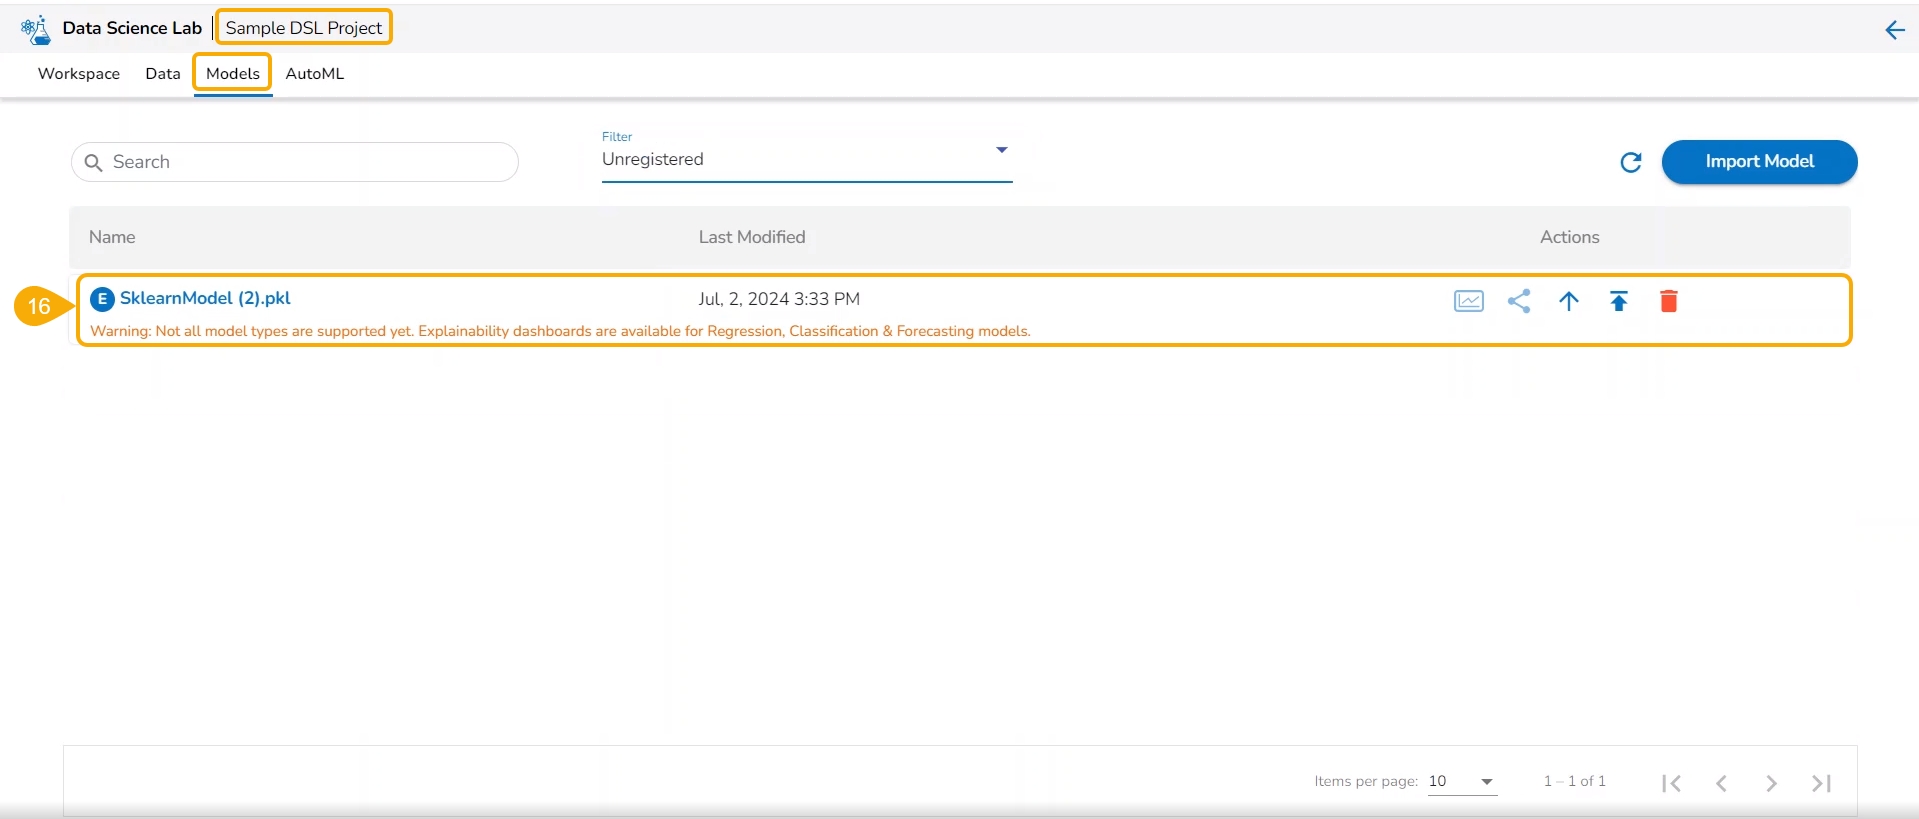
Please Note: The Imported models are referred to as External models in the model list and are marked with a pre-fix to their names (as displayed in the above-given image).
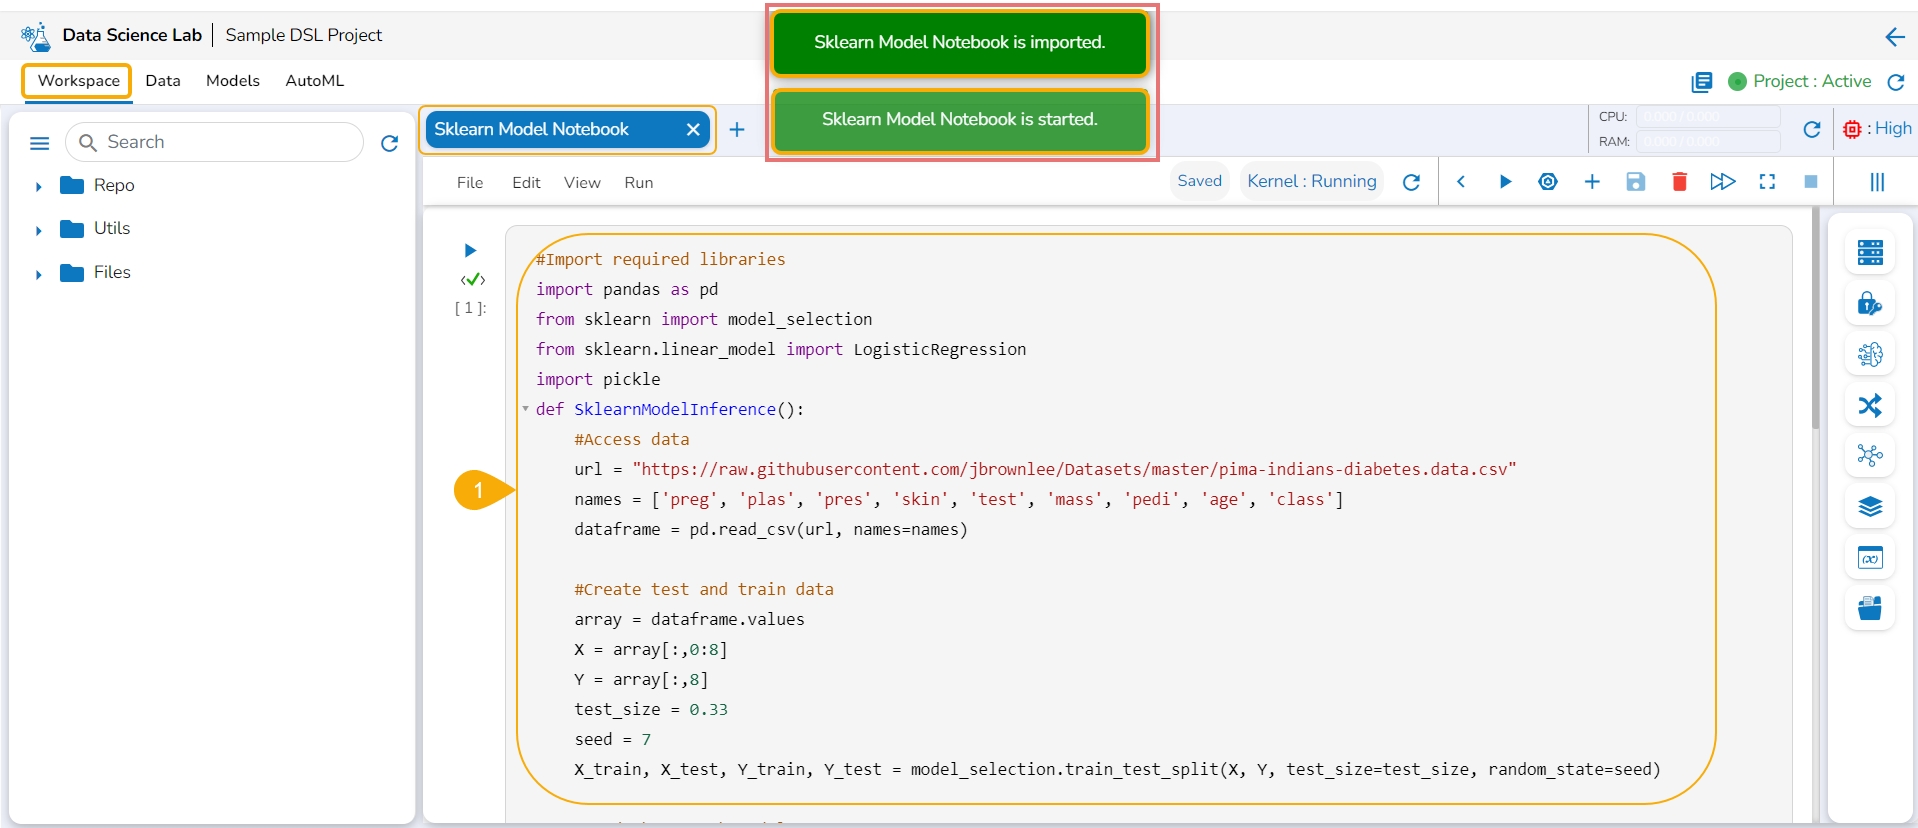
The user needs to start a new .ipynb file with a wrapper function that includes Data, Imported Model, Predict function, and output Dataset with predictions.
Check out the walk-through on Export to Pipeline Functionality for a model.
Navigate to a Data Science Notebook (.ipynb file) from an activated project. In this case, a pipeline has been imported with the wrapper function.
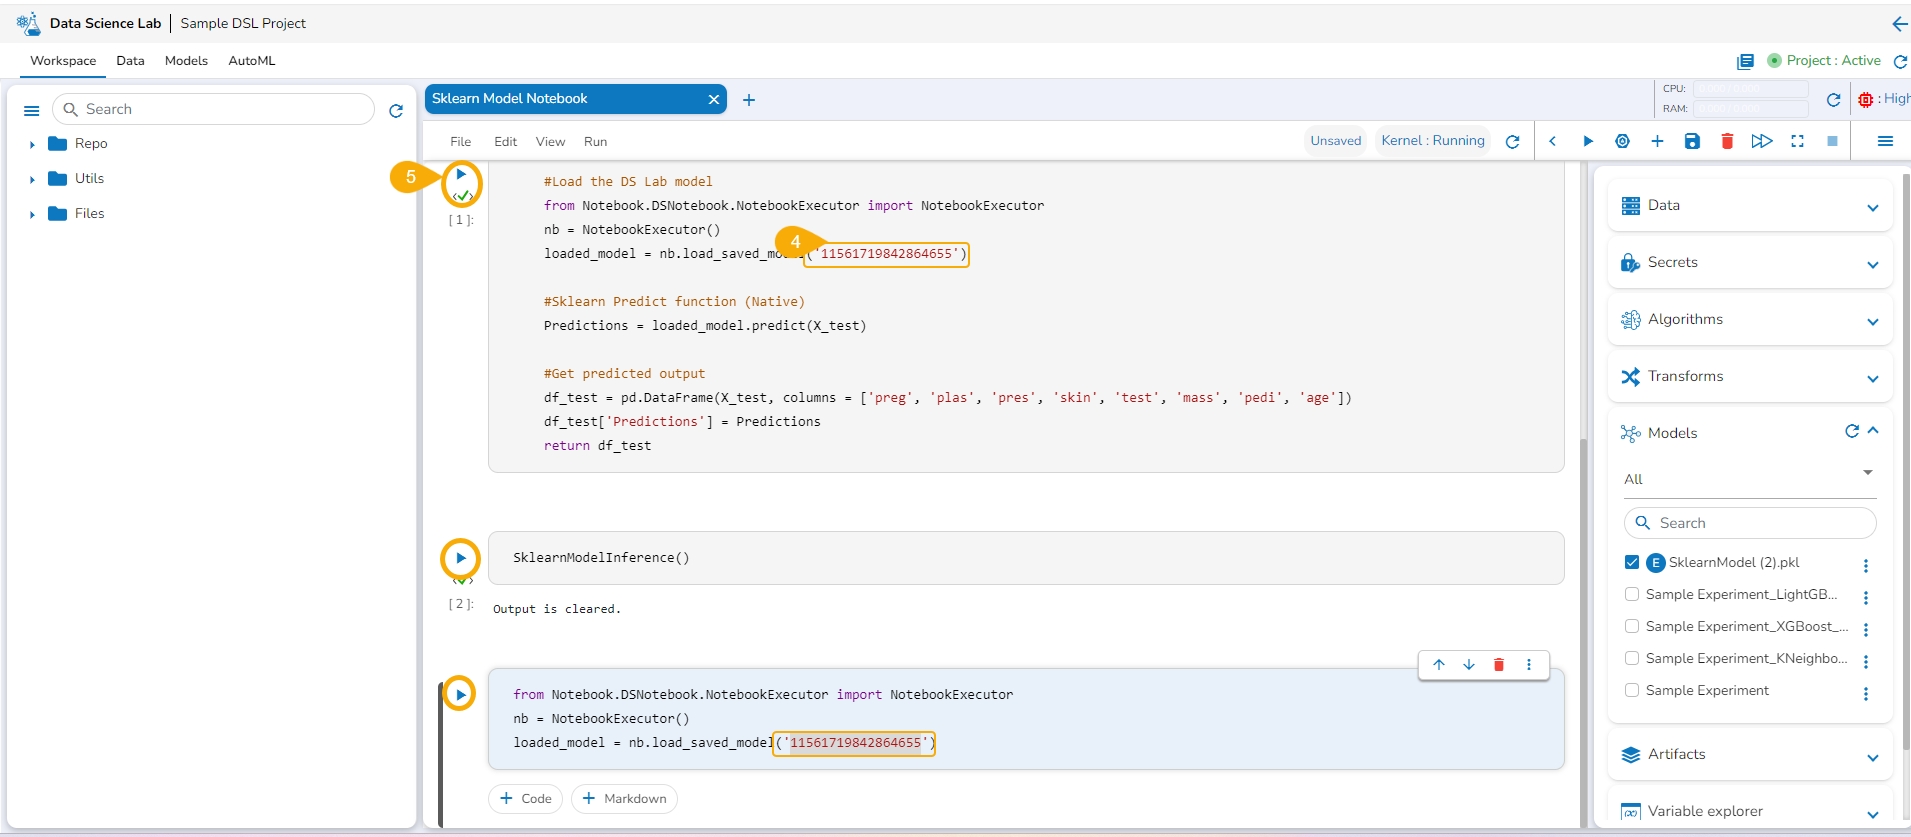
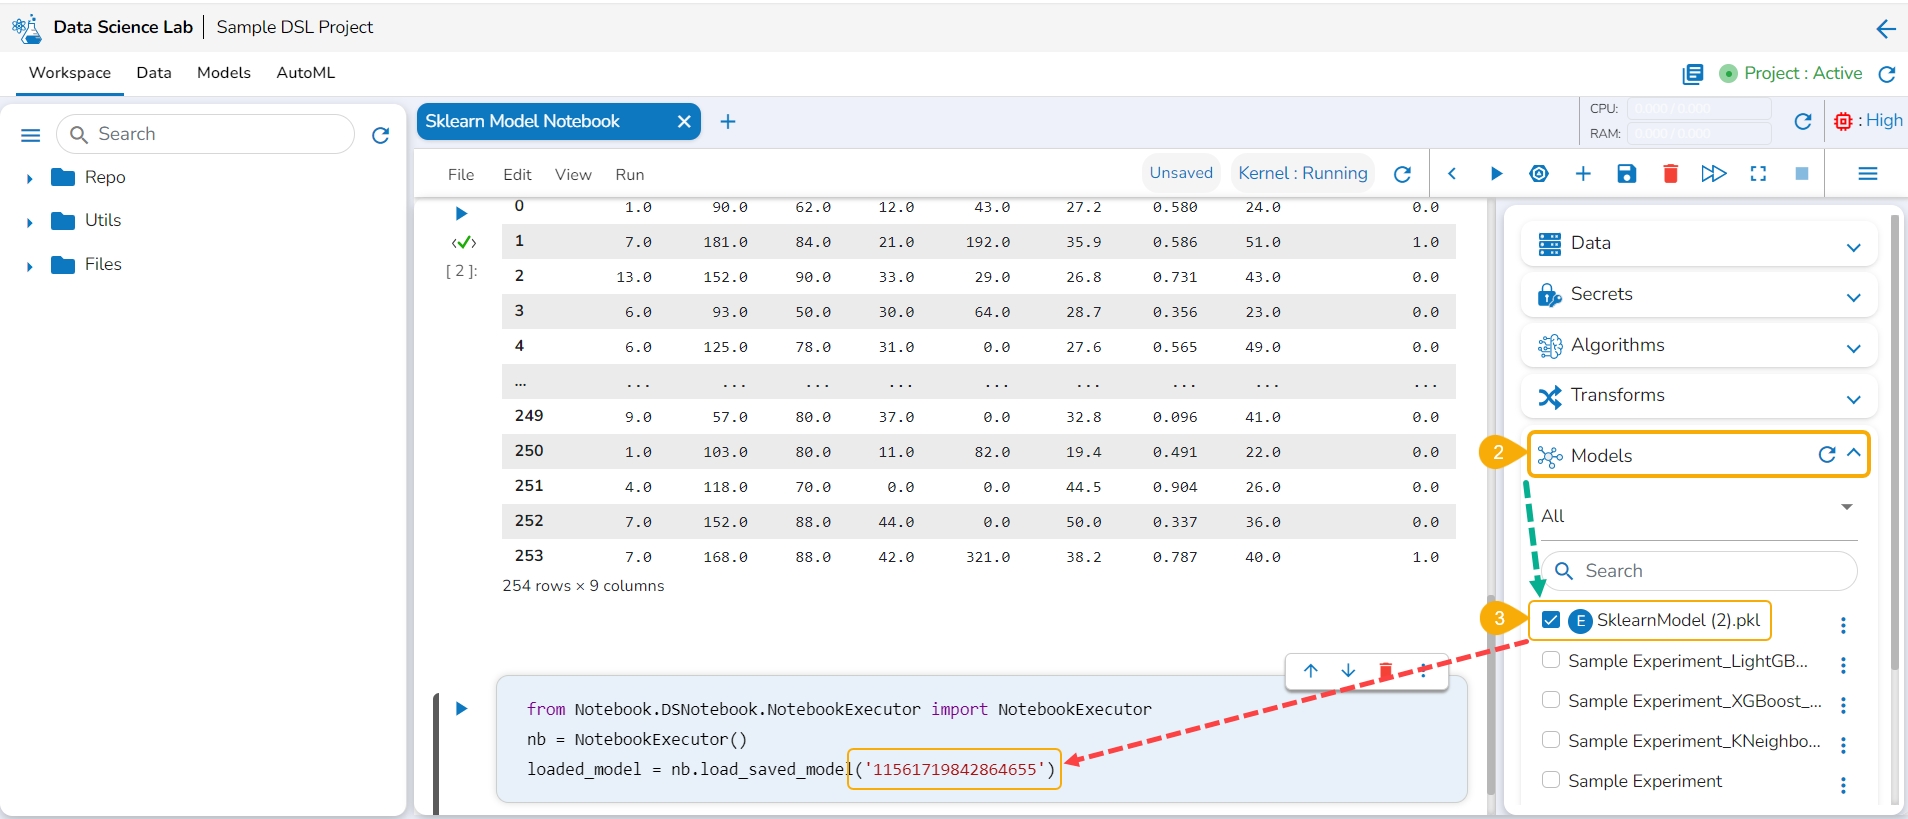
Access the Imported Model inside this .ipynb file.
Load the imported model to the Notebook cell.
Mention the Loaded imported model in the inference script.
Run the code cell with the inference script.
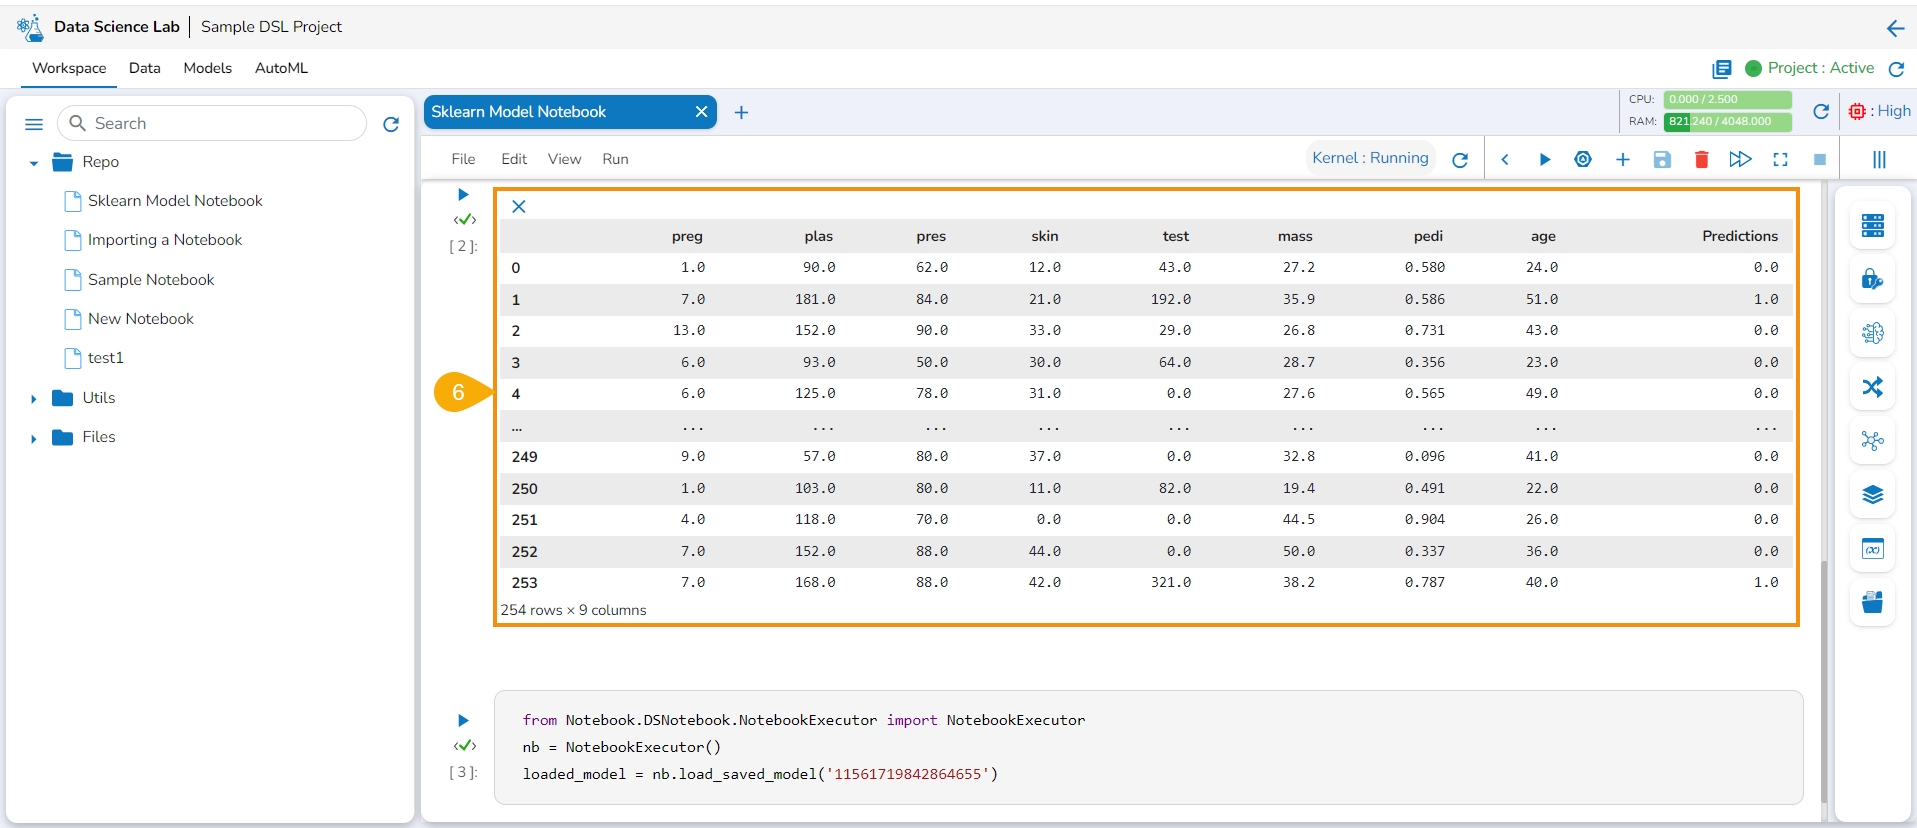
The Data preview is displayed below.
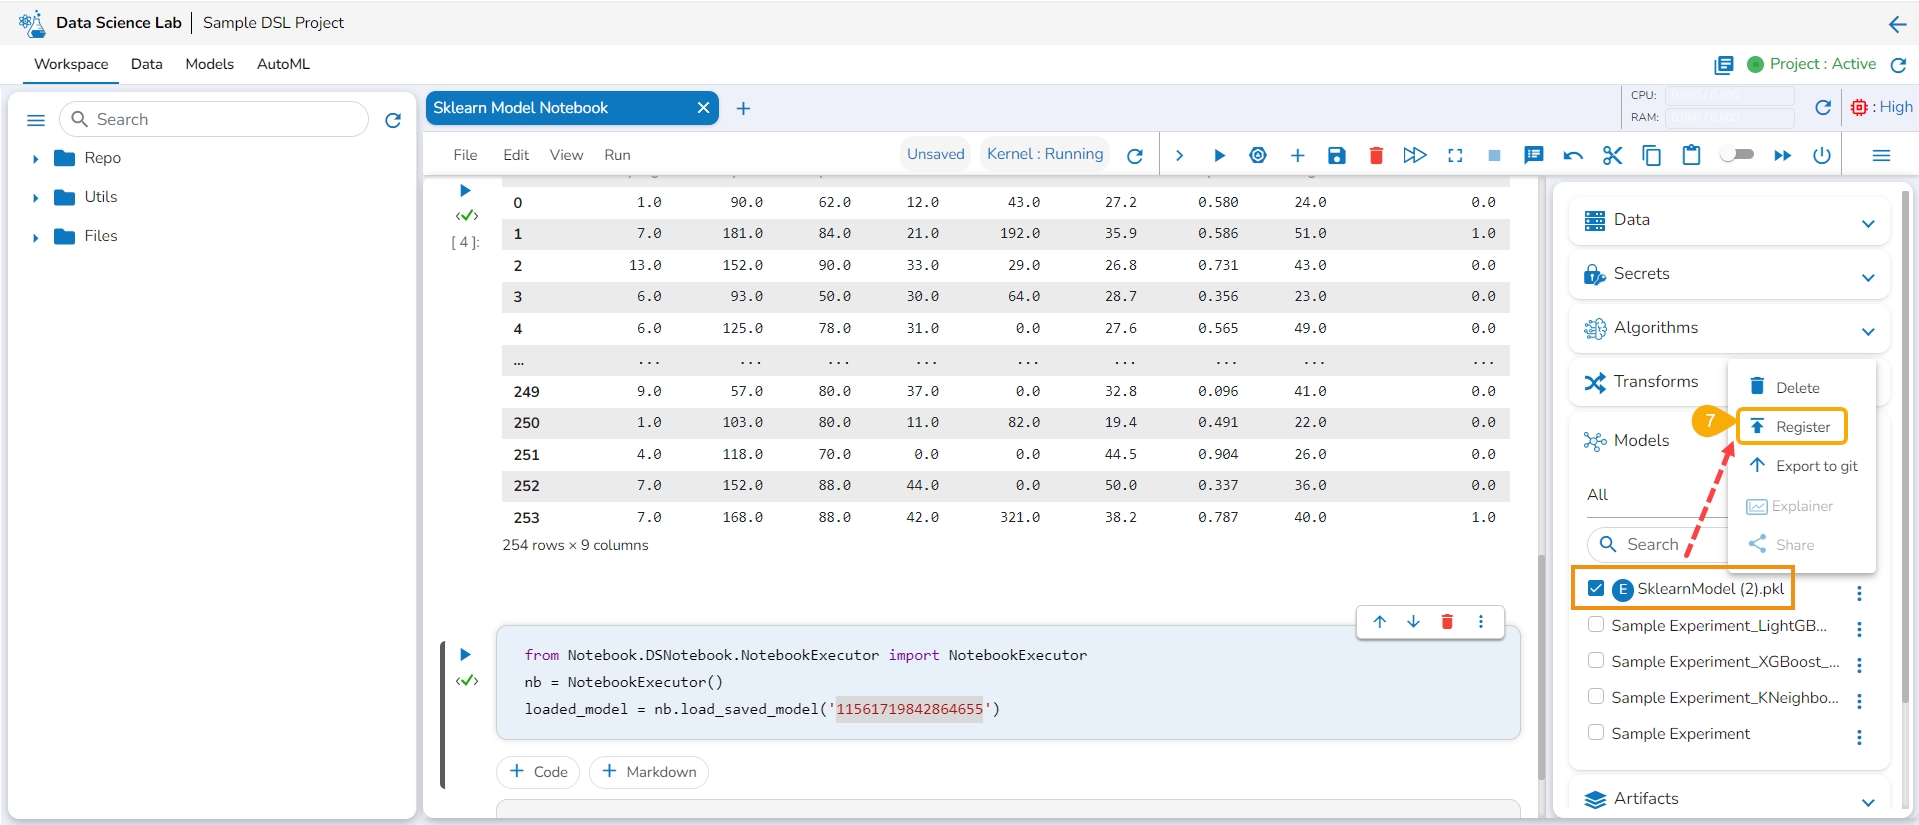
Click the Register option for the imported model from the ellipsis context menu.
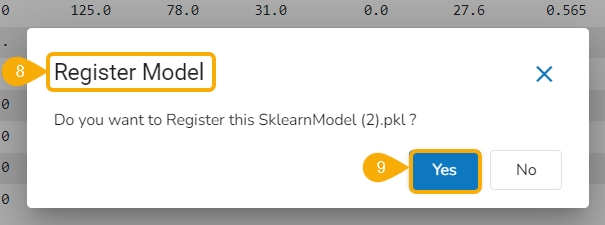
The Register Model dialog box appears to confirm the model registration.
Click the Yes option.
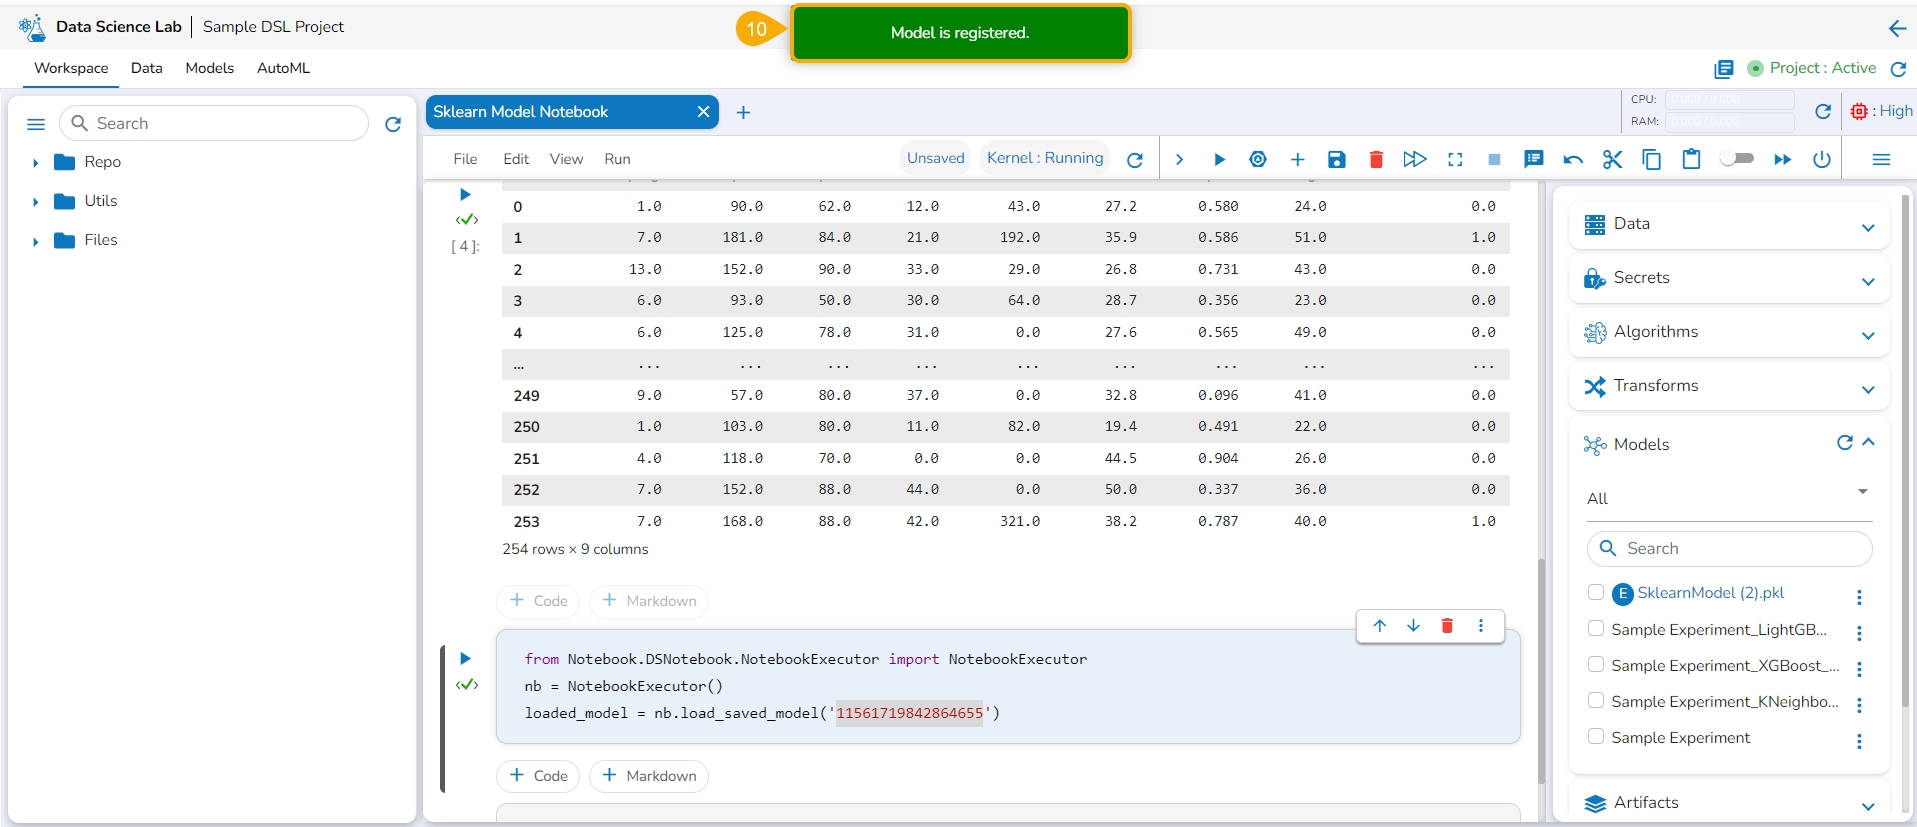
A notification message appears, and the model gets registered.
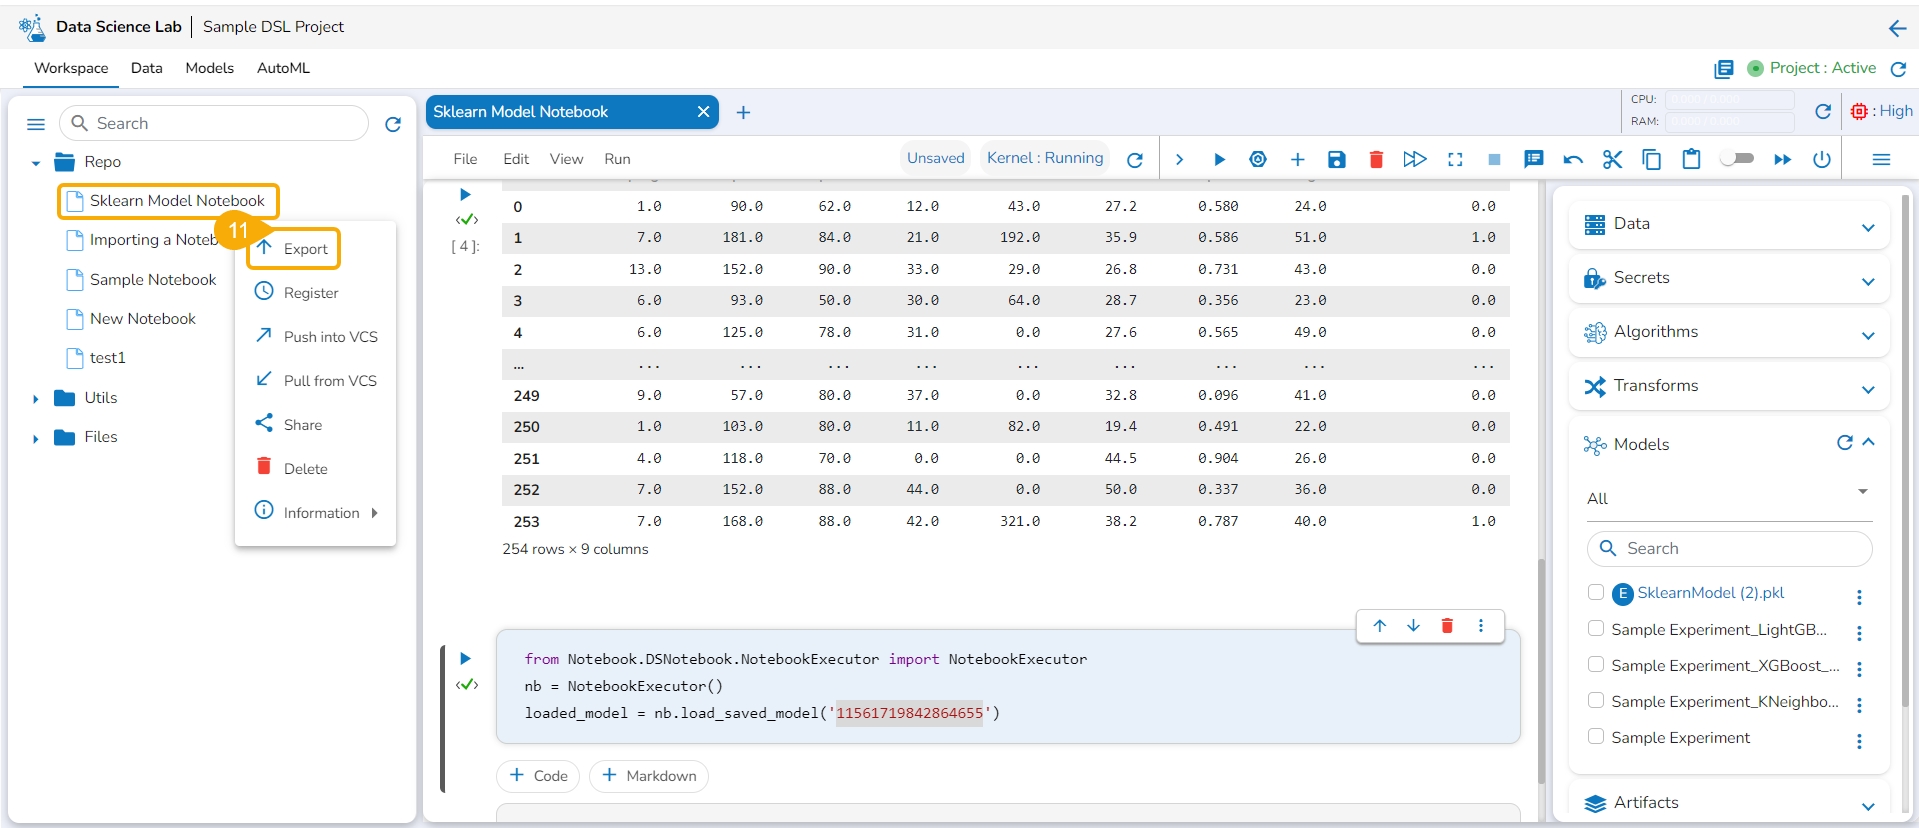
Export the script using the Export functionality provided for the Data Science Notebook (.ipynb file).
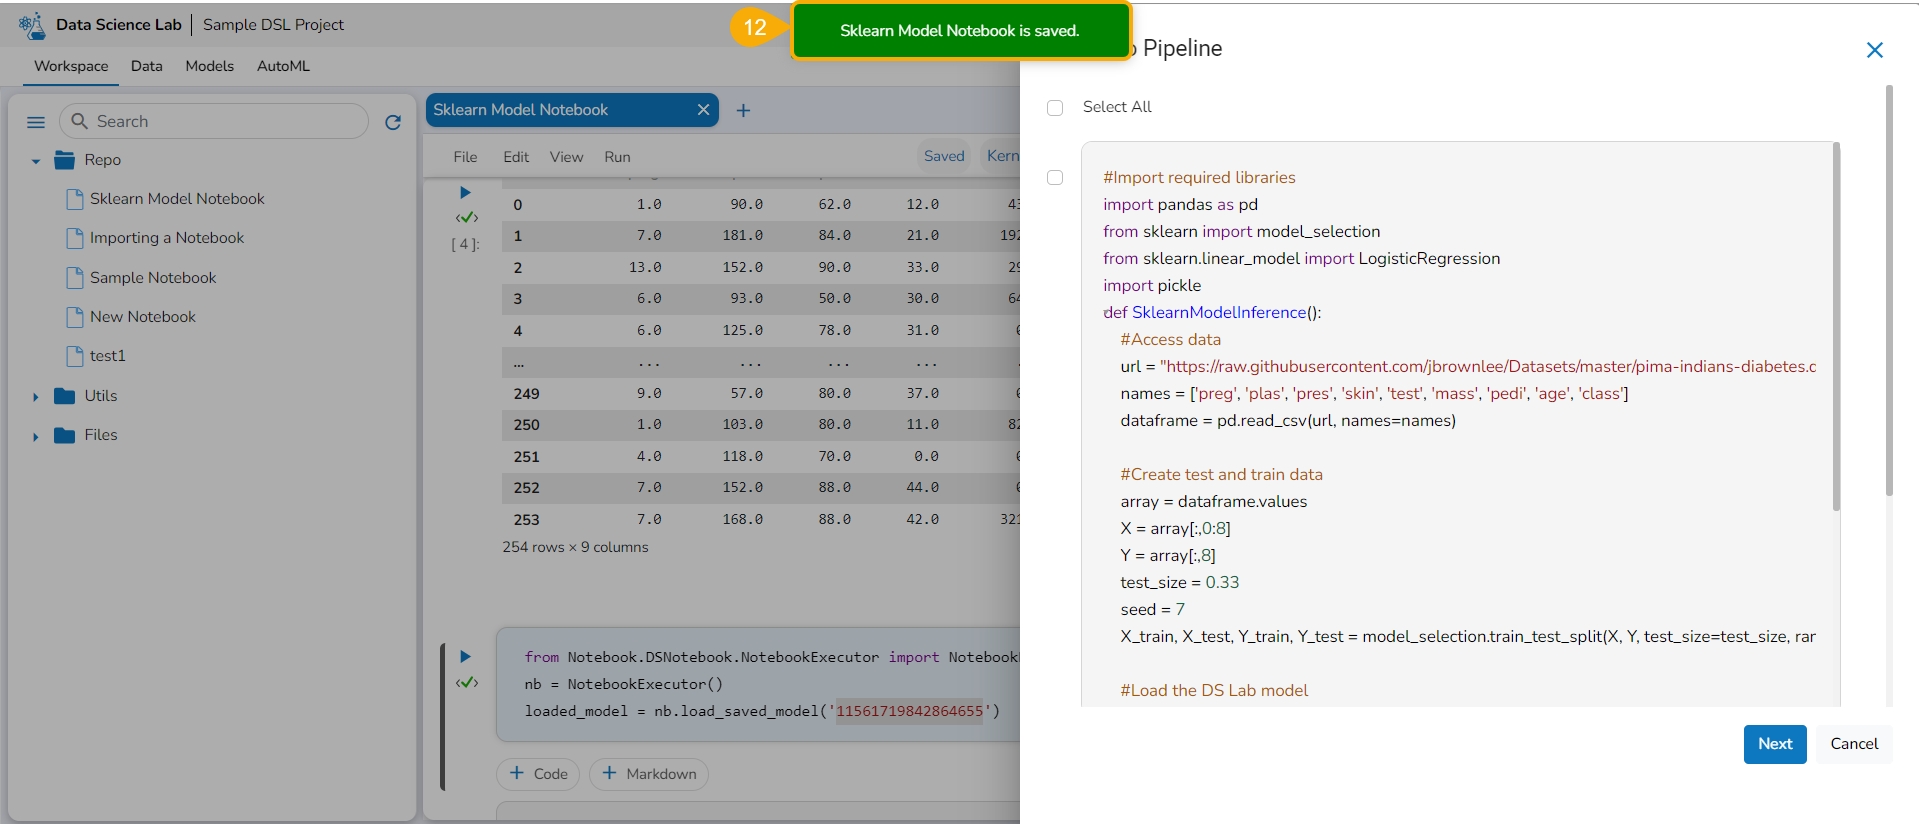
Another notification appears to ensure that the Notebook is saved.
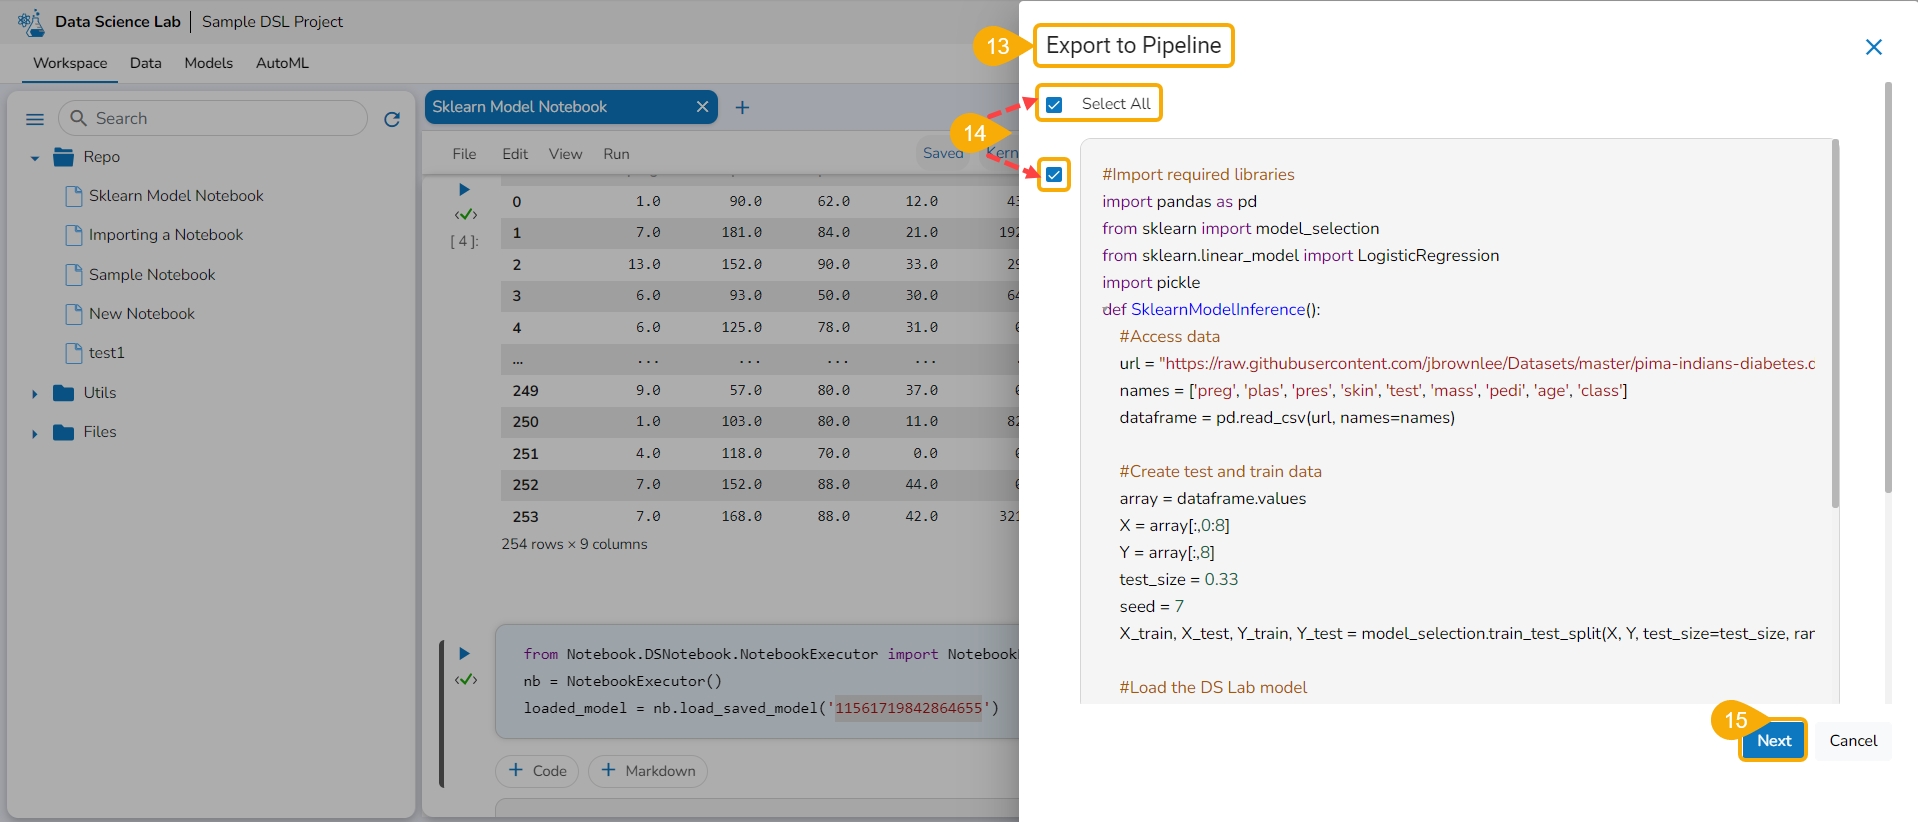
The Export to Pipeline window appears.
Select a specific script from the Notebook. or Choose the Select All option to select the full script.
Select the Next option.
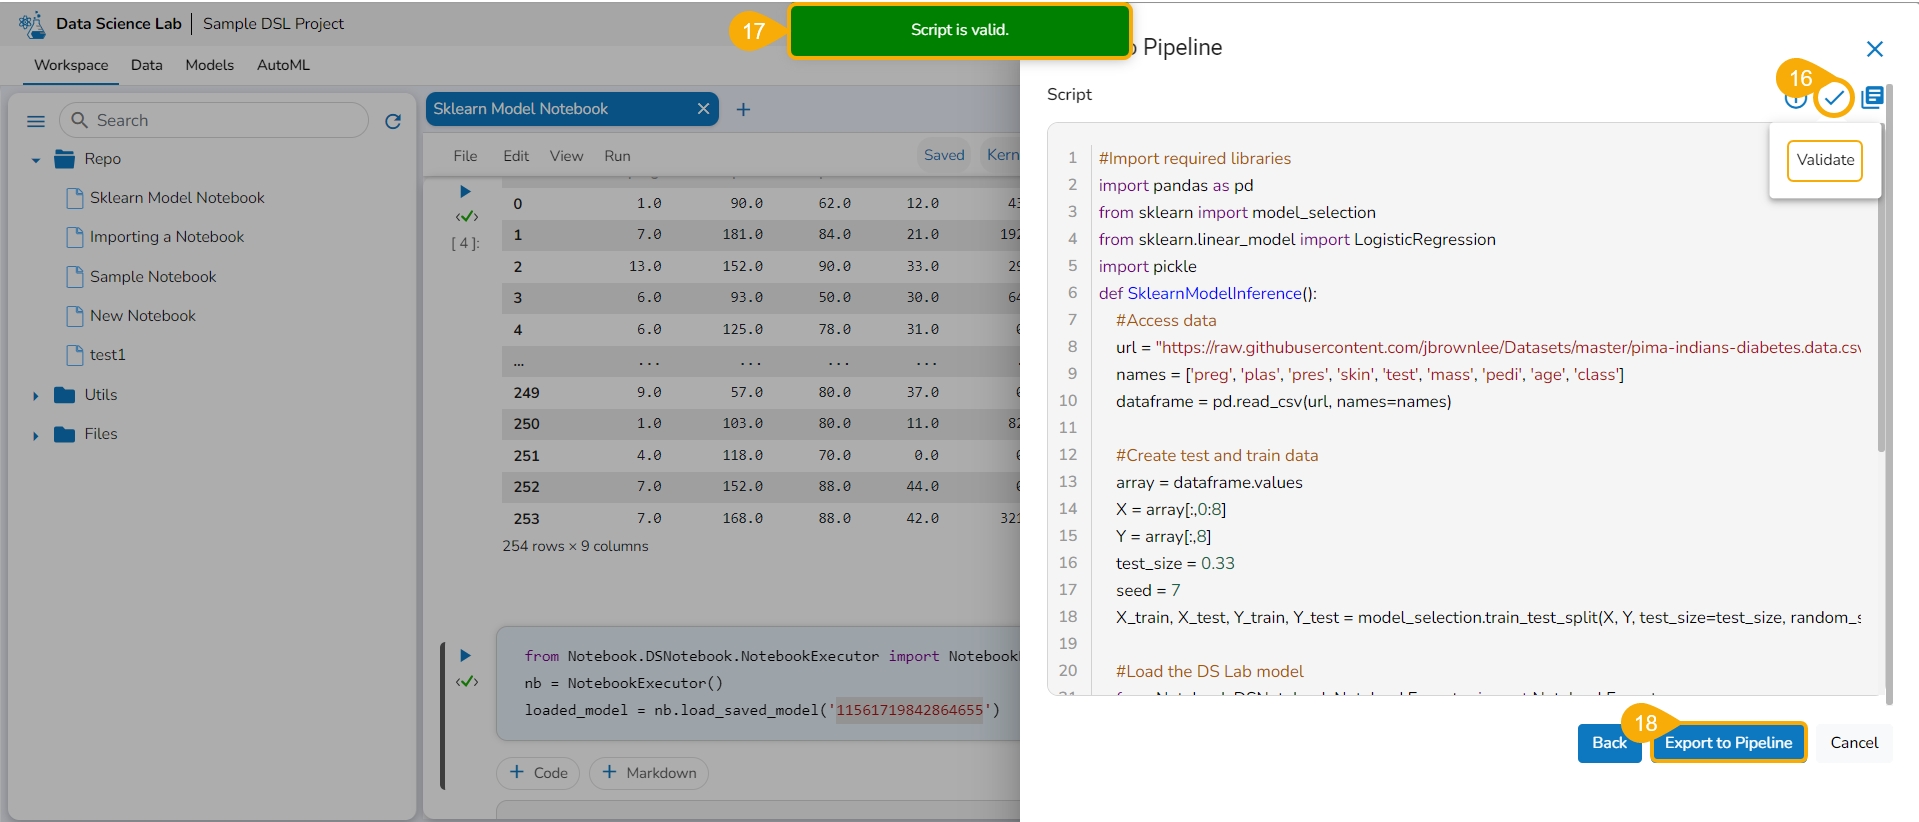
Click the Validate icon to validate the script.
A notification message appears to ensure the validity of the script.
Click the Export to Pipeline option.
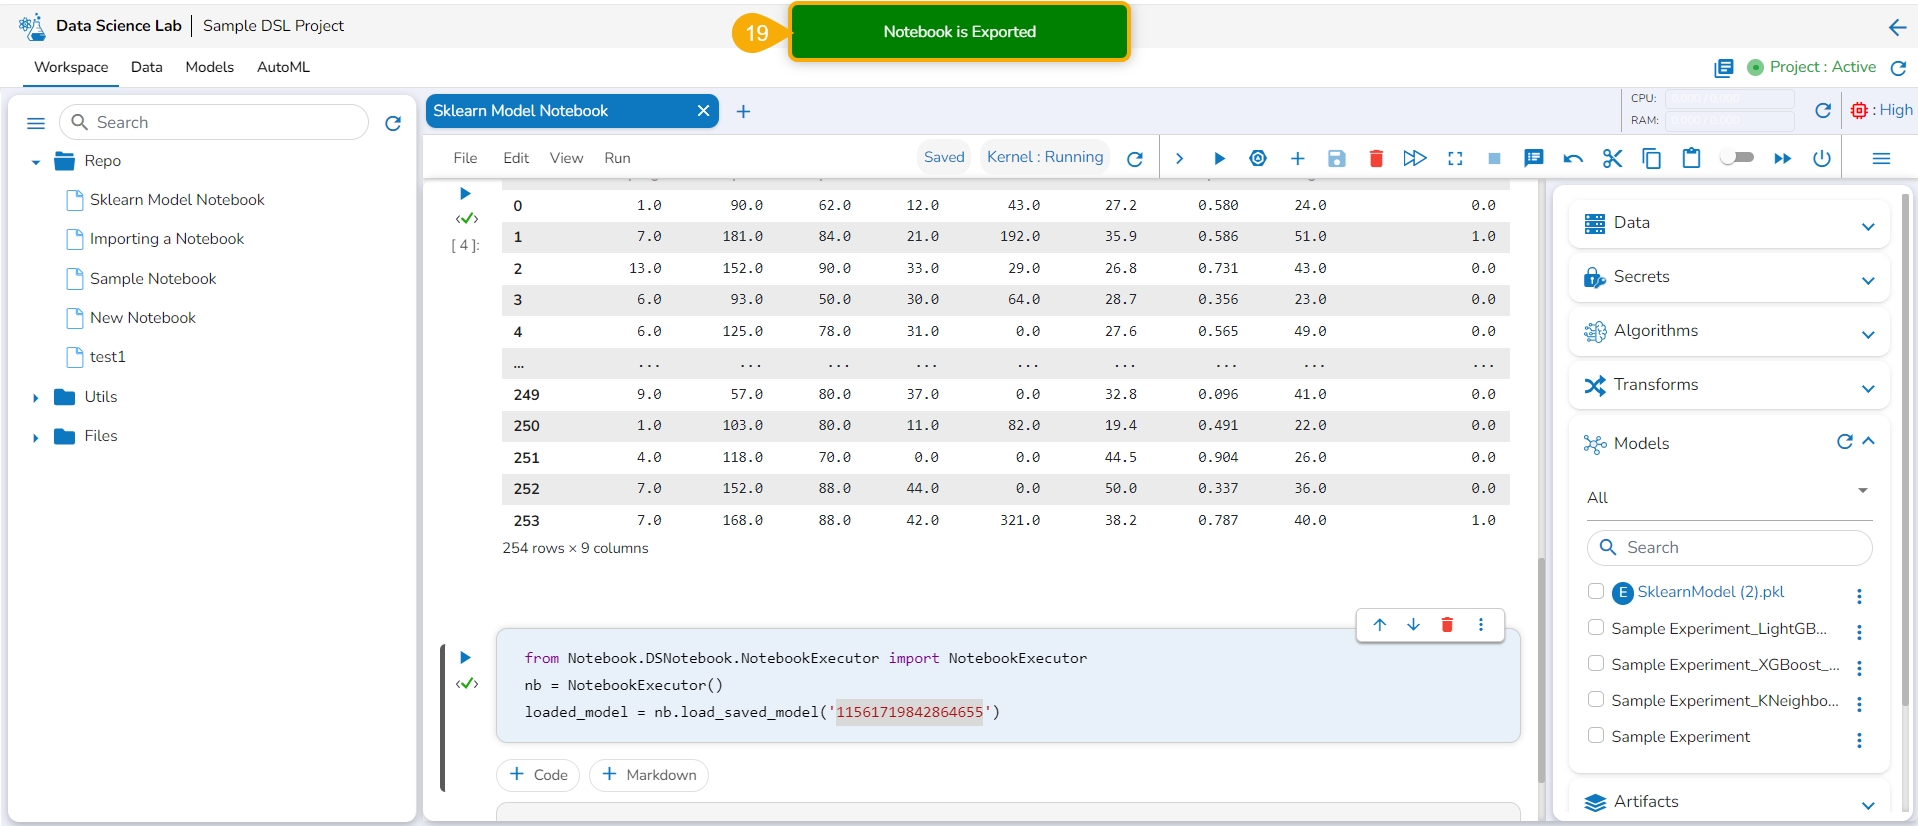
A notification message appears to ensure that the selected Notebook has been exported.
Please Note: The imported model gets registered to the Data Pipeline module as a script.
Navigate to the Data Pipeline Workflow editor.
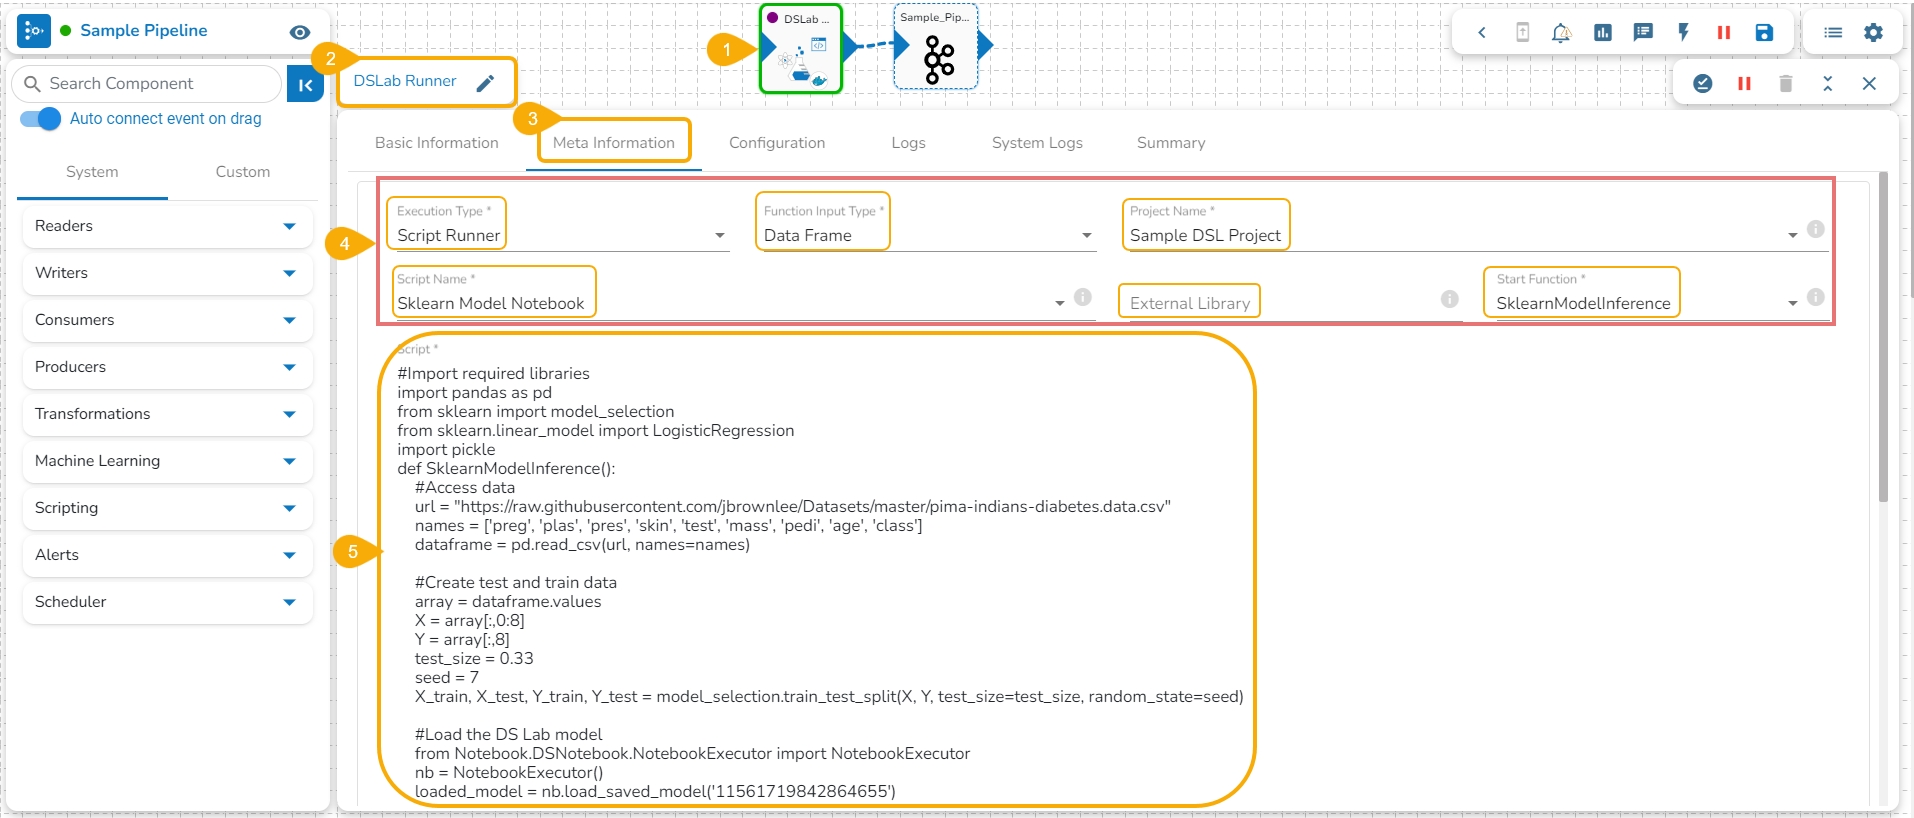
Drag the DS Lab Runner component and configure the Basic Information.
Open the Meta Information tab of the DS Lab Runner component.
Configure the following information for the Meta Information tab.
Select Script Runner as the Execution Type.
Select function input type.
Select the project name.
Select the Script Name from the drop-down option. The same name given to the imported model appears as the script name.
Provide details for the External Library (if applicable).
Select the Start Function from the drop-down menu.
The exported model can be accessed inside the Script section.
The user can connect the DS Lab Script Runner component to an Input Event.
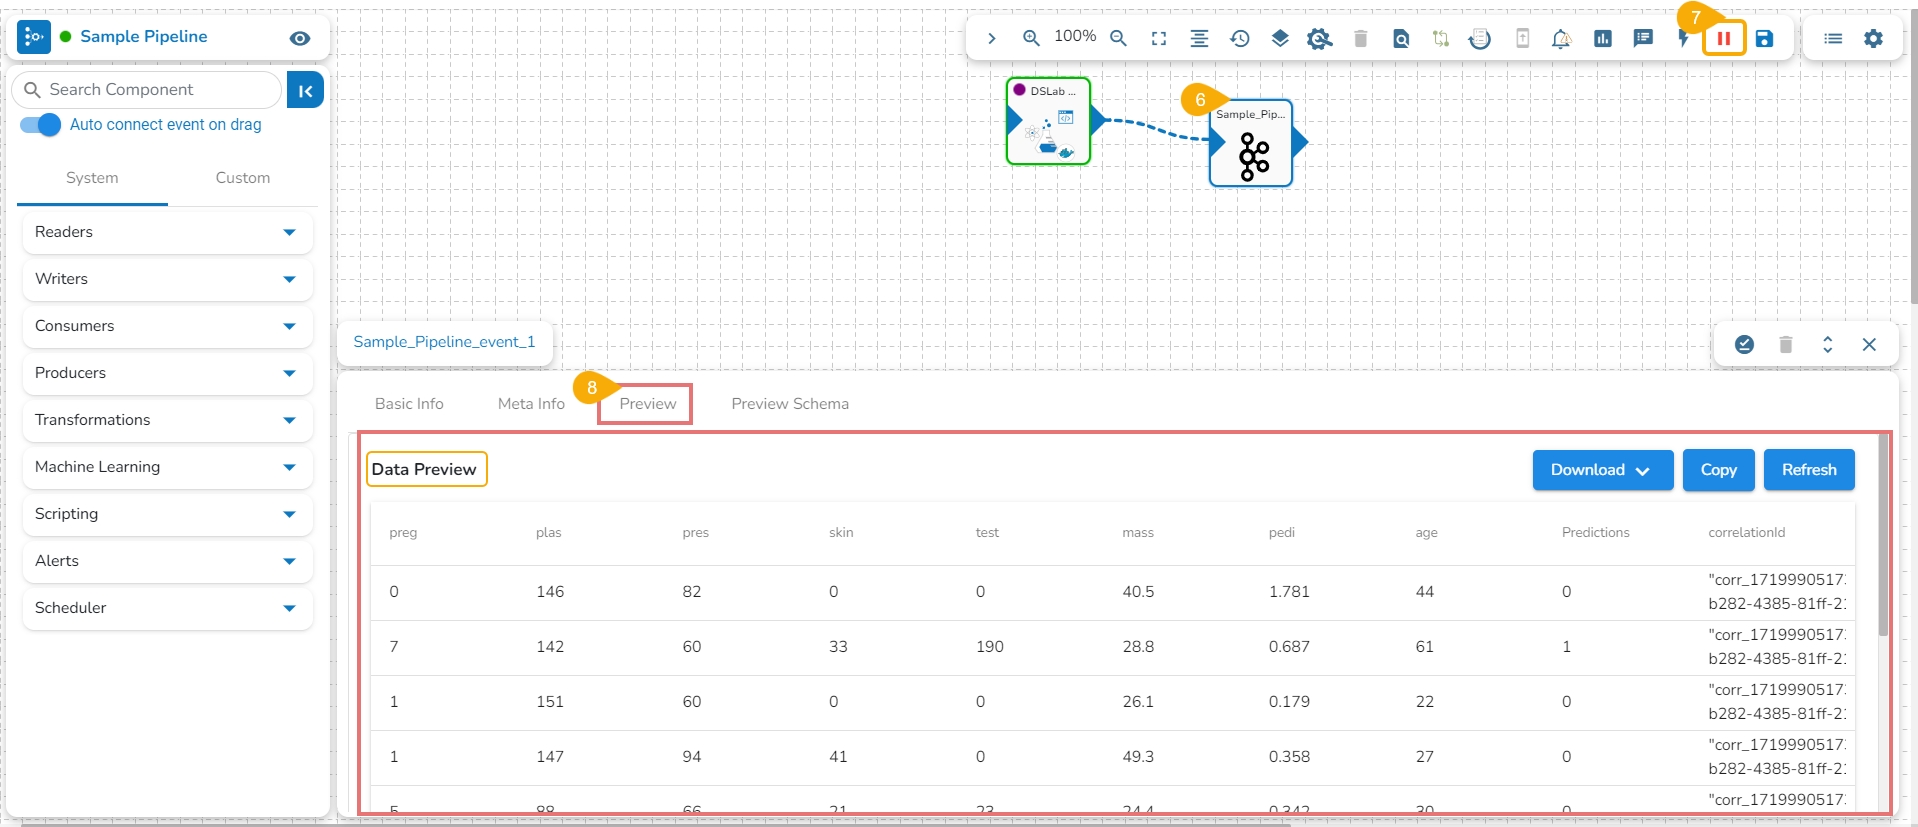
Run the Pipeline.
The model predictions can be generated in the Preview tab of the connected Input Event.
Please Note:
The Imported Models can be accessed through the Script Runner component inside the Data Pipeline module.
The execution type should be Model Runner inside the Data Pipeline while accessing the other exported Data Science models.
The supported extensions for External models - .pkl, .h5, .pth & .pt
This page explains Model migration functionality. You can find steps to Export and Import a model to and from Git repository explained on this page.
Prerequisite: The user must do the required configuration for the DS Lab Migration using the Admin module before migrating a DS Lab script or model.
The user can use the Migrate Model icon to export the selected model to the GIT repository.
Check out the illustration on Export to Git functionality.
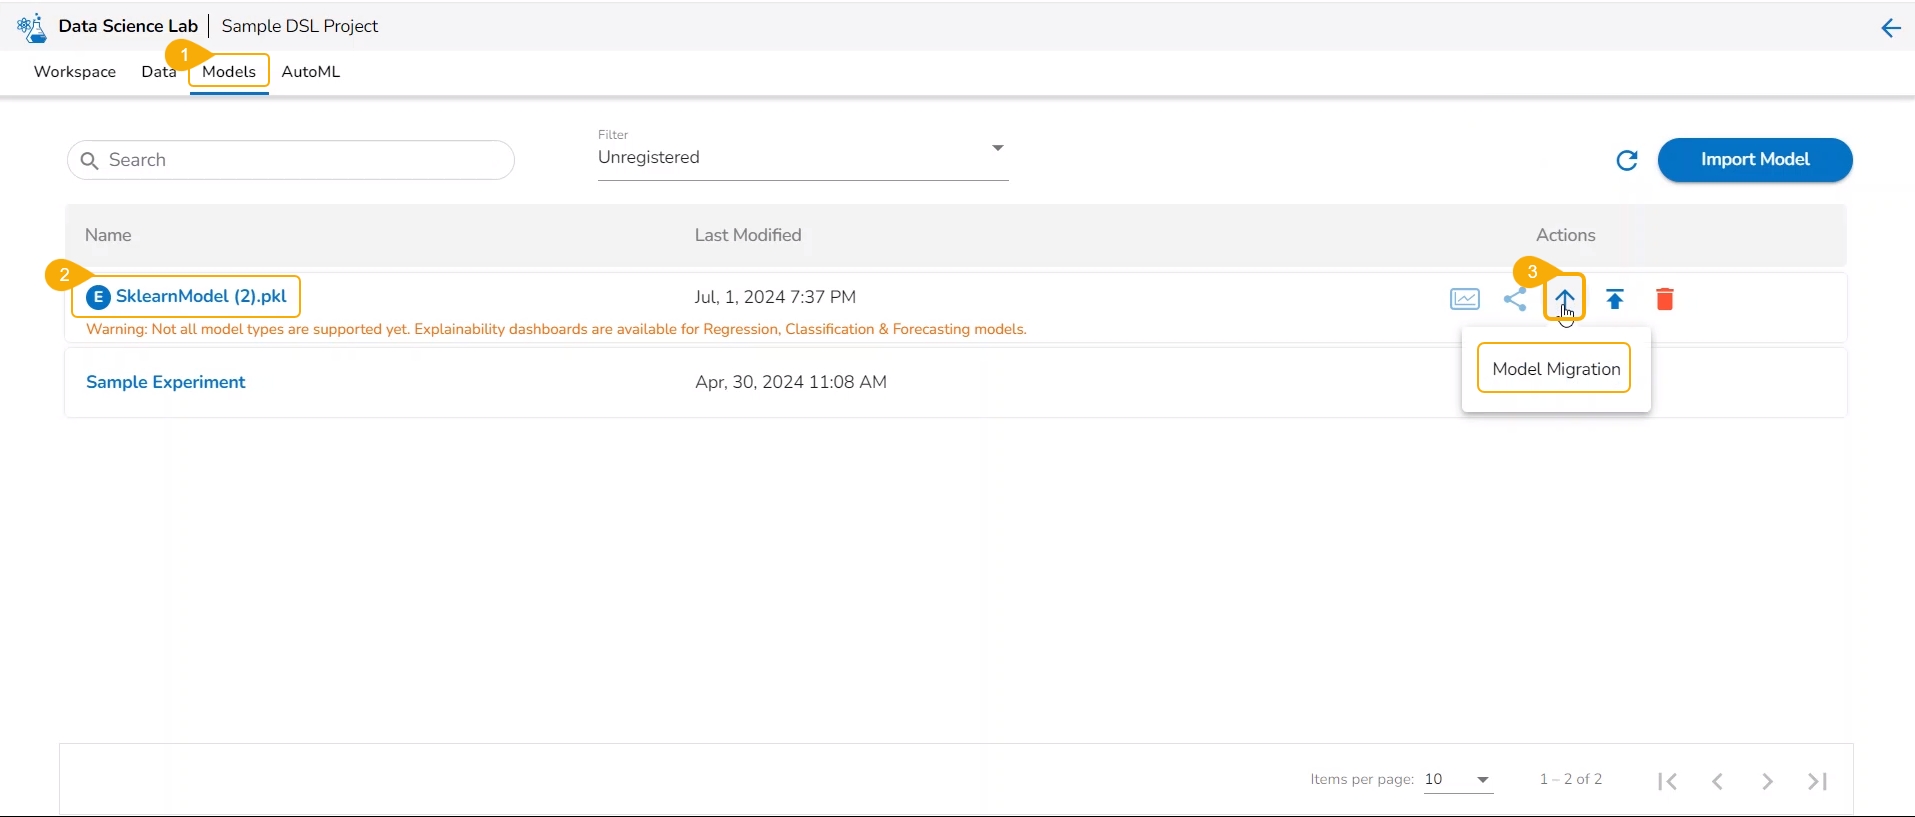
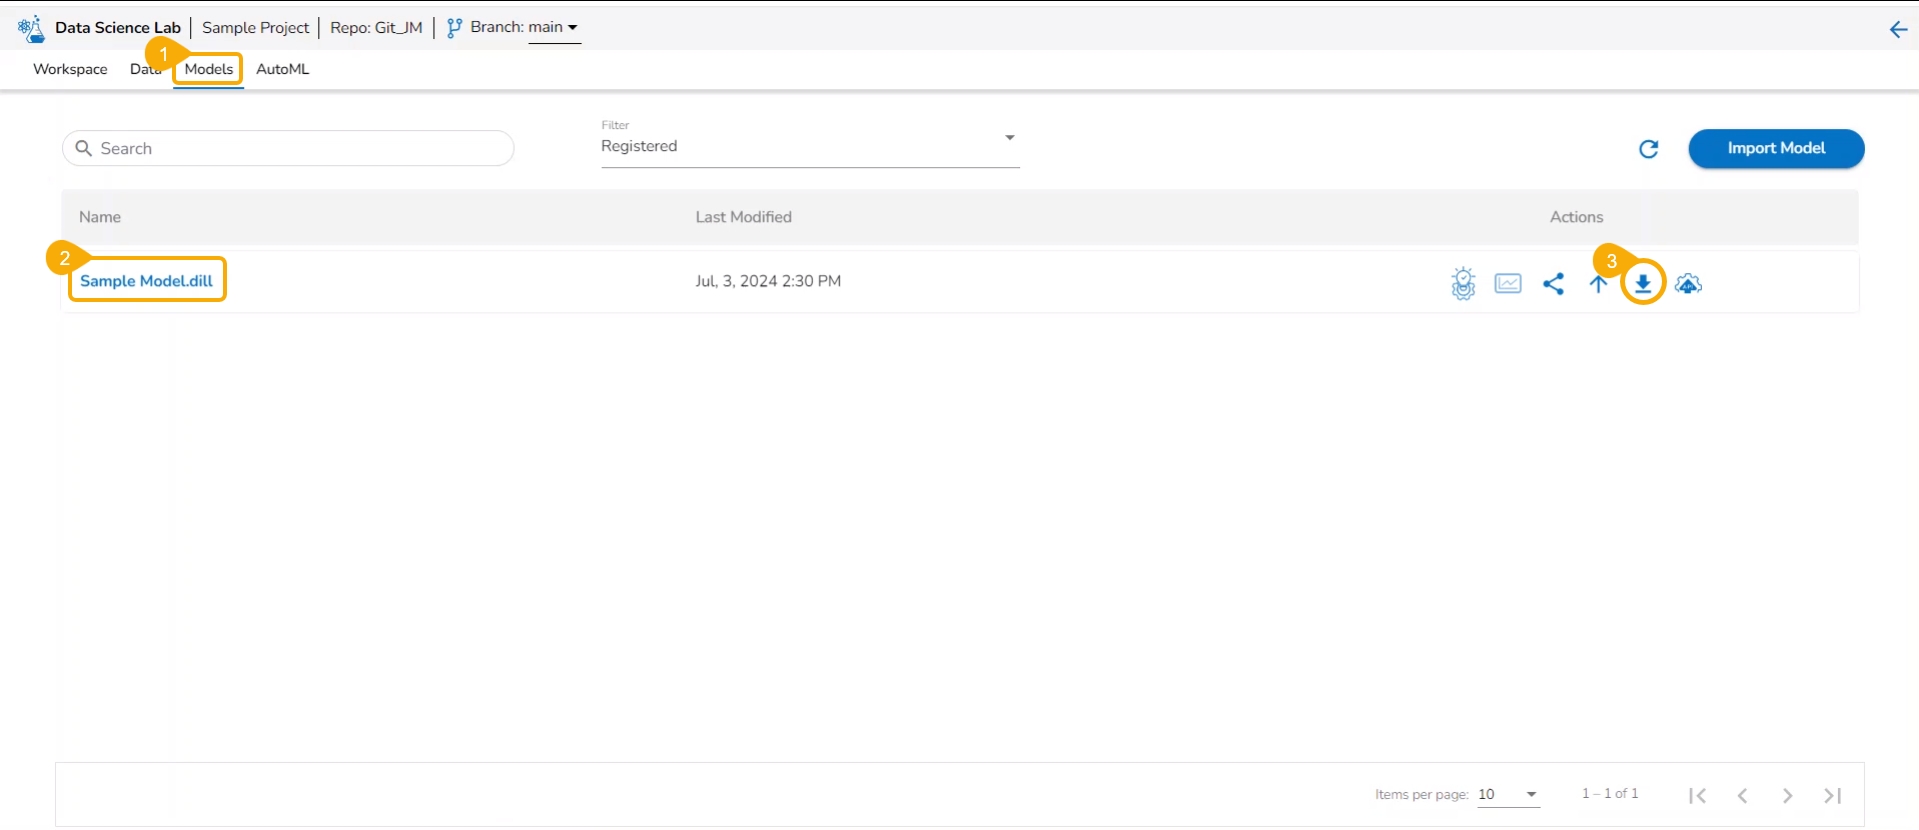
Navigate to the Models tab.
Select a model from the displayed list
Click the Model Migration icon for a Model.
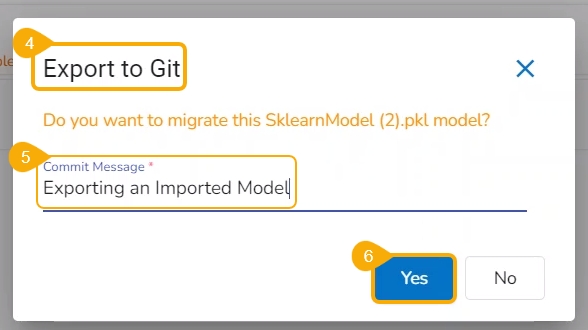
The Export to GIT dialog box opens.
Provide a Commit Message in the given space.
Click the Yes option.
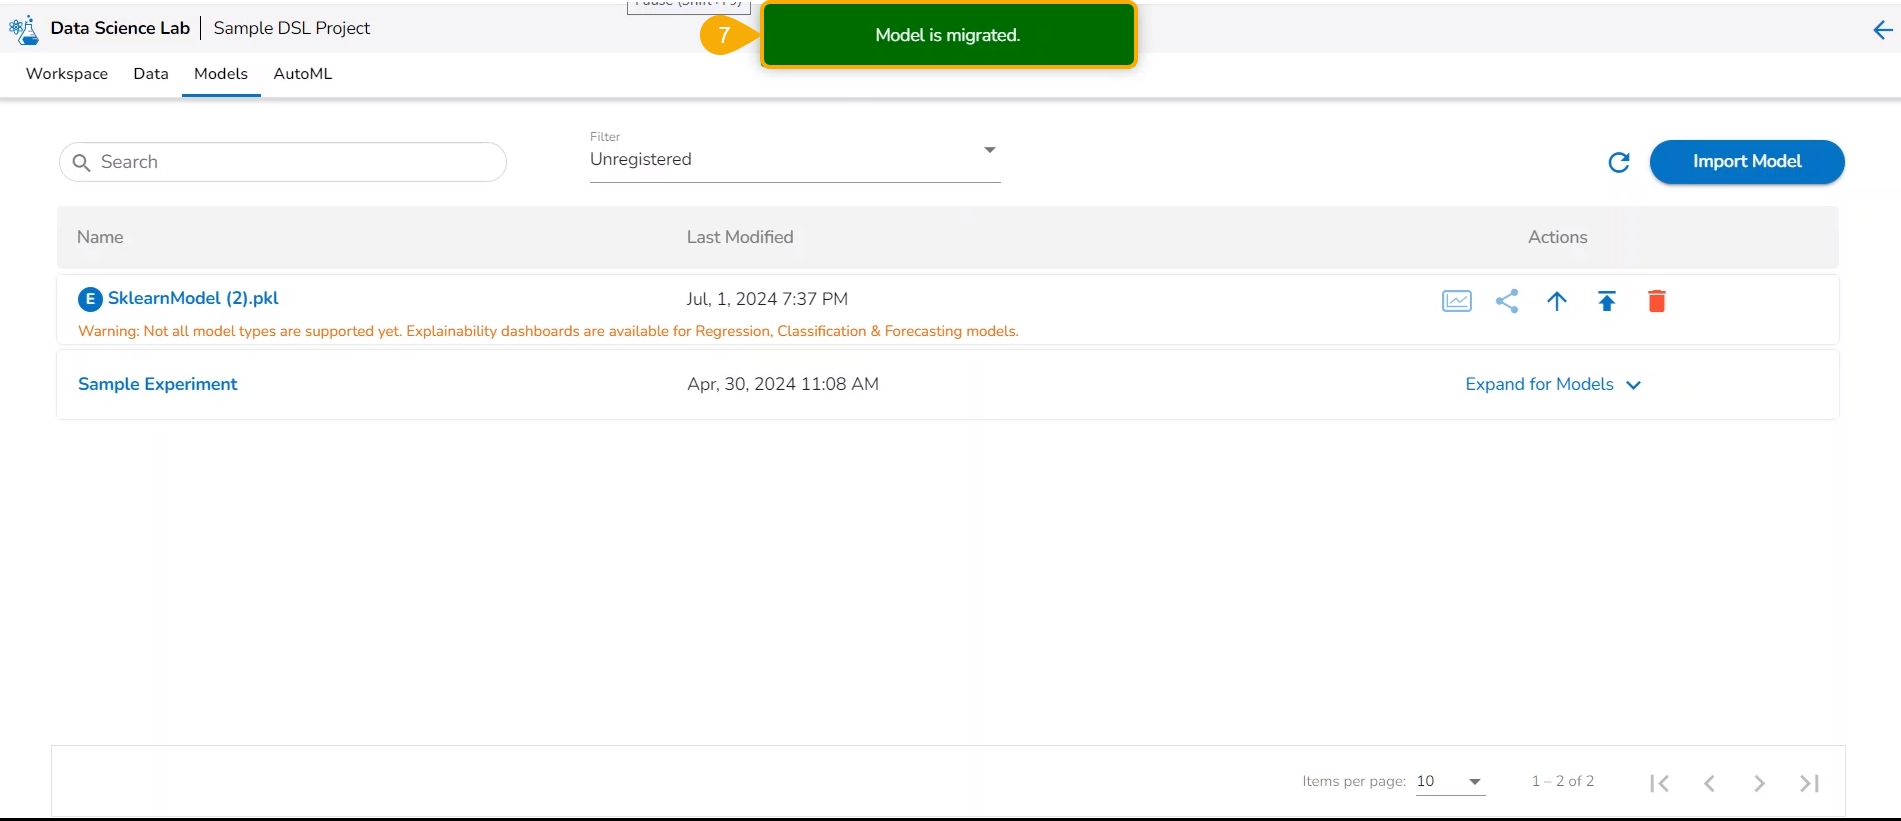
A notification message appears informing that the model is migrated.
Check out the given walk-through to understand the import of a Migrated DSL Model. inside another user under a different space.
Choose a different user or another space for the same user to import the exported model. In this case, the selected space is different from the space from where the model is exported.
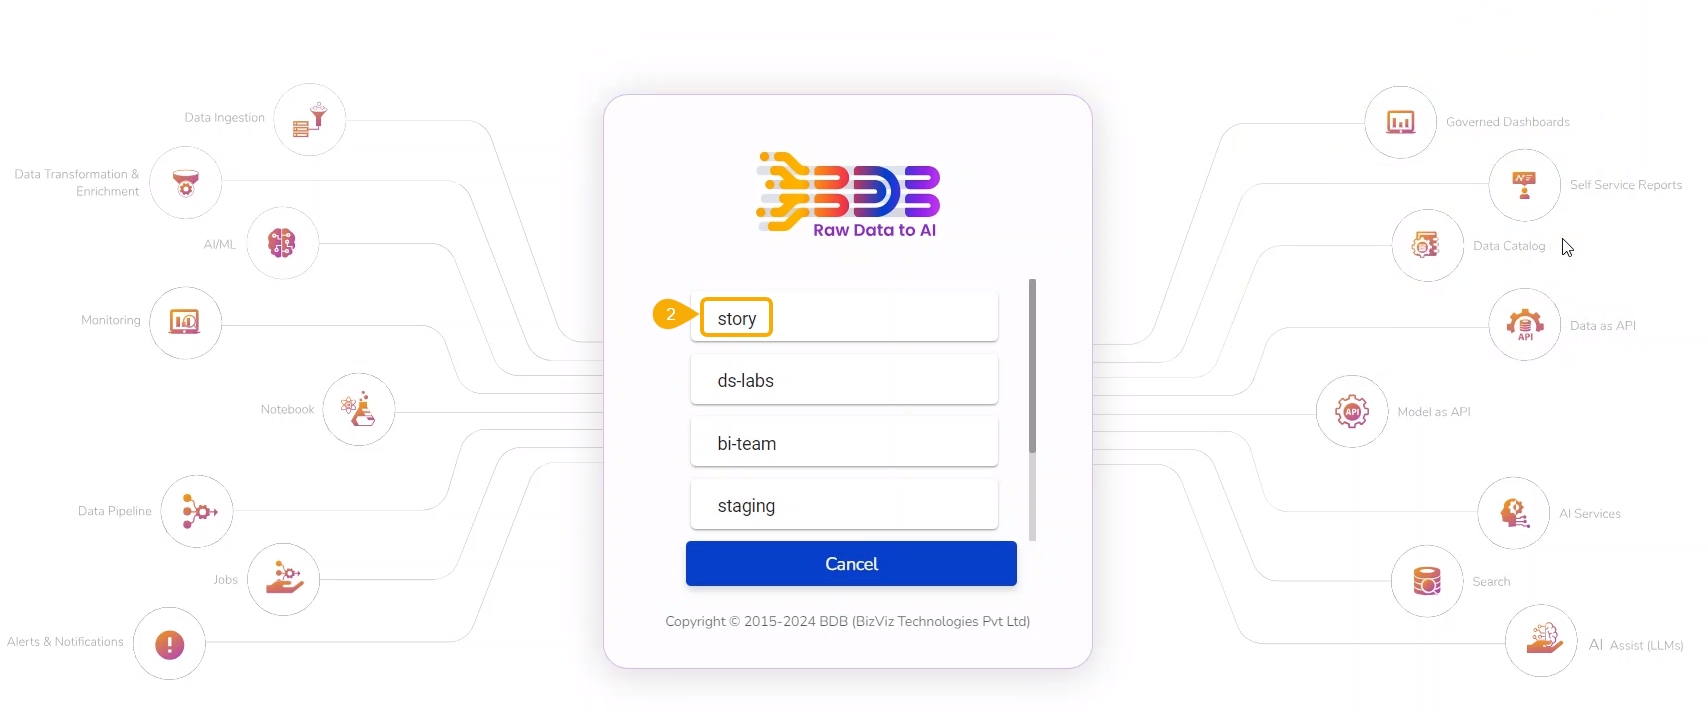
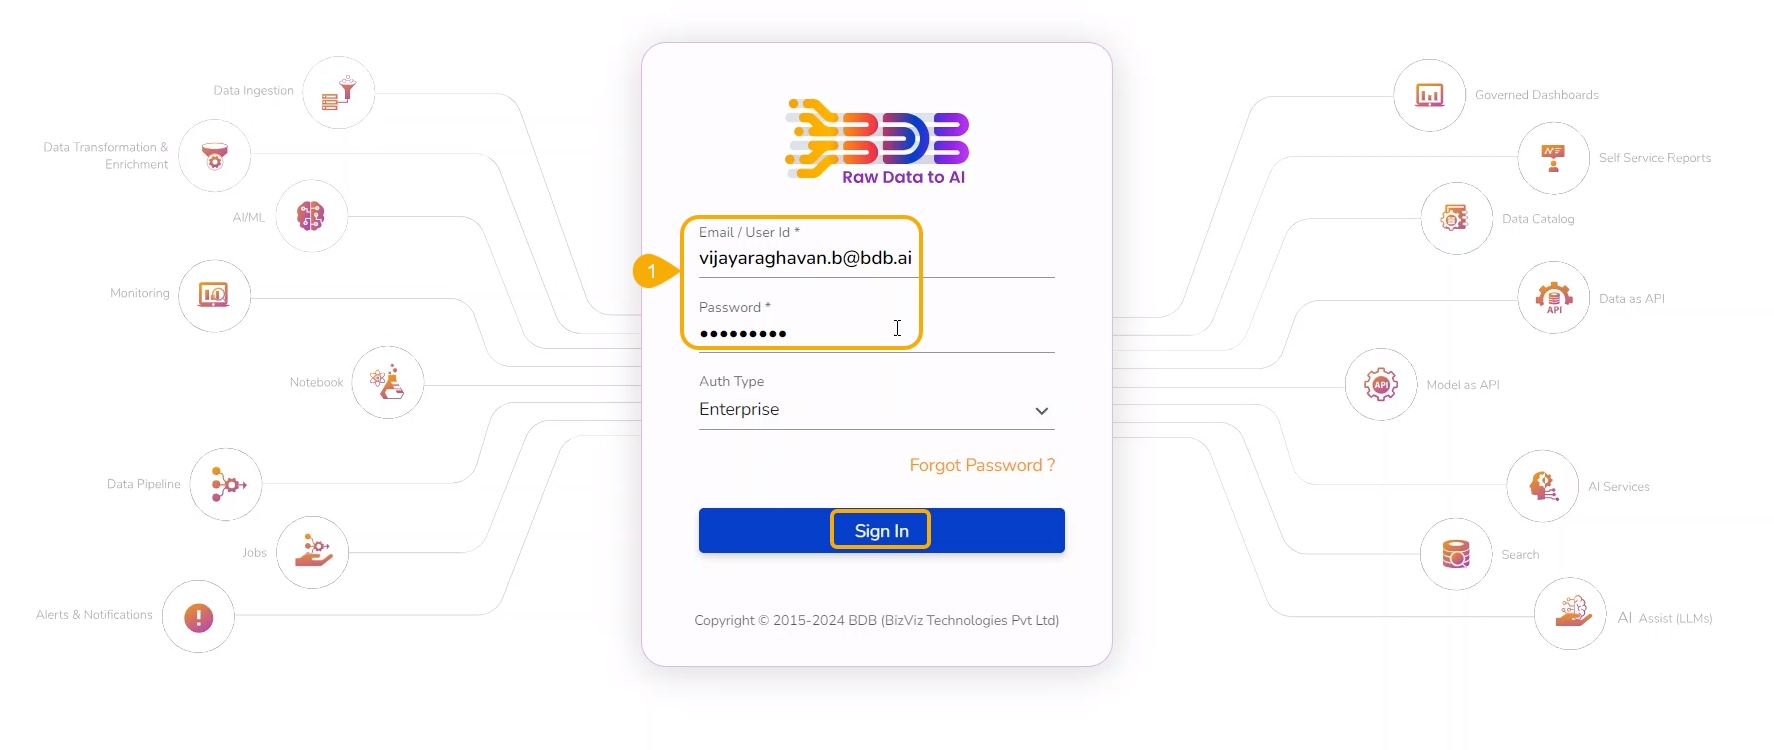
Select a different tenant to sign in to the Platform.
Choose a different space while signing into the platform.
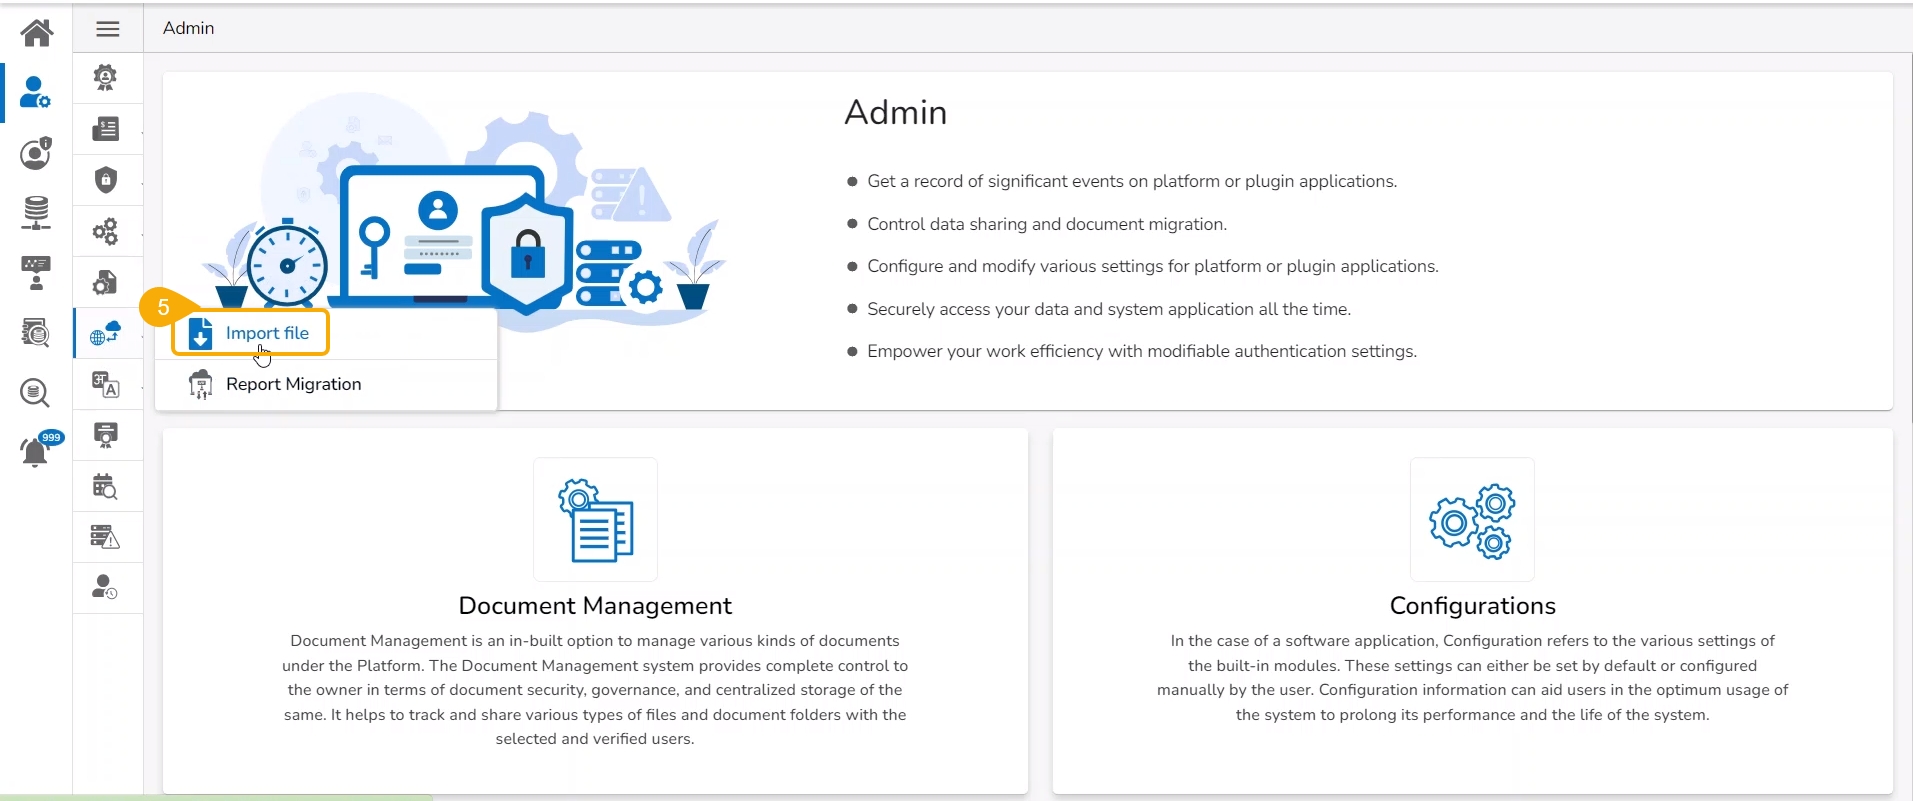
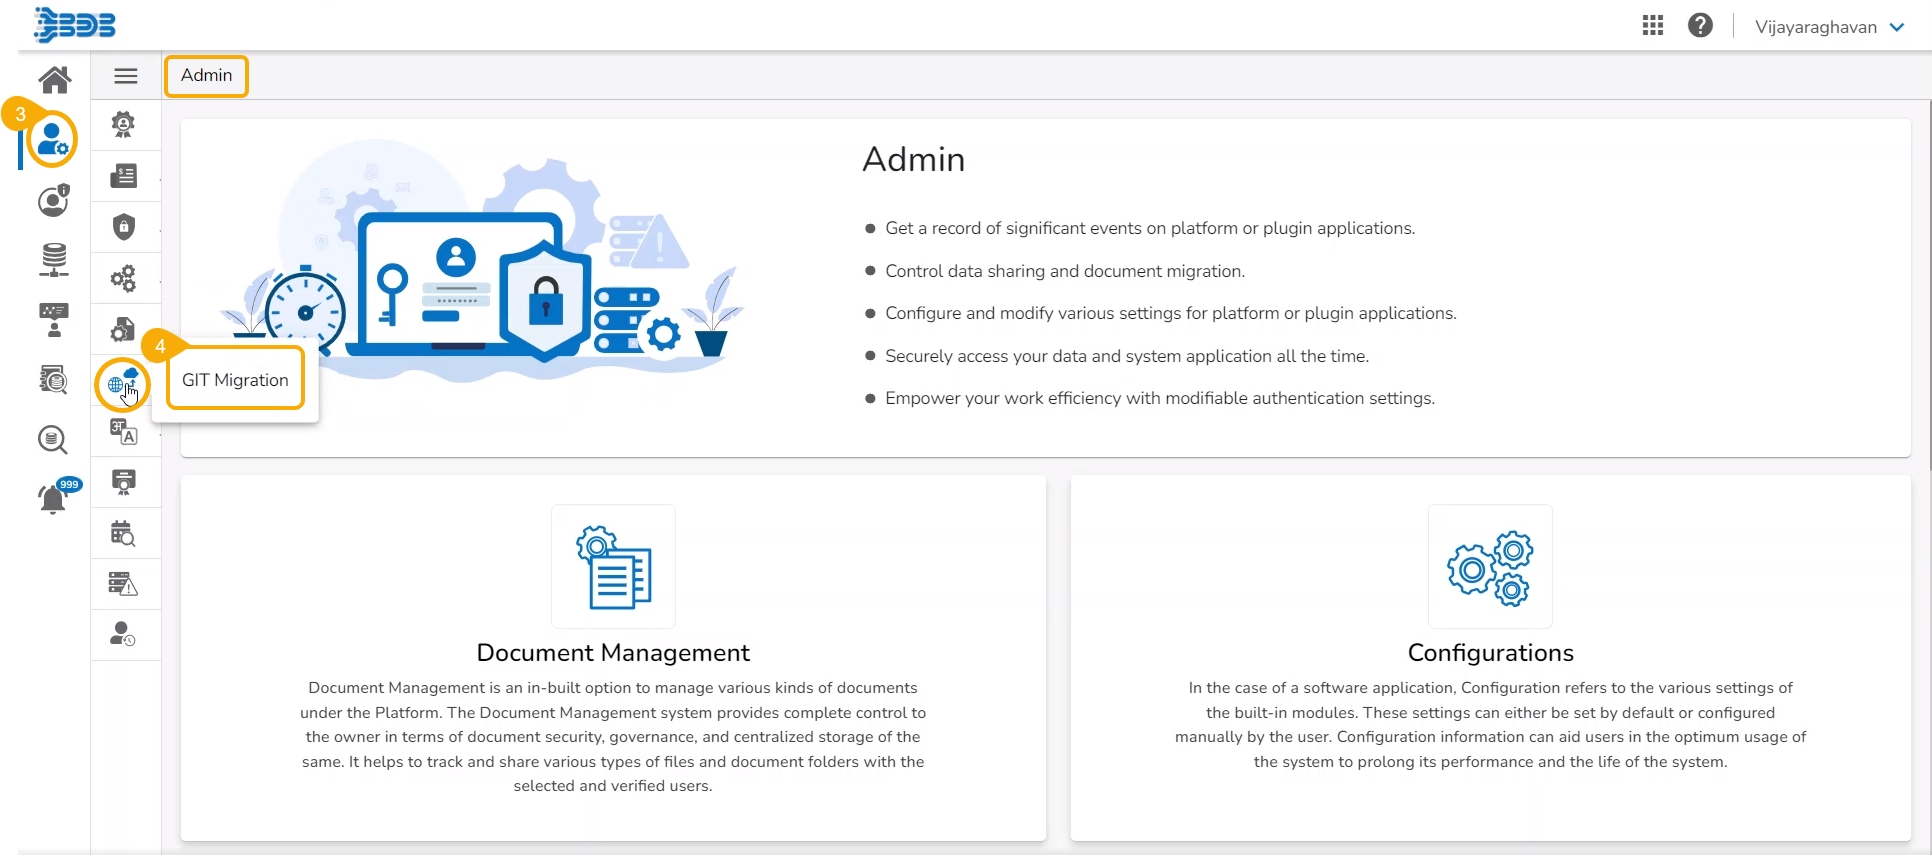
Navigate to the Admin module.
Select the GIT Migration option from the admin menu panel.
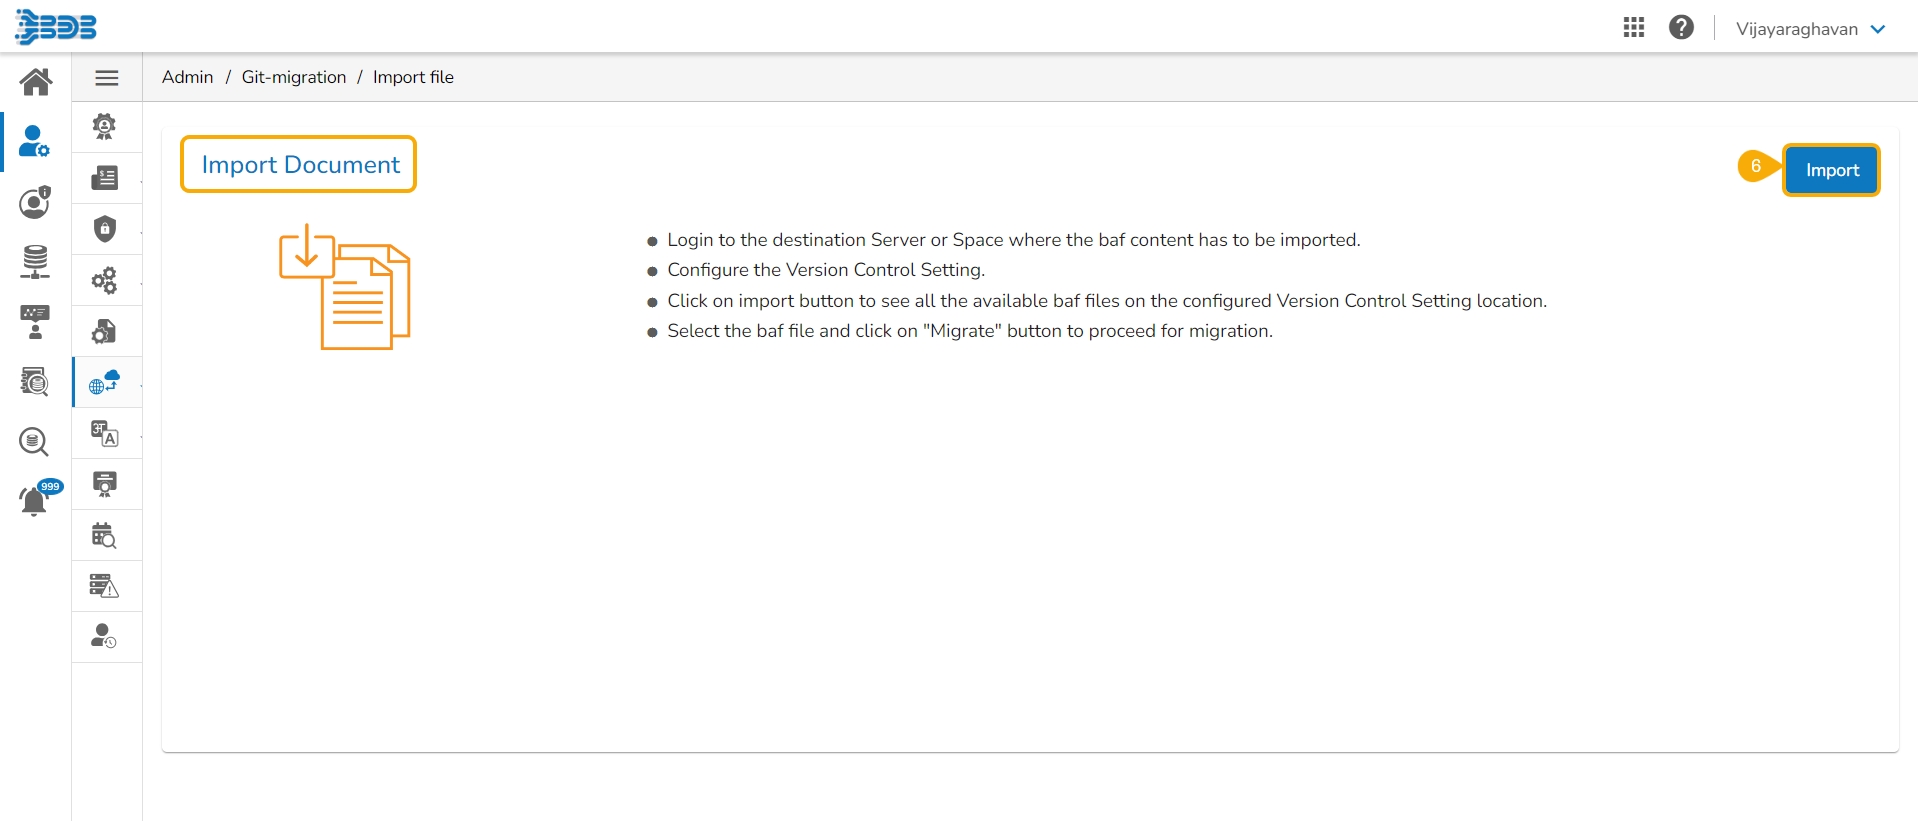
Click the Import File option.
The Import Document page opens, click the Import option.
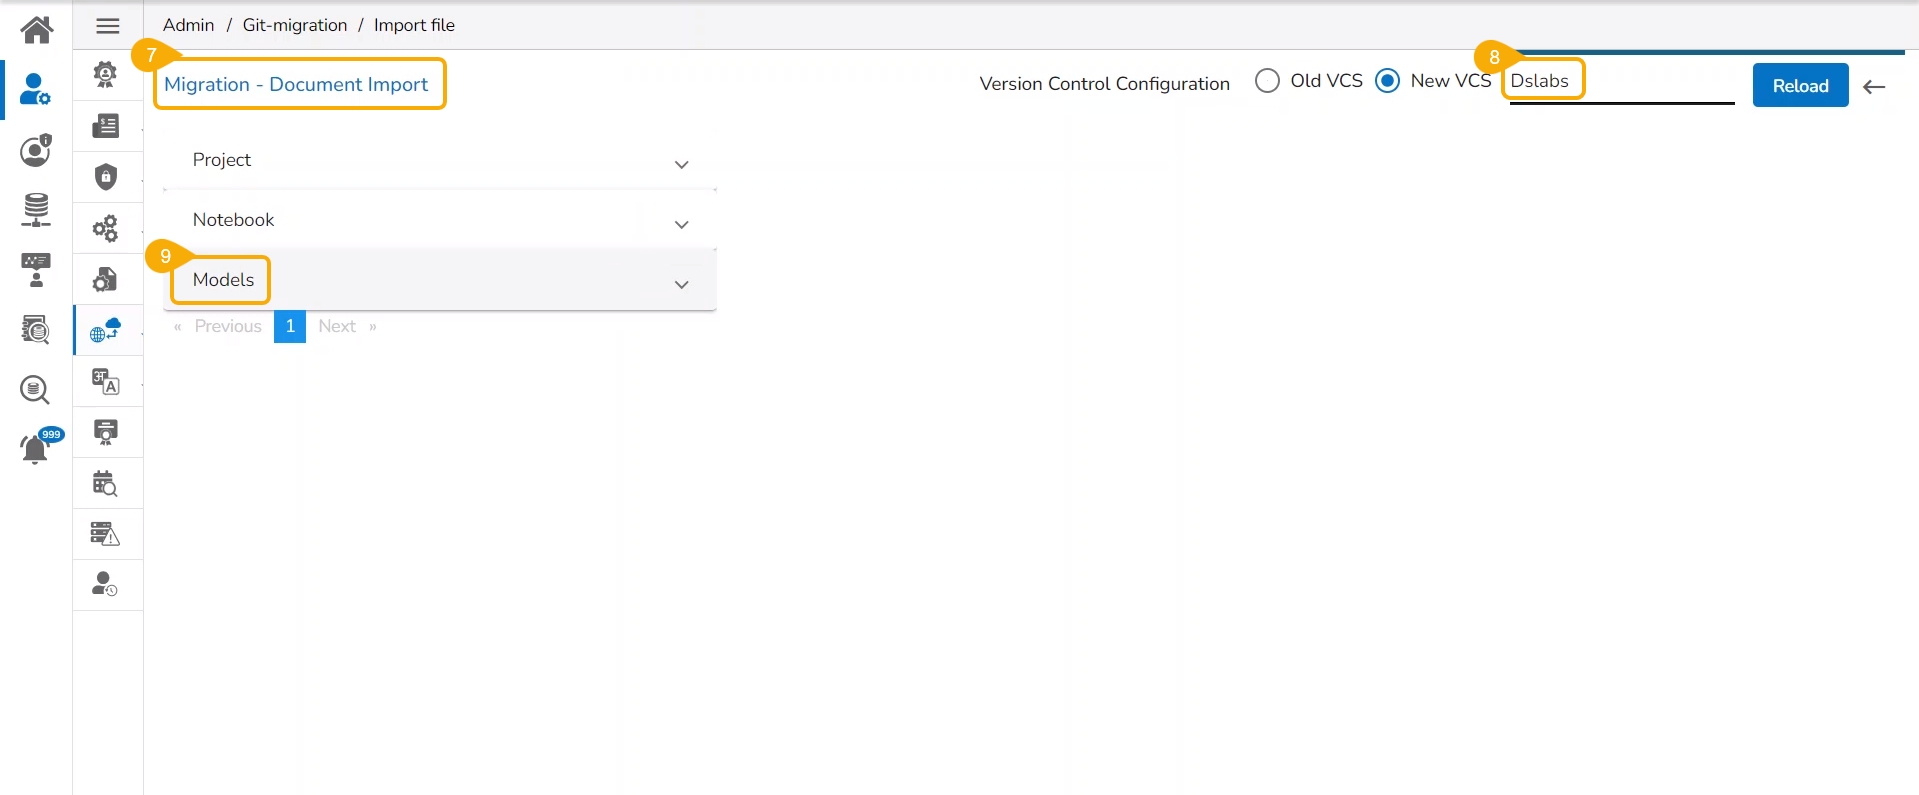
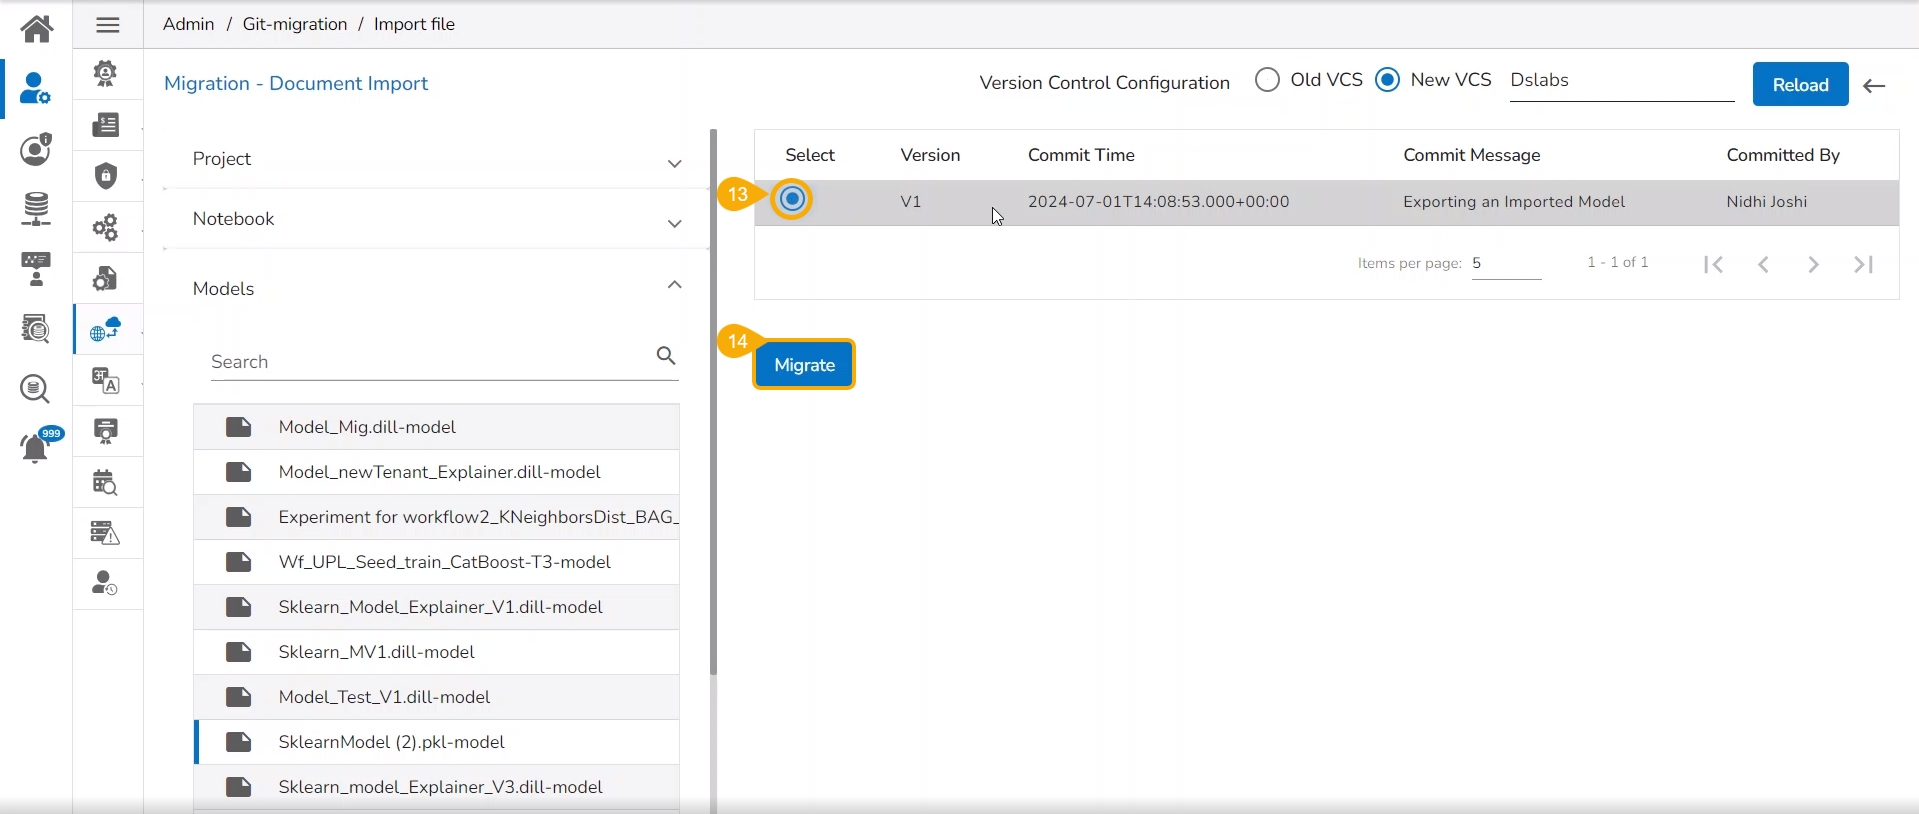
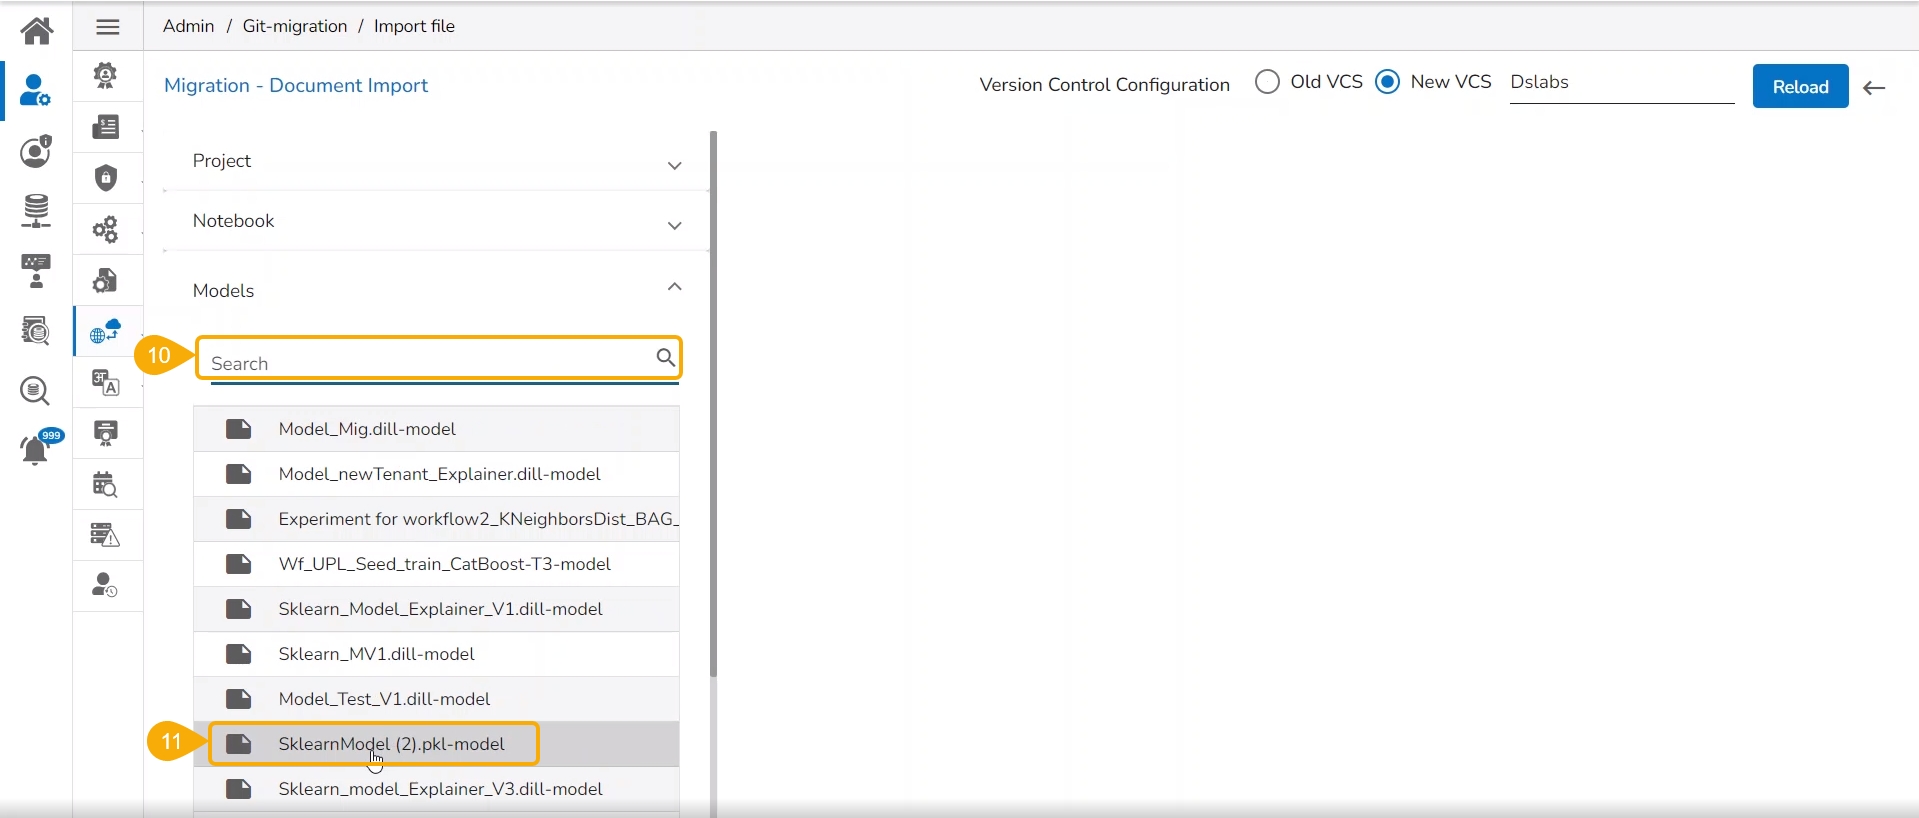
The Migration- Document Import page opens. By default, the New VCS as Version Control Configuration will be selected .
Select the DSLab option from the module drop-down menu.
Select the Models option from the left side panel.
Use Search space to search for a specific model name.
All the migrated Models get listed based on your search.
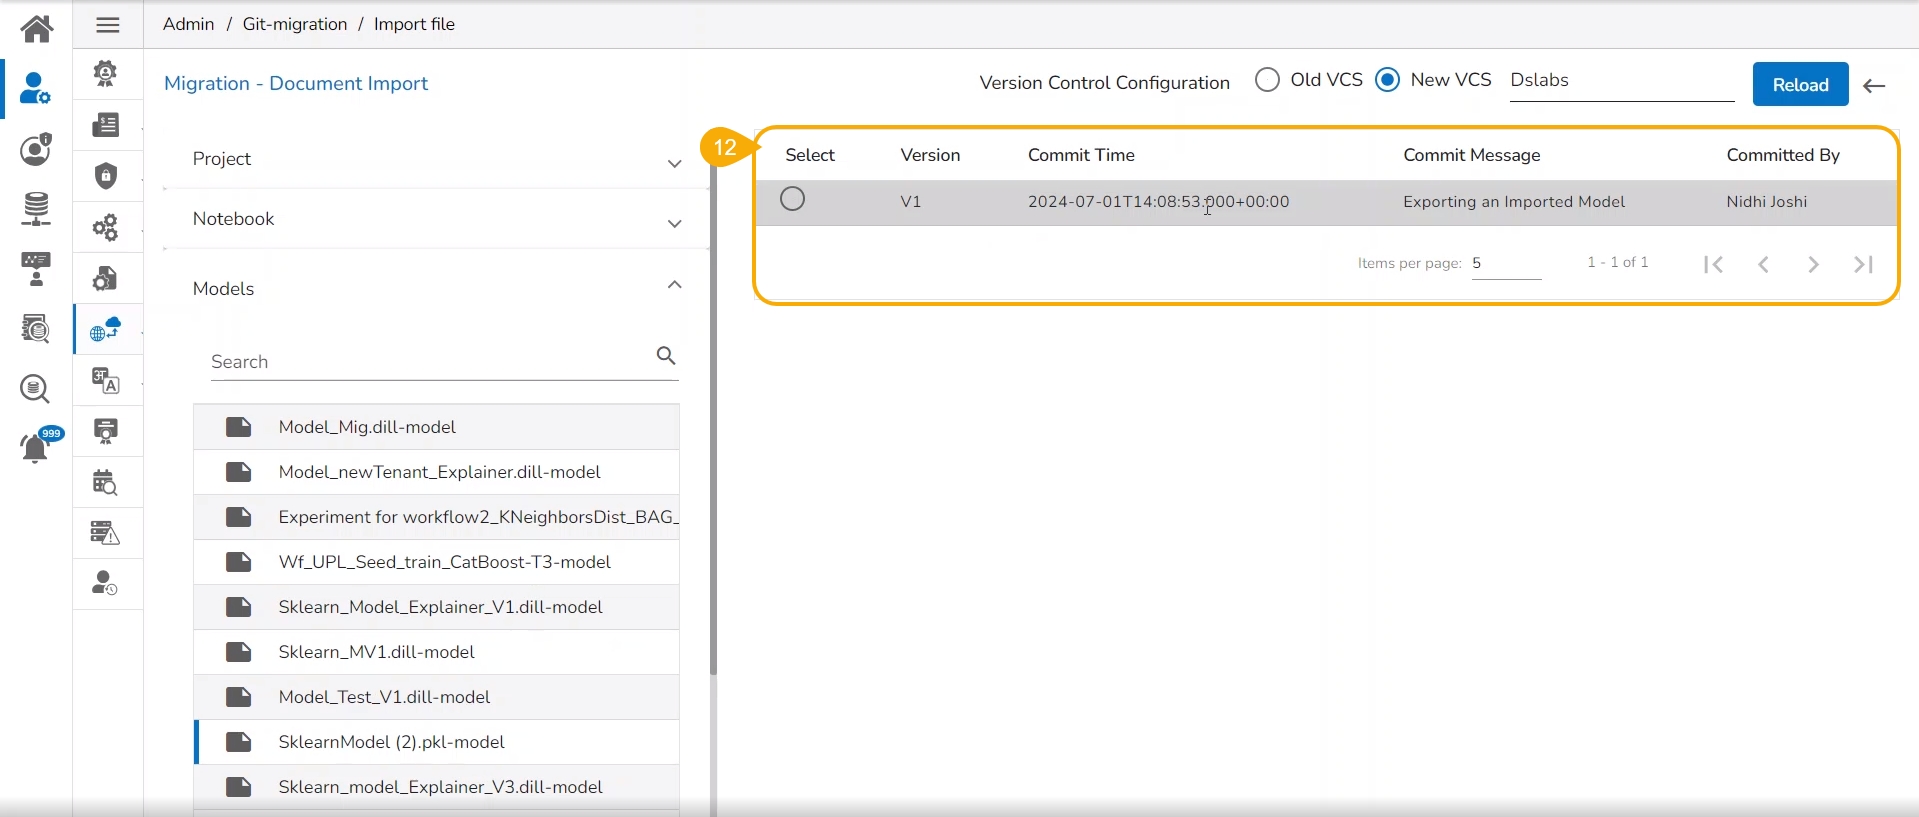
Select a Model from the displayed list to get the available versions of that Model.
Select a Version that you wish to import.
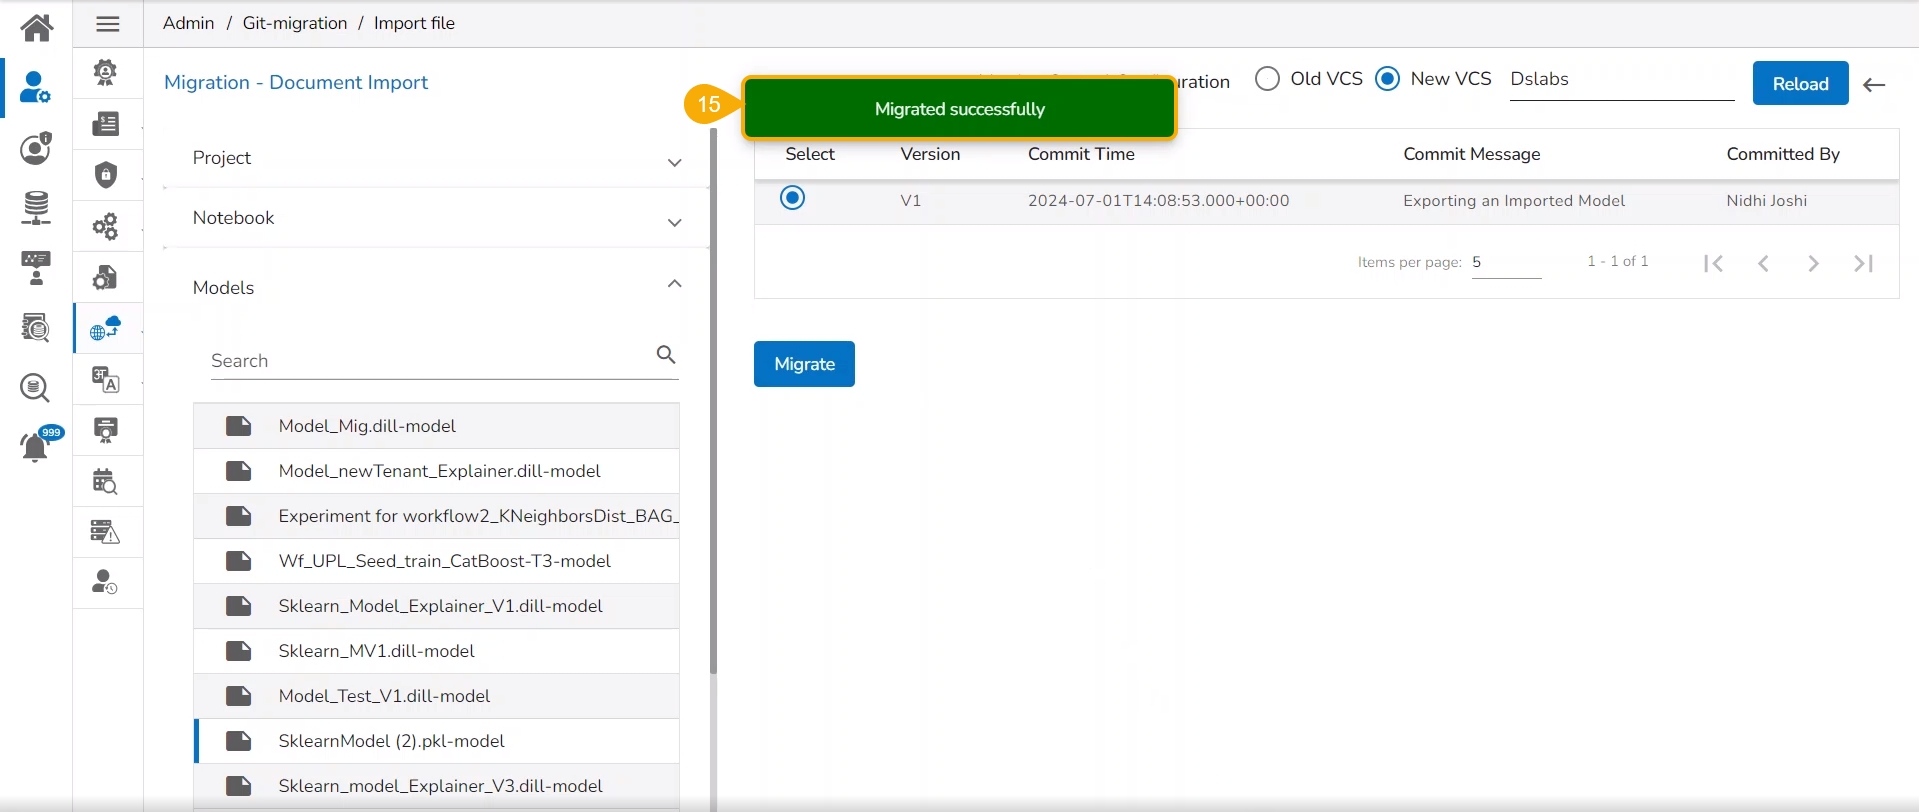
Click the Migrate option.
A notification message appears informing that the file has been migrated.
The migrated model gets imported inside the Models tab of the targeted user.
Please Note: While migrating the Model the concerned Data Science Project also gets migrated to the targeted user's account.
To unregister a model means to remove it from the Data Pipeline environment.
Check out the illustration on unregistering a model functionality using the Models tab.
A user can unregister a registered model by using the Models tab.
Navigate to the Models tab.
Select a registered model (use the Registered filter option to access a model).
Click the Unregister icon for the same model.
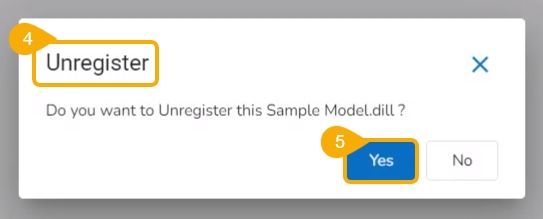
The Unregister dialog box appears to confirm the action.
Click the Yes option.
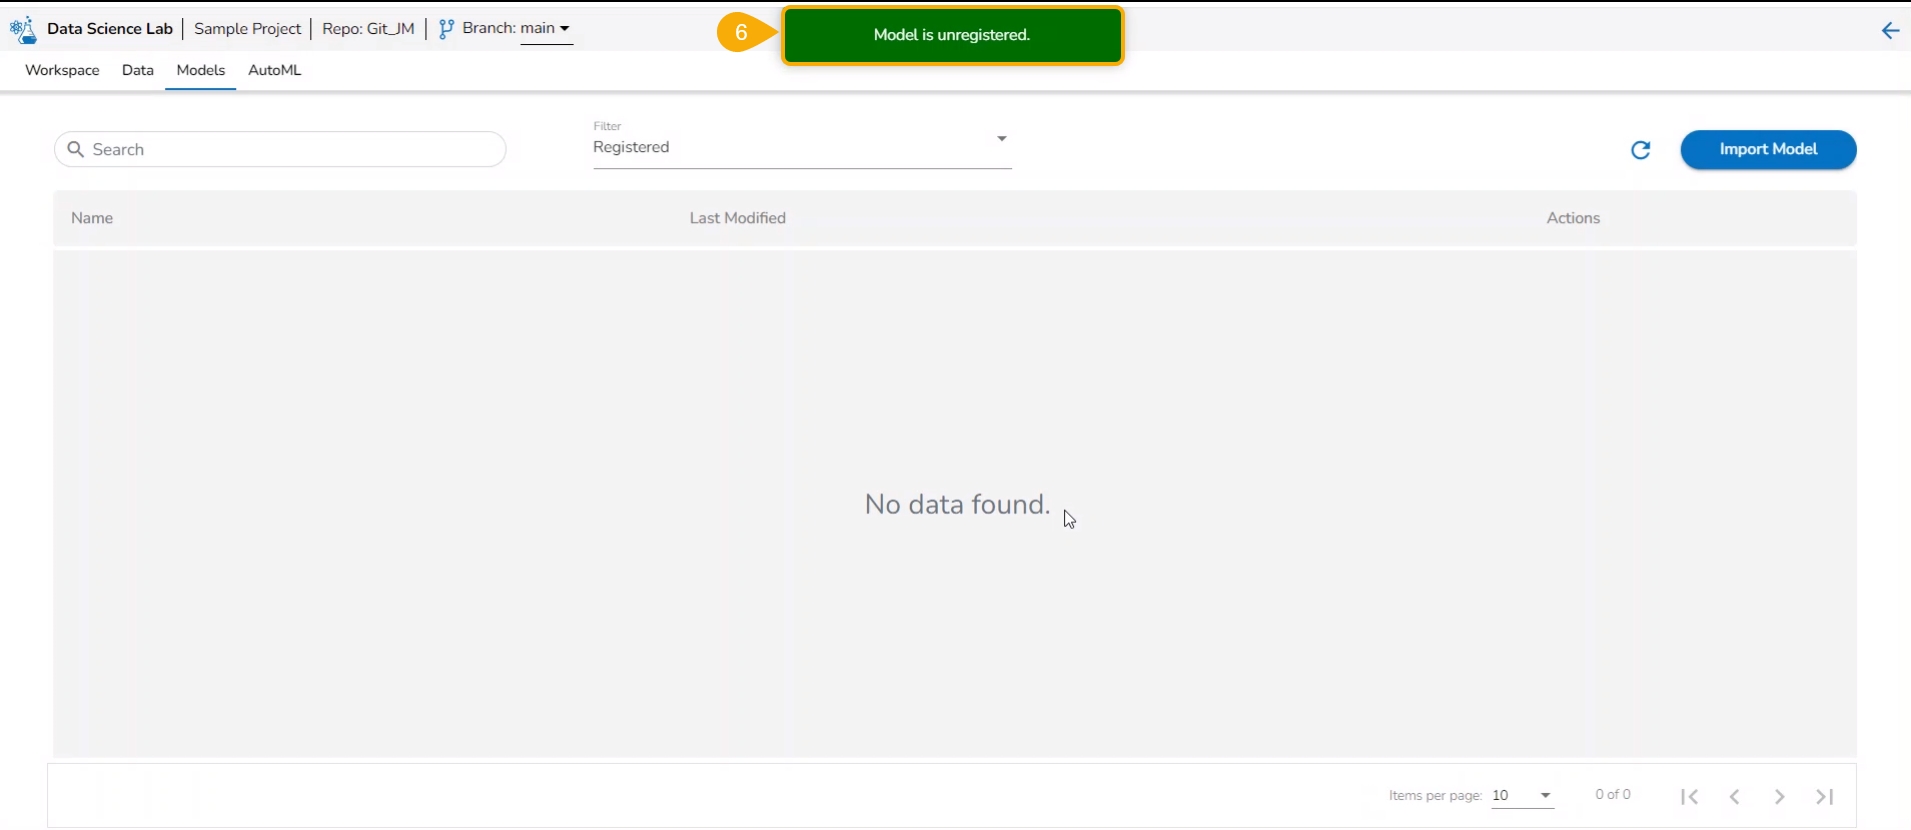
A notification message appears to inform the same.
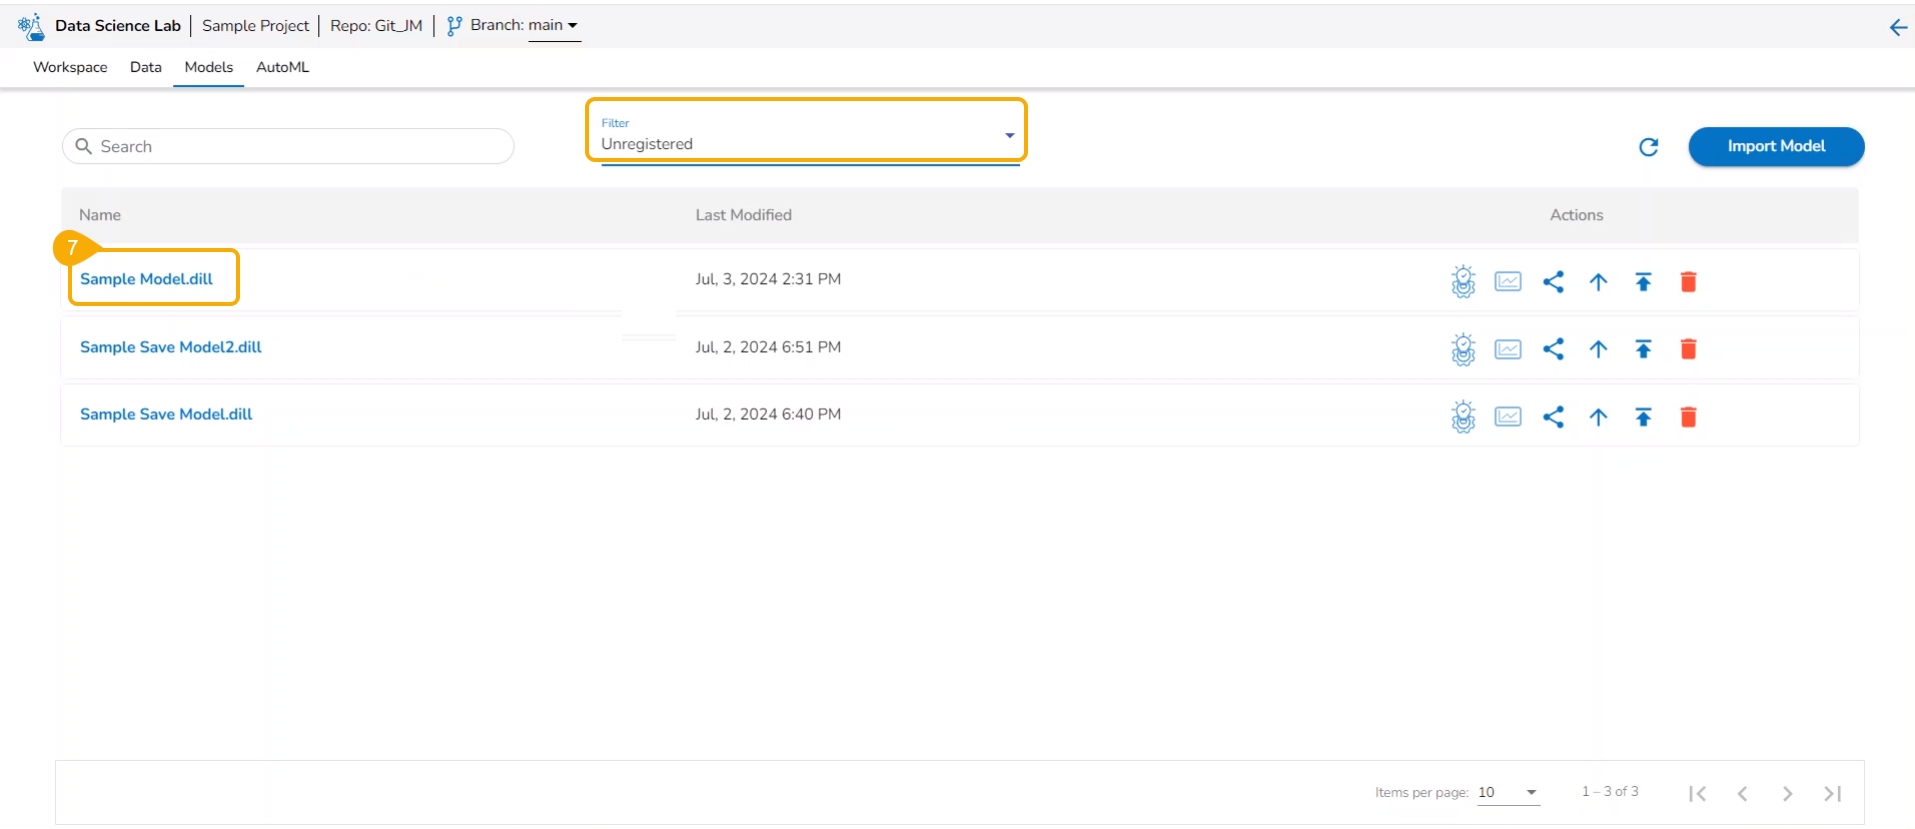
The unregistered model appears under the Unregistered filter of the Models tab.
Please Note:
The Unregister function when applied to a registered model, gets removed from the Data Pipeline module. It also disappears from the Registered list of the models and gets listed under the Unregistered list of models.
This section explains steps involved in registering a Data Science Model as an API Service.
To publish a Model as an API Service, the user needs to follow the three steps given below:
Step-1 Publish a Model as an API
Step-2 Register an API Client
Step-3 Pass the Model values in the Postman
Check out the illustration to understand the Model as API functionality.
Using the Models tab, the user can publish a DSL model as an API. Only the published models get this option.
Navigate to the Models tab.
Filter the model list by using the Registered or All options.
Select a registered model from the list.
Click the Register as API option.
The Update Model page opens.
Provide Max instance limit.
Click the Save and Register option.
Please Note: Use the Save option to save the data which can be published later.
The model gets saved and registered as an API service. A notification message appears to inform the same.
Please Note: The Registered Model as an API can be accessed under the Registered Models & API option in the left menu panel on the Data Science Lab homepage.
Navigate to the Admin module.
Click the API Client Registration option.
The API Client Registration page opens.
Click the New option.
Select the Client type as internal.
Provide the following client-specific information:
Client Name
Client Email
App Name
Request Per Hour
Request Per Day
Select API Type- Select the Model as API option.
Select the Services Entitled -Select the published DSL model from the drop-down menu.
Click the Save option.
A notification message appears to inform the same.
The client details get registered.
Once the client gets registered open the registered client details using the Edit option.
The API Client Registration page opens with the Client ID and Client Secret key.
The user can pass the model values in Postman in the following sequence to get the results.
Check out the illustration on Registering a Model as an API service.
Navigate to the Postman.
Go to the New Collection.
Add a new POST request.
Pass the URL with the model name for the POST request.
Provide required headers under the Headers tab:
Client Id
Client Secret Key
App Name
Put the test data in the JSON list using the Body tab.
Click the Send option to send the request.
Please Note:
A job will get spin-up at the tenant level to process the requests.
The input data (JSON body) will be saved in a Kafka topic as a message, which will be cleared after 4 hours.
The tenant will get a response as below:
Success: the success of the request is identified by getting 'true' here.
Request ID: A Request ID is generated.
Message: Ensures that the service has started running.
Please Note: The Request ID is required to get the status request in the next step.
Pass the URL with the model name for the POST request.
Provide required headers under the Headers tab:
Client Id
Client Secret Key
App Name
Open the Body tab and provide the Request ID.
Click the Send option to send the request.
The response will be received as below:
Success: the success of the request is identified by getting 'true' here.
Request ID: The used Request ID appears.
Status Message: Ensures that the service has been completed.
Pass the URL with the model name for the POST request.
Provide required headers under the Headers tab:
Client Id
Client Secret Key
App Name
Open the Body tab and provide the Request ID.
Click the Send option to send the request.
The model prediction result will be displayed in response.
Please Note: The output data will be stored inside the Sandbox repository in the specific sub-folder of the request under the Model as API folder of the respective DSL Project.
This section focuses on how to delete a model using the Models tab.
Users can delete any unregistered model using the delete icon from the Actions panel of the Model list.
Check out the illustration on deleting a model.
Navigate to the Models tab.
Select an unregistered model filter option.
Select a model from the displayed list.
Click the Delete icon.
A confirmation message appears.
Click the Yes option.
A notification message appears.
The selected model gets deleted.
Please Note: The Delete icon appears only for the unregistered models. The registered models will not get the Delete icon.


