Loading...
Loading...
Loading...
Loading...
Loading...
Loading...
Loading...
Loading...
This page displays steps to access the Data Preparation workspace for a selected Data Sandbox file.
Navigate to the Data Sandbox list.
Select a Data Sandbox from the list.
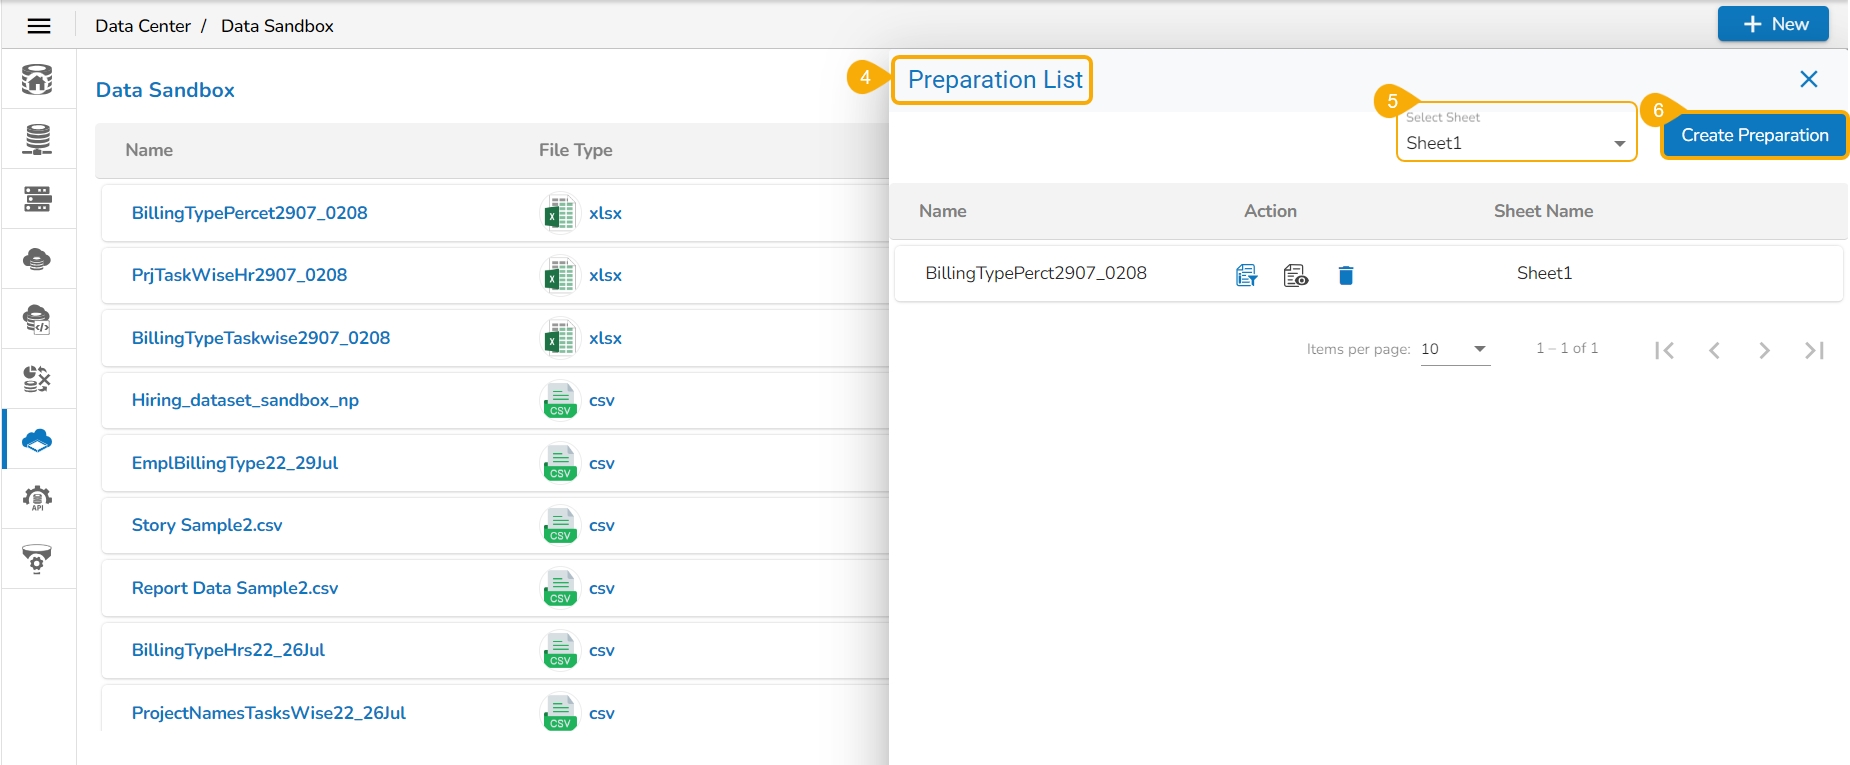
Click the Data Preparation icon.
The Preparation List drawer window opens.
Select a sheet using the drop-down menu option.
Click the Create Preparation option.
Please Note: The Preparation List drawer will appear only after saving at least one Data Preparation using the specific Excel data without multiple sheets.
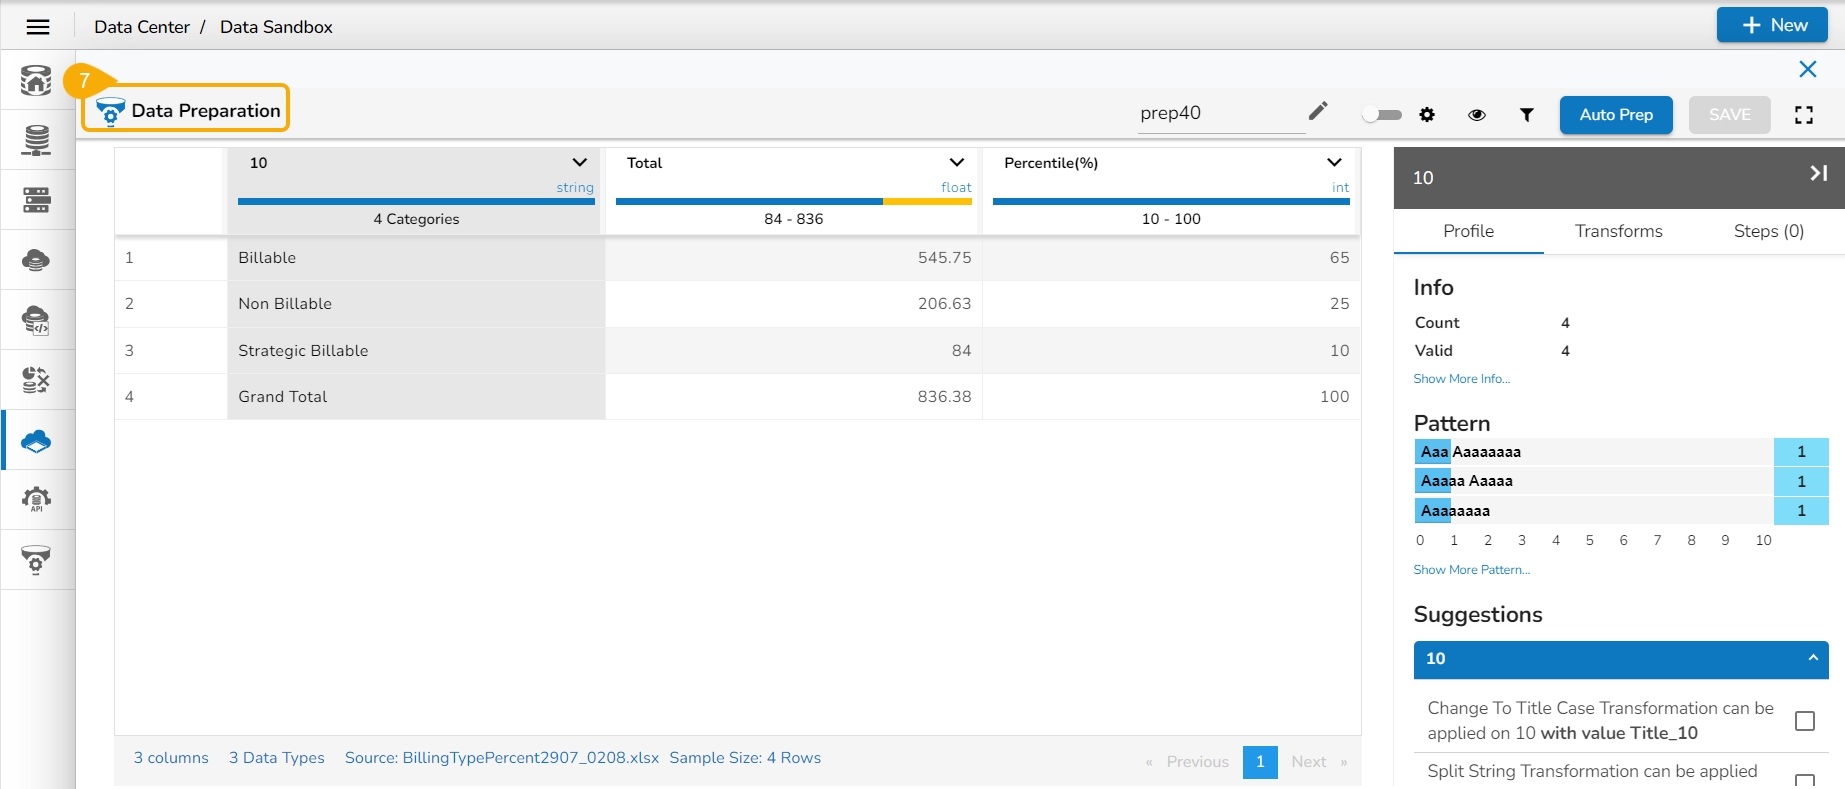
The data of the selected Data Sandbox file/ sheet gets displayed in the Data Preparation workspace.
Please refer to the Data Preparation section of the documentation to know more about this module.
This page describes deleting a data sandbox functionality.
Check out the illustration on Deleting a Data Sandbox file from the Sandbox list page.
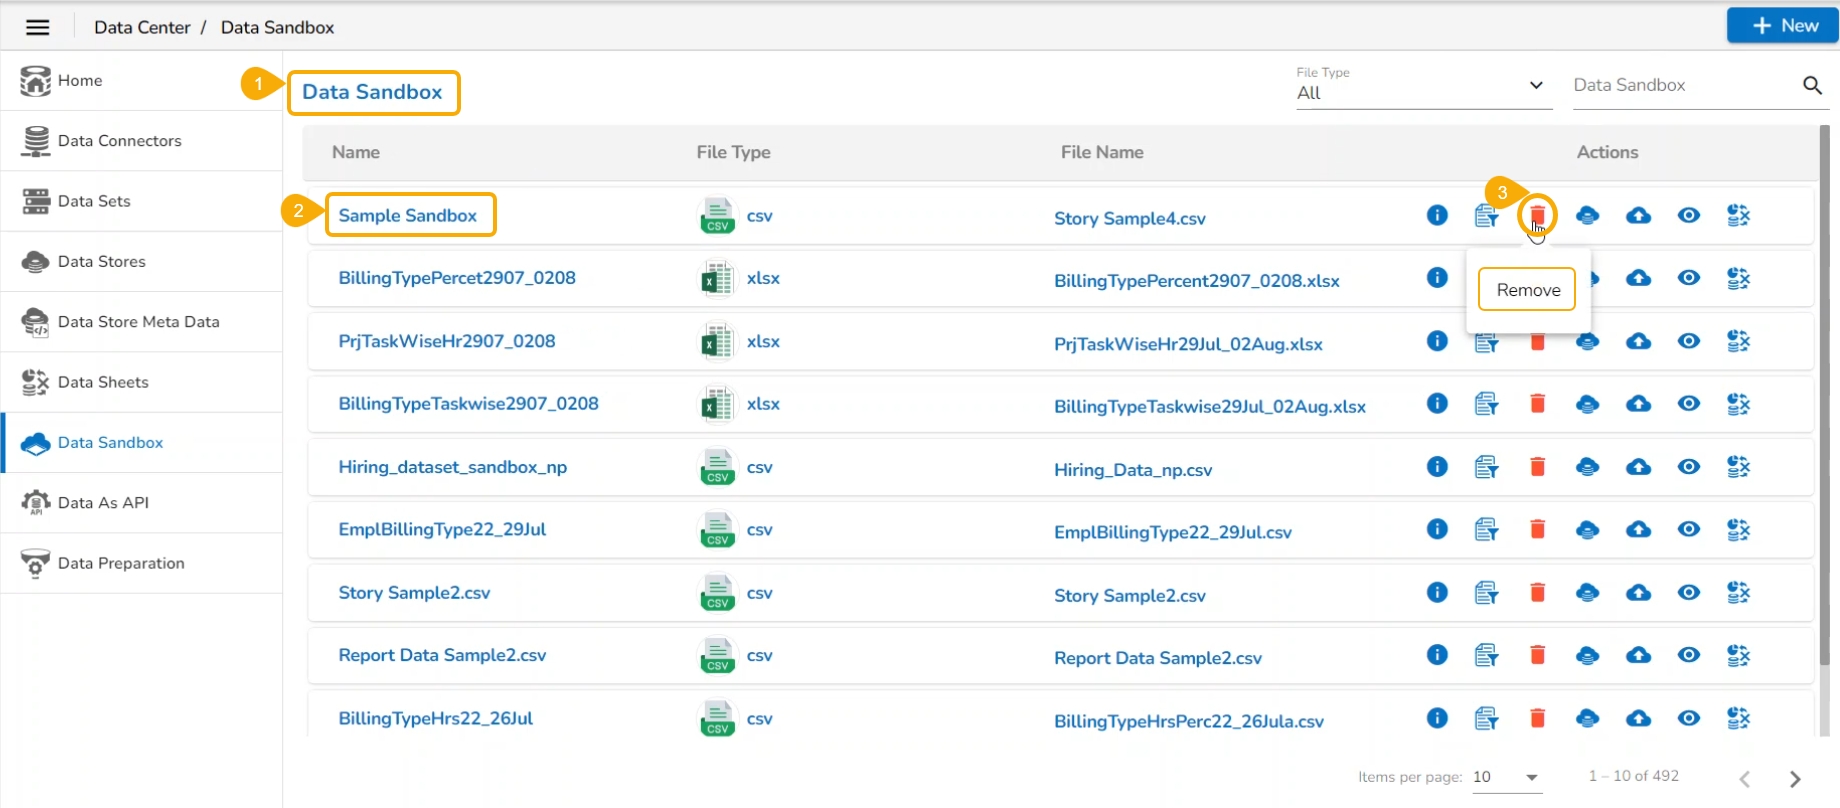
Navigate to the Data Sandbox list.
Select a Data Sandbox from the list.
Click the Remove icon for it.
The Remove Data Sandbox dialog box opens to confirm the deletion.
Click the Yes option.
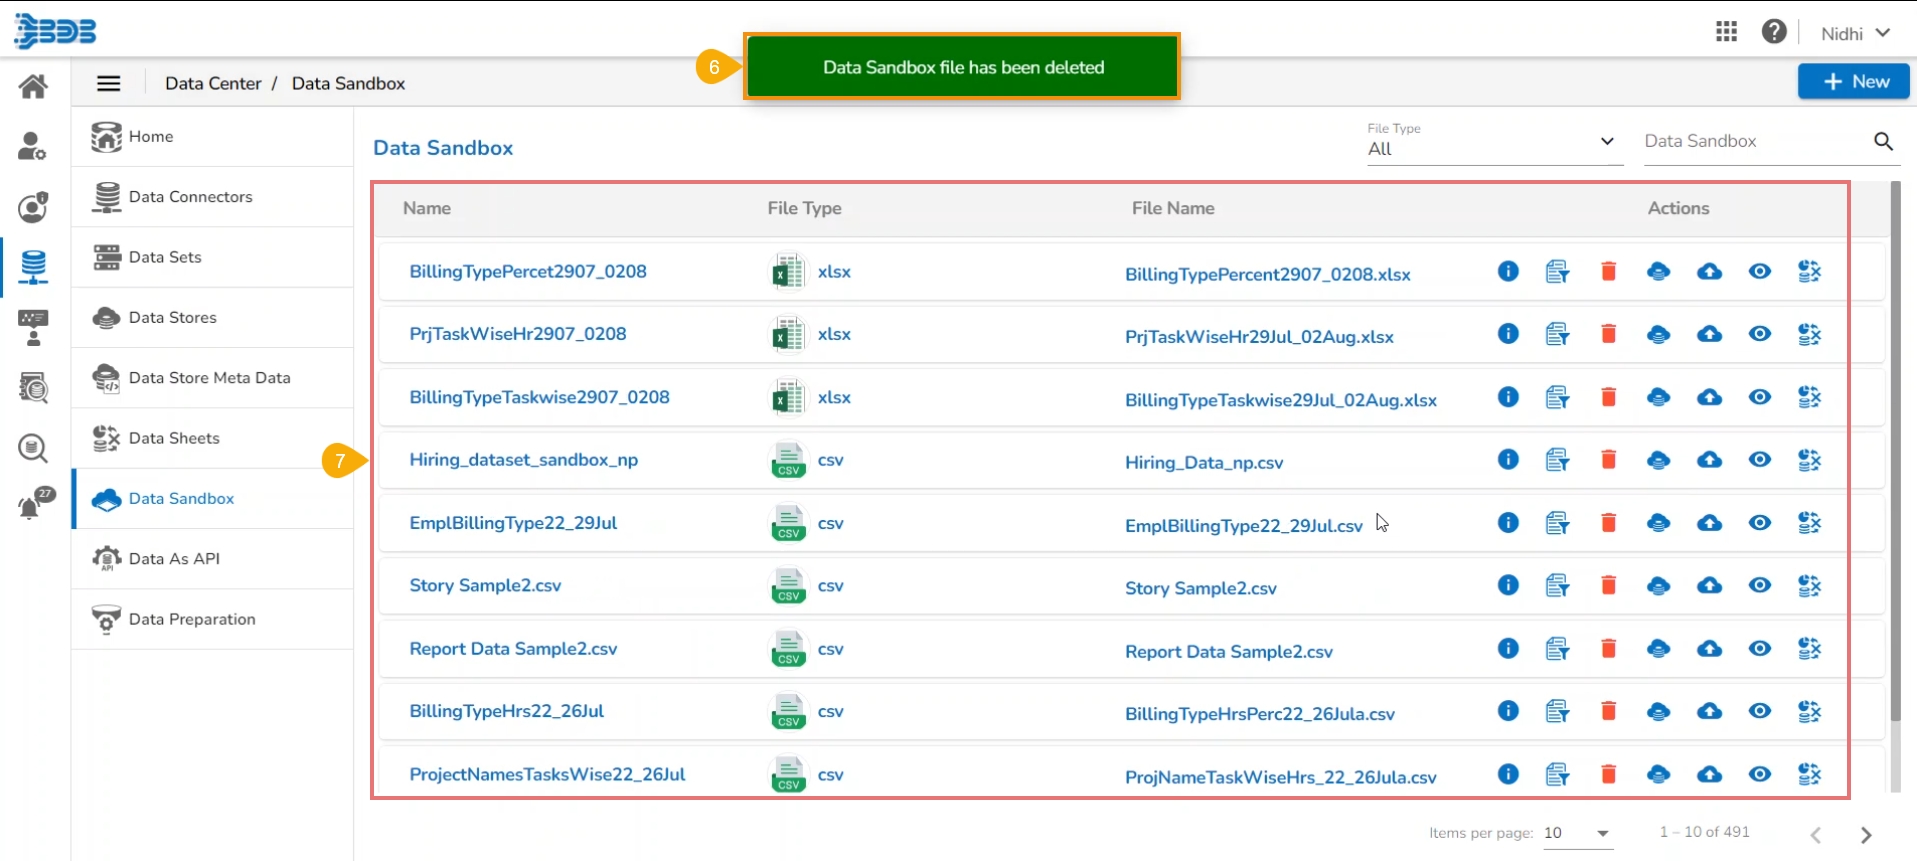
A notification message appears to inform about the deletion of the selected Data Sandbox entry.
The concerned file gets removed from the Data Sandbox List page.
This page describes steps to create a Data Store based on a Sandbox.
Check out the walk-through on creating a Data Store based on a Sandbox file.
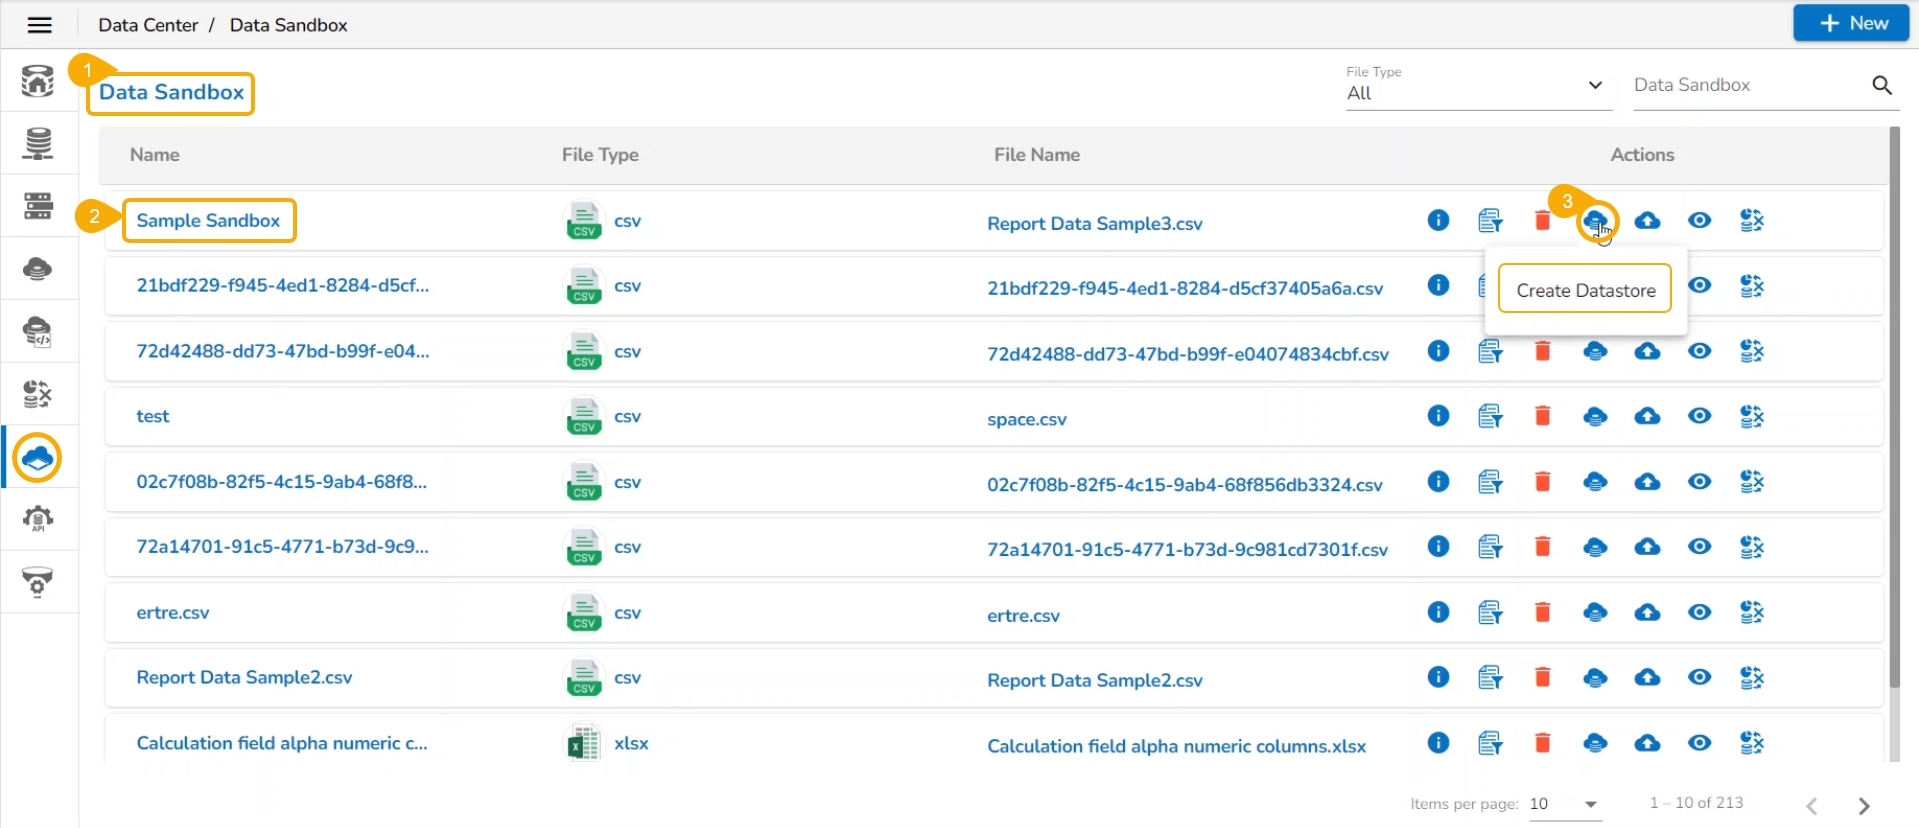
Navigate to the Data Sandbox list.
Select a Data Sandbox from the list.
Click the Create Datastore icon for the selected Data Sandbox file.
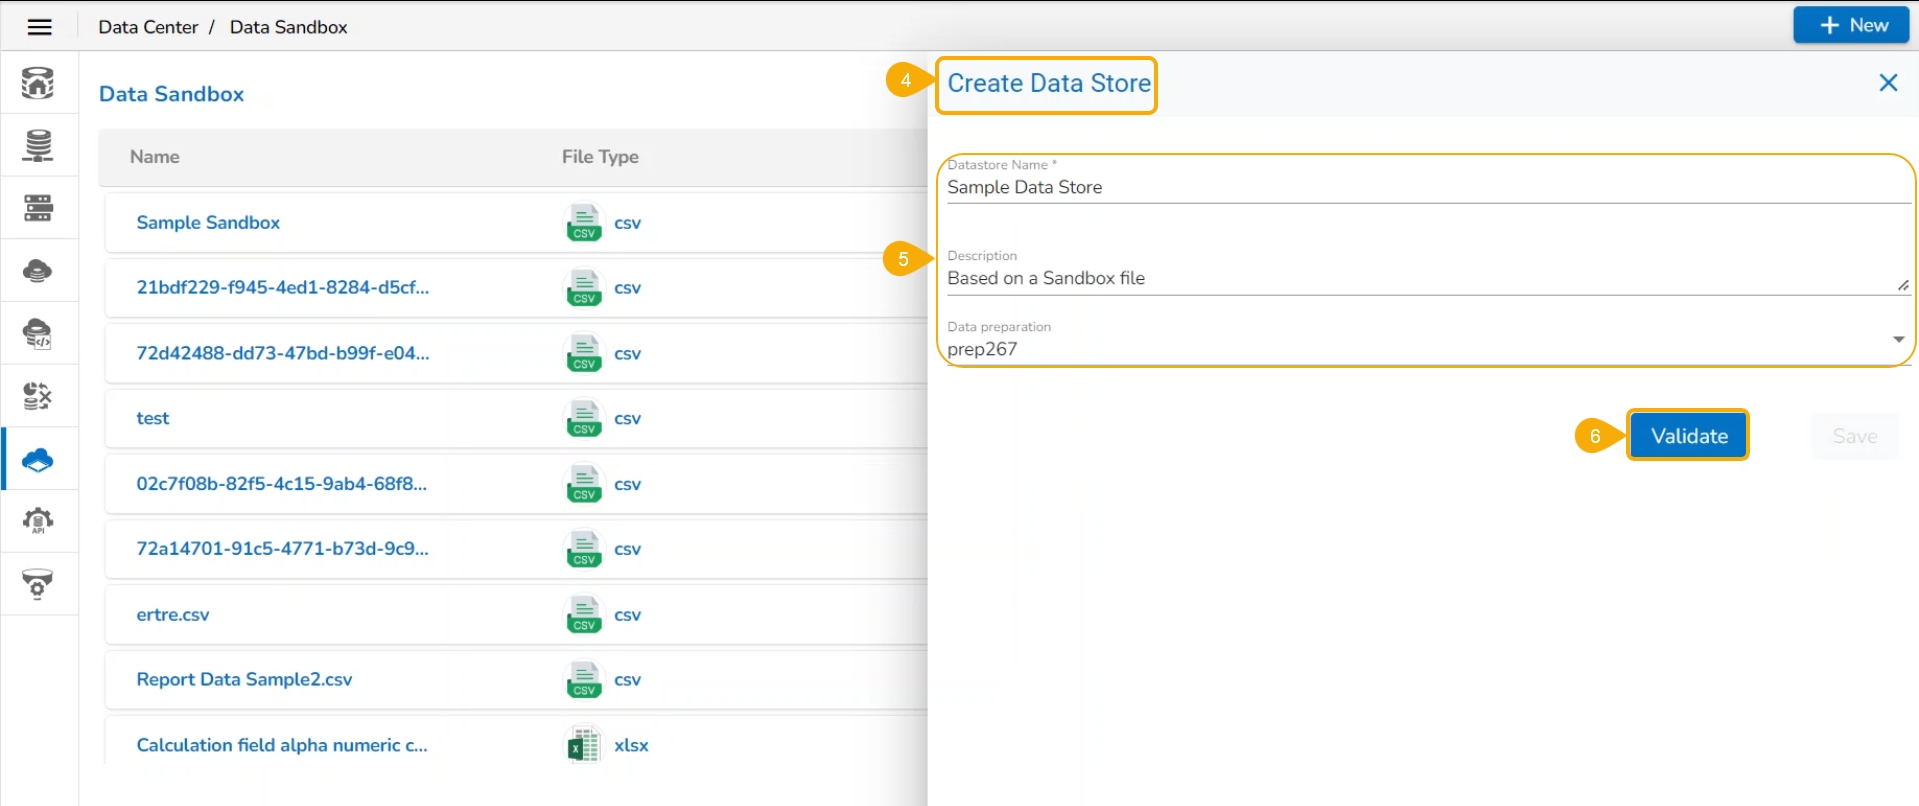
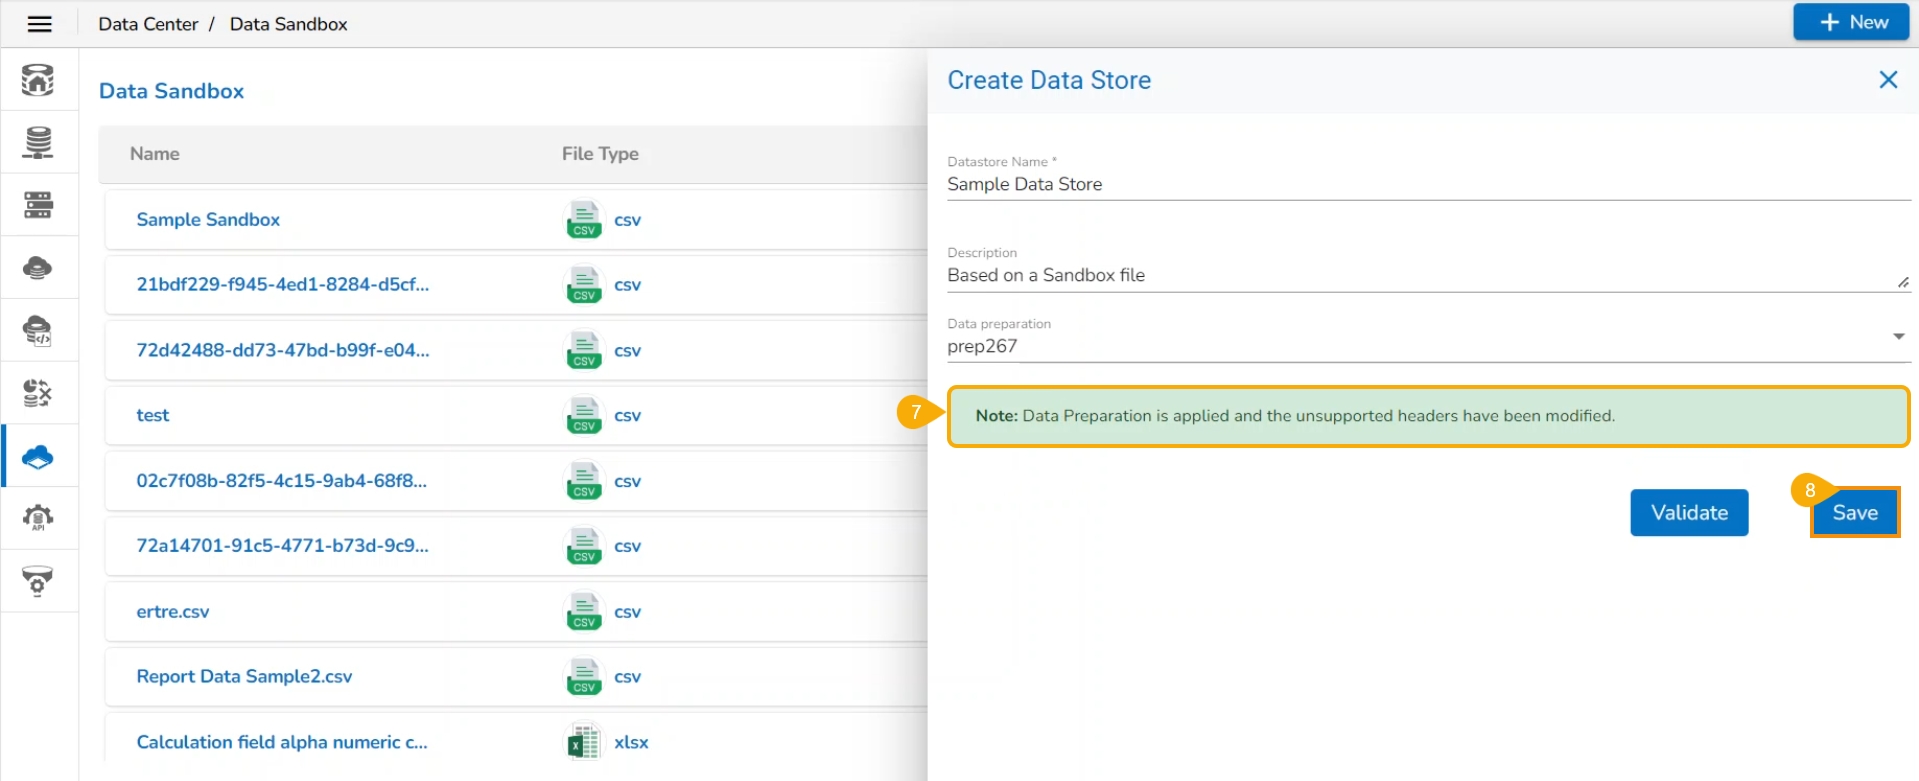
The Create Data Store page appears.
Provide the following information:
Provide a name for the Datastore under the Datastore Name field.
Describe the Data Store.
Select preparations from the Data Preparation drop-down if the sandbox has any preparations (This field appears only when the selected Sandbox file contains at least one saved Data Preparation).
Click the Validation option.
A notification ensures the application of data preparation and modification of the unsupported headers.
Click the Save option.
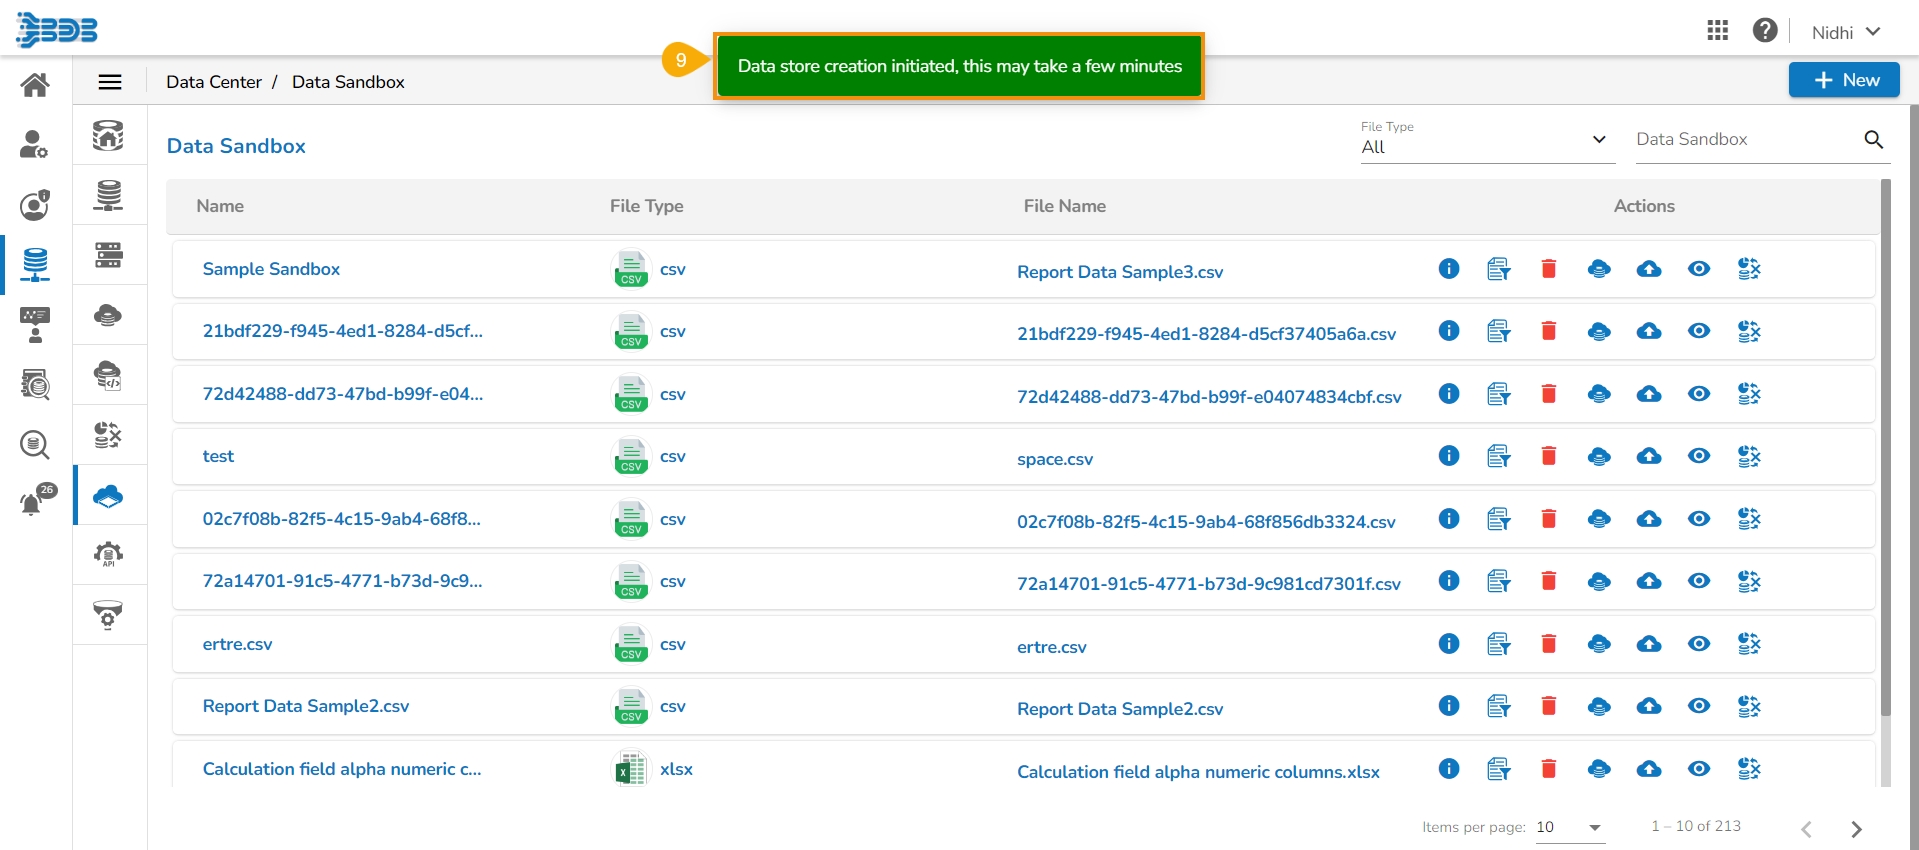
A notification appears and states that the Data Store creation is initiated and may take a few minutes to complete the process.
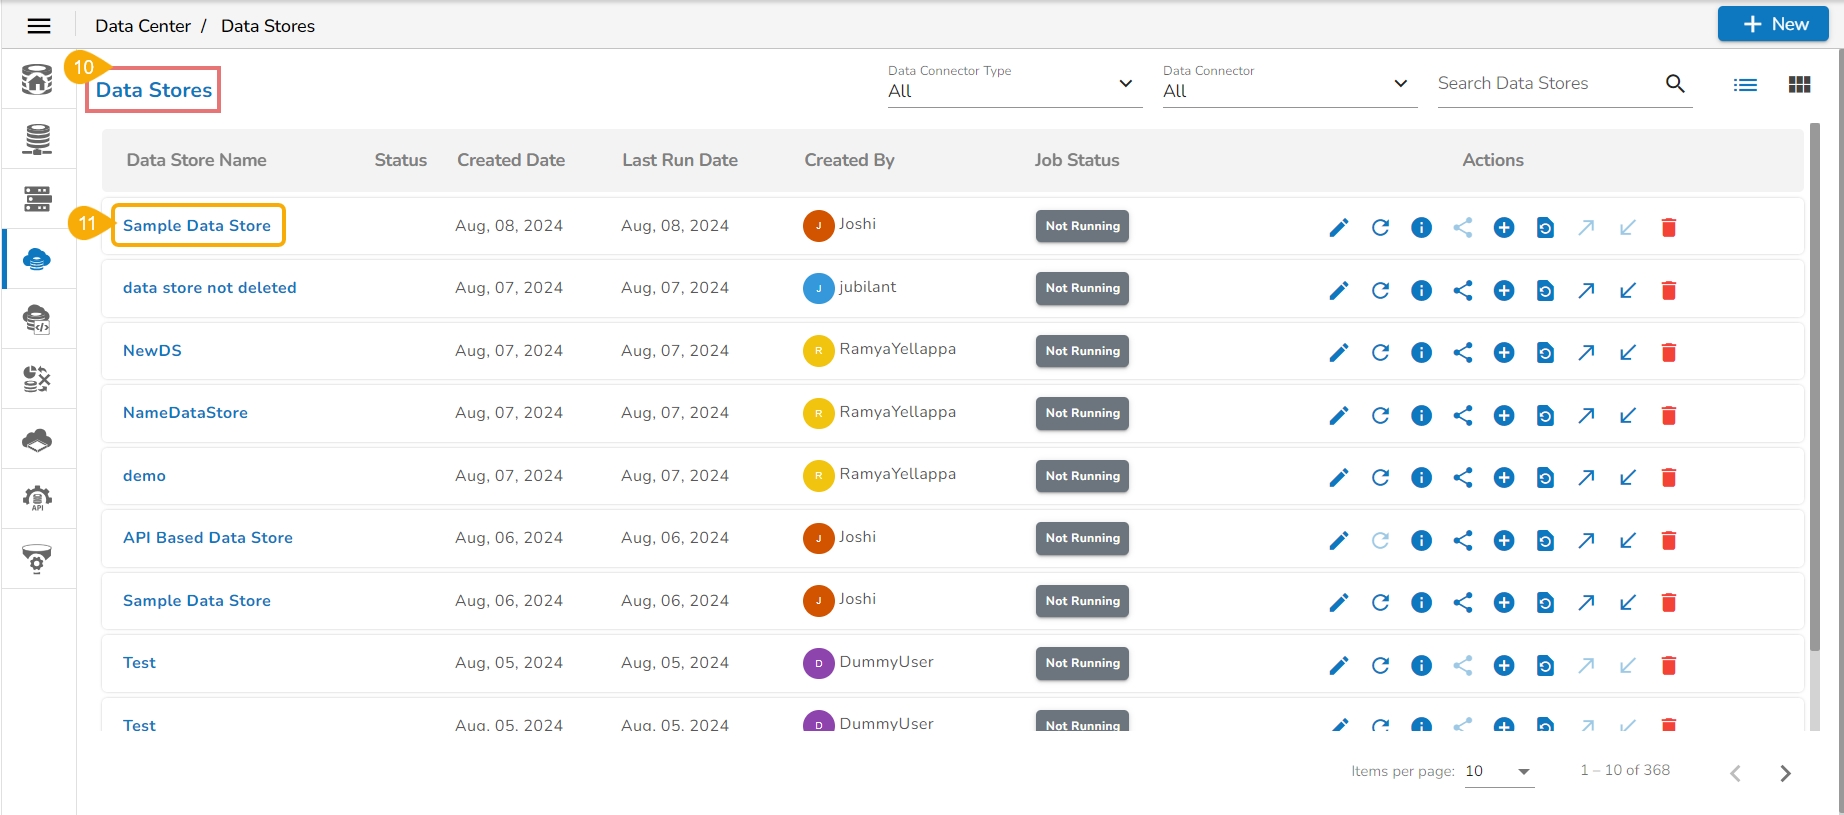
Navigate to the Data Store list page.
The newly created Data Store gets added at the top of the displayed list.
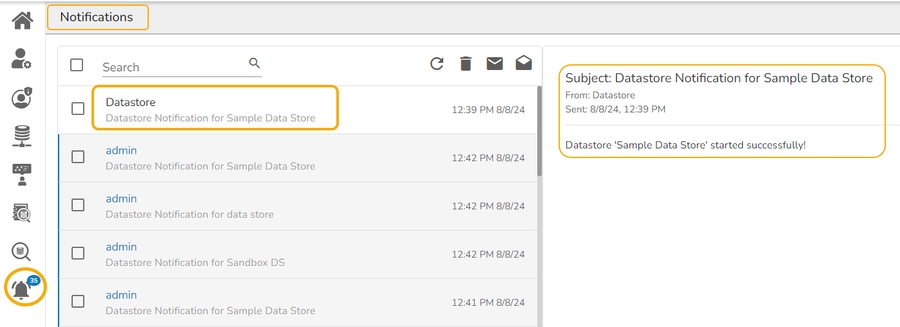
Please Note: The user can check the Notifications options provided on the Platform homepage to confirm data load into the recently created Datastore.
This section explains the various options provided for a Data Sandbox file on the Data Sandbox List page.
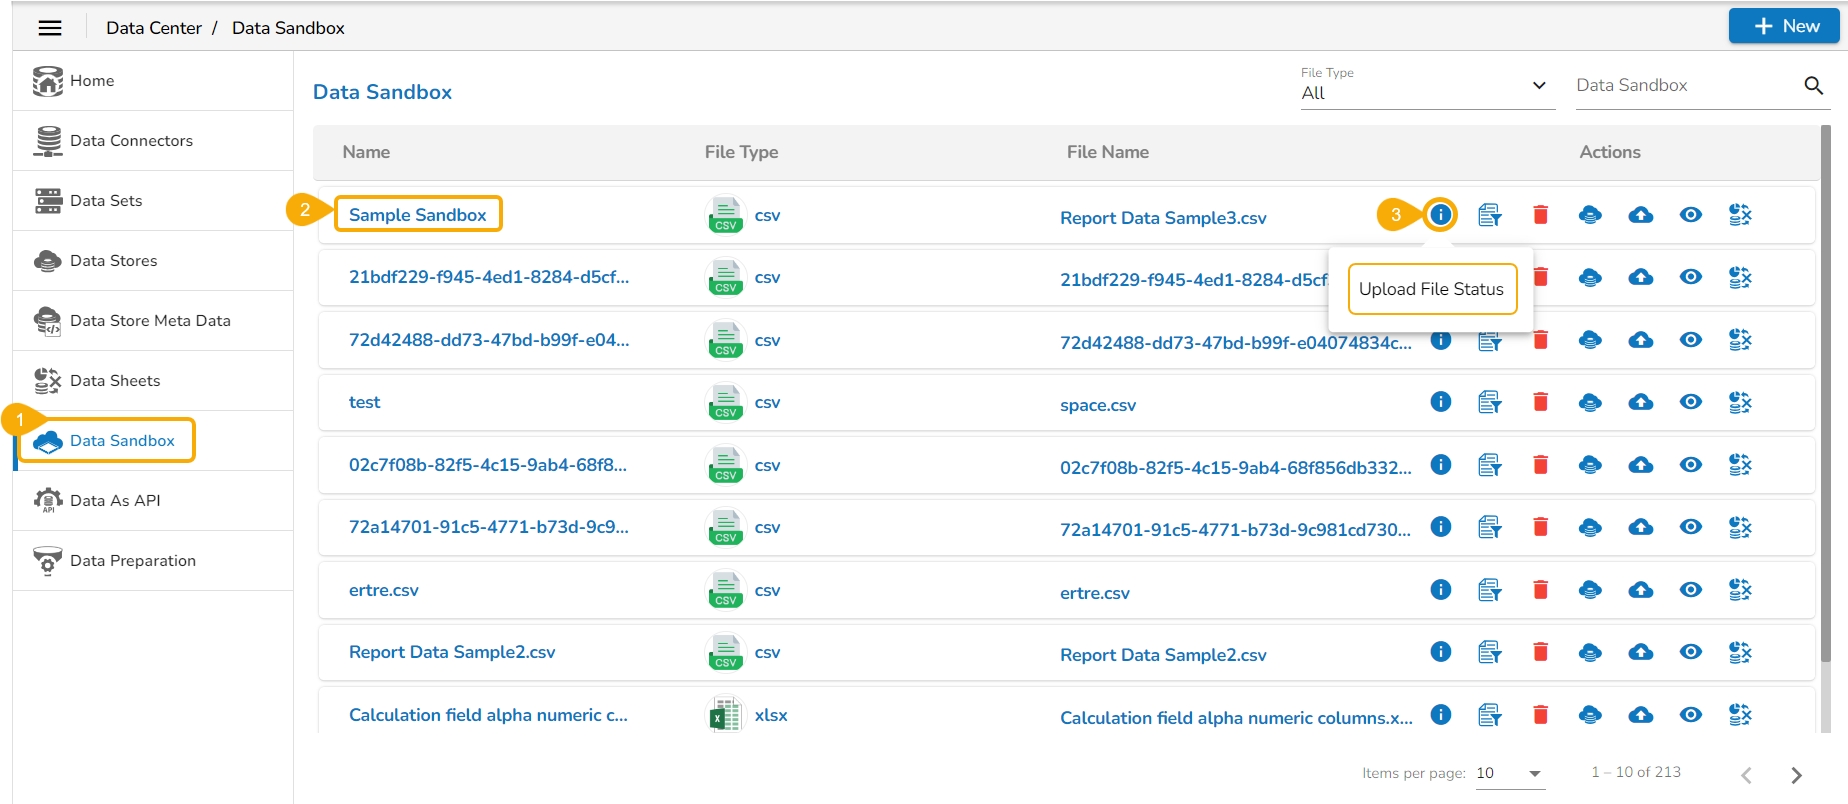
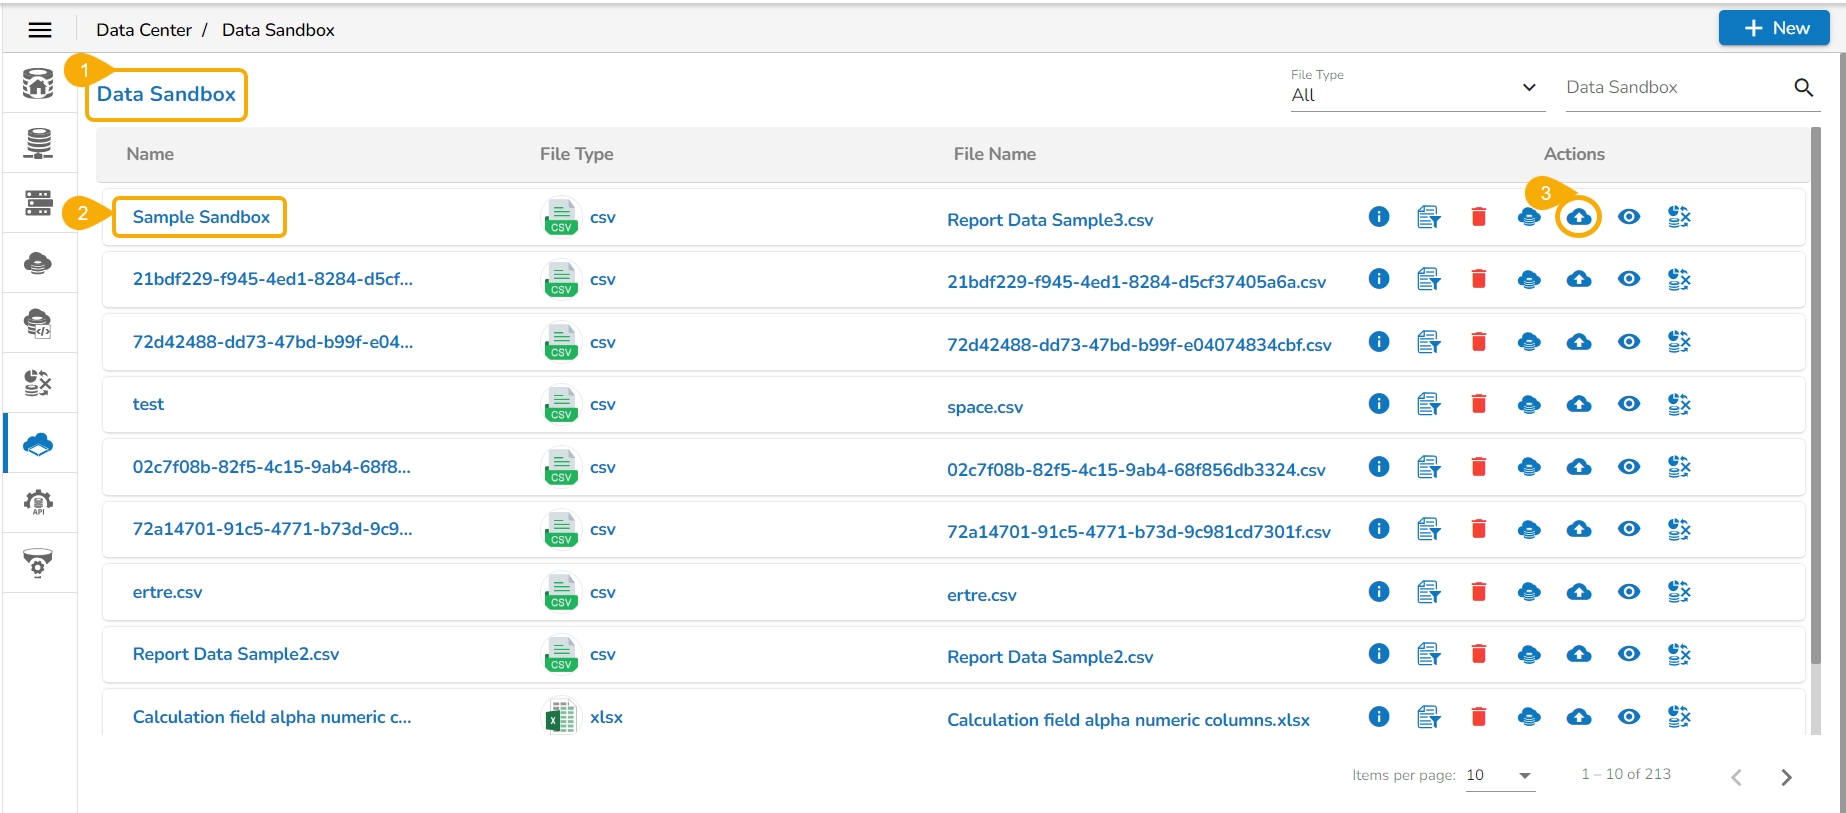
Navigate to the Data Sandbox list page.
Select a Data Sandbox.
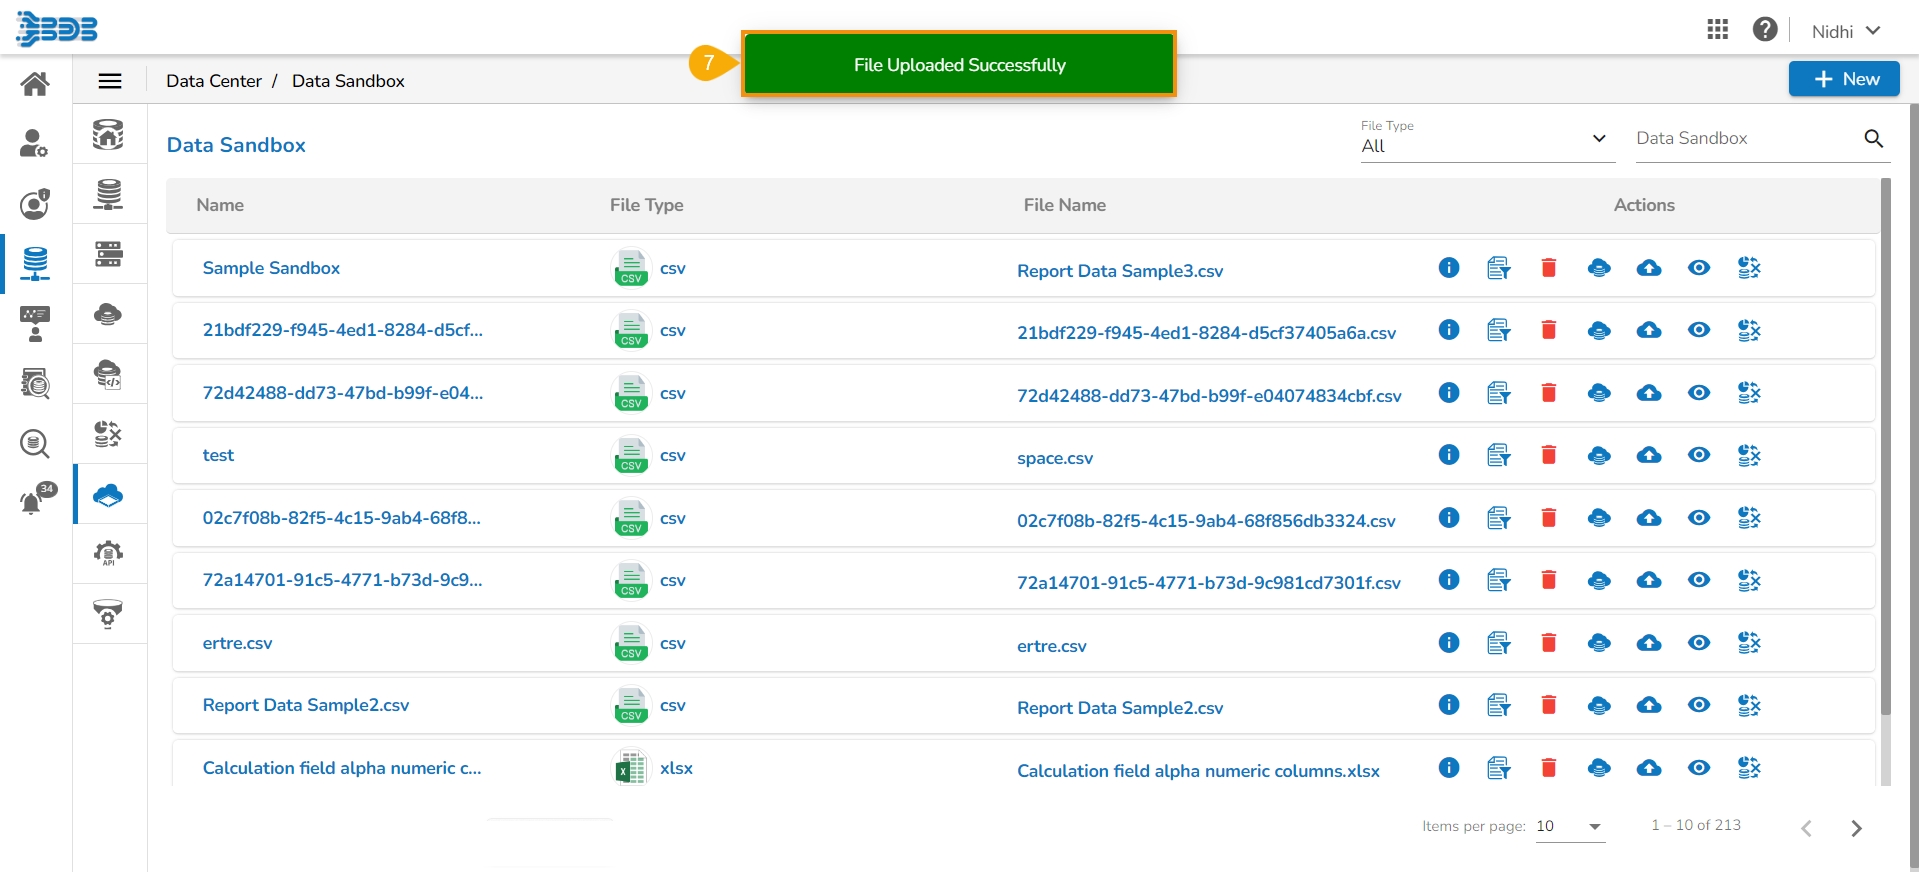
Click the Upload File Status icon for a Data Sandbox.
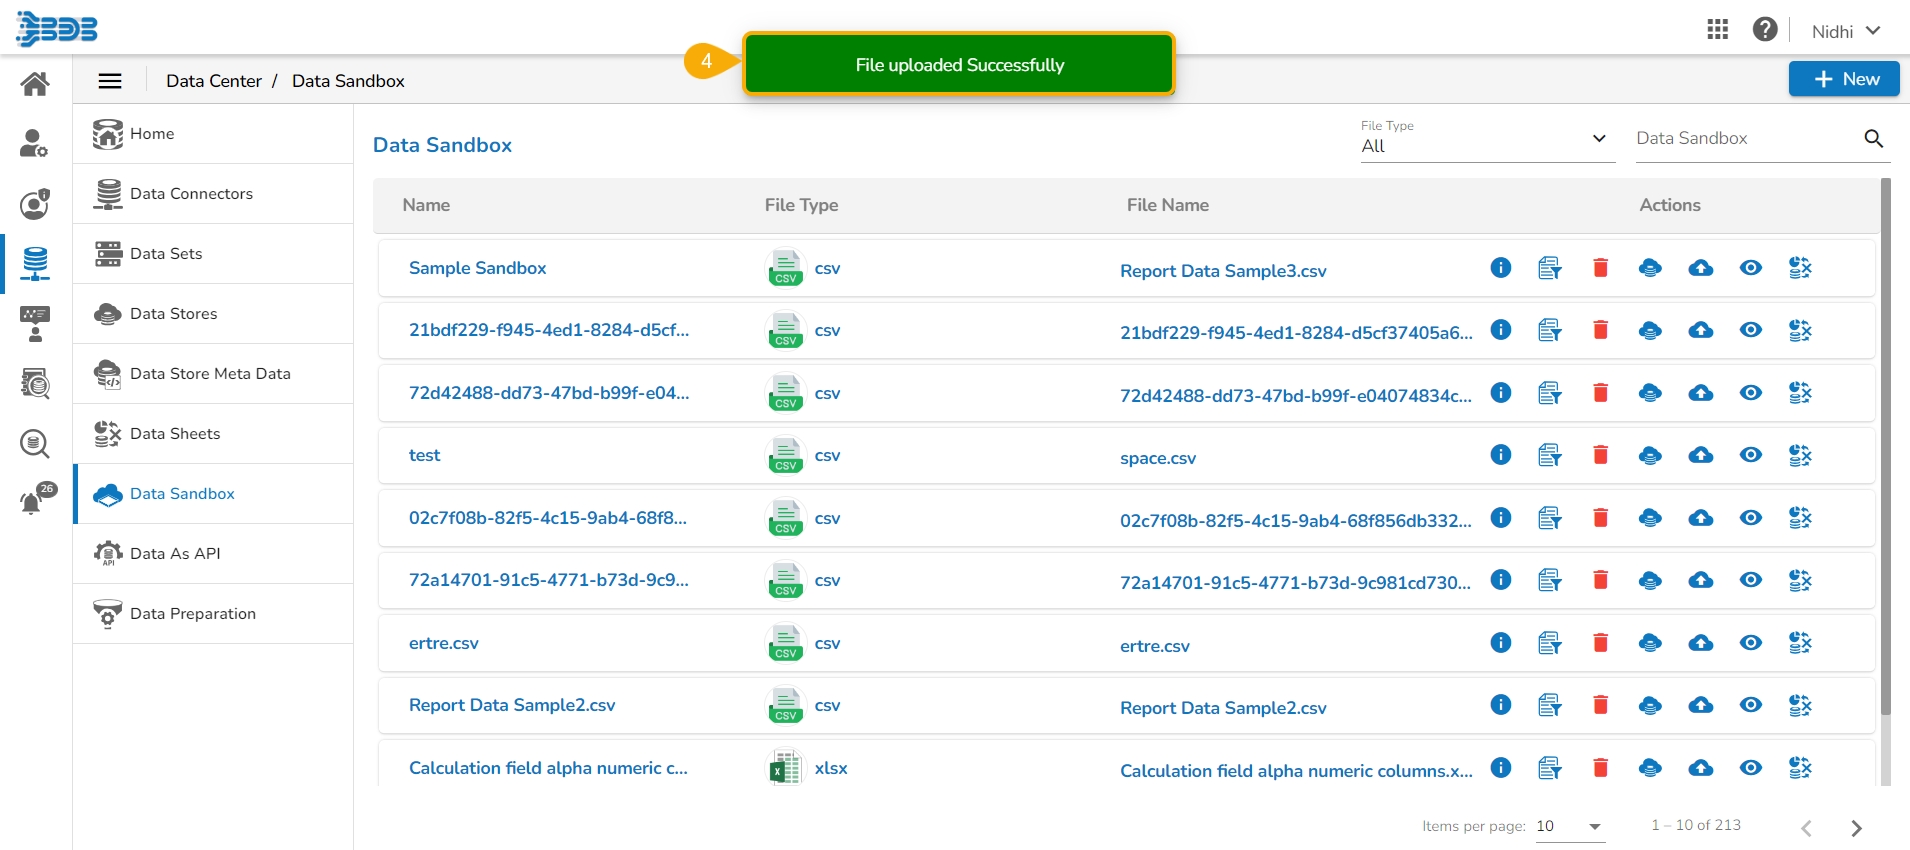
A success message appears, and the Data Sandbox gets uploaded to the DS Lab module.
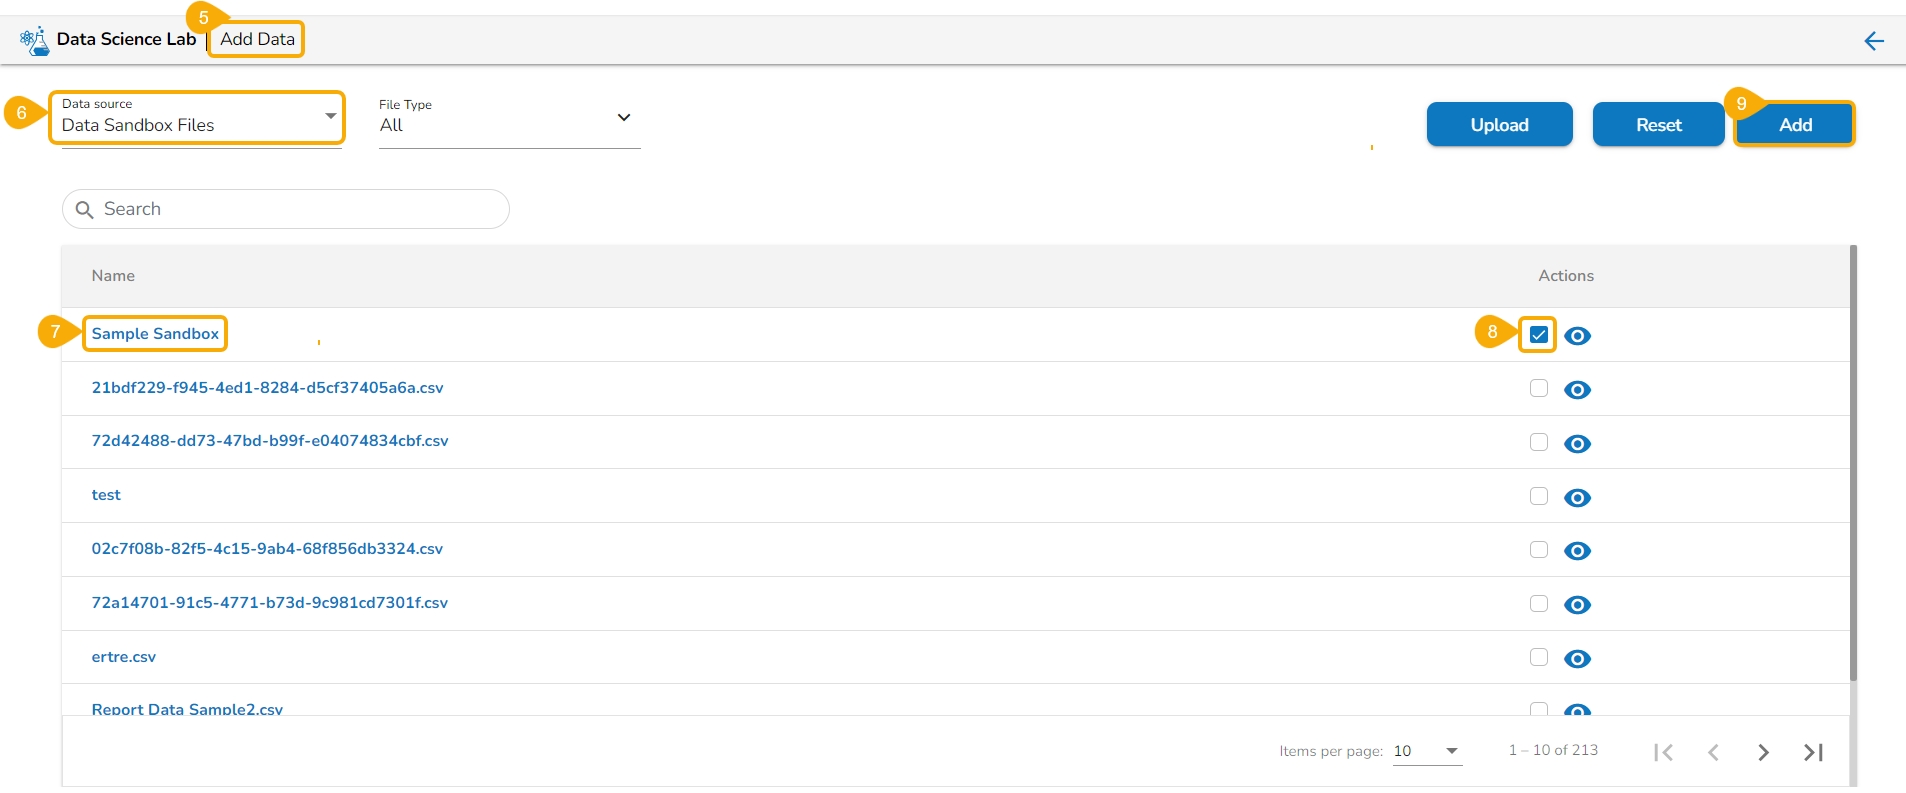
Navigate to the Add Dataset page for a Project using the Data Science Lab module.
Select the Data Sandbox option as a Data Source.
You can see the uploaded Data Sandbox listing at the top of the displayed Data Sandbox list.
Select the Sandbox file by using the Checkbox provided next to it.
Click the Add option to add it to that DS Lab Project.
Please Note:
The Add option appears on the Add Datasets page only after selecting a Data source (For the given example, it is a Data Sandbox).
The user can use the Search bar to search for a specific Data source (For the given example, it will be a Data Sandbox).
The user can reupload the Sandbox file if some file has not got uploaded while creating the Sandbox entry.
Navigate to the Data Sandbox List page.
Select a Data Sandbox for which it is required to re-upload the file.
Click the Reupload icon.
The Data Sandbox form reopens for the file reupload.
The user can choose the file again by using the Choose File option.
Click the Reupload option.
The file gets reuploaded, and the same gets notified with a notification message.
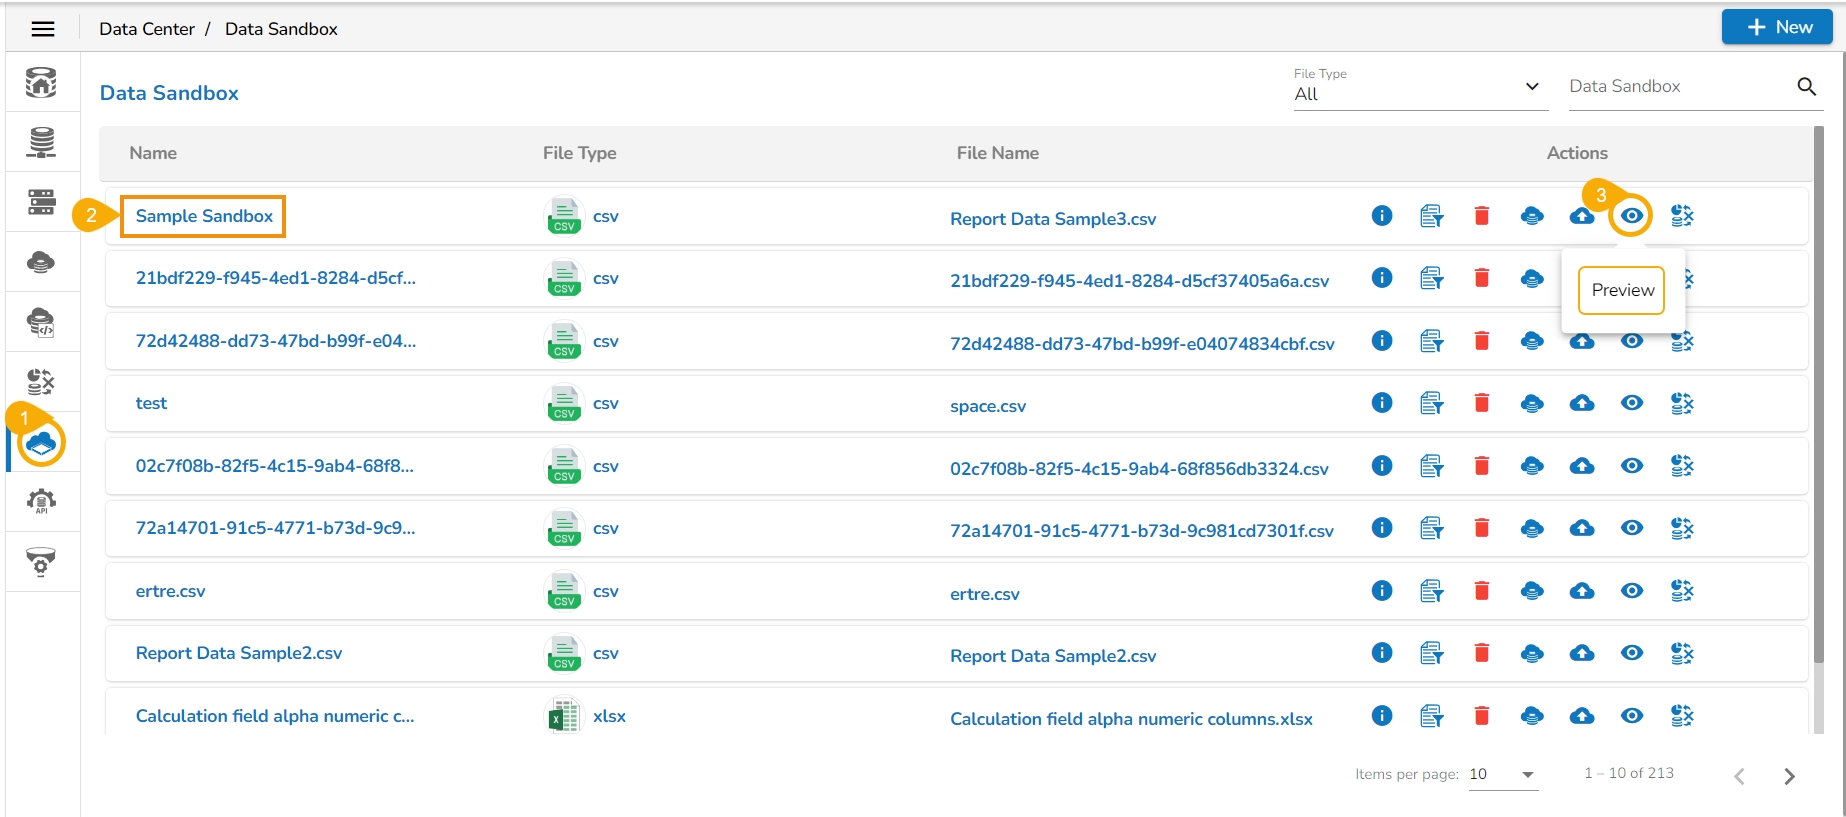
This page displays steps to Preview the sandbox data.
Navigate to the Data Sandbox list page.
Select a Data Sandbox file.
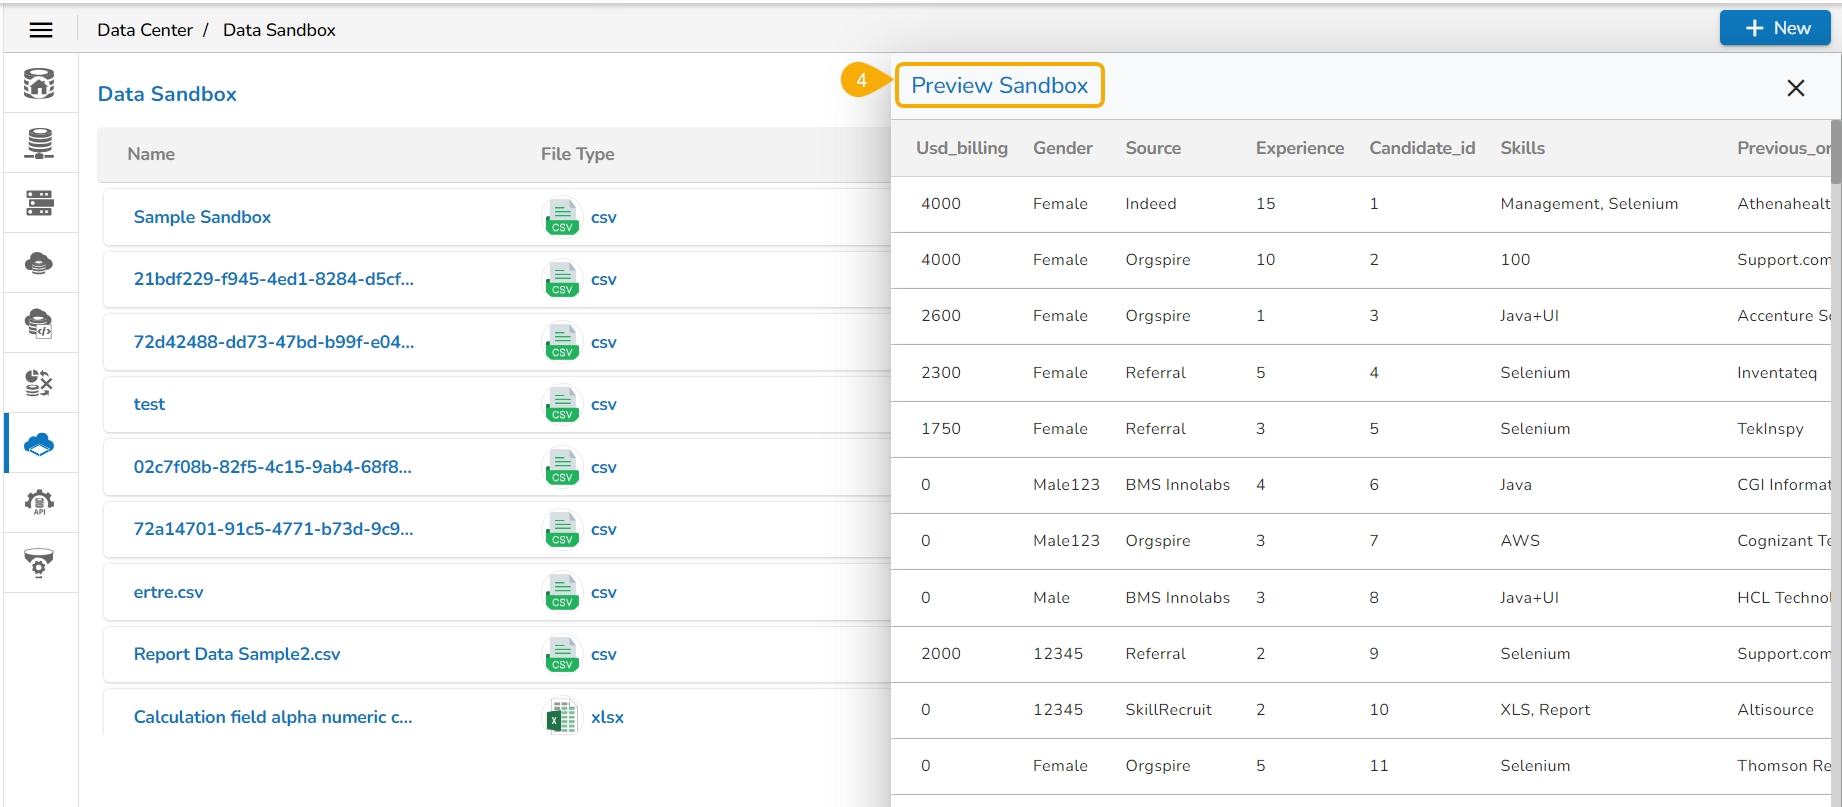
Click the Preview icon.
The Preview Sandbox page opens displaying the data preview of the sandbox file.

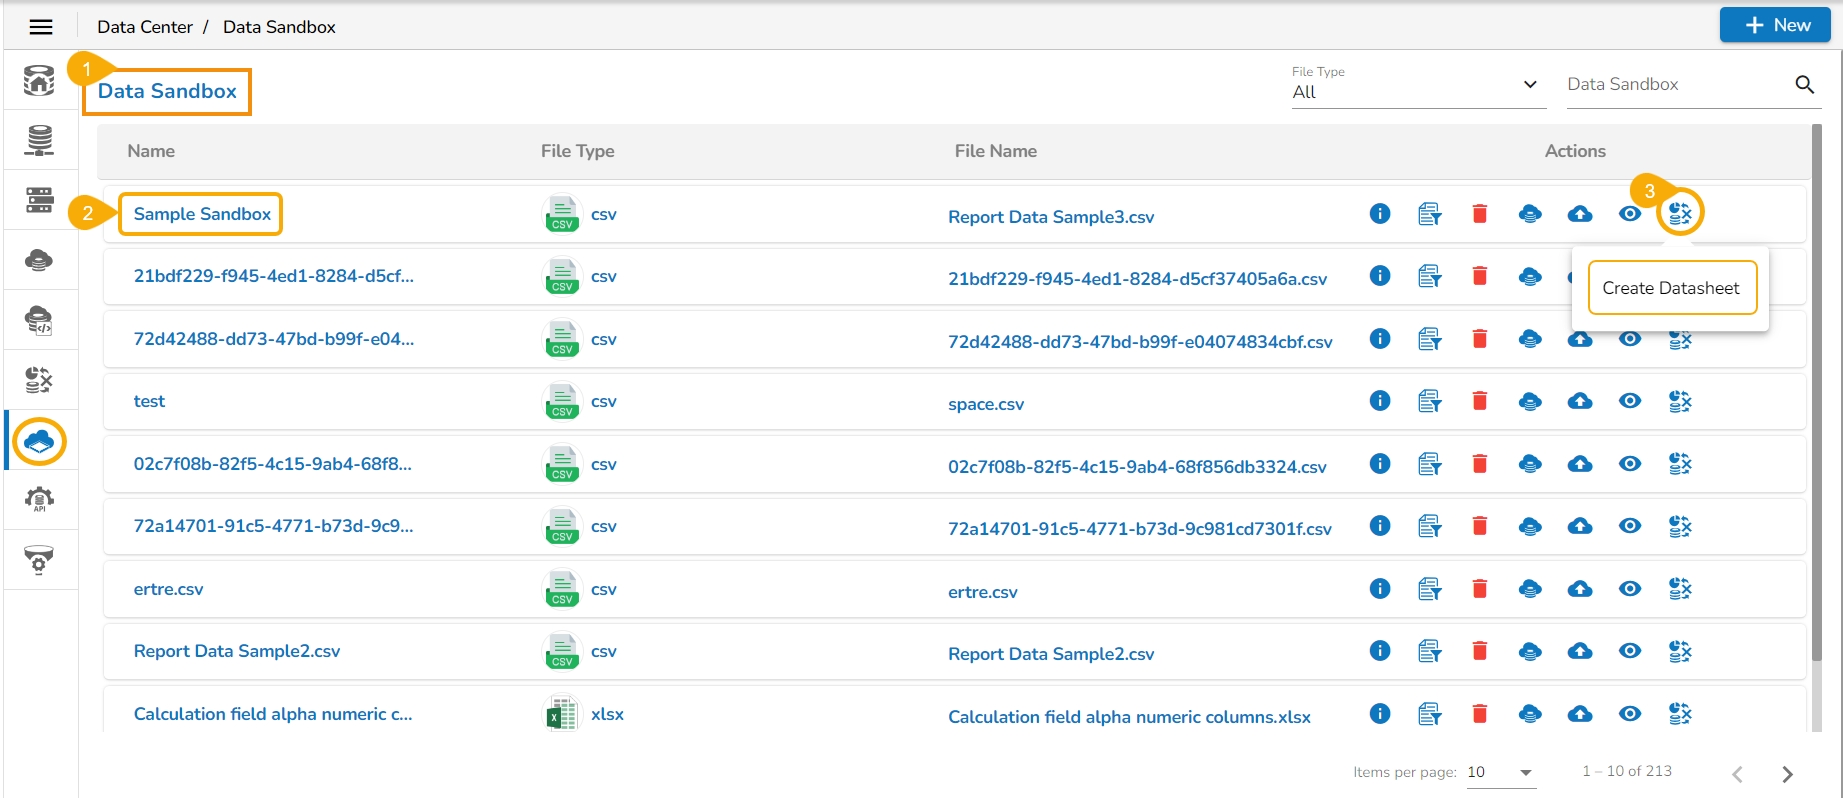
This section describes steps to create a Datasheet based on a Data Sandbox.
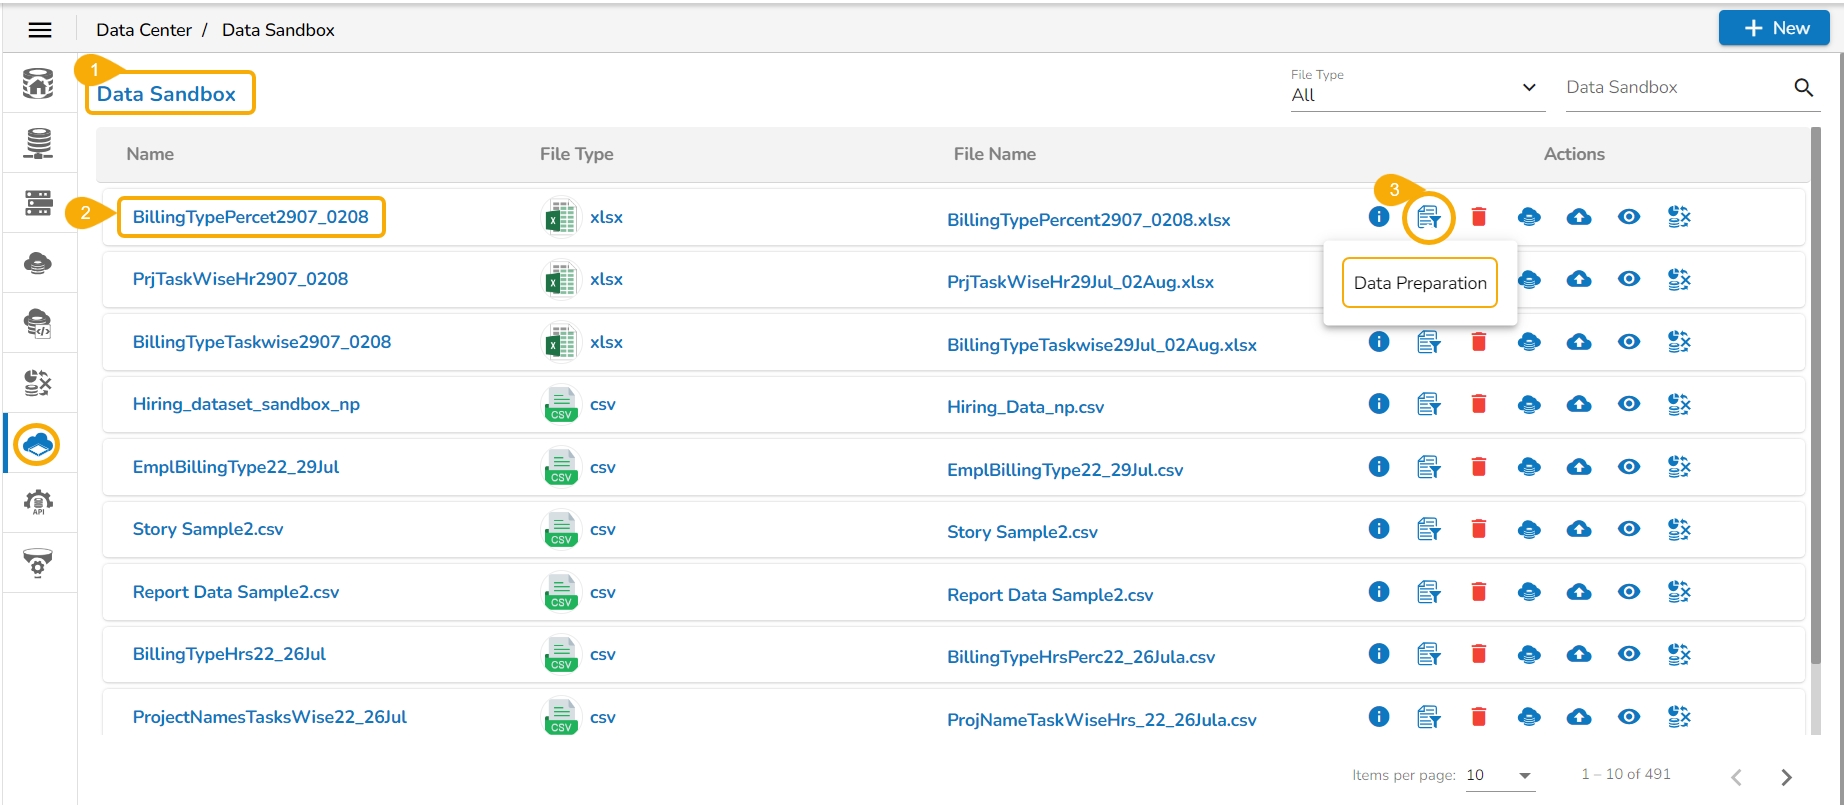
Navigate to the Data Sandbox list page.
Select a Data Sandbox file.
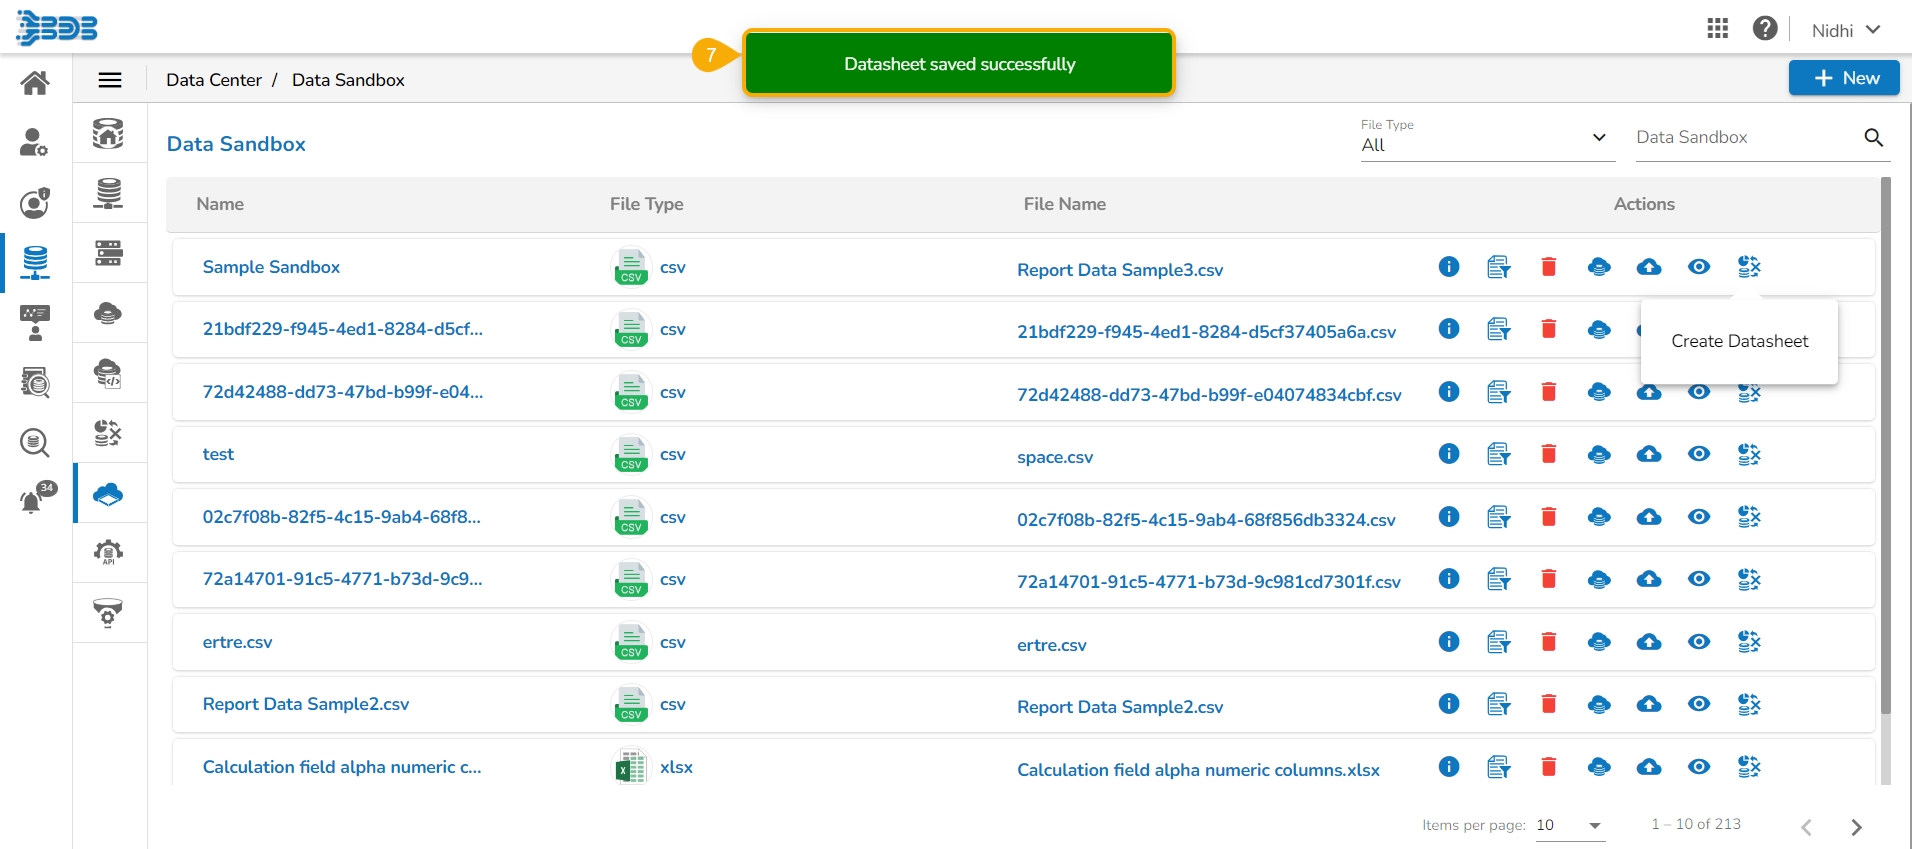
Click the Create Datasheet icon.
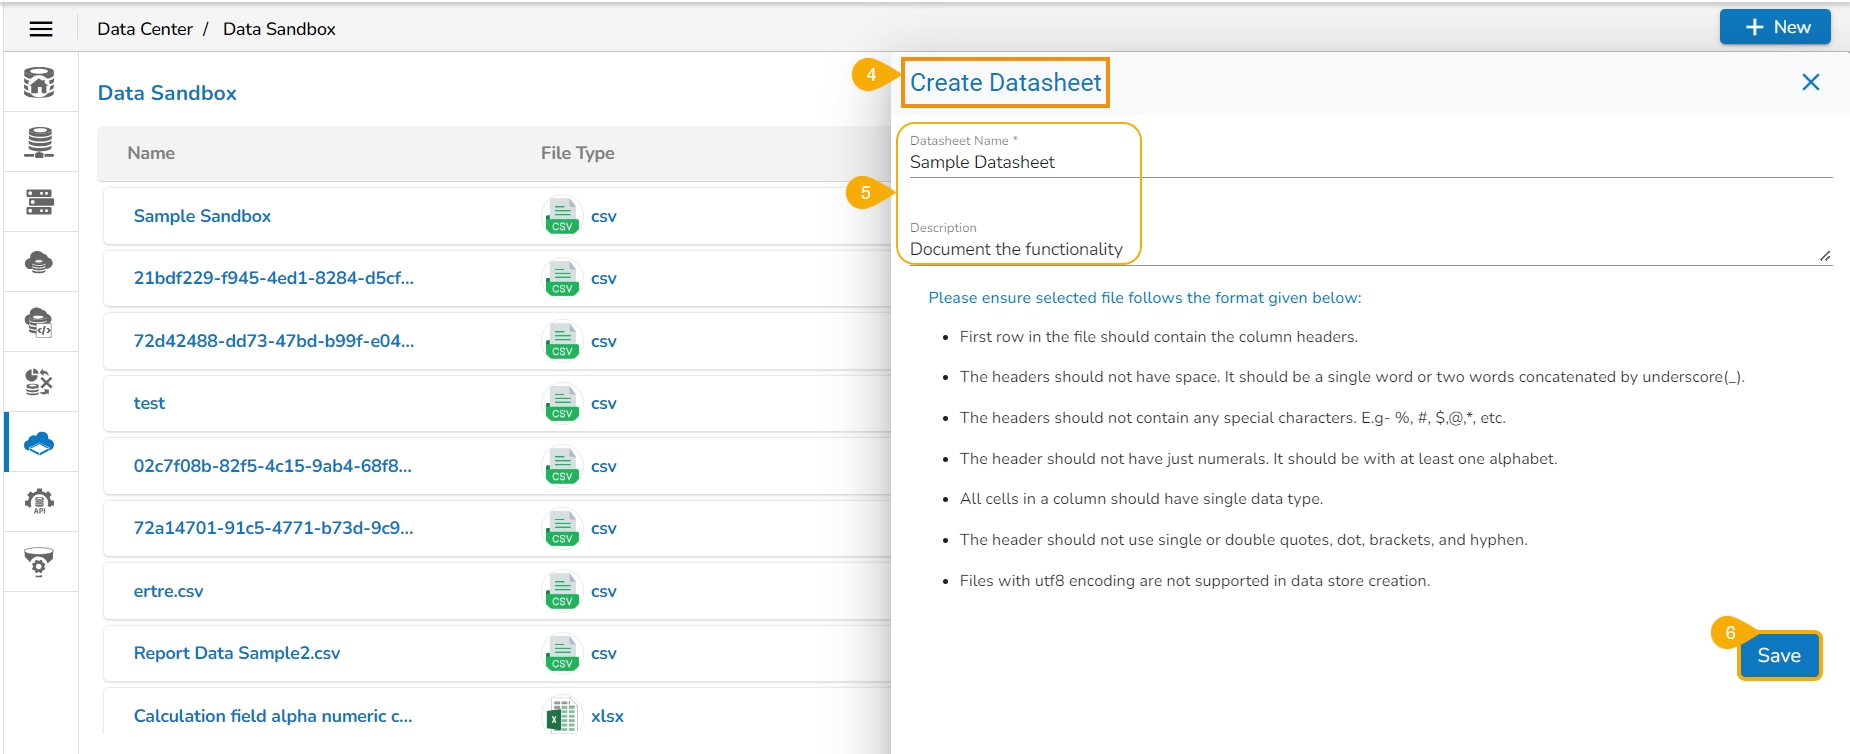
The Create Datasheet page opens.
Provide the following information:
Datasheet Name
Describe the Datasheet (Optional)
Click the Save option.
A notification message ensures the user that the newly created Datasheet is saved.
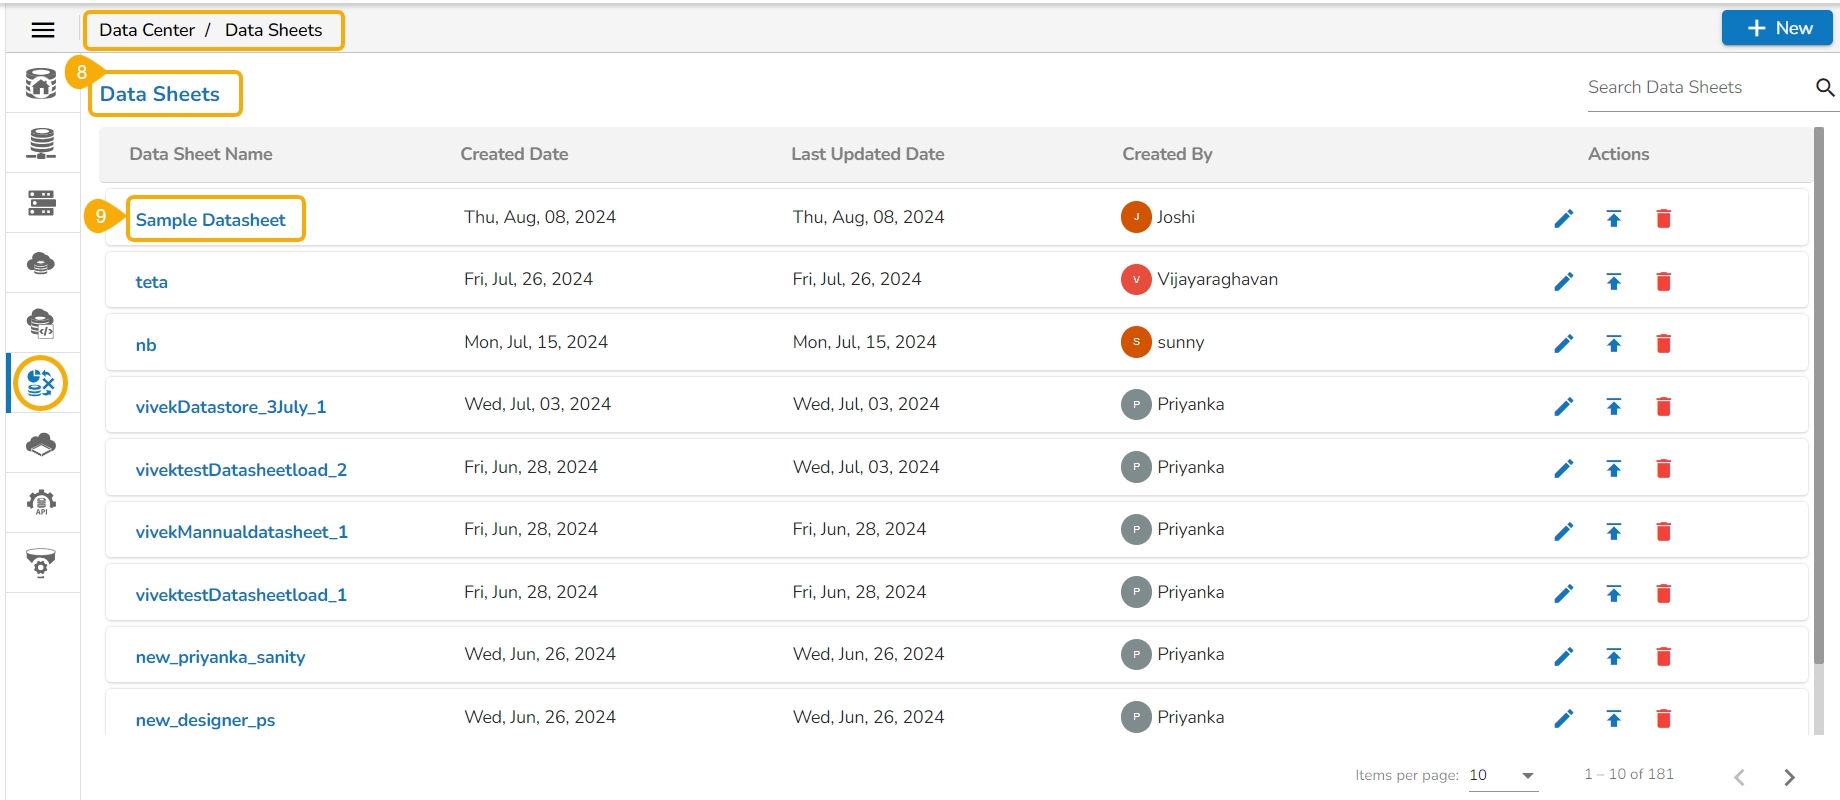
Navigate to the Data Sheet List.
The newly created Data Sheet gets added at the top.

