Loading...
Loading...
Loading...
Loading...
Loading...
Loading...
Loading...
Loading...
Loading...
Loading...
Loading...
There are two kinds of View options are available on the Data Sets list page:
List View
Grid View
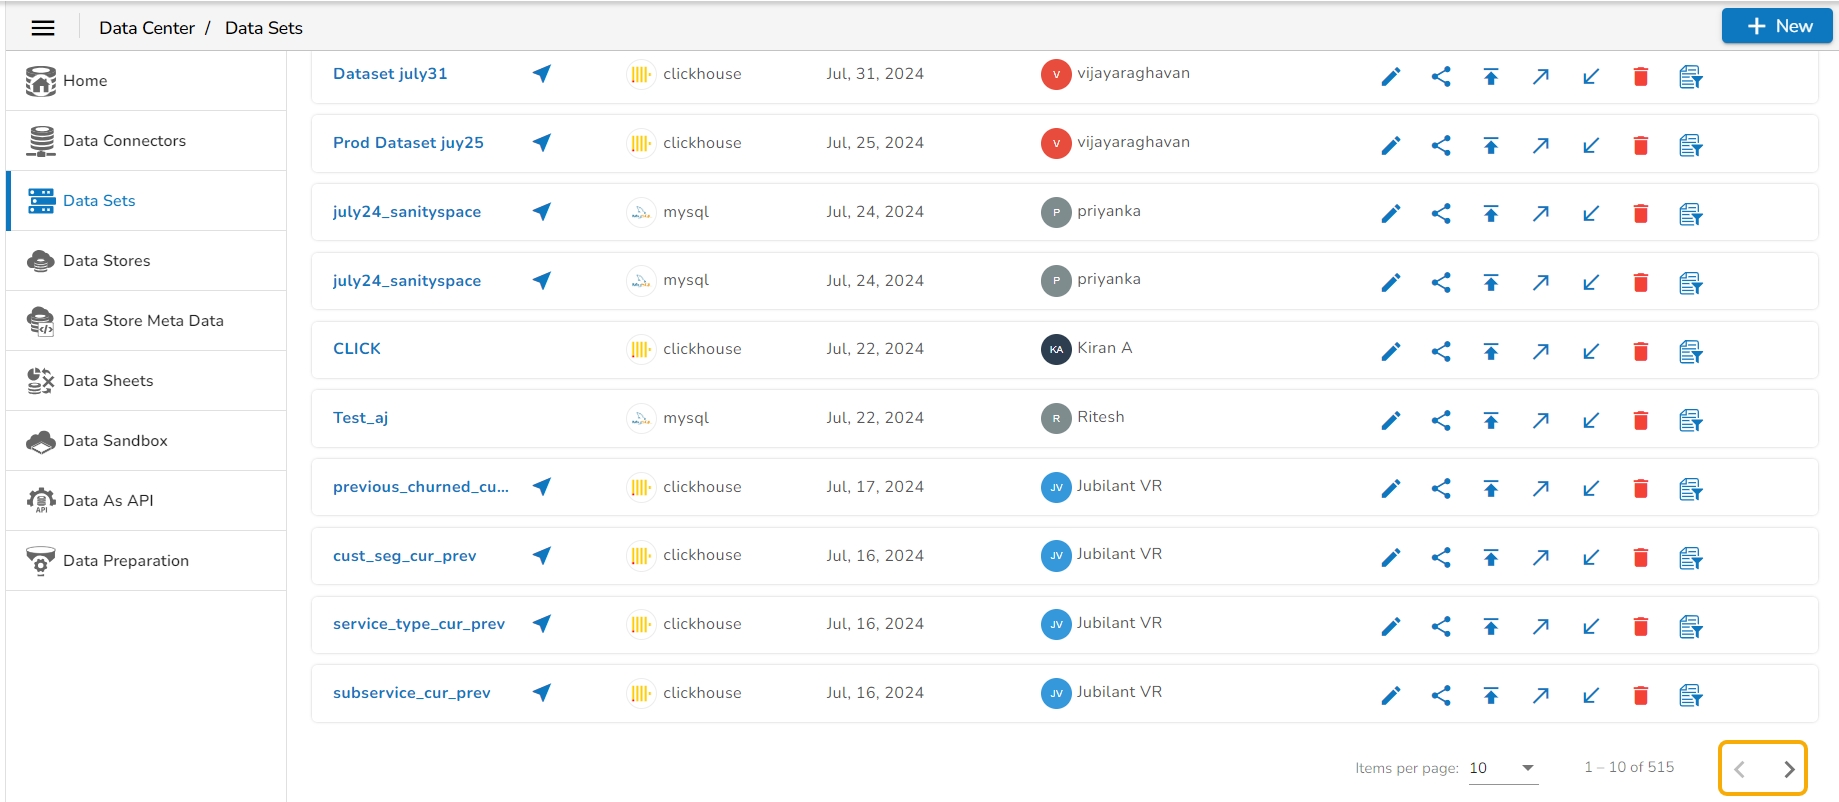
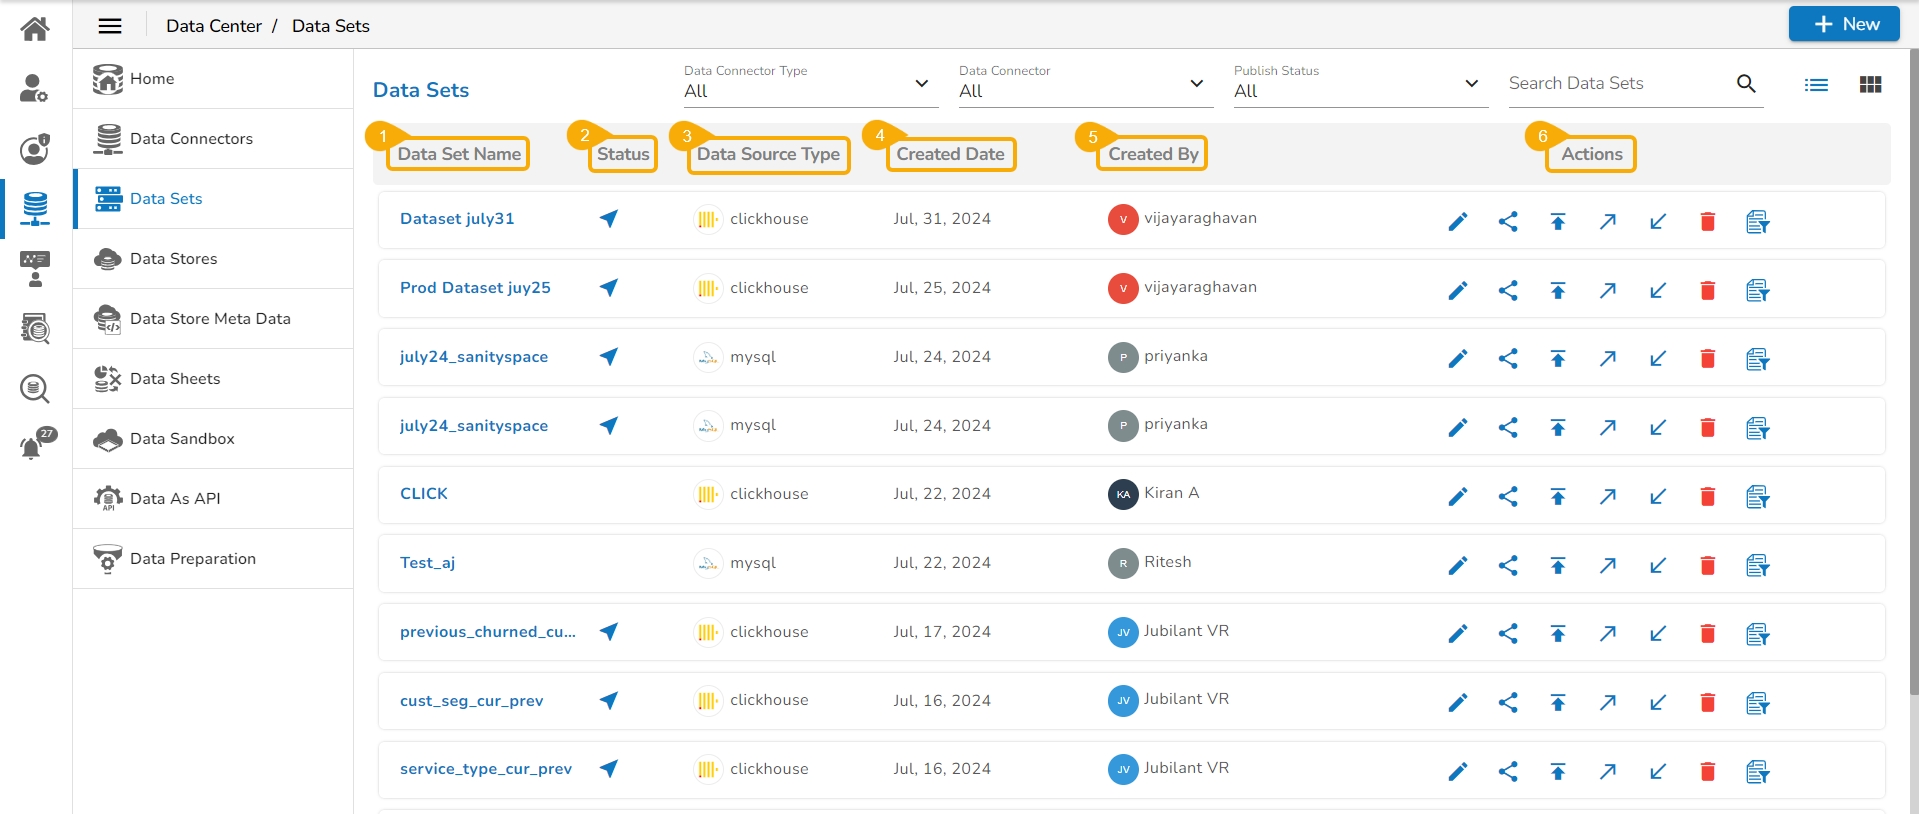
In the list view, five columns contain data set information and action buttons as follows:
Data Set Name
Status
Data source Type
Created Date
Click on the List View icon to view all the Data set details in a list format. It is the default view for the Data Sets list.
Items per page display the number of data sets listed on the page.
The Next and Previous buttons are provided to go to the next and previous page respectively.
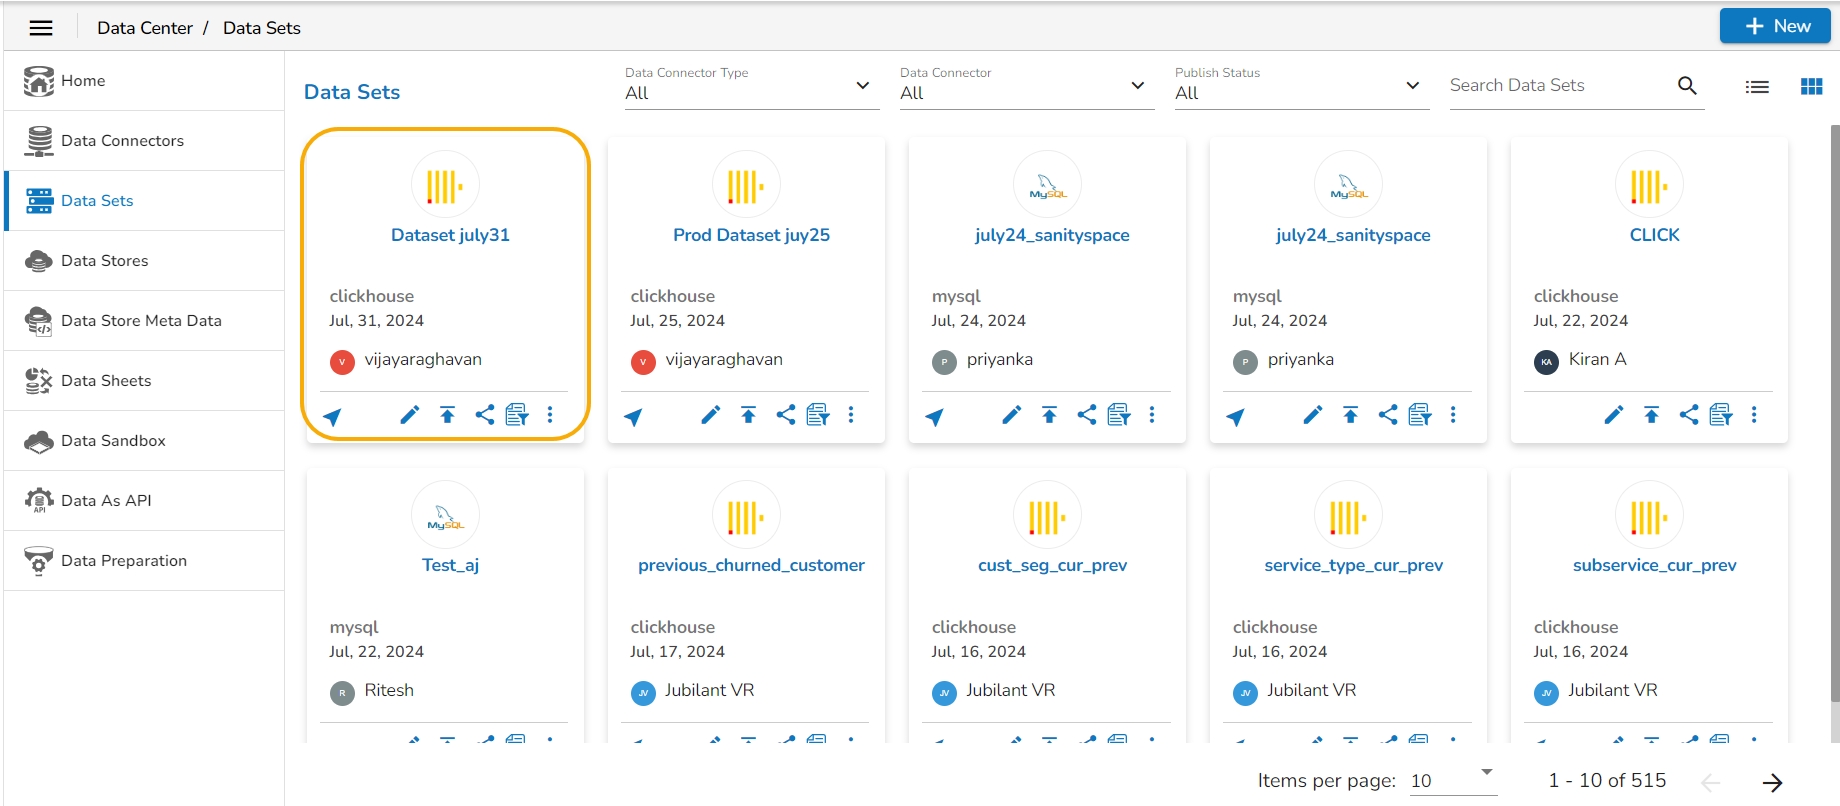
Click on the Card view icon on the top right corner, once the option is selected then the icon color will change to blue. The Card View will contain the following data set information:
Name
Created Date
Last run Date
Created User
The Action items mentioned under the Cards are:
View/ Edit
Publish
Share
Data Prep
This page explains the Reset filter functionality for the Data Sets List page.
The Platform allows users to retain their applied filters on the Data Set List page, eliminating the need to reapply filters when returning to the list. This functionality improves efficiency by streamlining dataset searches and enhancing user experience.
Users can save specific parameters such as Connector Type, Connector, or Publish Status, ensuring quick access to their previously filtered datasets.
Even after navigating away to other parts of the module or editing a dataset, users will be seamlessly redirected back to the filtered Data Set List page, making it easier to continue their work without losing context. E.g., the following image displays the application of the Edit option on the same Data Set as the Update page is displayed for the Data Set.
Click the Reset Filter icon to clear the applied filters.
The selected filters will be cleaned and the entire Data Set List will be displayed.
Created By
Actions
Visualize
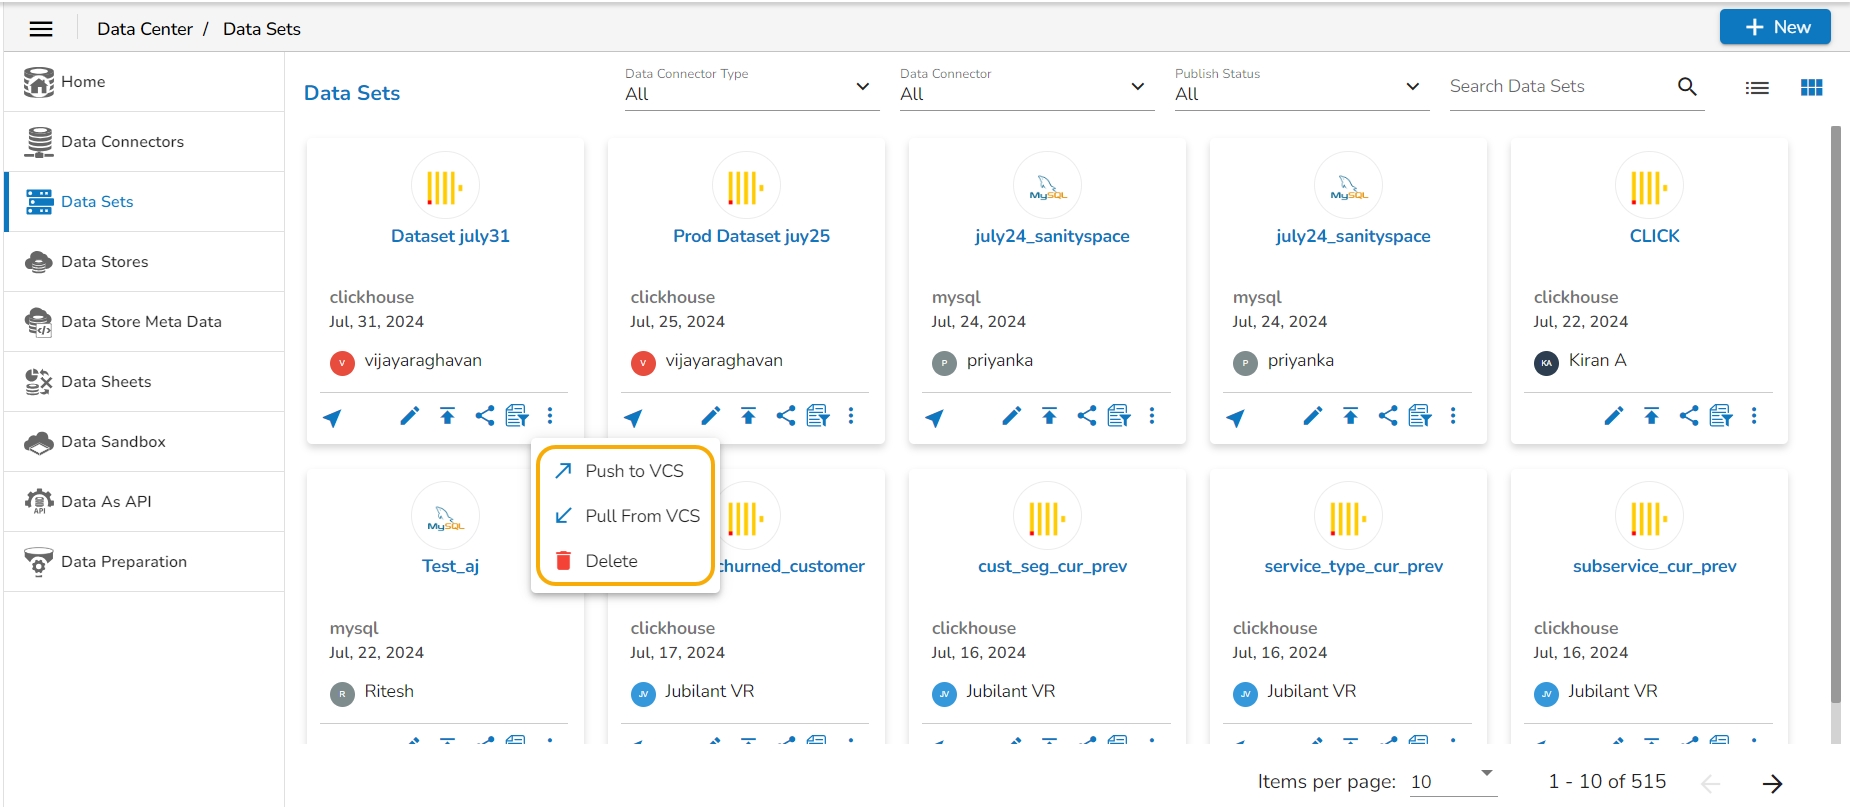
More Options
Push to VCS
Pull From VCS
Delete


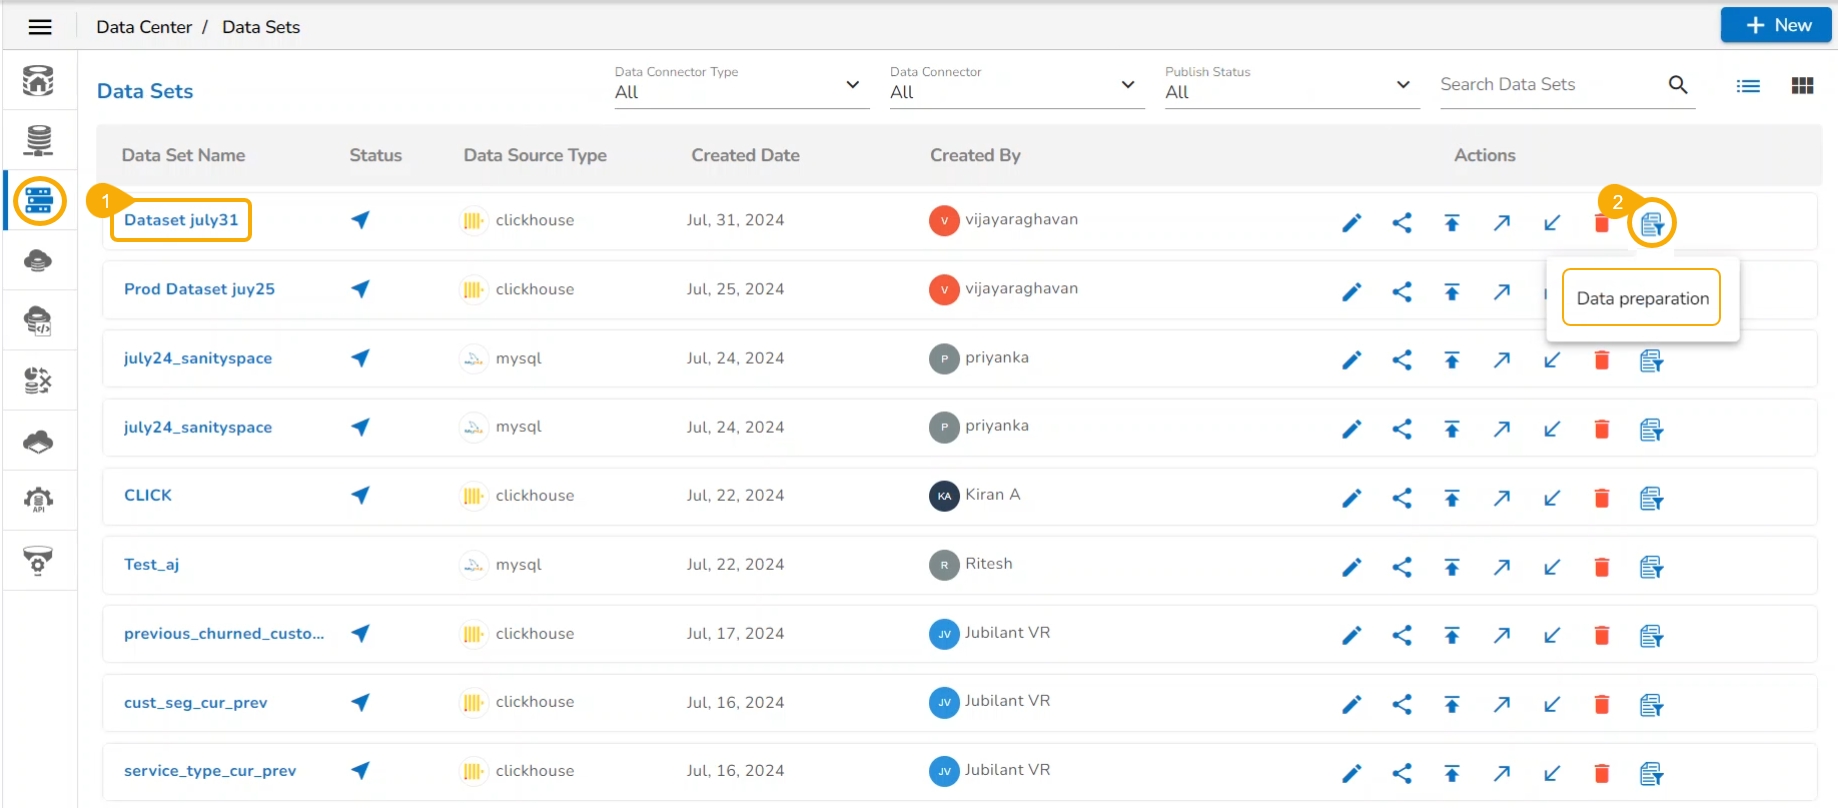
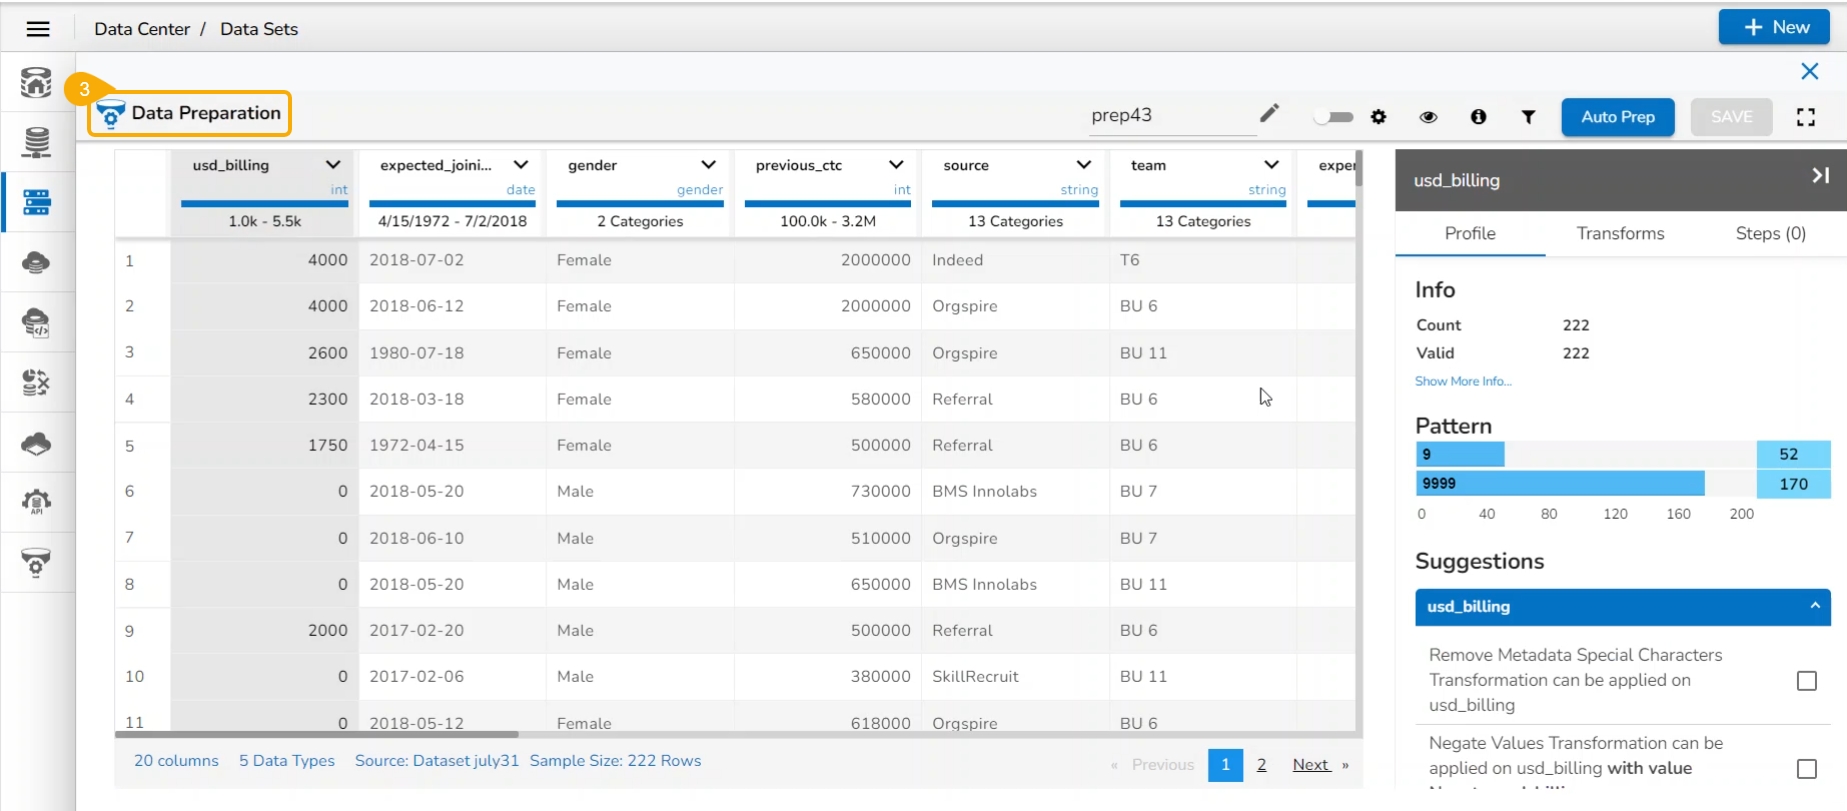
This page displays steps to access Data Preparation interface using the Data Set list.
Check out the illustration describing the steps to access the Data Preparation interface from the Data Set list page.
Select a Data Set from the Data Set list.
Click the Data Preparation icon for that Data Set.
Data from the selected Data Set gets displayed in the Data Preparation framework.
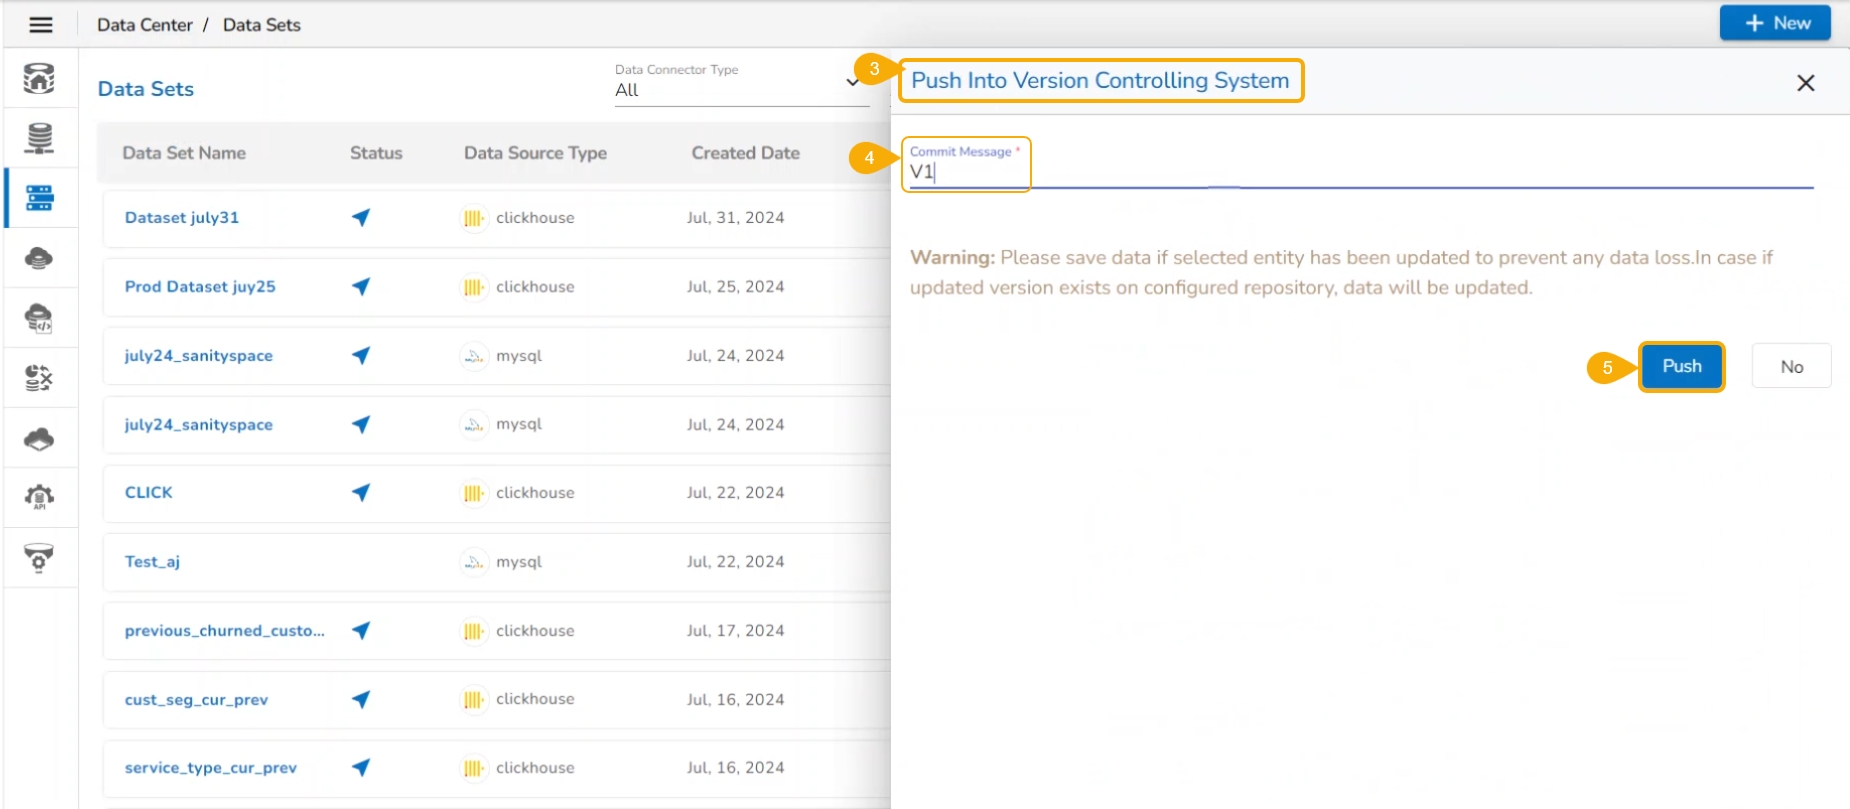
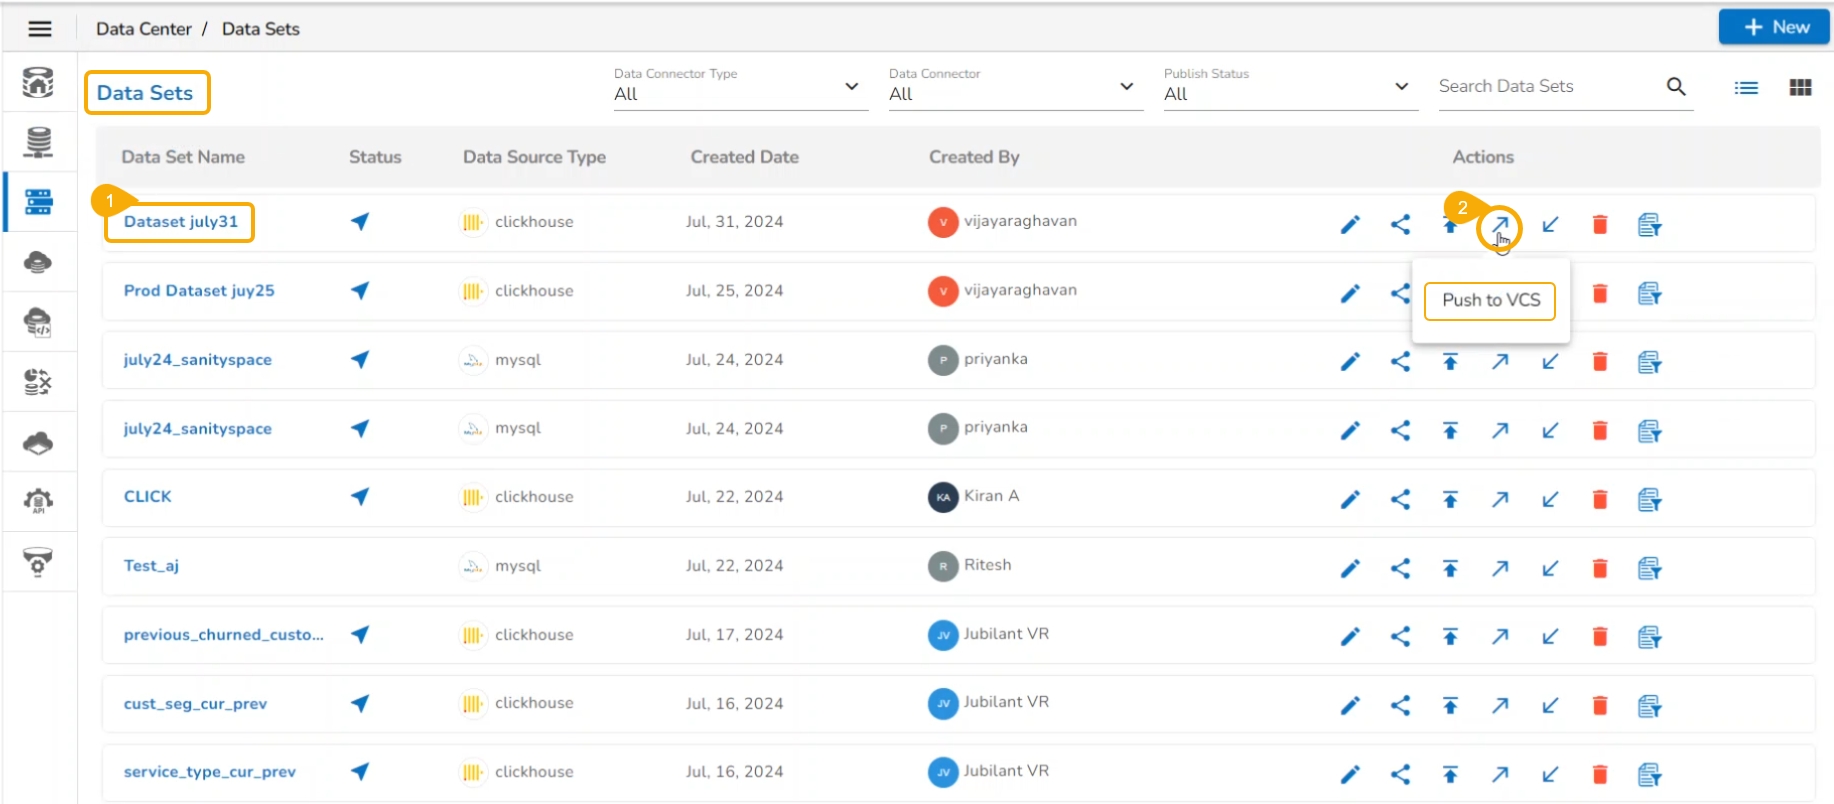
This page focuses on the steps to Push a version to VCS.
This is the mechanism for versioning the Data set and storing the latest versions in Git. While pulling the Data set user can see the committed message of each version, so the user will get more info about the committed data set.
Check out the illustration on pushing a Data Set to VCS.
Select a Data Set from the Data Sets
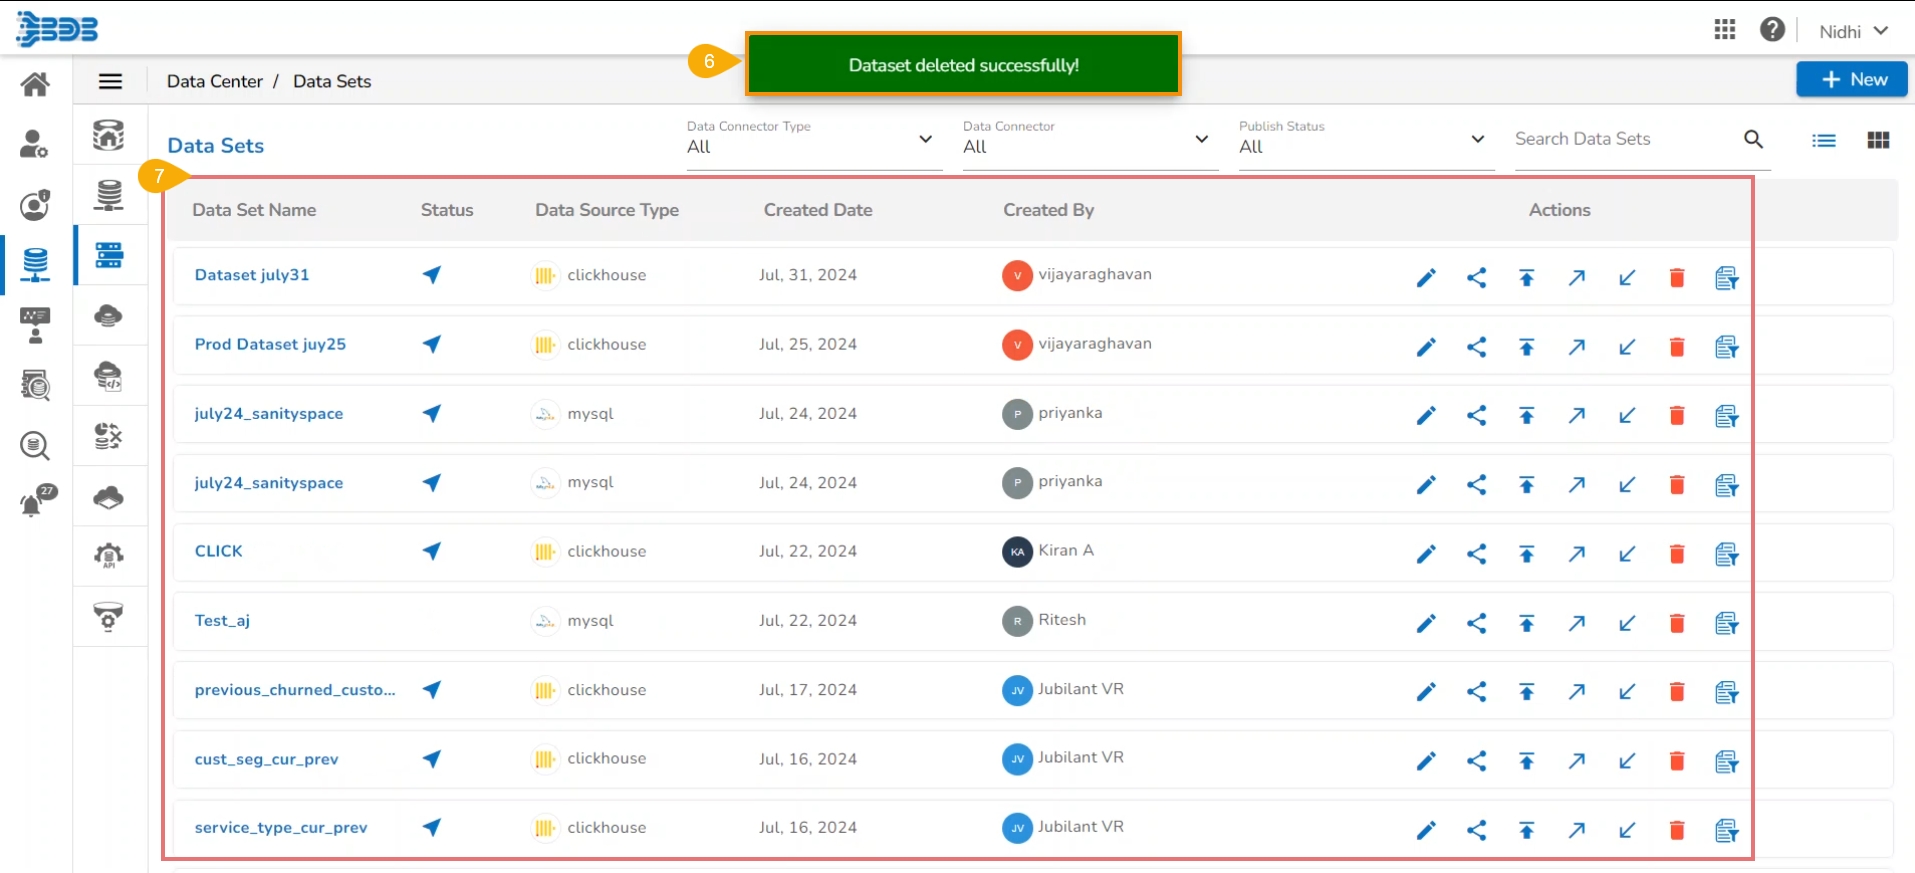
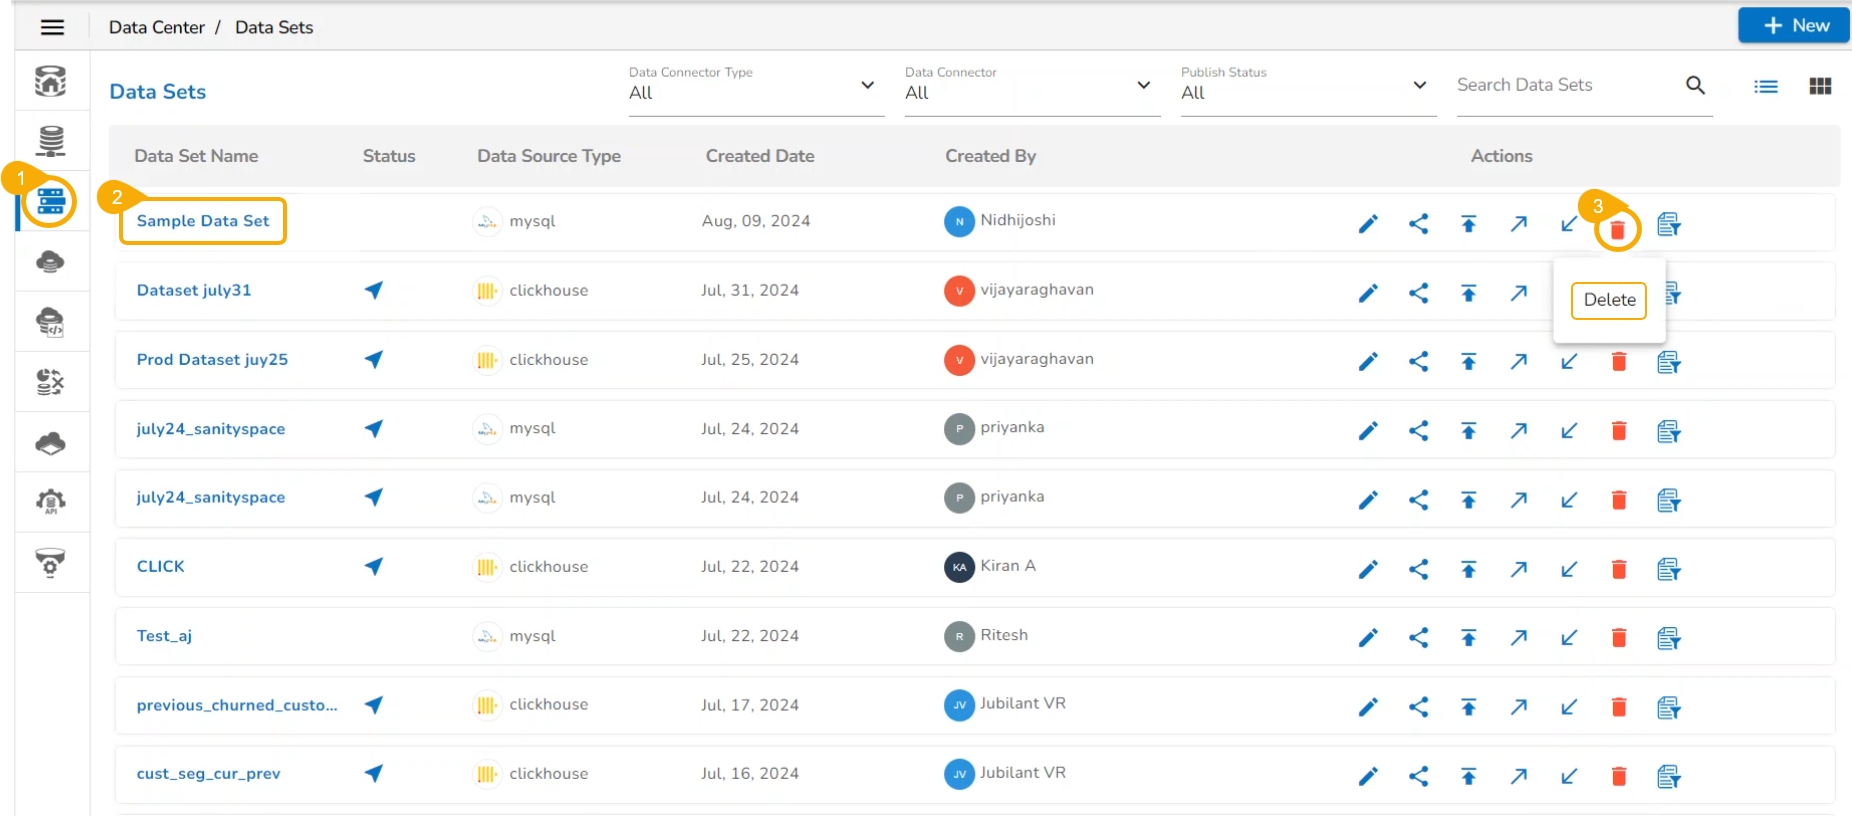
This section explains steps to delete a Data Set.
Check out the illustration to delete a data set.
Navigate to the Data Sets list page.
Select a Data Set from the list.
Click on the Push to VCS icon.
The Push into Version Controlling System dialog box appears.
Provide a Commit message – this message is saved as a label in the Version Controlling System.
Click the Push option.
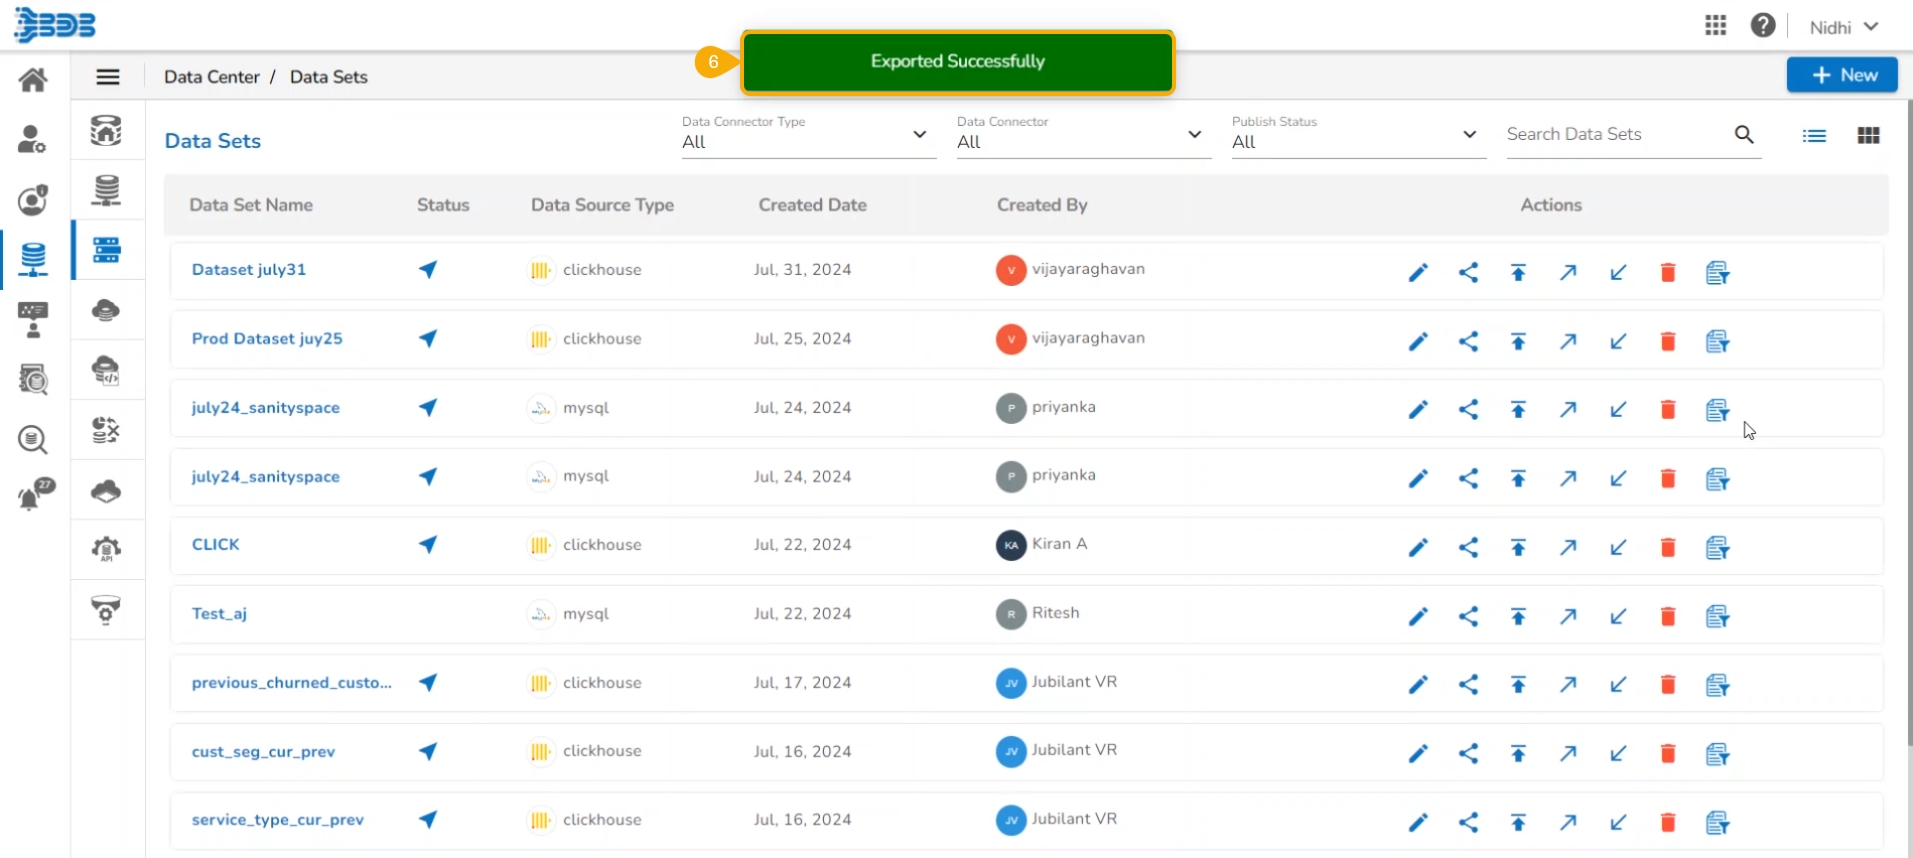
A confirmation message appears, and the selected Data Set version gets pushed to the VCS.
Click the Delete icon for the selected Data Set.
The Remove Data Set dialog box opens to confirm the deletion.
Click the Yes option.
A confirmation message appears.
The selected Data Set gets removed from the Data Sets list.
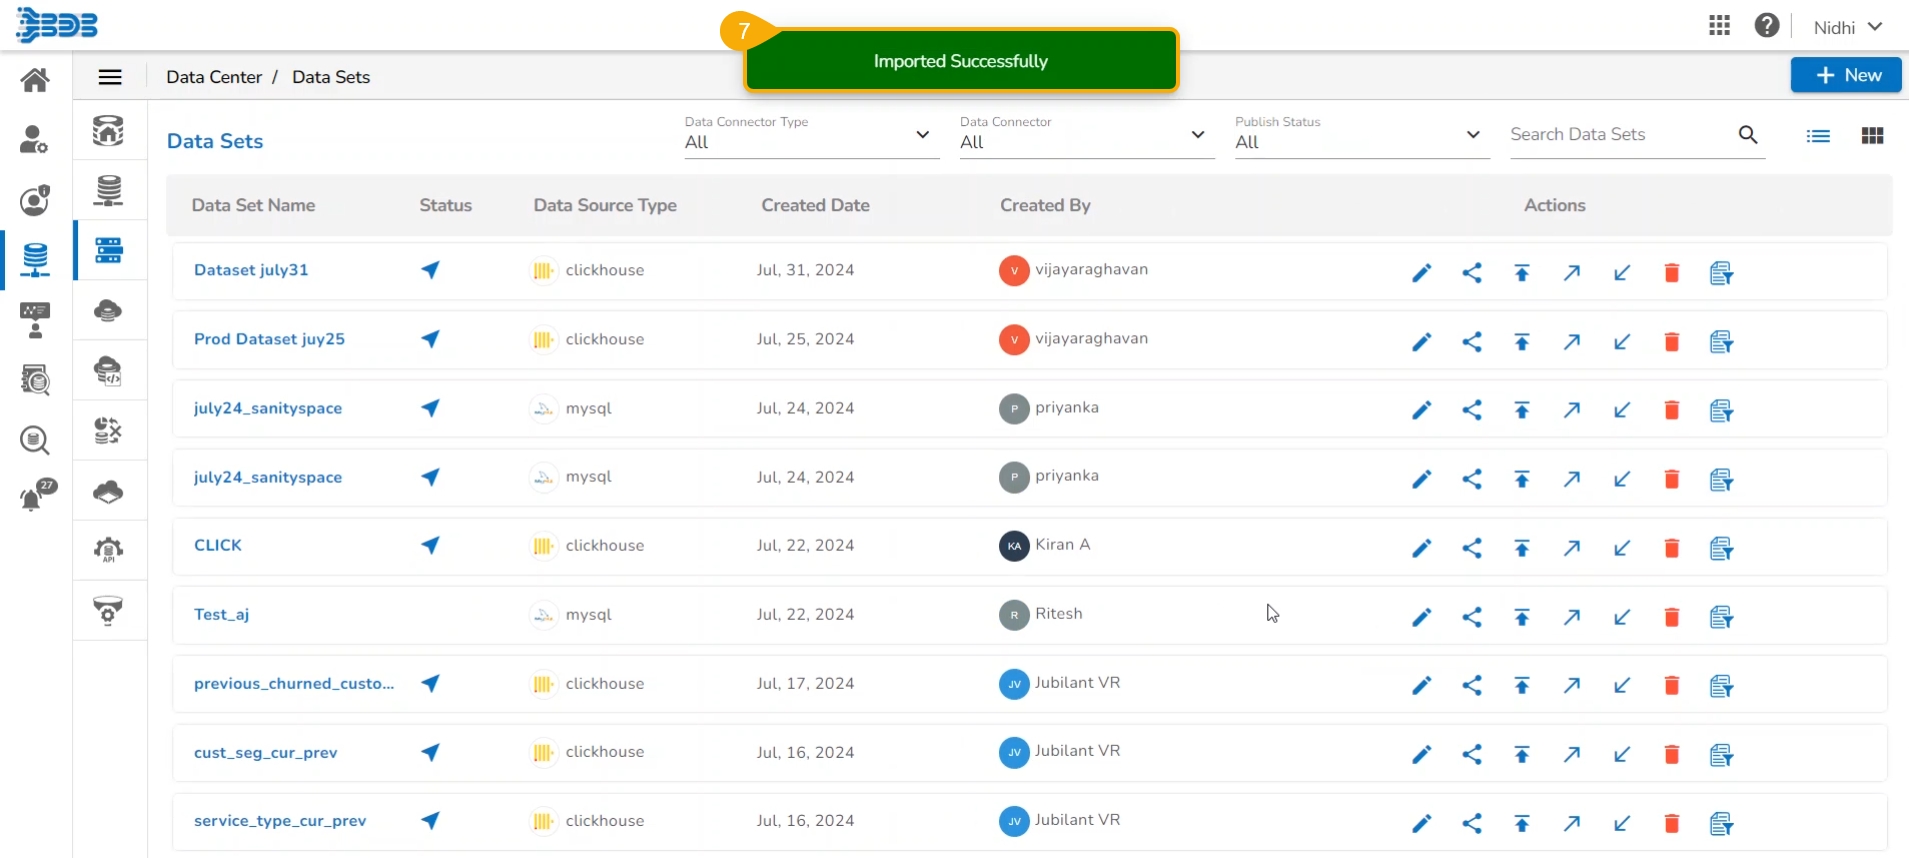
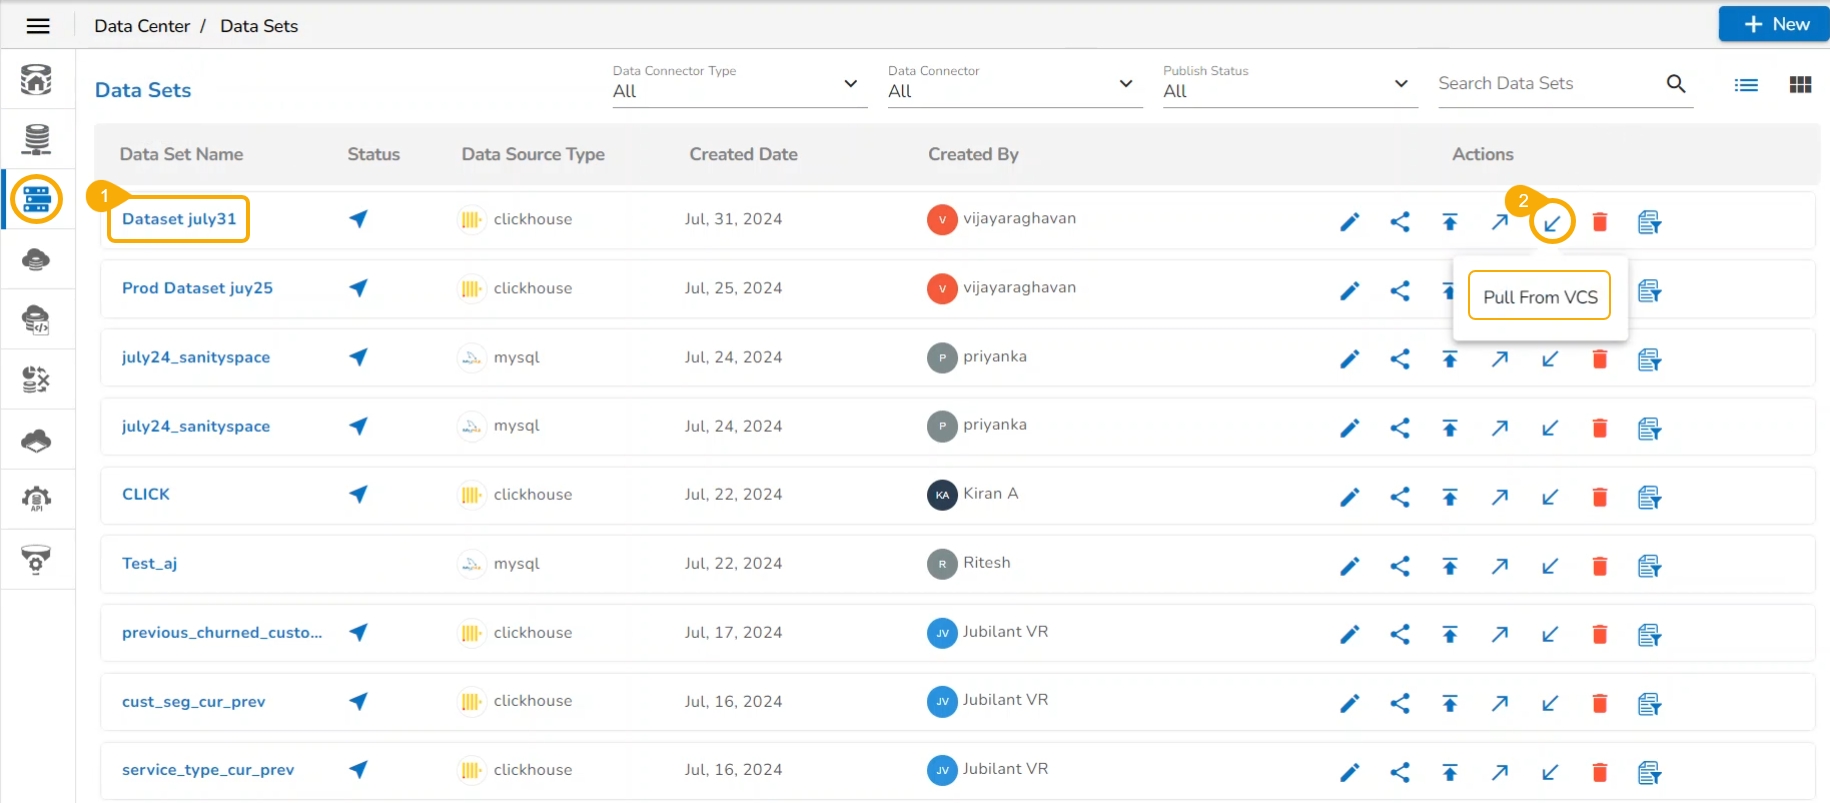
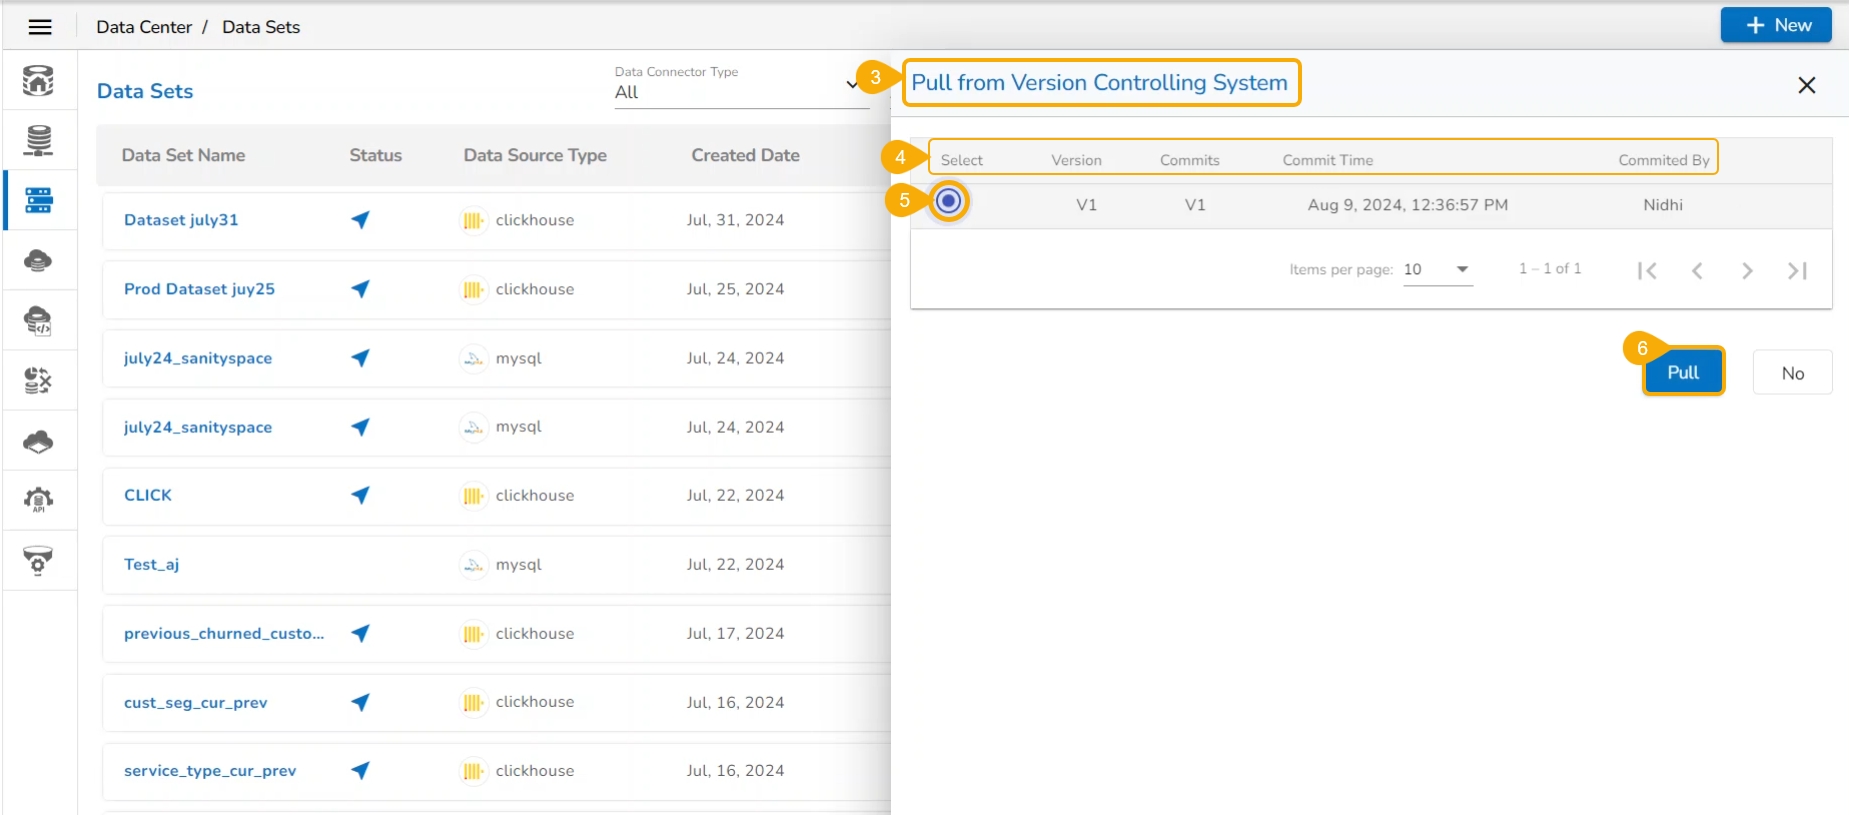
This page focuses on the steps to pull a data set version from the VCS.
Check out the illustration on pulling a data set from VCS.
Select a Data Set of which some version is available in the VCS using the Data Sets list.
Click the Pull from VCS icon for a Data Set.
The Pull from Version Controlling System dialog box appears.
The multiple uploaded versions of the Data Set with committed message for each version get listed.
Select: To select the version you want to pull.
A confirmation message appears once the selected Data Set version is pulled from the VCS.
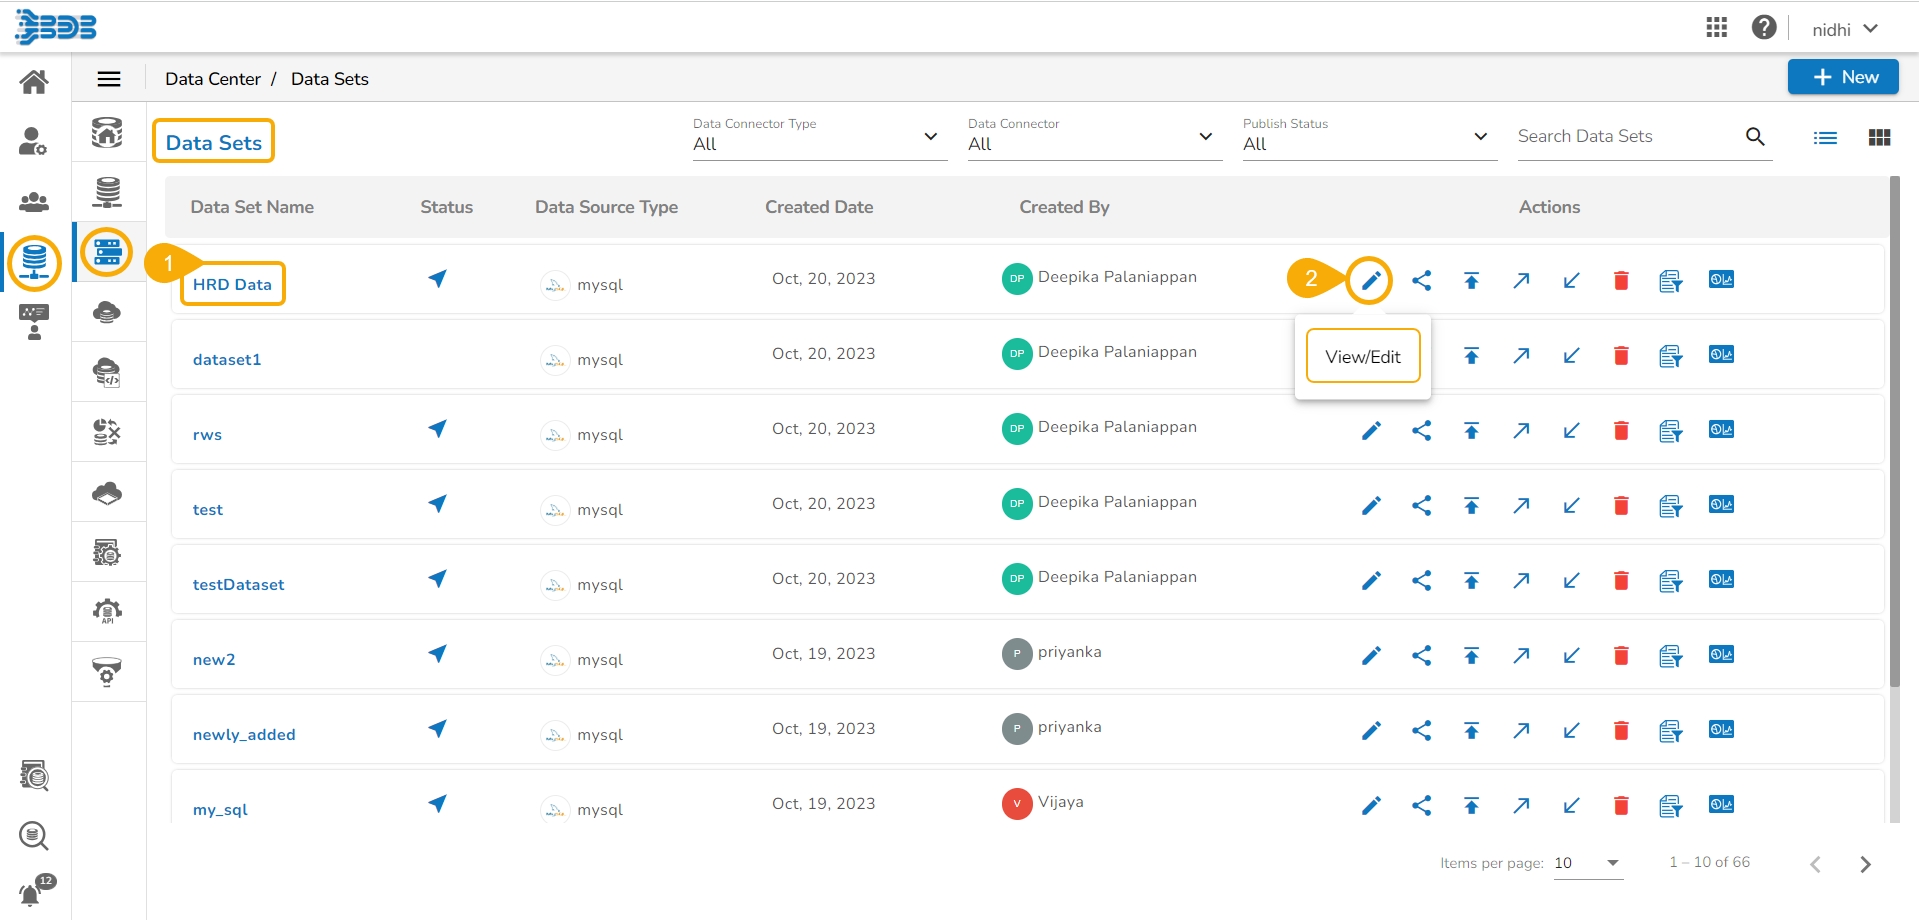
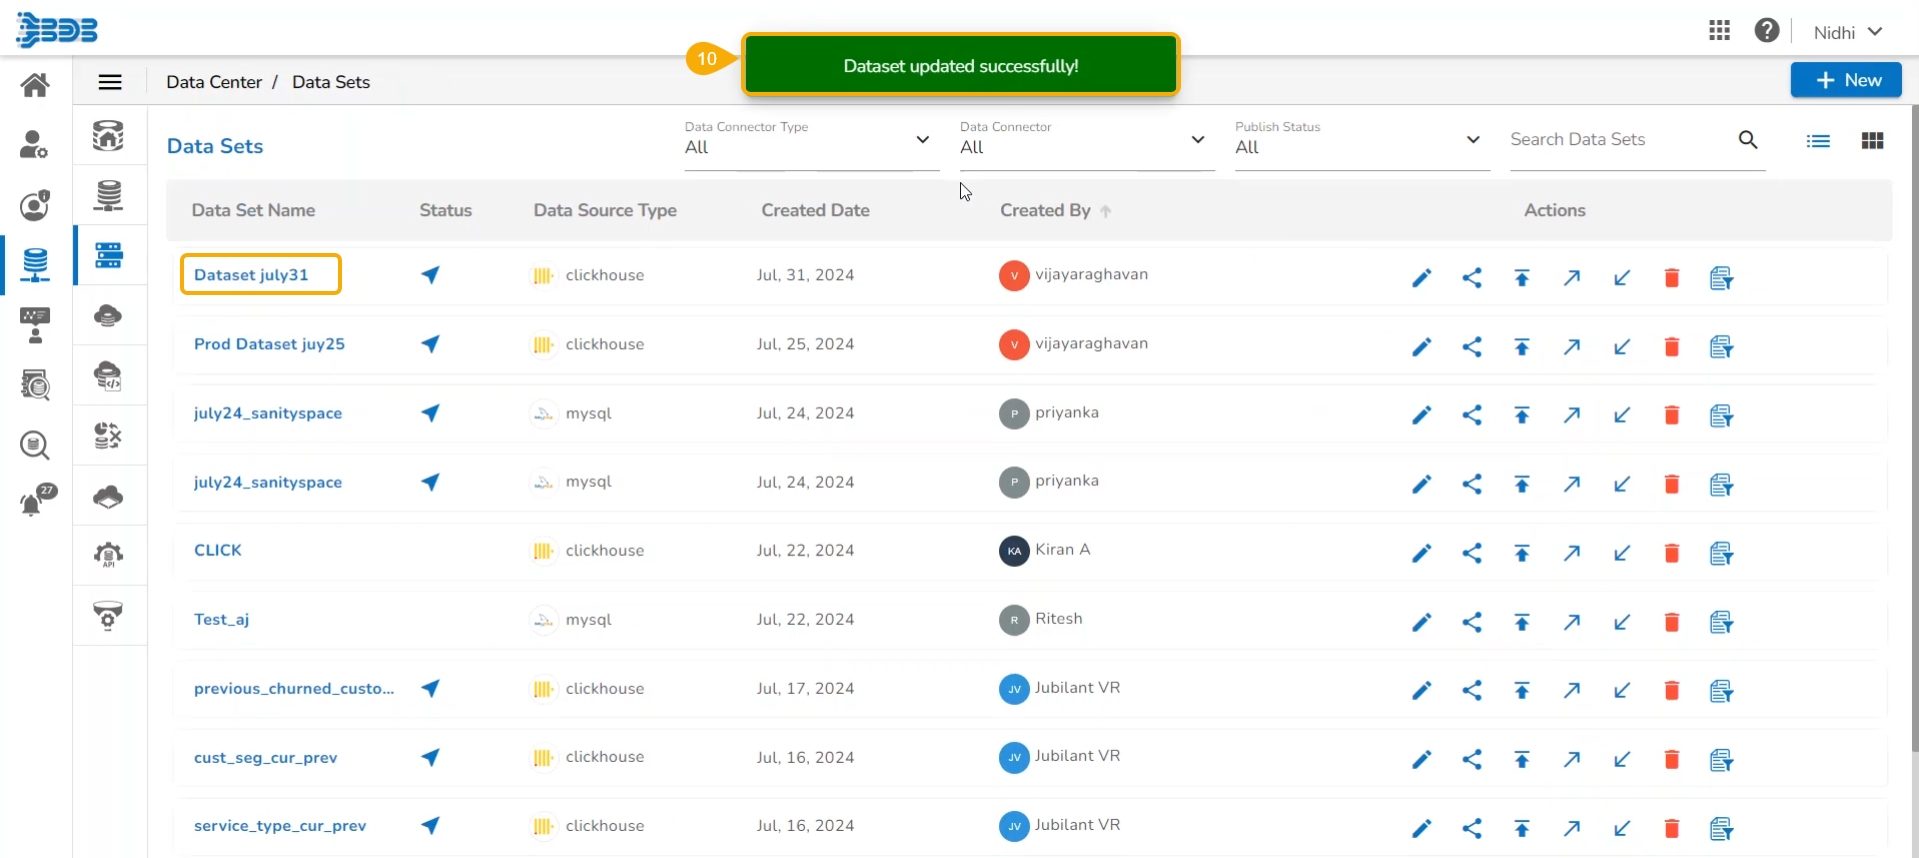
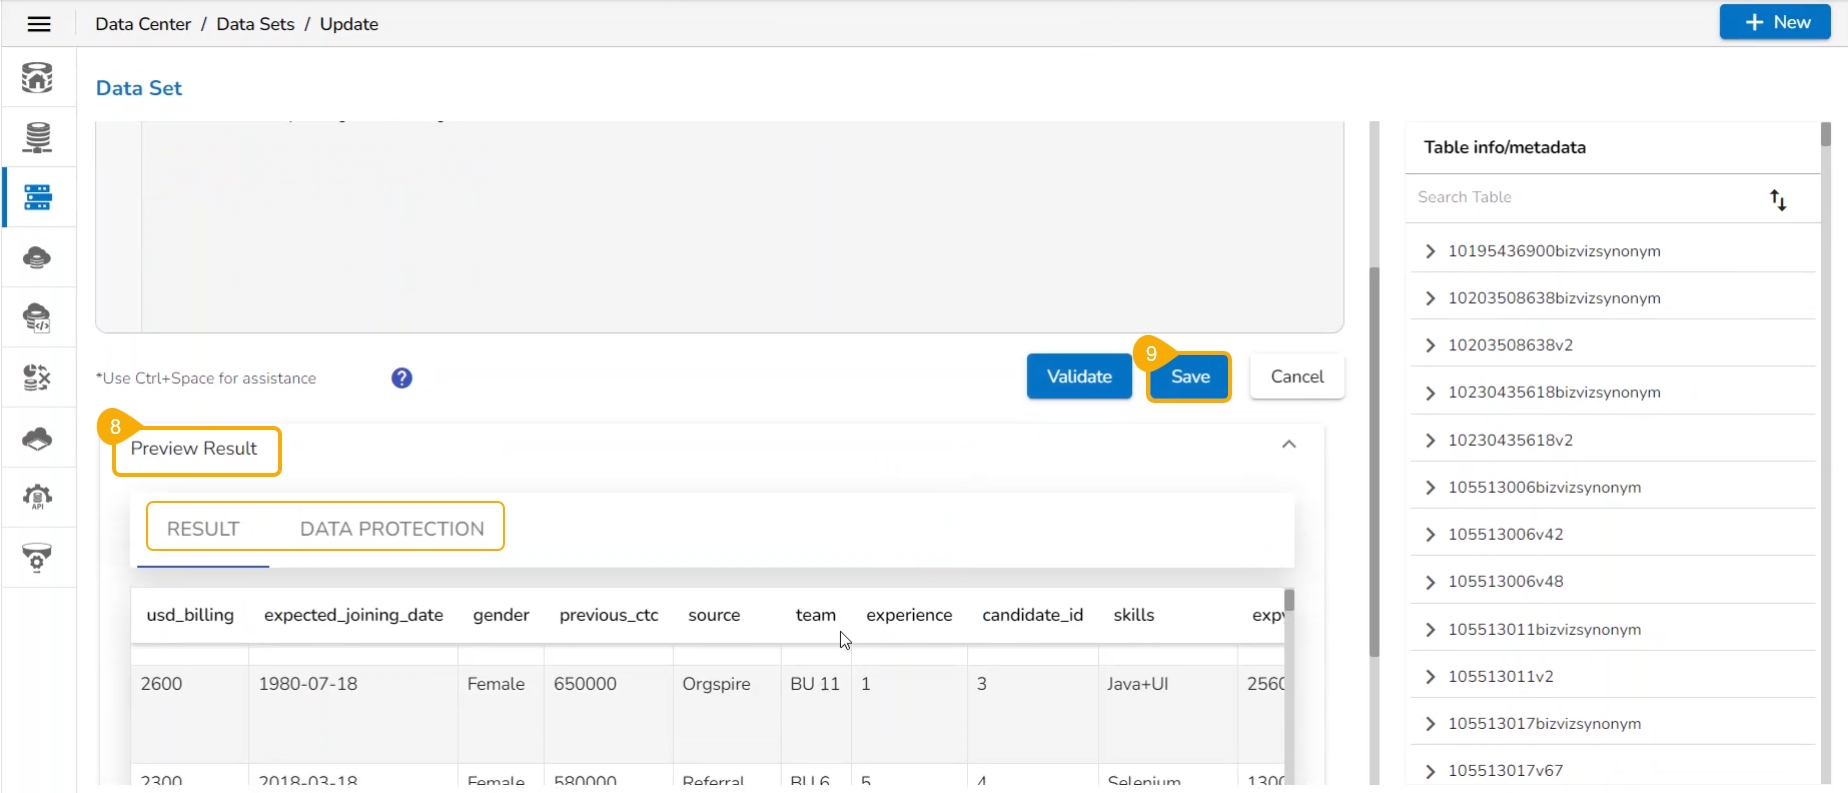
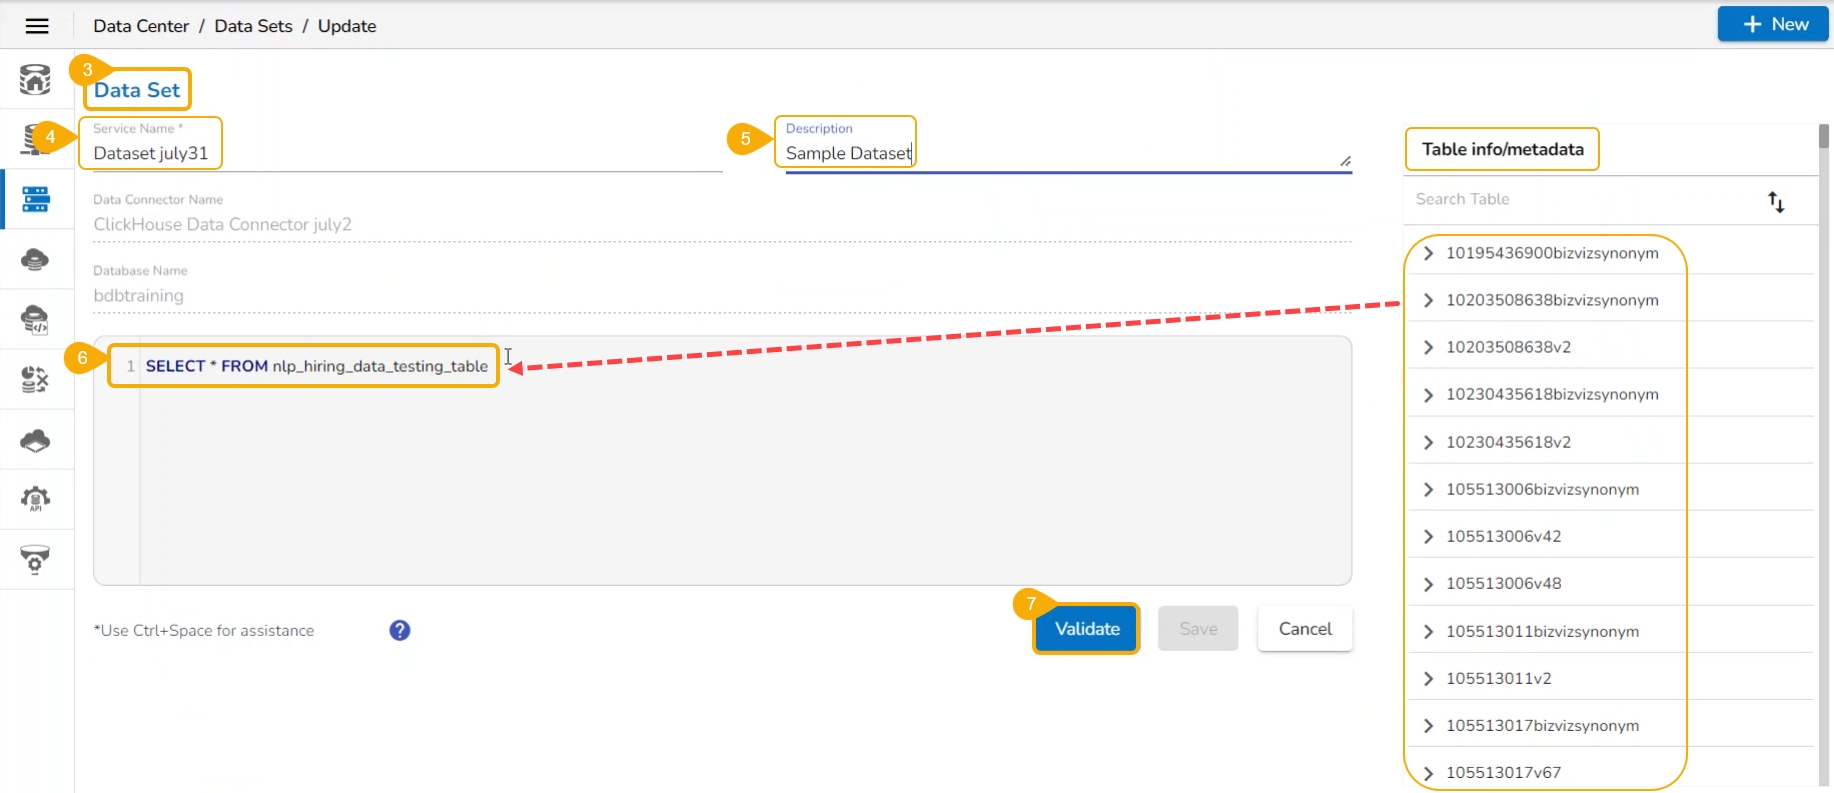
This page displays steps to edit a data set.
Check out the illustration on editing a dataset.
Select a Data Set from the Data Set list.
Click the View/Edit icon for that Data Set.
The selected Data Set opens in the editable format.
Edit the Data Set name.
Edit or modify the Description.
Modify the provided query either by clicking the table Info or writing a query.
Click the Validate option after modifying the data set.
The Preview Result is displayed with the RESULT and DATA PROTECTION tabs.
The Save option gets enabled, click the Save option.
A confirmation message appears, and the selected Data Set gets updated.
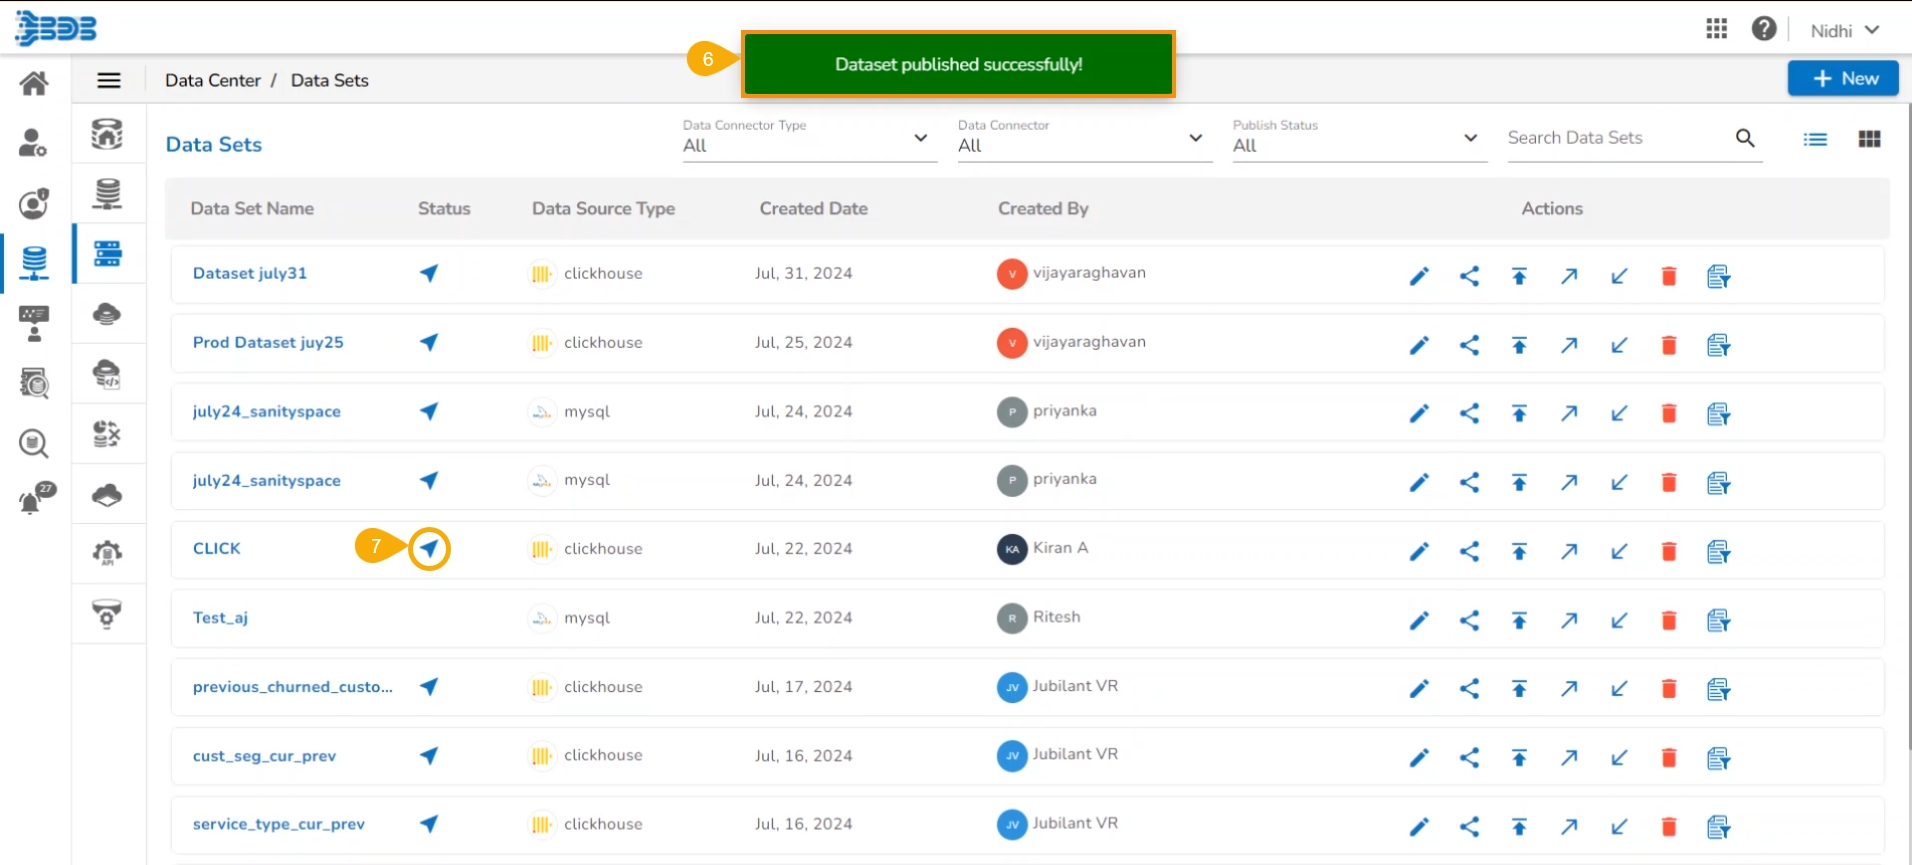
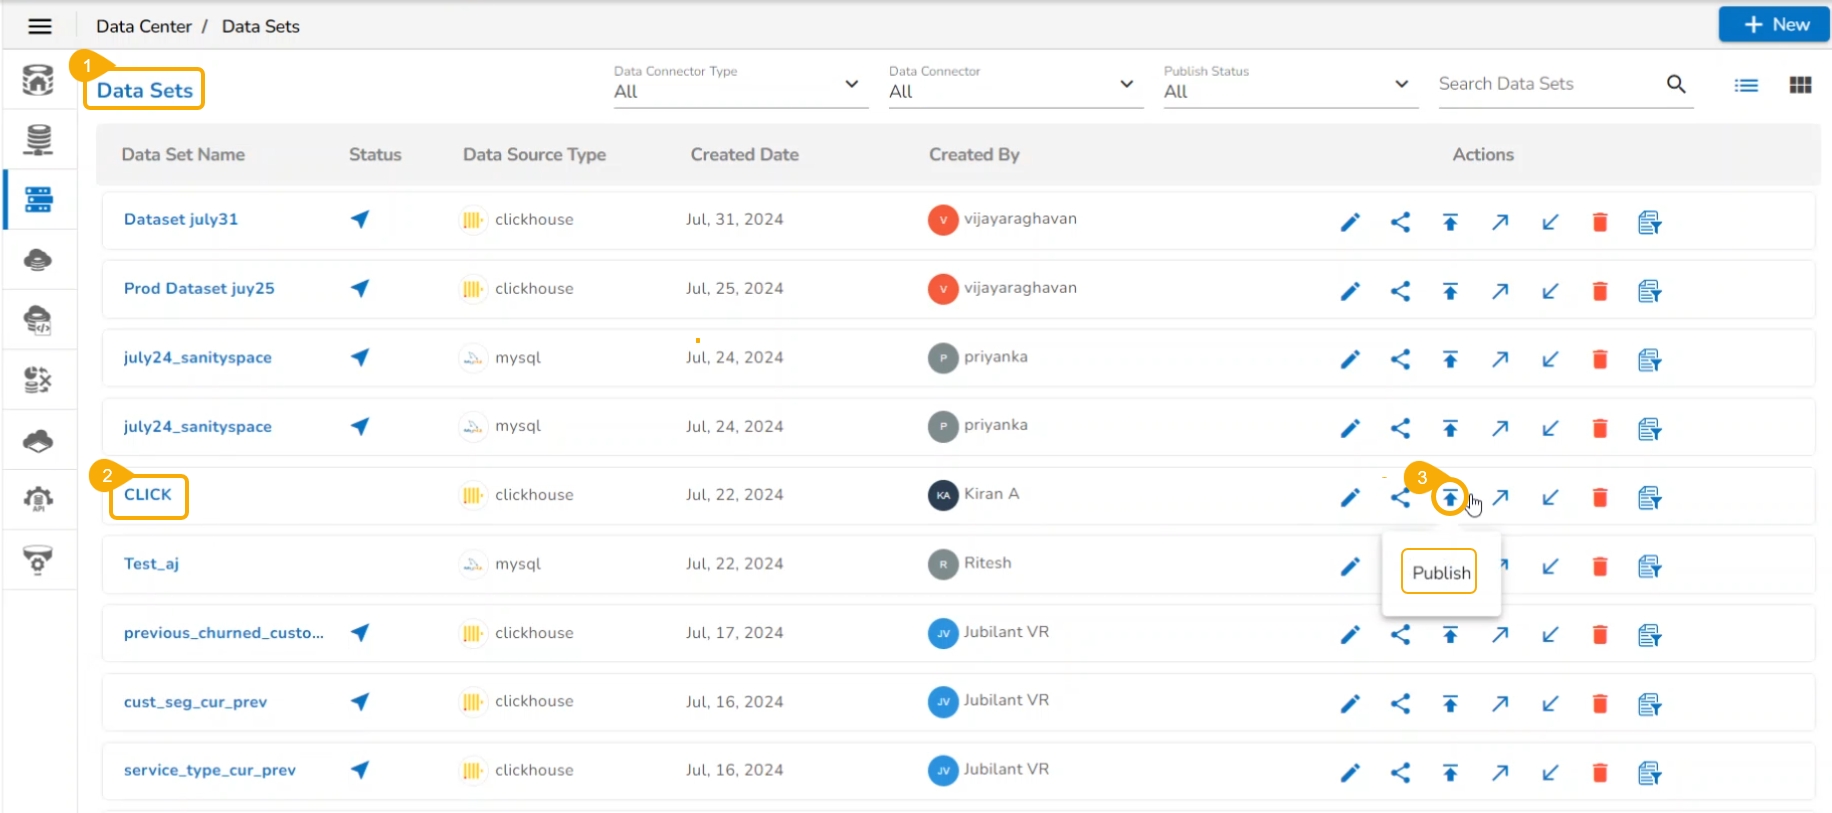
This section describes steps to publish a Data Set.
Check out the illustration on steps to publish a Data Set.
Navigate to the Data Sets list page.
Select a Data Set from the list.
Version: Version number only will list as V1, V2, etc.
Commit: This is to Identify the data set version Pulling from VCS.
Commit time – The date and time that the data set is committed.
Committed By- The User name who committed the data set.
Select a version by using the checkbox provided next to the version number.
Click the Pull option.
Click the Publish icon for the selected Data Set.
The Publish Data Set dialog box opens to confirm the action.
Click the Yes option.
A confirmation message appears, and the selected Data Set gets published.
The published Data Set is indicated by the Publish icon in the Data Sets list.

This option helps the user to share a Data Set with other user(s) or user group(s). The user can also exclude a user(s) or user group(s) from the rights to access a Data Set using the Exclude User option provided under the Share Data Set dialog box.
Check out the illustration on sharing a data set functionality.
Navigate to the Data Sets list.
Select a Data Set from the Data Sets list.
Click the Share icon for the selected Data Set.
A confirmation message appears and the Data Set gets shared with the selected user(s)/ user group(s).
The selected user(s) / group(s) will be listed under the Granted Permissions section.
Navigate to the user account with whom the Dataset has been shared.
Open the Data Set List page, the shared Data Set gets marked with a specific icon under the Status column.
The receiver user will have limited permission of Actions on the Shared Data Set.
Check out the illustration on excluding users from sharing a Data Set.
Navigate to the Manage Access window for a Data Set.
Grant Permissions using the checkboxes provided under the Grant Permissions option.
Open the User Groups tab.
select user group(s) using the checkboxes.
Navigate to the Exclude Users tab.
Select the user(s) using the checkboxes.
Click the Save option.
A notification message ensures the selected data set is shared with the selected group.
The excluded users will be listed under the Excluded Users section.
Check out the illustration on including the excluded users for a shared Data Set.
Open the Manage Access window for a shared data set.
Navigate to the Excluded Users list.
Select a user from the list.
Click the Include User icon.
Check out the illustration on revoking the privileges for the shared user.
Navigate to the Manage Access window.
The Granted Permissions section will list the selected user(s) or user group(s).
Select a user or user group from the displayed list.
Click the Revoke Privileges icon.
Select permissions using the checkboxes from the Select Permissions option.
Select one tab from the Users/ User Groups tabs.
Search a specific user or user group.
Select a user(s)/ user group(s) from the selected tab.
Click the Save option.
A notification ensures that the privileges are shared with the recently included user from the group.
The Excluded Users list gets modified.
A notification message ensures that the granted permissions are revoked for the selected user(s)/ user group(s).
The granted permissions list gets modified.
The Exclude User tab helps to exclude the user(s) from the rights to access a Data Set, if it is already shared. Only the users part of the selected user group to which the Data Set has been shared will be listed under the Exclude User tab.
The Action permissions for a shared Data Set may vary based on the granted privileges while sharing the Data Set.