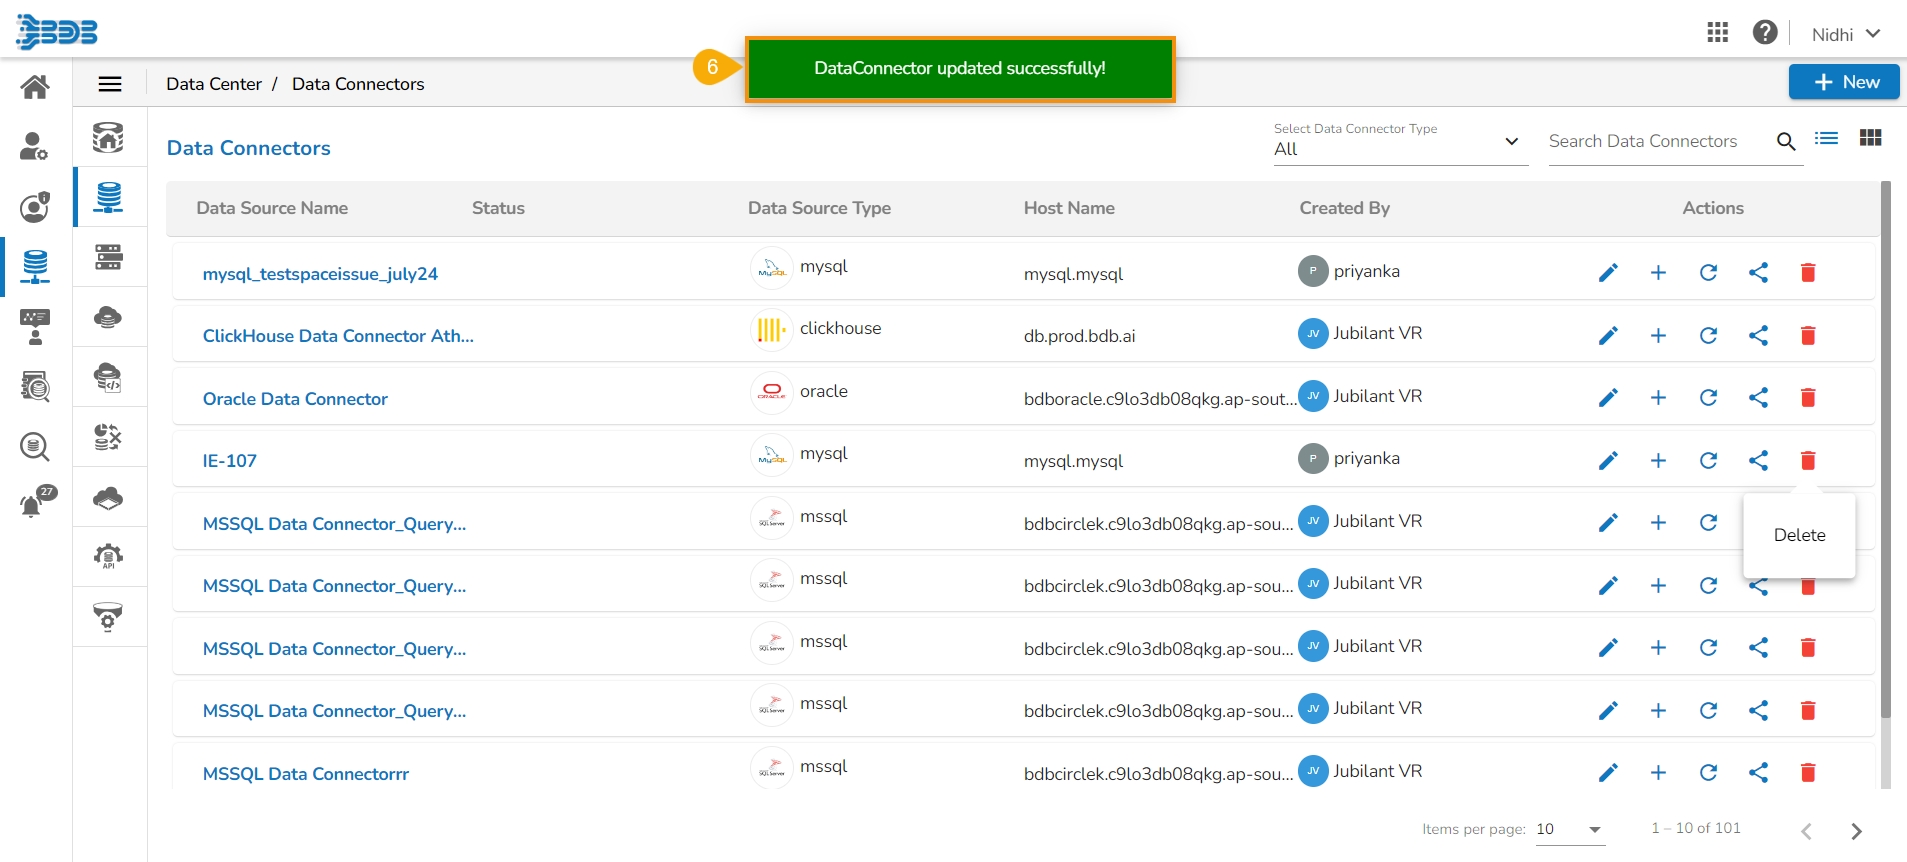
This page aims to explain all the options that are credited to a Data Connector on the List of Data Connectors.
Loading...
Loading...
Loading...
Loading...
Loading...
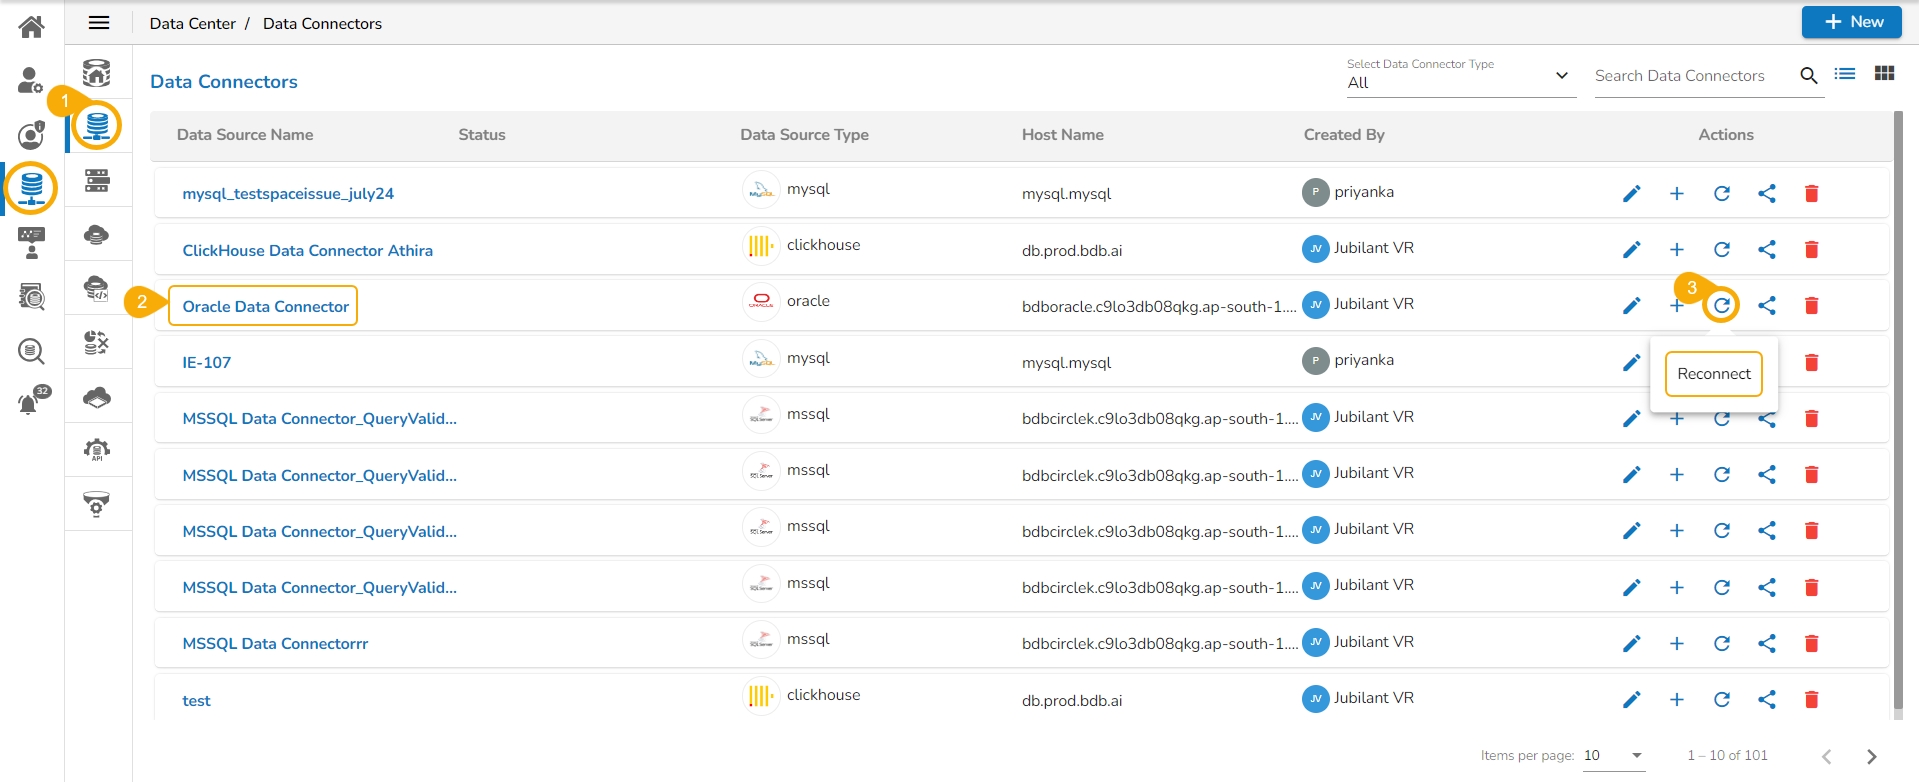
Navigate to the Data Connectors list page.
Select a Data Connector from the list.
Click the Reconnect icon for the selected Data Connector.
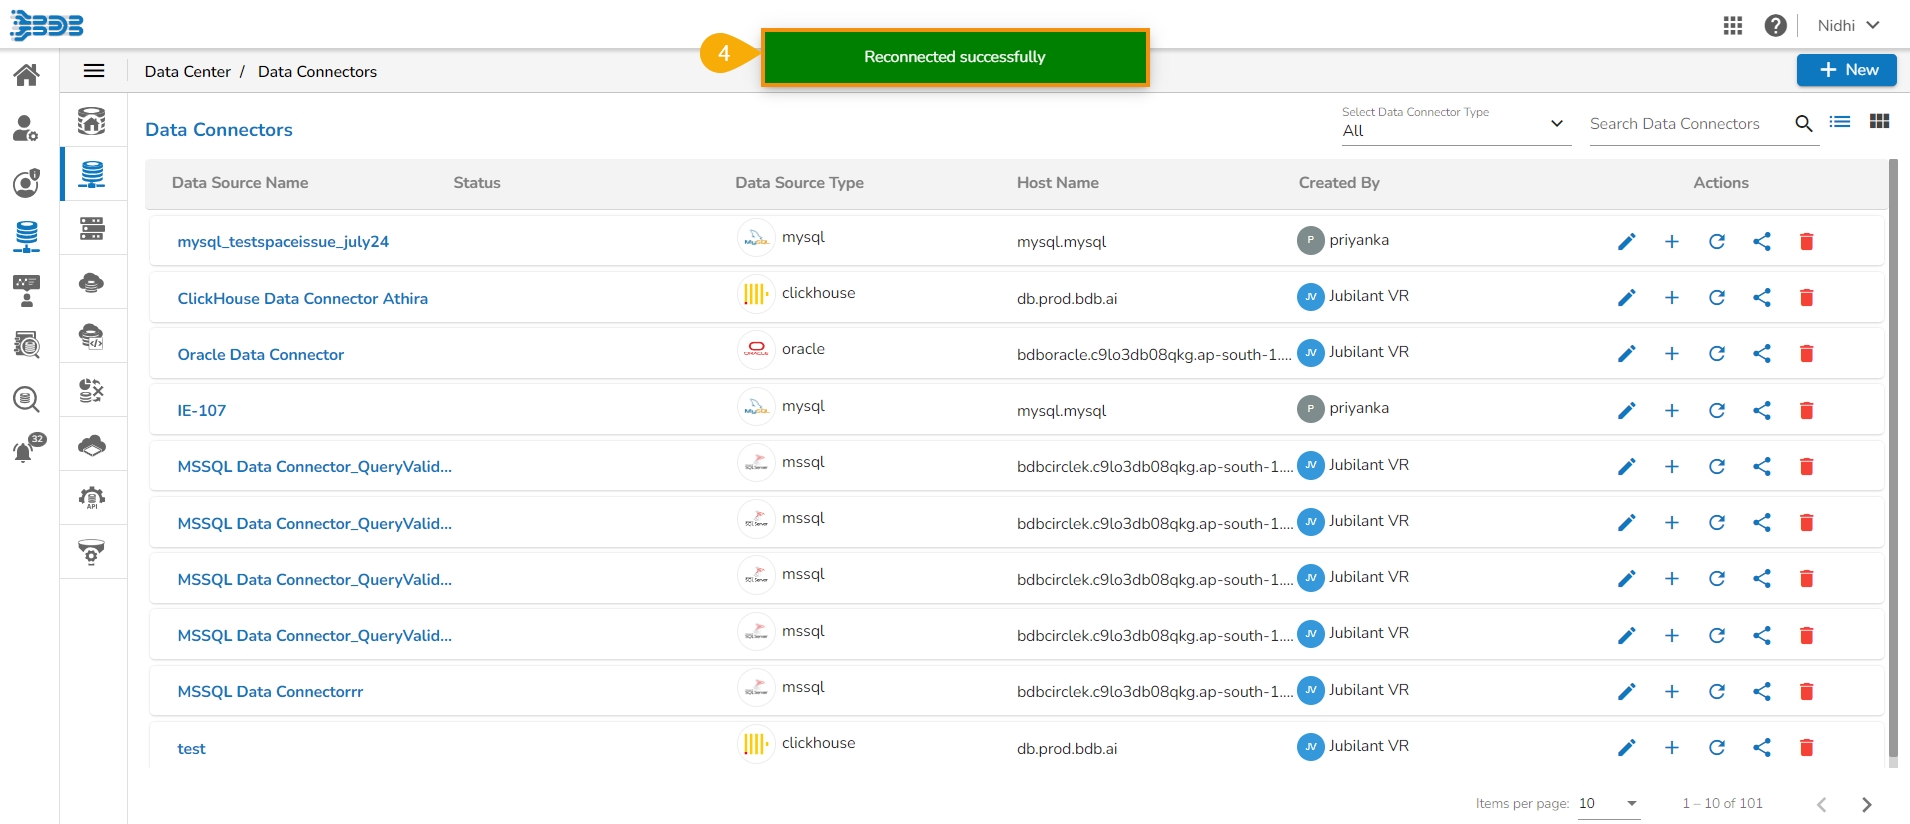
A confirmation message appears, the selected Data Connector gets reconnected.
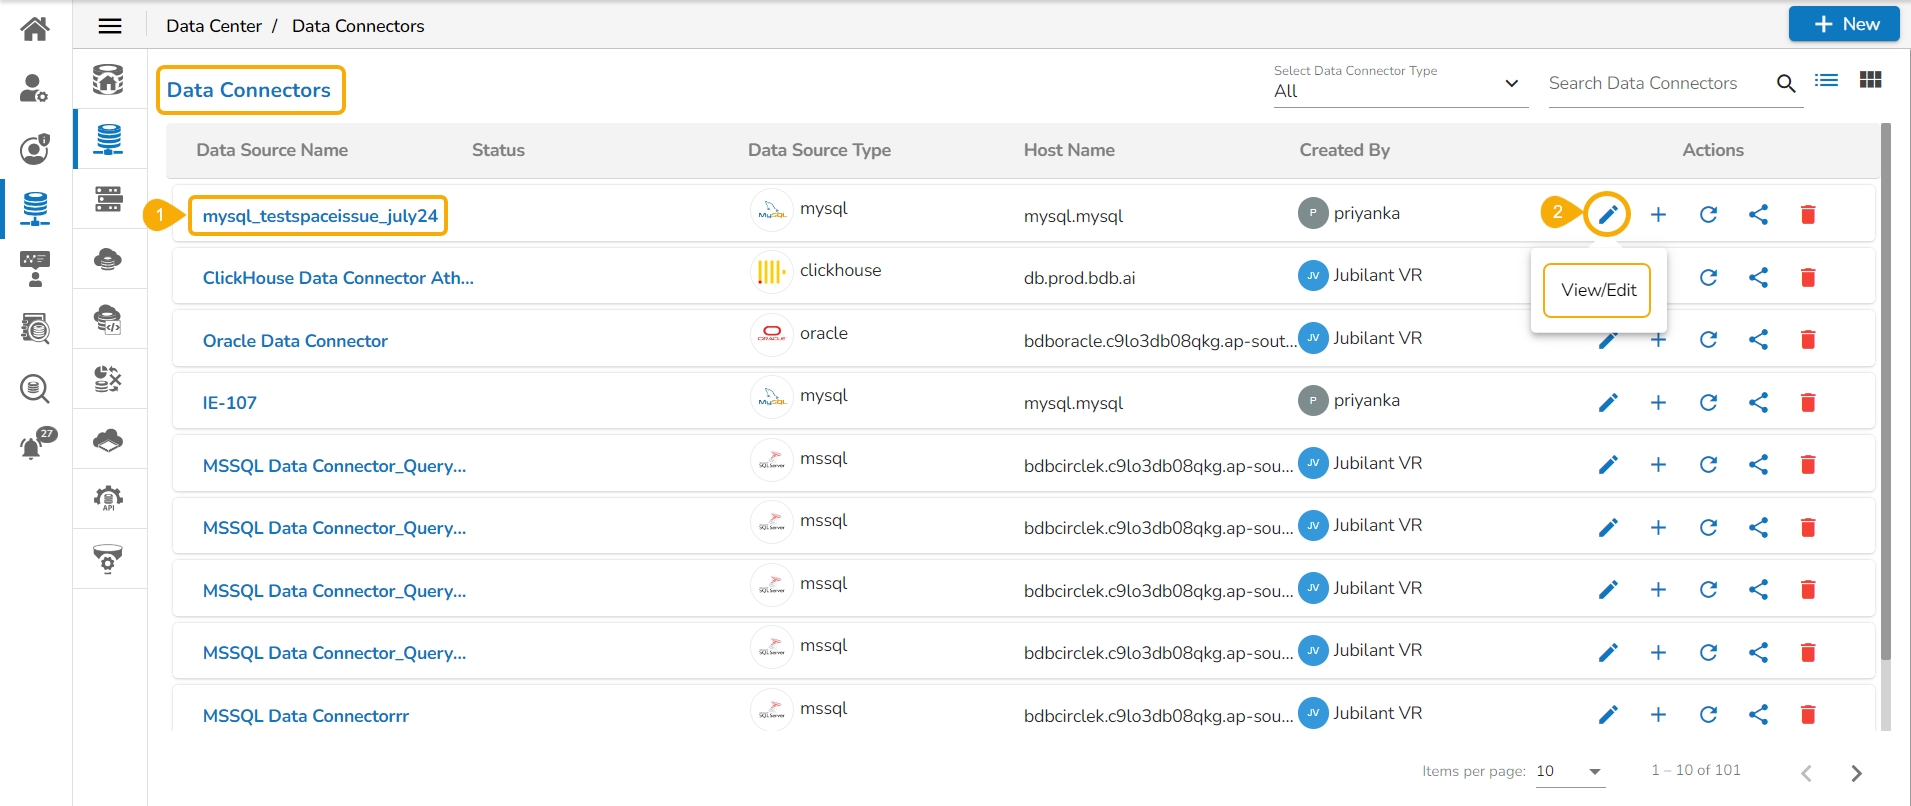
Select a Data Connector from the Data Connectors list.
Click the View/Edit icon for that Data Connector.
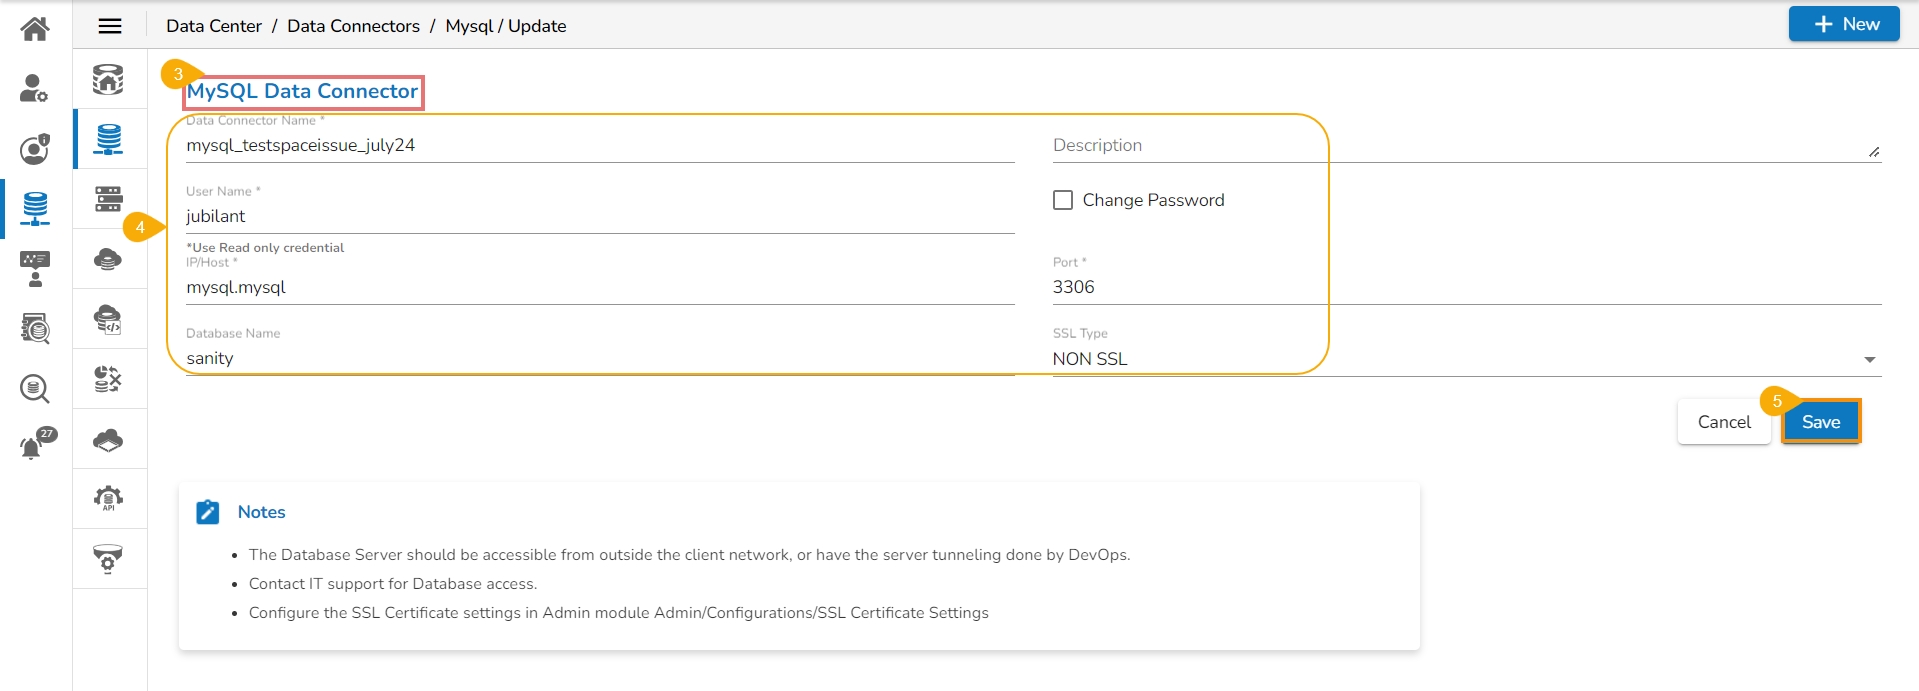
The selected Data Connector opens in the editable format.
You can edit the permitted information from the Data Connector form. (The editable information may vary based on the categories of the Data Connector).
Click the Save option.
A confirmation message appears, and the selected Data Connector gets updated.
This option helps the user to share a Data Connector with other user(s) or user group(s). The user can also exclude a user(s) or user group(s) from the rights to access a Data Connector using the Exclude User option provided under the Share Data Connector dialog box.
Check out the illustration on sharing a Data Connector functionality.
Navigate to the Data Connectors list.
Select a Data Connector from the Data Connectors list.
Click the Share icon for the selected Data Connector.
The Manage Access window opens for the selected data connector.
Choose an option to Grant Permissions out of View and Edit options.
Select a tab out of User, User group, and Exclude User options.
Search the specific user or user group using the search bar.
Select a single or multiple User/ User group from the chosen list. If a user is selected using the Exclude User tab, it will allow the selected user to be excluded from the access of the data connector.
Click the Save option.
A confirmation message appears and the Data Connector gets shared with the selected user(s)/ user group(s).
The Granted Permissions will be listed.
Please Note: Multiple permissions can be granted to a selected data connector.
The shared data connector appears with the shared status notification (as displayed in the image) in the receiver's user account.
Please Note: A targeted share user cannot re-share or delete a shared Data Connector, regardless of the permission level (View or Edit).
Check out the illustration on Excluding users from sharing a connector.
Navigate to the Manage Access window.
Select permissions using the Grant Permissions.
Open the User Groups tab.
Select user groups by using checkboxes.
Navigate to the Exclude Users tab.
Select the user(s) using the checkboxes.
Click the Save option.
A notification message appears.
The excluded users are listed under the Excluded Users section.
Check out the illustration on Including users in sharing a connector.
Navigate to the Manage Access window for a shared connector.
The Excluded Users section will list the excluded users if some users are excluded.
Select a user from the Excluded Users list.
Click the Include User icon.
A notification message ensures the data connector is shared with the included user.
The included user gets removed from the Excluded Users list.
Check out the illustration on revoking permissions.
Open the Manage Access window for a shared data connector.
Navigate to the Granted Permissions section.
Select a user/ user group from the granted permissions list of users.
Click the Revoke Privileges icon.
A notification message ensures that privileges are revoked.
The selected user/ user group gets removed from the Granted Permissions section.
Please Note:
Users can share the Data Connector with a Single group or Multiple groups using the User Group tab.
The Exclude User tab helps to exclude the user(s) from the rights to access a Data Connector, if it is already shared. Only the users part of the selected user group will be listed under the Exclude User tab.
The Data Connectors list displays the Create option to Create a Data Set and Data Store.
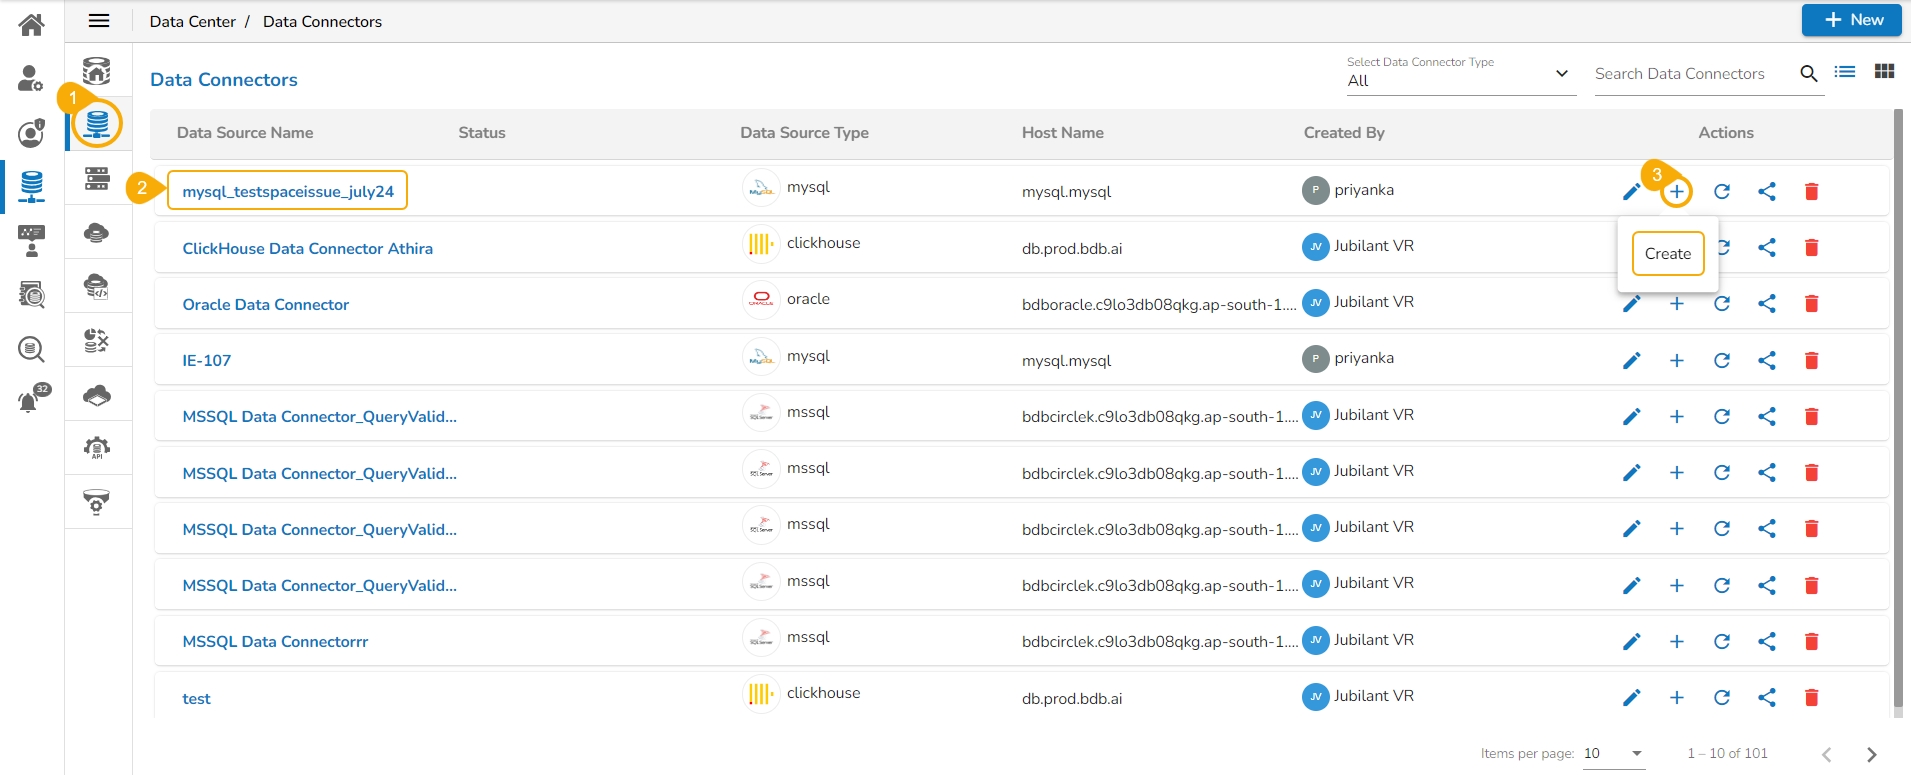
Navigate to the Data Connectors list.
Select a Data Connector from the Data Connectors list.
Click the Create icon for that Data Connector.
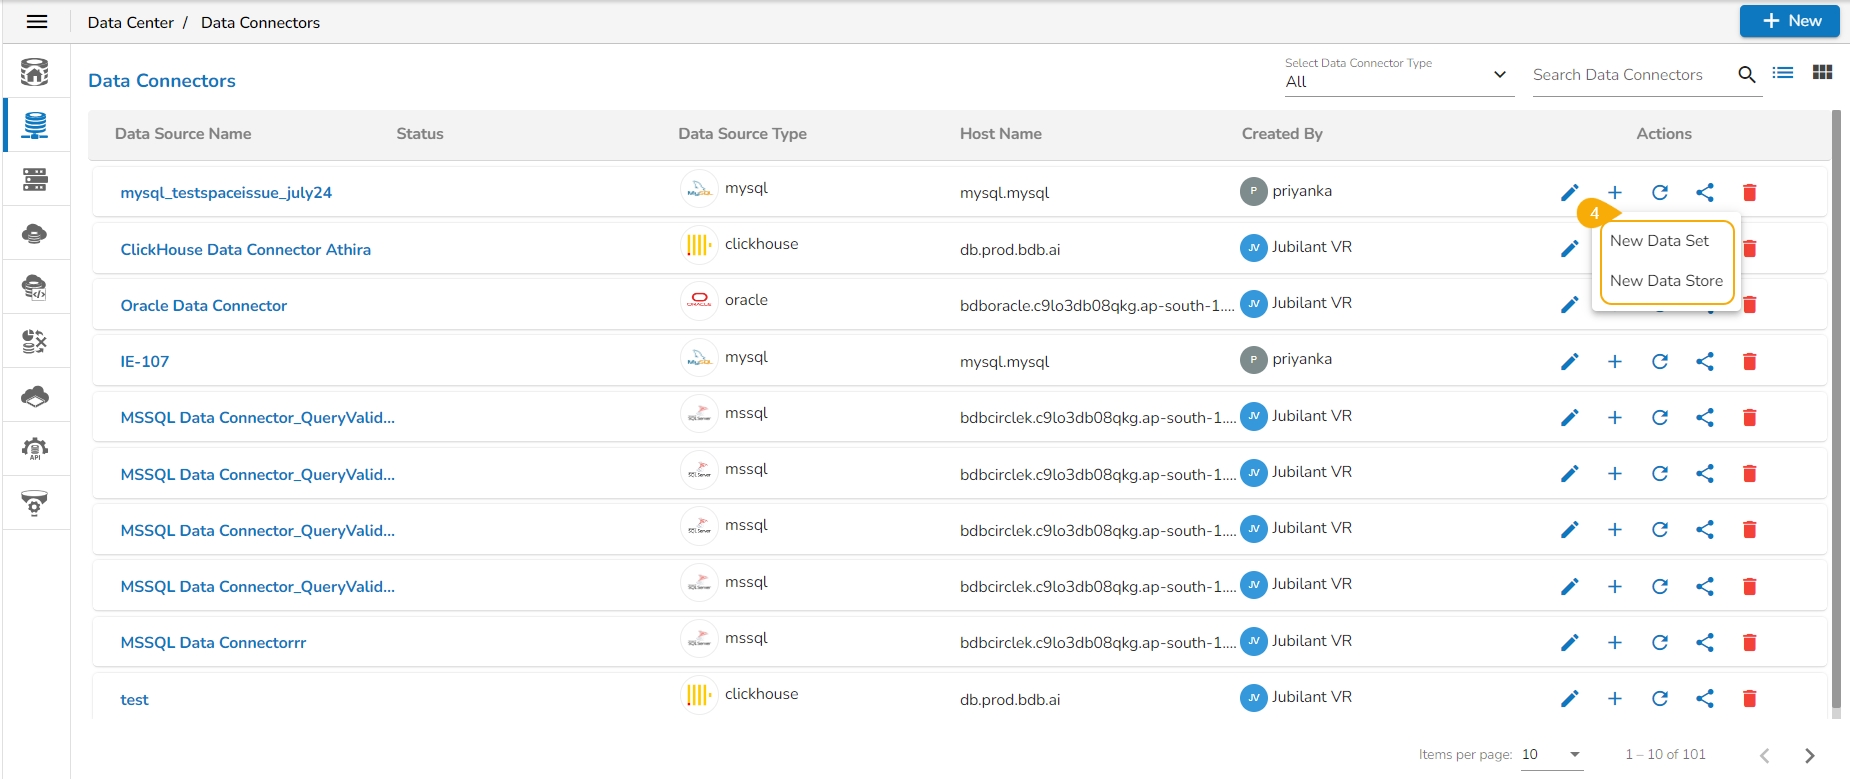
Two options to create appears:
New Data Set
New Data Store
Please Note:
The next page opens based on the selected option from the Create context menu.
Please refer to the Creating a New Data Set section for more details on the New Data Set option.
Please refer to the Creating a New Data Store section for more details on the New Data Store option.
Navigate to the Data Connectors list page.
Select a Data Connector from the list.
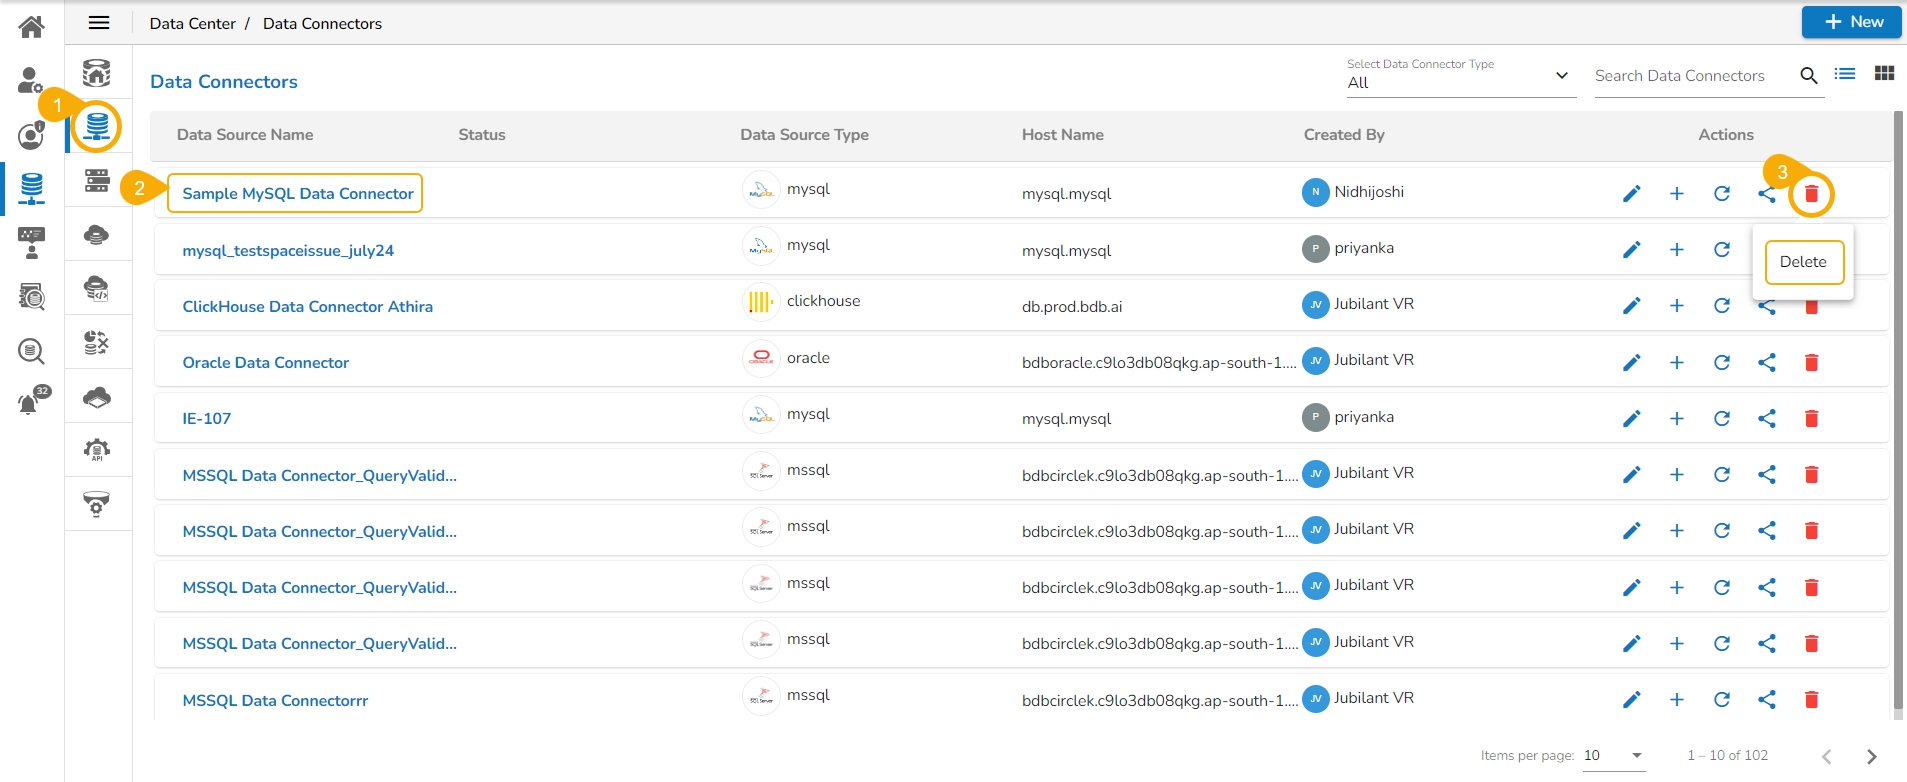
Click the Delete icon for the selected Data Connector.
The Remove Connector dialog box opens to confirm the deletion.
Click the Yes option.
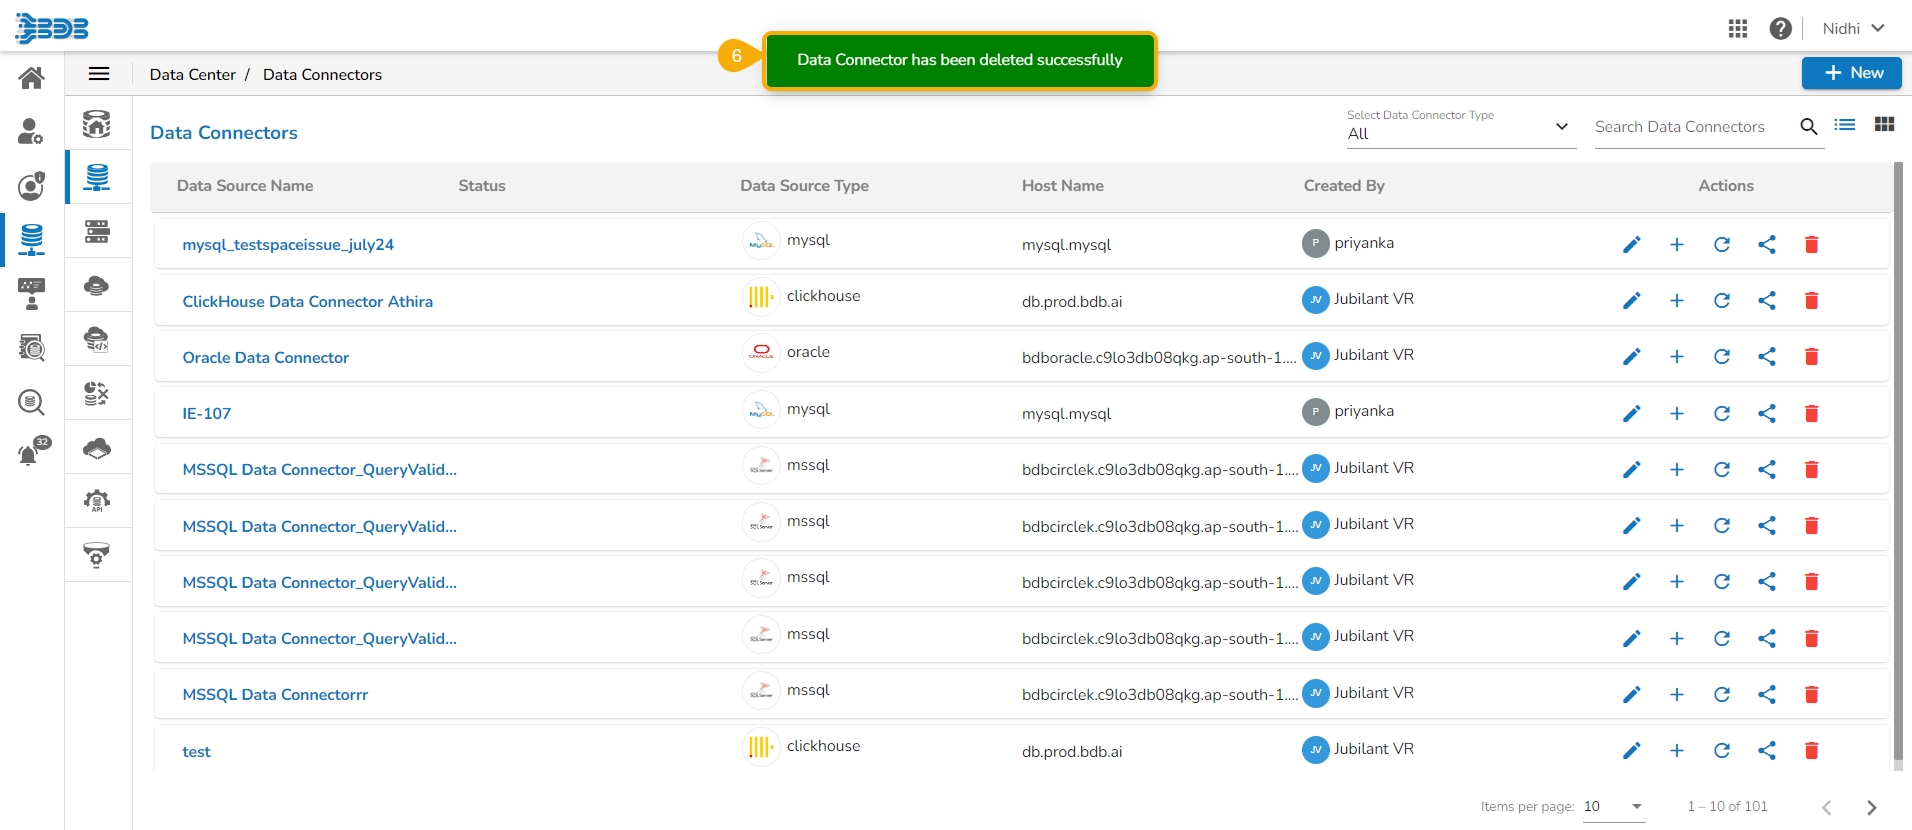
A confirmation message appears, and the selected Data Connector gets removed from the Data Connectors list.


