Loading...
Loading...
Loading...
Loading...
Loading...
Loading...
Loading...
Loading...
Loading...
Loading...
This page aims to describe the various options provided on the Data Stores List.
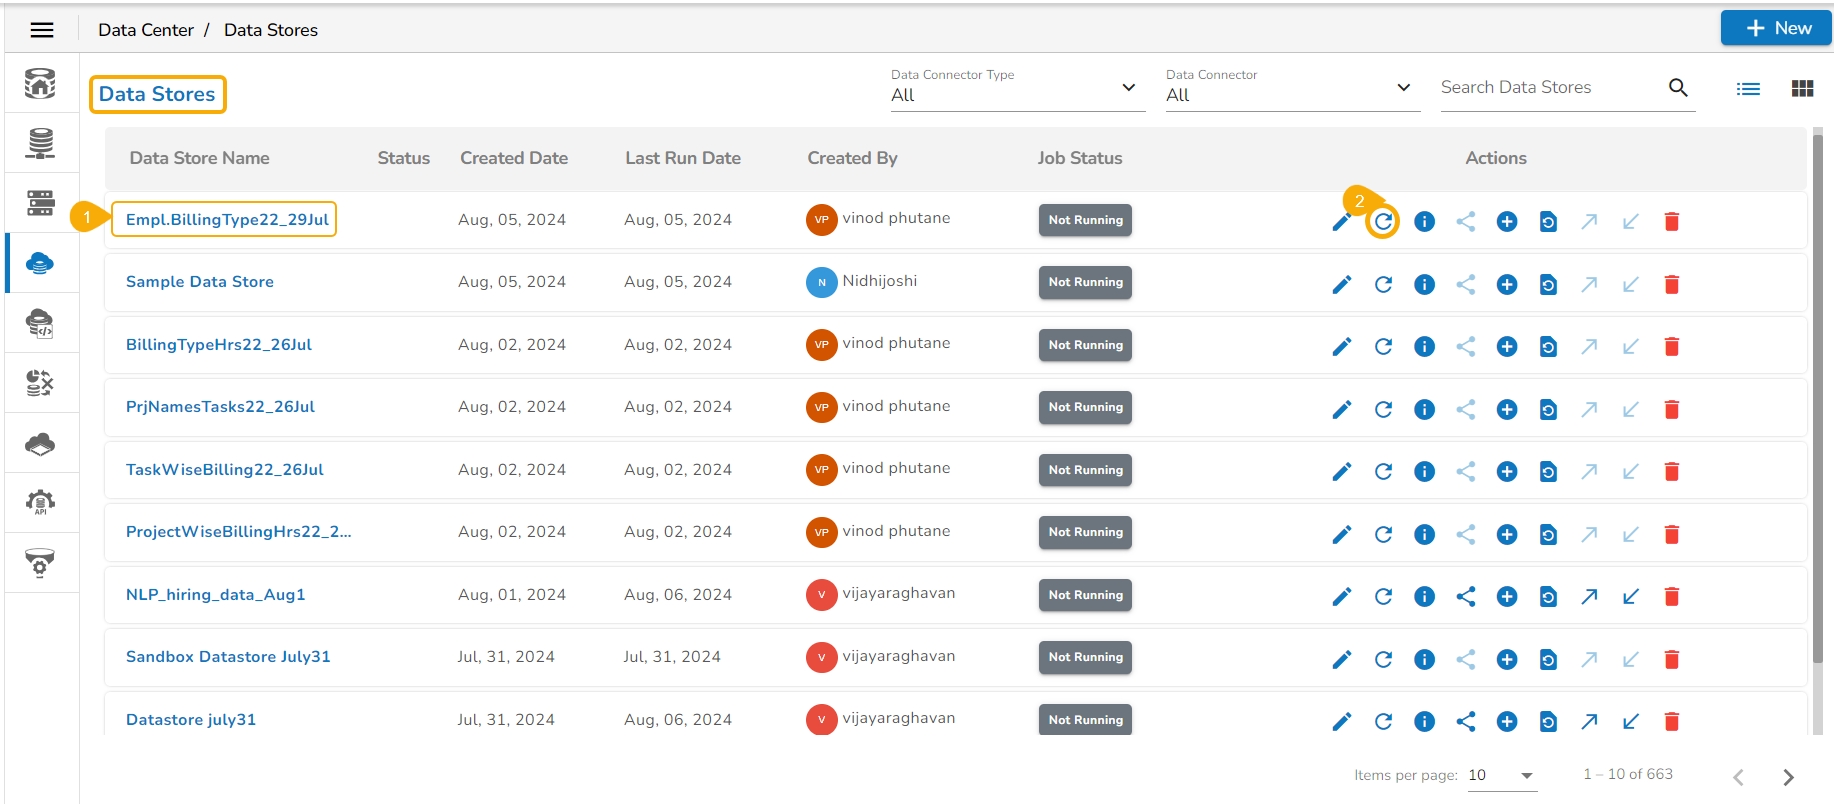
Select a Data Store from the Data Stores list.
Click the Refresh Data icon for that Data Store.
The Data Store Refresh dialog box opens.
Click the Yes option.
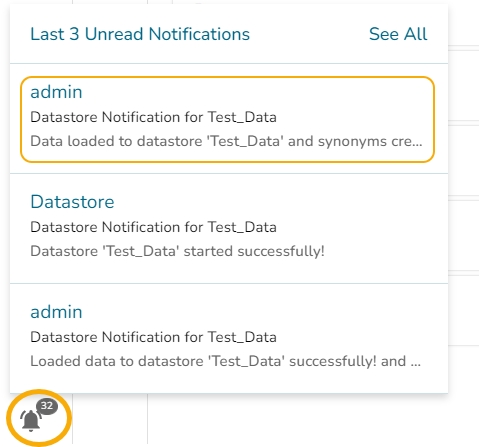
A notification message appears stating that the Refresh process has been started and status notification will be provided to the user through the notification icon.
Please Note: The Notification icon will get a new notification when the Data Store data gets loaded.
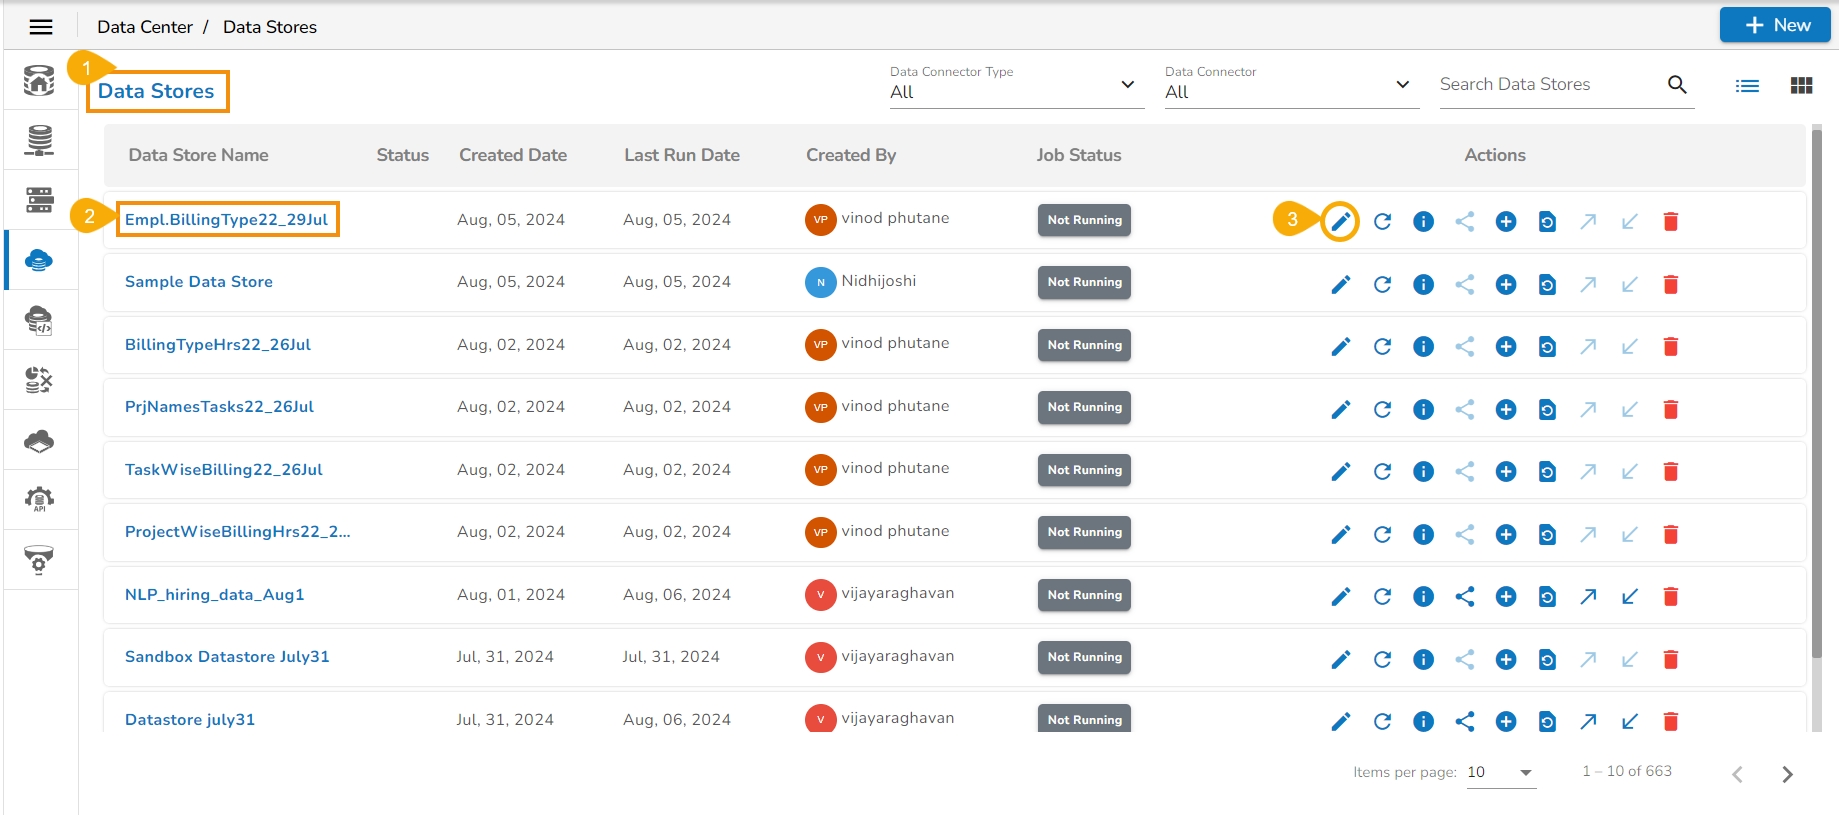
Navigate to the Data Stores list page.
Select a Data Store from the Data stores list.
Click the View/Edit icon for that Data Store.
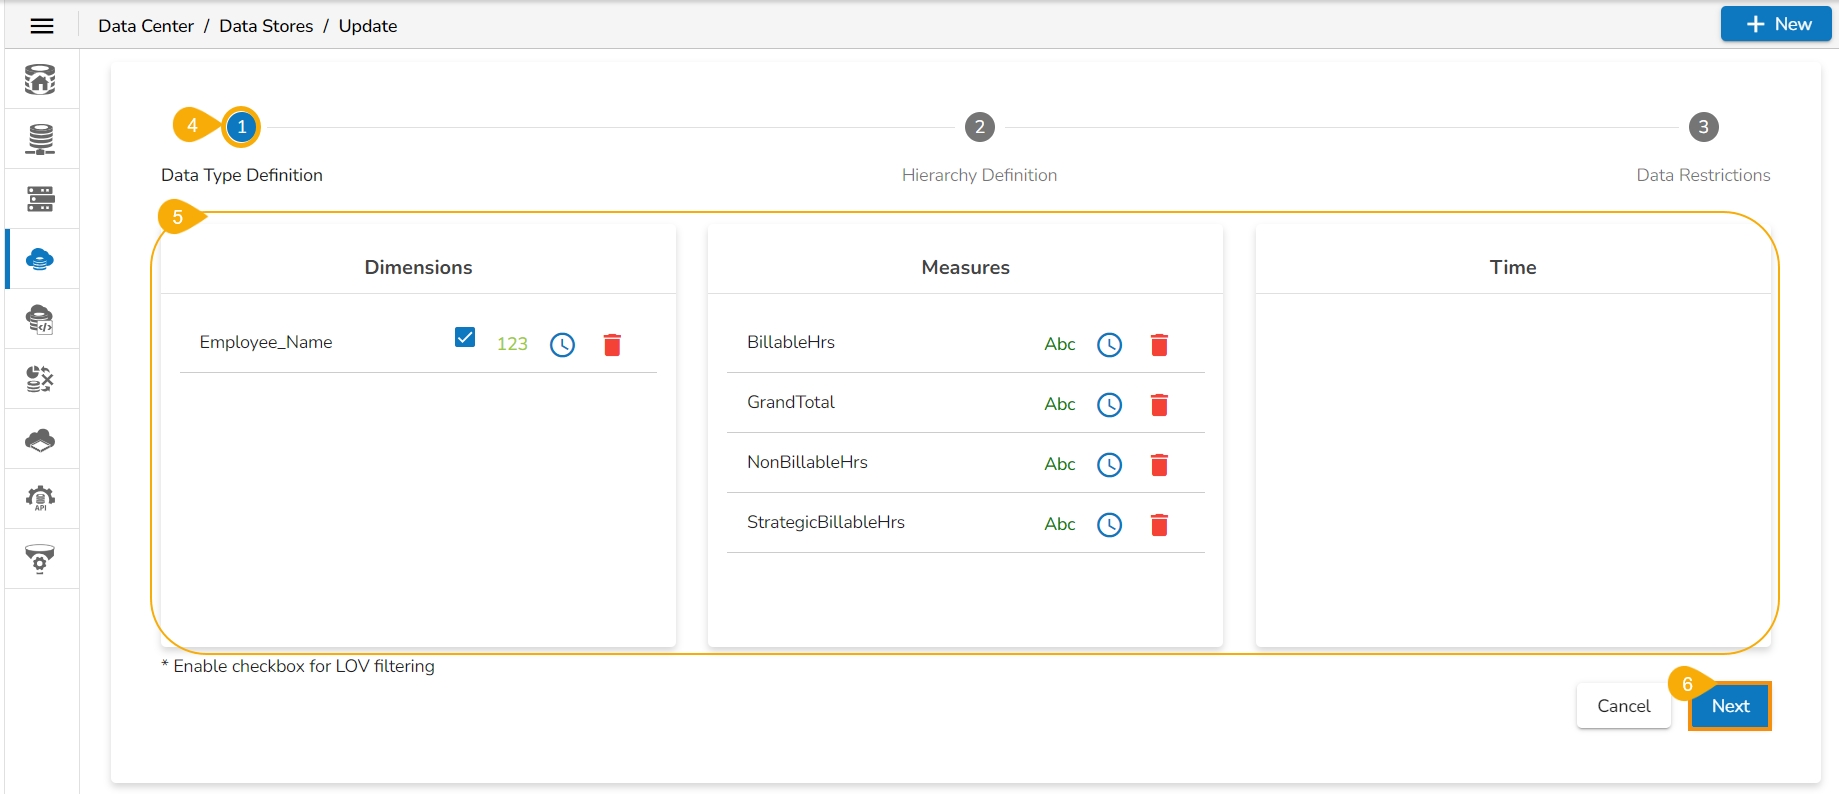
The selected Data Store opens in the editable format.
You can edit the permitted information from the Data Store form.
Select the Next option.
The user can edit the required details under the various steps of the Data Store till the last step gets configured.
Click the Finish option.
Please Note:
The steps required to create/edit a Data Store may vary based on the categories of the Data Source used.
The Finish option is provided on the last tab of the Data Store creation.
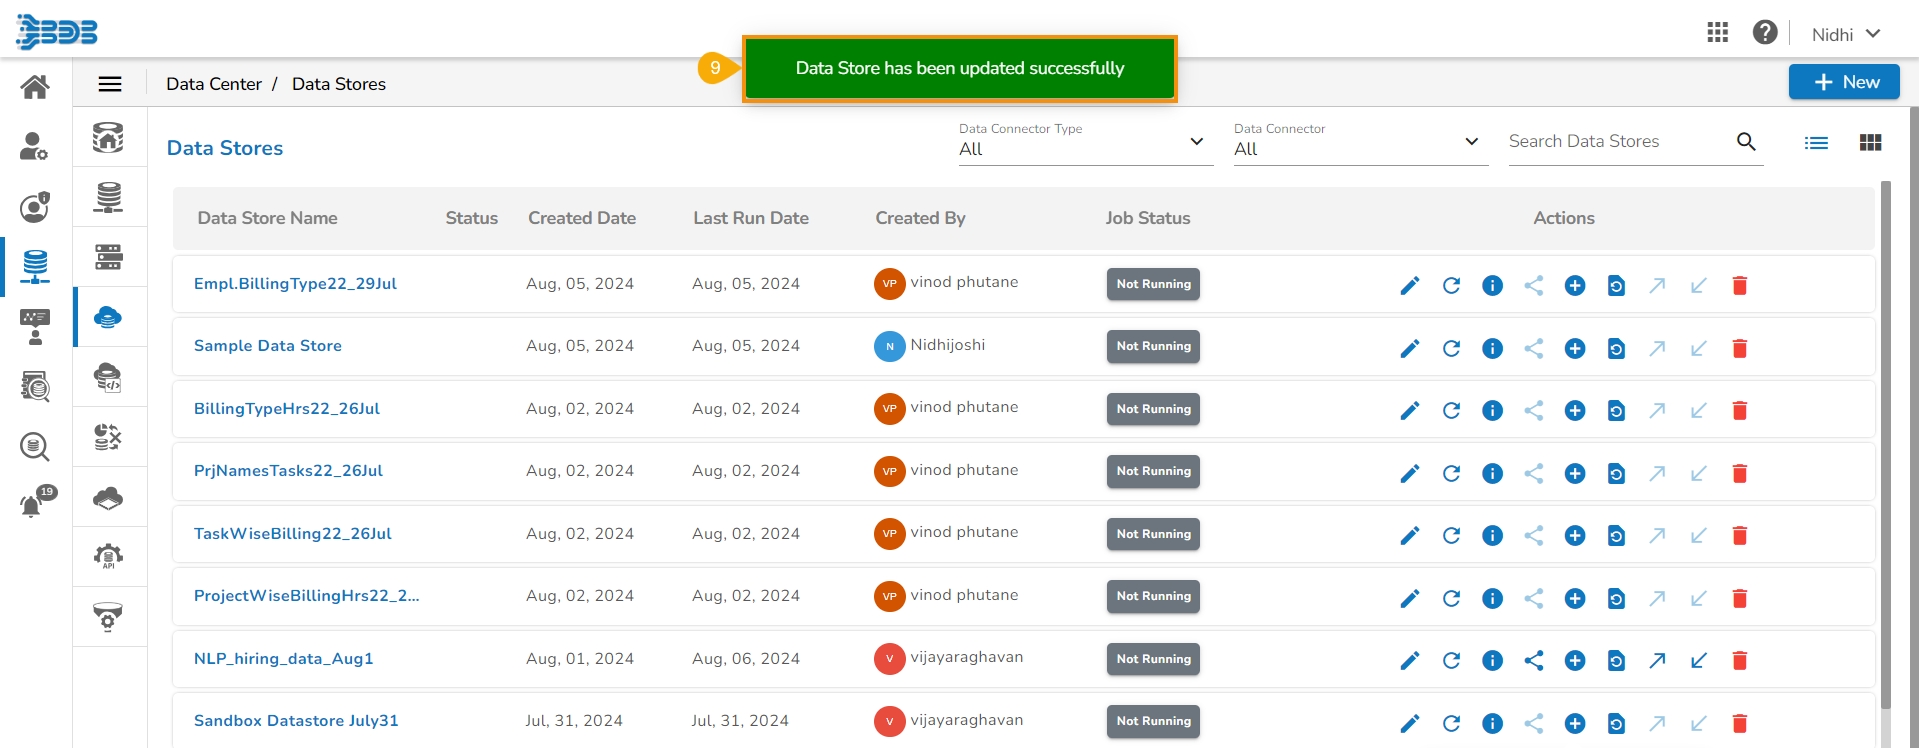
A confirmation message appears, and the selected Data Store gets updated.
Please Note: For the Database category of the Data Stores the user needs to Validate the information before saving it.
This option provides the Data Store details for the selected Data Store.
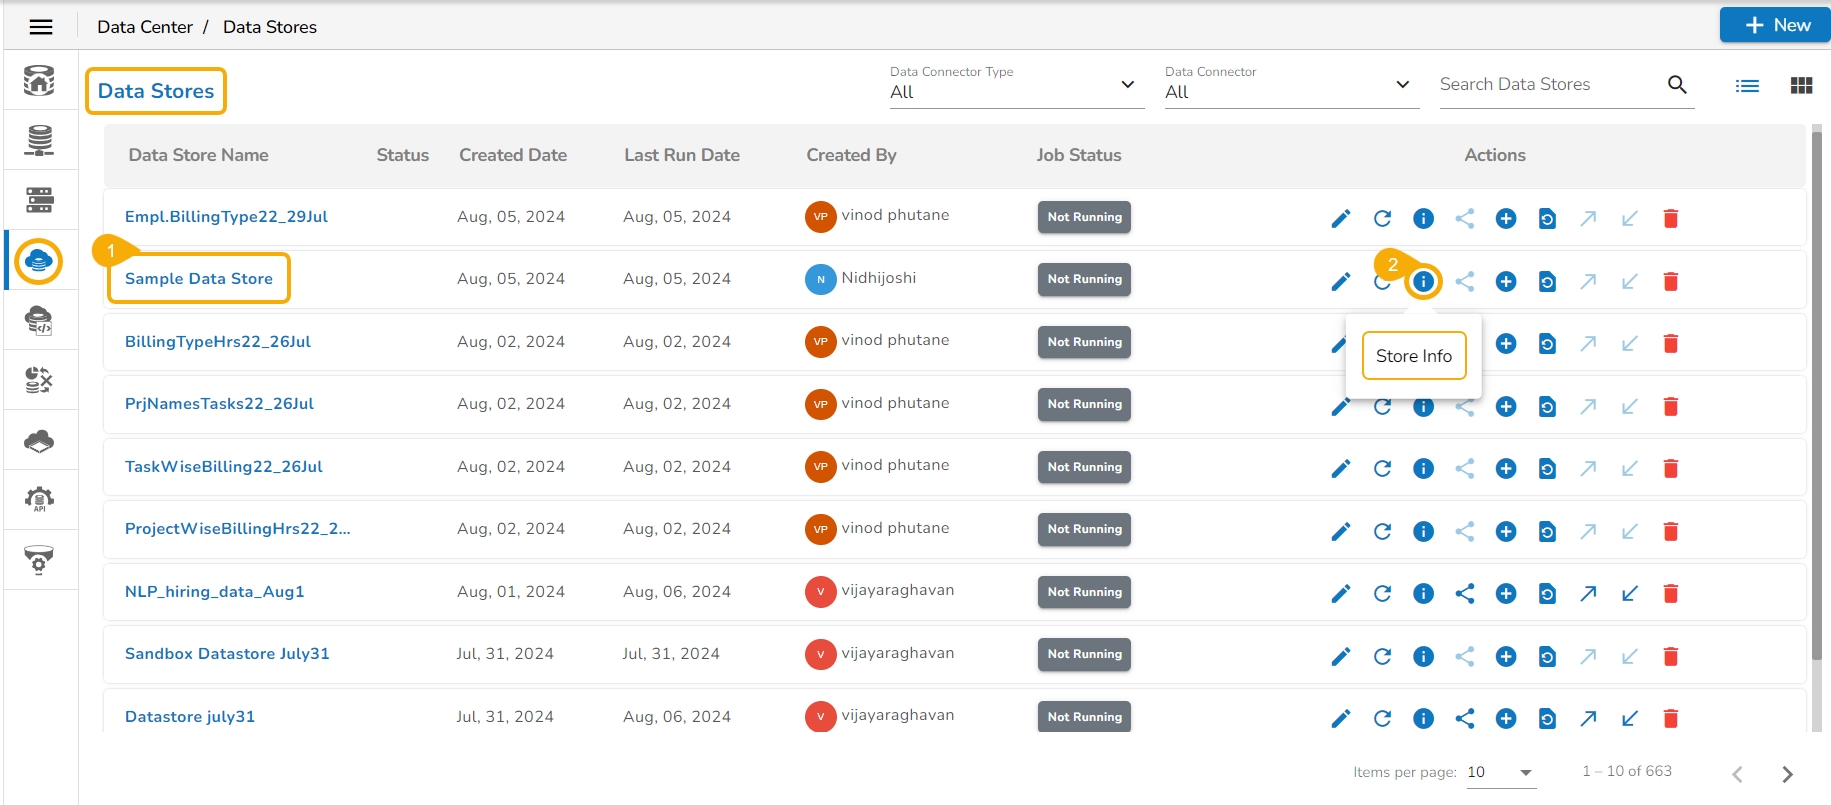
Select a Data Store from the Data stores list.
Click the Store Info icon for that Data Store.
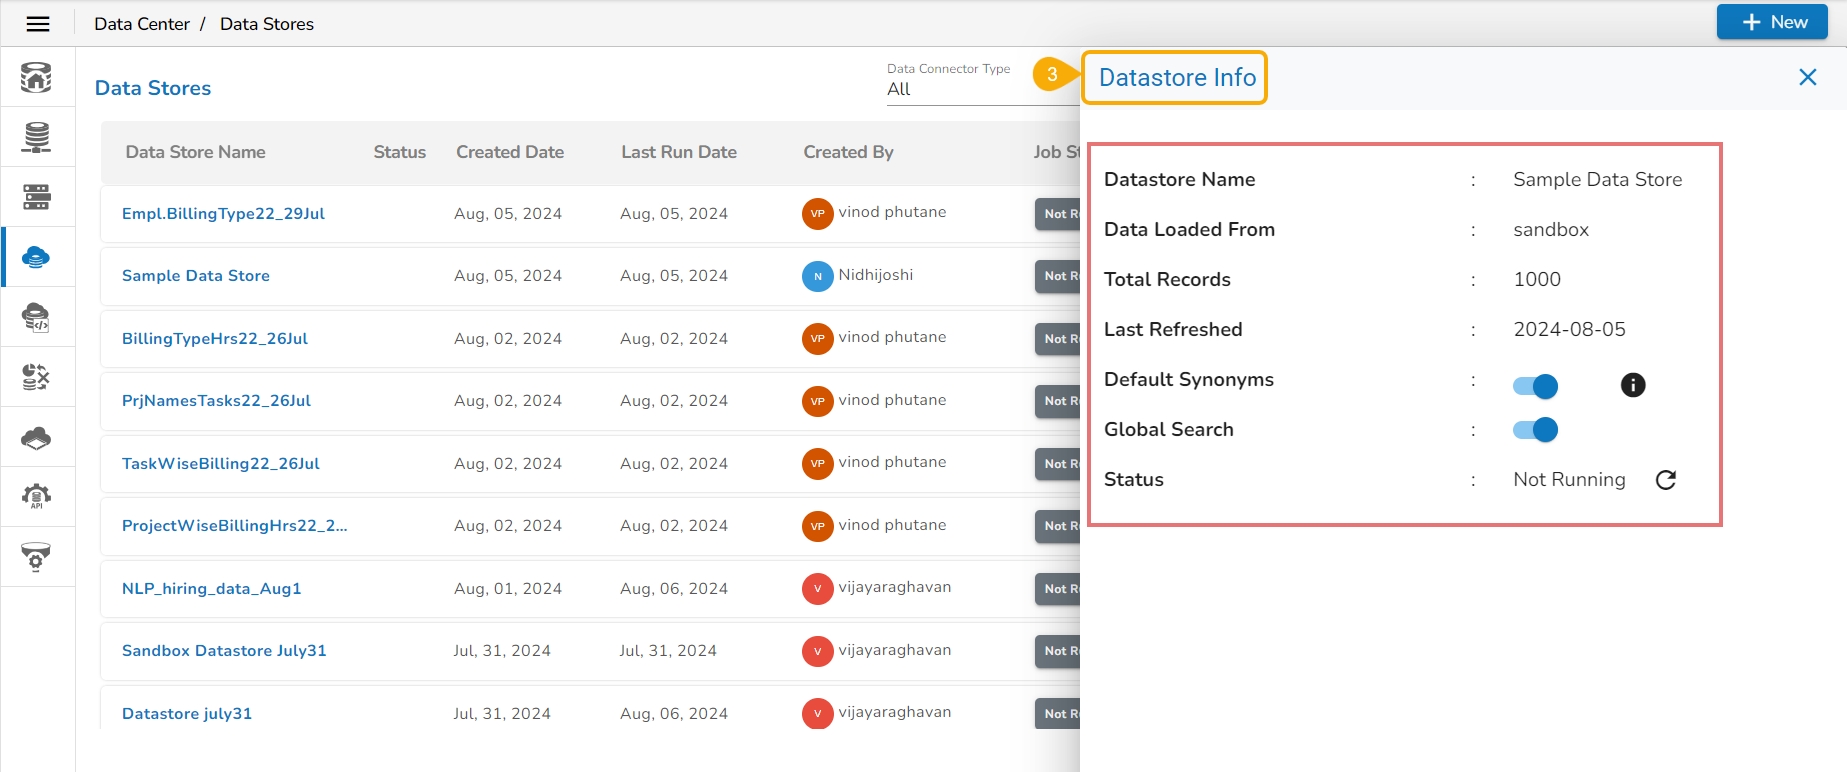
The Data Store Info drawer opens displaying the following details:
Datastore Name: Name of the Datastore.
Data Loaded From: Source database from where the data is loaded.
Total Records: Total no. of records.
Last Refreshed: Date when the Data Store was last refreshed.
Default Synonyms: Enabling this option allows recreation of the synonyms.
Global Search: Enabling this option allows the user to access the concerned Data Store while using the Global Search.
Status: It indicates the status of the job that runs while refreshing the Data Store data.
Check out the illustration on adding synonyms to a Datastore.
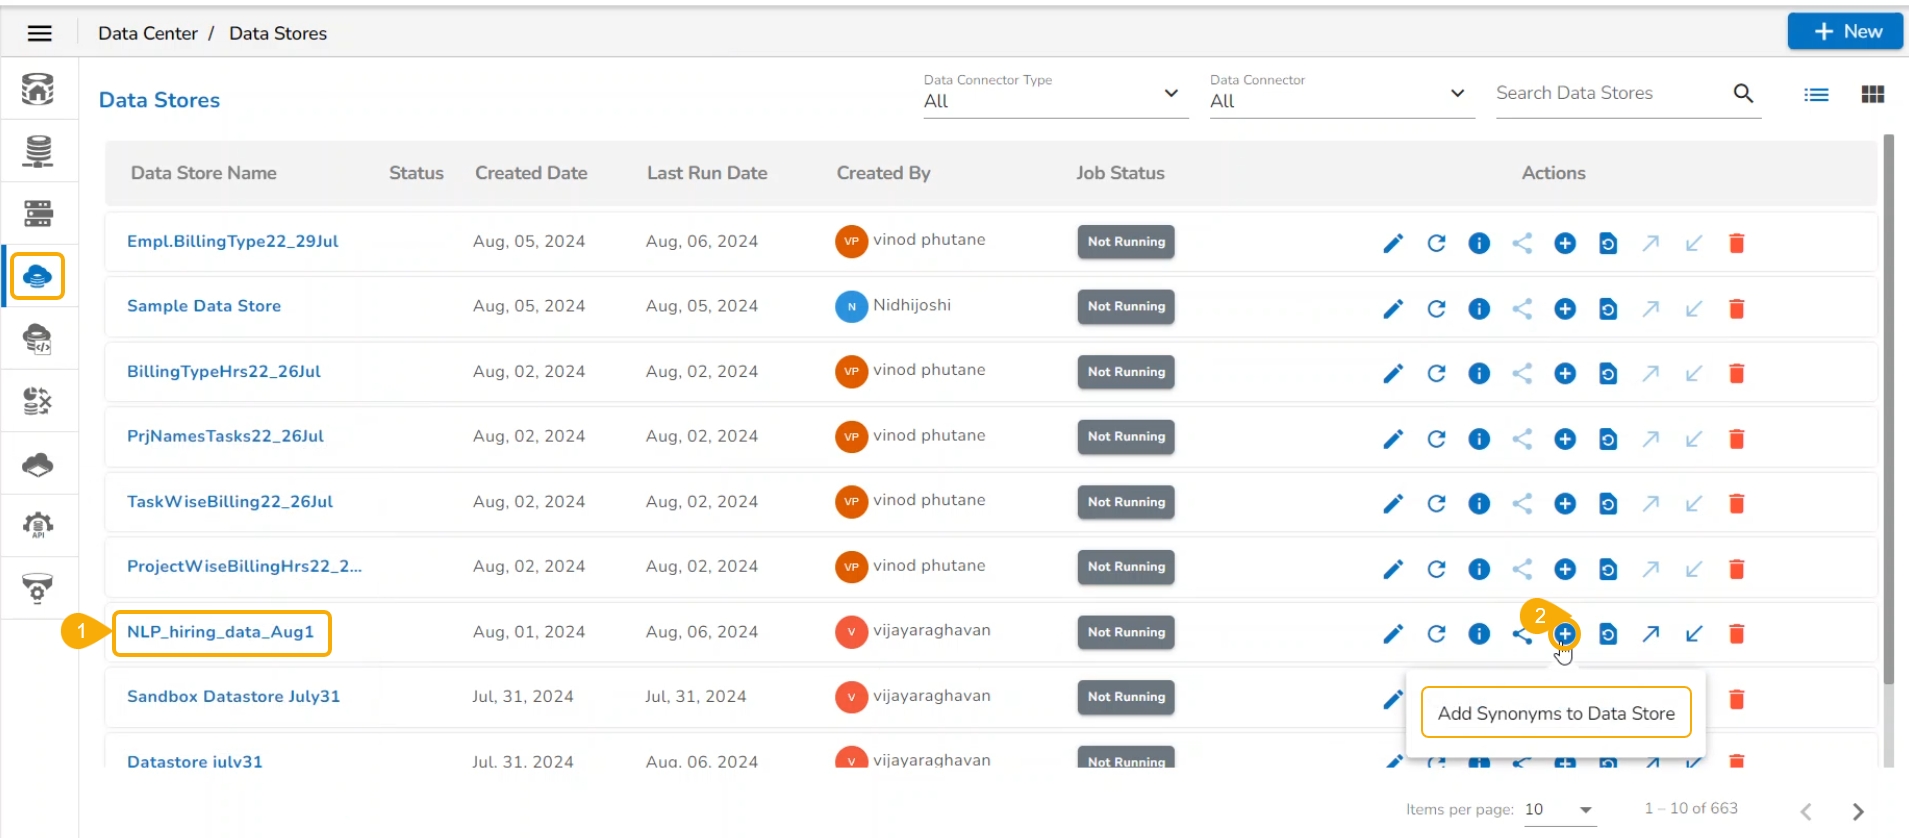
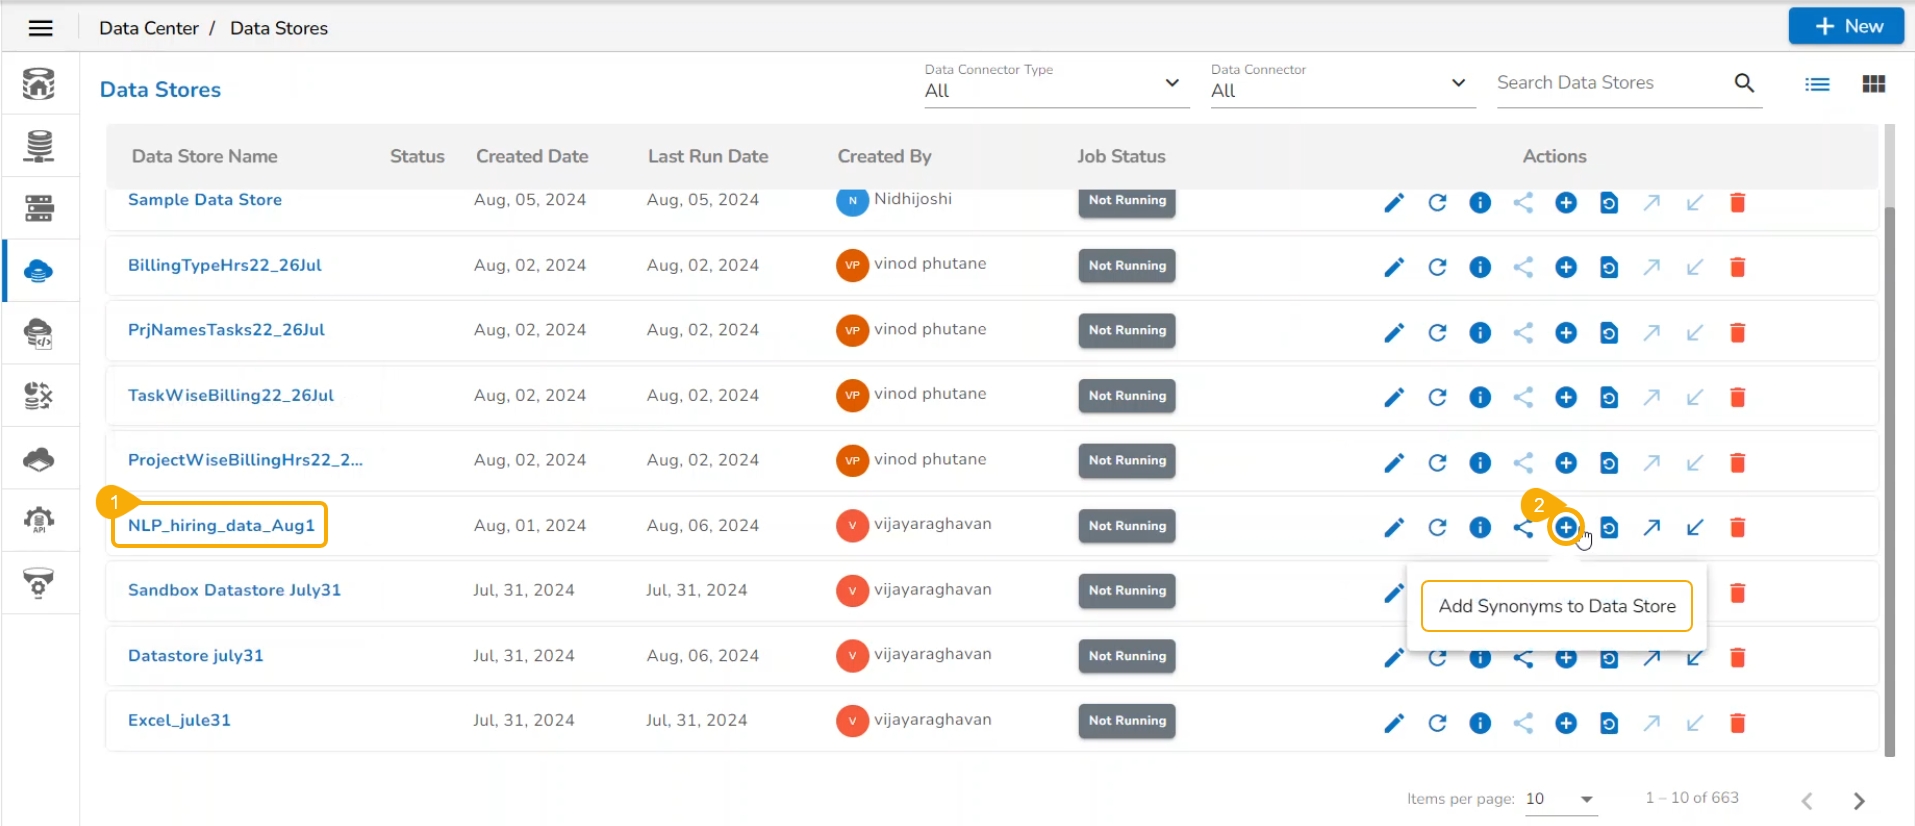
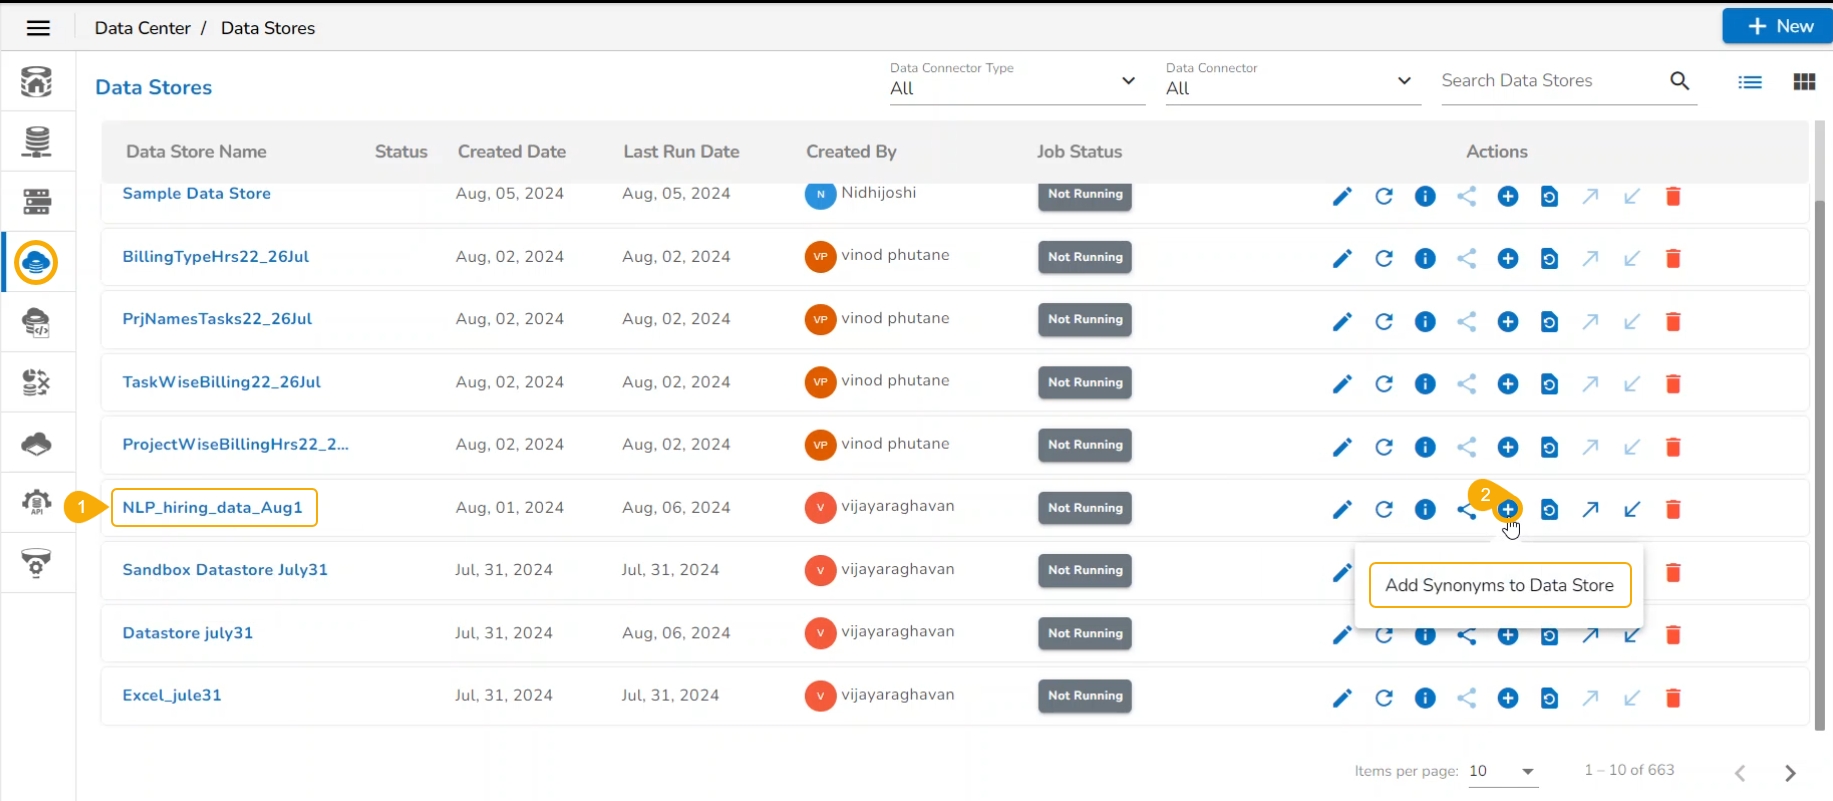
Select a Data Store from the Data Stores list.
Click the Add Synonym to Data Store option.
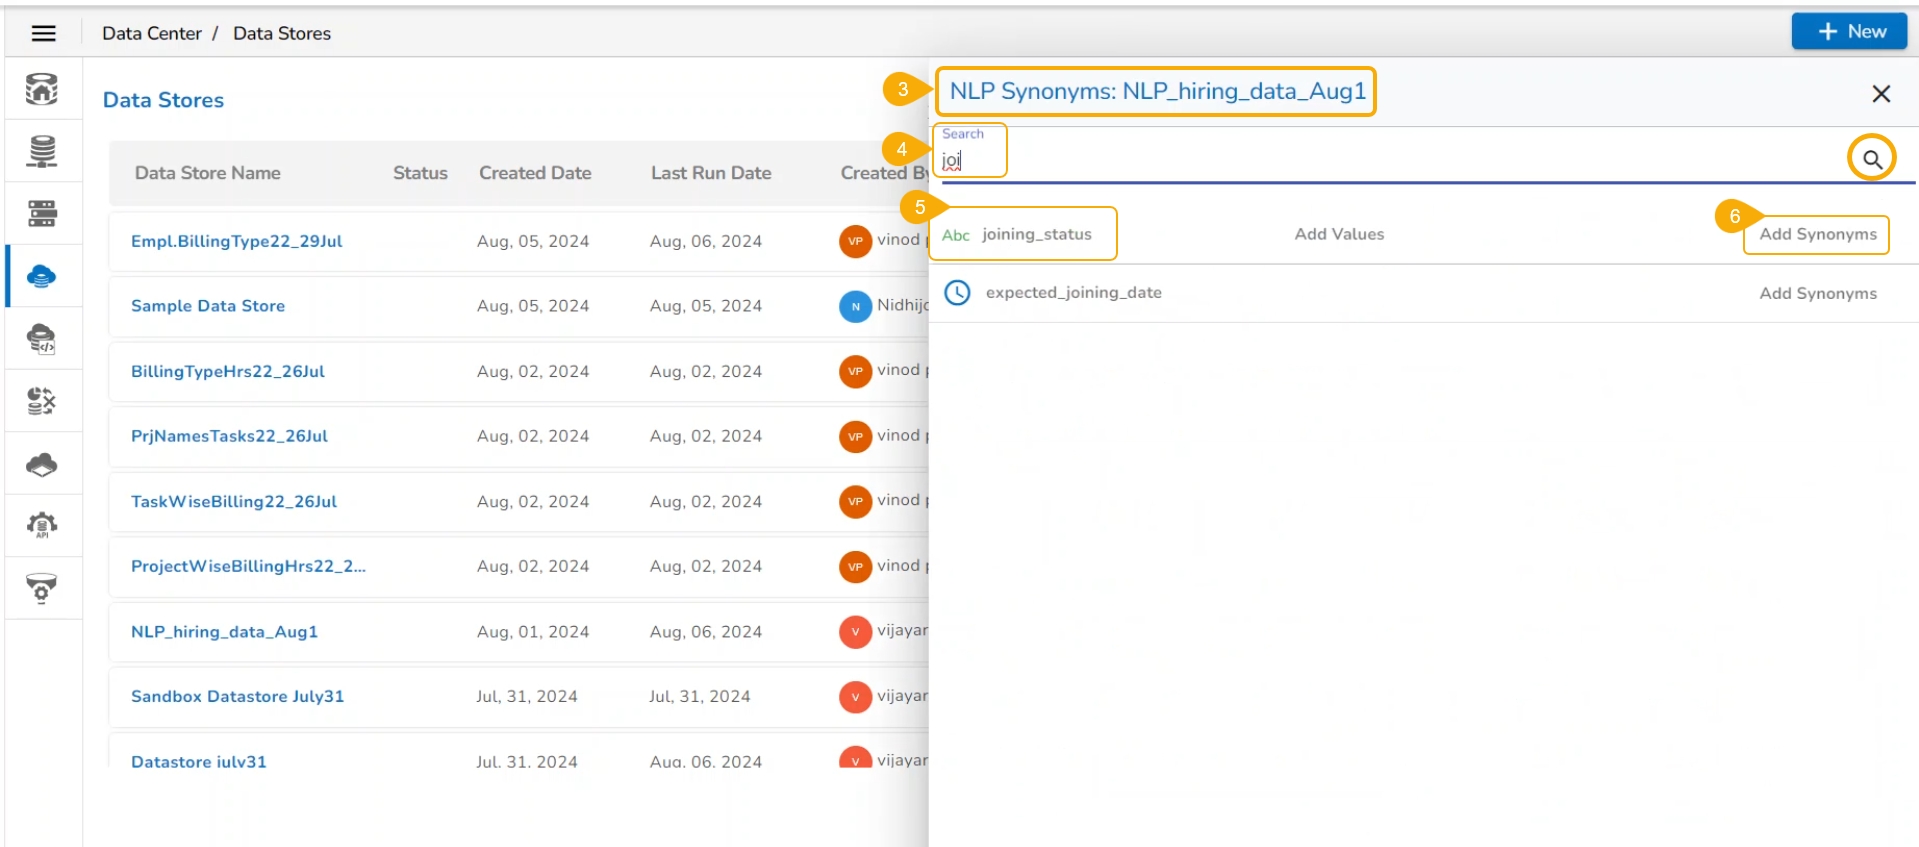
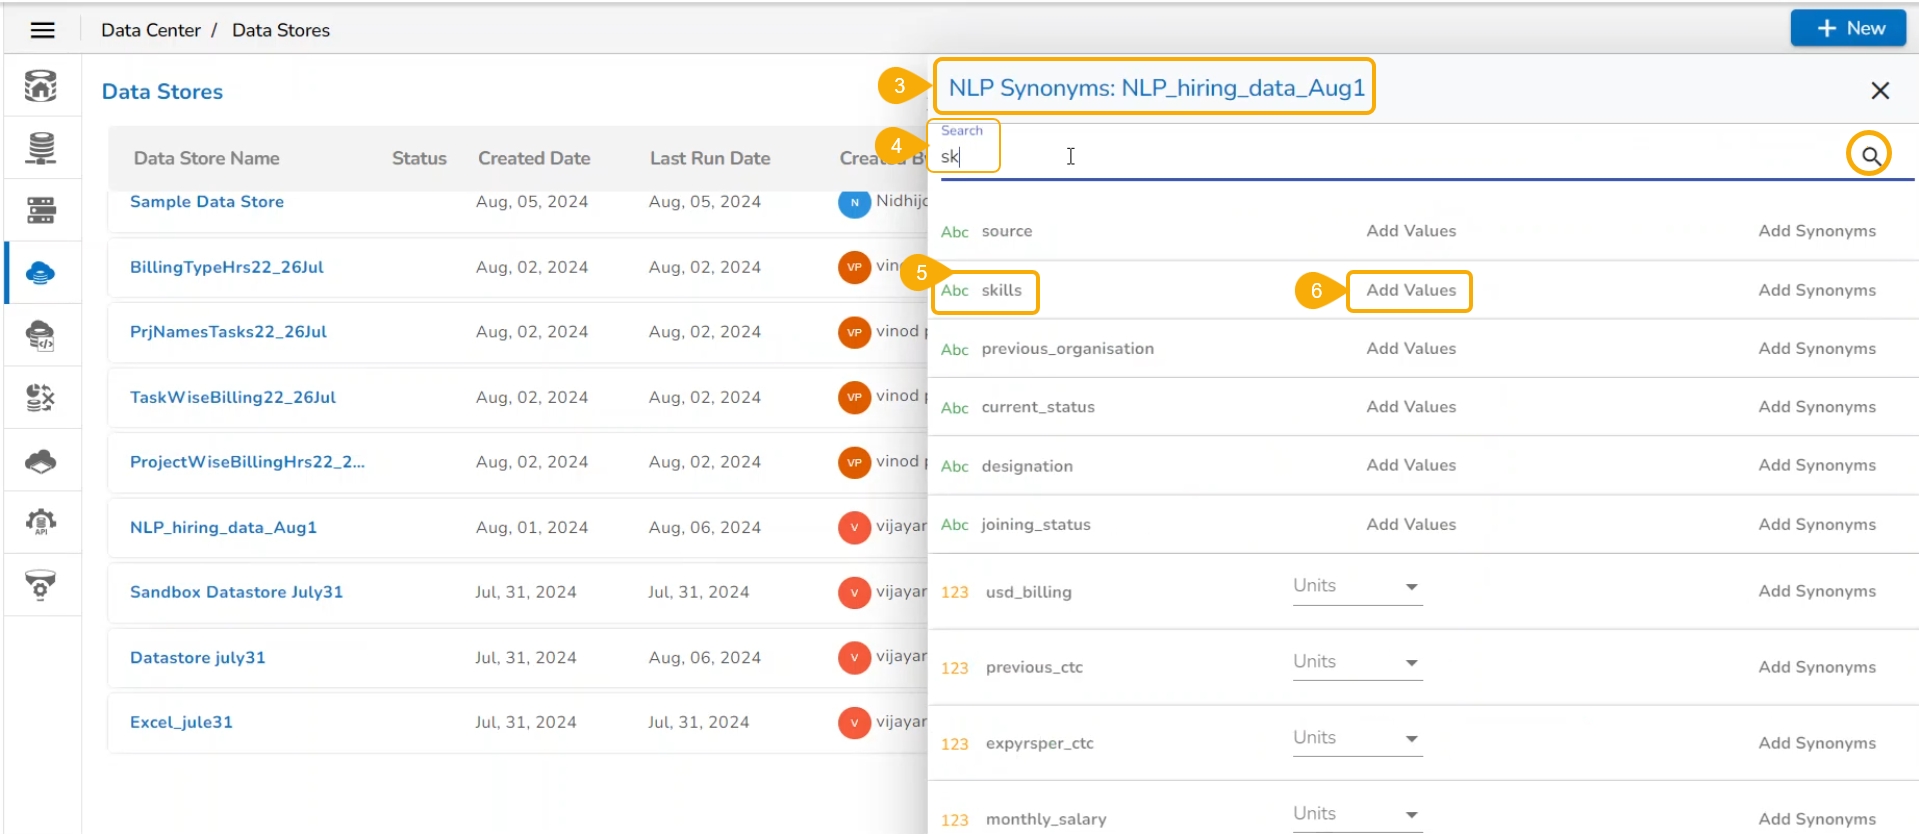
All the Attributes are displayed in a list form.
You can search for a field from the displayed list using the Search space.
Select a field name.
Click the Add Synonyms option.
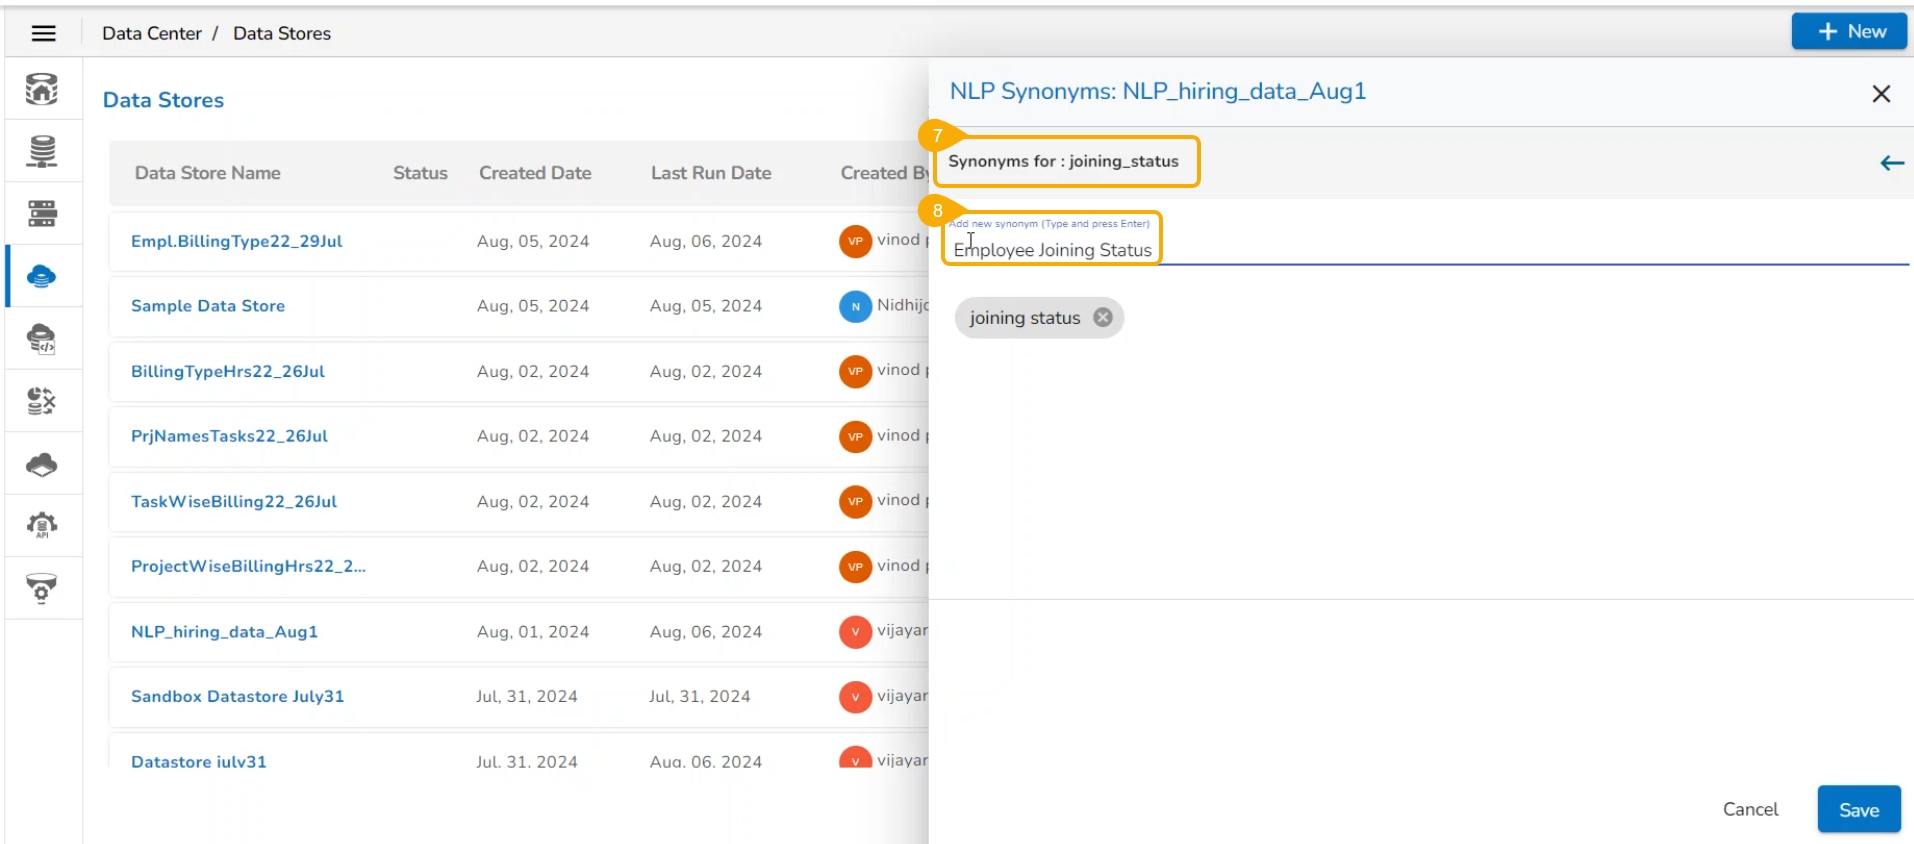
A new window opens to add synonyms.
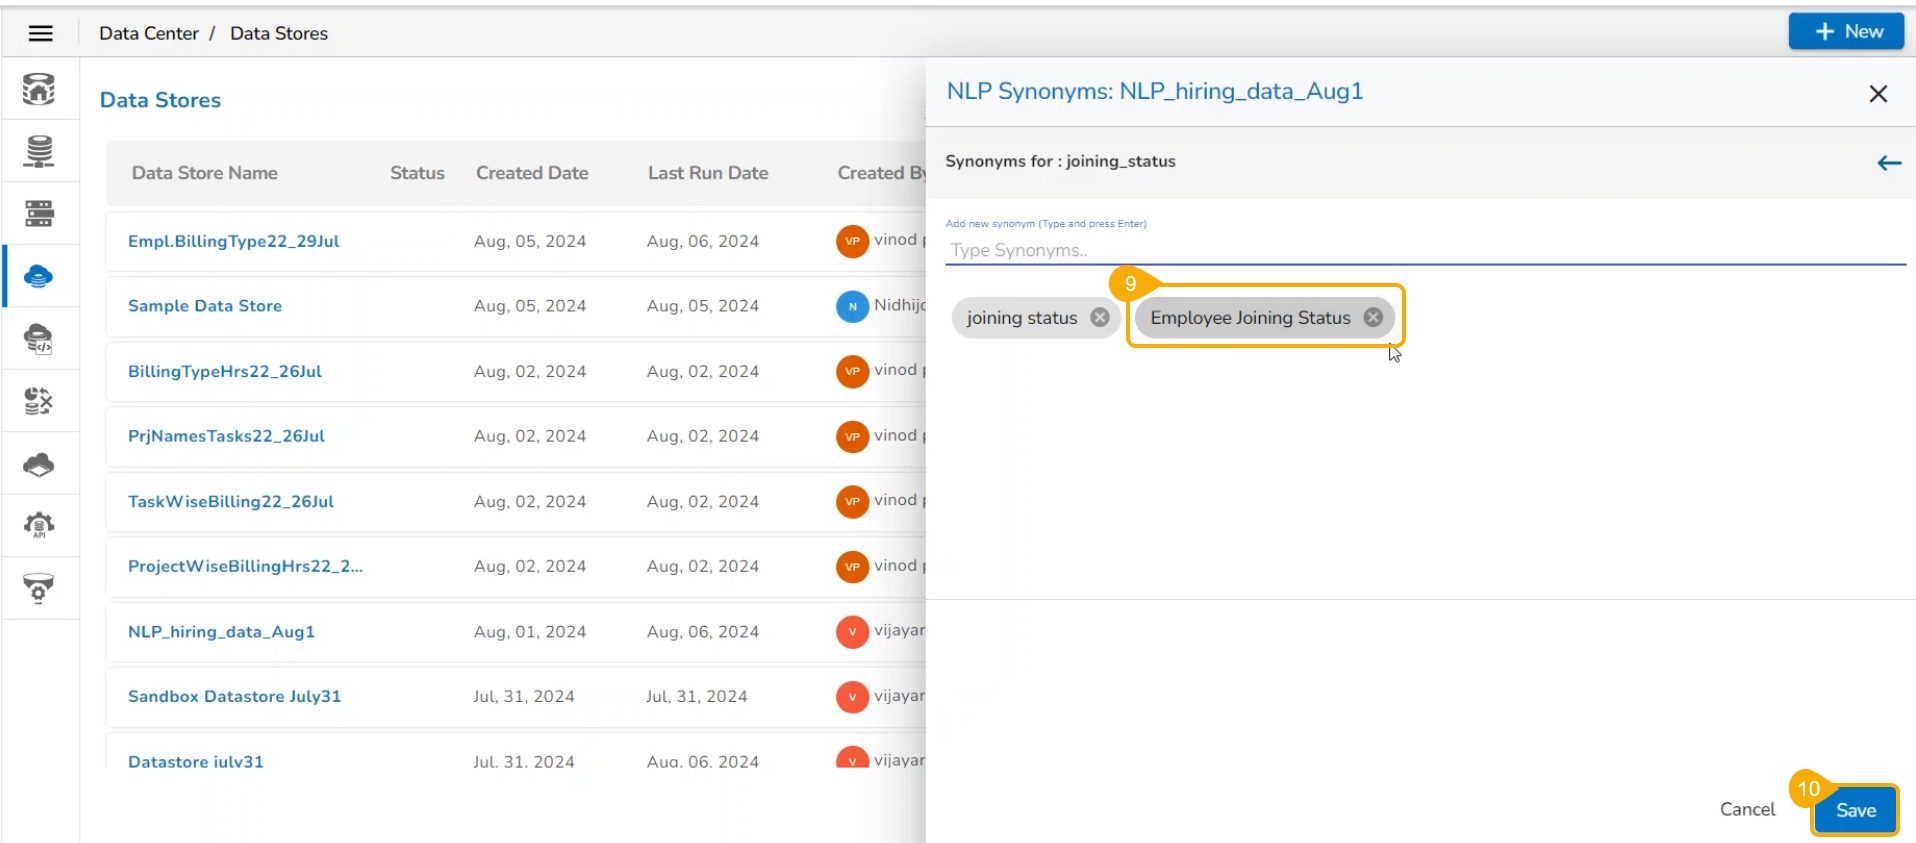
Insert new synonyms in the specified space.
The added synonym(s) appear below with the remove option.
Click the Save option.
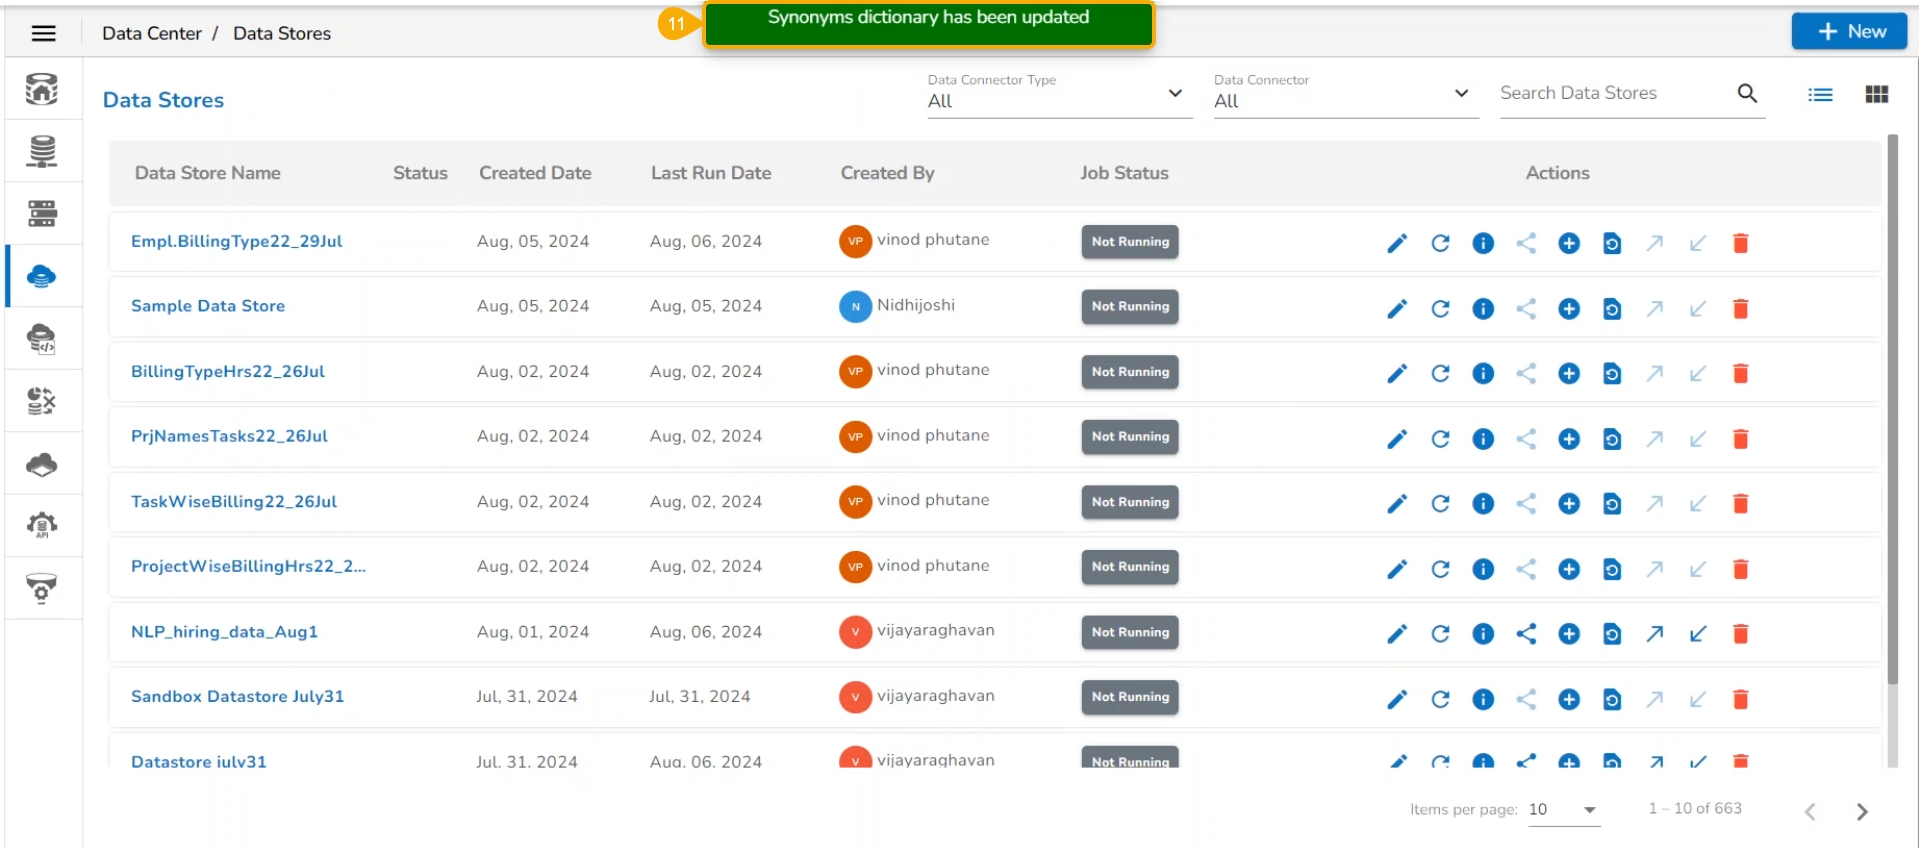
A success message appears to ensure that the synonym dictionary is updated with the newly added synonym.
Check out the video on adding synonyms for a Dimension Value.
Select a Data Store from the Data Store List.
Click the Add Synonym to Data Store icon.
The NLP Synonyms window opens for a data store.
You can search for a Dimension from the displayed list using the Search space.
Select a Dimension.
Select the Add Values option for the selected Dimension.
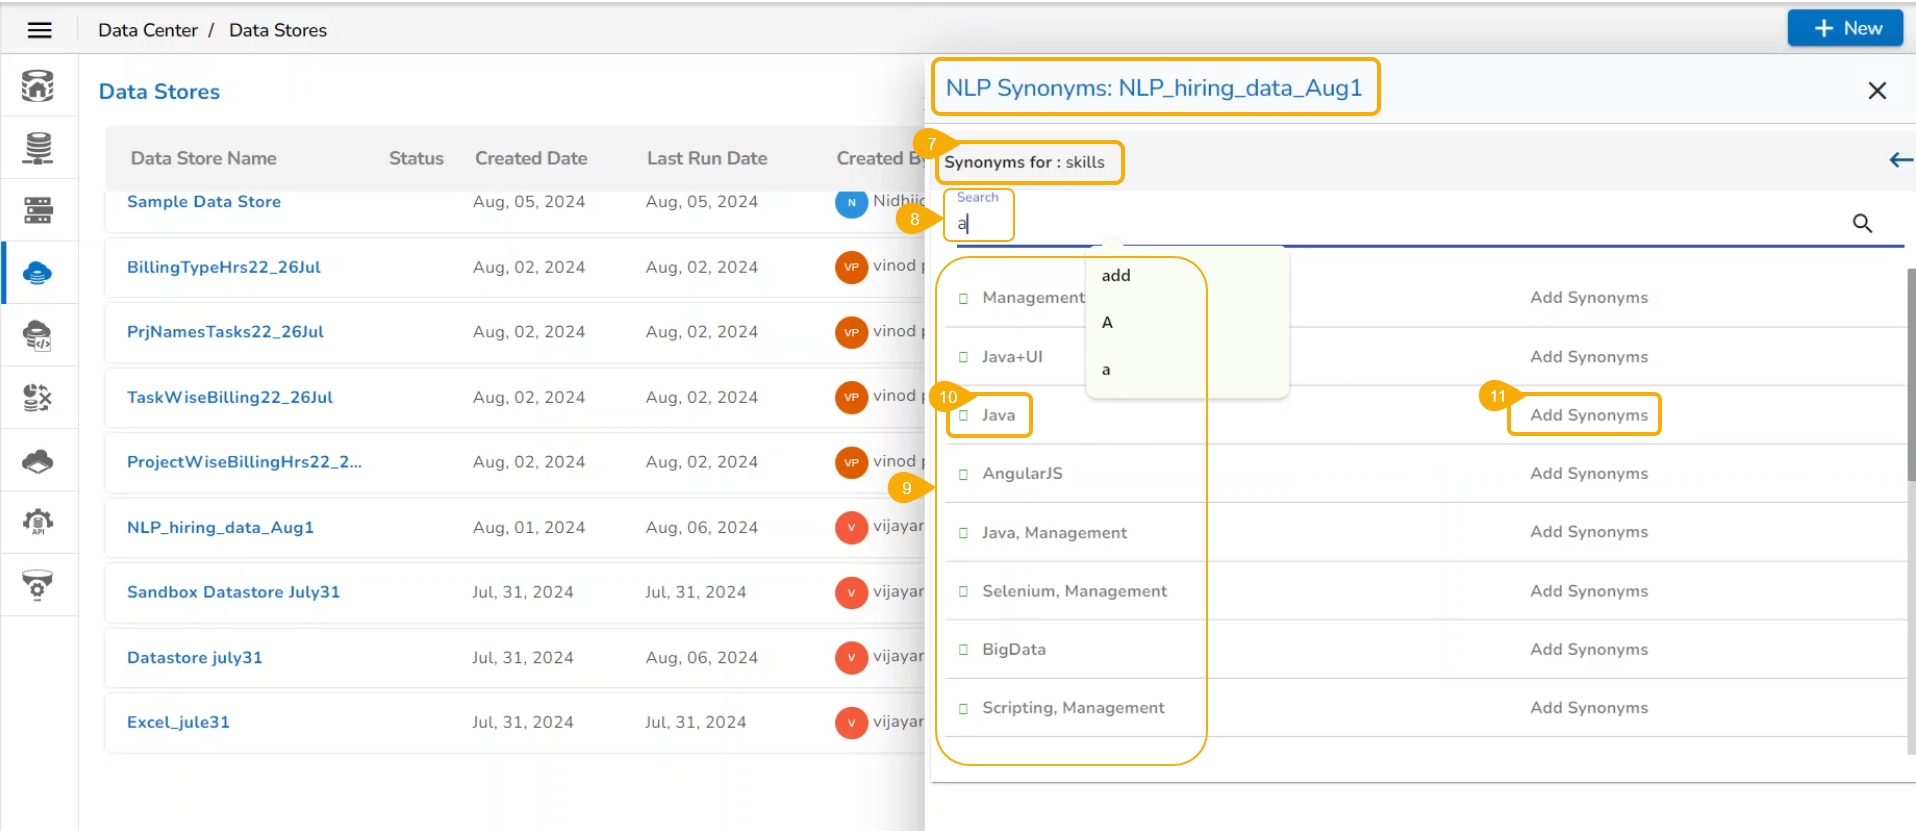
The selected Dimension appears on the top. (E.g., skills in the below image).
Use the search bar to find specific dimension values.
A list of Values appears.
Select a Value from the displayed list.
Click the Add Synonyms option for the selected value.
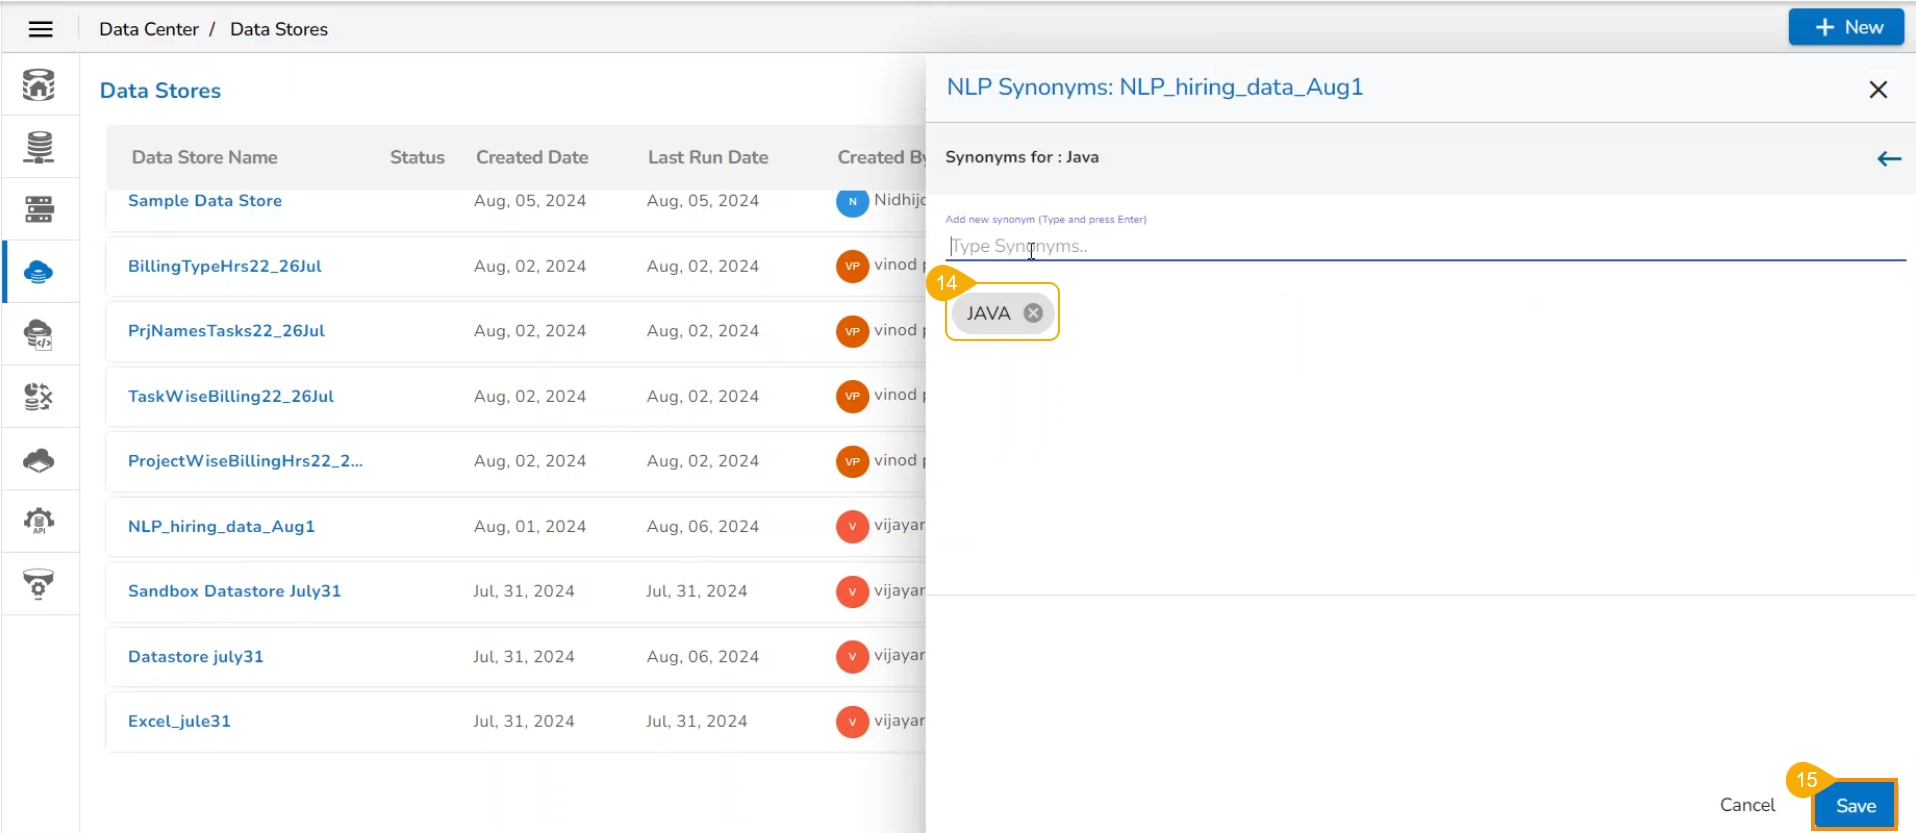
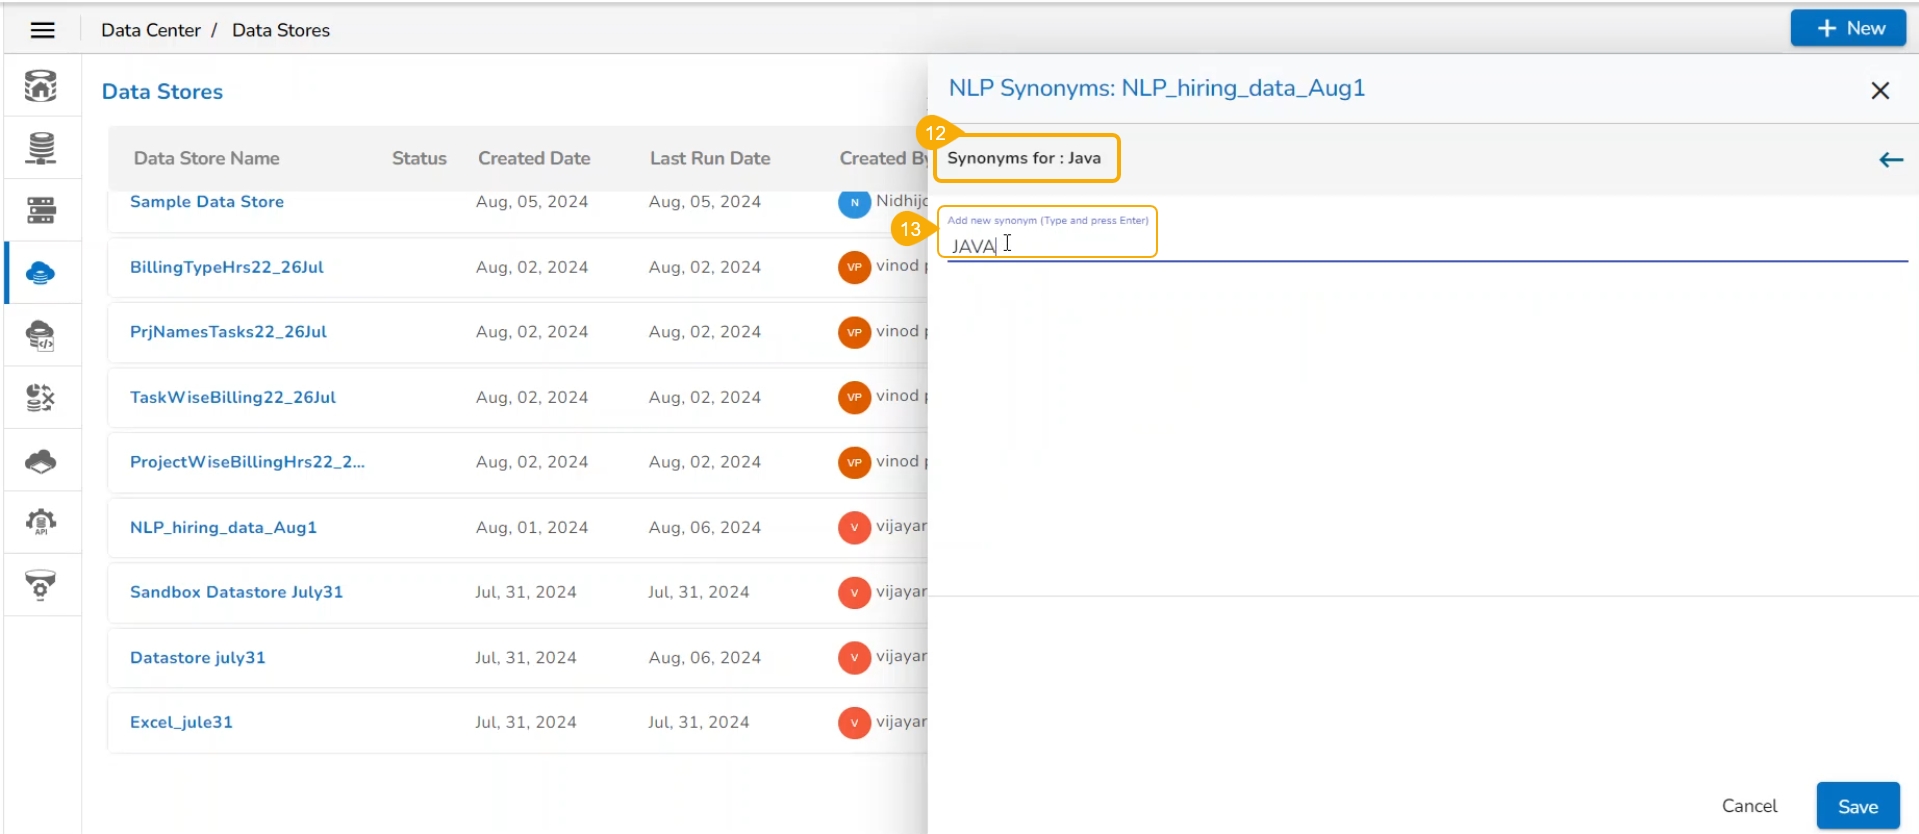
The selected dimension value appears to add synonyms.
Add synonyms by inserting new synonyms in the specific space, and clicking the Enter key.
The Value gets added to the selected dimension value.
Click the Save option to save the added synonyms.
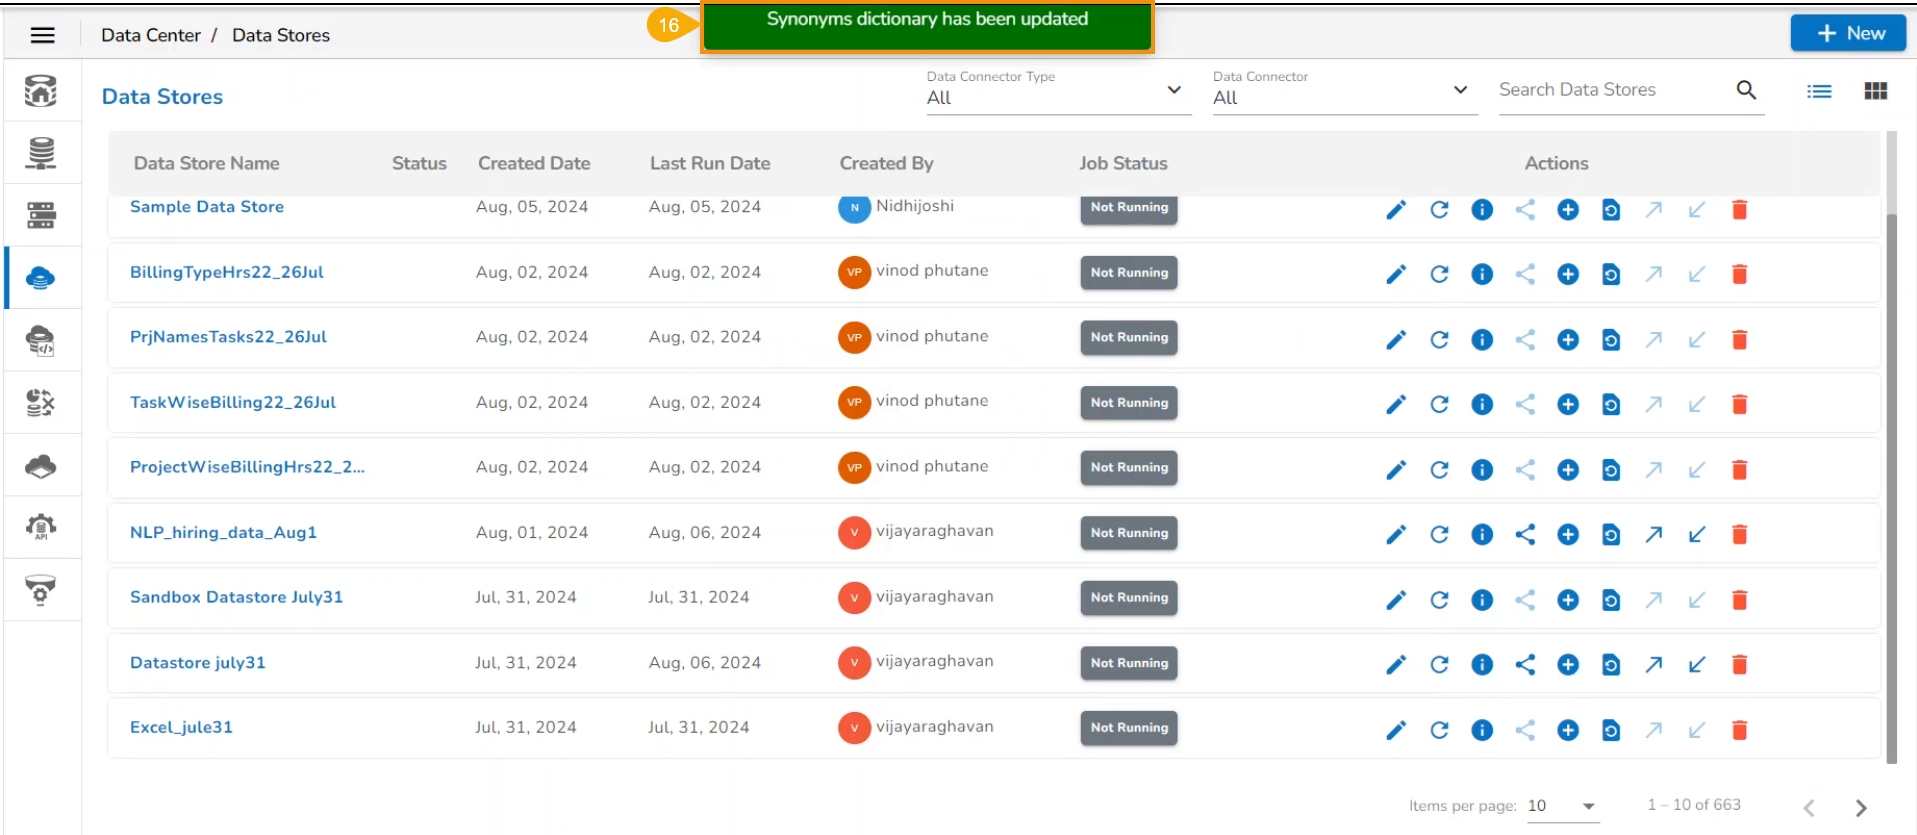
A success message appears to ensure that the Synonyms dictionary is updated.
Check out the illustration on providing the Units for Measure values.
Select a Data Store from the Data Store list.
Click the Add Synonyms to Data Store icon.
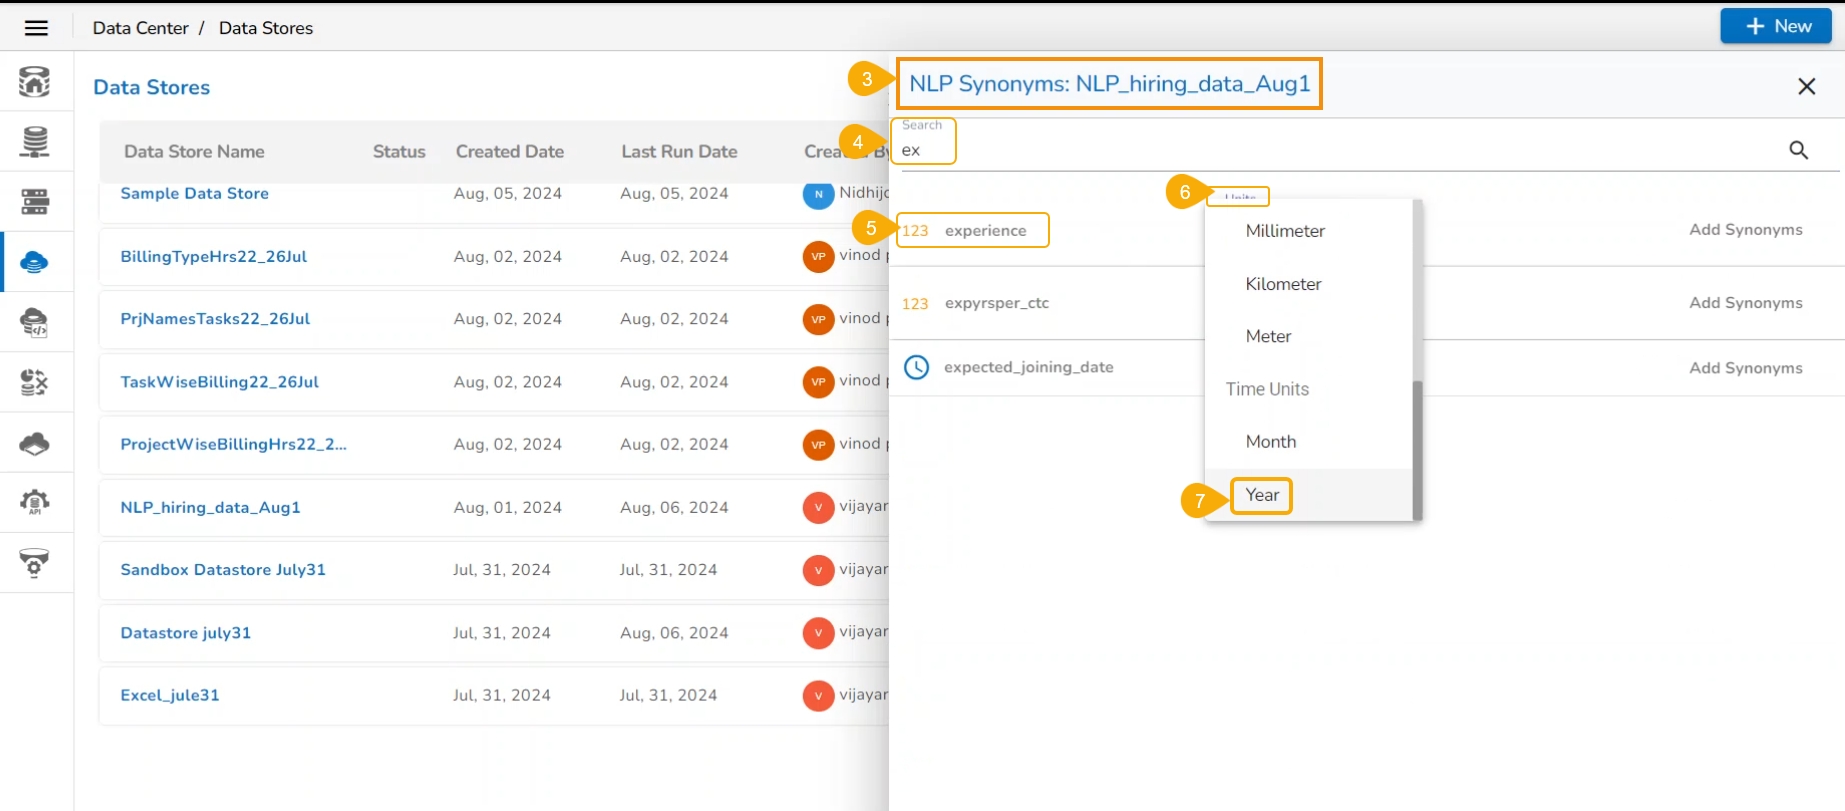
The NLP Synonyms window opens for a data store.
You can search for a Measure from the displayed list using the Search space.
Select a Measure from the displayed list.
Click the Units drop-down menu to display the options of the unit.
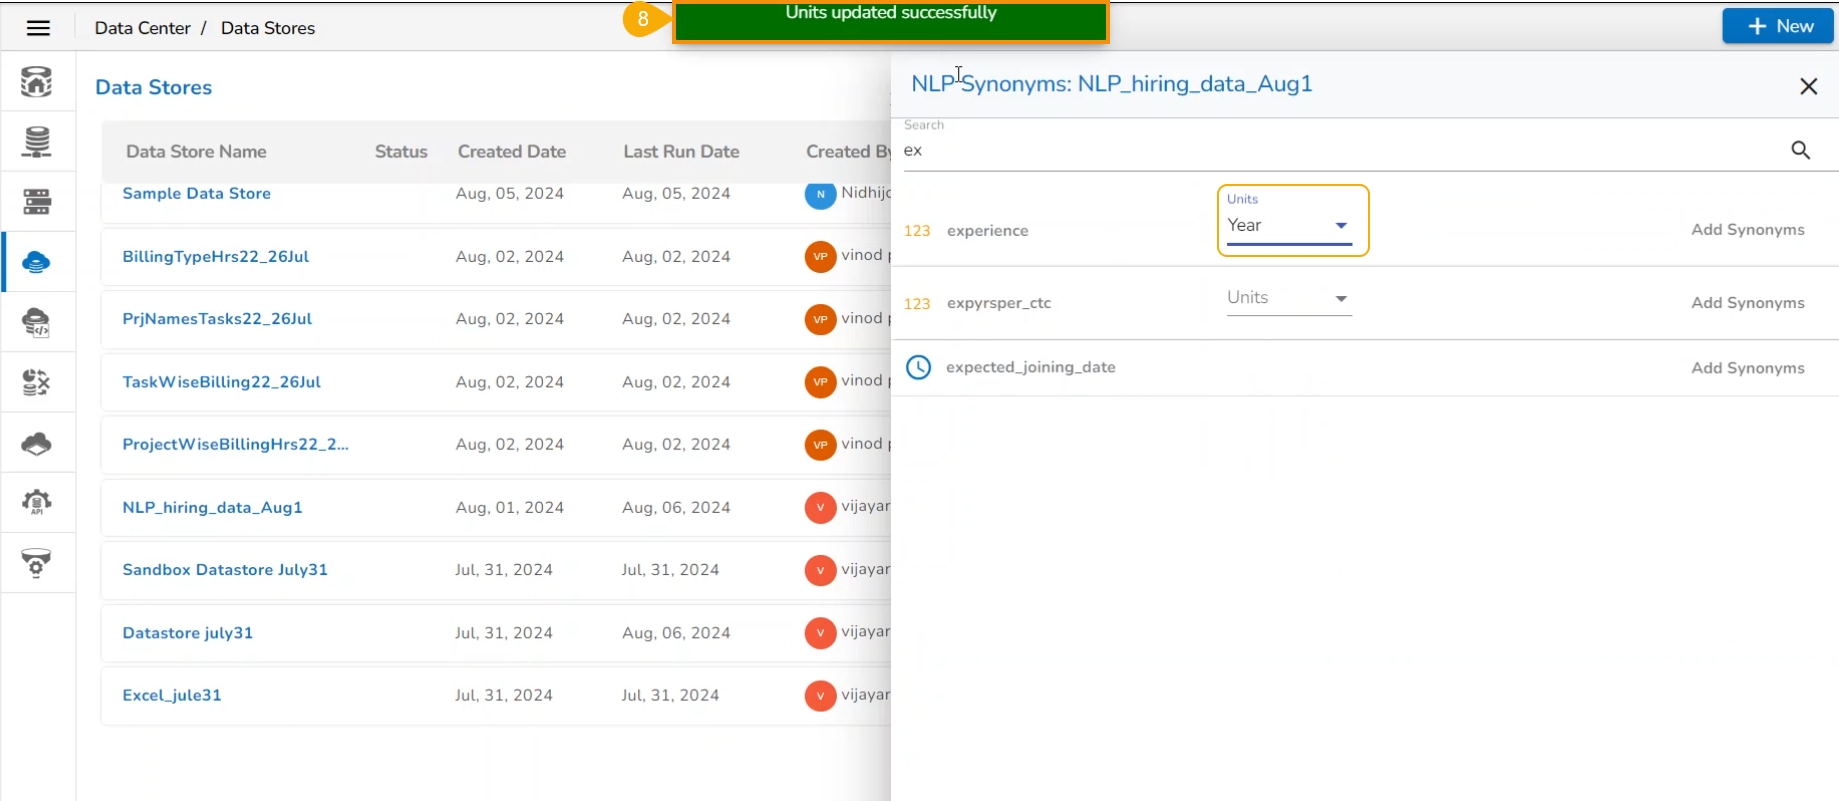
Select a unit for the Measure.
A notification message appears to inform the recent update the user, and the user gets redirected to the Data Stores List page.
The Refresh Synonyms option helps to refresh data store tables to reflect the later changes in the data store synonyms directory.
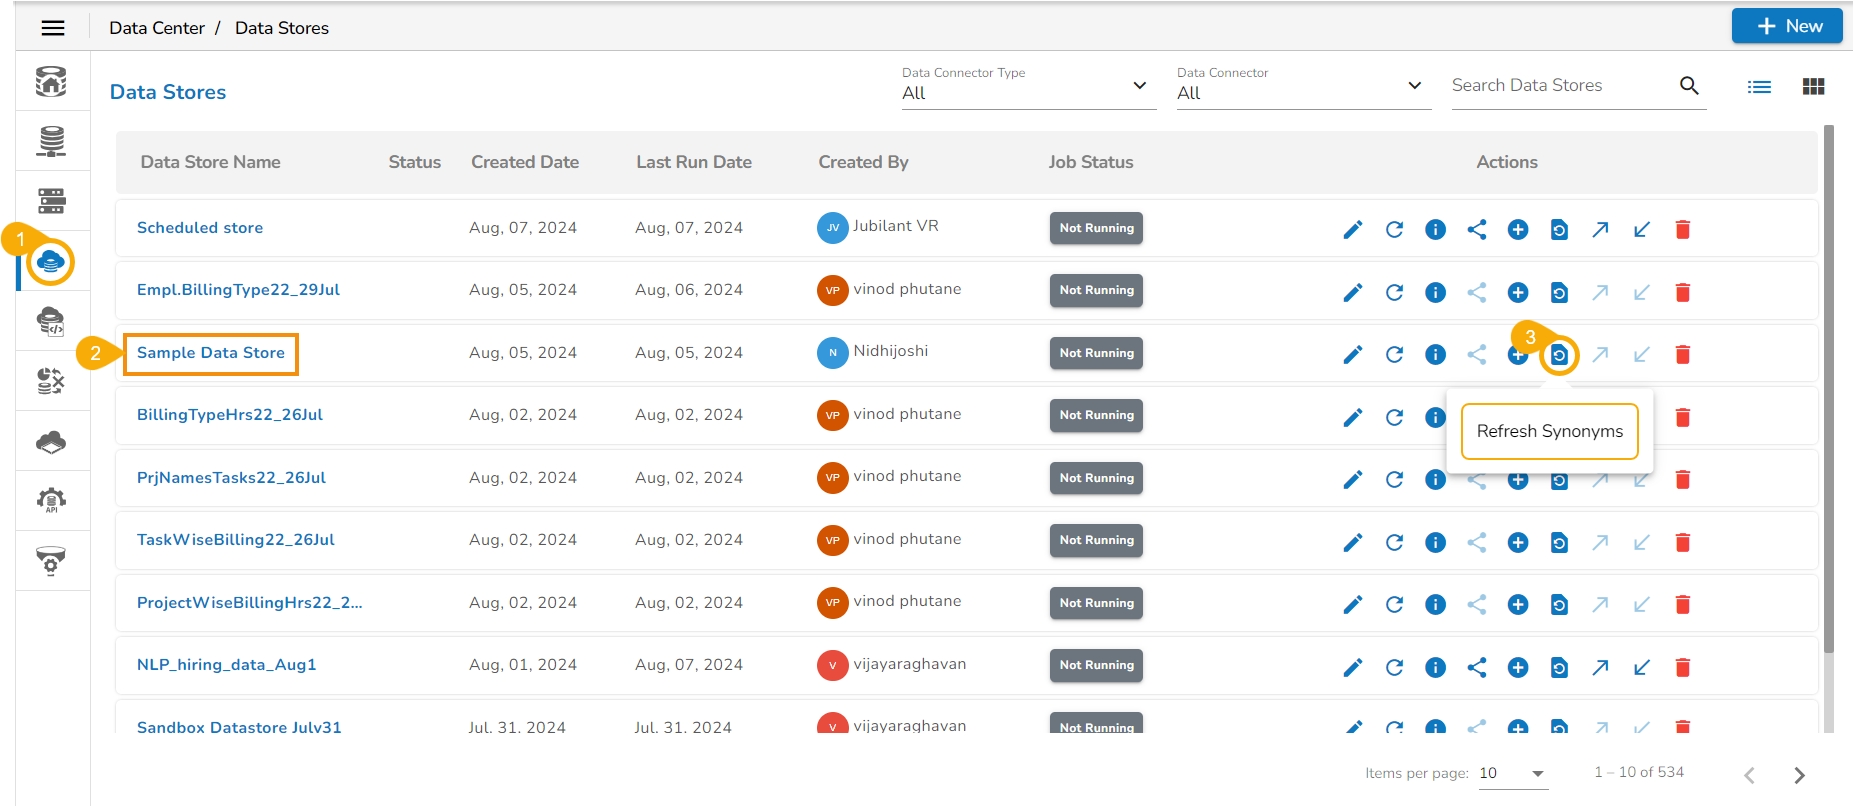
Navigate to the Data Stores list.
Select a Data Store from the list.
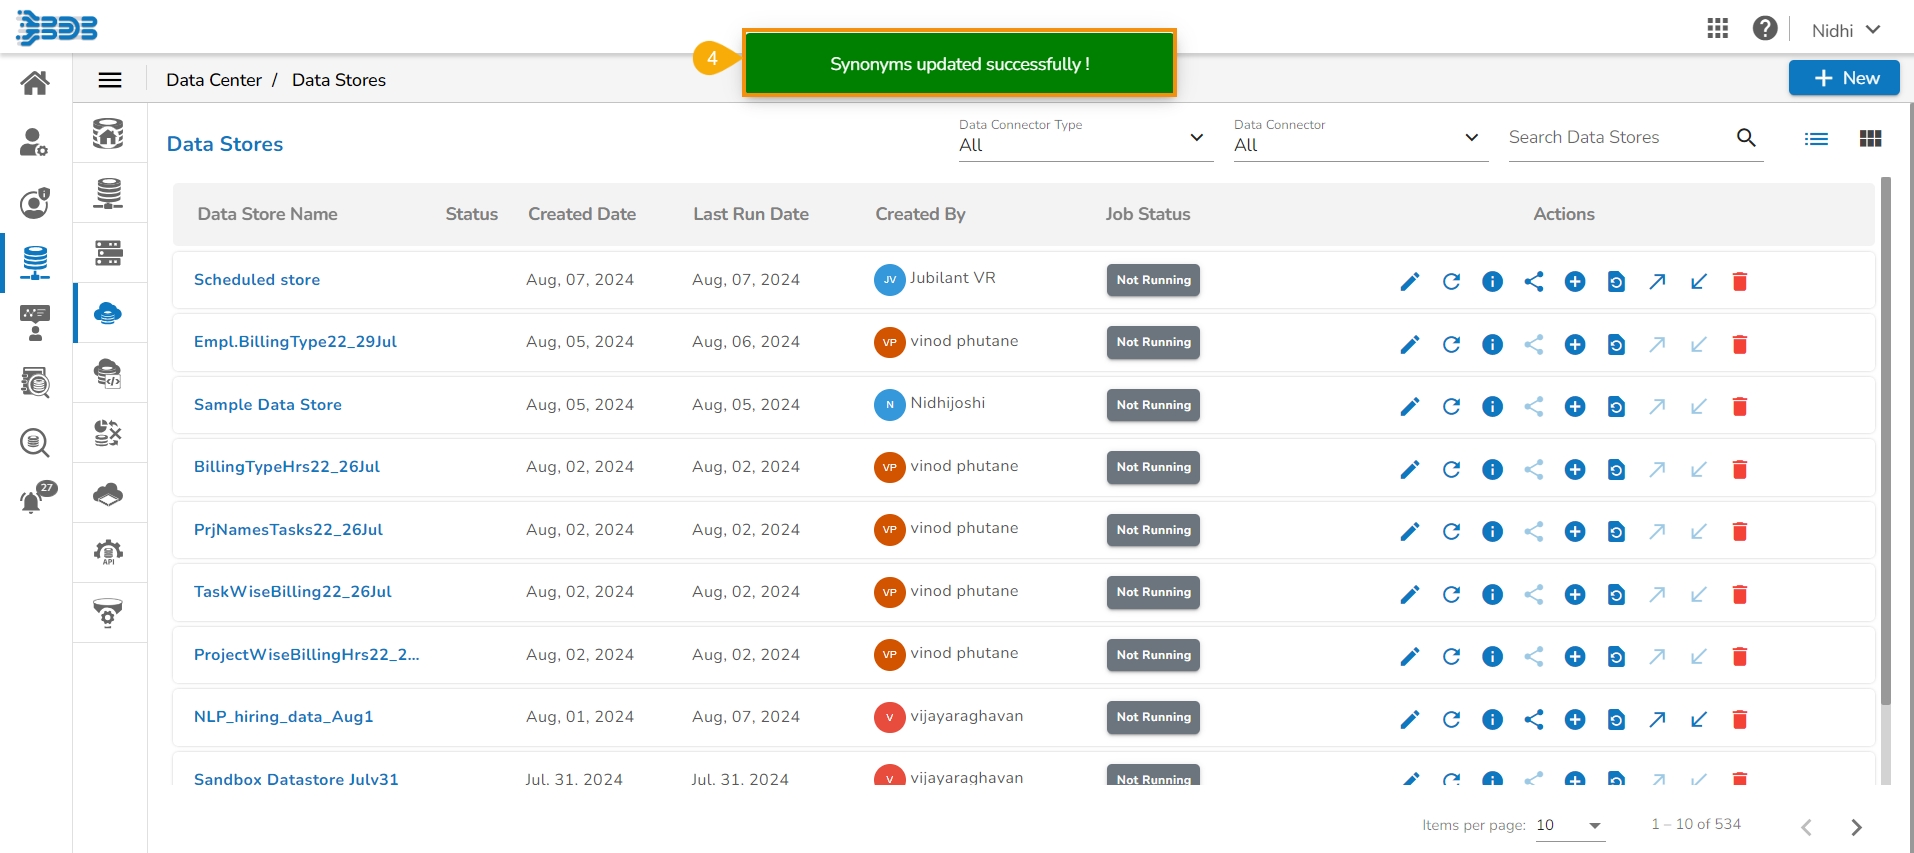
Click the Refresh Synonyms icon.
A confirmation message appears to inform the users that the Synonyms are updated.
This page focuses on the Push to VCS functionality for Data Stores.
This is the mechanism for versioning the Data Store and storing the latest versions in Git. While pulling the Data Store, the user can see each version's committed message. The user will get more info about the committed data set.
Check out the illustration to push a version of a Data Store.
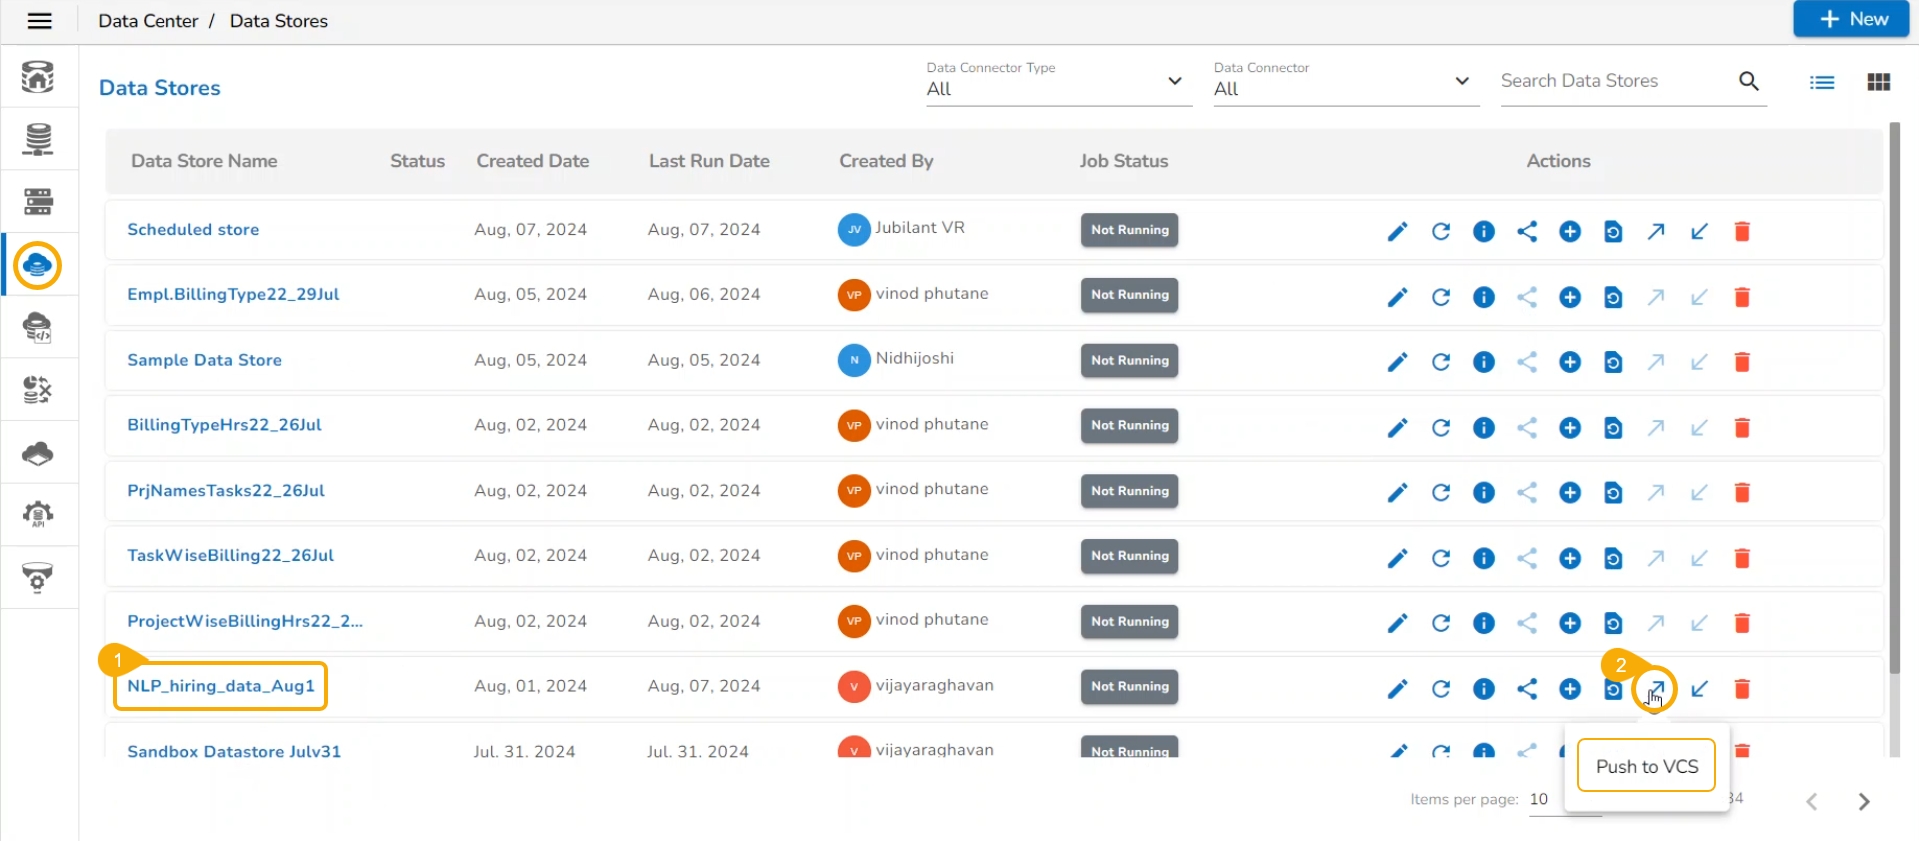
Select a Data Store from the Data Stores list.
Click on the Push to VCS icon.
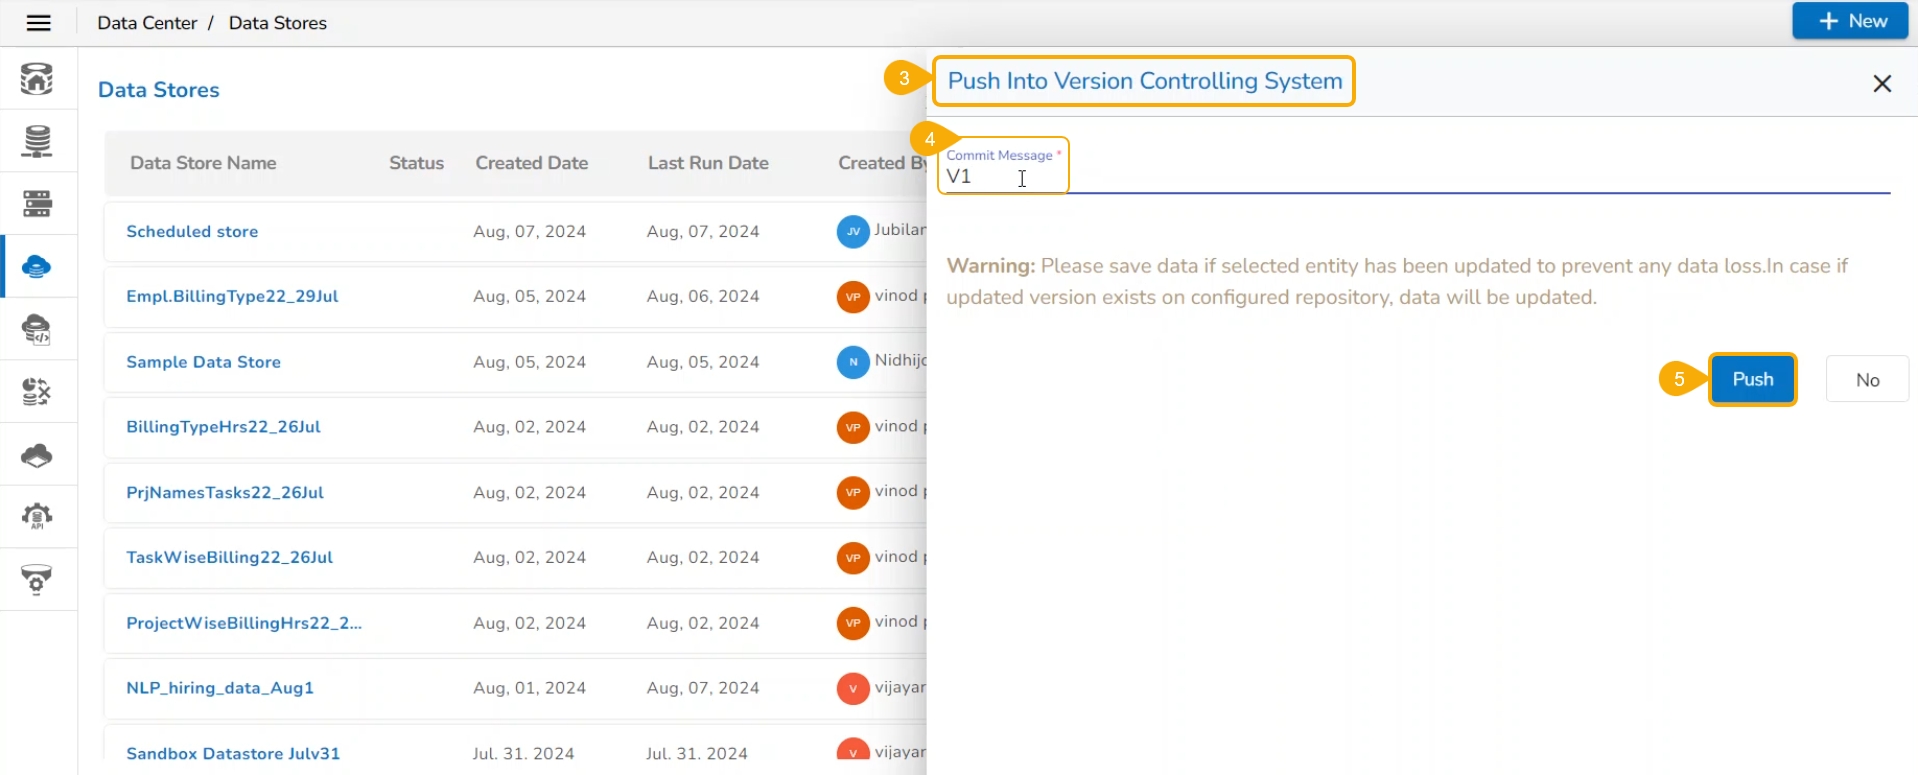
The Push into Version Controlling System dialog box appears.
Commit message – this message is saved as a label in GIT.
Click the Push option.
A confirmation message appears and the Data Store version gets pushed to the VCS.
Please Note: Commit message is a required field after giving the message only the Push option will get enabled.
This option helps the user to share a Data Store with other user(s) or user group(s). The user can also exclude a user(s) or user group(s) from the rights to access a Data Store using the Exclude User option provided under the Share Data Store dialog box.
Check out the illustration on the Share Data Store functionality.
Select a Data Store from the Data Stores list.
Click the Share Datastore icon for the selected Data Store.
The Manage Access window opens.
Select permission using the Grant Permissions section.
The Users, User Groups, and Exclude Users tabs appear.
Search a specific user or user group using the search bar.
Select user(s) or user group(s) using the Users or User Groups tabs.
Click the Save option.
A confirmation message ensures that the selected Data Store is shared successfully.
The selected user(s)/ user group(s) will be listed under the Granted Permissions.
Navigate to the user account where the Data Store is shared.
The shared Data Store lists the Status mentioned with a Share icon for the user(s) to whom it has been shared. The Actions may vary based on the selected granted permission for the Data Store.
The shared Data Store will have limited Action permissions.
Please Note: A targeted share user cannot re-share or delete a shared Data Store, regardless of the permission level (View or Edit).
Check out the illustration on excluding user(s) while sharing a Data Store with the selected user group(s).
Navigate to the Manage Access window for a Data Store.
Select privileges using the checkboxes provided for the Grant Privileges.
Navigate to the User Groups tab.
Select user group(s) using the checkbox.
Navigate to the Exclude Users tab.
Select the users to be excluded from the selected group(s) to access the data store using the checkboxes.
Click the Save option.
A notification message appears, and the selected user group(s) name will be added under the Granted Permissions section.
The excluded users will be listed under the Excluded Users section.
Check out the illustration on including an excluded user.
Open the Manage Access window for a shared data Store.
Navigate to the Excluded Users list.
Select a user from the list.
Click the Include User icon.
A notification ensures that the privileges are shared with the recently included user from the group.
The Excluded Users list gets modified.
Check out the illustration on revoking a user's access to a shared Data Store.
Navigate to the Manage Access window.
The Granted Permissions will be listed.
Select a user or user group from the displayed list.
Click the Revoke Privileges icon.
A notification message appears, and the granted permissions list gets modified as the targeted user/ user group gets removed from the list.
Please Note:
Users can share the Data Store with a Single group or Multiple Groups using the user group tab. The steps to share a Data Store with User Group(s) are similar to those mentioned above for sharing a Data Store with User(s).
The Exclude User tab helps to exclude the user(s) from the rights to access a Data Store, if it is already shared. Only the users of the selected user group with whom it has been shared will be listed under the Exclude User tab.
This page describes the Pull from VCS functionality for Data Store.
Check out the illustration to understand the Pull from VCS functionality for a Data Store.
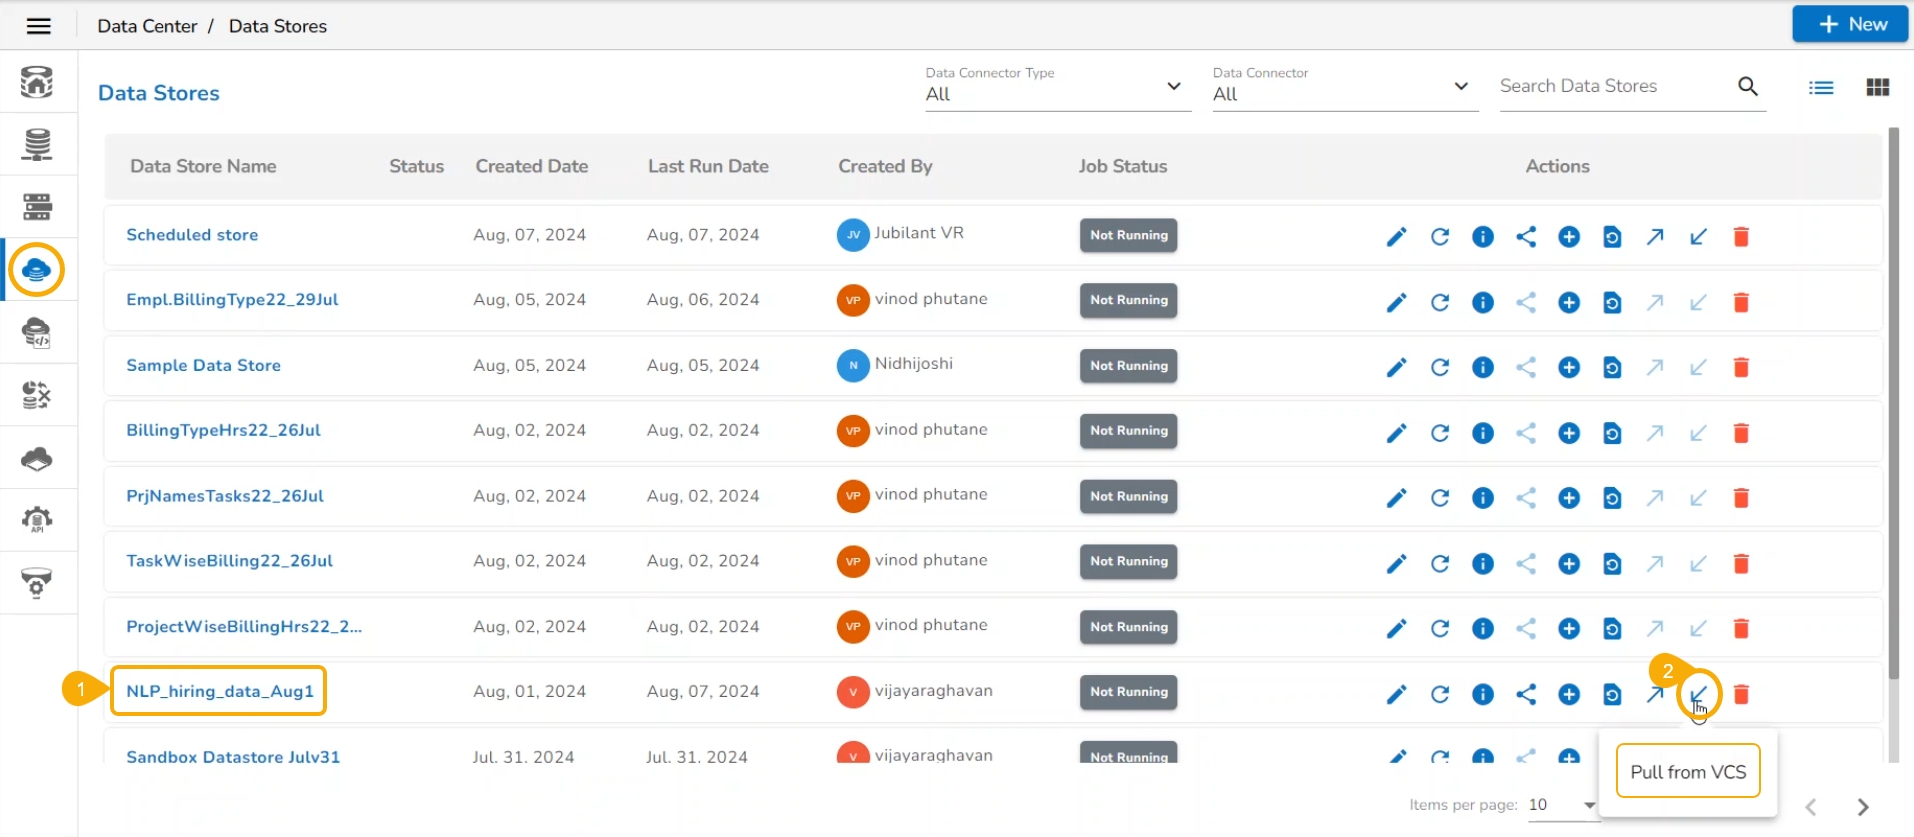
Select a Data Store from the Data Stores list (The Data Store should be Pushed at least once to the GIT repository).
Click the Pull from VCS icon for the selected Data Store.
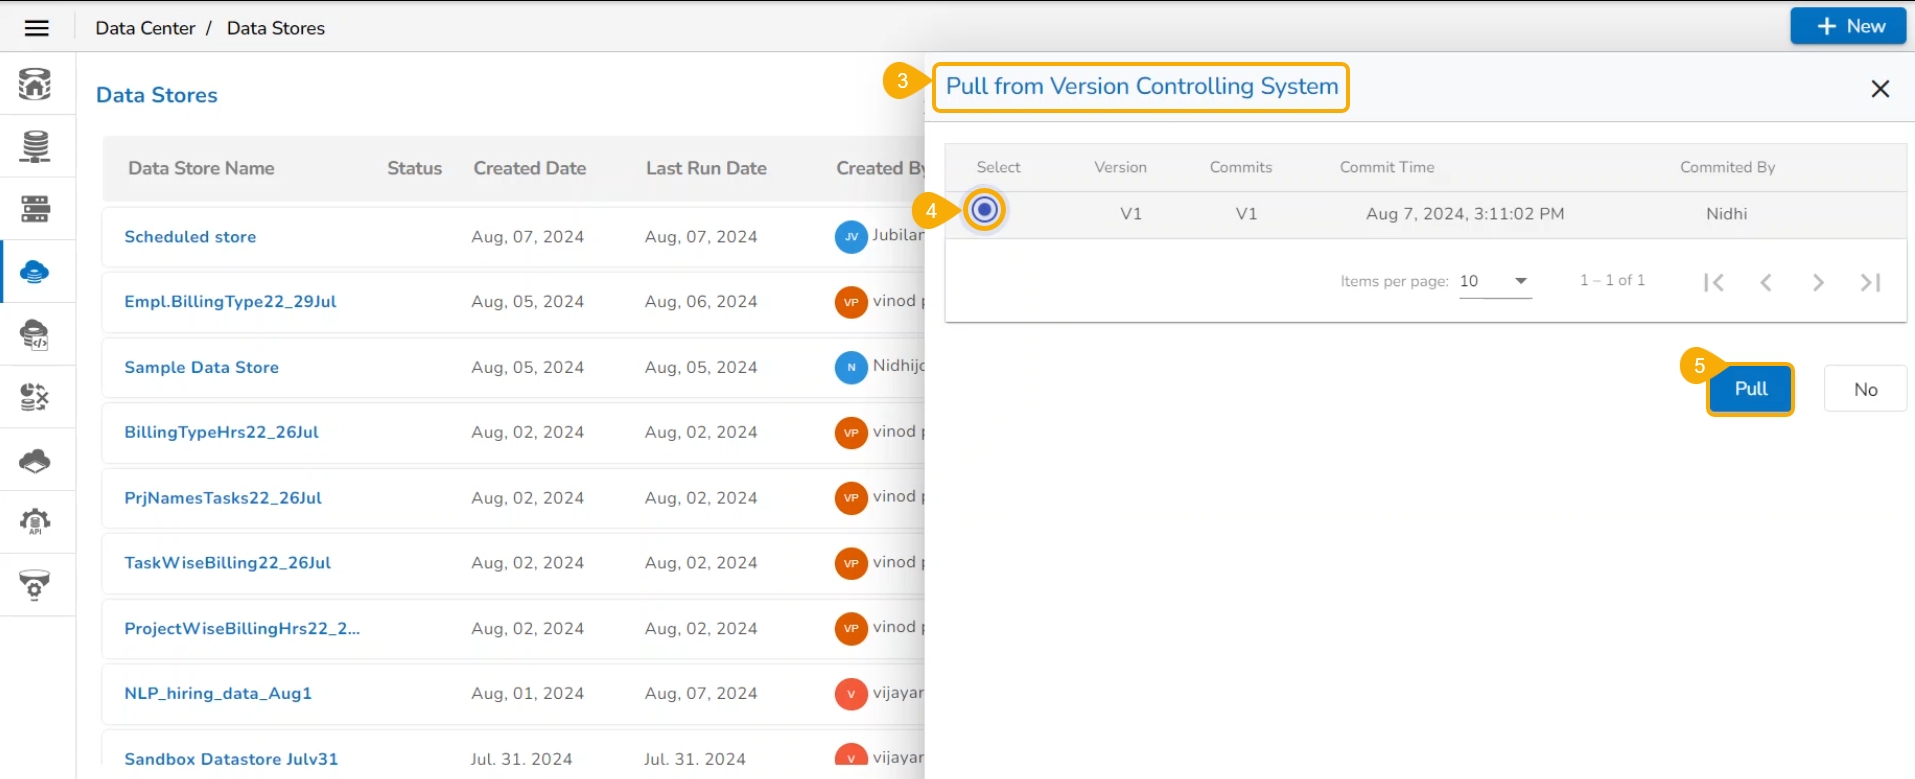
The Pull from VCS dialog box appears.
The multiple uploaded versions of a Data Store with the committed message for each version are listed as shown below:
Select: To select the version you want to pull.
Version: Version number only will list as V1, V2, etc.
Commits: This is to Identify the Data Store version Pulling from VCS (This is the message given while committing the data store push).
Commit Time – The date and time that the Data Store is committed.
Committed By- The Username who committed the Data Store versioning.
Click the Pull option.
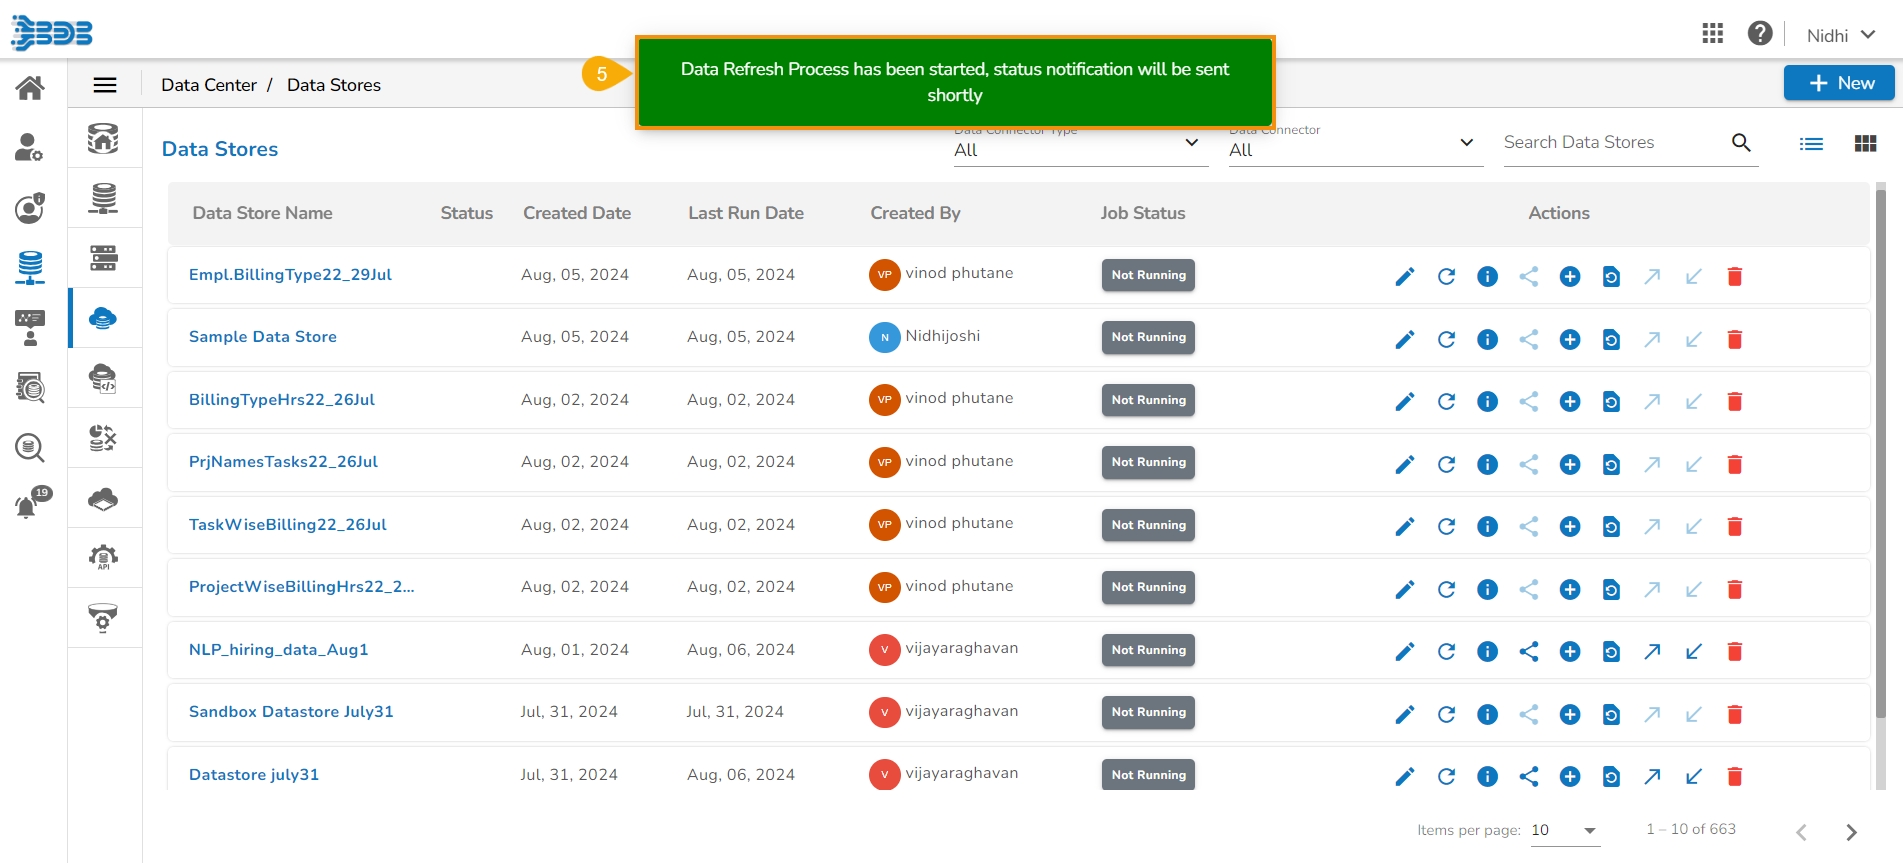
A confirmation message appears once the selected version of the Data Store is pulled from the VCS.
Please Note: Once the user selects any version, the Pull option gets enabled.
This page describes steps to delete a data store from the Data Store List.
Check out the illustration on deleting a Data Store.
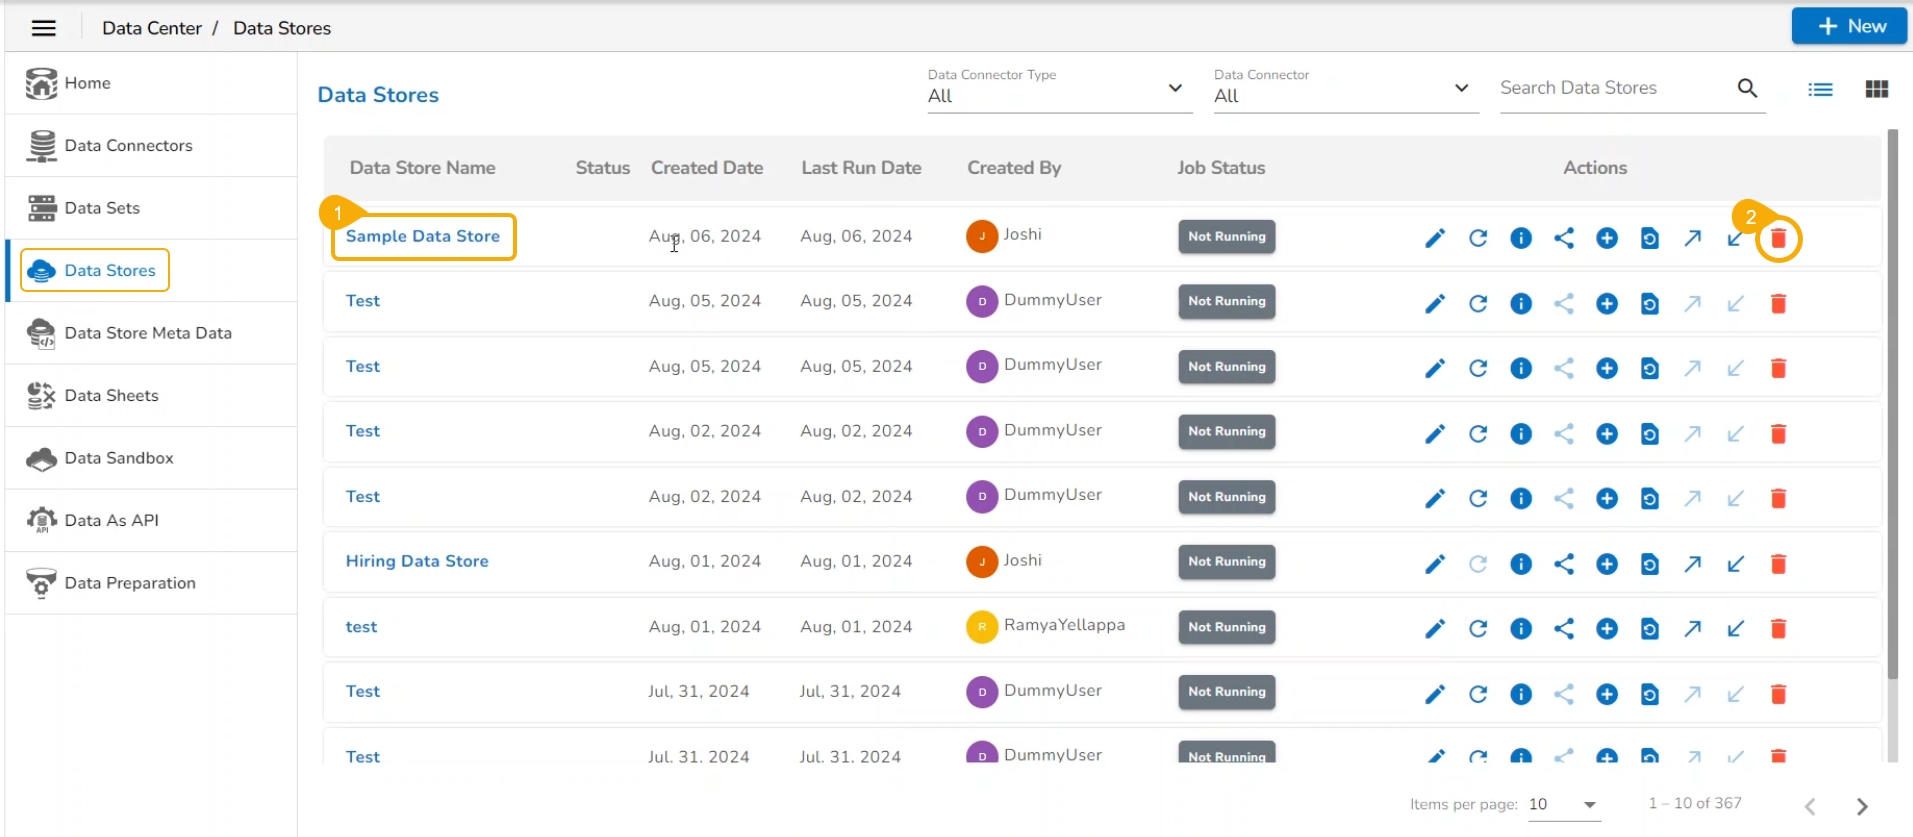
Select a Data Store from the Data Stores list page.
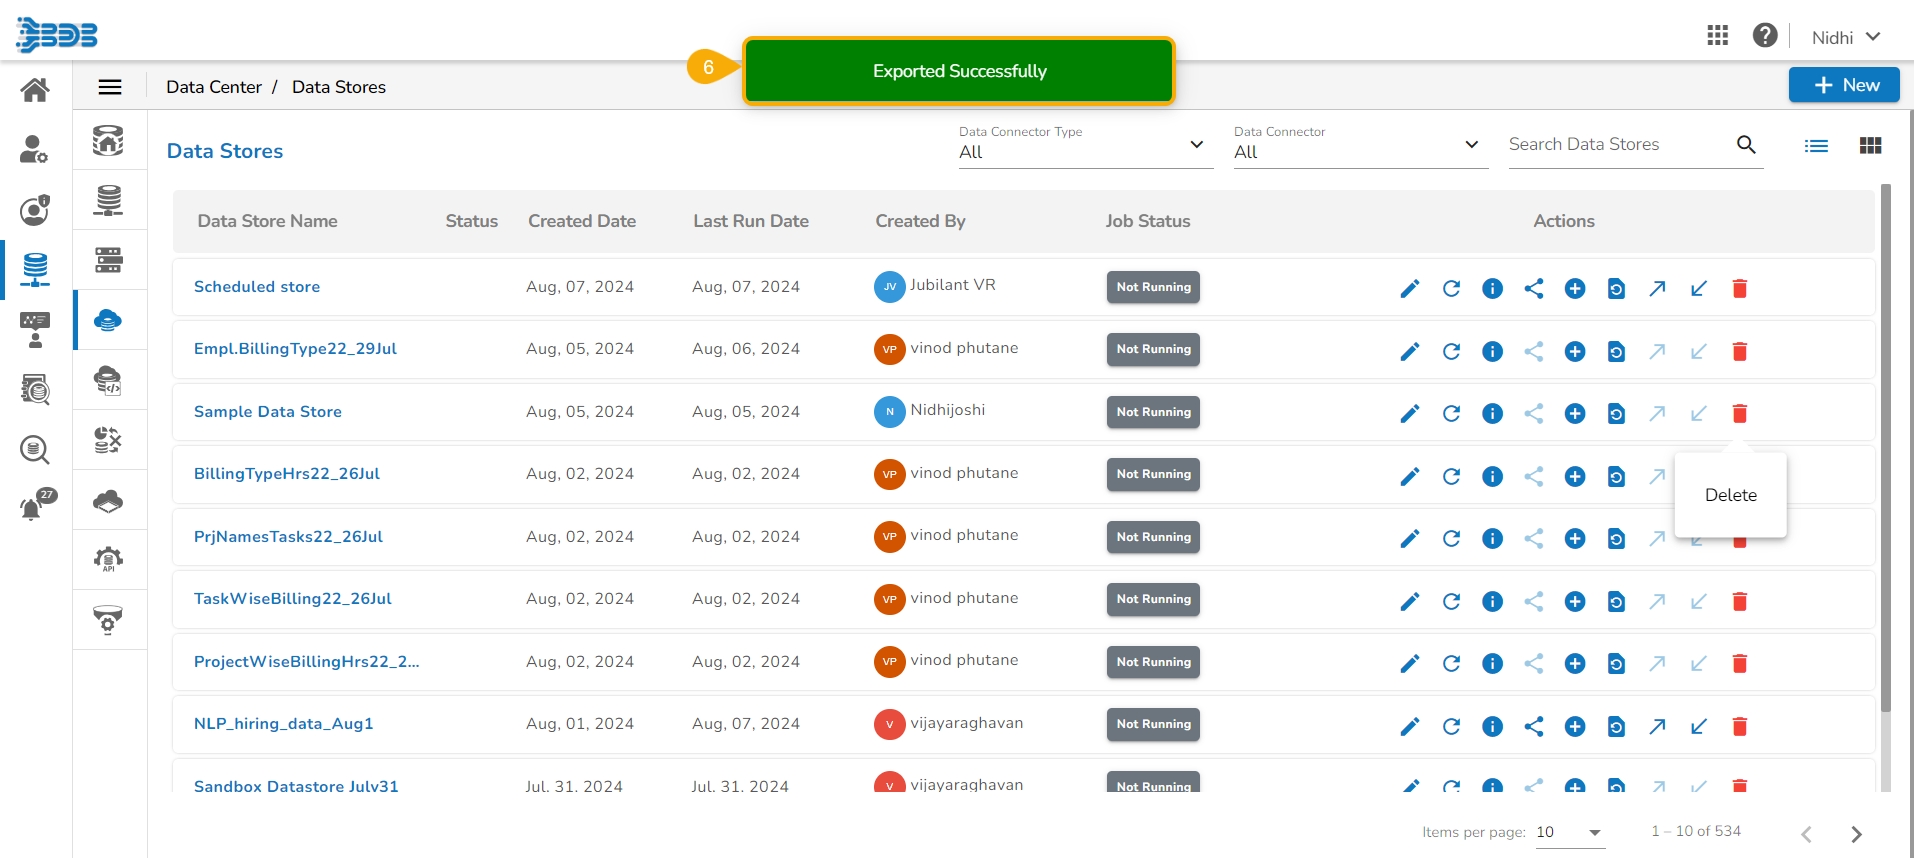
Click the Delete icon for the selected Data Store.
The Remove Data Store dialog box opens to confirm the deletion.
Click the Yes option.
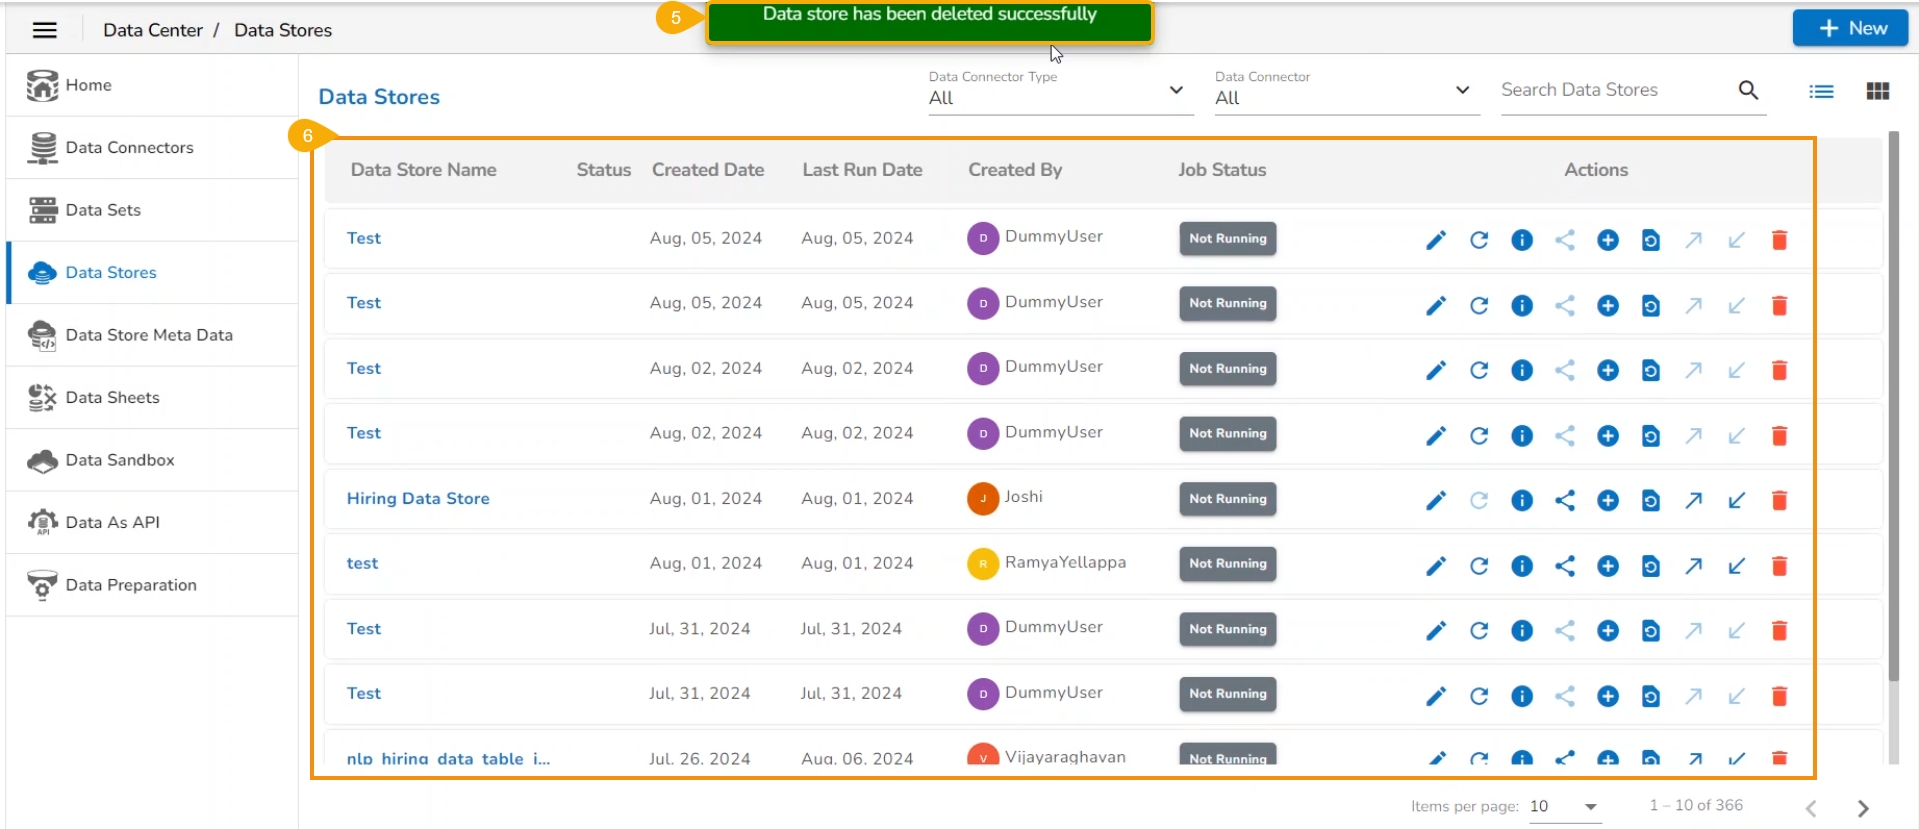
A confirmation message appears.
The selected Data Store gets removed from the Data Stores list.


