
Creating a New Meta Data Store
There are two ways to create Data Store Meta Data:
By mapping to an existing Collection
Without mapping to any existing Collection
Creation by Mapping to an Existing Collection
The Data Store Metadata can be created by mapping it with an existing collection. In this case, it will display the data of the mapped collection.
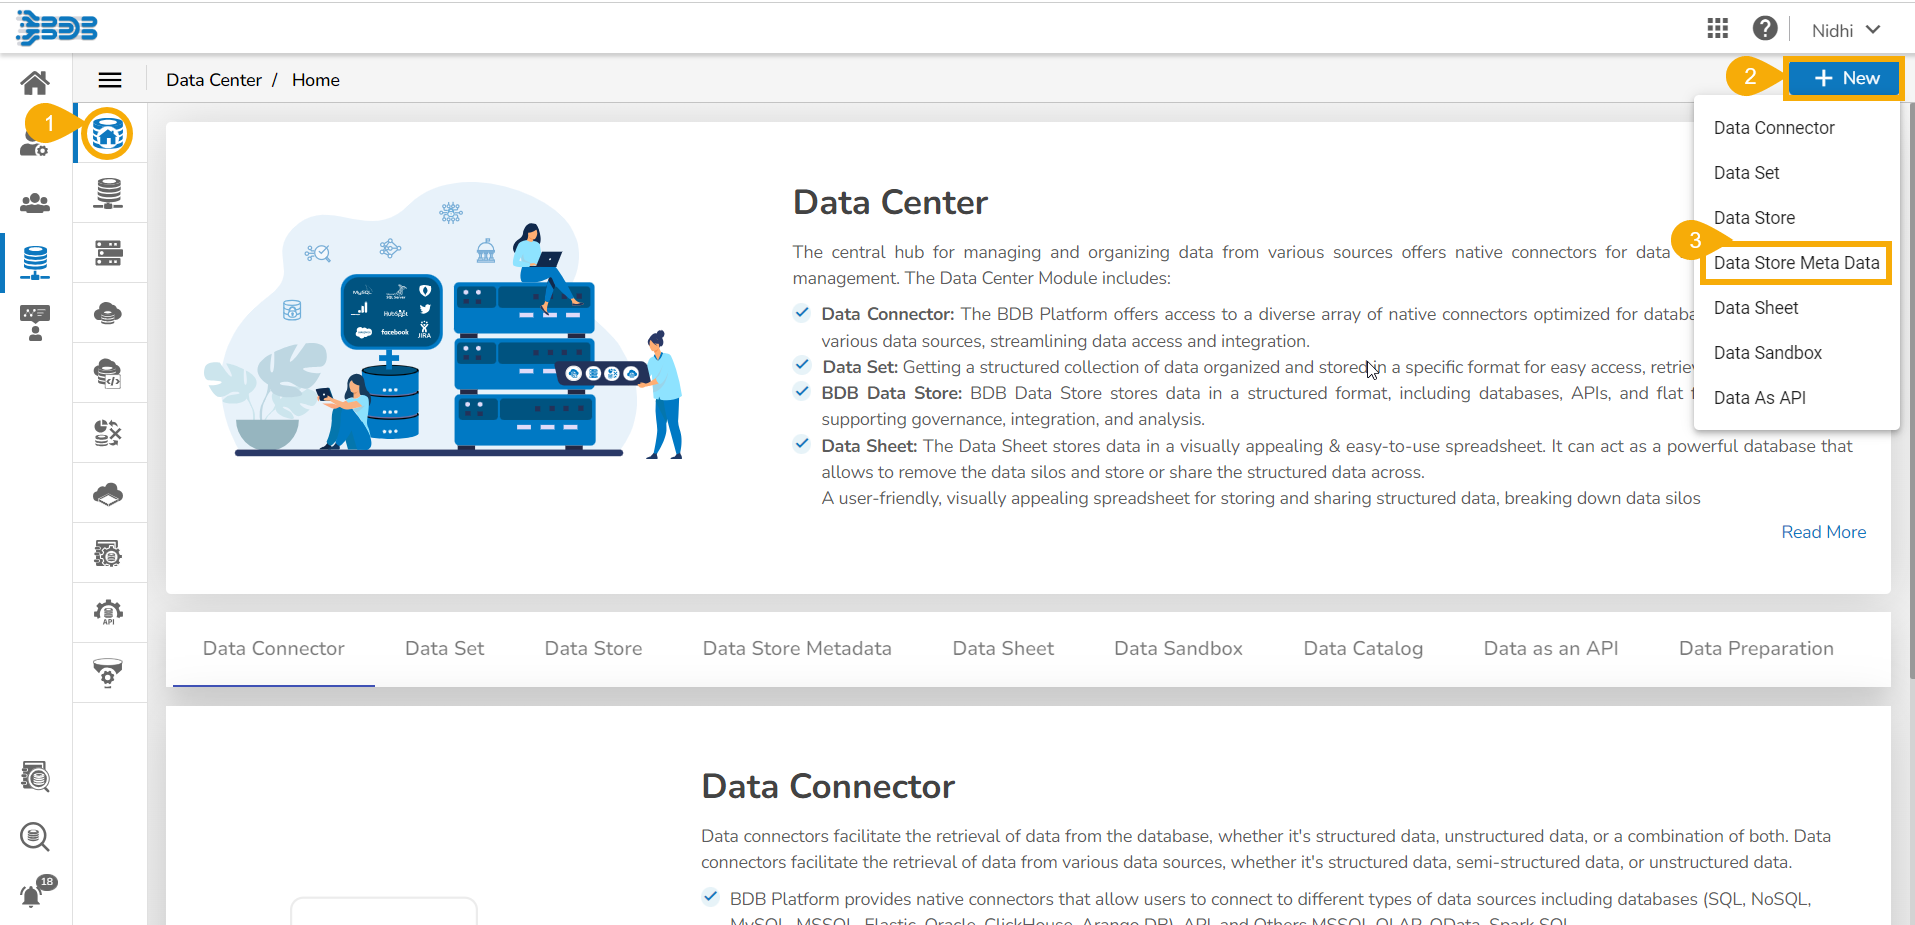
Navigate to the Data Center Homepage.
Click the New menu.
Select the Data Store Meta Data option from the New context menu.

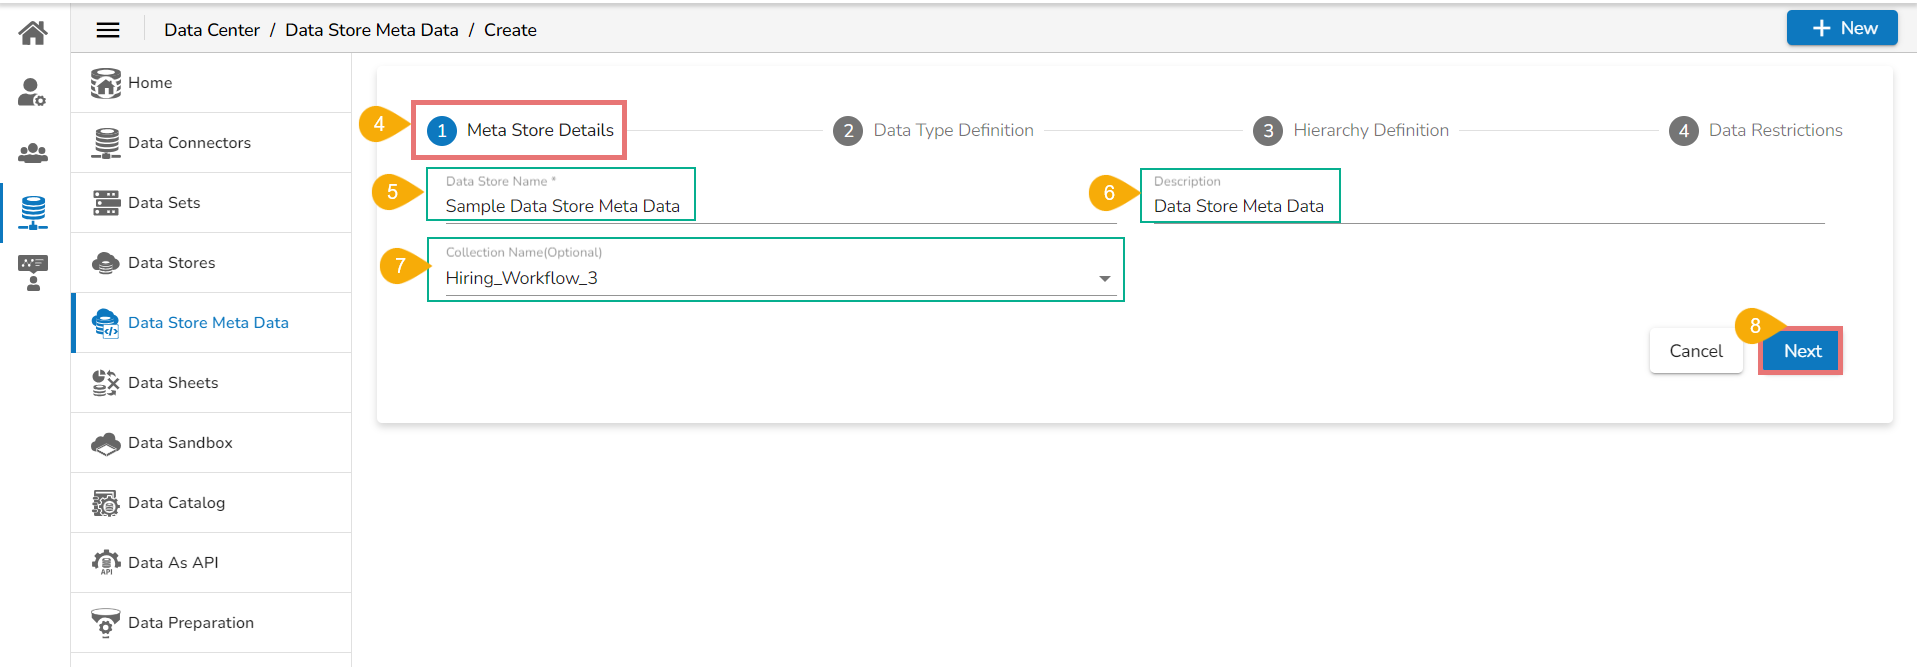
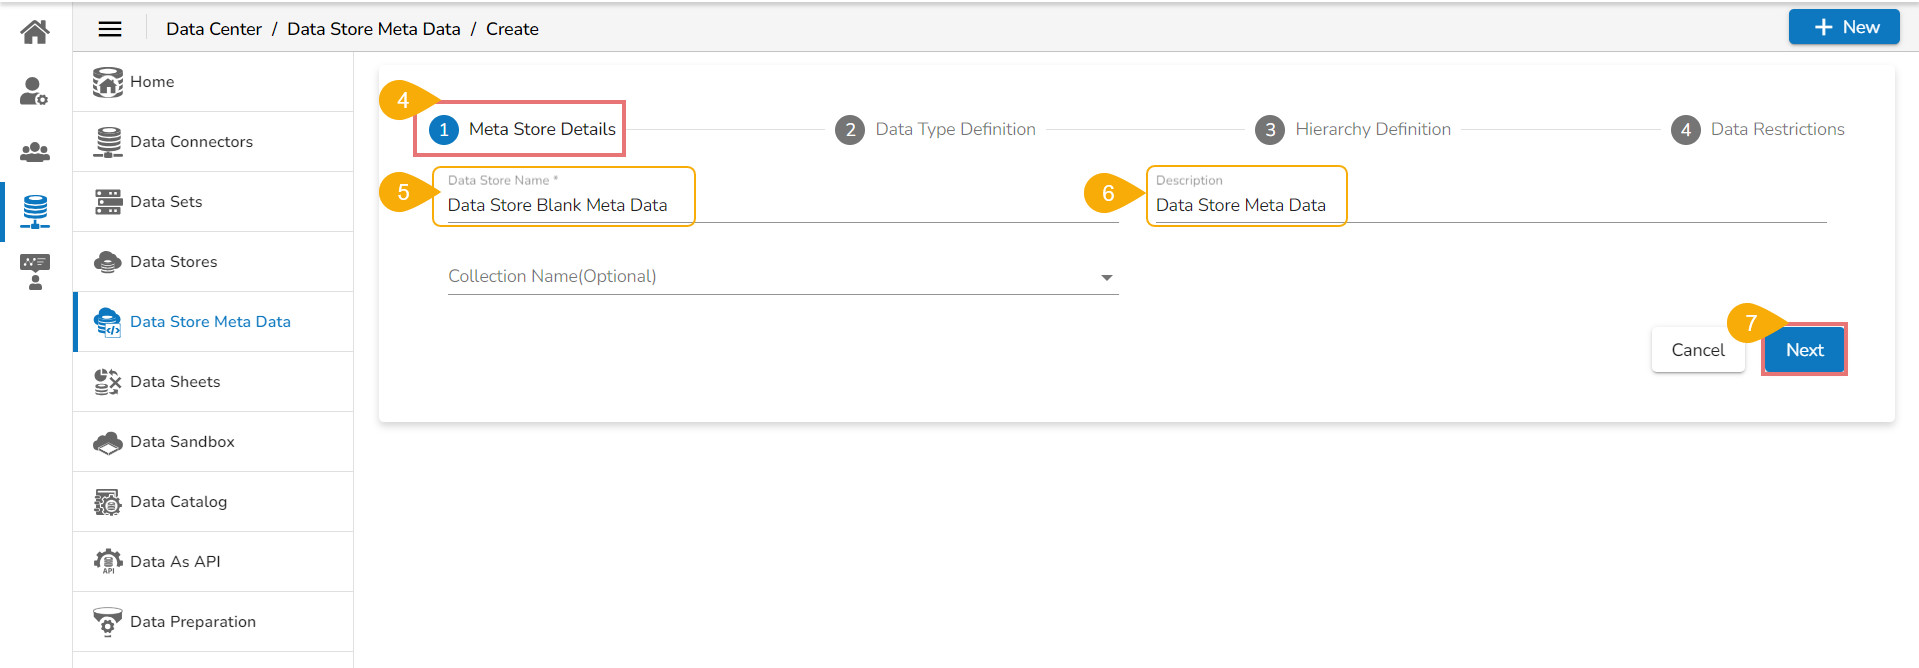
A new page asking for the Meta Store details opens.
Enter a Data Store Name.
Provide the Description of the Data Store Meta Data.
Choose a Collection Name from the drop-down list (optional). In this case, a collection has been selected.
Click the Next option.
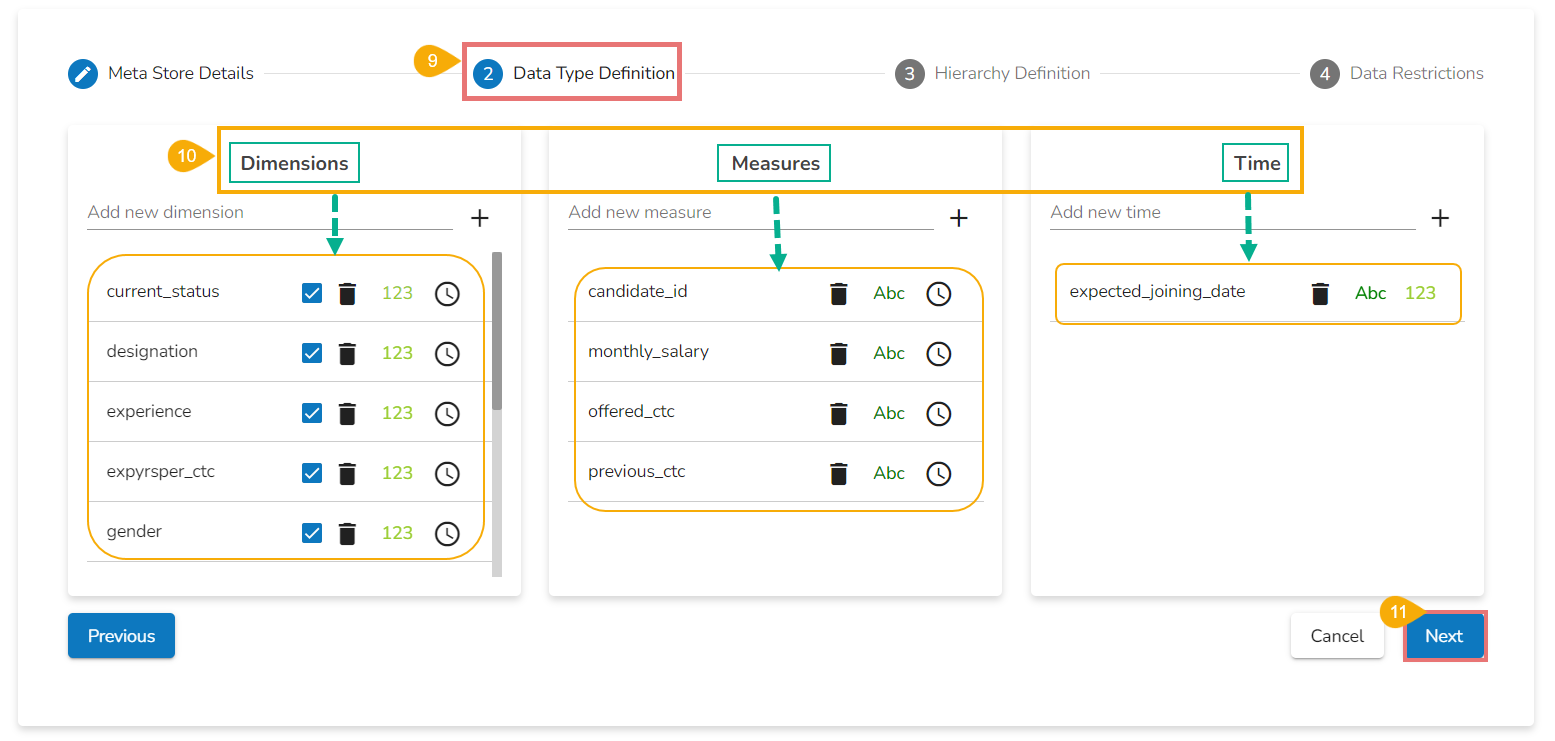
The names of the fields get selected from the chosen Collection.
The user also gets the data for the Dimensions, Measures, and Time categories. The user can interchange the data categories of dimension, measure, and time value by using the below-given options:

Click the Next option.
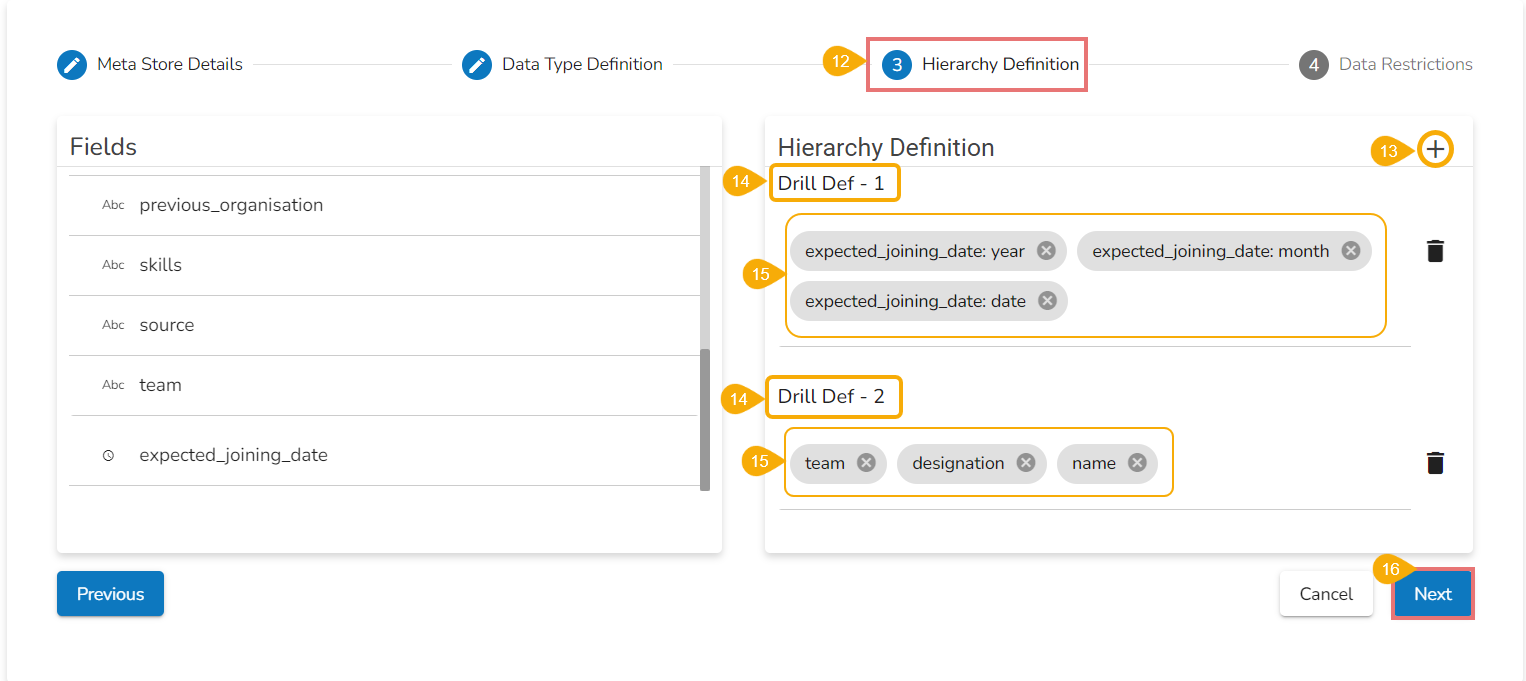
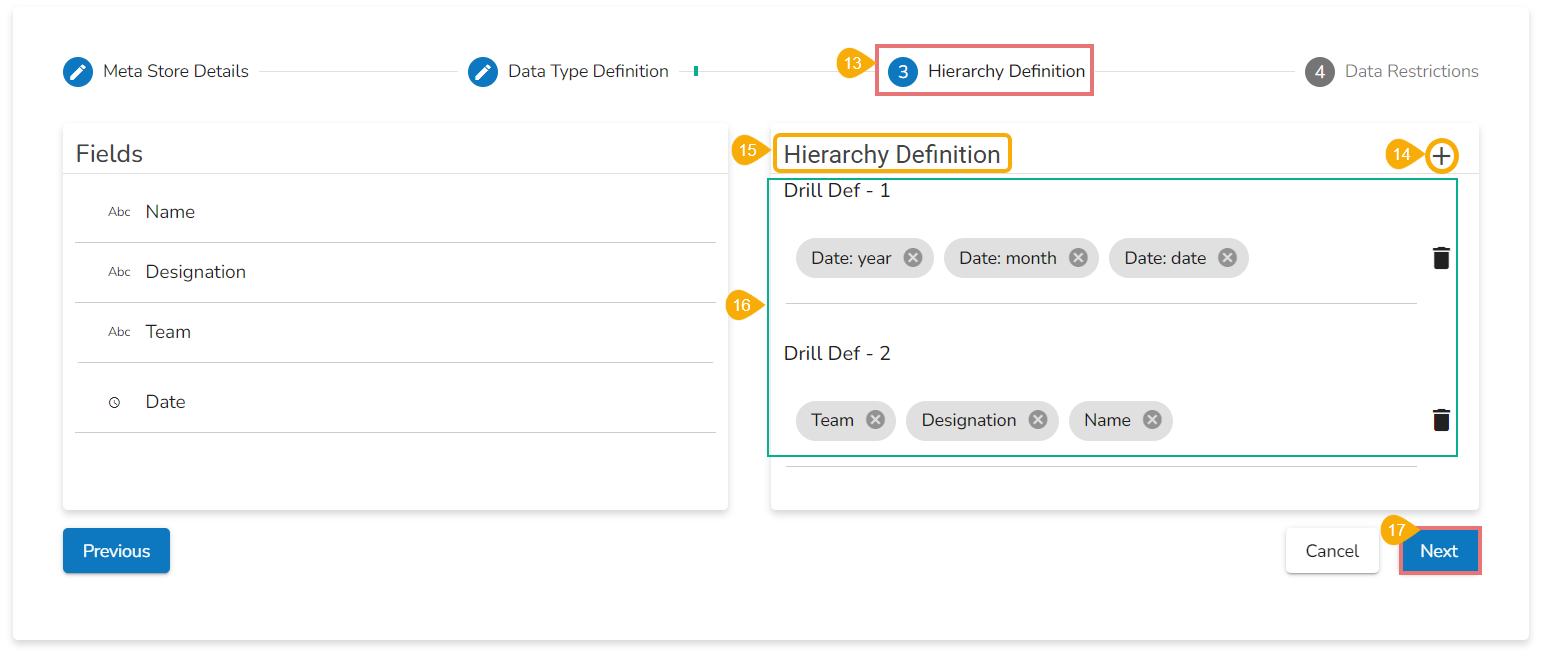
The Hierarchy Definition tab opens.
Click the Add icon provided in the Hierarchy Definition window.
A new Drill Def box gets added to the page.
Drag and drop the dimensions or time options to define a hierarchy.
The time dimension creates a hierarchical sequence from the higher to lower time values by default. E.g., year->month->date by pulling it once in the Drill Def boxes.
Dimensions have to be manually pulled to create a hierarchy.
Click the Next option.
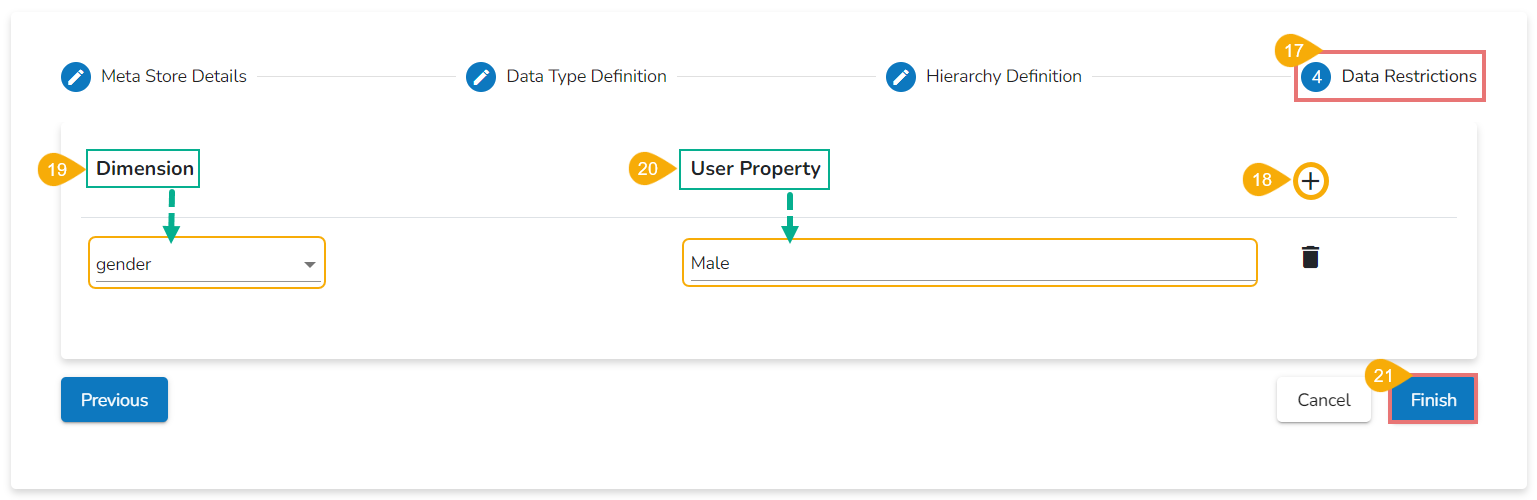
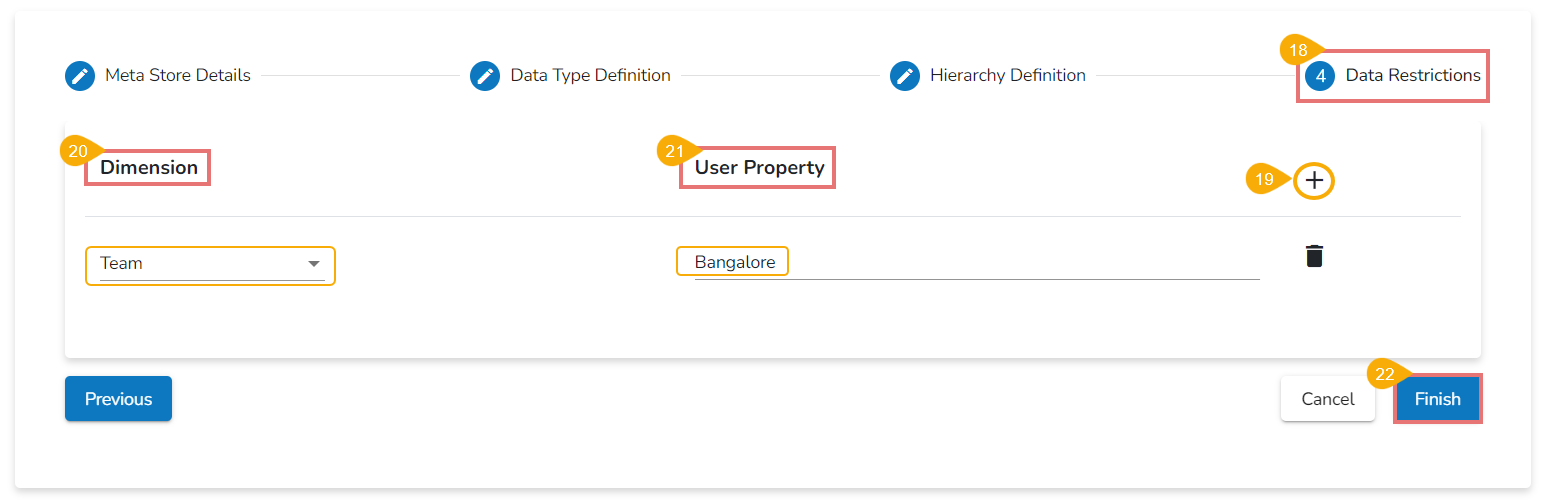
The Data Restrictions tab opens. The Data Restriction tab allows the user/user group to access data as per the selected User Property options.
Click the Add icon to insert new fields for Dimension and User Property.
Select a dimension from the drop-down menu to apply filter values to the data store.
Enter a User Property to create a filter parameter based on the user.
Click the Finish option.
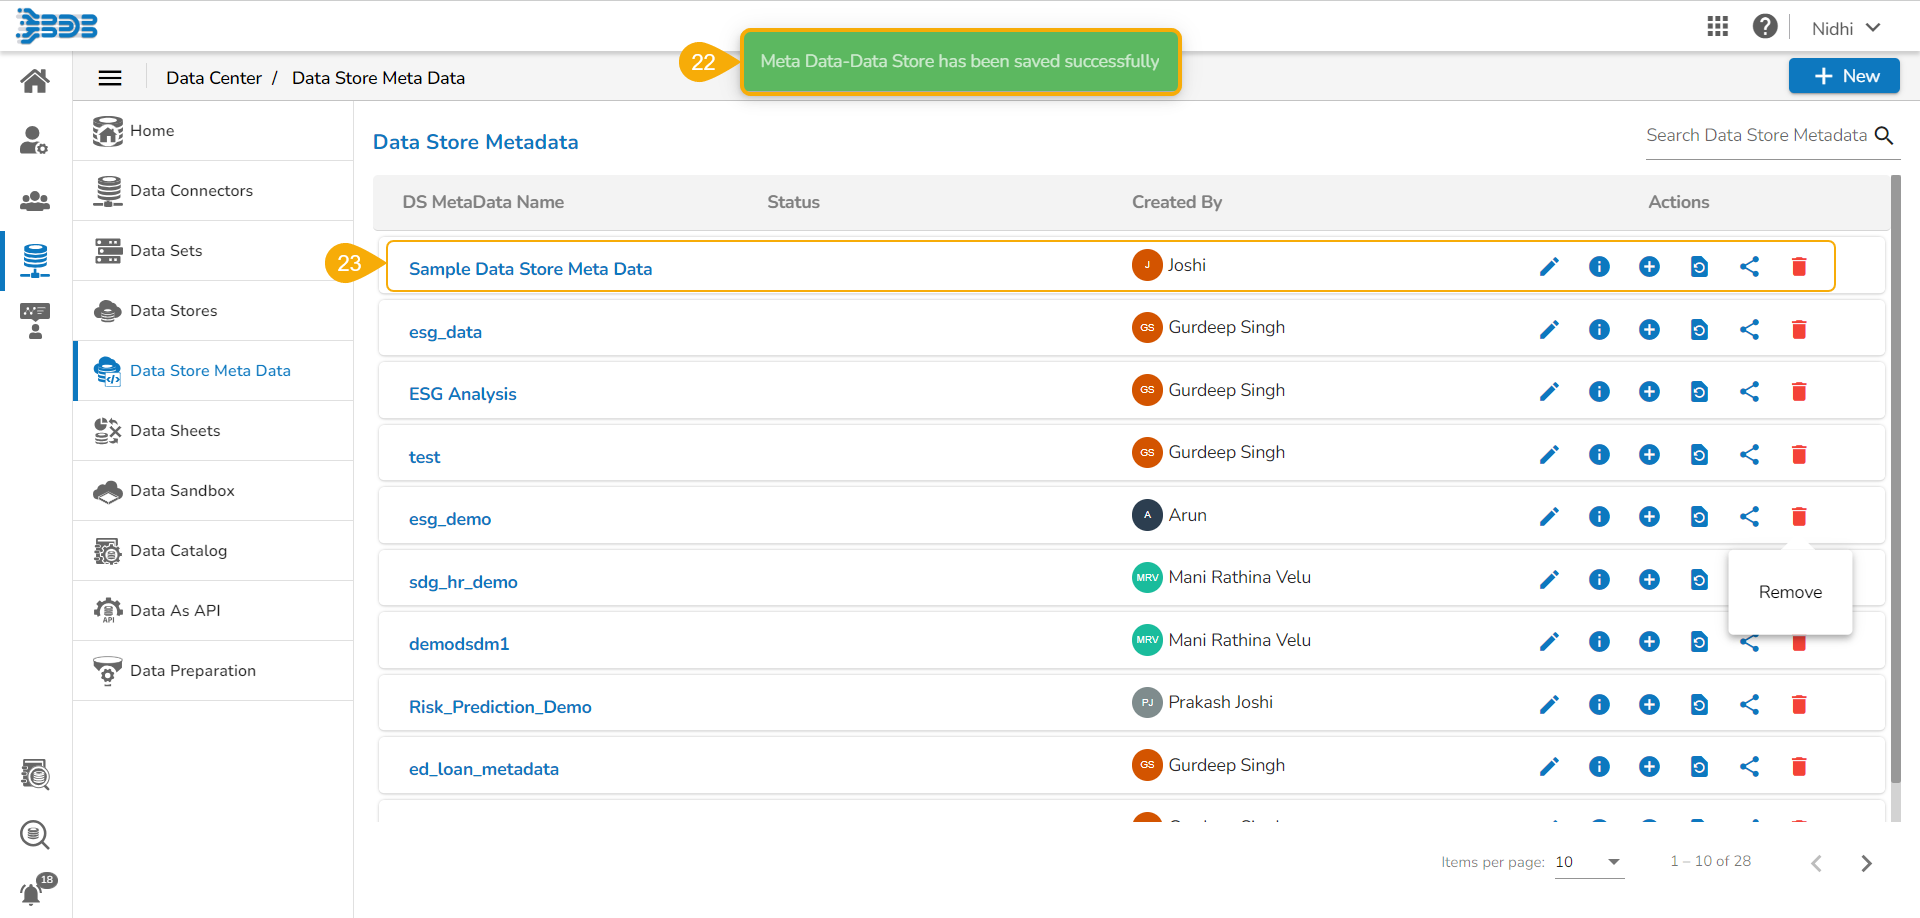
A notification message appears to confirm the configuration of the new Meta Data.
The newly created Meta Data gets added to the list displayed on the left pane of the page.
Creation without Mapping to any Existing Collection
The Data Store Metadata can be a structure/index in which the actual data can be stored/written using an application such as Data Pipeline. In this case, there will be user defined structure without actual data in it.
Navigate to the Data Center Homepage.
Click the New menu.
Select the Data Store Metadata option from the New context menu.
A new page asking for the Meta Store details opens.
Enter a Data Store Name.
Choose no Collection Name from the drop-down list.
Click the Next option.
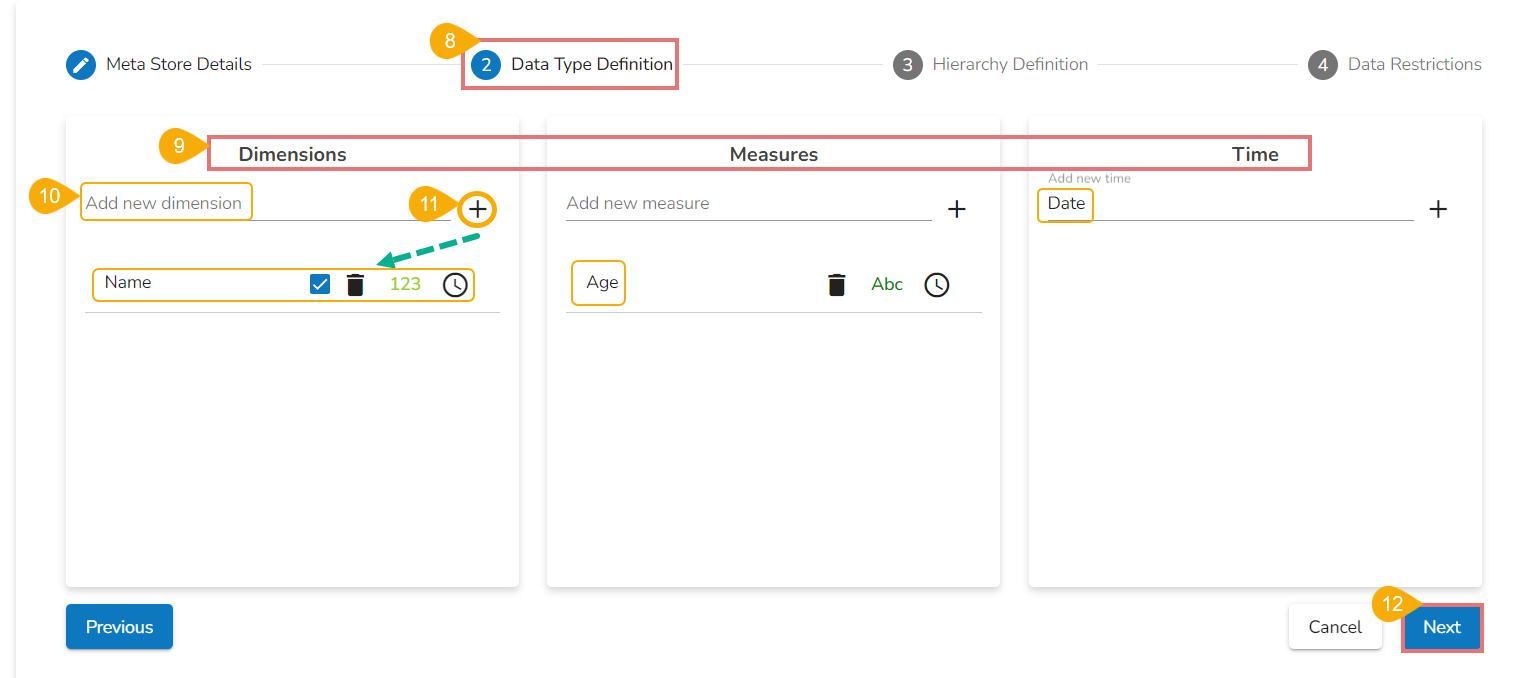
Define the data type to insert the field name manually since the Collection Name is not chosen.
The users can define the data for the Dimensions, Measures, and Time categories. The user can even interchange the data categories of dimension, measure, and time value by using the below-given options:
Provide a title for Dimensions, Measures, or Time entities.
Use the Add icon to add the defined Dimension, Measure and Time values.
Click the Next option.
The Hierarchy Definition tab opens.
Click the Add icon provided in the Hierarchy Definition window.
A new Drill Def box gets added to the page.
Drag and drop the dimensions or time options to define a hierarchy.
The time dimension creates a hierarchical sequence from the higher to lower time values by default. E.g., year->month->date by pulling it once in the Drill Def boxes.
Dimensions have to be manually pulled to create a hierarchy.
Click the Next option.
The Data Restrictions tab opens. The Data Restriction tab allows the user/user group to access data as per the selected User Property options.
Click the Add icon to insert a new field to provide Dimension and User Property.
Select a dimension from the drop-down menu to apply filter values to the data store.
Enter a User Property to create a filter parameter based on the user.
Click the Finish option.
A notification message appears to confirm the configuration of the new Meta Data.

The newly created Meta Data gets added to the list displayed on the left pane of the page.

Please Note:
The user can configure the option whether to choose the MongoDB, ClickHouse, or Elastic Search using the Datastore Settings configuration section under the Admin module.
A created Data Store Meta Data lists under the Existing Data Store list while creating a Story selecting which a user can quickly map to the data and start the Story creation.
If the user creates a Data Store Meta Data without mapping it with an existing collection, the Data Store Metadata will not contain any data. In this circumstances, the user needs to insert the data using a data pipeline or add the data manually in the table (in DB) before going for Story creation with the same Data Store Meta Data.
The DB used to map or write a new table while creating Data Store Meta Data will always be the DB configured by the user in the Admin section.
Option
Name
Task
![]()
Edit
Redirects the user to edit the Metadata Store fields.
![]()
Store Details
Displays the Store information via a pop-up window.
![]()
Add Synonyms to Metadata Store
Redirects the user to add synonyms to the selected Metadata store.
![]()
Refresh Synonyms
Refreshes the Synonyms
![]()
Share Metadata Store
Redirects the user to share the selected Metadata Store to users or user groups.
![]()
Remove
Removes the data store metadata from the list