This page explains steps for View Filter based on data Dimensions.
Check out the walk-through to filter a View based on Dimension value.
Steps to Apply Dimension-based View Filter
Navigate to the Design workspace.
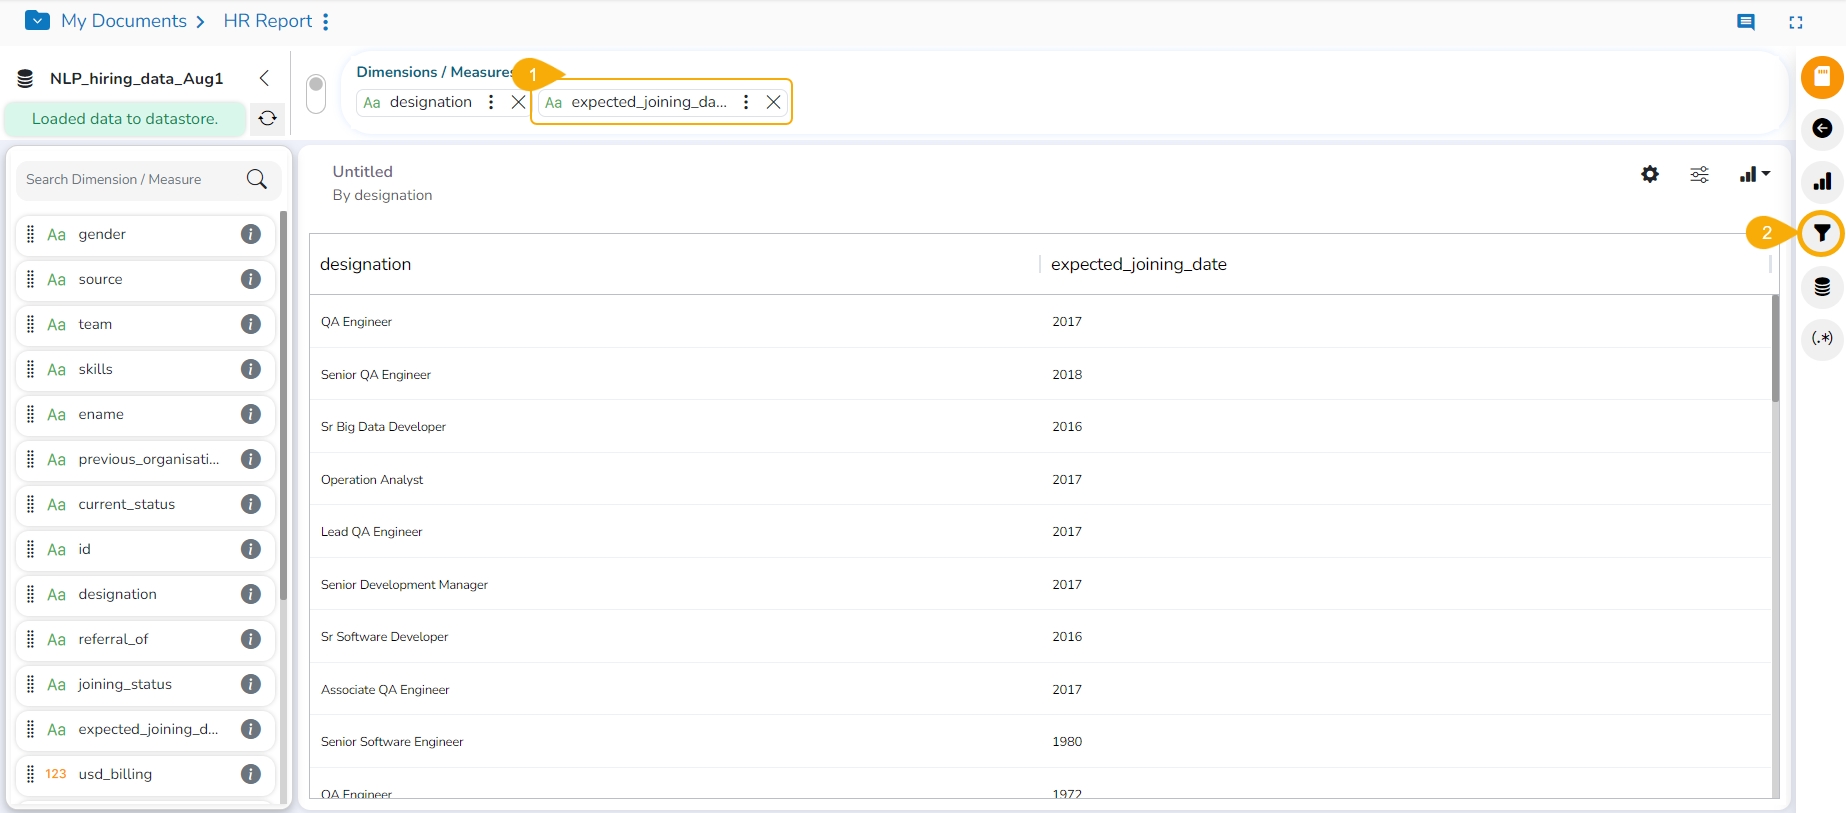
Create a View with the combination of Dimension and Measure.
Click the Filter icon from the Design workspace of a View.
A Filter panel opens with the list of available filter values.
Select a dimension to display a list containing all the sub-dimensions.
Four(4) types of Filter conditions are available to be applied to a selected dimension: In, Not in, Like, and Not like.
Select the In option as the filter condition from the drop-down menu.
Select sub-dimension(s) by putting checkmarks in the box (the user can select multiple values as sub-dimension).
Click the Apply icon.
The View Filter icon gets highlighted.
The concerned View gets filtered by the applied filter condition(s).
If the selected filter condition is Not In for the View Filter.
Then, the View gets filtered by the not-selected filter values (In the below-given image, the View gets filtered by the not-selected value of the dimension).
If the selected filter condition is Like for the View Filter, the View gets filtered by the given sub-dimension value.
The View gets filtered by Team BU 4 data.
If the selected filter condition is Not like for the View Filter, the view gets filtered by not selecting the given sub-dimension value.
In the image, the View shows the data other than BU 10.
The user needs to click the Apply Filter button while enabling or eliminating the View-specific filter values to reflect the same in the displayed chart.
The Analyse option allows users to insert, modify, or remove a view-specific filter.
The View Filter becomes ineffective when the selected View is inserted into a report, and the Global Filter is applied to it.
Check out the given walk-through on using a Measure-based filter on a View.
The user can add a View filter based on the Measure values.
Click the View filter option on the Design page.
The Filter panel opens.
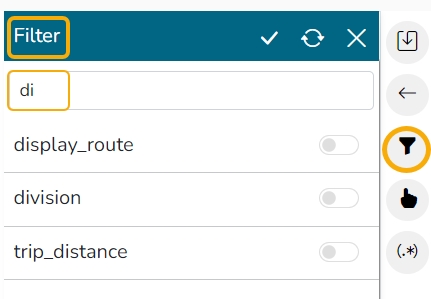
Use the Search bar to search for a measure.
Select a Measure from the displayed list of Dimensions and Measures.
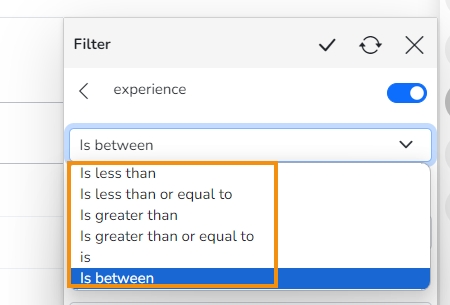
Select a condition from the drop-down menu.
Provide the required information to configure it. This information may vary based on the selected condition/ Filter rule.
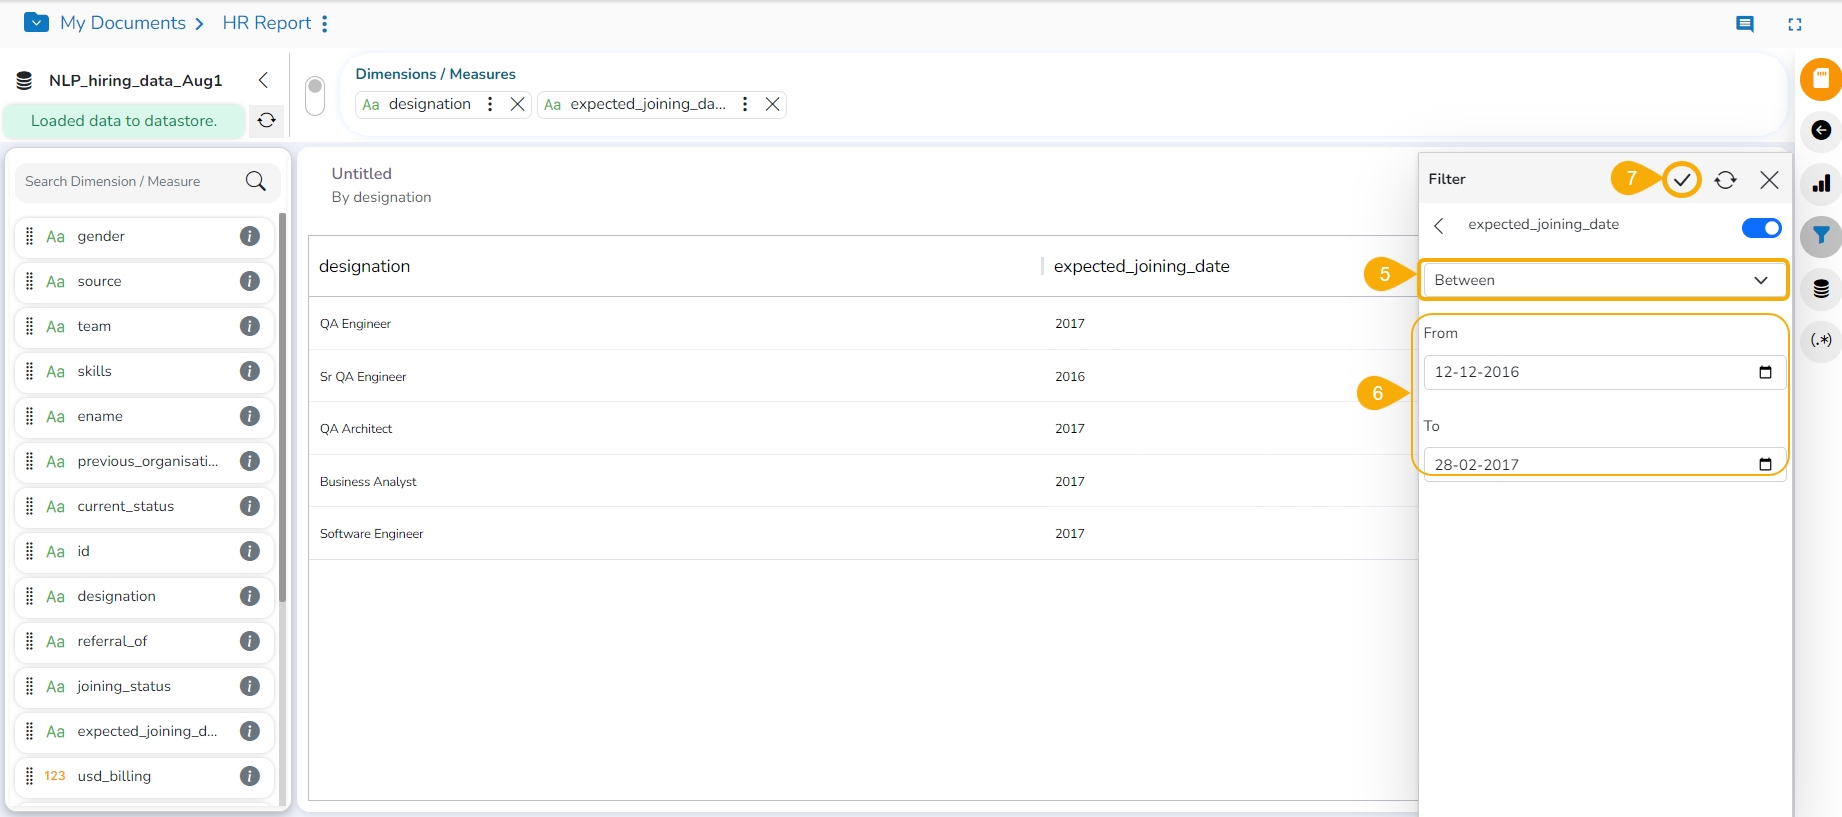
E.g., the given image shows is between the selected filter condition, and the required information for the selected filter condition is From and To values.
The view gets modified according to the selected View filter condition.
Click the Apply icon.
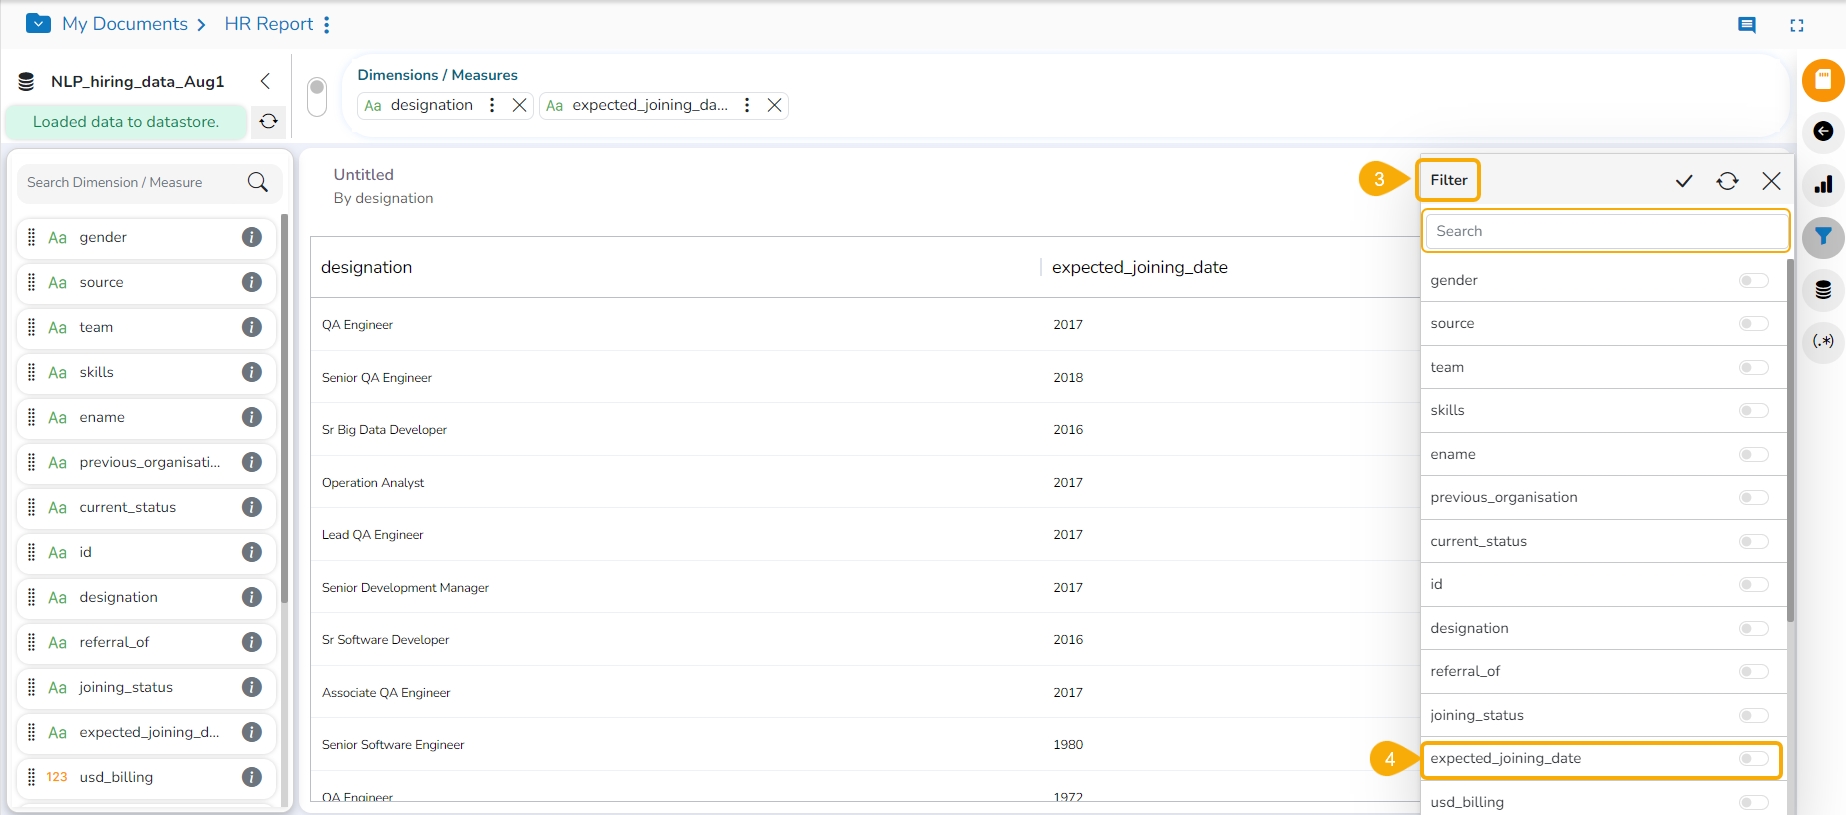
Check out the walk-through on how to filter a View based on Date values.
The users can apply Date based View Filter by selecting the Date Values from the Data Store. The user can provide two kinds of conditions on the Date values:
Between
Relative
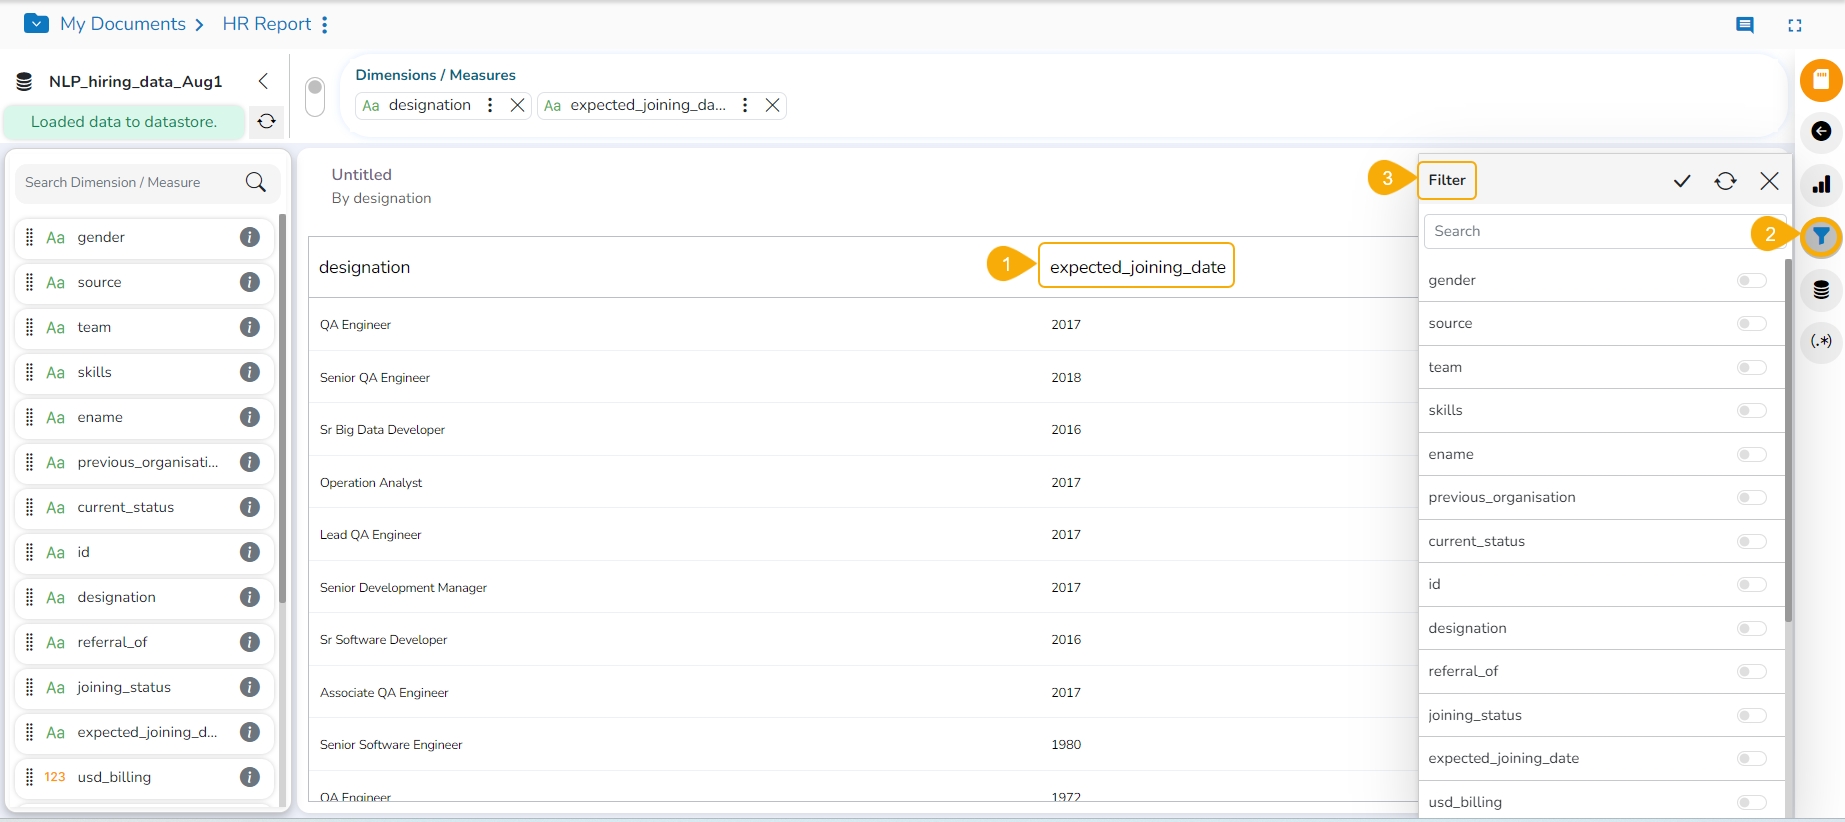
Avail a View using the Design workspace containing a Time dimension.
Click the Filter icon on the Design page.
The Filter panel opens, displaying all the available filter values.
Select a dimension or measure containing Date values to filter the View. The user can also use the search bar to search it.
Choose the Between option from the drop-down menu.
Provide the From and To dates.
Click the Apply icon.
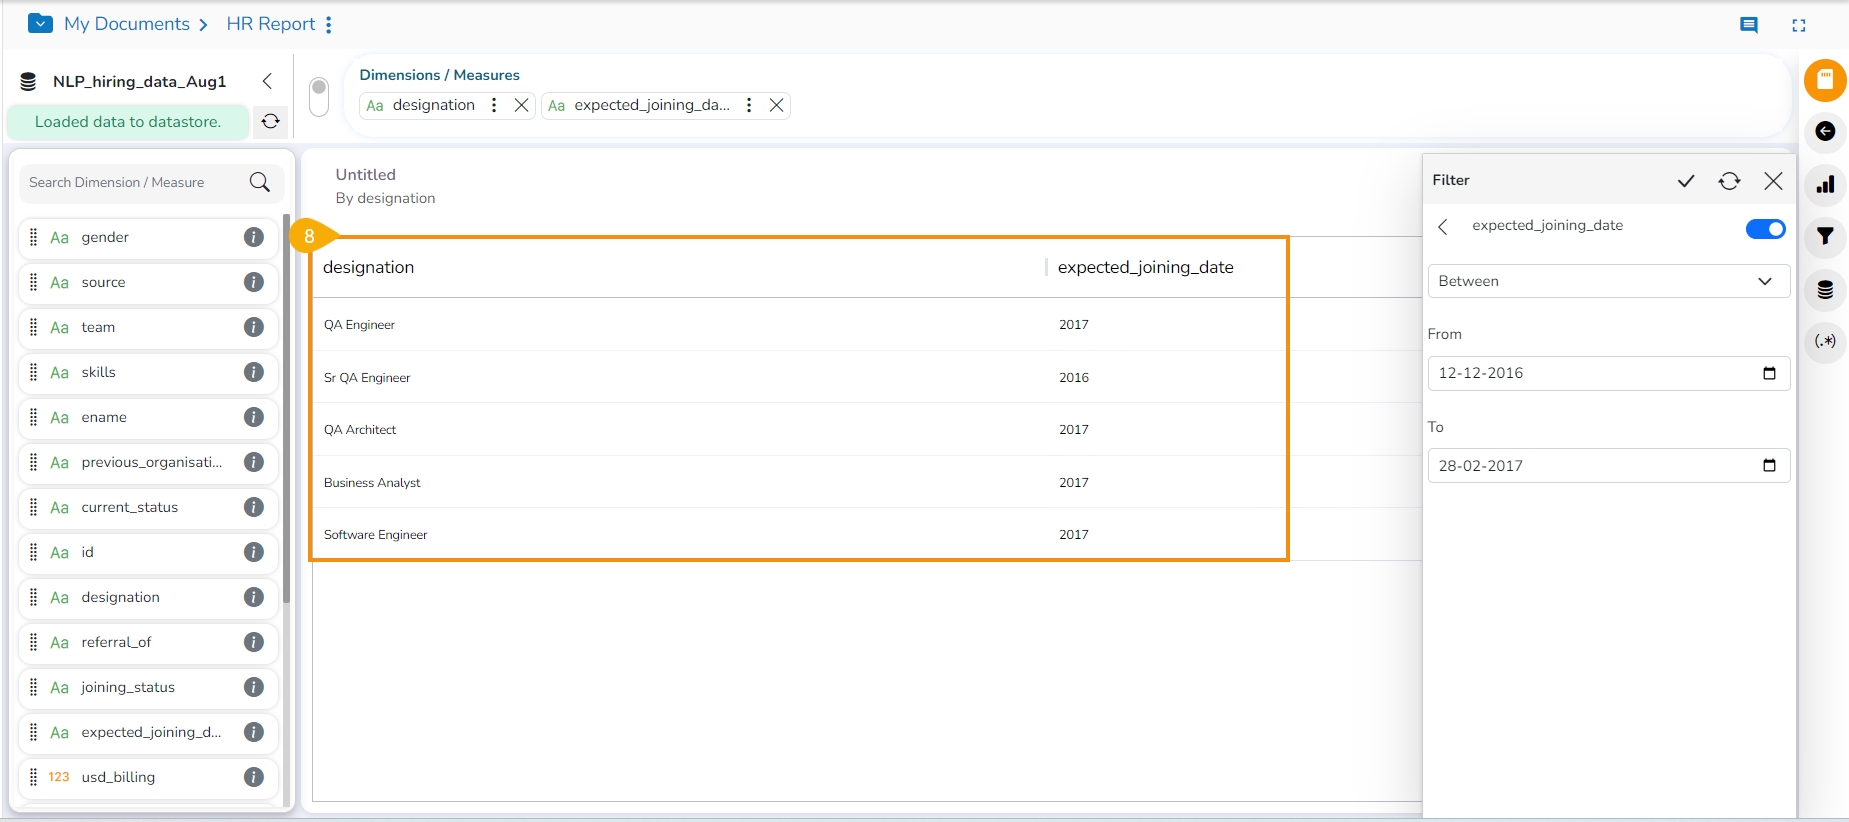
The selected view gets filtered as per the applied date filter conditions.
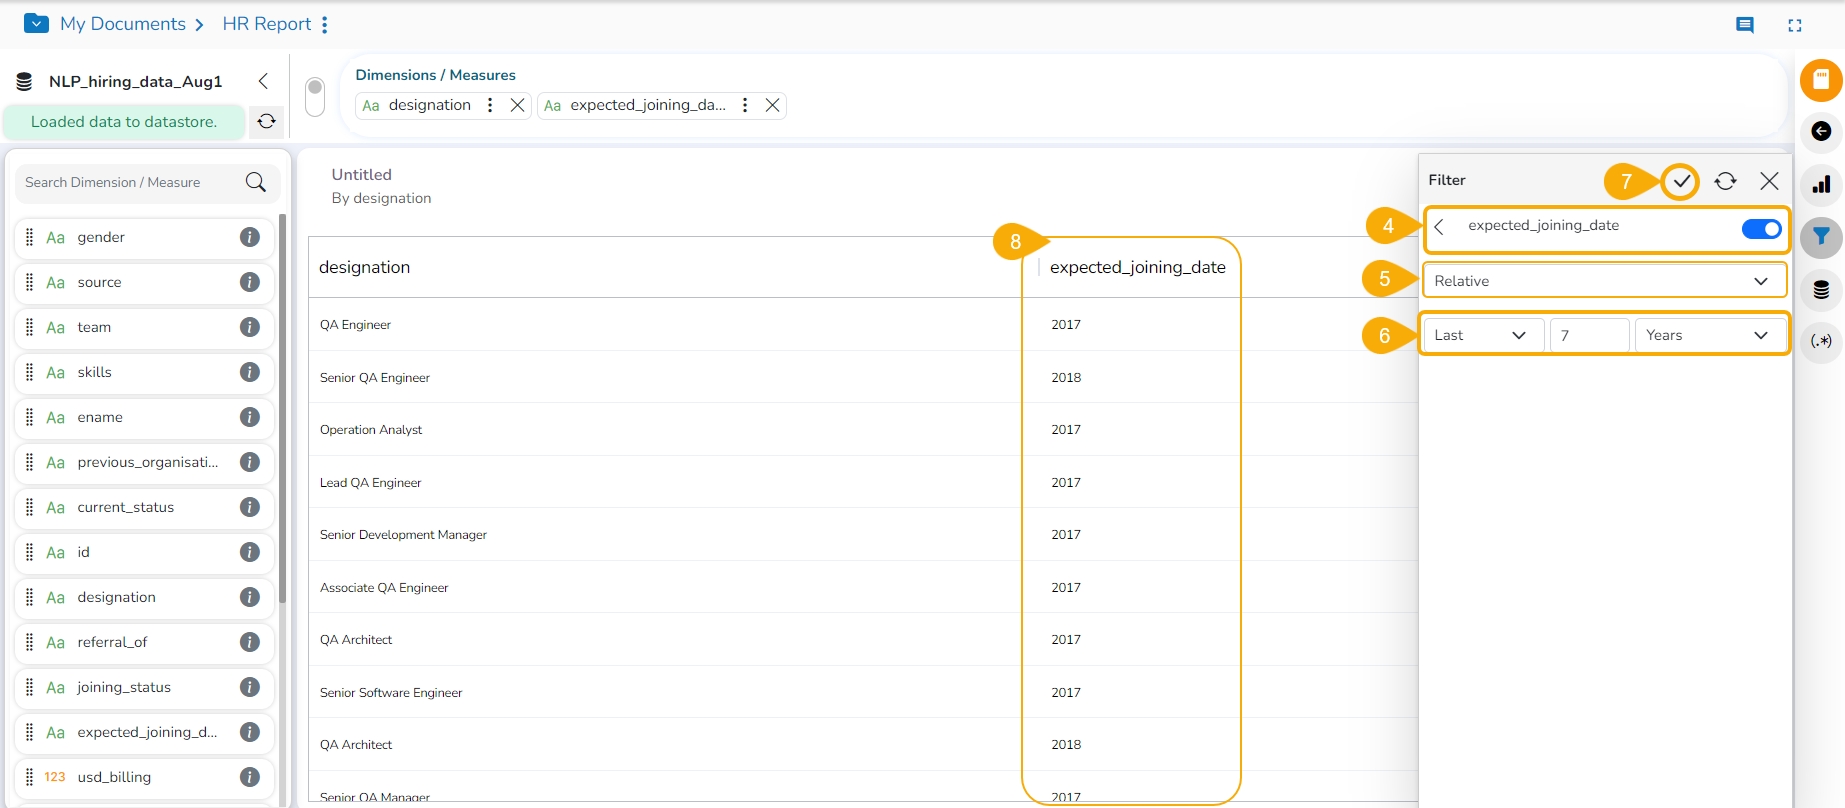
Create a View with the Date Dimension.
Click the Filter icon on the Design page.
The Filter panel opens.
Select a Date value as the filter condition.
Choose the Relative option from the drop-down.
Insert a period by selecting the required values.
The user gets the Last and This under the drop-down menu to select the past or present time zone.
There are 4 categories of time pointers provided in another drop-down menu, which allow the user to select a value out of Years/ Months/Weeks/Days. E.g., the image displays the Last 5 years.
Click the Apply icon.
The selected View gets filtered based on the applied date conditions.