> For the complete documentation index, see [llms.txt](https://docs.bdb.ai/data-science-lab-4/llms.txt). Markdown versions of documentation pages are available by appending `.md` to page URLs; this page is available as [Markdown](https://docs.bdb.ai/data-science-lab-4/project/tabs-for-a-data-science-lab-project/tabs-for-tensorflow-and-pytorch-environment/notebook/notebook-page/notebook-cells/using-a-markdown-cell.md).
# Using a Markdown Cell
This page describes steps to use the text cells of the Notebook.
The Markdown cells are used to enter a description for the Notebook. They are formatted using a simple markup language called Markdown. The Markdown cell contains a toolbar to assist with editing.
## Inserting a Markdown Cell
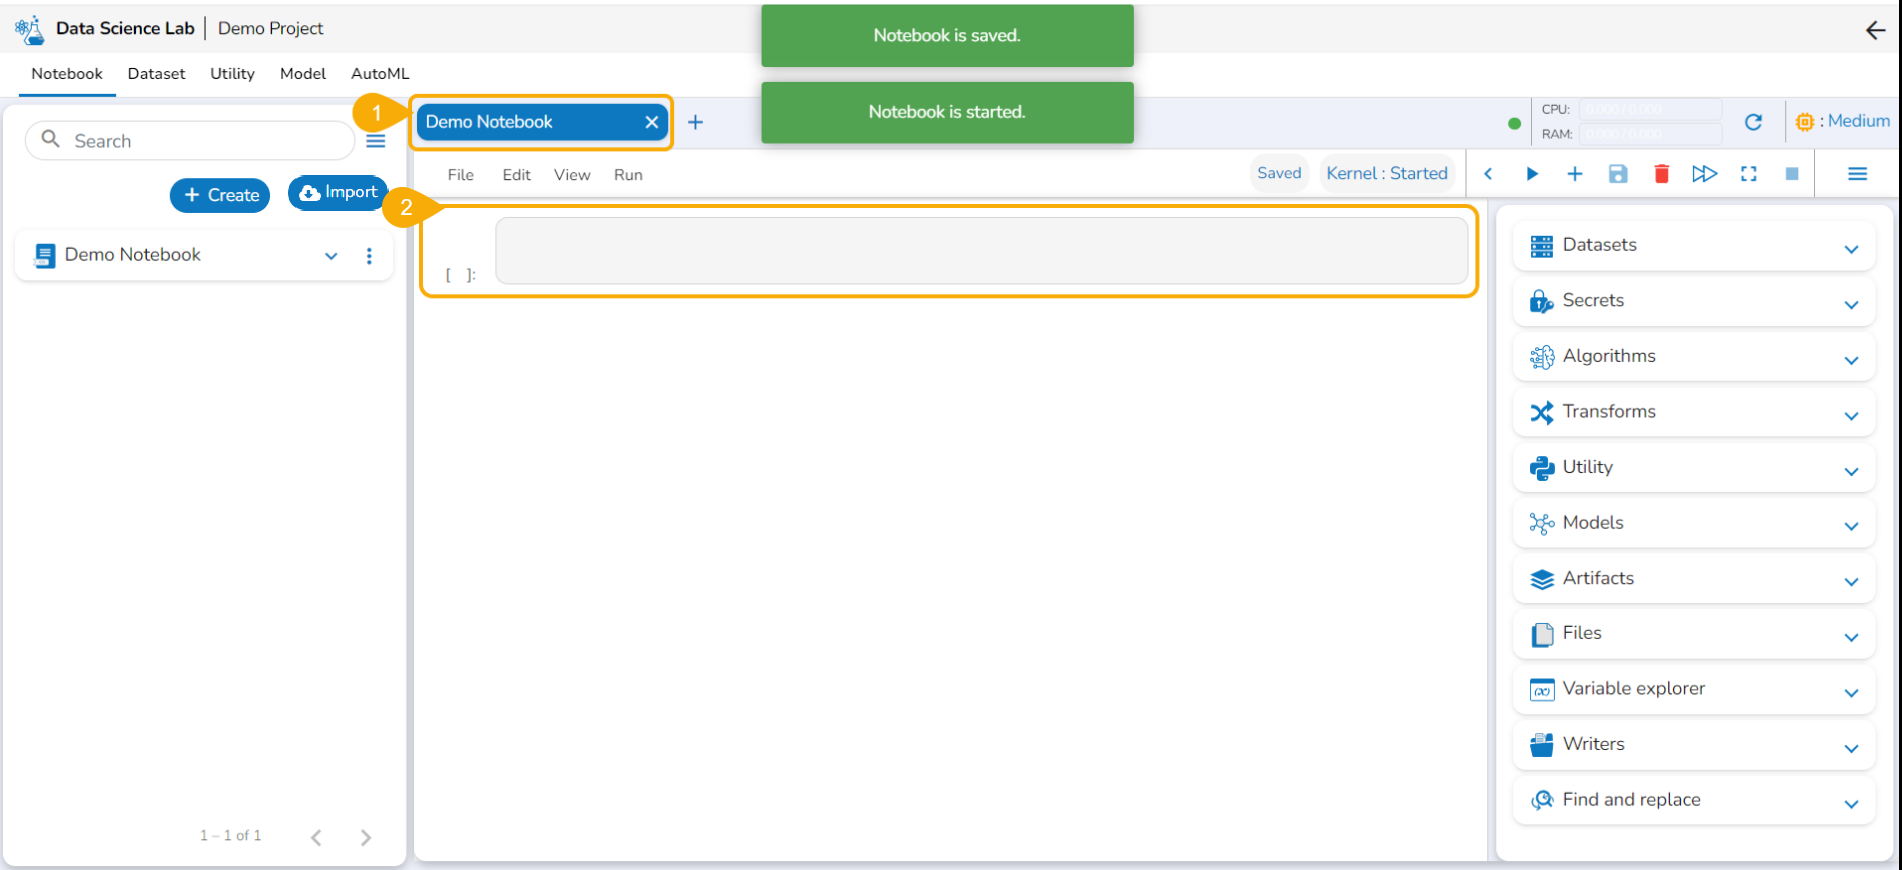
* Navigate to a Notebook.
* The code cell gets added to a newly created Notebook by default.
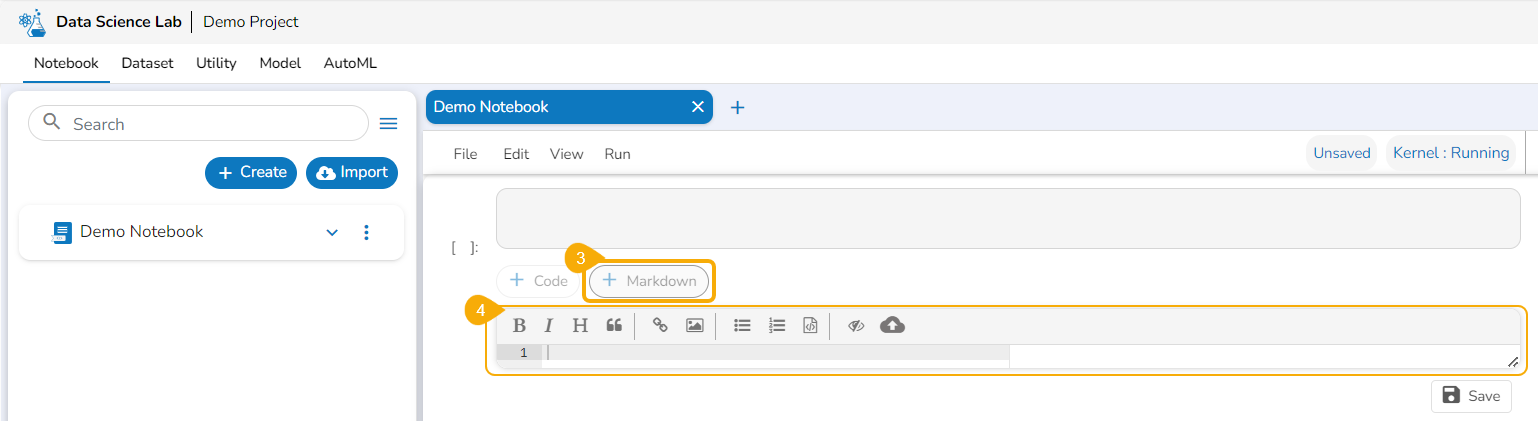
* Click the ***+Markdown*** option that appears below the code cell.
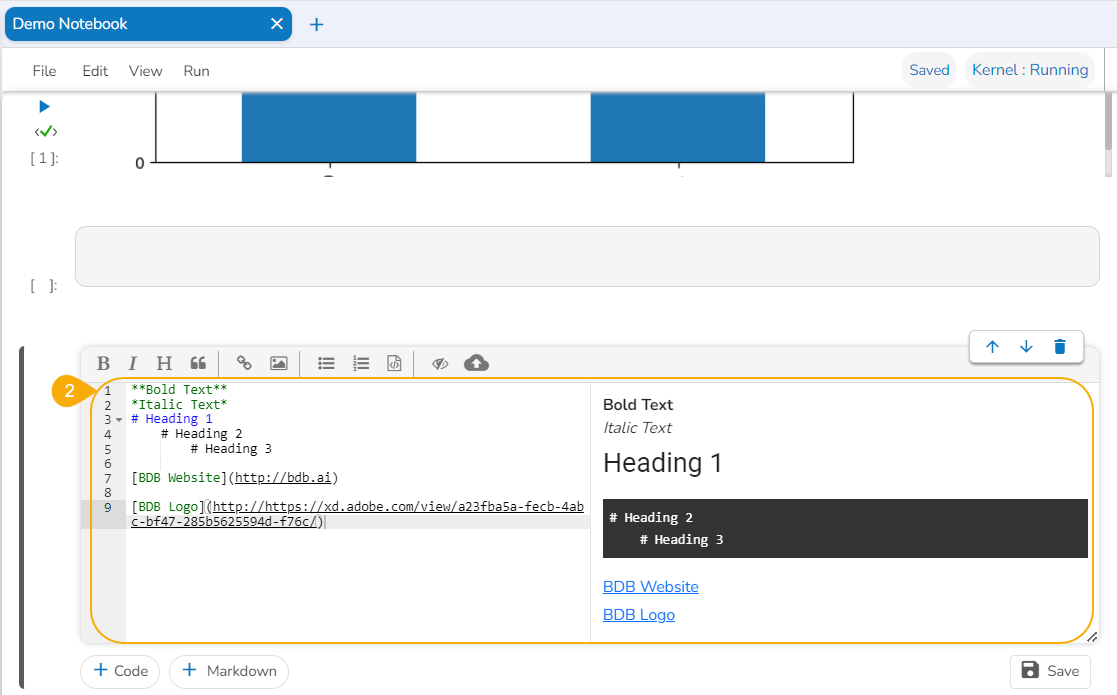
* The ***Markdown*** cell appears below to insert Markdown to the Notebook.
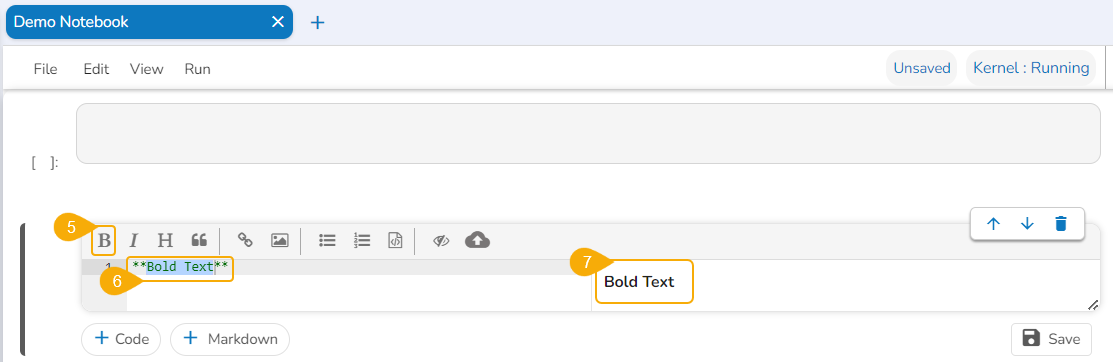
* Choose an action from the toolbar.
* It gets added to the left side of the Markdown cell.
* The right-side Markdown space displays the text with the applied effect.
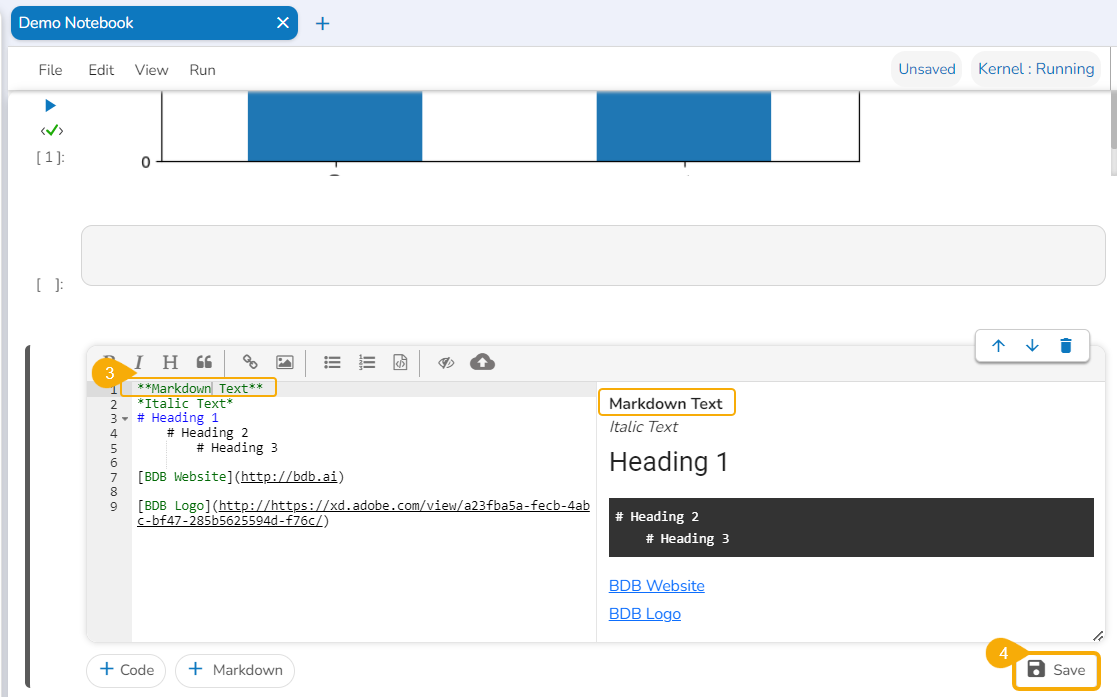
Markdown cell with inserted text
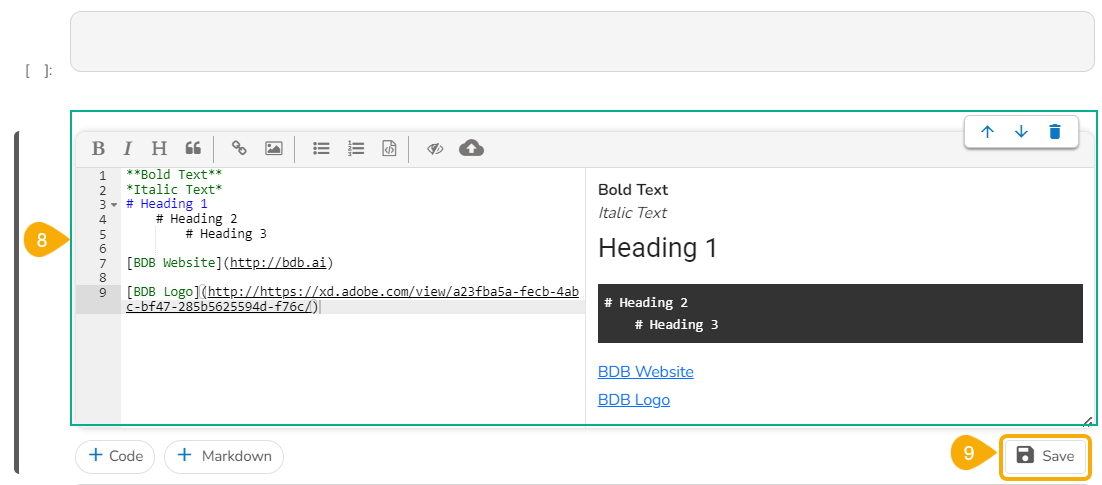
* The below-given image displays some actions from the toolbar (such as Bold, Italic, Heading, Reference) applied to the ***Markdown*** text.
* Click the ***Save*** option.
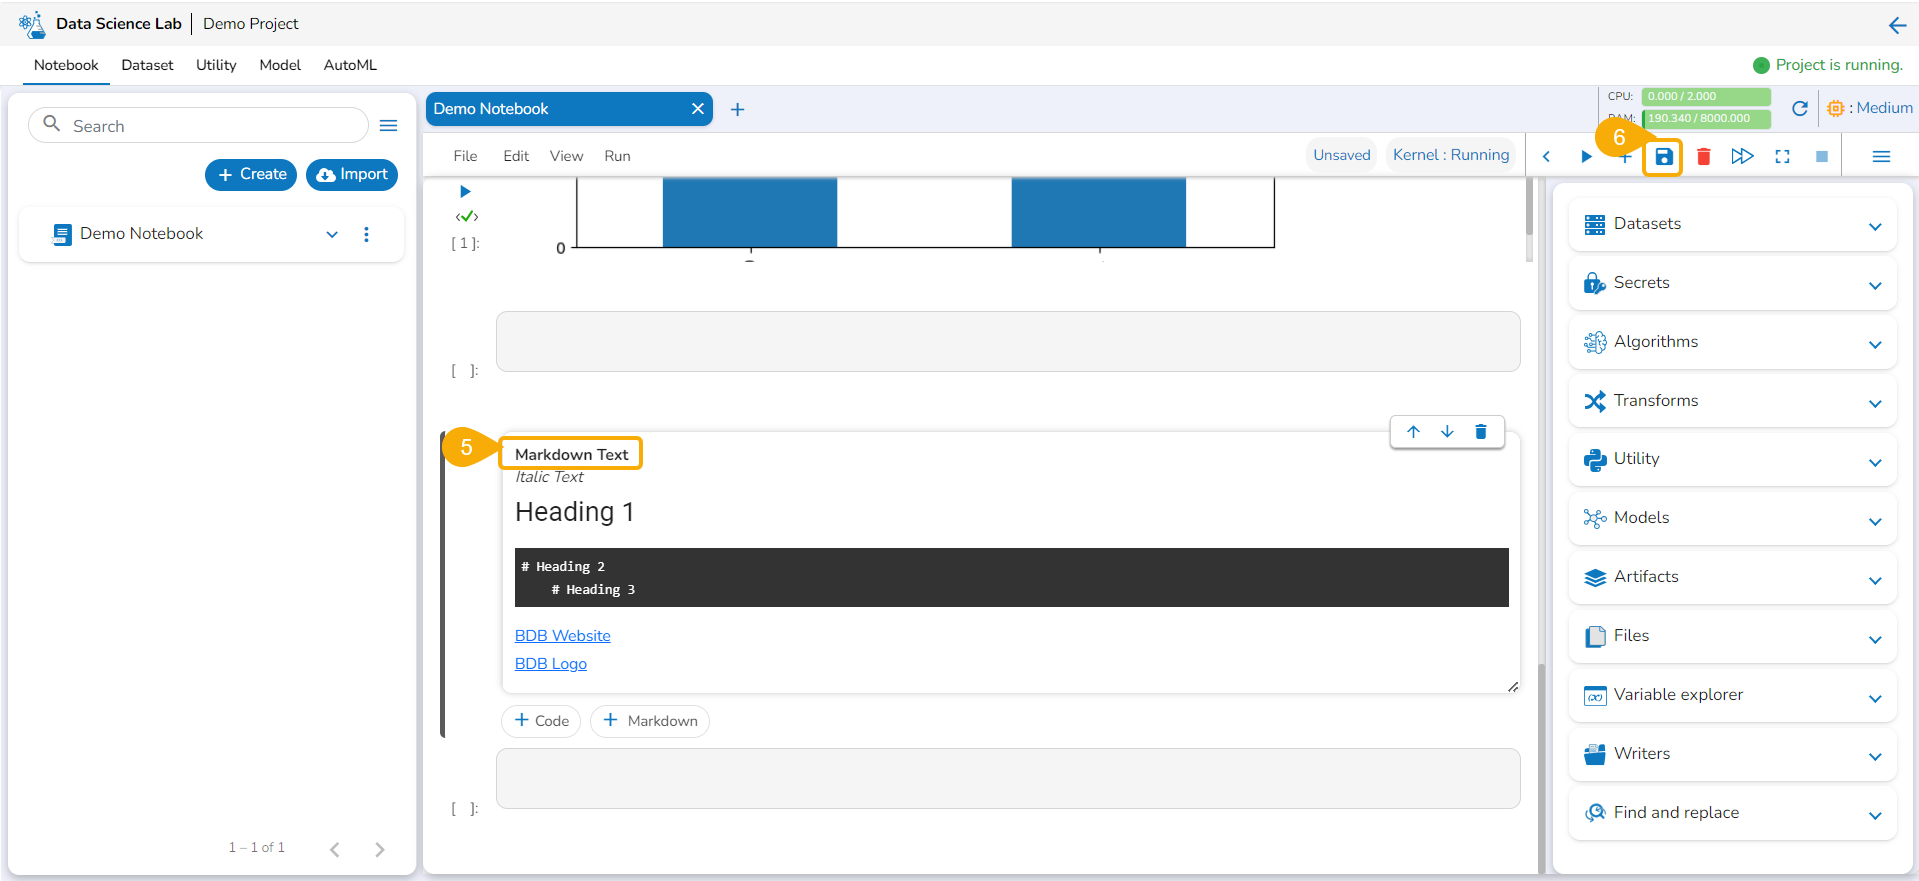
Saving the inserted text inside a Markdown cell
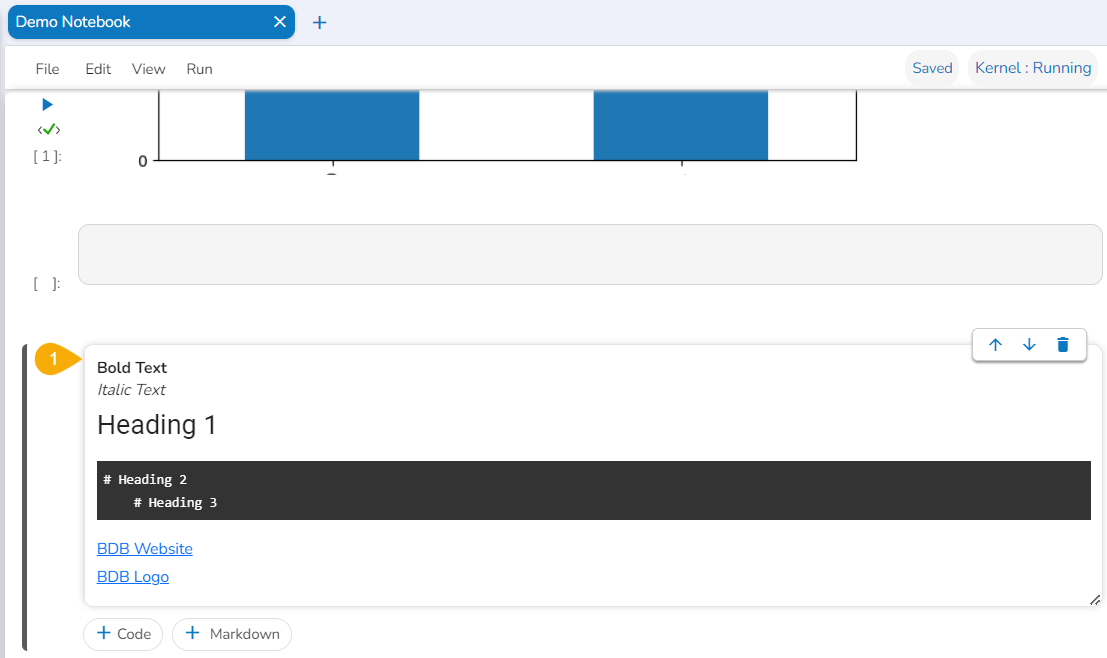
* The Markdown cell with inserted effect gets saved and the Markdown display gets changed displaying the text with saved effects on the left side (as shown in the given image).
{% hint style="info" %}
*Please Note: A Code cell gets added below the saved Markdown cell.*
{% endhint %}
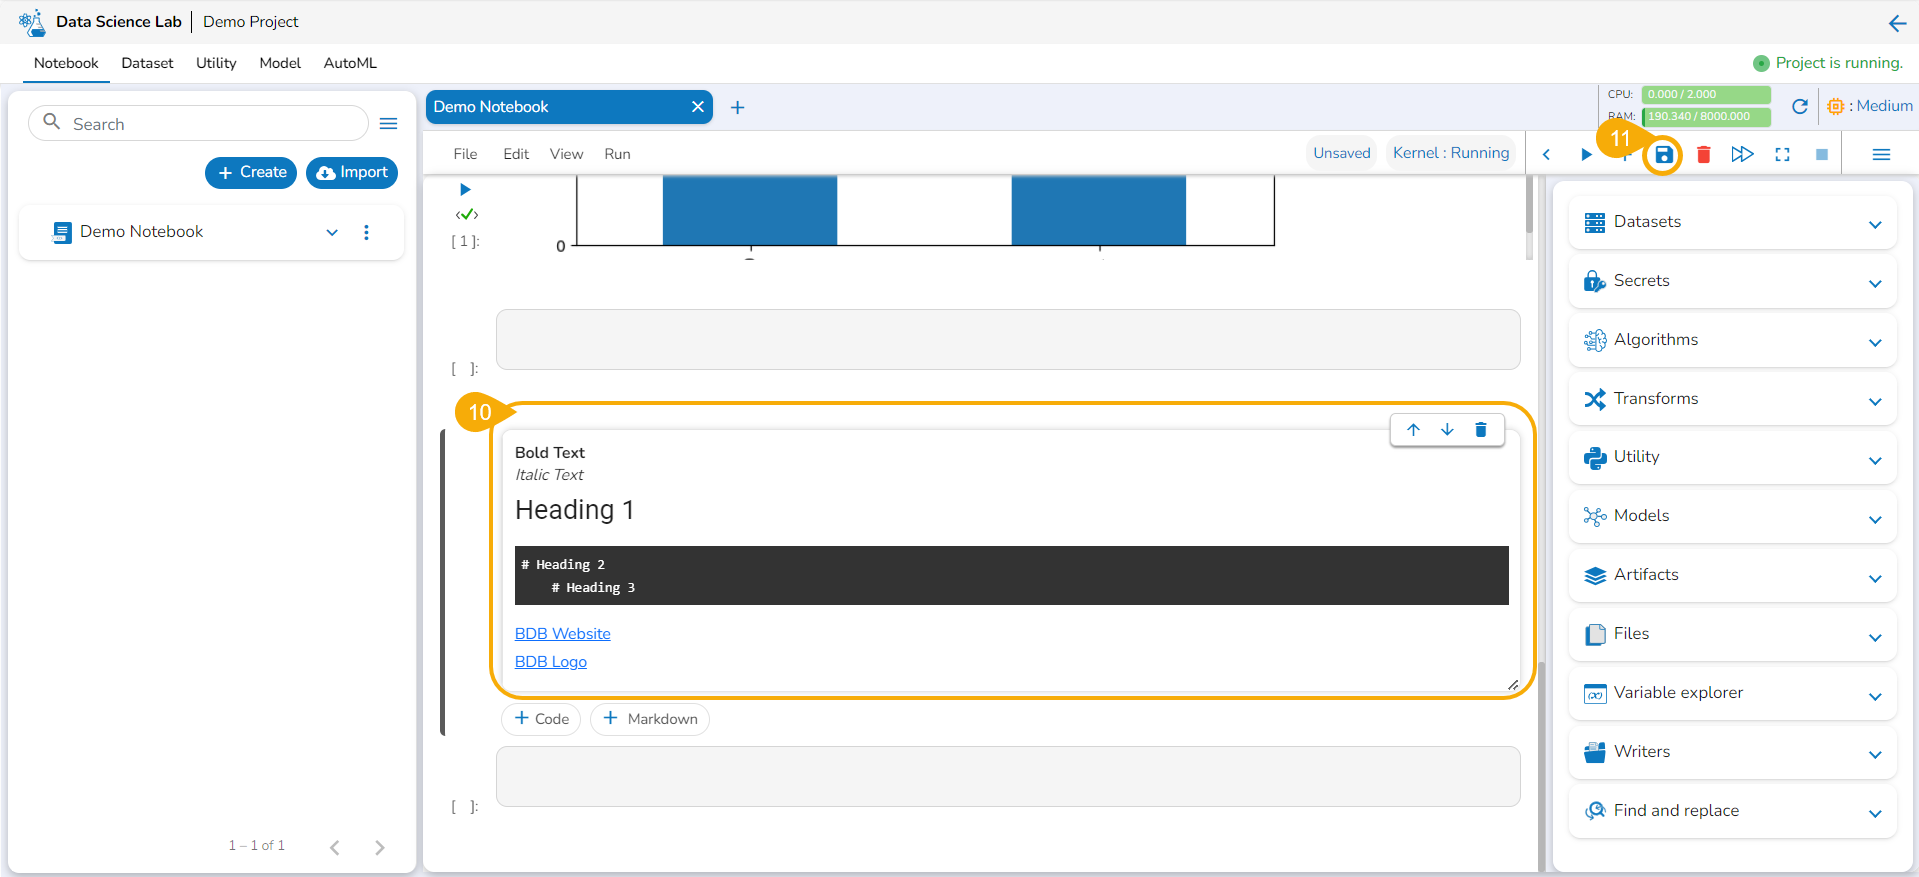
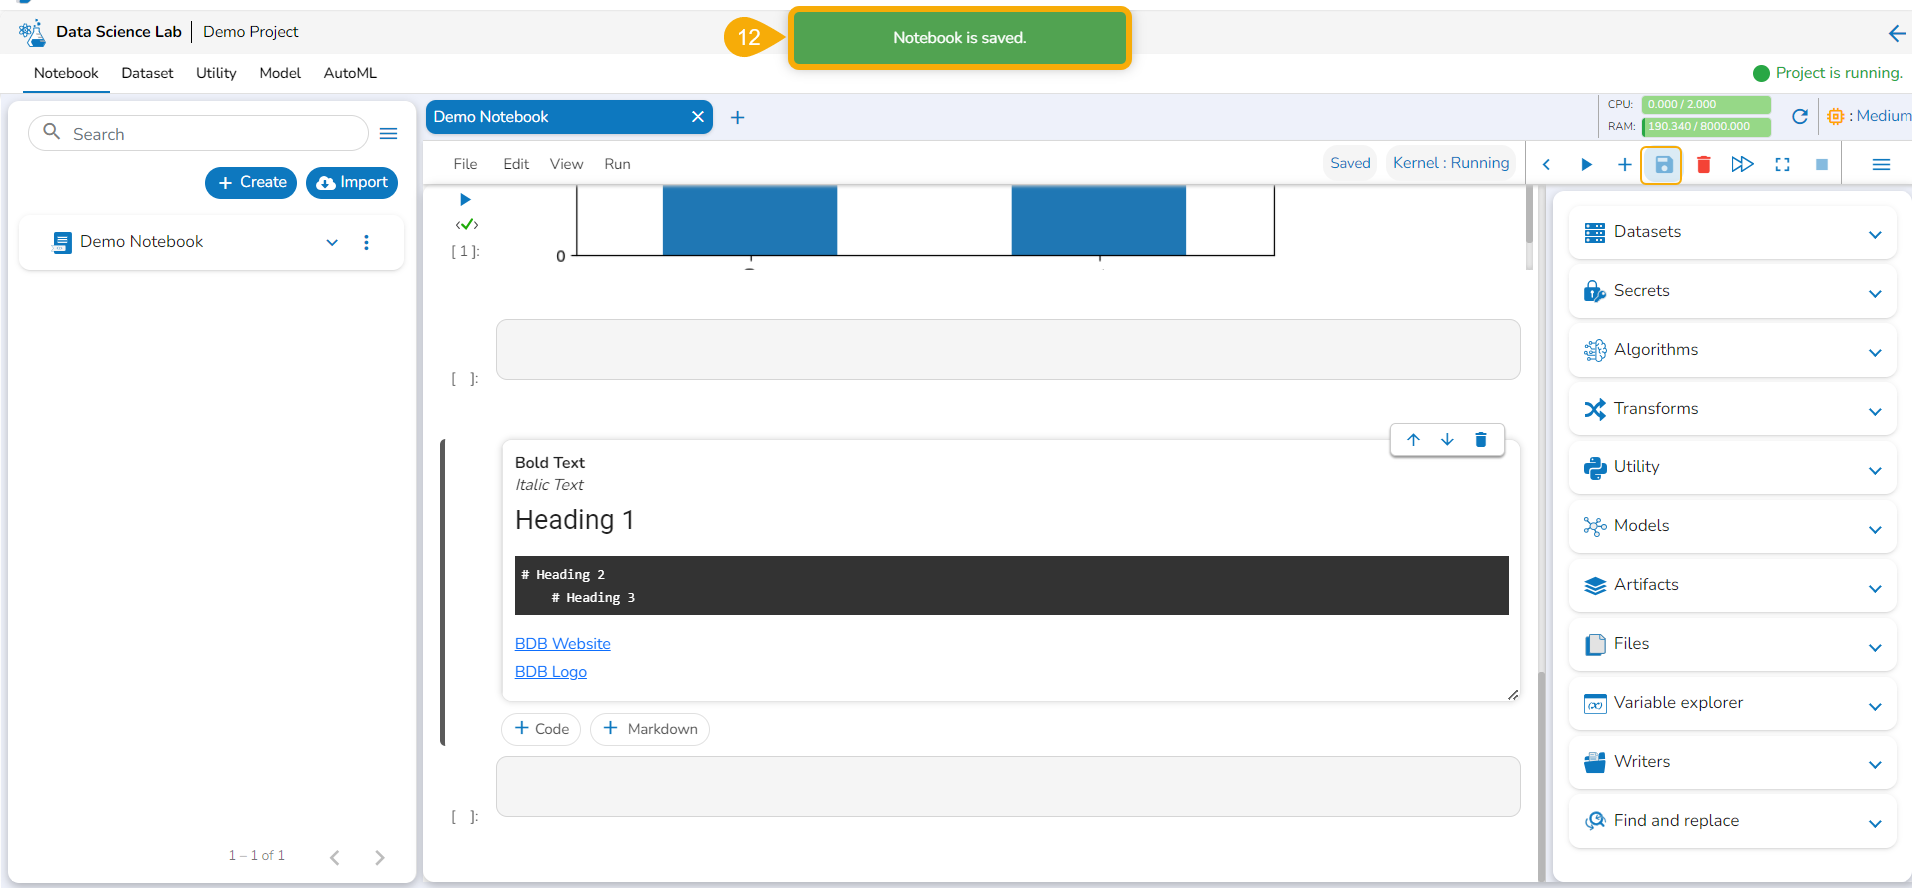
* The user can click the ***Save*** option provided for the Notebook to save the update in the Notebook (after the Markdown cell has been added to it).
* The Notebook gets updated and the same gets communicated through a notification message.
## **Editing a Markdown Cell**
* Use the double clicks on a saved Markdown cell.
* The Markdown cell opens in the editable format to edit it.
theMarkdown cell opens in the editable format
* Modify the text inside the Markdown cell.
* Click the ***Save*** option to update the edited Markdown in the Notebook.
Saving the Markdown updates
* The updated Markdown text gets saved in the Notebook.
* Click the ***Save*** option provided for the Notebook to save the changes in the Notebook.
## **Deleting a Markdown Cell**
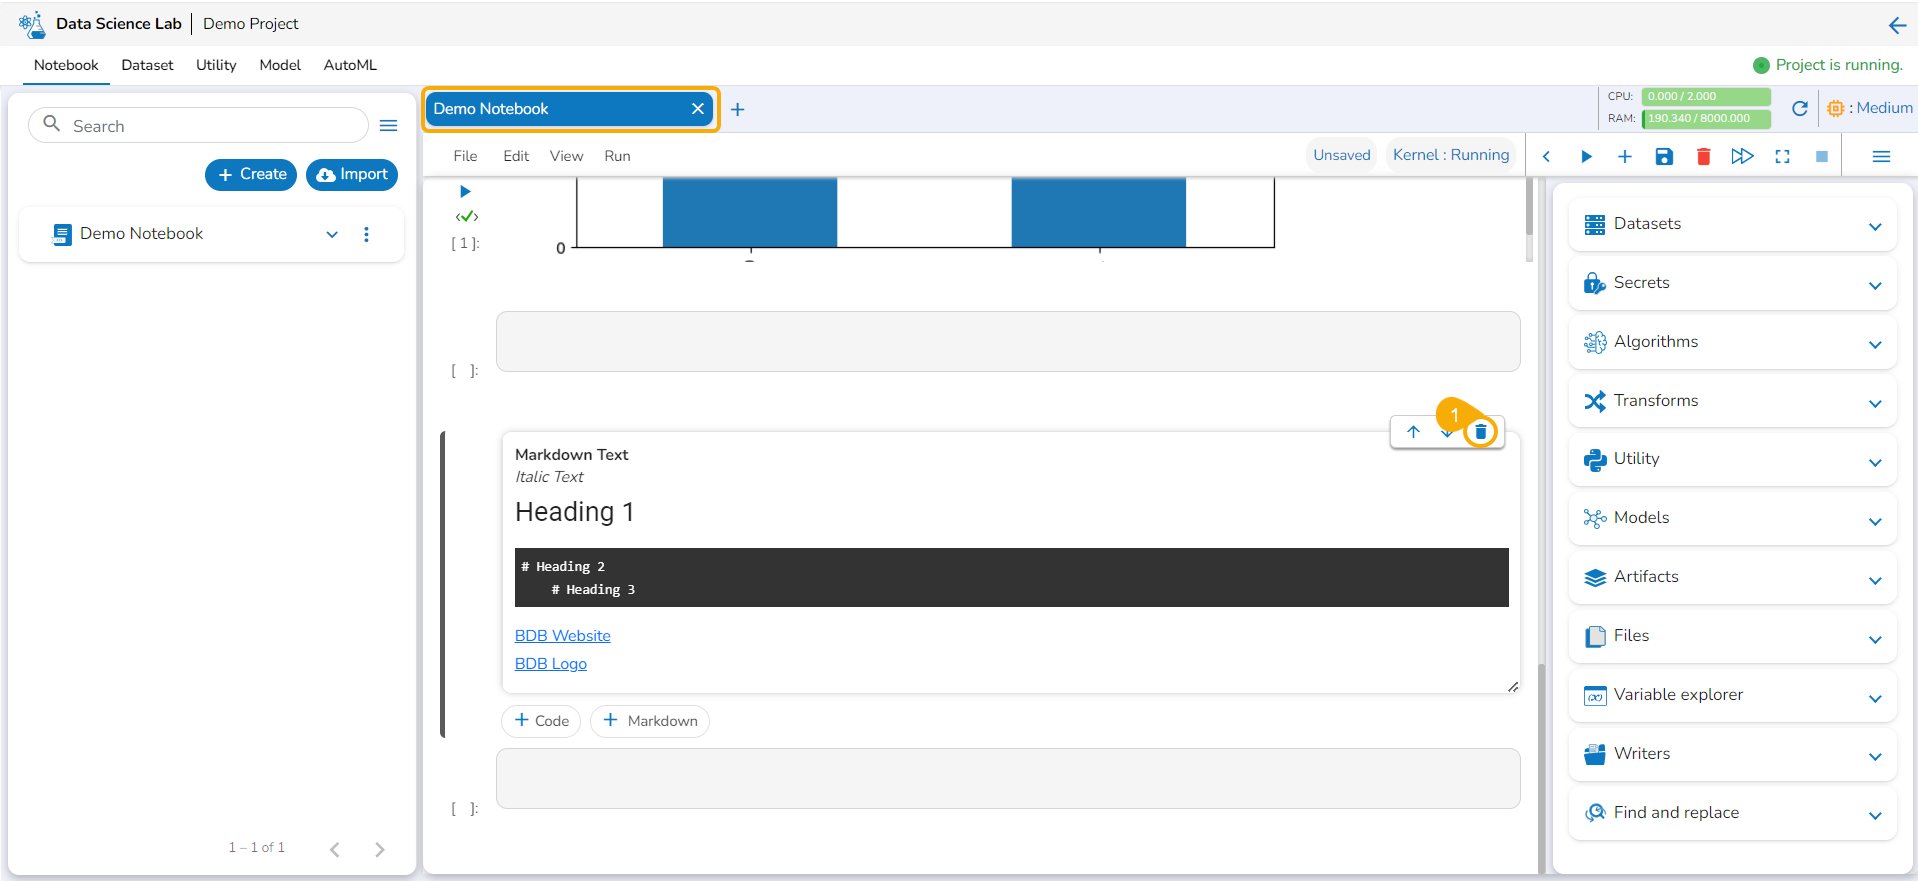
* Click the ***Delete markdown*** icon for a saved Markdown cell.
Delete Markdown icon for the Markdown cell
* The ***Delete Cell*** dialog box opens.
* Click the ***Yes*** option.

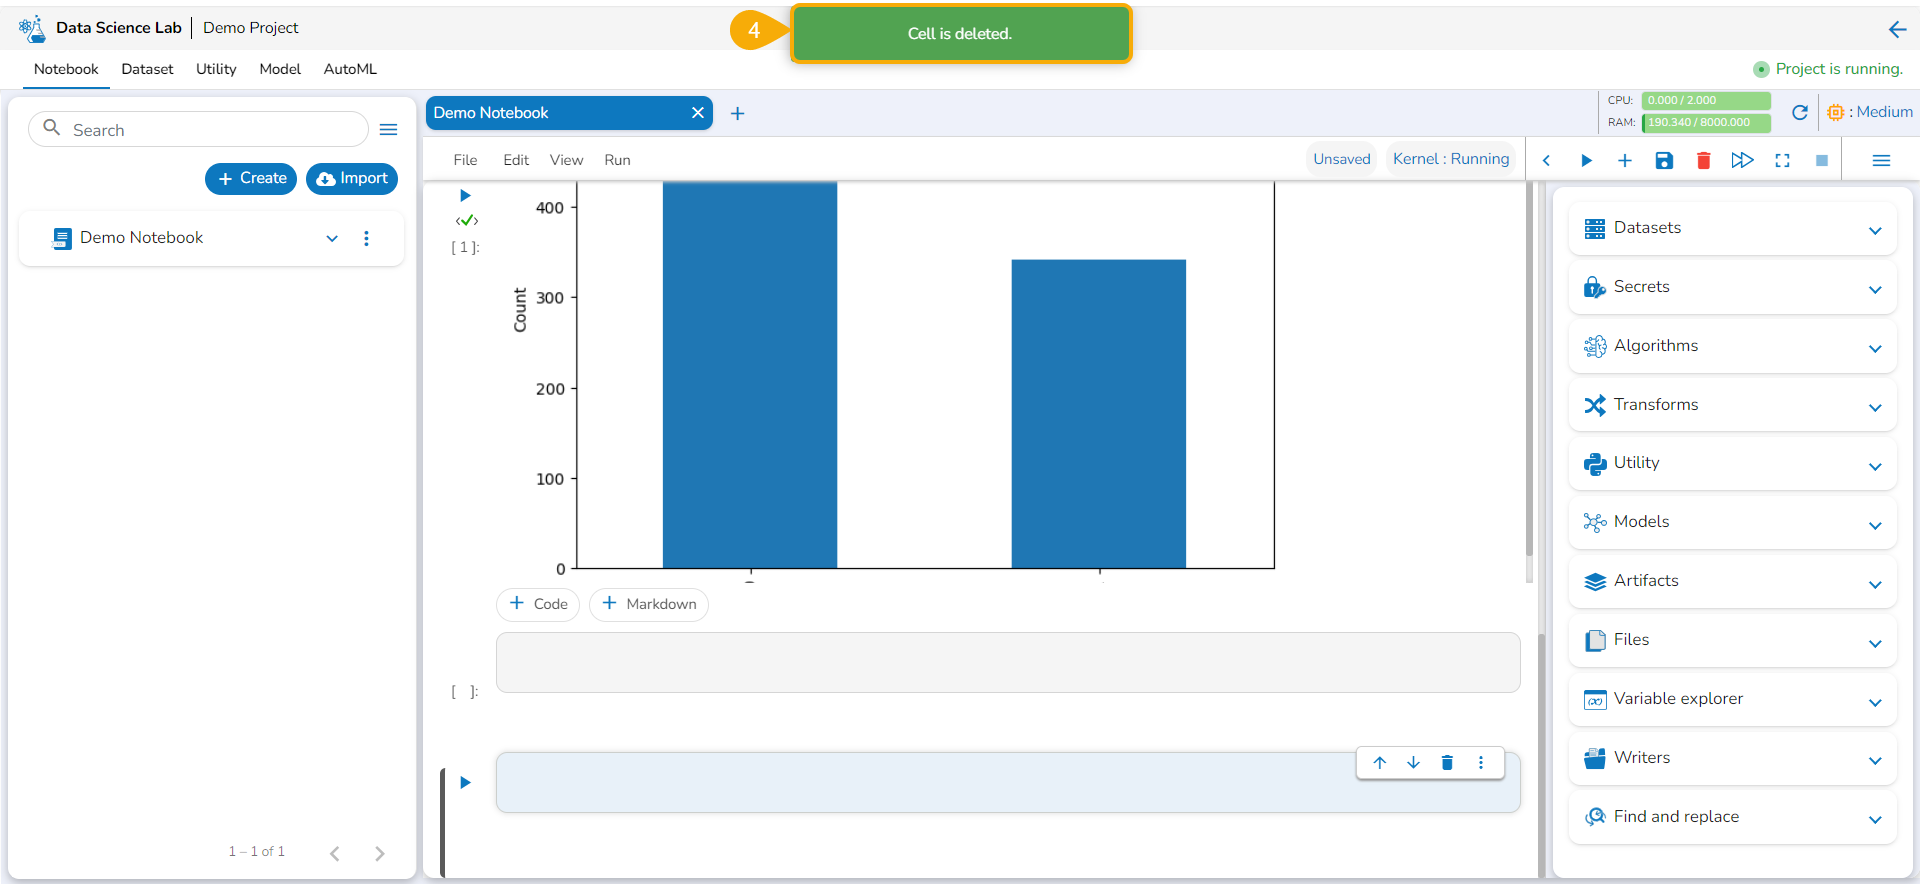
* The selected Markdown gets removed and the same gets communicated by a notification message.
The Markdown cell gets deleted
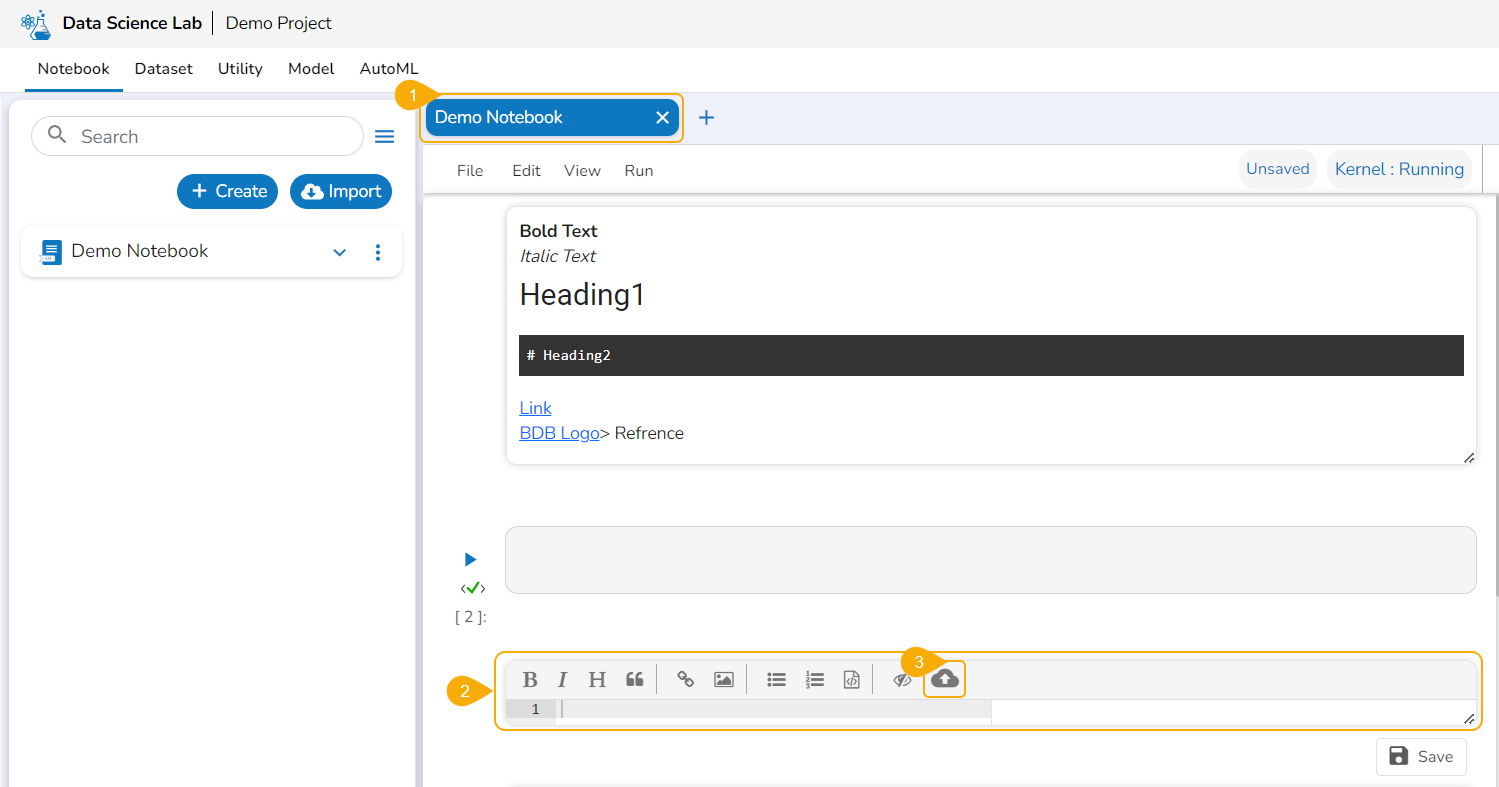
## Uploading an Image in the Markdown
* Navigate to a Notebook inside an activated Project.
* Access a ***Markdown*** cell.
* Click the ***Upload*** icon.
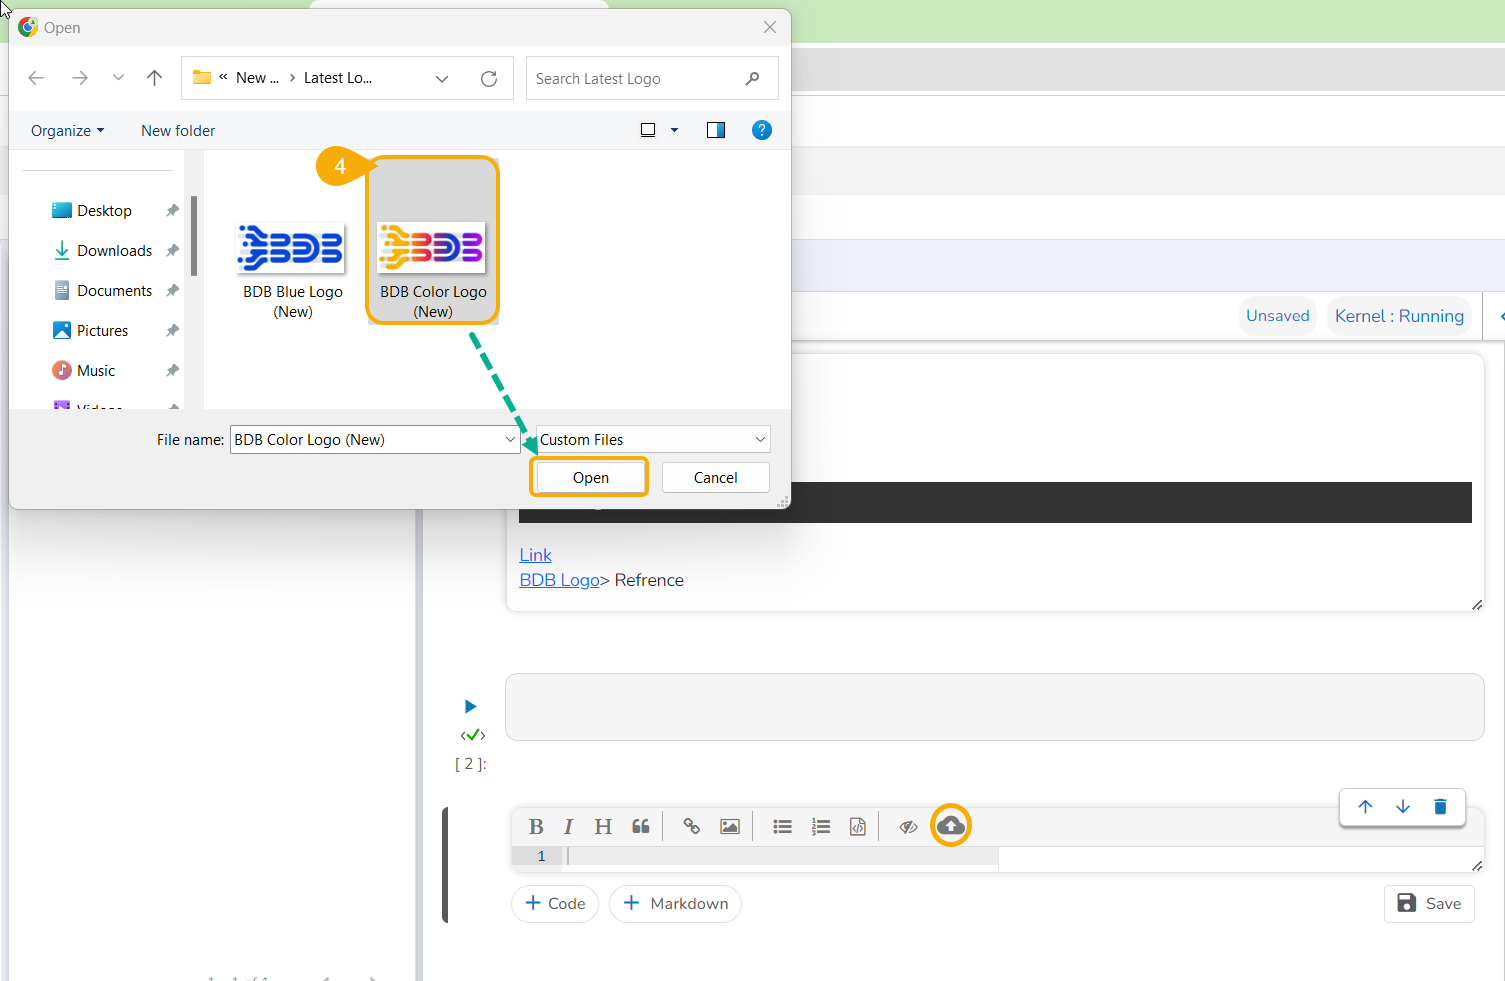
* Upload an image.
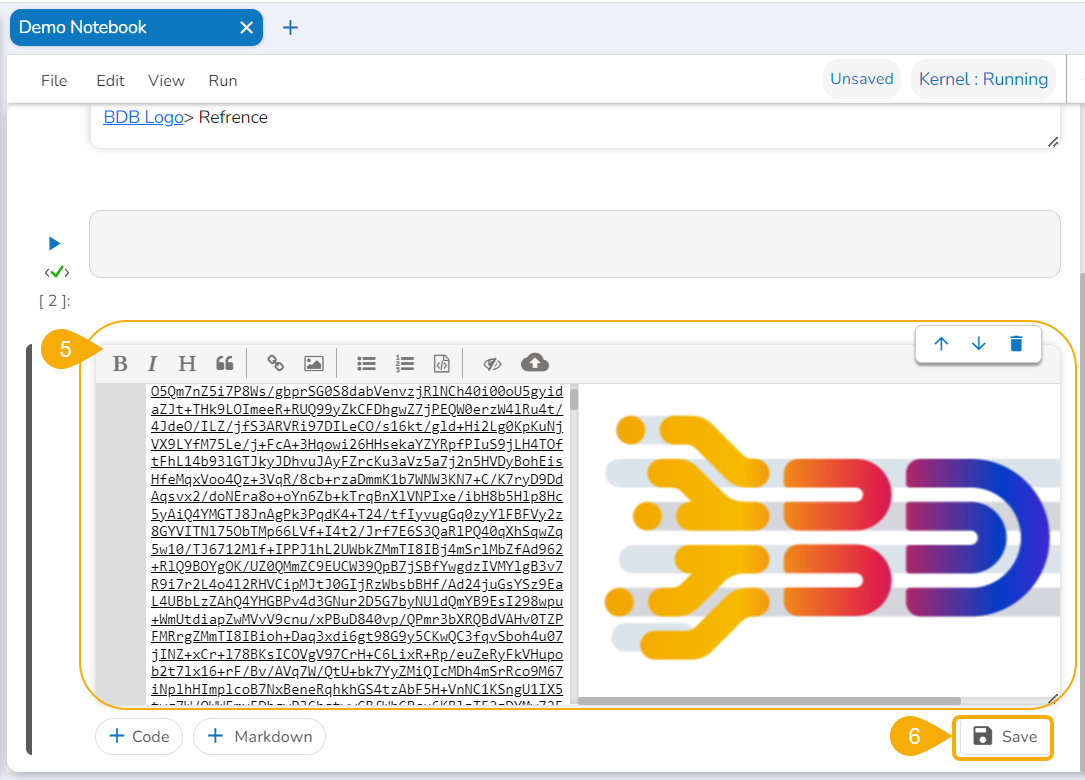
* The image gets uploaded to the markdown cell.
* Click the ***Save*** icon.
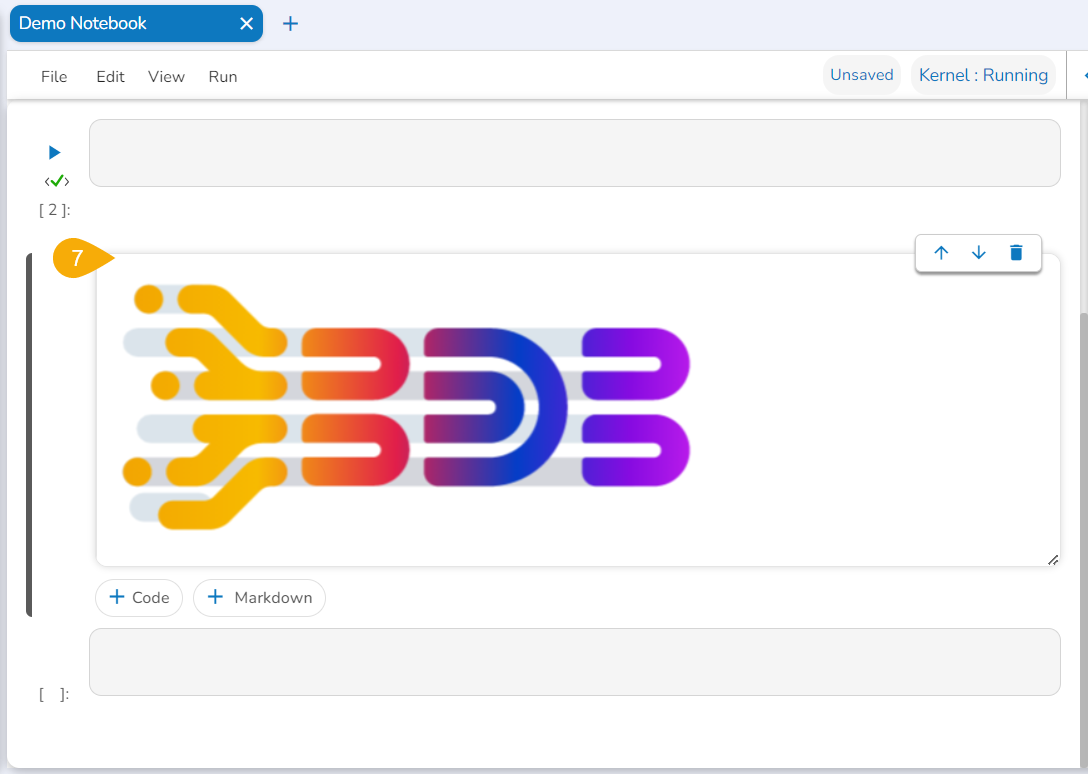
* The markdown cell gets saved the uploaded image appears in the View mode of the markdown.
{% hint style="info" %}
*Please Note: Refer the* [***Data Science Lab Quick Start Flow*** ](https://docs.bdb.ai/data-science-lab-4/data-science-lab-quick-start-flow)*page to get an overview of the **Data Science Lab** module in nutshell.*
{% endhint %}